Working with Namespaces in Kubernetes
 Unnati Gupta
What are Namespaces in Kubernetes?
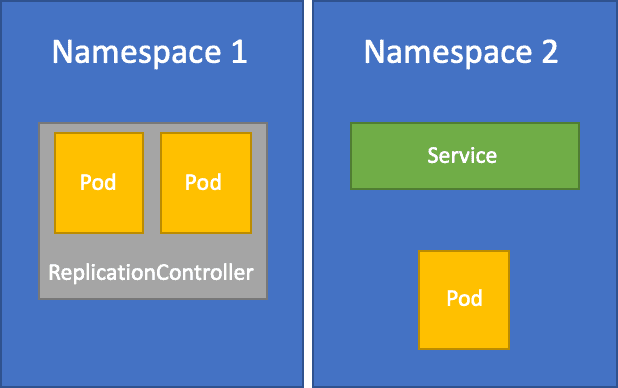
Namespaces are used to create isolated environments for resources. Each Namespace is like a separate cluster within the same physical cluster.
By default, these namespaces are present in the K8S cluster:

f you create something without mentioning the namespace, it will be created in the default namespace.
Why do we use the namespaces concept in K8S?
Let's take a scenario, In an organization, multiple applications are going on, if multiple applications are on the same cluster without any isolation they affect each other and it's too difficult to manage, and can't create the cluster for each service. It was too much expensive.
To overcome this problem, the Namespaces concept comes into the field. It provided an isolated environment for each service. so they are not affected by each other. and if some issue comes in one microservice it's easy to resolve.
Features Provided by Namespaces:
a) Logical Isolation: Namespaces provide a way to logically isolate resources within a Kubernetes cluster. This allows different teams or projects to use the same cluster without interfering with each other.
b) Resource Quotas: You can set resource quotas on namespaces to limit the amount of CPU, memory, and other resources that can be consumed by the objects within that namespace.
c) Object Scope: Kubernetes objects (such as pods, services, and replication controllers) belong to a namespace. This means that you can organize and manage your resources within a namespace, and the same object names can be reused in different namespaces.
d) RBAC (Role-Based Access Control): RBAC policies can be applied at the namespace level, allowing you to control access to resources based on roles and role bindings within a specific namespace.
e) Limit Range: Limit ranges can be set on namespaces to control resource limits for certain resource types within that namespace.
Kubernetes Namespaces Command:
a) Create a Namespace
kubectl create namespace <namespace-name>
b) Get Namespaces
kubectl get namespace
or
kubectl get ns
c) Switch Context to a namespaces
kubectl config set-context --current --namespace=<namespace-name>
d) Describe namespaces
kubectl describe ns <namespace-name>
e) Delete a namespace
kubectl delete namespace <namespace-name>
f) Apply resource configuration to a namespace
kubectl apply -f <resource-file.yaml> -n <namespace-name>
❄Tasks:
Create a namespace. Verify it's created then create a deployment in the newly created namespace.
Step 1: Create a new namespace and Verify it.
kubectl create ns app-deploy
kubectl get ns

Step 2: Create deployment.yaml file and Verify if it's created or not Successfully.
vi deployment.yaml
apiVersion: apps/v1
kind: Deployment
metadata:
  name: app-deployment
  namespace: app-deploy
spec:
 replicas: 2
 selector:
   matchLabels:
    app: django-app
 template:
   metadata:
     name: app-deployment
     labels:
       app: django-app
   spec:
     containers:
       - name: app-deployment
         image: chanchal8765/Django-docker
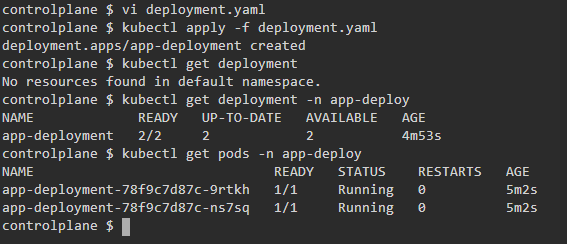
kubectl get deployment -n app-deploy
kubectl get pods -n app-deploy

In the above image notice, that if you get deployment in the default namespace it's not present because you created it in a particular namespace.
Set Limit Ranges of resources on the namespace and Verify whether it works or not.
Step 1: Create a limit-range file and pod. yaml according to resources.
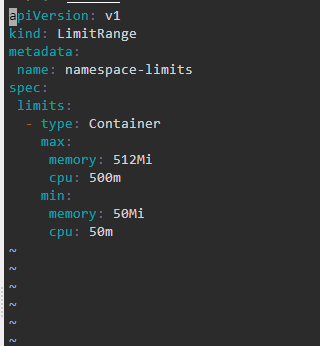
vi limitrange.yaml
apiVersion: v1
kind: LimitRange
metadata:
 name: namespace-limits
spec:
 limits:
  - type: Container
    max:
     memory: 512Mi
     cpu: 500m
    min:
     memory: 50Mi
     cpu: 50m
vi pod.yaml
apiVersion: v1
kind: Pod
metadata:
 name: limit-range-pod
spec:
 containers:
   - name: limit-range-pod
     image: chanchal8765/django-docker
     resources:
       requests:
         memory: 64Mi
         cpu: 50m
kubectl get pods


Note: if you take resources more than limit pods going to the pending state.
Congratulations!! you successfully created a new namespace and deployed your first application.
In the Next Article, we will go deep down in K8S Service.......
Thank you for giving your precious time to read this blog/article and if any suggestions or improvements are required on my blogs feel free to connect on LinkedIn Unnati Gupta. Happy Learning !!!
Subscribe to my newsletter
Read articles from Unnati Gupta directly inside your inbox. Subscribe to the newsletter, and don't miss out.
Written by

Unnati Gupta
Unnati Gupta
👨💻 DevOps Architect @ Hippo Technik, LLC Passionate about bridging the gap between development and operations, I'm a dedicated DevOps Engineer at 6D Technology. With a strong belief in the power of automation, continuous integration, and continuous delivery, I thrive in optimizing software development pipelines for efficiency and reliability. 🚀 Exploring the DevOps Universe In my articles, I delve into the fascinating world of DevOps, where I share insights, best practices, and real-world experiences. From containerization and orchestration to CI/CD pipelines and infrastructure as code, I'm here to demystify the complex and empower fellow developers and ops enthusiasts. 📝 Blogging for Knowledge Sharing As a tech enthusiast and a lifelong learner, I'm committed to sharing knowledge. My articles aim to simplify complex concepts and provide practical tips that help teams and individuals streamline their software delivery processes. 🌐 Connect with Me Let's connect and explore the ever-evolving landscape of DevOps together. Feel free to reach out, comment, or share your thoughts on my articles. Together, we can foster a culture of collaboration and innovation in the DevOps community. 🔗 Social Links LinkedIn: https://www.linkedin.com/in/unnati-gupta-%F0%9F%87%AE%F0%9F%87%B3-a62563183/ GitHub: https://github.com/DevUnnati 📩 Contact Have questions or looking to collaborate? You can reach me at unnatigupta527@gmail.com Happy Learning!!