A Modern Node.JS TypeScript Lib Template
 Cris Mihalache
Table of contents

Starting a new Node.JS project written in TypeScript in today's software development world is daunting; with the multitude of tools available for testing, linting, deploying, and generating documentation, it is difficult at best to find the proper combination of tools for your needs. Configuring everything (tests, builds, linting, etc) takes up valuable time that could be spent developing features.
I've developed an opinionated template for new Node.JS TypeScript library projects, aptly named node-ts-lib-template. It provides the following:
A modern README.md with a standard structure
Release scripts that update the CHANGELOG.md and bump the package version
Builds TypeScript sources to JS
Lints with ESLint (configured for TypeScript)
Generates docs with TypeDoc, automatically publishing to GitHub Pages
Provides GitHub actions for CI and automatic publishing to the NPM registry.
And finally, it gives a sane configuration for all utilized tools.
Project Structure
All project code goes into the src folder, and is built to dist with npm run build. Tests are expected to reside in src/tests; by default, a file named index.ts is provided so npm test succeeds. Documentation is built with npm run docs into the docs folder.
Getting Started
To begin, change the name field in package.json to your actual project name, update all repo links in the manifest to point to your project repository, and populate the README.md with information pertaining to your project.
Readme
The README.md follows a standard format, providing sections detailing instructions for installing the package, using it, and developing and/or making contributions. It also links to the CHANGELOG.md which is updated automatically via npm run update-version.
For the changelog to be automatically populated correctly, you must format your git commit messages with the conventional commits standard.
Scripts & Usage
These are the scripts from the package.json manifest:
{
    "docs": "npx typedoc --out docs src && cp LICENSE.md docs/LICENSE.md && cp CHANGELOG.md docs/CHANGELOG.md",         "test": "NODE_PATH=./src NODE_ENV=test mocha",
    "test:coverage": "NODE_PATH=./src NODE_ENV=test nyc mocha",
    "test:watch": "NODE_PATH=./src NODE_ENV=test nyc mocha --watch",
    "build": "NODE_PATH=./src tsc -p tsconfig.json",
    "lint": "eslint -f unix \"src/**/*.{ts,tsx}\"",
    "update-deps": "updates -u -g -c",
    "update-version": "standard-version",
    "release": "npm run lint && npm run test && npm run build && npm run docs && npm run update-version && git push --follow-tags origin main",
    "prepare": "husky install",
    "prepublish": "npm run build"
}
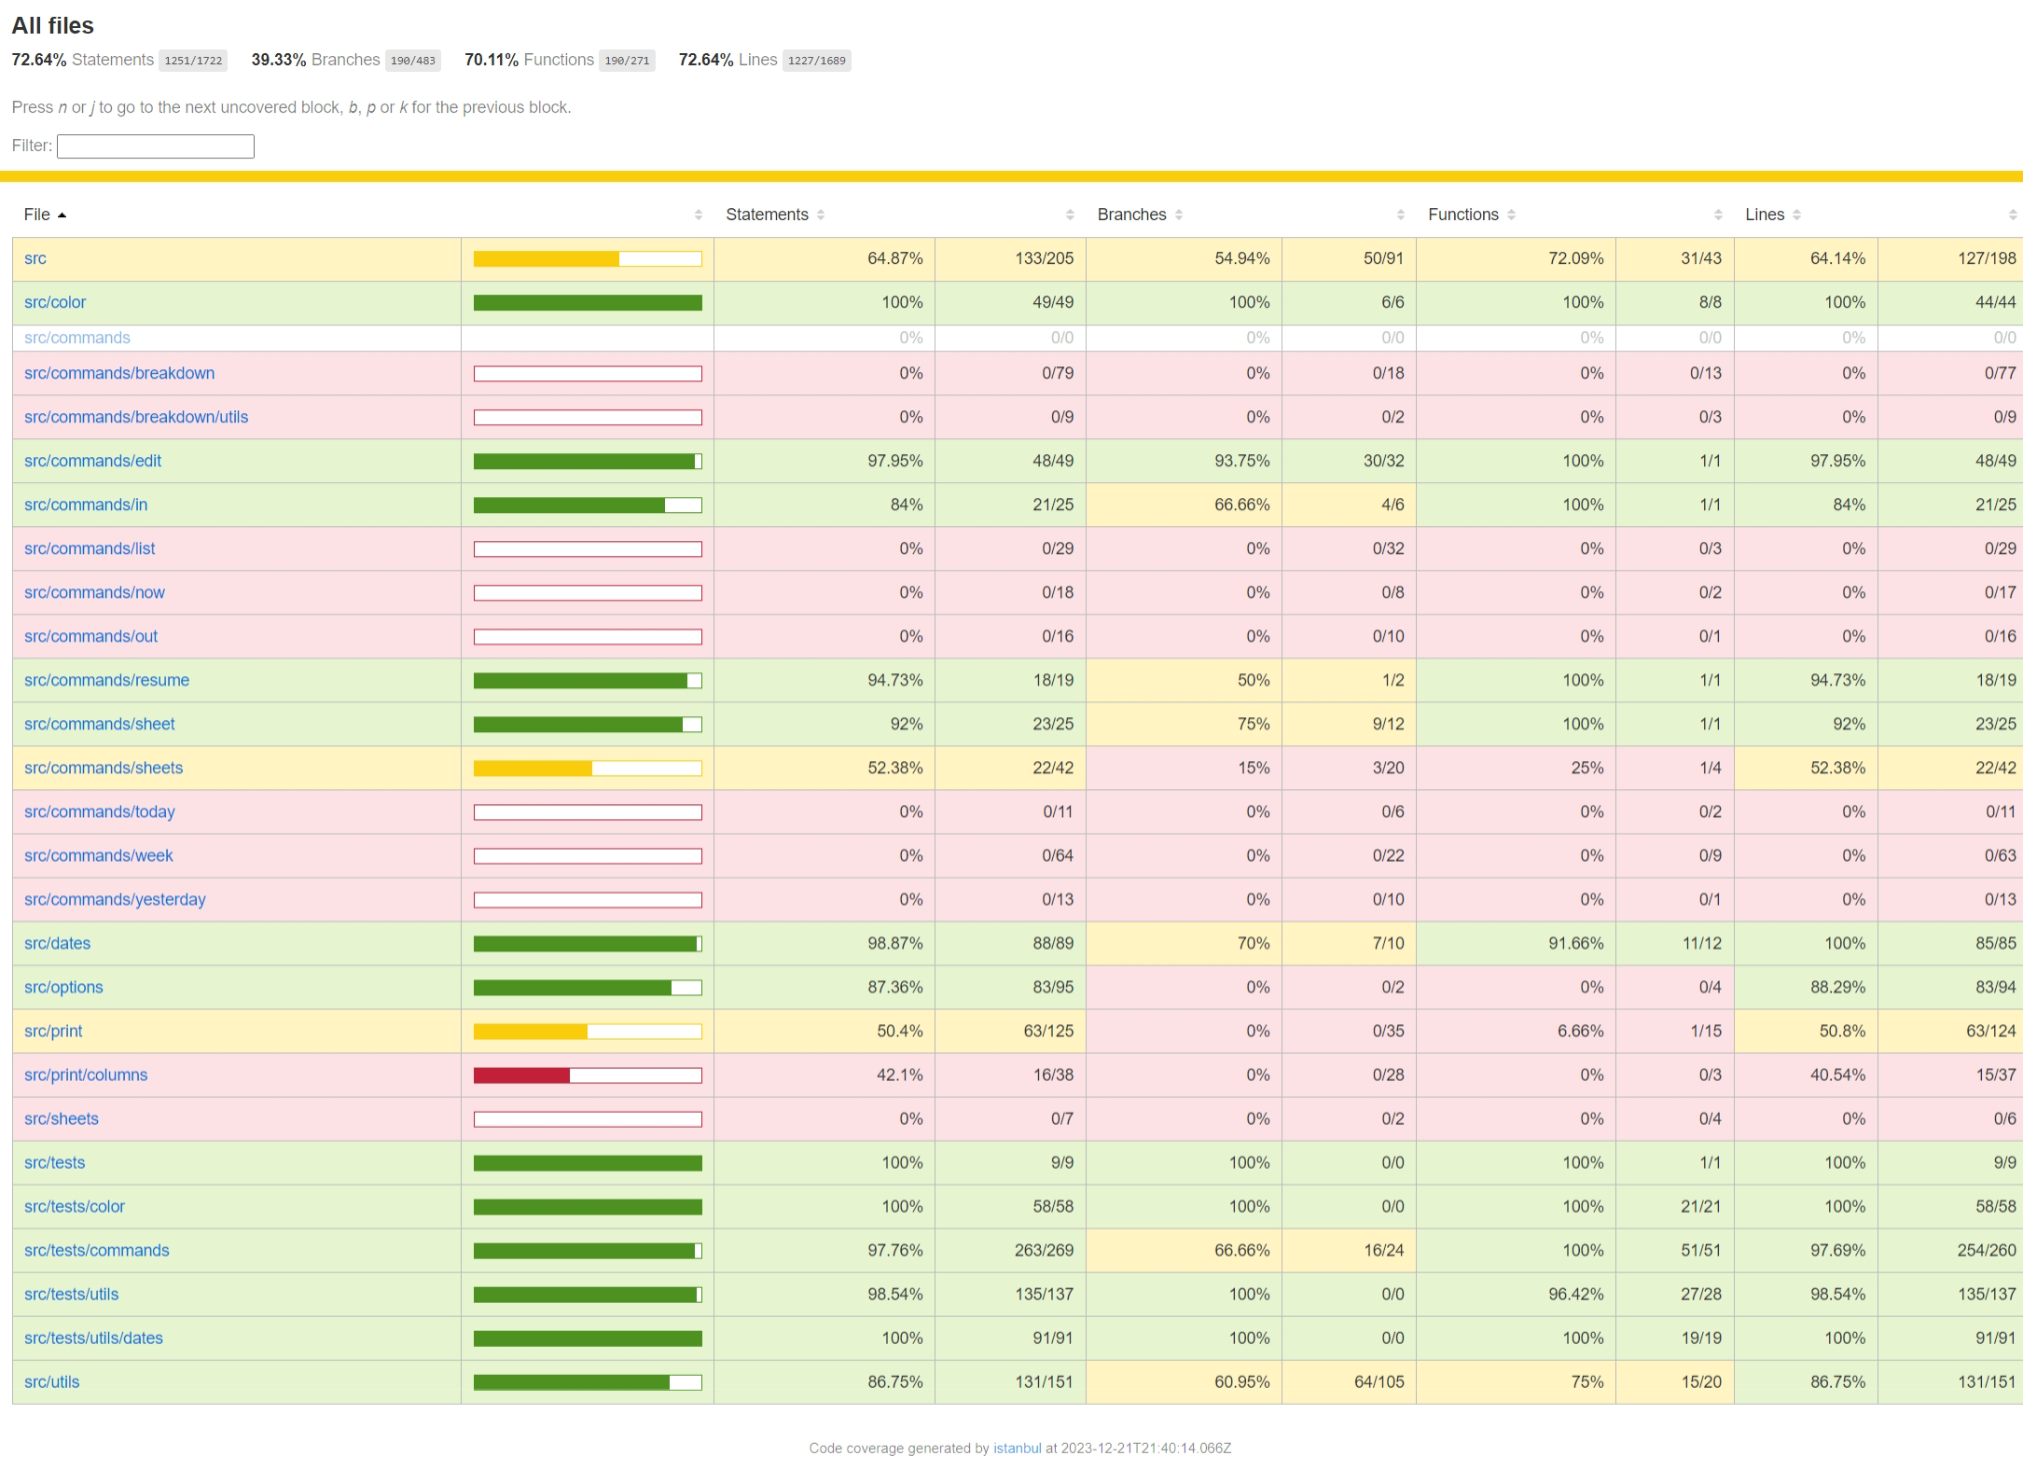
To generate a coverage report run npm run test:coverage. It uses nyc to create an HTML report in a folder named coverage. I personally use http-server to view the report, with the command http-server coverage/lcov-report.
Here is an example of a coverage report generated in this way:

A special script named update-deps is provided in the manifest, which will bump all package dependencies to the newest available versions. Use this with caution.
Linting is done with ESLint with a fairly minimal configuration, utilizing the eslint:recommended ruleset. Just run npm run lint
Publishing
Once you are ready to publish your project to the NPM registry, simply run npm run update-version. It will update CHANGELOG.md with all relevant commits since the last release, bump the version accordingly, commit the changes and create a new tag.
After a git push --follow-tags origin main, the included GitHub workflow npm-publish.yml will automatically publish your package to the registry, as long as you've configured your NPM access token as a secret named npm_token.
That's about it! I hope this template speeds up the start of your project development.
Subscribe to my newsletter
Read articles from Cris Mihalache directly inside your inbox. Subscribe to the newsletter, and don't miss out.
Written by

Cris Mihalache
Cris Mihalache
I am a senior software engineer and have been coding since my childhood. I have a passion for programming and enjoy working both on personal and professional projects. Over the years I have worked with a variety of languages, including Ruby, Go, Python, JavaScript, Java, C, C++, and more. I love perfecting my development environment and continuously updating my NeoVim config.