Creating a Simple Flowchart with Mermaid.js
 Opaluwa Emidowojo
Table of contents

Introduction
Regarding software development and technical documentation, having clear visual aids like flowcharts is crucial for grasping various processes like deployment and logical architecture. One handy tool for this is Mermaid.js, a JavaScript library that simplifies the creation of different diagrams and flowcharts. It is not just for tech-savvy folks – its user-friendly syntax makes it accessible to anyone, even if you are not a coding expert.
Whether you are working on a technical document, software development project, or any other professional tasks that involve complex information, Mermaid.js can be your go-to solution. Think of it like crafting with simple, text-based code. In this guide, I will take you through a step-by-step process of creating a basic flowchart using Mermaid.js. So, let's dive in and make your visualizations a breeze!
Prerequisites
Before you begin, make sure you have a basic understanding of HTML and JavaScript. Also, ensure that you have a code editor (e.g., Visual Studio Code) or any code editor of your choice installed on your computer.
I would also like you to refer to the Mermaid documentation and syntax. You will find that it is not too tricky and can be learned in a day.
Diagram Examples can be found in the Mermaid Live Editor, which is also a great practice area.
Setting up the flowchart
Step 1: Set Up Your HTML File
Create a new HTML file and open it in your preferred code editor.
<!DOCTYPE html>
<html lang="en">
<head>
  <meta charset="UTF-8">
  <meta name="viewport" content="width=device-width, initial-scale=1.0">
  <title>Mermaid.js Flowchart</title>
  // Include Mermaid.js library
  <script type="module" src="https://cdn.jsdelivr.net/npm/mermaid@10/dist/mermaid.esm.min.mjs"></script>
</head>
<body>
  // Your flowchart will be rendered here
  <div id="flowchart"></div>

  // Your Mermaid.js code goes here
<script type="module">
    // Mermaid.js code will be added here
  </script>
</body>
</html>
Step 2: Write Your Mermaid.js Code
Inside the script tag, write the Mermaid.js code to define your flowchart. Let's create a simple flowchart.
// Your Mermaid.js code
import mermaid from 'https://cdn.jsdelivr.net/npm/mermaid@10/dist/mermaid.esm.min.mjs';

mermaid.initialize({ startOnLoad: true });

const flowchartCode = `
  graph TD
    A[Enter Chart Definition] --> B(Preview)
    B --> C{decide}
    C --> D[Keep]
    C --> E[Edit Definition]
    E --> B
    D --> F[Save Image and Code]
    F --> B
`;

// Render the flowchart
mermaid.render('flowchart', flowchartCode);
Step 3: Save and Open in Browser
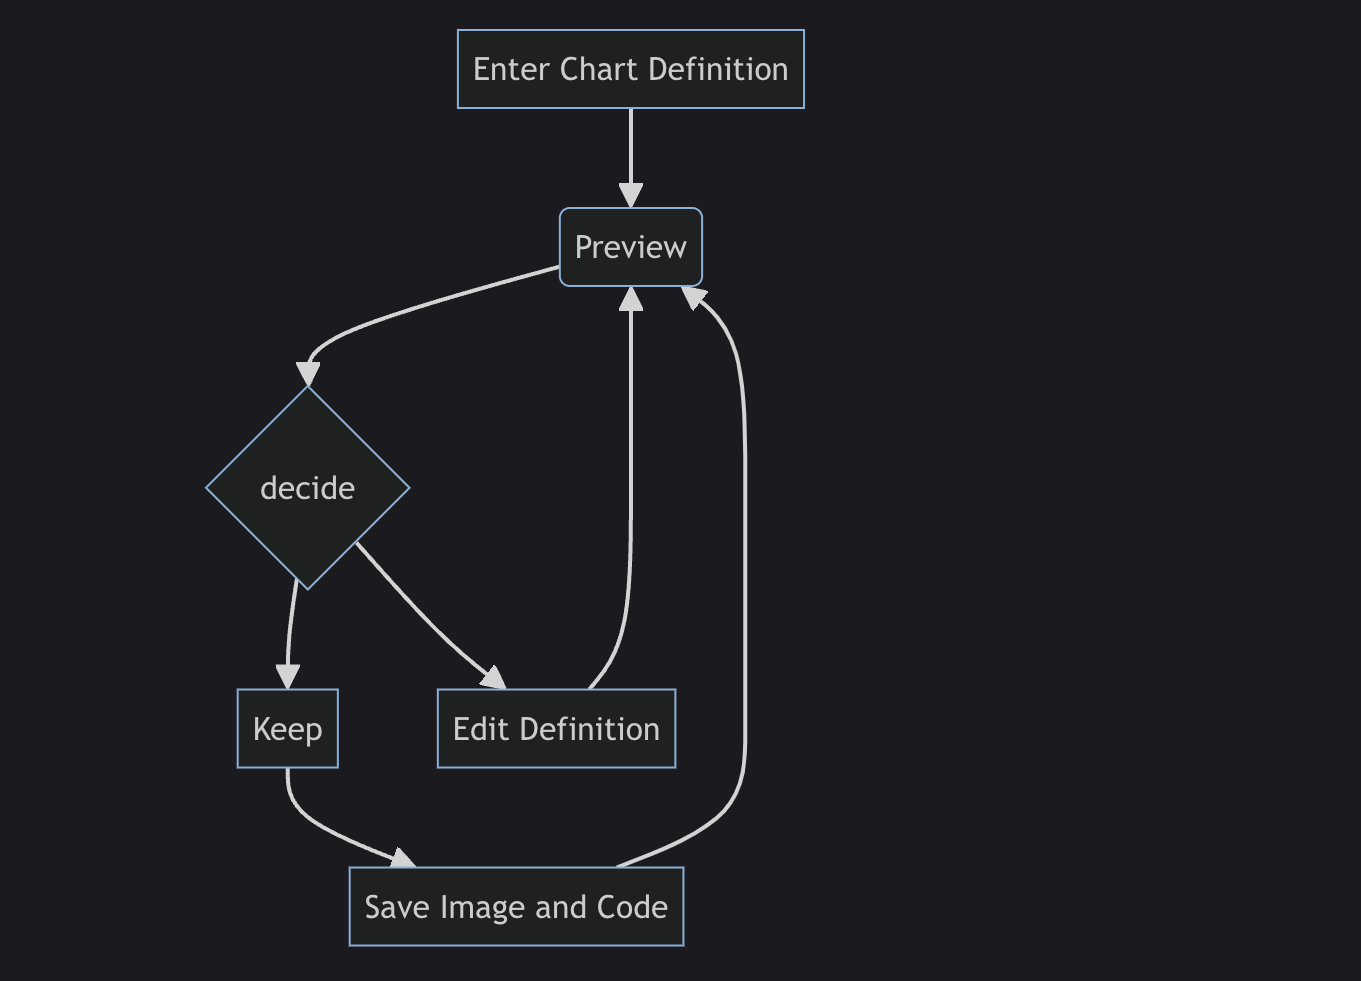
Save your HTML file and open it in a web browser. You should see your simple flowchart rendered on the page. Below is a screenshot of how the flowchart looks.

A Mermaid.js Flowchart documenting the Chart Definition process
Conclusion:
Congratulations! You have successfully created a simple flowchart using Mermaid.js. Feel free to experiment with different node shapes, styles, and connections to enhance your flowchart. Mermaid.js can also be used to create Sequence diagrams, Gantt charts, Class and State diagrams, and Pie charts.
Additional Tip:
- Explore different node types (e.g., graph TD for flowcharts, sequenceDiagram for sequence diagrams) based on your diagram needs.
Get diagramming!
Subscribe to my newsletter
Read articles from Opaluwa Emidowojo directly inside your inbox. Subscribe to the newsletter, and don't miss out.
Written by
