Hyperlane V3 - Permissionless deployment guide
 muskbuster
Introduction
Hyperlane has had unique and game changing updates with its latest release, Version 3. This update introduces some innovative features, including the introduction of custom hooks, ISMs (Interchain Security Modules), and advanced permissionless deployment agents.
Particularly noteworthy is the Hyperlane CLI, allowing users to effortlessly deploy Hyperlane instances onto their preferred blockchains.
This guide will give a hands on walk-through on how to deploy hyperlane to any chain using the CLI.
Prerequisites
node version 16 or above
private keys and address of wallet being used for - deployment , validators, relayers
Native tokens in each chain of interest for deployment gas fee
Some snacks
Installation and setup
To install the CLI to the global environment of your machine run the following command
npm install -g @hyperlane-xyz/cli
Once the CLI is installed you can configure your chain for deployment or check if it is already listed in the SDK.
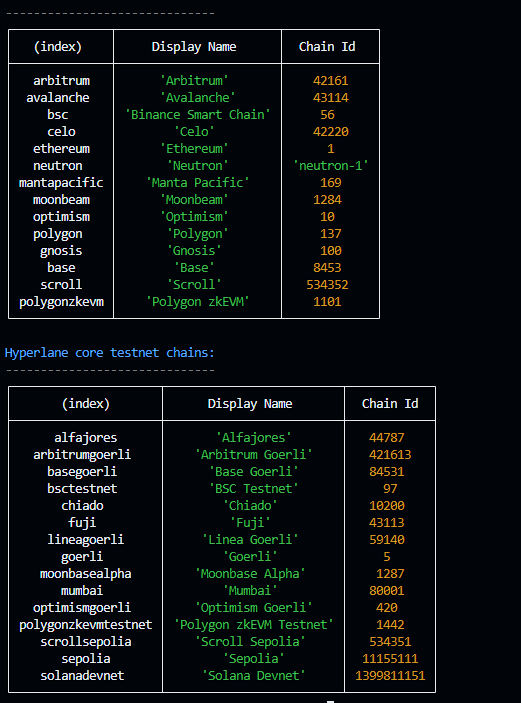
To check all listed chains run
hyperlane chains list
This will list all available chains in the SDK

Now if the chain of your interest is not listed here you can add it by running
hyperlane config create chain
Which will prompt you to fill in important details as follows

To further add more details about the chain you can manually configure the chains.yaml file as per this template.
# Configs for describing chain metadata for use in Hyperlane deployments or apps
# Consists of a map of chain names to metadata
# Schema here: https://github.com/hyperlane-xyz/hyperlane-monorepo/blob/main/typescript/sdk/src/metadata/chainMetadataTypes.ts
---
# You can define a full config for a new chain
mychainname:
  # Required fields:
  chainId: 1234567890 # Number: Use EIP-155 for EVM chains
  domainId: 1234567890 # Number: Recommend matching chainId when possible
  name: mychainname # String: Unique identifier for the chain, must match key above
  protocol: ethereum # ProtocolType: Ethereum, Sealevel, etc.
  rpcUrls: # Array: List of RPC configs
    # Only http field is required
    - http: https://mychain.com/rpc # String: HTTP URL of the RPC endpoint (preferably HTTPS)
      # Others here are optional
      pagination:
        maxBlockRange: 1000 # Number
        maxBlockAge: 1000 # Number
        minBlockNumber: 1000 # Number
      retry:
        maxRequests: 5 # Number
        baseRetryMs: 1000 # Number
  # Optional fields, not required for Hyperlane deployments but useful for apps:
  isTestnet: false # Boolean: Whether the chain is considered a testnet or a mainnet
  blockExplorers: # Array: List of BlockExplorer configs
    # Required fields:
    - name: My Chain Explorer # String: Human-readable name for the explorer
      url: https://mychain.com/explorer # String: Base URL for the explorer
      apiUrl: https://mychain.com/api # String: Base URL for the explorer API
      # Optional fields:
      apiKey: myapikey # String: API key for the explorer (optional)
      family: etherscan # ExplorerFamily: See ExplorerFamily for valid values
  nativeToken:
    name: Eth # String
    symbol: ETH # String
    decimals: 18 # Number
  displayName: My Chain Name # String: Human-readable name of the chain
  displayNameShort: My Chain # String: A shorter human-readable name
  logoURI: https://mychain.com/logo.png # String: URI to a logo image for the chain
  blocks:
    confirmations: 12 # Number: Blocks to wait before considering a transaction confirmed
    reorgPeriod: 100 # Number: Blocks before a transaction has a near-zero chance of reverting
    estimateBlockTime: 15 # Number: Rough estimate of time per block in seconds
  # transactionOverrides: # Object: Properties to include when forming transaction requests
  # Any tx fields are allowed

# Alternatively, you can extend a core chain config with only fields to be overridden
sepolia:
  rpcUrls:
    - http: https://mycustomrpc.com
ISM configuration and deployment
Now that we have configured the chains for deployment we will have to configure the ISMs to secure our interchain messages.
We will be deploying Message Multisig ISMs for our chains.
m of n Validators have attested to the validity of a particular interchain message.To setup run the command
hyperlane config create ism --advanced
Navigate through the options using up down buttons and select chains using space bar.
Choose the messageIdMultisigIsm as the type of validator. and enter the address of the validator as shown below

We are all set for the deployment.
Deployment
To deploy the hyperlane core contracts you need to set few variables ,the following command can be used with appropriate parameters.
export CHAIN_CONFIG_FILE=<absolute_path_to_chains.yaml>
export MULTISIG_CONFIG_FILE=<absolute_path_to_ism.yaml>
export YOUR_DEPLOYER_PRIVATE_KEY=<private_key>
export OUT_DIR=<where_you_want_the_addresses>
Now run the command after replacing chain1,chain2 with the names of chains you have configured
hyperlane deploy core \
    --targets chain1,chain2,... \
    --chains $CHAIN_CONFIG_FILE \
    --ism $MULTISIG_CONFIG_FILE \
    --out $OUT_DIR \
    --key $YOUR_DEPLOYER_PRIVATE_KEY
This will start the deployment sequence. Make sure the provided key is funded on all target chains. After few preflight checks, the deployment will start. This takes some time as multiple set of contracts are deployed to multiple chains, which means the snack will come in handy now.
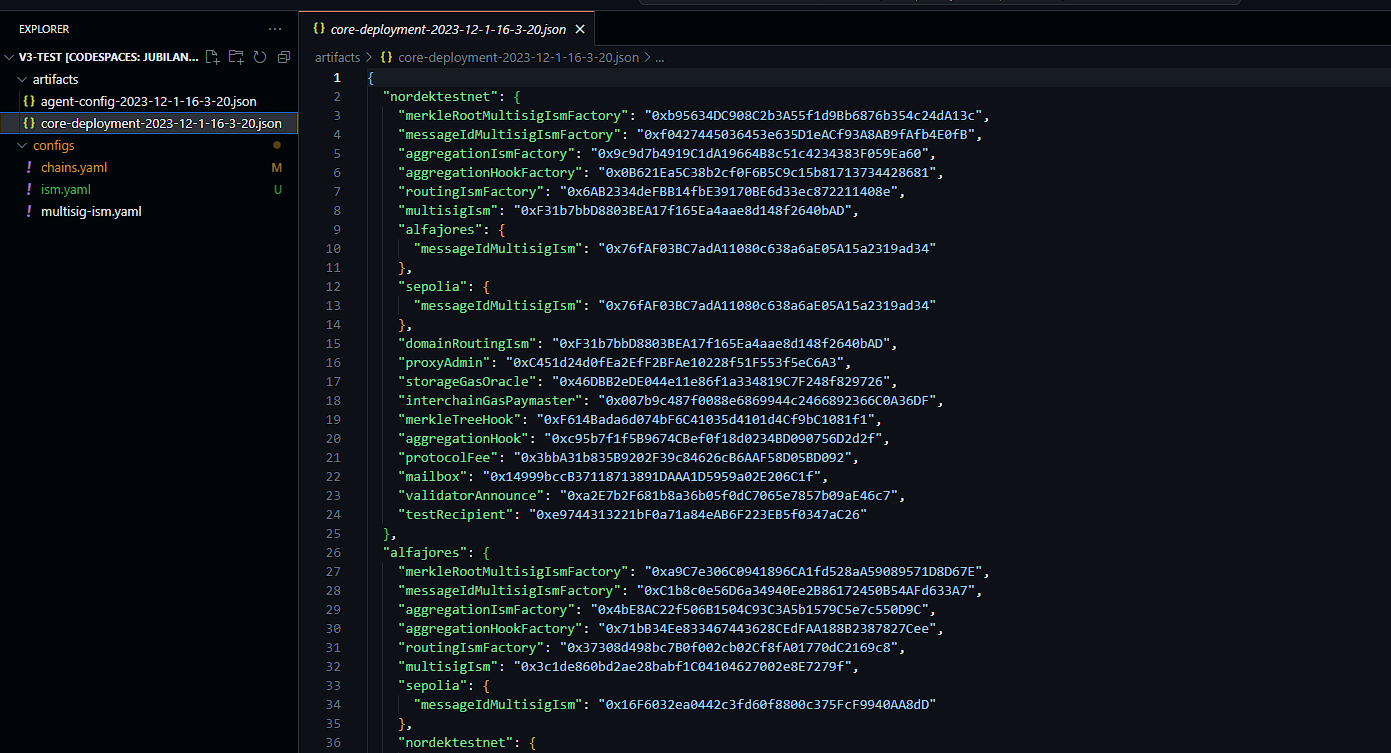
Upon completion of deployment, The addresses and Agent_config are written to the artifacts folder which is later used to setup relayers and validators.

Congratulations! you have deployed the core contracts of hyperlane to the configured chains. In the subsequent guides we will host the hyperlane agents and send test messages to test the deployment
Additional Guidelines
We have covered the deployment of smartContracts, however agents such as relayers and validators have to be hosted to fully complete the setup.
Follow this guide to deploy your agents on Kurtosis.
Guides to run agents on external VMs and warp route deployment will be published soon.
Stay flashy 💫.
For any clarifications you can tag me @muskbuster on discord of hyperlane or twitter
Subscribe to my newsletter
Read articles from muskbuster directly inside your inbox. Subscribe to the newsletter, and don't miss out.
Written by
