NavigationSplitView and MVVM in SwiftUI
 Andrés Portillo
SwiftUI's NavigationSplitView is a great choice when looking for a navigation container for your app, this is especially true if you are targeting multiple form platforms. On iPhone, the NavigationSplitView folds its views and presents them similarly to a NavigationStack while on iPad and Mac it shows up to 3 views (side bar, content and detail view) side by side and provides bindings to control which views are visible.
I have been working on adding Mac Catalyst support for my app Lines and decided to go with NavigationSplitView as it does a lot of the heavy lifting needed for adapting to different size classes. In this blog post I share my approach to using NavigationSplitView using my go-to architectural pattern: MVVM.
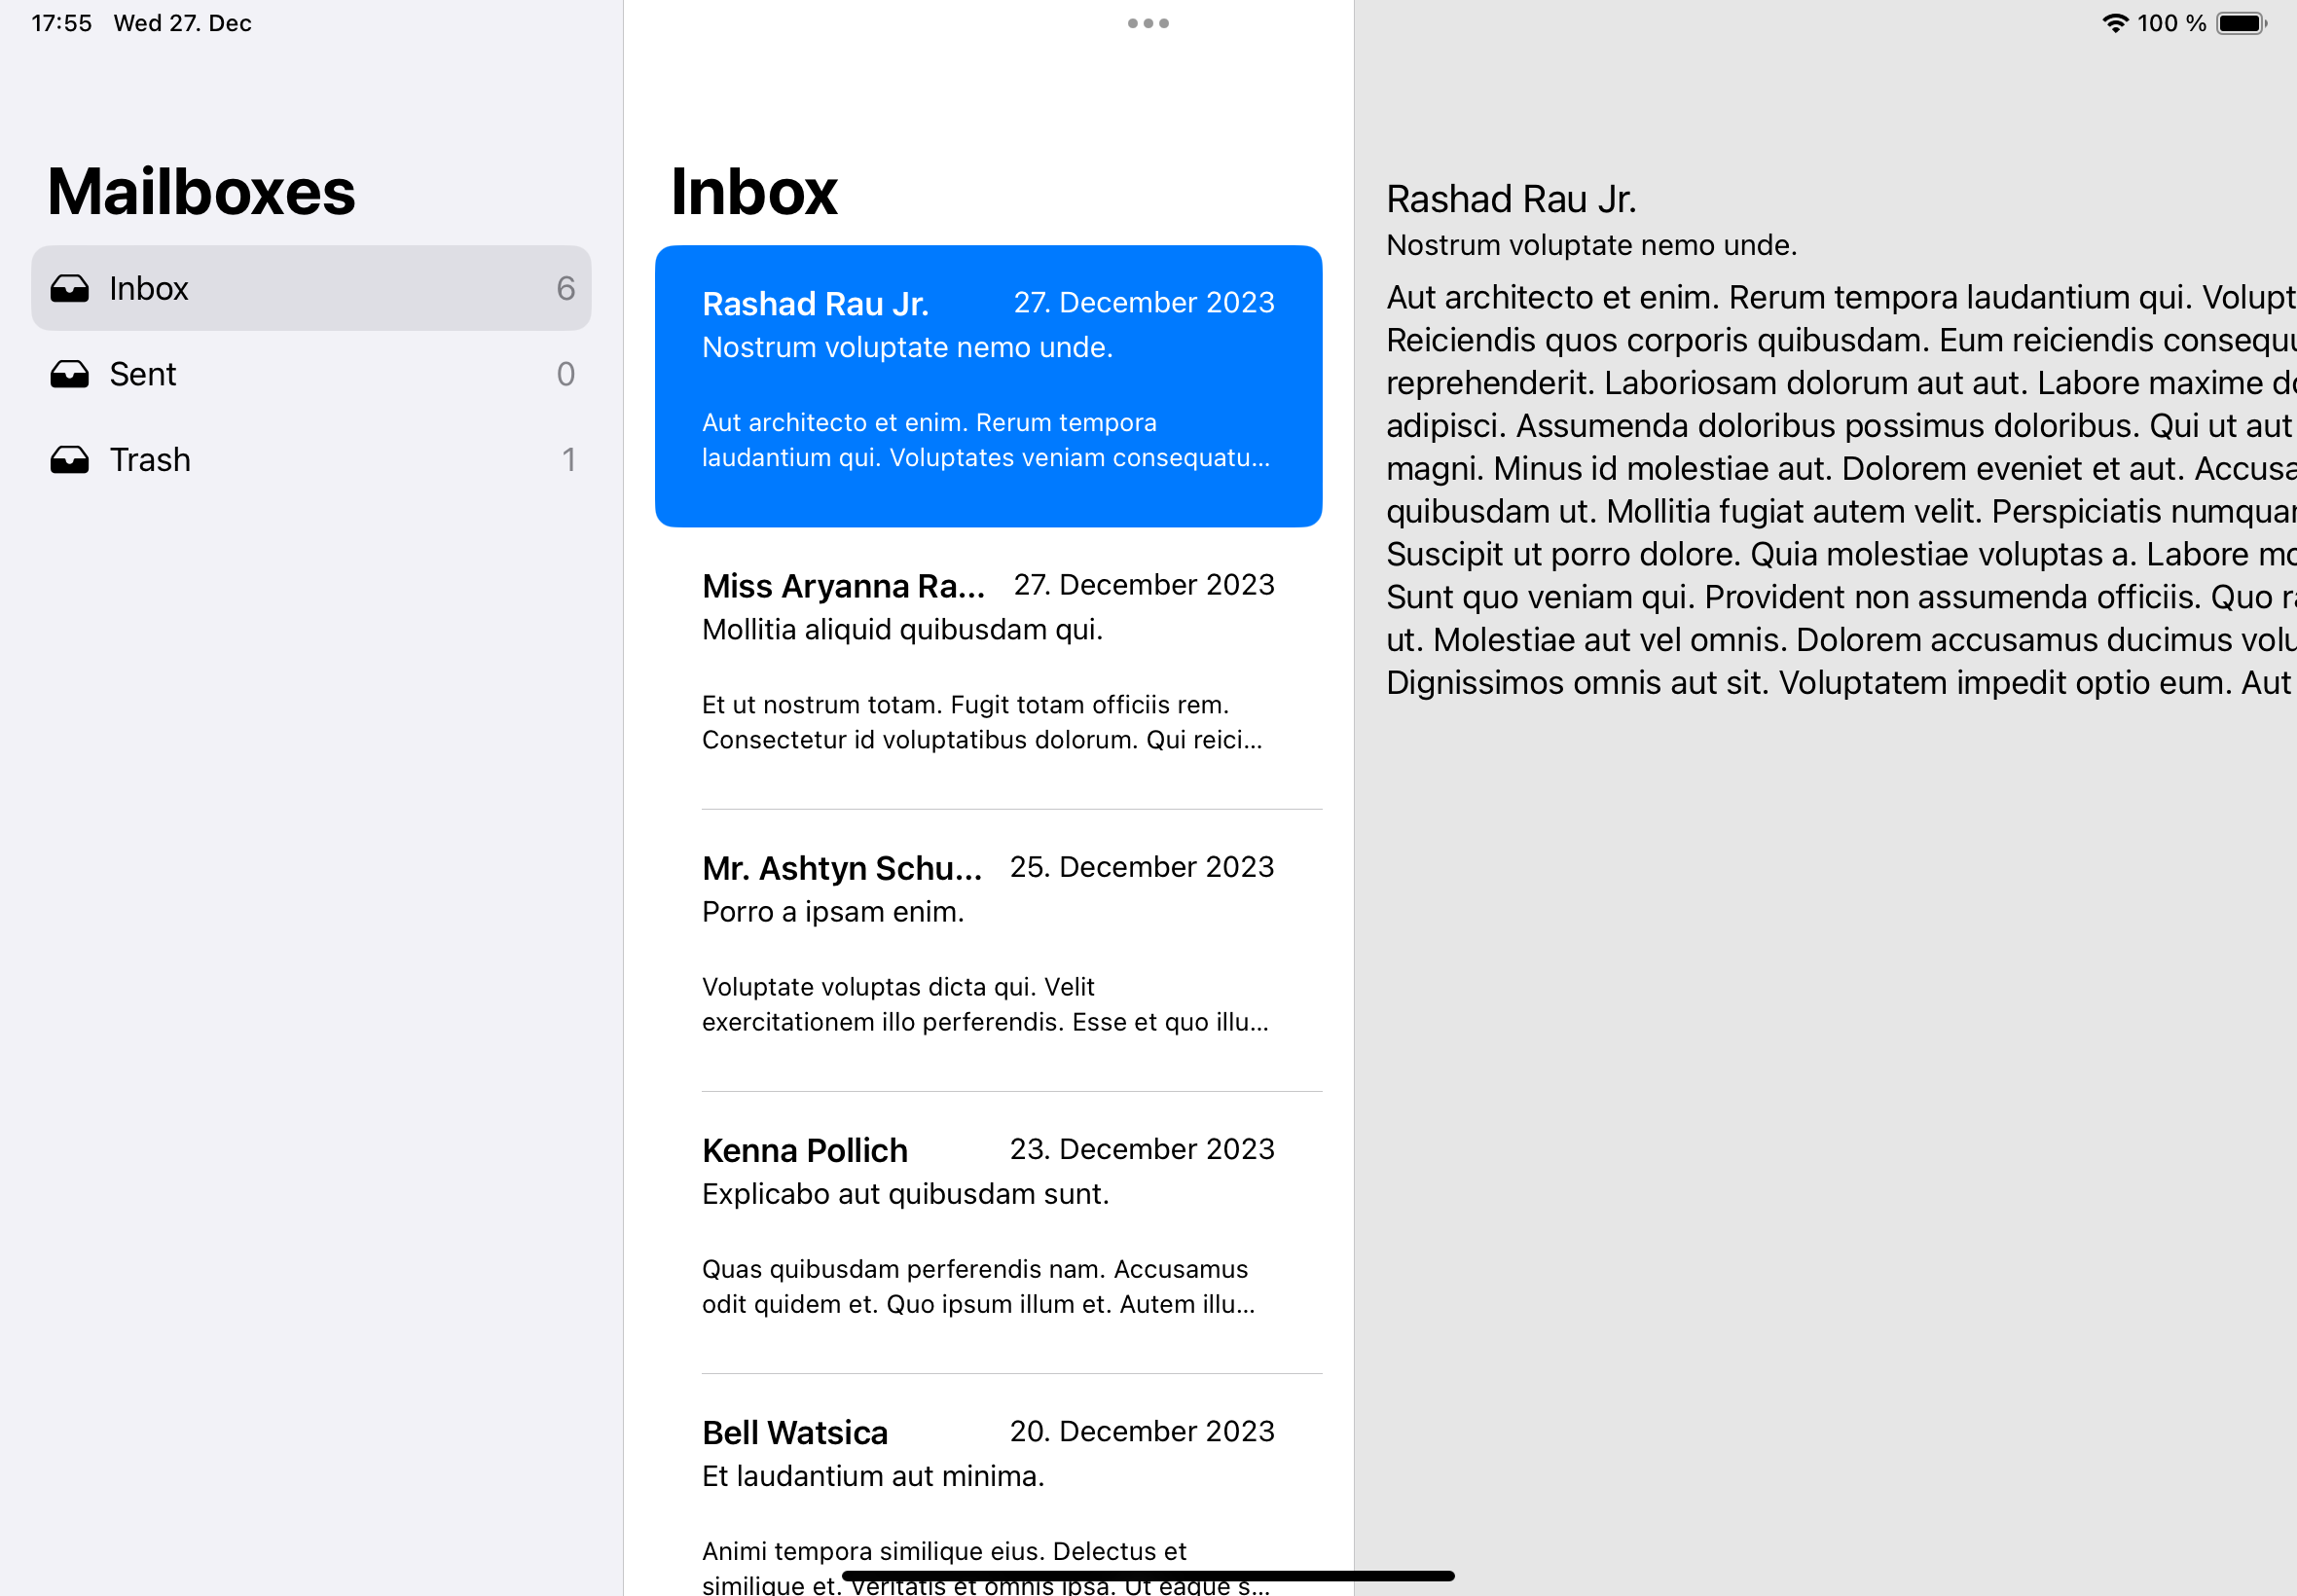
To demonstrate my approach I've built an app that emulates the Mail app on iOS. It will have the following main views:
A mailbox list as the NavigationSplitView sidebar view,
a mailbox view as the NavigationSplitView content view,
and a mail view as the NavigationSplitView detail view.
This will result in a view hierarchy with 3 levels where the presented mailbox view is determined by the selection of the mailbox list, and the presented mail view is determined by the selection in the mailbox view listing the emails in the mailbox.
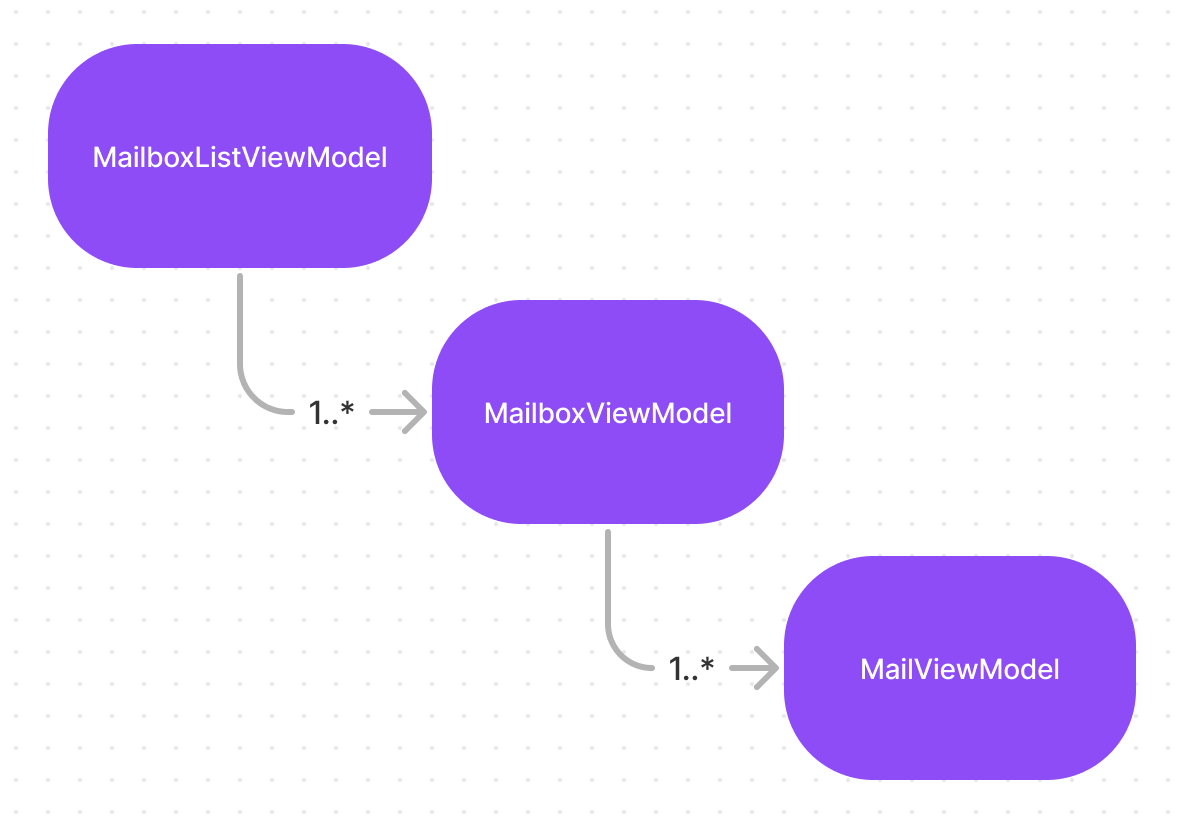
When architecting apps with MVVM, a good rule of thumb is to have the view model structure mirror that view structure, for the Mail app it will look like this:

The main view model holds an array of MailboxViewModel (one for each mailbox) which in turn holds an array of MailViewModel (one for each mail in the mailbox). Having the view model structure mirror the view structure makes it easy to reason about the code and provides and easy way for child view models to pass messages to their parents (i.e. via delegates) which otherwise we would need to handle on the view layer which would be far from ideal for multiple reasons. The implementation for this looks as follows:
@main
struct MailApp: App {
    @State private var viewModel = MailAppViewModel()
    var body: some Scene {
        WindowGroup {
            NavigationSplitView(columnVisibility: $viewModel.columnVisibility) {
                MailBoxListView(viewModel: viewModel.mailBoxListViewModel)
            } content: {
                if let contentViewModel = viewModel.mailBoxViewModel {
                    MailboxView(viewModel: contentViewModel)
                }
            } detail: {
                if let detailViewModel = viewModel.mailViewModel {
                    MailView(viewModel: detailViewModel)
                }
            }
        }
    }
}

// view model

@Observable
final class MailAppViewModel: MailBoxListViewModelDelegate, MailboxViewModelDelegate {
    let mailBoxListViewModel: MailBoxListViewModel
    var mailBoxViewModel: MailboxViewModel?
    var mailViewModel: MailViewModel?
    var columnVisibility: NavigationSplitViewVisibility = .all

    init() {
        self.mailBoxListViewModel = MailBoxListViewModel()
        mailBoxListViewModel.delegate = self
    }

    // MARK: - MailBoxListViewModelDelegate

    func mailBoxListViewModel(_ viewModel: MailBoxListViewModel, didSelectMailbox mailbox: Mailbox) {
        mailBoxViewModel = MailboxViewModel(mailbox: mailbox)
        mailBoxViewModel?.delegate = self
    }

    // MARK: - MailboxViewModelDelegate

    func mailboxViewModel(_ viewModel: MailboxViewModel, didSelectMail mail: Mail) {
        mailViewModel = MailViewModel(mail: mail)
    }
}
As described in the diagram, the view models follow the same structure as the views where the content view model is produced by the sidebar view model (MailBoxListViewModel) and the detail view model is produced by the content view Model (MailBoxViewModel), when selection occurs, MailAppViewModel takes care of orchestration and translating selections into new view models.
Both the side bar and content view models pass a selection binding to a list which will assign a value given a selection interaction and notify the NavigationSplitView so it can update its content accordingly.
List(selection: $viewModel.selectedMailbox) {
    ForEach(viewModel.mailboxes, id: \.self) { mailbox in
        NavigationLink(value: mailbox) {
            MailboxListItemView(viewModel: viewModel.viewModel(for: mailbox))
        }
    }
}
And that's it! If you are curious about how everything fits together you can download the full Xcode project on Github.
Subscribe to my newsletter
Read articles from Andrés Portillo directly inside your inbox. Subscribe to the newsletter, and don't miss out.
Written by

Andrés Portillo
Andrés Portillo
I am a software engineer based in Berlin primarily developing for Apple platforms. Previous professional experiences include SoundCloud, Spotify and Shopify.