Elements of API proxy.
 Nainaz
In this blog, we will understand the elements of API proxy in detail.
Before going to Elements of API proxy let's understand the role played by Environments and Environment groups.
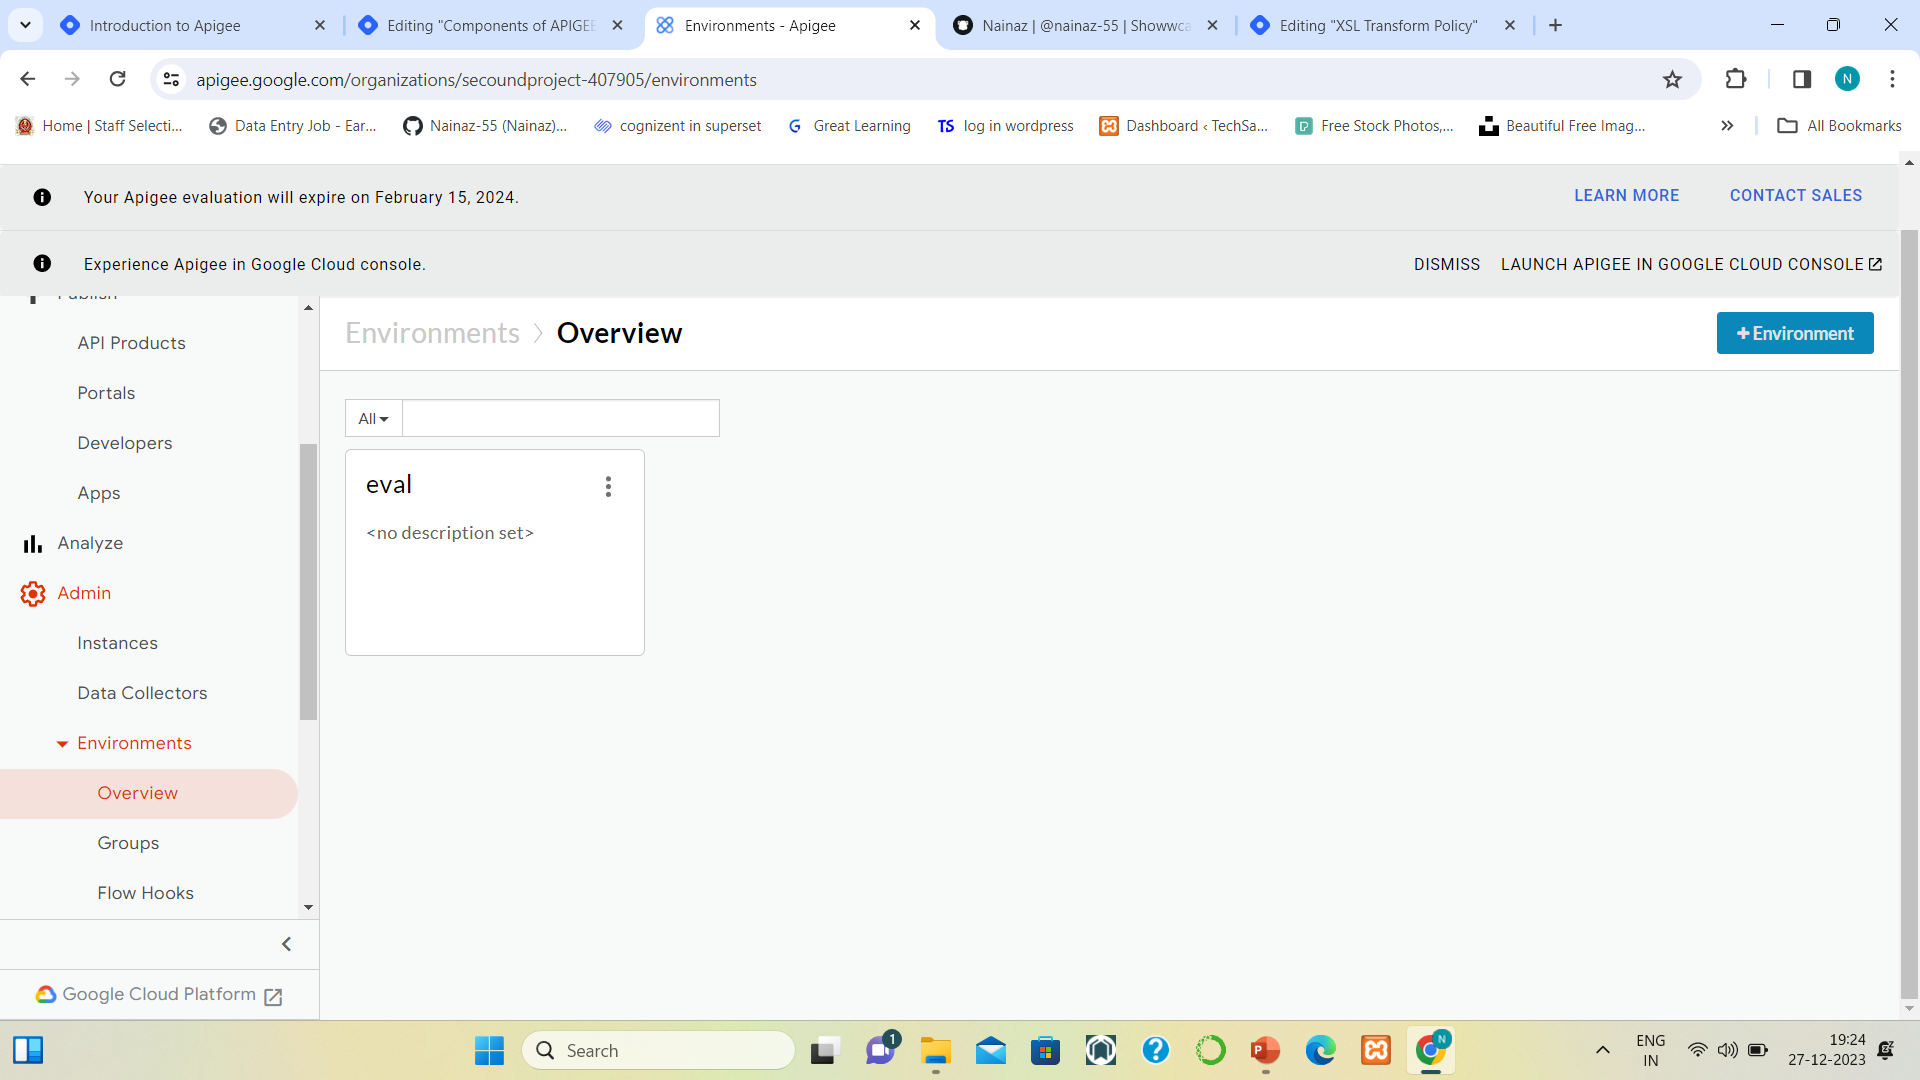
Environments
It is the runtime context to deploy API proxies. API proxies are in a running state once it is deployed to an environment. Proxies can deployed in multiple environments.
Environment groups
It is a collection of environments.
- hostnames are defined on the environment groups.
Environment groups --> Hostnames --> Environments (ex. prod, dev)
To access each (environment --> proxy), it should be associated with hostnames, Hostnames should be added inside the environment groups.
We can add multiple hostnames in each group.
We can't add the same hostnames to multiple environment groups.
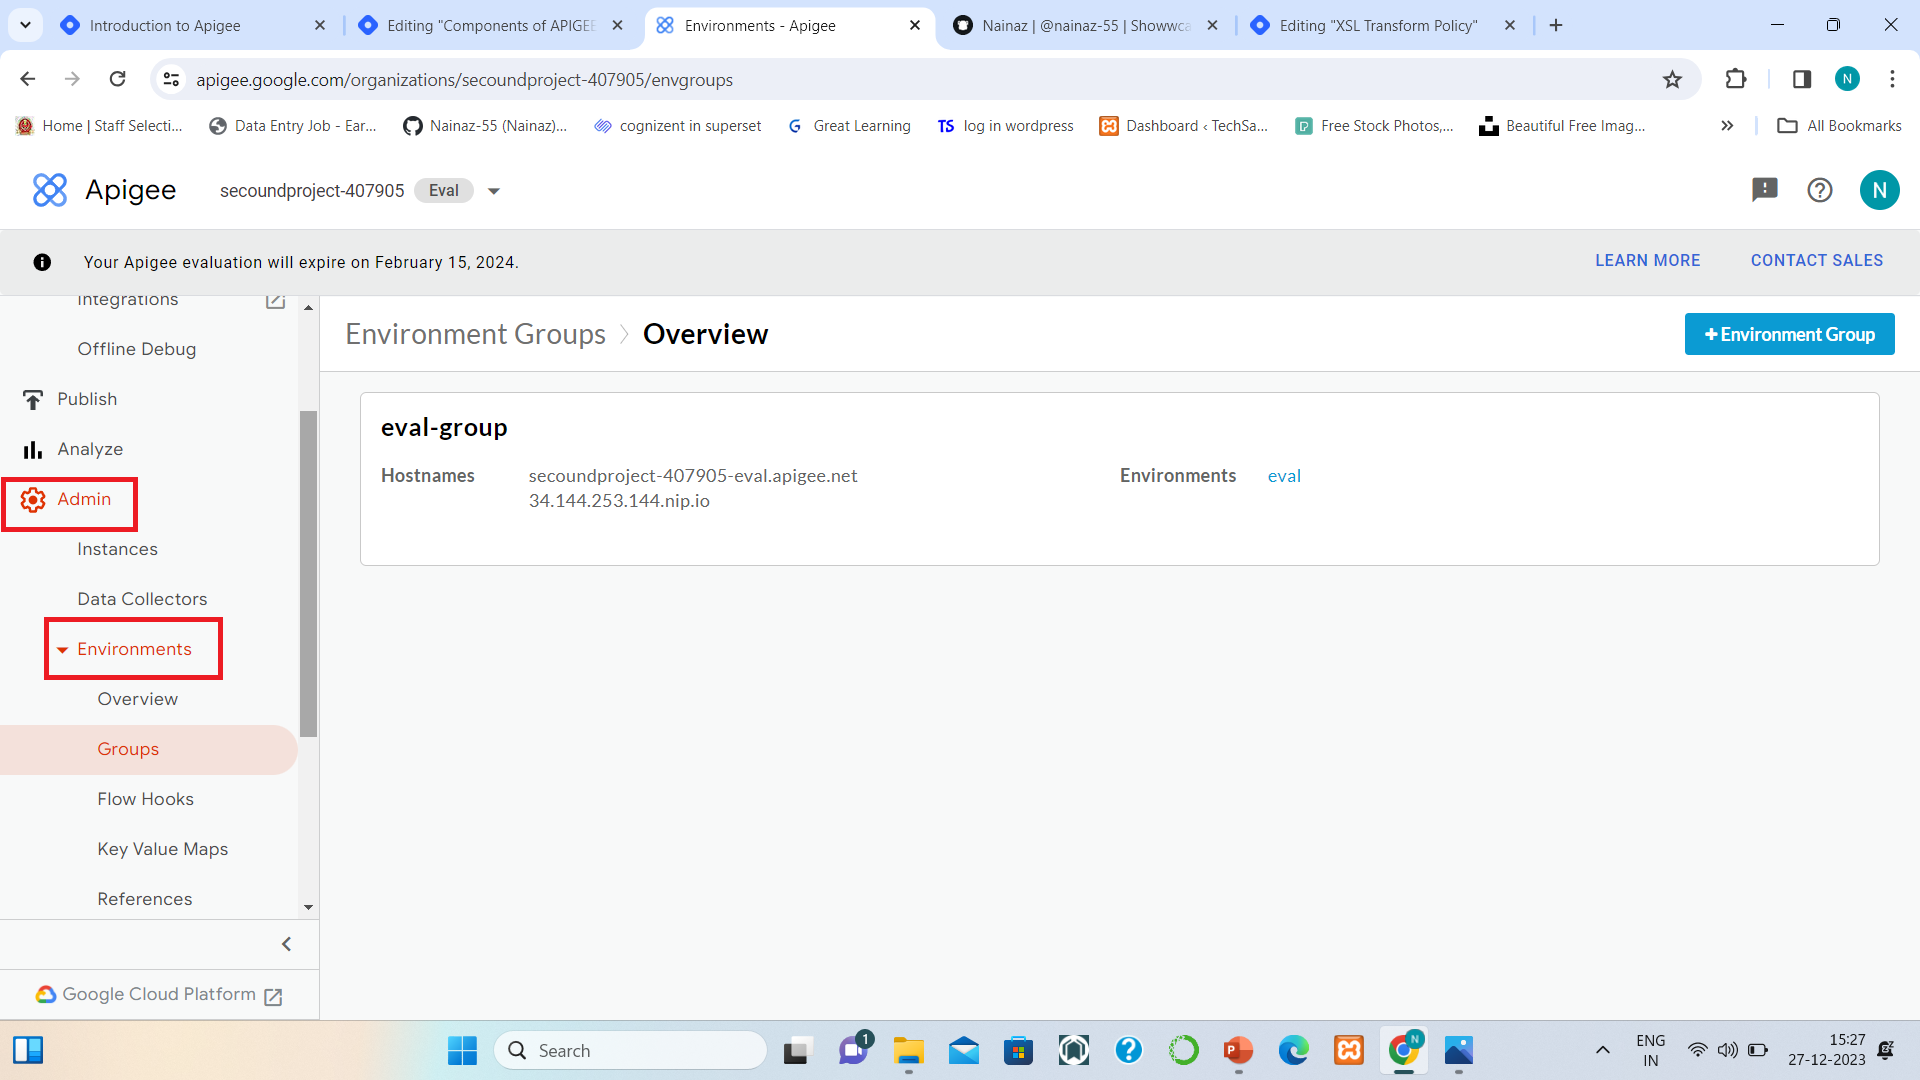
Create a new +Environment Group and add hostnames and environments to that group
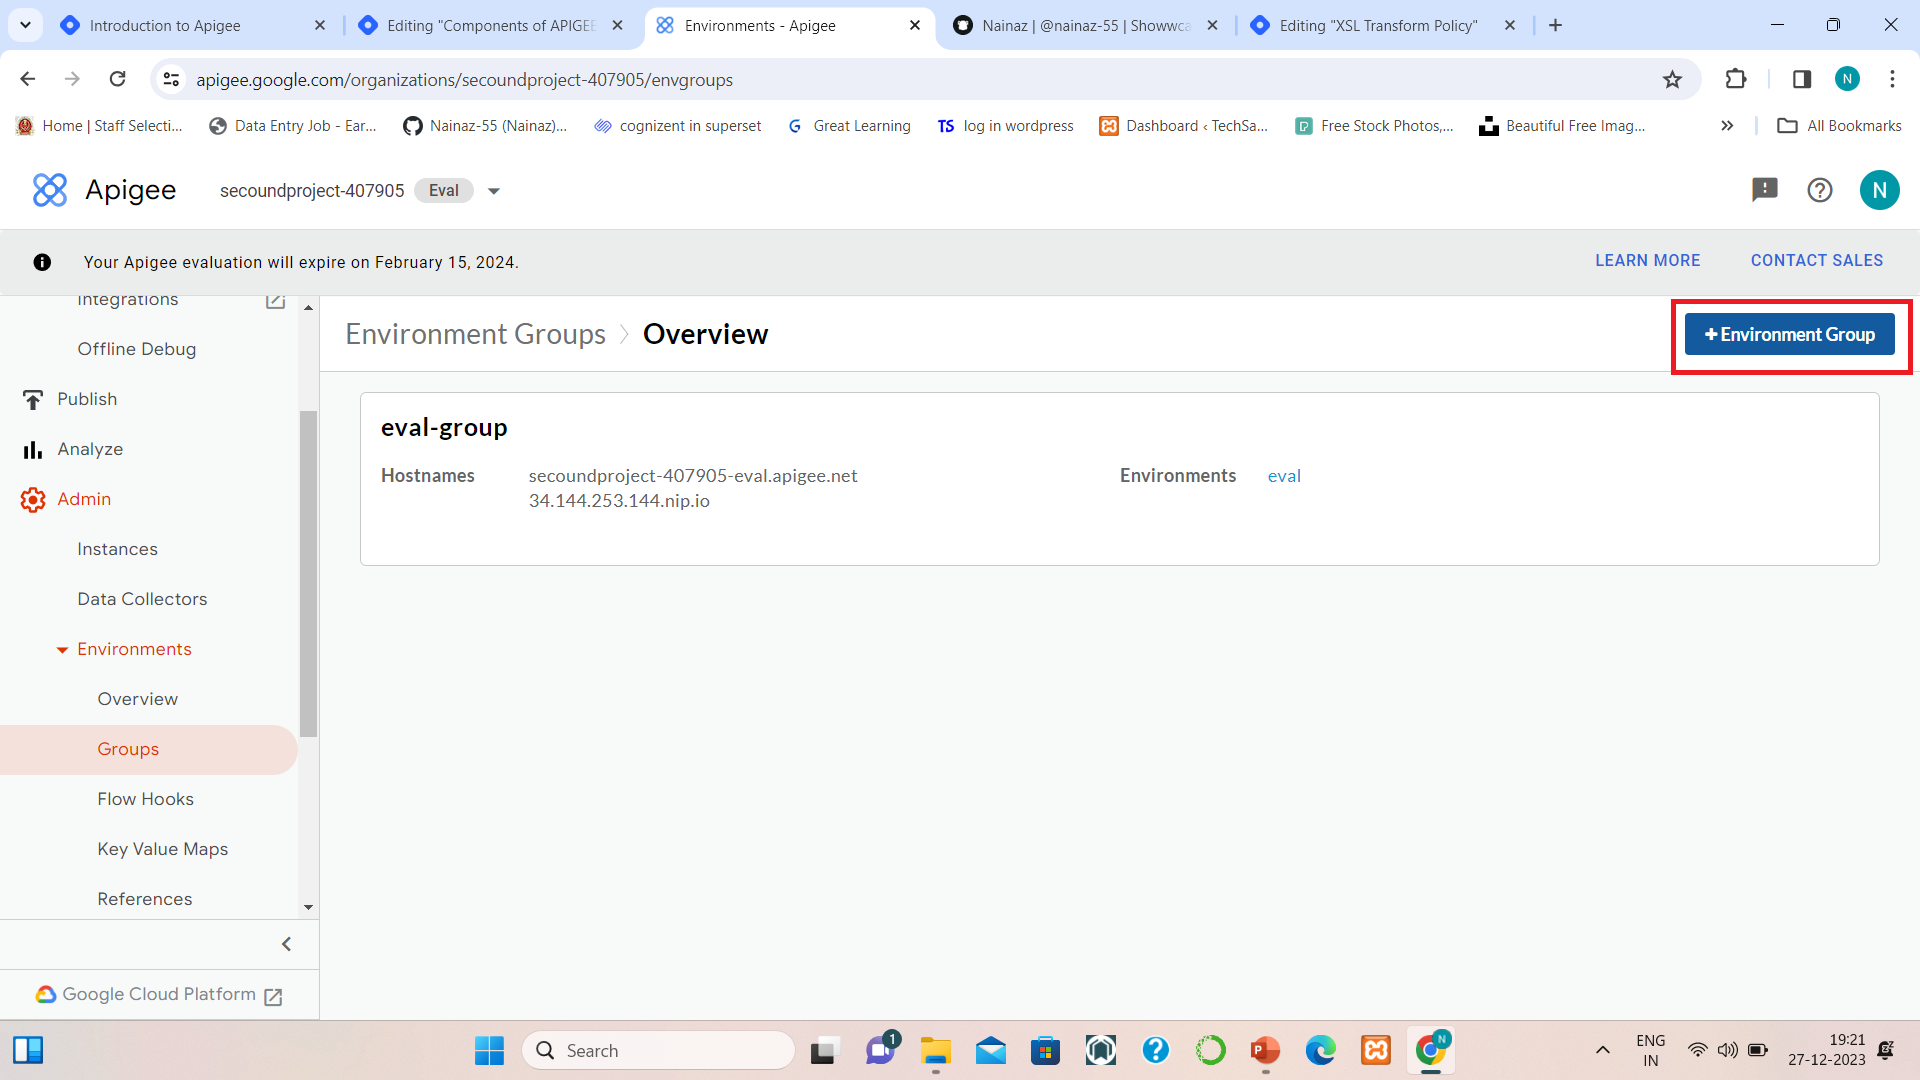
Hostname: 34.144.253.144.nip.io
The domain name of that hostname: secoundproject-407905-eval.apigee.net
API Proxy
API proxies act as interfaces for the developers to access backend services.
Backend services are secured by using API proxies.
All the security and rate-limiting policies are applied to the API proxy before passing it to the backend.
In this type of architecture, the backend service URL is not shared with the consumers, the consumer must hit the API proxy to get the service from the backend.
the backend service URLs are not shared with the consumers as the services are exposed through proxy endpoints.
Consumers are unaware of the backend service changes, for example in the database.
API tools provide out-of-the-box policies to apply to the API proxies.
Let's create a new proxy and understand each element of the Proxy:
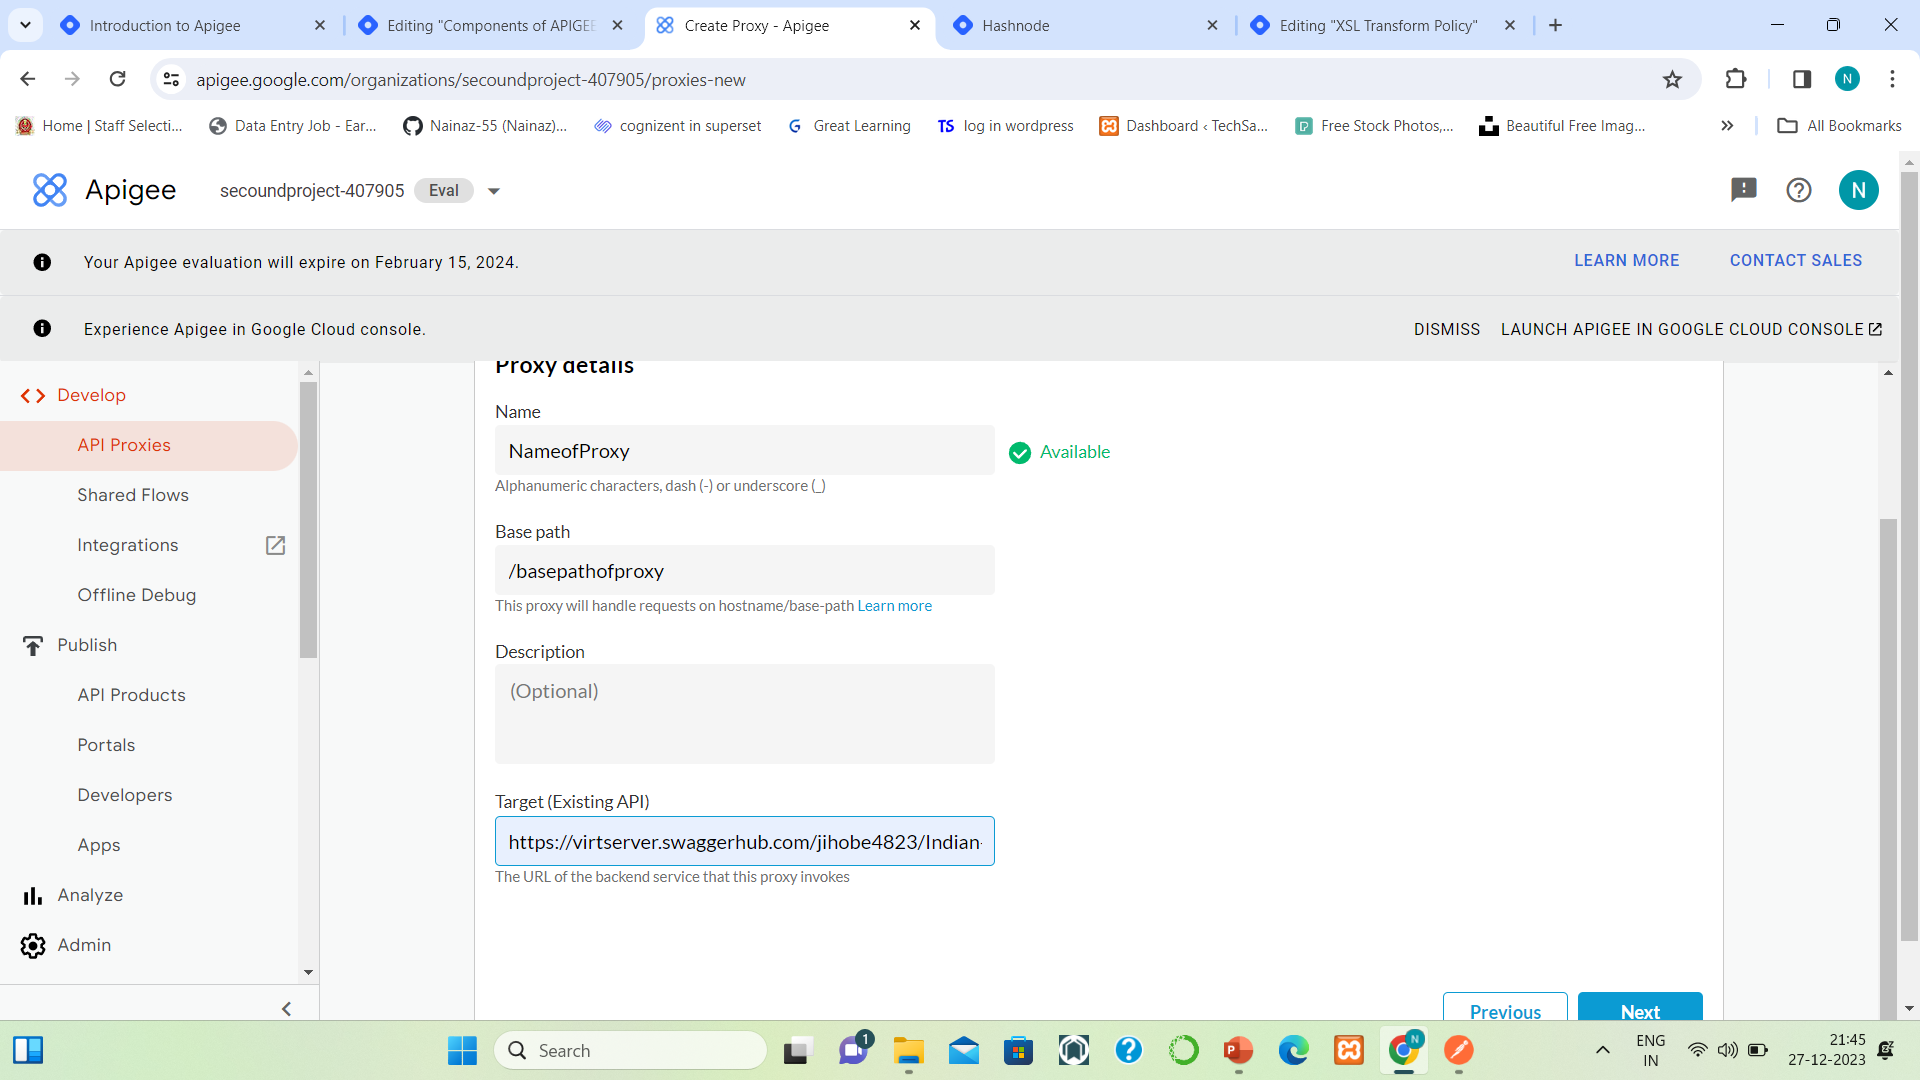
Name: This field identifies the name of the proxy.
Base path: This field identifies the base path of the proxy. It can be the same as the name of the proxy. But it should not contain the capital alphabets.
Target (Existing API): Actulal API of the Backend Server.
https://virtserver.swaggerhub.com/jihobe4823/Indian-Air-Flight-API/v1/flights
The output of this is,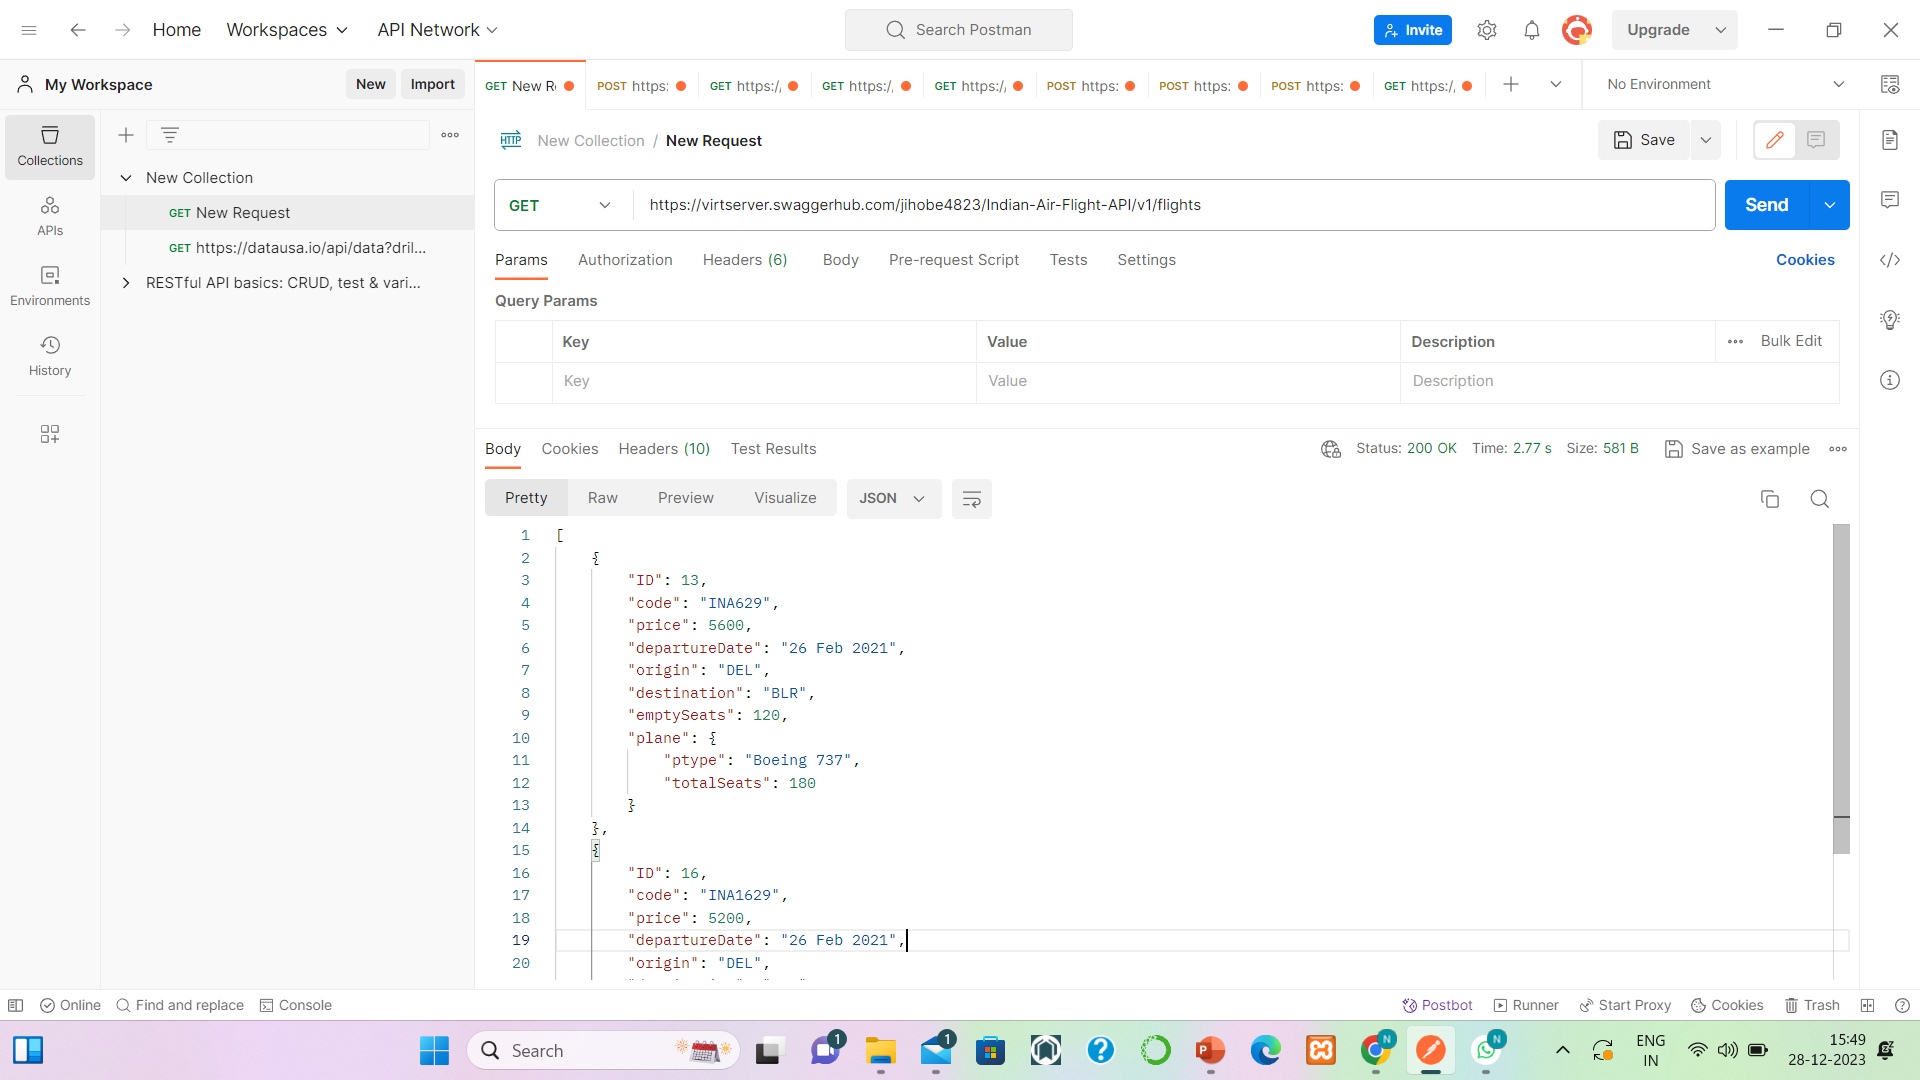
Click on Next.
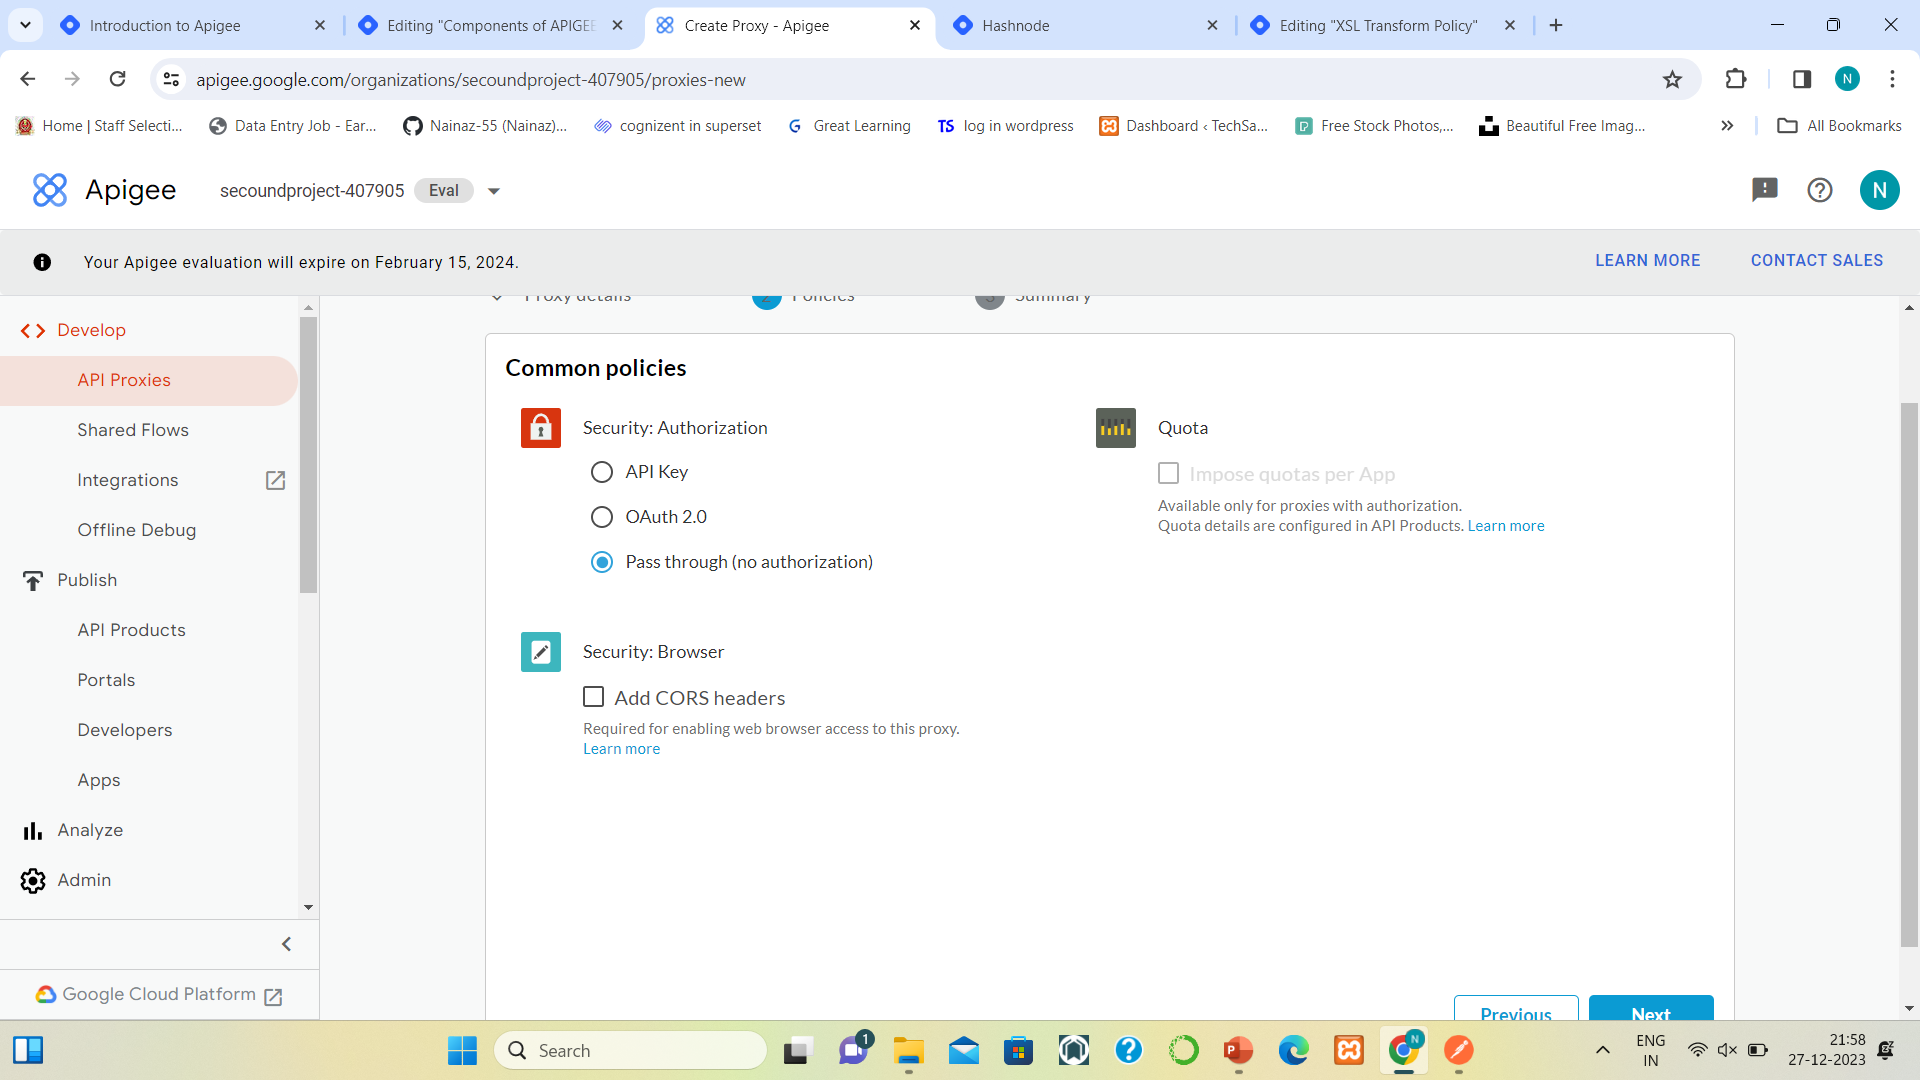
Security: Authorization: We can choose security policies while creating the proxy. If we don't want to choose any policy we can select pass-through (no authorization).
Security: Browser: Select this if you want to access the proxy through the web browser.
Quota: Select this if wanted to apply the Quota policy on Proxy while creating it.
But one condition, To make this option available, we need to select a security option, and Quata details for this proxy should be configured in the API product.
Click on Next.
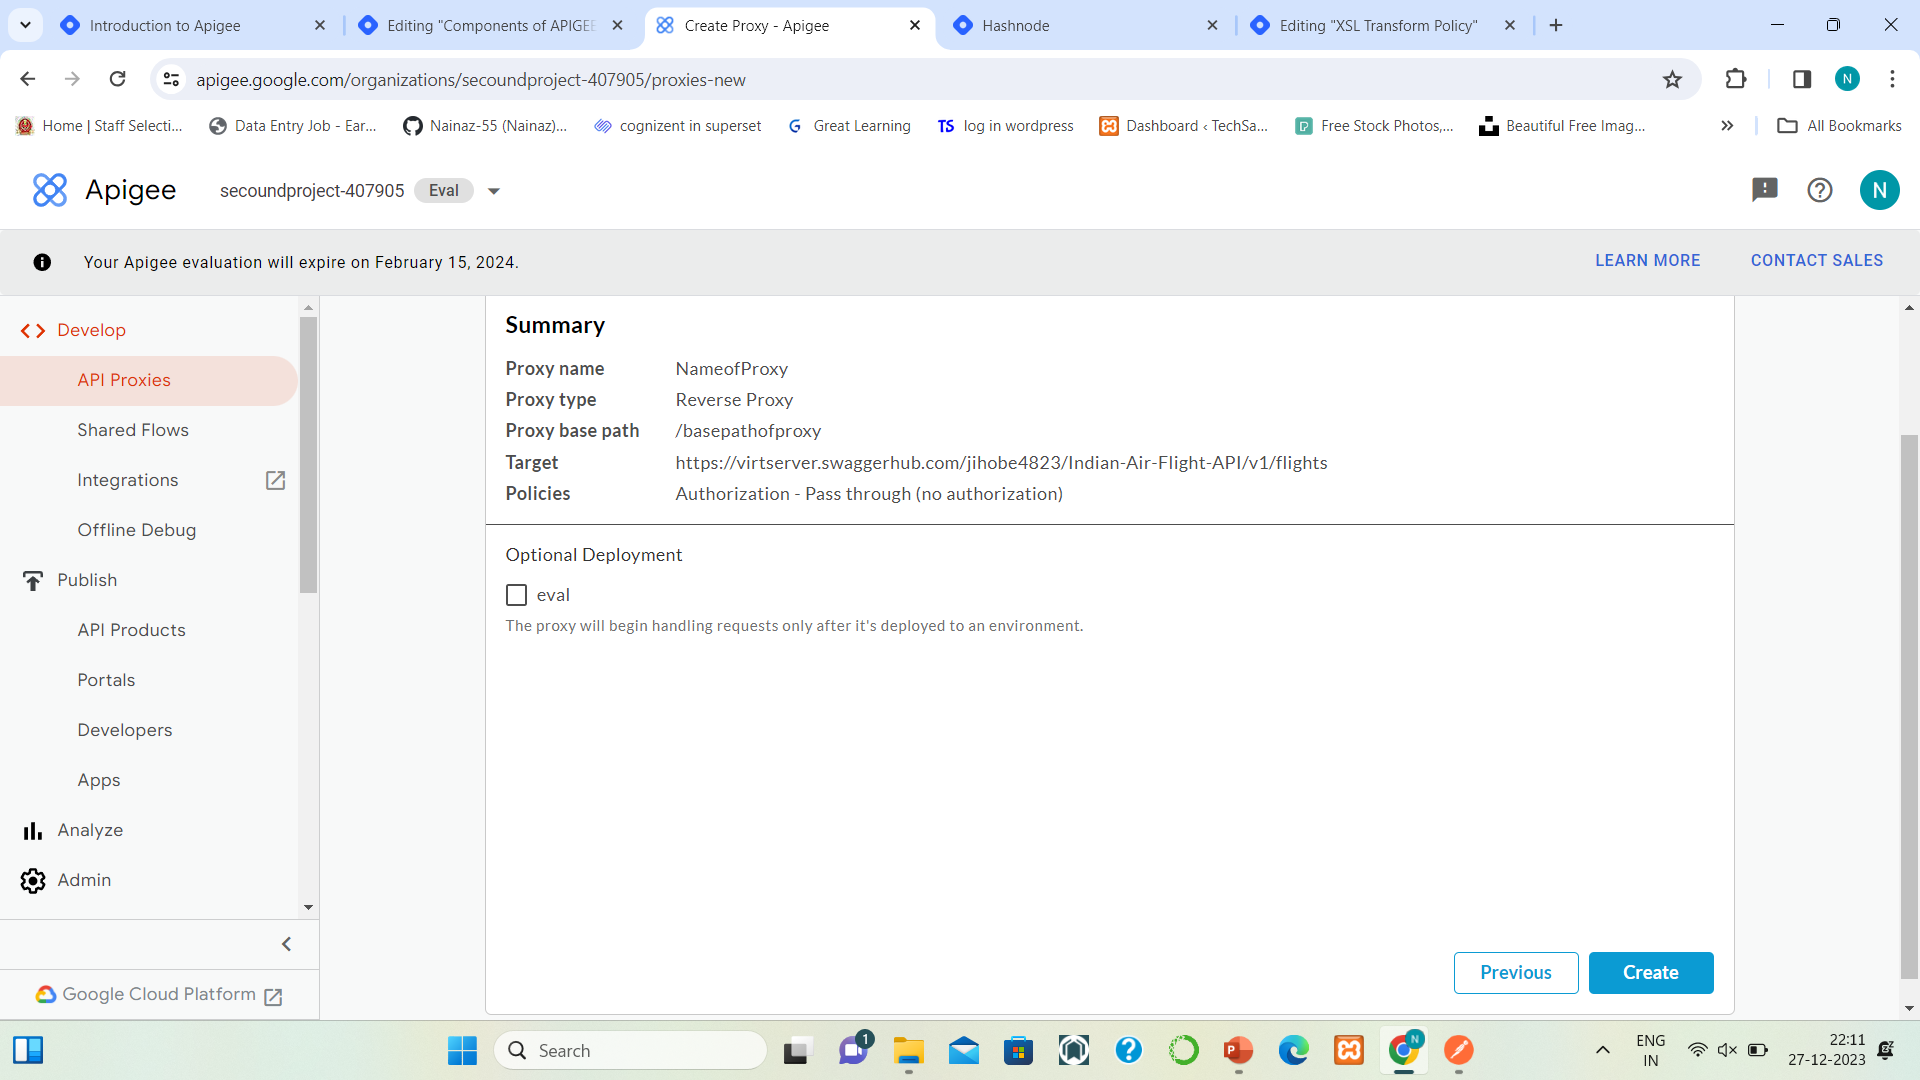
Select the eval environment to deploy while creating the API proxy or this option is optional we can deploy this after creating and editing the proxy.
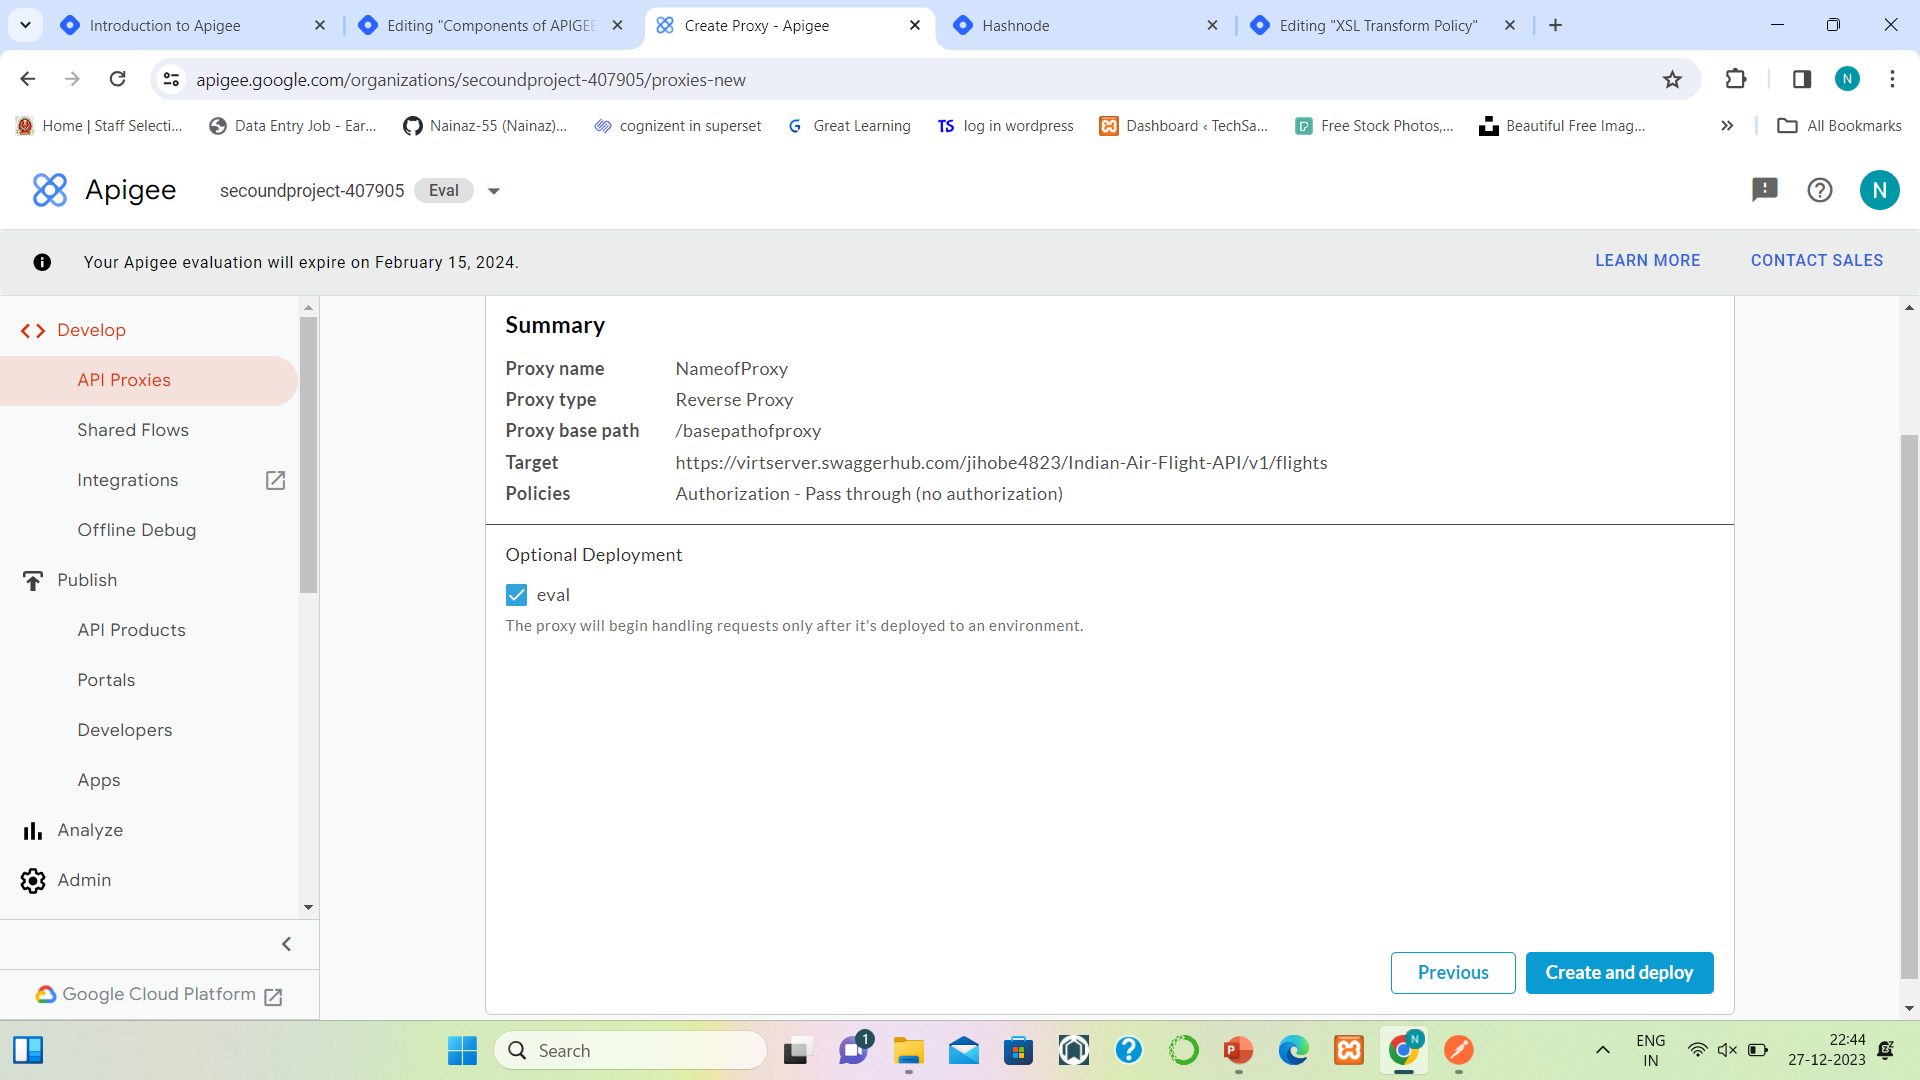
But now I will select the eval environment and we move forward to understand the rest of the elements of Proxy.
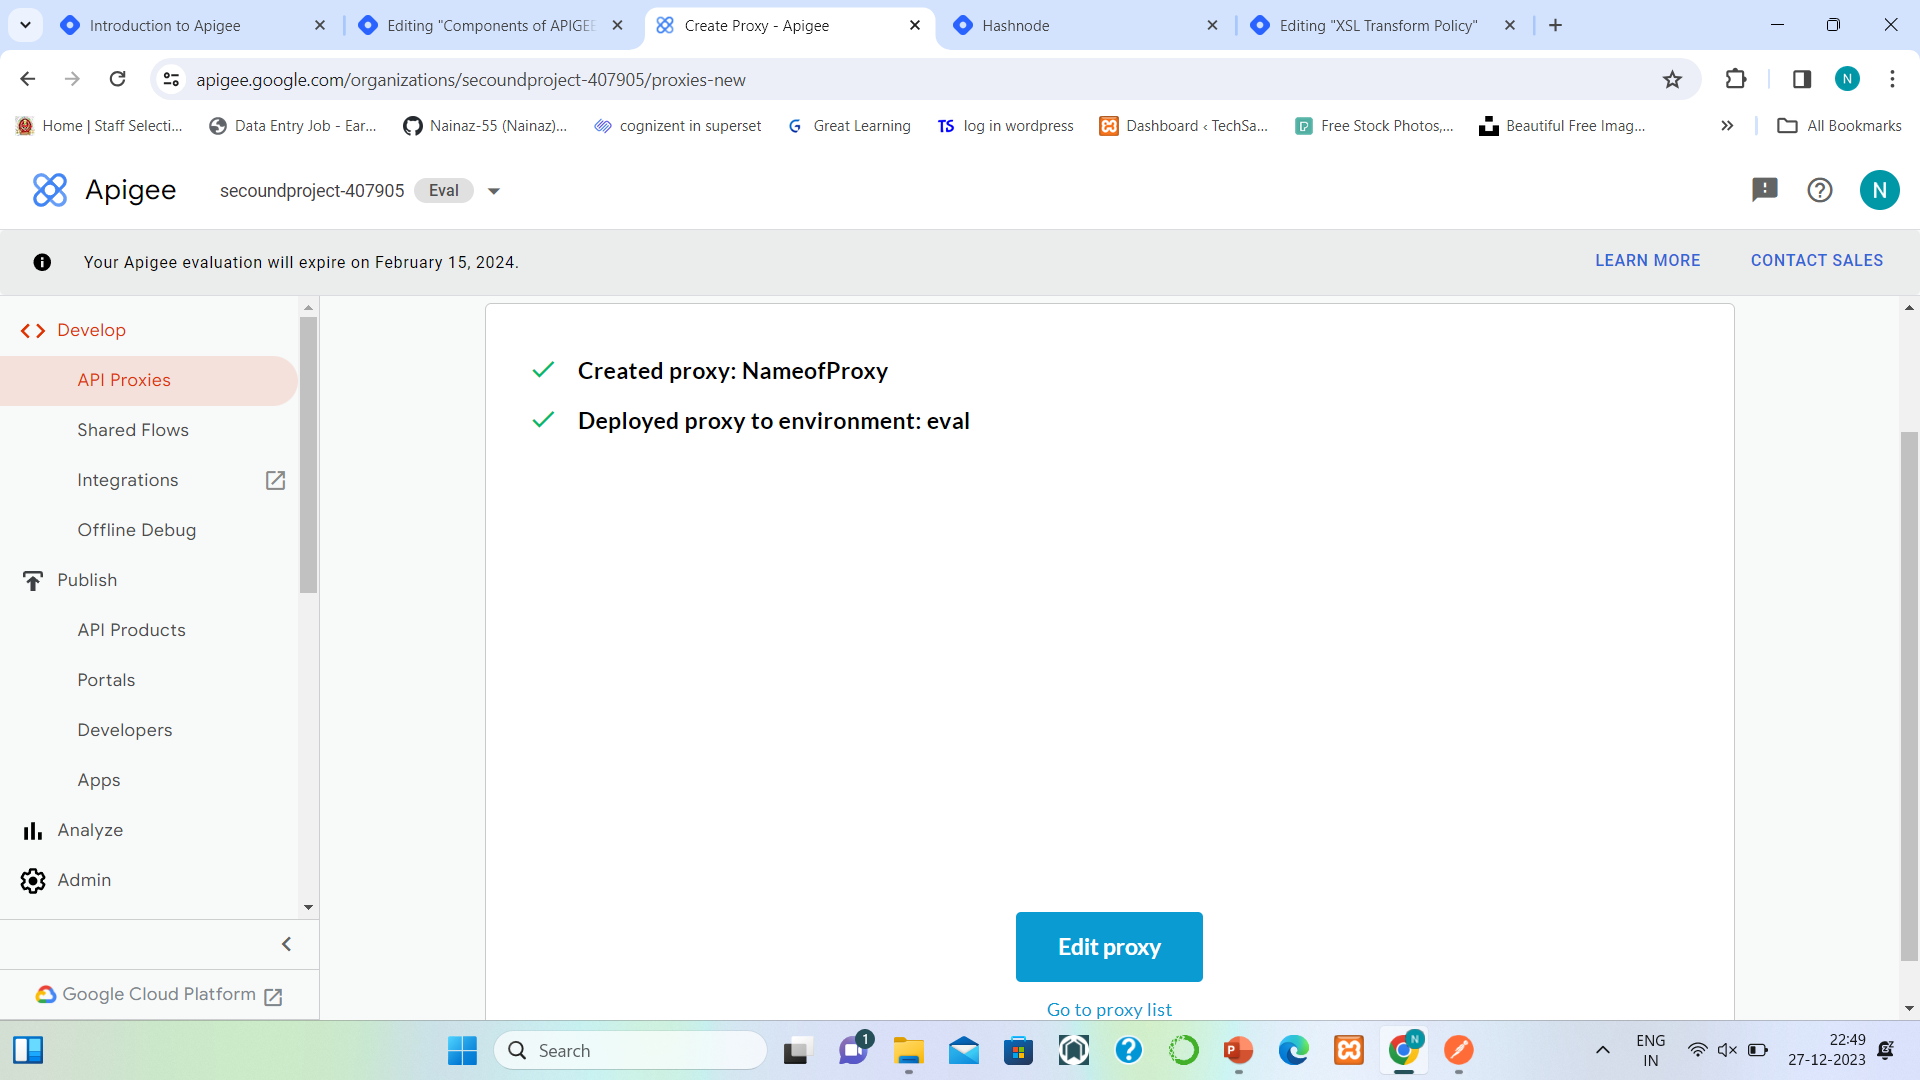
After successfully creating and deploying the proxy. Click on Edit Proxy to update the proxy as per our requirements.
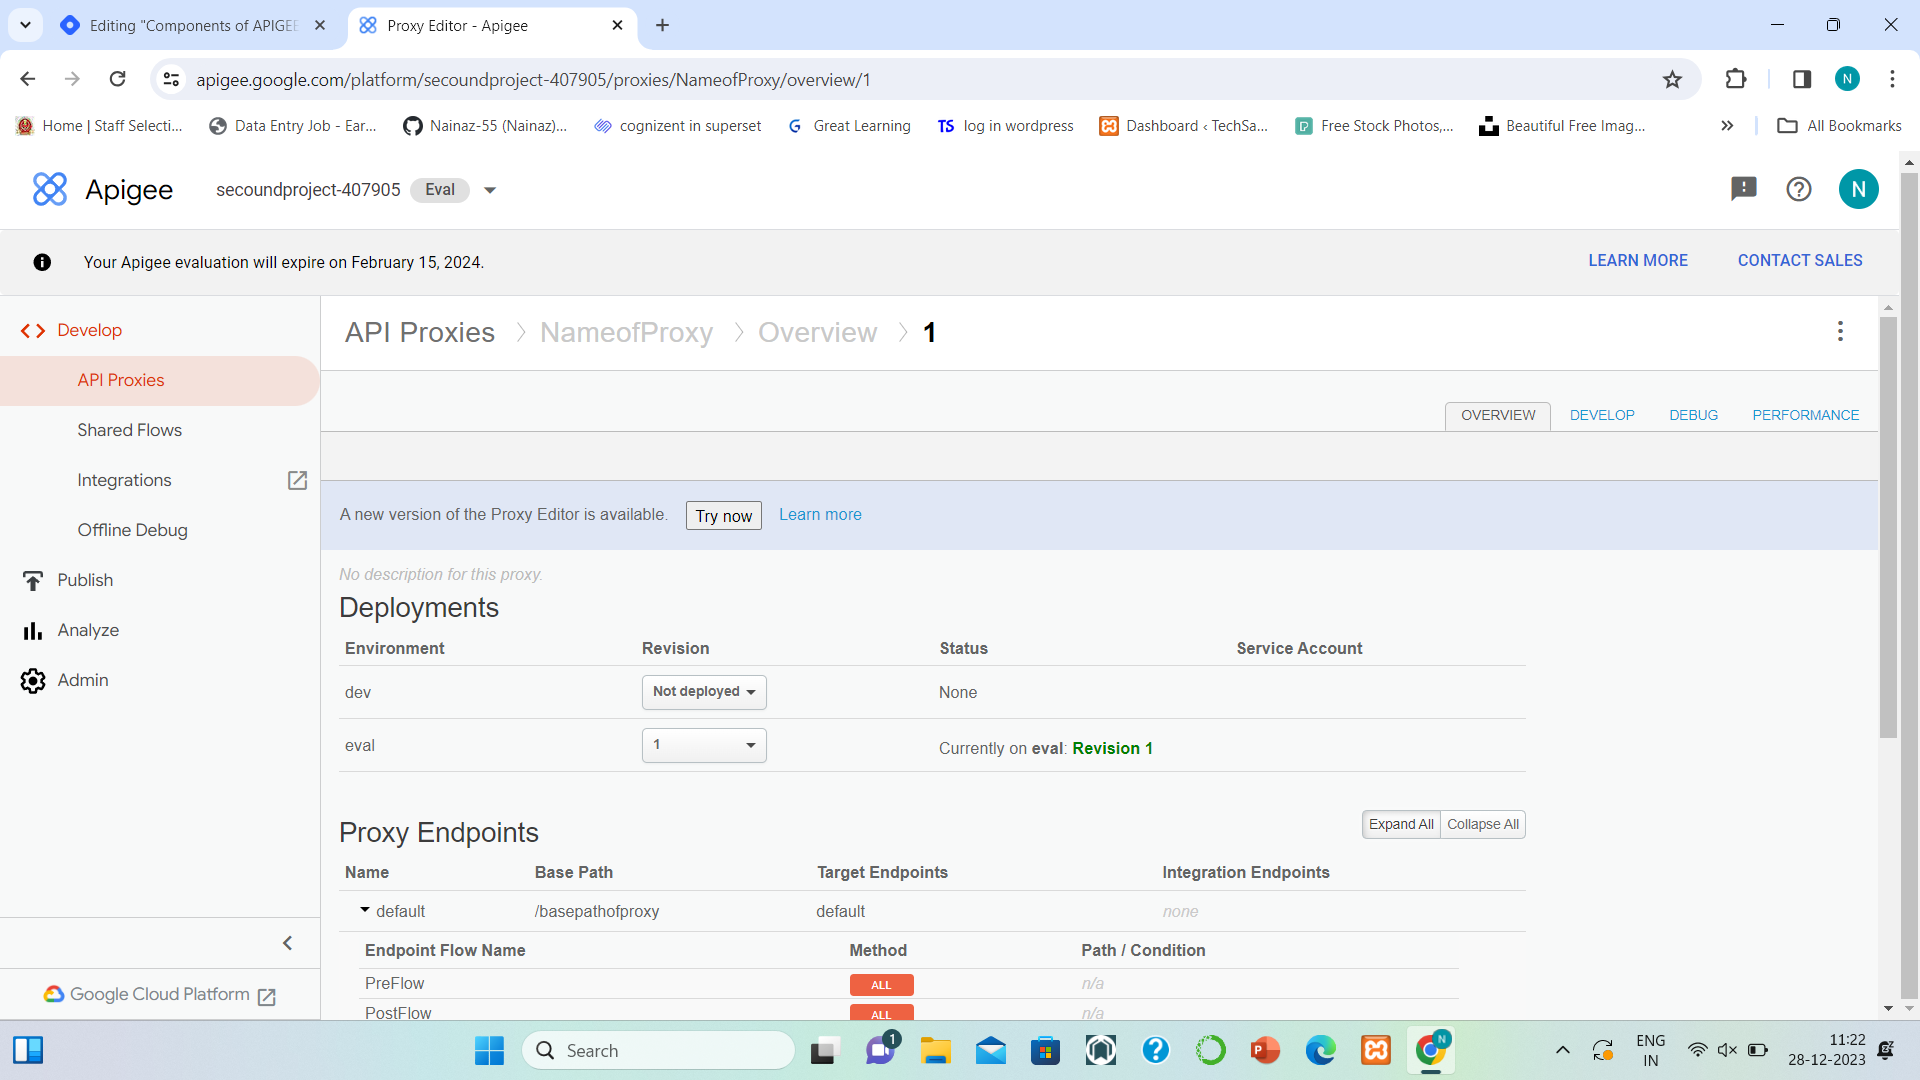
Deployments:
- Environment - It identifies in which environment the proxy is deployed.
- In the eval environment proxy is deployed.
- Revision - Version of the proxy. when every time the proxy gets deployed, it will get stored in a new revision(version).
- Environment - It identifies in which environment the proxy is deployed.
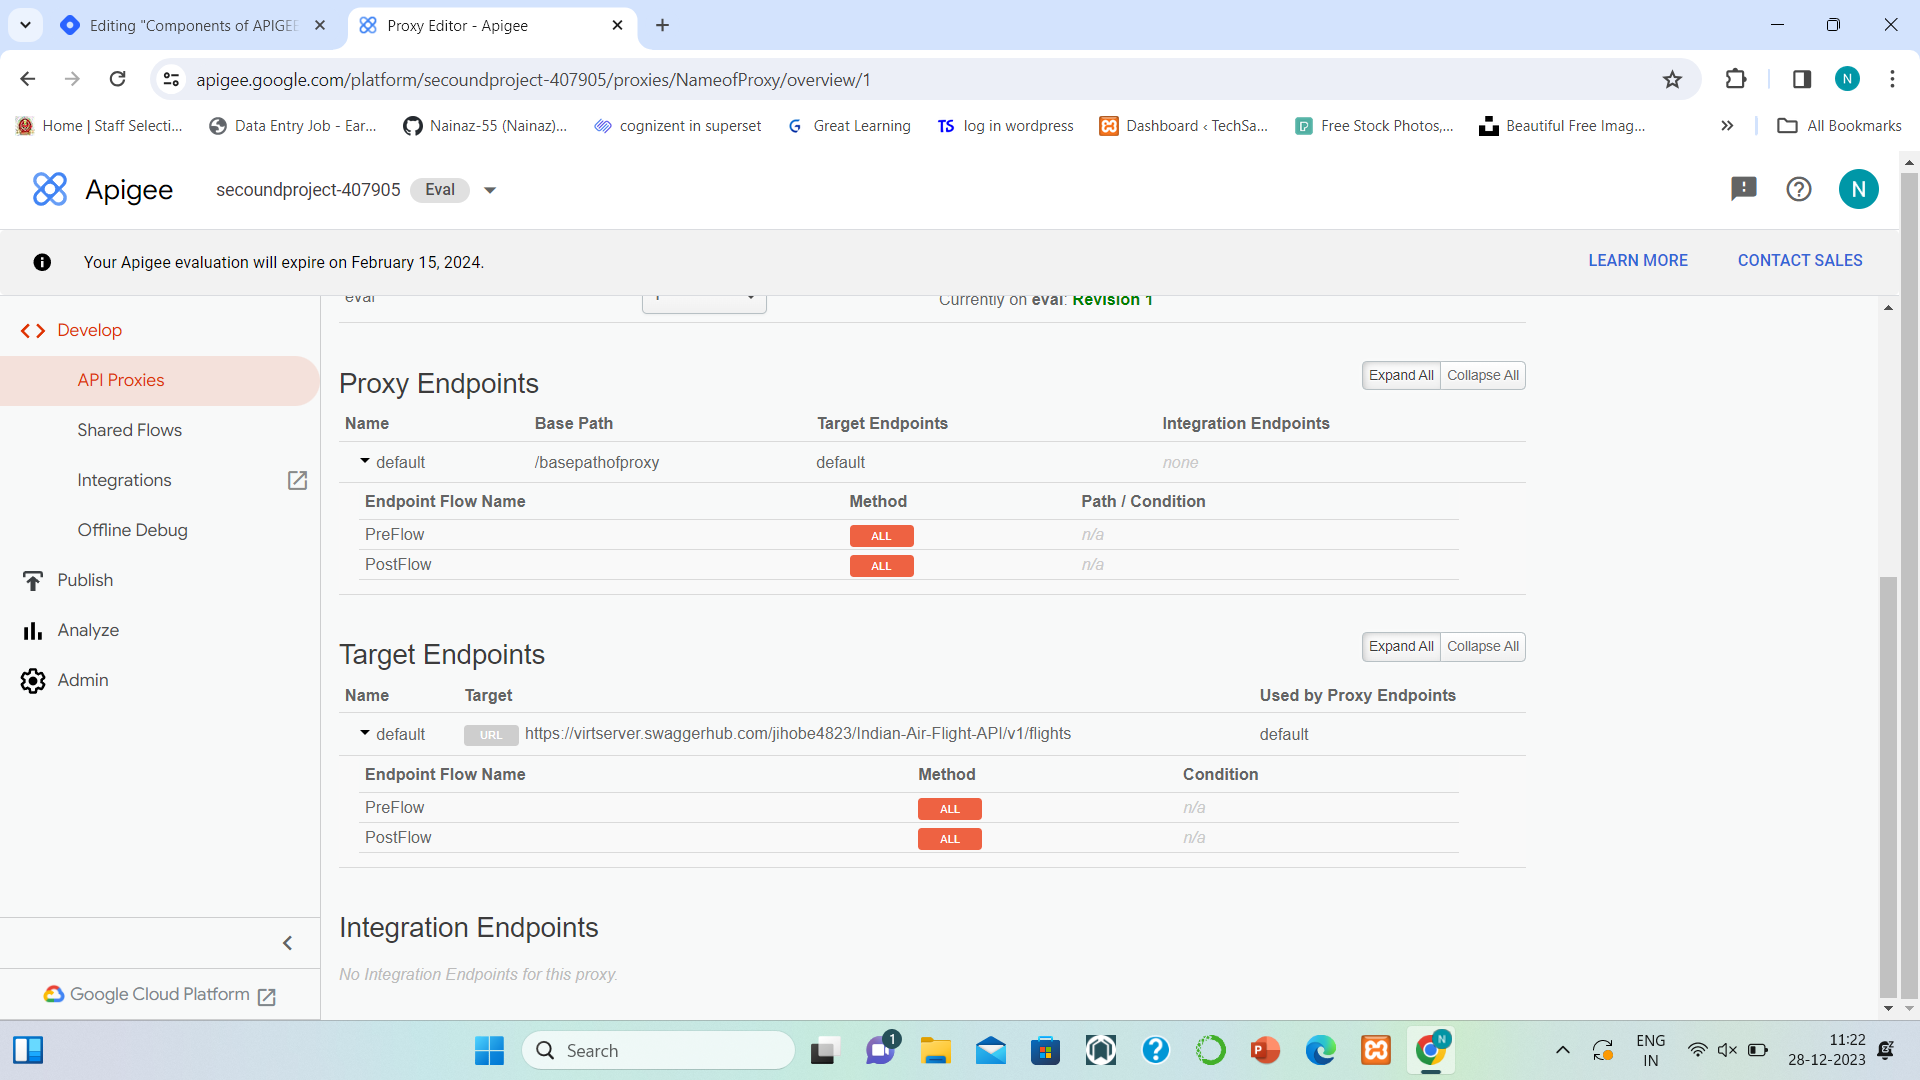
Proxy has Two endpoints one is the proxy endpoint connected to the client and another one is the target endpoint connected to the backend service.
Proxy Endpoints:
By default the name of the proxy endpoint will be "default". You can change the name of the endpoint.
We can see the proxy basepath here "/basepathofproxy".
It has two flows Preflow and Postflow, we can add conditional flow if needed.
Target Endpoint:
By default the name of the target endpoint will be "default". You can change the name of the endpoint.
Here you can see the actual API of the backend service. Which we are not sharing with the client directly.
It has two flows Preflow and Postflow, we can add conditional flow if needed.
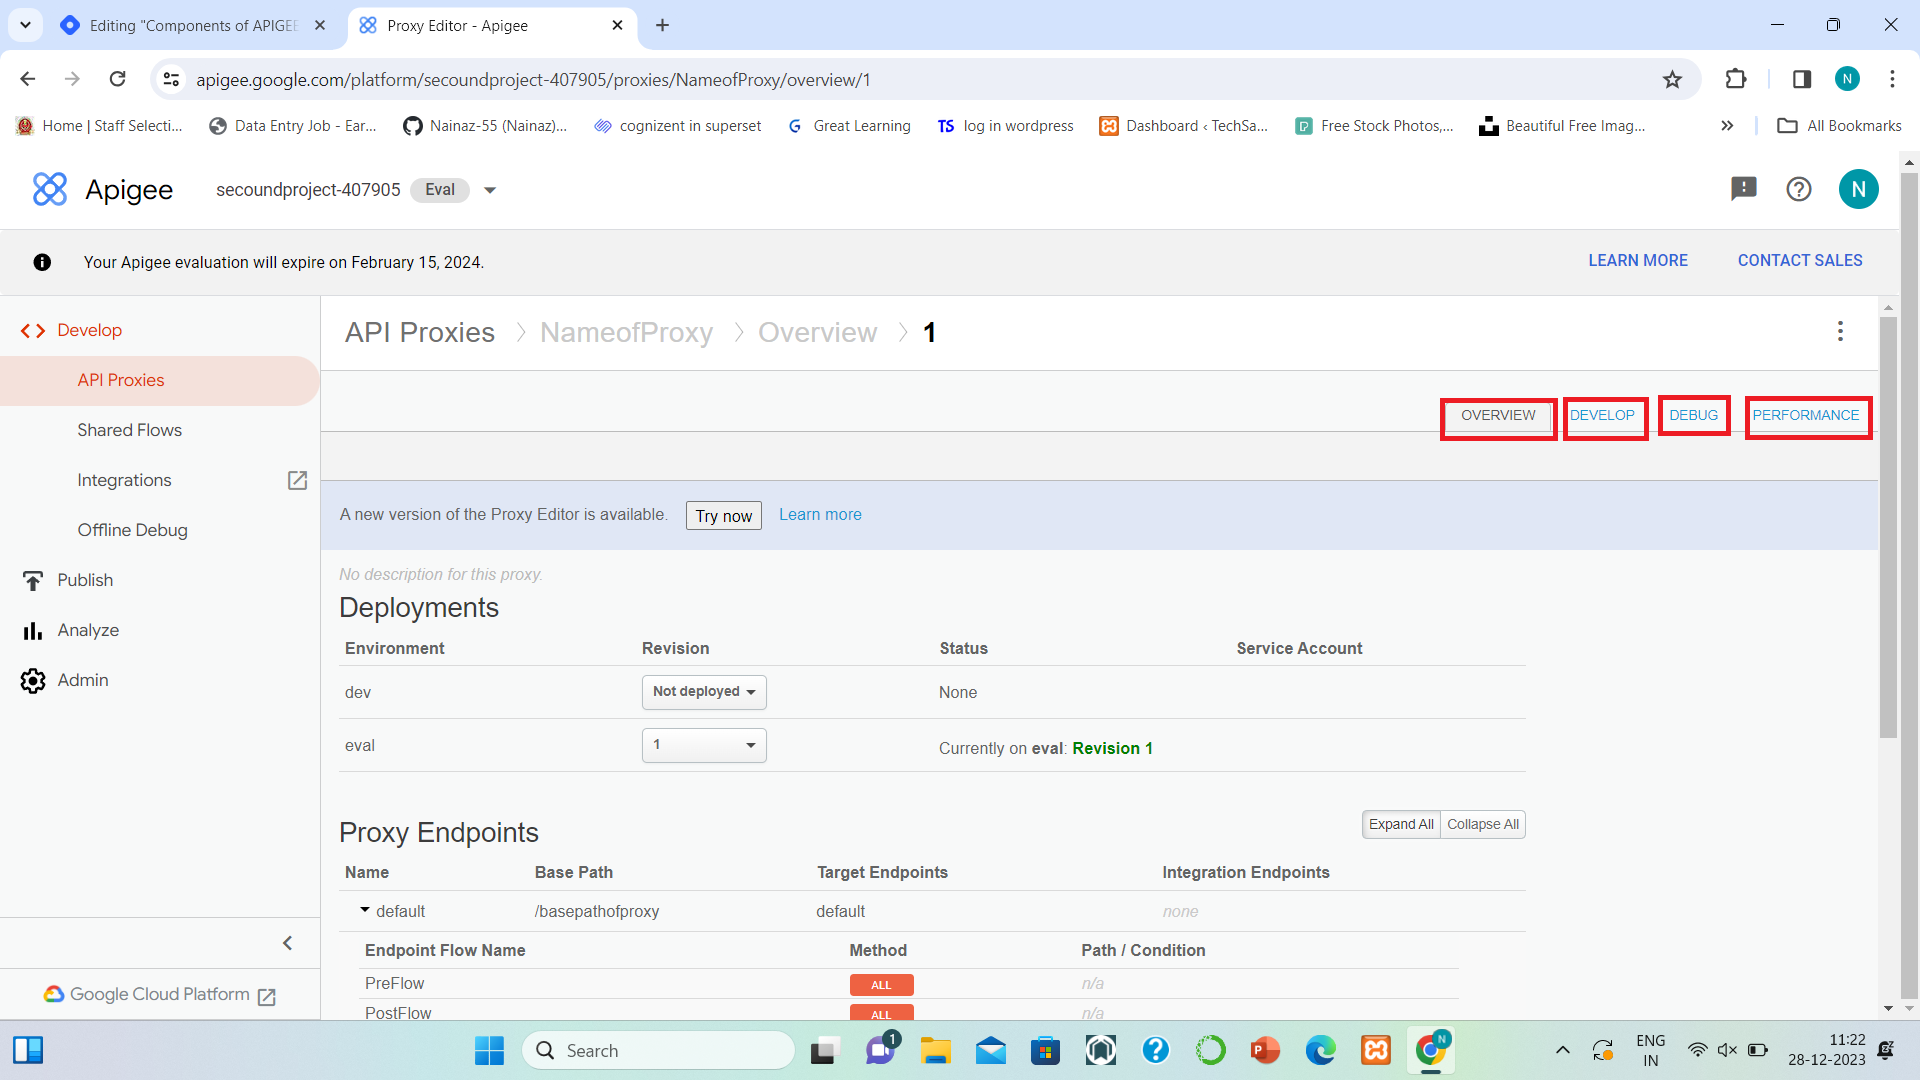
OVERVIEW: In this tab, you can see the details of the proxy.
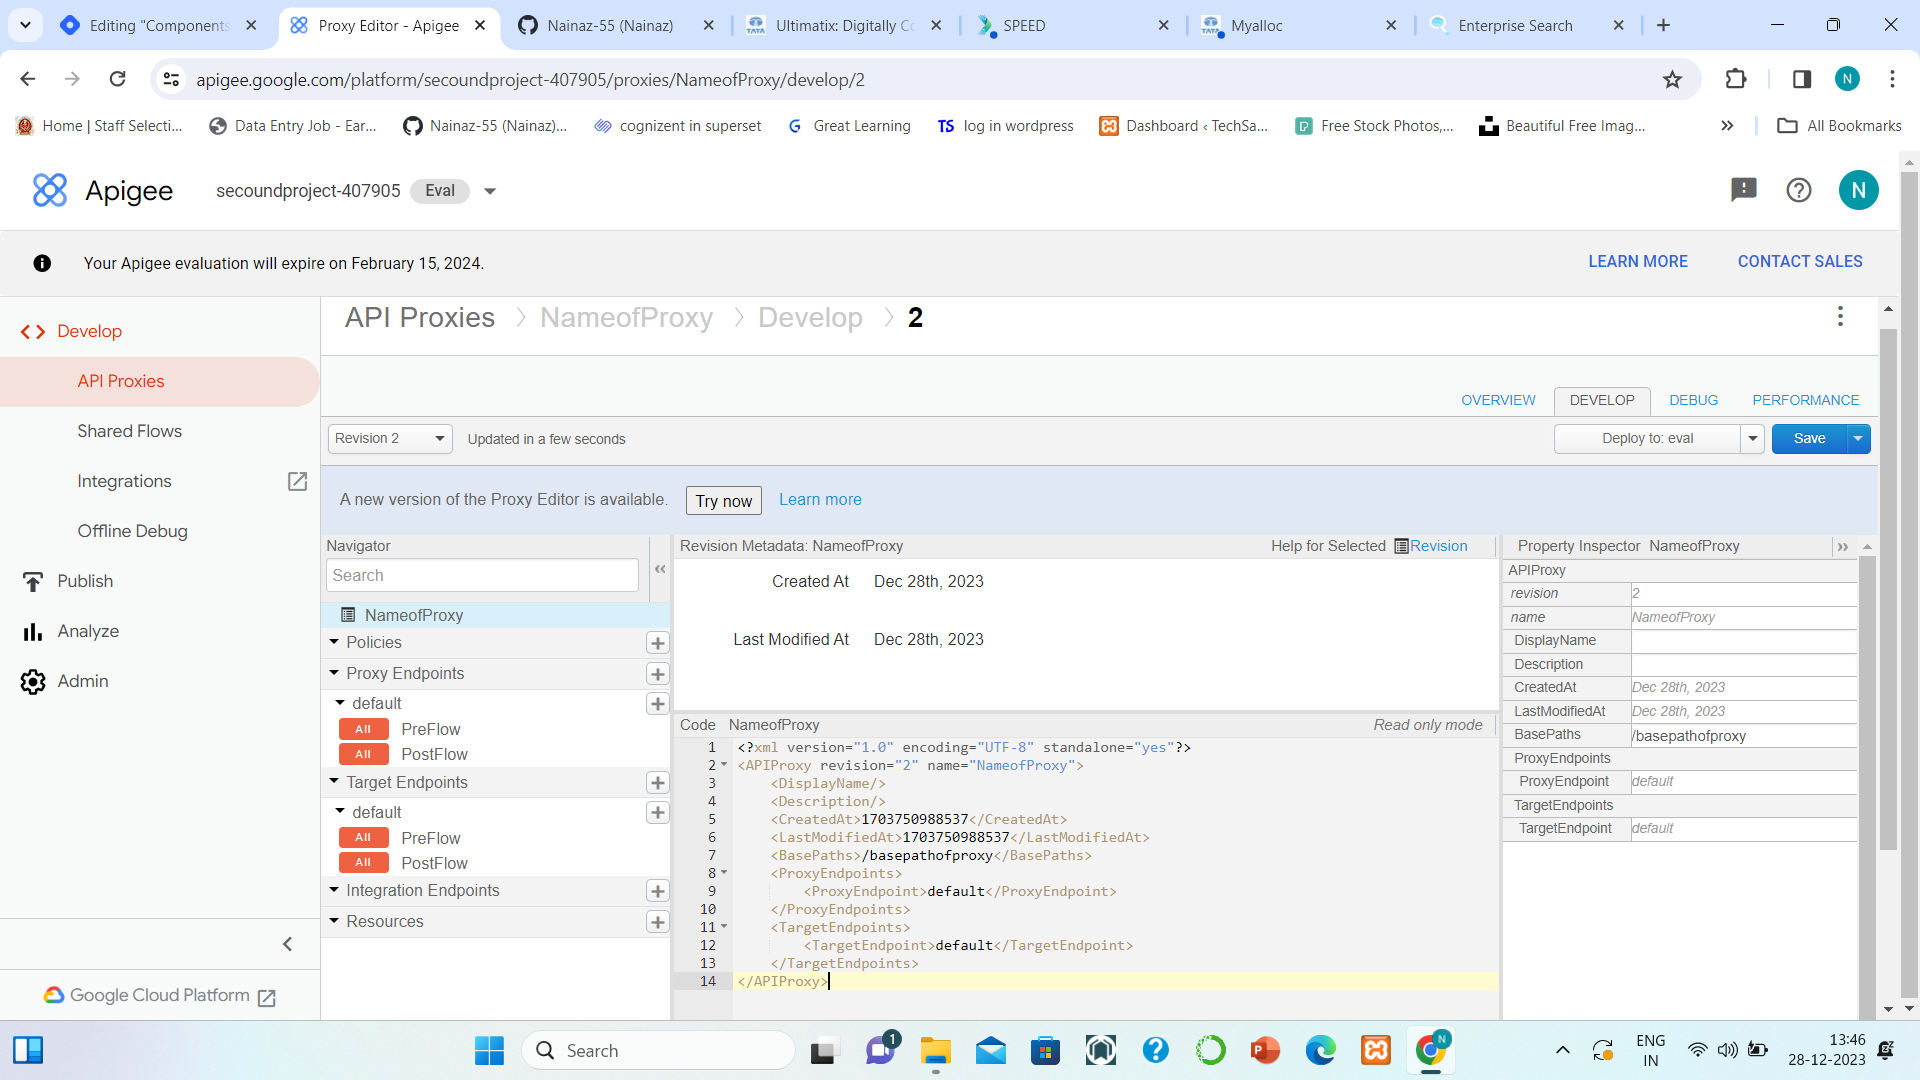
DEVELOP: In this tab, you can edit the proxy as per our requirement by adding the policies and developing the code.
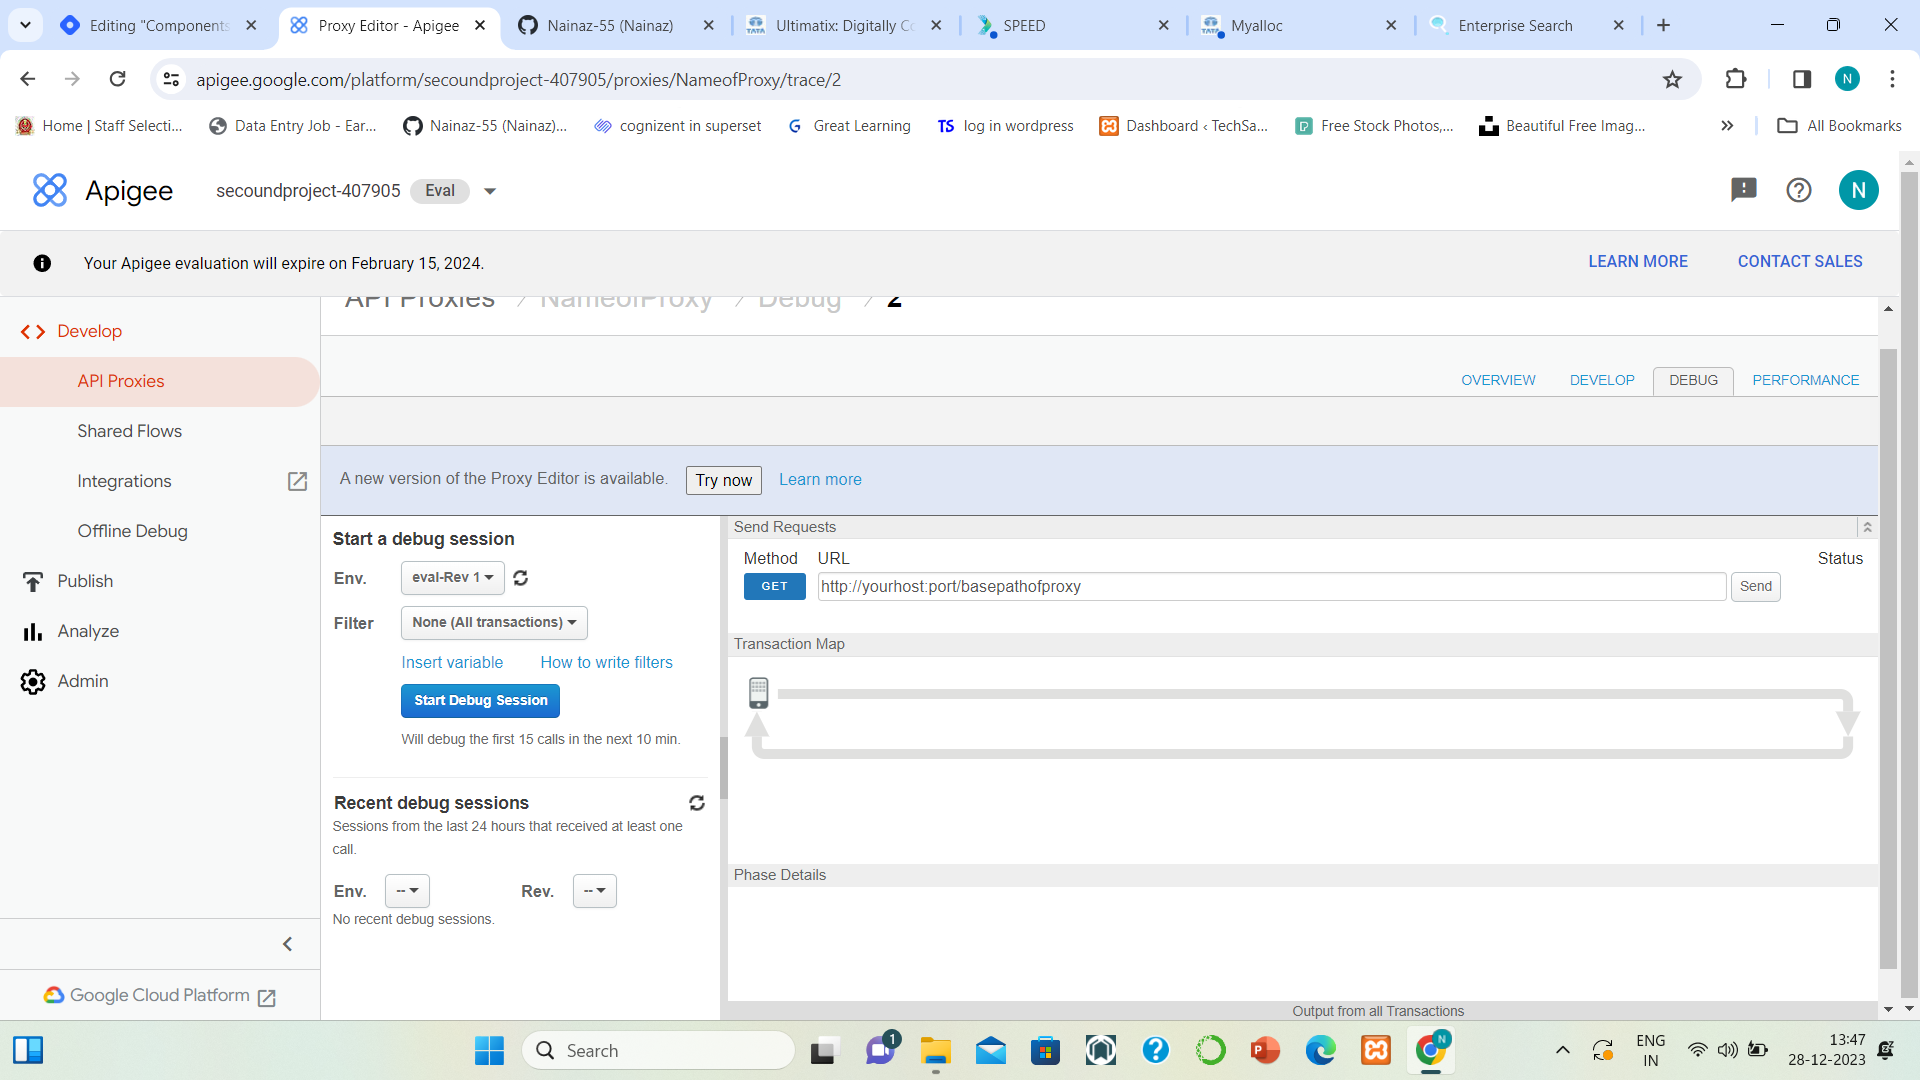
DEBUG: In this tab, you can debug or check the error of the proxy by looking at each flow.
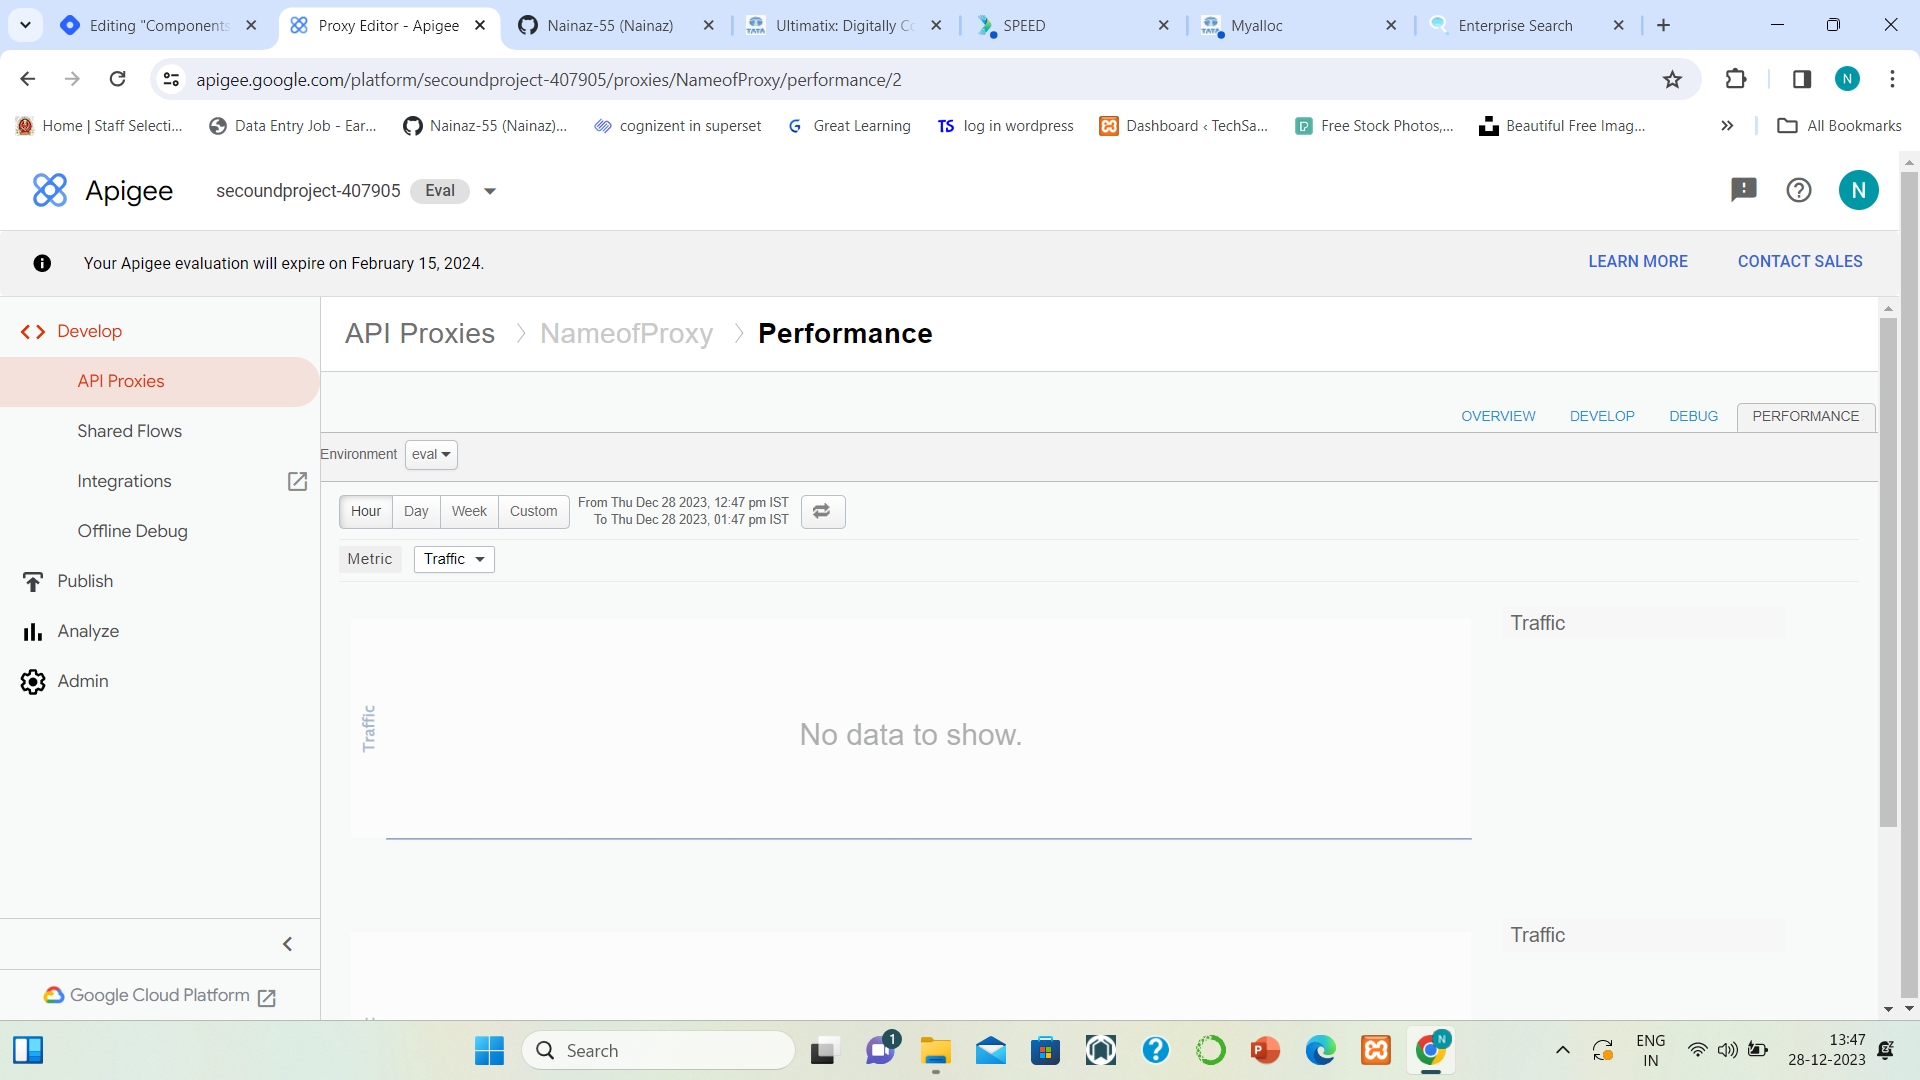
PERFORMANCE: In this tab, you can check the performance of the proxy.
Click on the DEVELOP tab to see the code of the endpoints.
The proxy endpoint code will look like below.
<?xml version="1.0" encoding="UTF-8" standalone="yes"?>
<!-- we can change the name of endoint below from "default" to "__"-->
<ProxyEndpoint name="default">
    <!-- It is preflow of proxy endpoint. If any policies added it will show inside
    the preflow tab-->
    <PreFlow name="PreFlow">
        <Request/>
        <Response/>
    </PreFlow>
    <!-- if you add conditional flow. The detalis related to it will show here-->
    <Flows/>
    <!-- It is postflow of proxy endpoint. If any policies added it will show inside
    the postflow tab-->
    <PostFlow name="PostFlow">
        <Request/>
        <Response/>
    </PostFlow>
    <HTTPProxyConnection>
        <!-- basepath of proxy endpoint-->
        <BasePath>/basepathofproxy</BasePath>
    </HTTPProxyConnection>
    <RouteRule name="default">
        <TargetEndpoint>default</TargetEndpoint>
    </RouteRule>
</ProxyEndpoint>
The target endpoint code will look like below.
<?xml version="1.0" encoding="UTF-8" standalone="yes"?>
<!-- we can change the name of endoint below from "default" to "__"-->
<TargetEndpoint name="default">
    <!-- It is preflow of target endpoint. If any policies added it will show inside
    the preflow tab-->
    <PreFlow name="PreFlow">
        <Request/>
        <Response/>
    </PreFlow>
    <!-- if you add conditional flow. The detalis related to it will show here-->
    <Flows/>
    <!-- It is PostFlow of target endpoint. If any policies added it will show inside
    the PostFlow tab-->
    <PostFlow name="PostFlow">
        <Request/>
        <Response/>
    </PostFlow>
    <!-- Actual API of backend server-->
    <HTTPTargetConnection>
        <URL>https://virtserver.swaggerhub.com/jihobe4823/Indian-Air-Flight-API/v1/flights</URL>
    </HTTPTargetConnection>
</TargetEndpoint>
Save and Deploy the proxy.
The client/consumer is provided by the API of the Proxy instead of the API of the Backend server.
API of the Proxy: http://yourhost:port/base_path_of_proxy
As per the above example,
- yourhost:port = 34.144.253.144.nip.io
- base_path_of_proxy = basepathofproxy
API for the above example proxy is:
https://34.144.253.144.nip.io/basepathofproxy
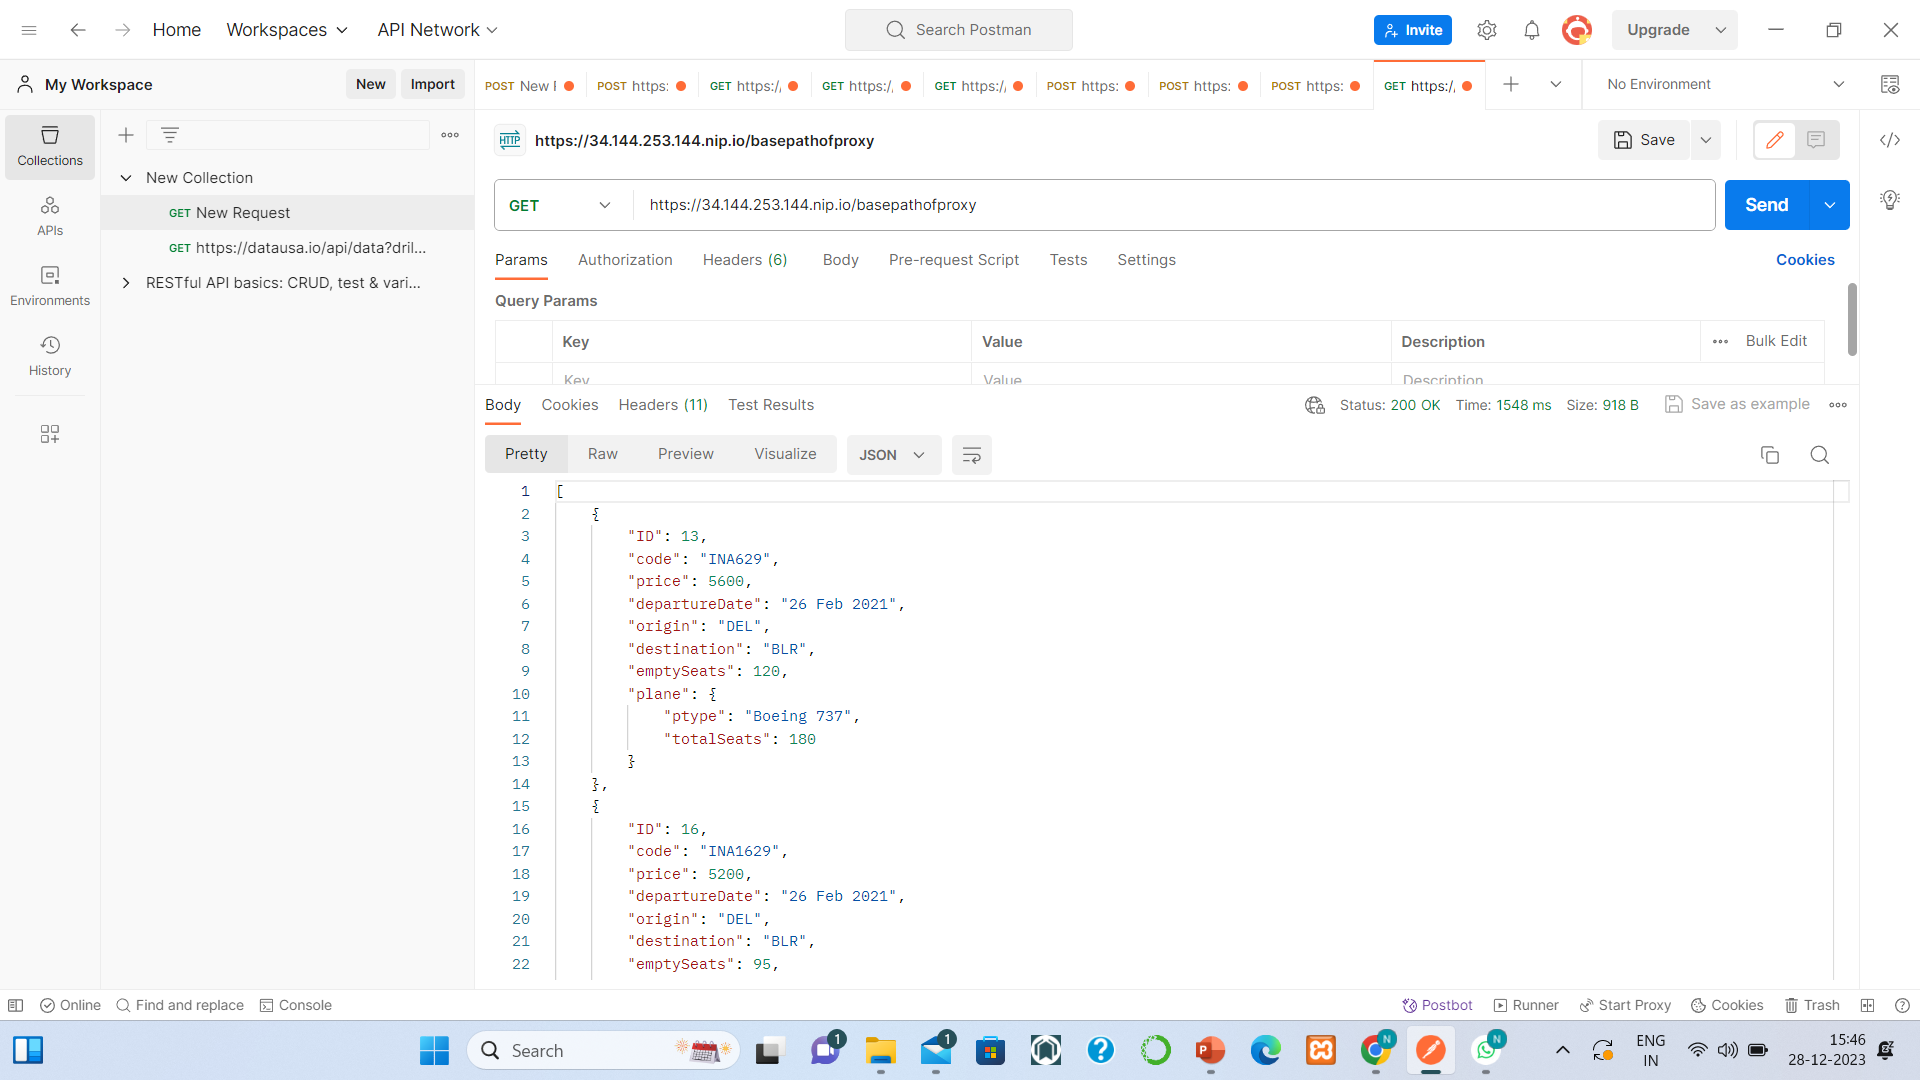
Without sharing an actual Backend API to the client/consumer. By using the proxy API, client/consumer got the data same as we will get the data by using the actual Backend server API.
In proxy we can secure the Backend API from the client actions.
Subscribe to my newsletter
Read articles from Nainaz directly inside your inbox. Subscribe to the newsletter, and don't miss out.
Written by
