Fun with Avatars: Containerize the app for deployment & distribution | Part. 2
 Lewis Munyi
This article series is structured into four parts:
Part 1: Creating the project, establishing the API, and developing the avatar generation module.
Part 2: Focuses on containerizing the application for deployment.
Part 3: Delves into optimizing the service for cost-effectiveness.
Part 4: Explores the integration of the service into real-life projects.
In Part 1, we successfully set up our app and established an API using FastAPI that generates avatars based on user prompts. Now, in this article, we'll focus on packaging the app into a Docker container for deployment.
You can find the code for this app here.
Docker, containerization & virtualization
Understanding containerization
Containerization is a lightweight form of virtualization that allows you to package and run applications and their dependencies in isolated environments called containers. Containers encapsulate an application and its dependencies, including libraries, runtime, and system tools, ensuring that the application runs consistently across different computing environments.

The key components of containerization include:
Container Engine: A runtime that executes and manages containers. Docker and containerd are popular container engines.
Container Images: Lightweight, standalone, and executable packages that include everything needed to run a piece of software, including the code, runtime, libraries, and system tools.
Container Orchestration tools: These are used to automate the deployment, scaling, monitoring, and management of containerized applications. These tools simplify the complexities of managing and coordinating containers across a cluster of machines. They include Kubernetes, Docker Swarm, Amazon ECS, Microsoft AKS, Google Kubernetes Engine (GKE), etc.
Containerization provides the following advantages:
Portability: Containers encapsulate the application and its dependencies, making it easy to move and run the same containerized application across different environments, such as development, testing, and production.
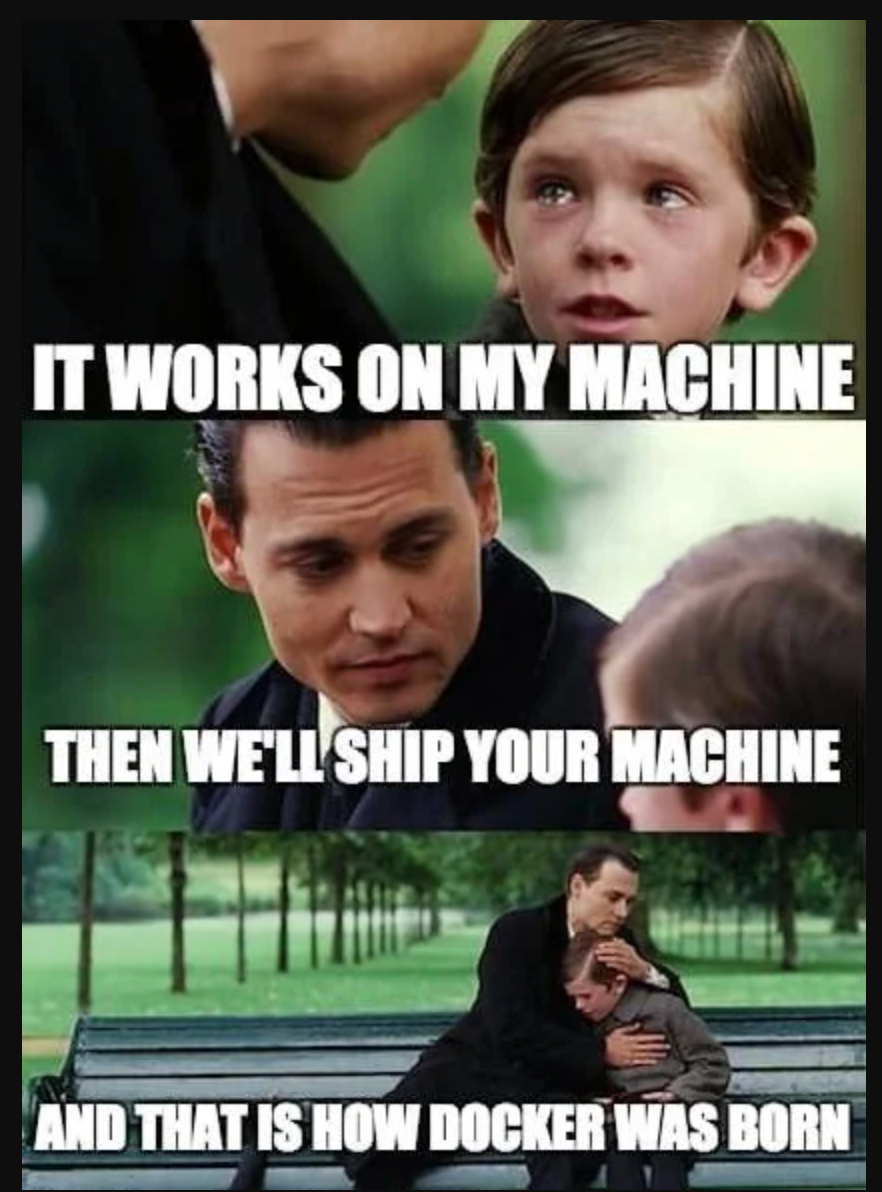
Consistency: Containers ensure consistency across different environments, reducing the "it works on my machine" problem. Since the environment is encapsulated, you can be confident that the application will behave the same way everywhere.
Isolation: Containers provide process and file system isolation, allowing multiple containers to run on the same host without interfering with each other. This isolation improves security and helps prevent conflicts between different applications.
Resource Efficiency: Containers share the host operating system's kernel, which reduces the overhead compared to traditional virtualization. This results in faster startup times and better utilization of system resources.
Scalability: Containers are designed to be lightweight and can be quickly scaled up or down to meet varying workloads. Container orchestration tools like Kubernetes facilitate the management and scaling of containerized applications.
Versioning and Rollback: Container images can be versioned, making it easy to roll back to a previous version if a new release introduces issues. This is particularly useful for maintaining and updating applications.
DevOps and Continuous Integration/Continuous Deployment (CI/CD): They enable developers to package applications and their dependencies, ensuring consistent deployment across different development lifecycle stages.
We will be using docker to containerize and run the app. Get docker up and running on your OS by following this tutorial.
At this point, we will assume that you have docker all set up and the docker daemon up and running.
Understanding docker components
By understanding these basic Docker components and installing Docker on your OS, you will be ready to containerize and deploy your apps.
Docker Engine: Docker Engine is the core runtime that runs and manages Docker containers. It is responsible for building, running, and managing containers on a host machine. Docker Engine includes several components such as:
Docker Daemon: The Docker Daemon is a background service that runs on the host machine and manages the lifecycle of containers. It listens to the Docker API requests and handles container operations such as starting, stopping, and monitoring containers.
Containerd: A lightweight container runtime that manages low-level container operations, including image handling, container execution, and storage.
Docker CLI: The Docker Command Line Interface (CLI) is a command-line tool used to interact with Docker. It provides a set of commands to manage Docker images, containers, networks, volumes, and other Docker resources.
Docker Images: A Docker image is a read-only template that contains all the dependencies, configuration, and code required to run a Docker container. Images are built using a Dockerfile, which defines the instructions to create the image. Images are stored in a registry, such as Docker Hub or a private registry, and can be pulled and run on any Docker-compatible system.
Docker Containers: A Docker container is a running instance of a Docker image. Containers are isolated environments that encapsulate the application and its dependencies, ensuring consistent behaviour across different environments. Each container runs as an isolated process and has its own filesystem, networking, and process space.
Docker Registry: A Docker registry is a repository that stores Docker images such as Docker Hub. You can also set up private registries to store your custom Docker images securely on the main cloud service providers such as Google Cloud Container Registry, Azure Container registry
Project Setup
Project structure and dependencies
The project so far contains a FastAPI application built on macOS with Uvicorn ASGI server serving the app. The project structure so far looks like this:
.
├── LICENSE
├── README.md
├── README.rst
├── avatars_as_a_service
│   ├── __init__.py
│   └── serializers
│       ├── Avatar.py
│       ├── AvatarFeatures.py
├── main.py
├── poetry.lock
├── pyproject.toml
└── tests
    ├── __init__.py
    └── test_avatars_as_a_service.py
[Optional] If you did not use poetry to manage your packages, choosing to use PIP instead, you will have to create a requirements.txt file at the root of the project that will contain all the needed Python packages for the project by running:
pip freeze > requirements.txt
If you used poetry, the poetry.lock file contains all the required packages for us to install.
Understanding the Dockerfile
- A Dockerfile is a script used to build a Docker image. Docker images are the executable packages that contain everything needed to run a piece of software, including the code, runtime, libraries, and system tools. The Dockerfile provides a set of instructions for building a Docker image in a consistent and reproducible manner.
Advantages of using Dockerfiles
Some advantages of using Dockerfiles are:
Reproducibility: Dockerfiles provide a clear, script-like representation of the steps required to build a Docker image. This ensures that the image can be reproduced consistently across different environments and by different team members. It helps eliminate the "it works on my machine" problem.
Versioning and History: Dockerfiles are typically stored alongside the source code in version control systems. This allows for versioning of both the application code and its corresponding Dockerfile, making it easy to track changes over time. Docker images also have a layered structure, and each instruction in the Dockerfile contributes to a layer. This layering system enables efficient caching during the build process and provides a clear history of image changes.
Modularity: Dockerfiles support a modular approach to building images. Each instruction in the Dockerfile creates a separate layer, and layers can be reused in other images. This promotes code reuse and helps manage dependencies efficiently.
Automated Builds: Dockerfiles enable automated and scripted builds of Docker images. Continuous Integration (CI) tools can be configured to monitor changes in the source code repository and trigger automated builds whenever updates are pushed. This ensures that the Docker image is always up to date with the latest version of the application.
Consistency: Dockerfiles allow developers and operations teams to define the entire configuration of an application, including dependencies and environment settings, in a single file. This consistency ensures that the application behaves the same way in different environments, such as development, testing, and production.
Collaboration: Dockerfiles are shared configuration files that can be easily shared among team members. This promotes collaboration by providing a standardized way to describe the application's environment and dependencies.
Efficient Image Size: Dockerfiles allow you to optimize the size of the resulting Docker image. By carefully crafting the instructions in the Dockerfile, you can minimize the number of layers and reduce the overall size of the image. This is important for efficient storage, faster image downloads, and quicker container startup times.
Integration with CI/CD: Dockerfiles integrate seamlessly with Continuous Integration and Continuous Deployment (CI/CD) pipelines. CI/CD systems can use Dockerfiles to build, test, and deploy containerized applications automatically.
Components of a Dockerfile
The components of a Dockerfile include:
Base Image: A Dockerfile typically starts with specifying a base image. The base image is an existing image from the Docker Hub or another registry that serves as the starting point for building your custom image. It may include an operating system, runtime, and other dependencies.
Instructions: Dockerfiles consist of a series of instructions that are executed to build the image layer by layer. Some common instructions include:
RUN: Executes a command in the image.COPYandADD: Copy files from the local file system into the image.WORKDIR: Sets the working directory for subsequent instructions.ENV: Sets environment variables.EXPOSE: Informs Docker that the container will listen on specified network ports at runtime.CMD: Provides a default command to run when the container starts.LABEL: Adds metadata to an image
Layers: Each instruction in a Dockerfile creates a new layer in the image. Layers are cached, and Docker uses a layered file system to optimize the image-building process. This allows for faster builds and reduces the size of incremental changes.
Create the Dockerfile
Create a file called Dockerfile and paste the following code into it:
# Python base image
FROM python:3.10

LABEL maintainer="Lewis Munyi"

LABEL environment="production"

# https://stackoverflow.com/questions/59812009/what-is-the-use-of-pythonunbuffered-in-docker-file
ENV PYTHONUNBUFFERED=1
ENV POETRY_VERSION=1.7.1

# Set the working directory inside the container
WORKDIR /api

# Copy the application code to the working directory
COPY . .

# Uncomment the following lines if you are using Pip not poetry
# Install the Python dependencies
#RUN pip install -r requirements.txt

# Install poetry & packages
RUN curl -sSL https://install.python-poetry.org | python3 -

# Update path for poetry
ENV PATH="${PATH}:/root/.local/bin"

# https://python-poetry.org/docs/configuration/#virtualenvscreate
RUN poetry config virtualenvs.create false
RUN poetry install --no-root --no-interaction


# Expose the port on which the application will run
EXPOSE 8000

# Run the FastAPI application using uvicorn server
CMD ["uvicorn", "main:app", "--host", "0.0.0.0", "--port", "8000"]
Next, we need to ignore the .env file because we do not want to ship our API keys with the docker image that will be created.
Create a .dockerignore file at the root of the project and add the following code to it:
# Ignore .env file
.env

# Ignore logs directory
logs/

# Ignore the git and cache folders
.git
.cache

# Ignore all markdown and class files
*.md
**/*.class
Optimizing the Dockerfile
Use a minimal base image: Choosing a slim or lightweight base image, like
python:3.10-slim, helps reduce the size of the resulting Docker image.Use a specific version of the base image such as
python:3.10and notpython:latestas the latter is non-deterministic and could end up introducing breaking changes once the base image is updated to a different version.Leverage layer caching: Place the instructions that are least likely to change, such as copying the requirements and installing dependencies, earlier in the Dockerfile. This allows Docker to cache the layers and speeds up subsequent builds.
Use
.dockerignore: Create a.dockerignorefile in the project directory to specify files and directories that should not be copied into the Docker image. This helps minimize the size of the image and improves build performance.Avoid running unnecessary commands: Minimize the number of
RUNinstructions in the Dockerfile to avoid unnecessary layer creation. Combining multiple commands using&&orRUN ["command1 && command2"]helps reduce the number of layers.Clean up after installations: Remove unnecessary files or cleanup commands (
apt-get cleanorpoetry cache clear --all .orpip cache purge) after installing dependencies to minimize the size of the final image.Use multi-stage builds (optional): If there are build dependencies that are only required during the build process and not in the final image, you can use multi-stage builds to separate the build environment from the runtime environment. This helps reduce the size of the final image.
Build the docker images
Build for deployment
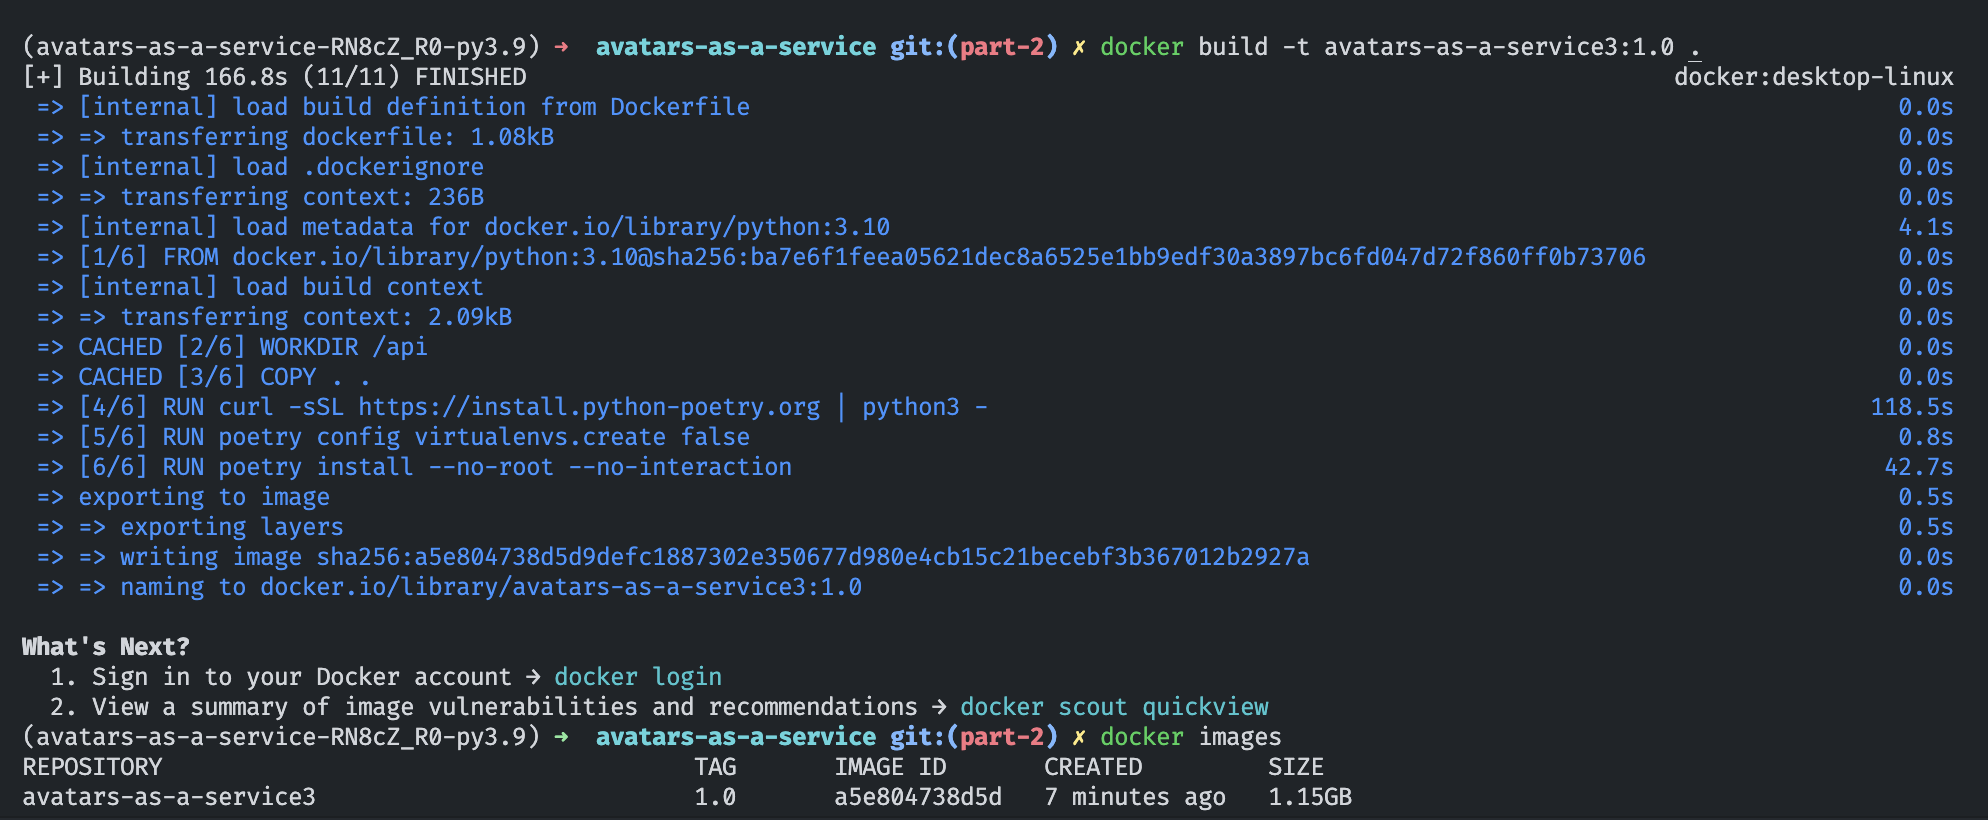
Run the following command to create an image from the Dockerfile:
docker build -t avatars-as-a-service:1.0 .
The
buildcommand tells docker that we are about to create a docker image from a Dockerfile-t avatars-as-a-service:1.0is the tag name and version (1.0) that will be assigned to our image.The
.points to the directory in which to find the Dockerfile.
After building the image you will see it when you run docker images on the console:

Running the image as a container
You can run the image by running the following commands in your bash console:
> OPENAI_API_KEY=<your-openai-api-key>
> docker run -p 8000:8000 -e OPENAI_API_KEY -d avatars-as-a-service:1.0
OPENAI_API_KEY=<...>: Sets the OpenAI API key as an environment variable
run: tells docker that we want to spin up a container instance from an image
-p 8000:8000:
-pis short for--portand it says that we're mapping port8080on the local computer to port8000on the virtual OS-e OPENAI_API_KEY: tells docker that we're about to pass some environment variables to the virtual OS on start. Running the command without this line results in the following error:
2023-12-27 03:54:10 The api_key client option must be set either by passing api_key to the client or by setting the OPENAI_API_KEY environment variable
2023-12-27 03:54:10 INFO: 192.168.65.1:42202 - "POST /query HTTP/1.1" 200 OK-d: Tells docker to run it as a daemon (background service) so it doesn't terminate when we exit the shell
avatars-as-a-service:1.0: The repository and tag (1.0) name of the image that we want to run
We can check if the container is up and running by running:
docker ps
Our container is up and running. Yay! 🎊

Testing the service
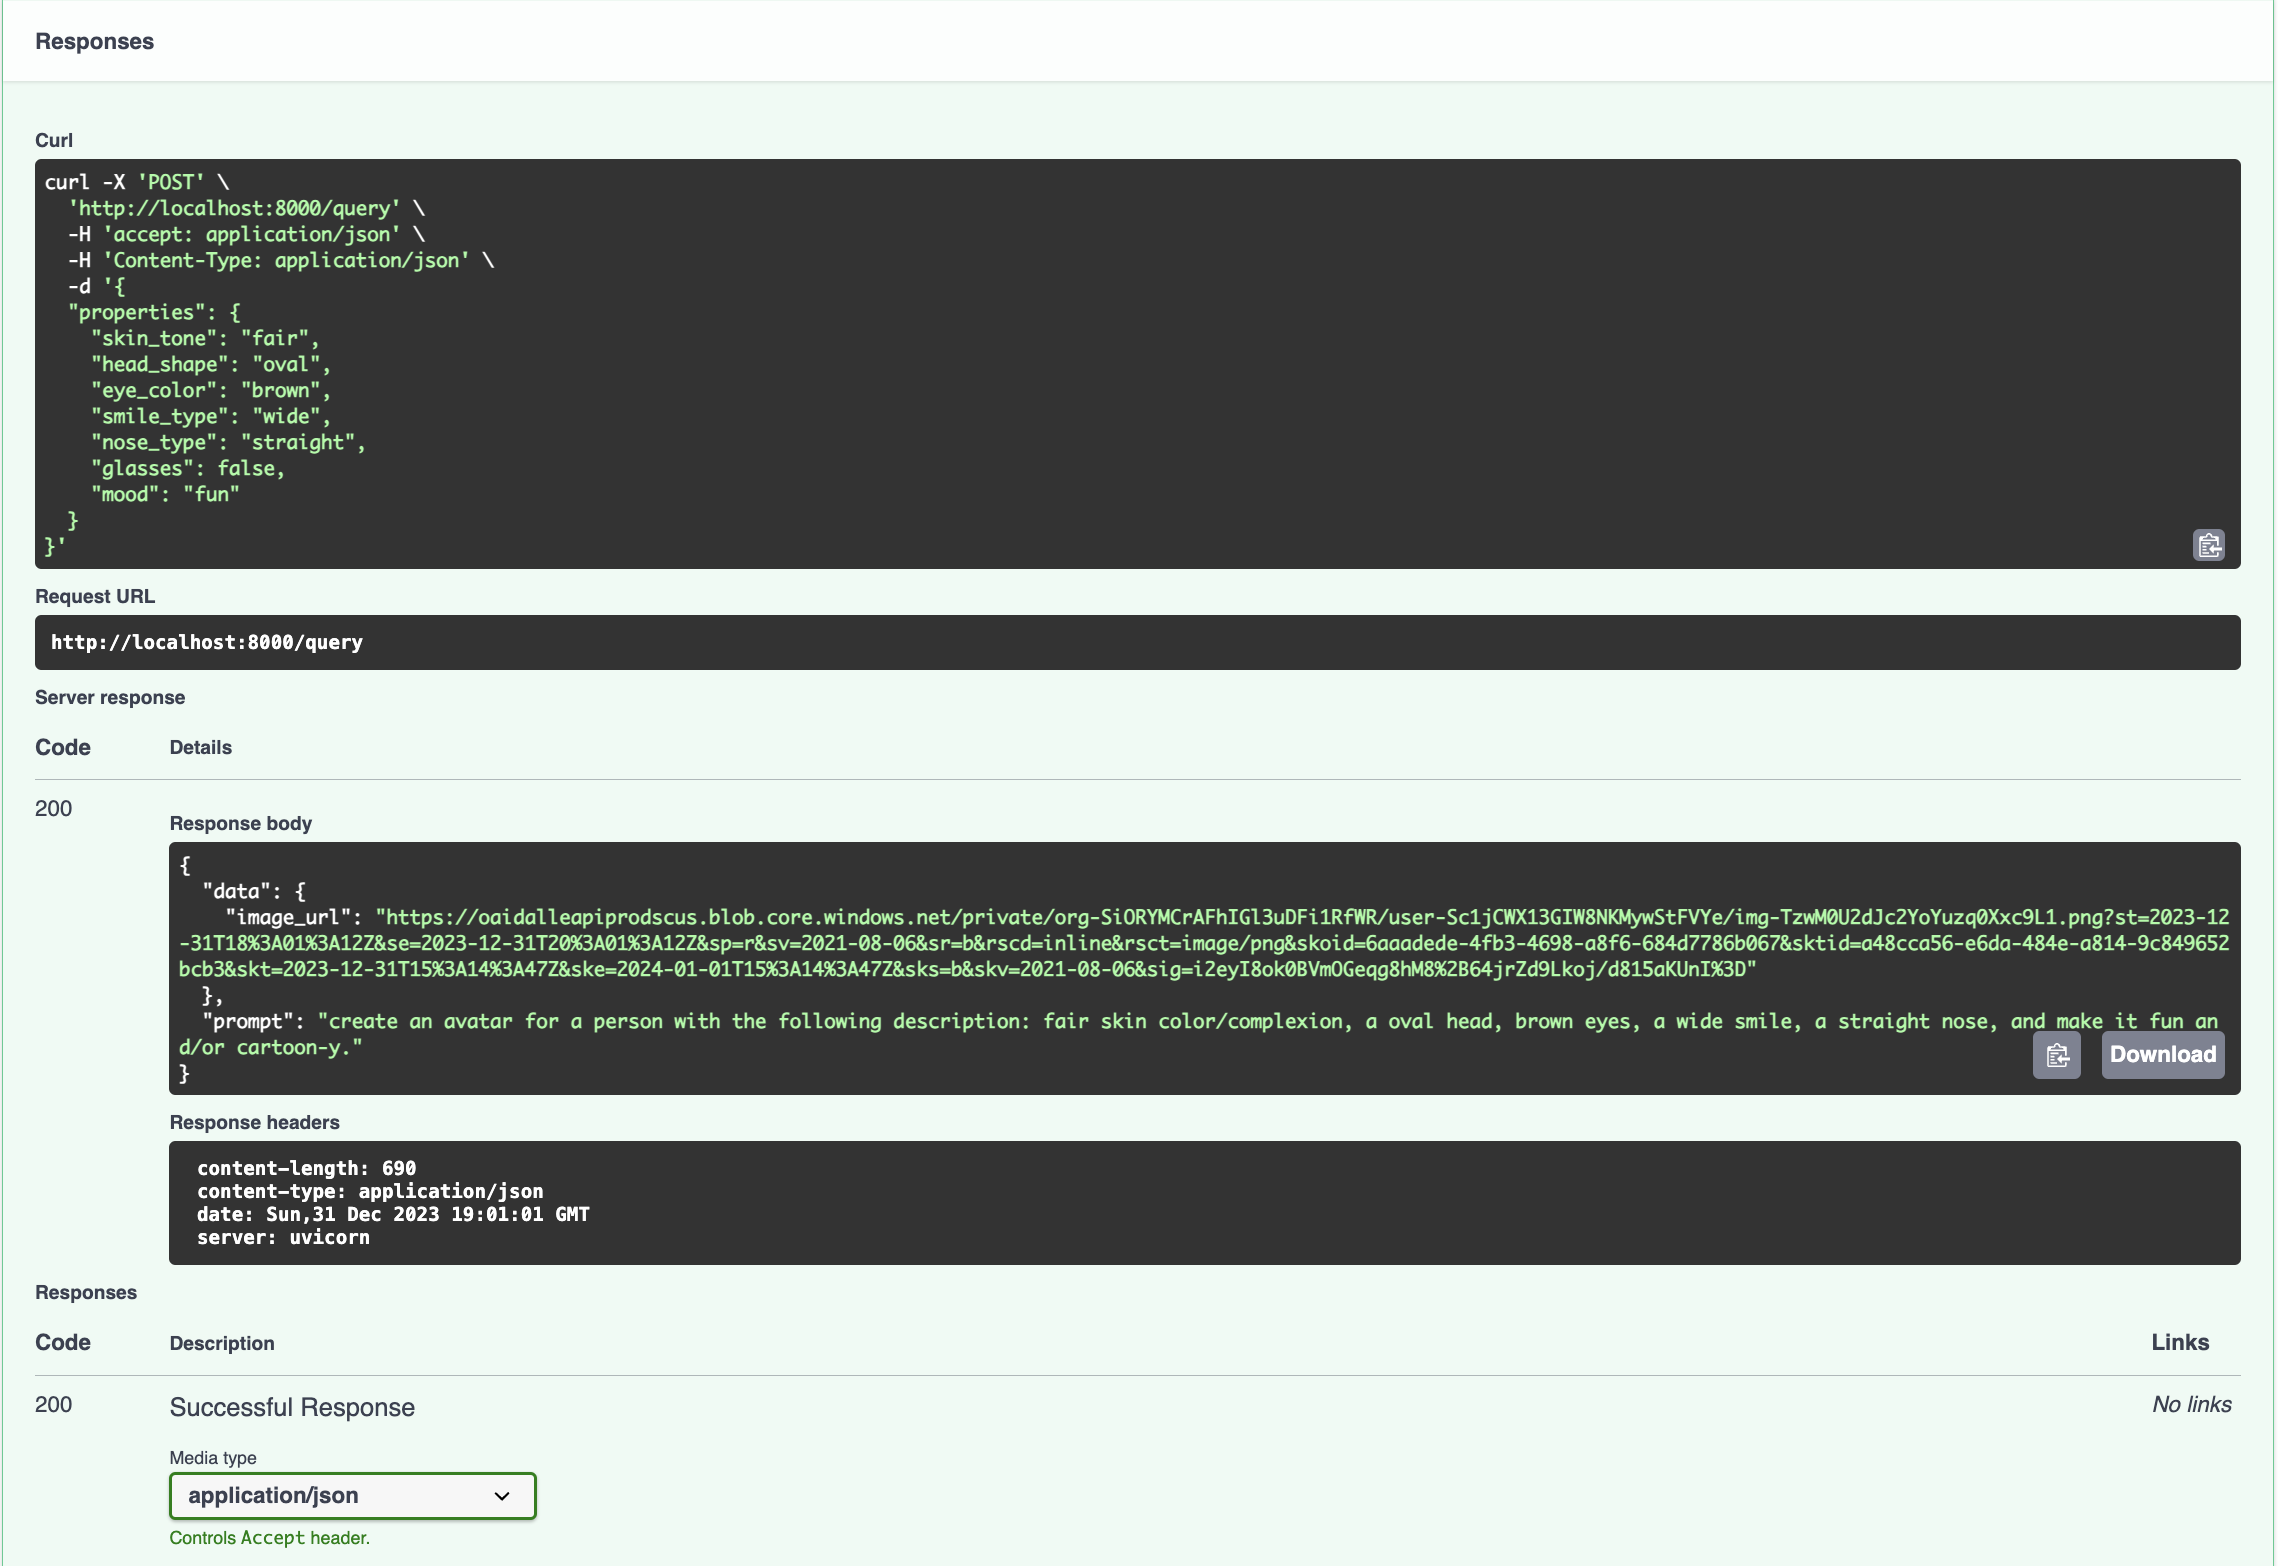
Navigate to http://127.0.0.1:8000/docs and you'll see the now familiar swagger API docs page. Sending requests to the API returns correct responses. This shows that the docker service is up and running. Yay! 🎊


Build for development
So far we have successfully containerized the application and run it as a container. However, a drawback has surfaced — every time we make changes to project files, we must rebuild the image and recreate the container. While this is manageable for minor adjustments, it could impede active development. To overcome this hurdle, we'll leverage a tool known as Docker Volumes.
Understanding Docker Volumes
Docker volumes offer a solution for persisting and managing data generated by Docker containers. These volumes, represented as directories or filesystems, exist outside the container filesystem but can be mounted into one or more containers. They enable data sharing between containers, ensuring persistence even when containers are removed.
Key Aspects of Docker Volumes:
Data Persistence:
- Volumes serve as the preferred method for persisting data generated by containers. Using volumes ensures that data remains intact even if the associated container is removed or replaced. This proves particularly valuable for databases, file uploads, log files, and other data types requiring survival across container lifecycle changes.
Sharing Data Between Containers:
- Volumes can be shared among multiple containers, facilitating access and modification of the same set of data. This promotes communication and collaboration among containers in a multi-container application.
Volume Types:
Named Volumes: Assigned specific names during creation or container runtime, these volumes are easily managed and shareable among multiple containers.
Anonymous Volumes: Unnamed volumes automatically receive unique identifiers and are typically utilized for temporary or disposable data.
Host Bind Mounts: Docker allows mounting a directory directly from the host system into a container, known as a host bind mount and is specified with the
-voption.
Implementation
In our project, we will introduce two key changes:
Creation of a new Docker image for development labelled with the
devtag.Utilization of host bind mount Docker volumes to link the local development directory with the working directory in the virtual OS.
To implement these changes, create a file named development.Dockerfile in the root of the directory and paste the below code into it.
# Python base image
FROM python:3.10

LABEL maintainer="Lewis Munyi"

LABEL environment="dev"

# https://stackoverflow.com/questions/59812009/what-is-the-use-of-pythonunbuffered-in-docker-file
ENV PYTHONUNBUFFERED=1
ENV POETRY_VERSION=1.7.1

# Set the working directory inside the container
WORKDIR /api

# Copy the application code to the working directory
COPY . .

# Uncomment the following lines if you are using Pip not poetry
# Copy the requirements file to the working directory
#COPY requirements.txt .

# Install the Python dependencies
#RUN pip install -r requirements.txt

# Install poetry & packages
RUN curl -sSL https://install.python-poetry.org | python3 -

# Update path for poetry
ENV PATH="${PATH}:/root/.local/bin"

# https://python-poetry.org/docs/configuration/#virtualenvscreate
RUN poetry config virtualenvs.create false
RUN poetry install --no-root --no-interaction

# Expose the port on which the application will run
EXPOSE 8000

# Run the FastAPI application using uvicorn server
CMD ["uvicorn", "main:app", "--host", "0.0.0.0", "--port", "8000", "--reload"]
We have added the --reload flag to instruct uvicorn to reload the server on file changes.
Rebuild the image by running
docker build -t avatars-as-a-service:dev -f development.Dockerfile .
A new image will appear with the dev tag

Run the docker container with a mounted volume
docker run -p 8000:8000 -e OPENAI_API_KEY -v .:/api/ avatars-as-a-service:dev
-v .:/api/: This creates a hosted volume that maps the project's root (.) directory to the VM's working directory /api/
Testing the dev service
The server will now reload on any changes

Publishing to Docker Hub
Follow the following tutorial to publish the image on Docker Hub. It will be available for download freely thereafter.
Conclusion
That brings us to the end of this article. We have done a deep dive into containers and docker and have packaged the app for deployment and distribution. The code to this repository can be found freely on my GitHub.
As you may have already noticed, the app must make a new request to OpenAI for each request for an avatar that it receives. This is inefficient and could easily rack up API costs as it scales. We need to find a way to optimize the avatar load times and more importantly, the cost effectiveness. We’ll dive into that in Part 3.
Cheers!
Subscribe to my newsletter
Read articles from Lewis Munyi directly inside your inbox. Subscribe to the newsletter, and don't miss out.
Written by
