Beginners guide to creating a Linux virtual machine
 Wisdom Iyayinosa Bezaleel
Linux, just like Windows. MacOS etc. is an operating system and it is considered by many as one of the most efficient, secure and worry-free operating systems available.
Creating a Linux virtual machine is very similar to that of the Windows 11, at least most of the configurations on the azure platform. First, you must have an azure account, if you do not have one click this link to create one now azure.microsoft.com
After you have created, you should be able to access the azure portal which looks like this.
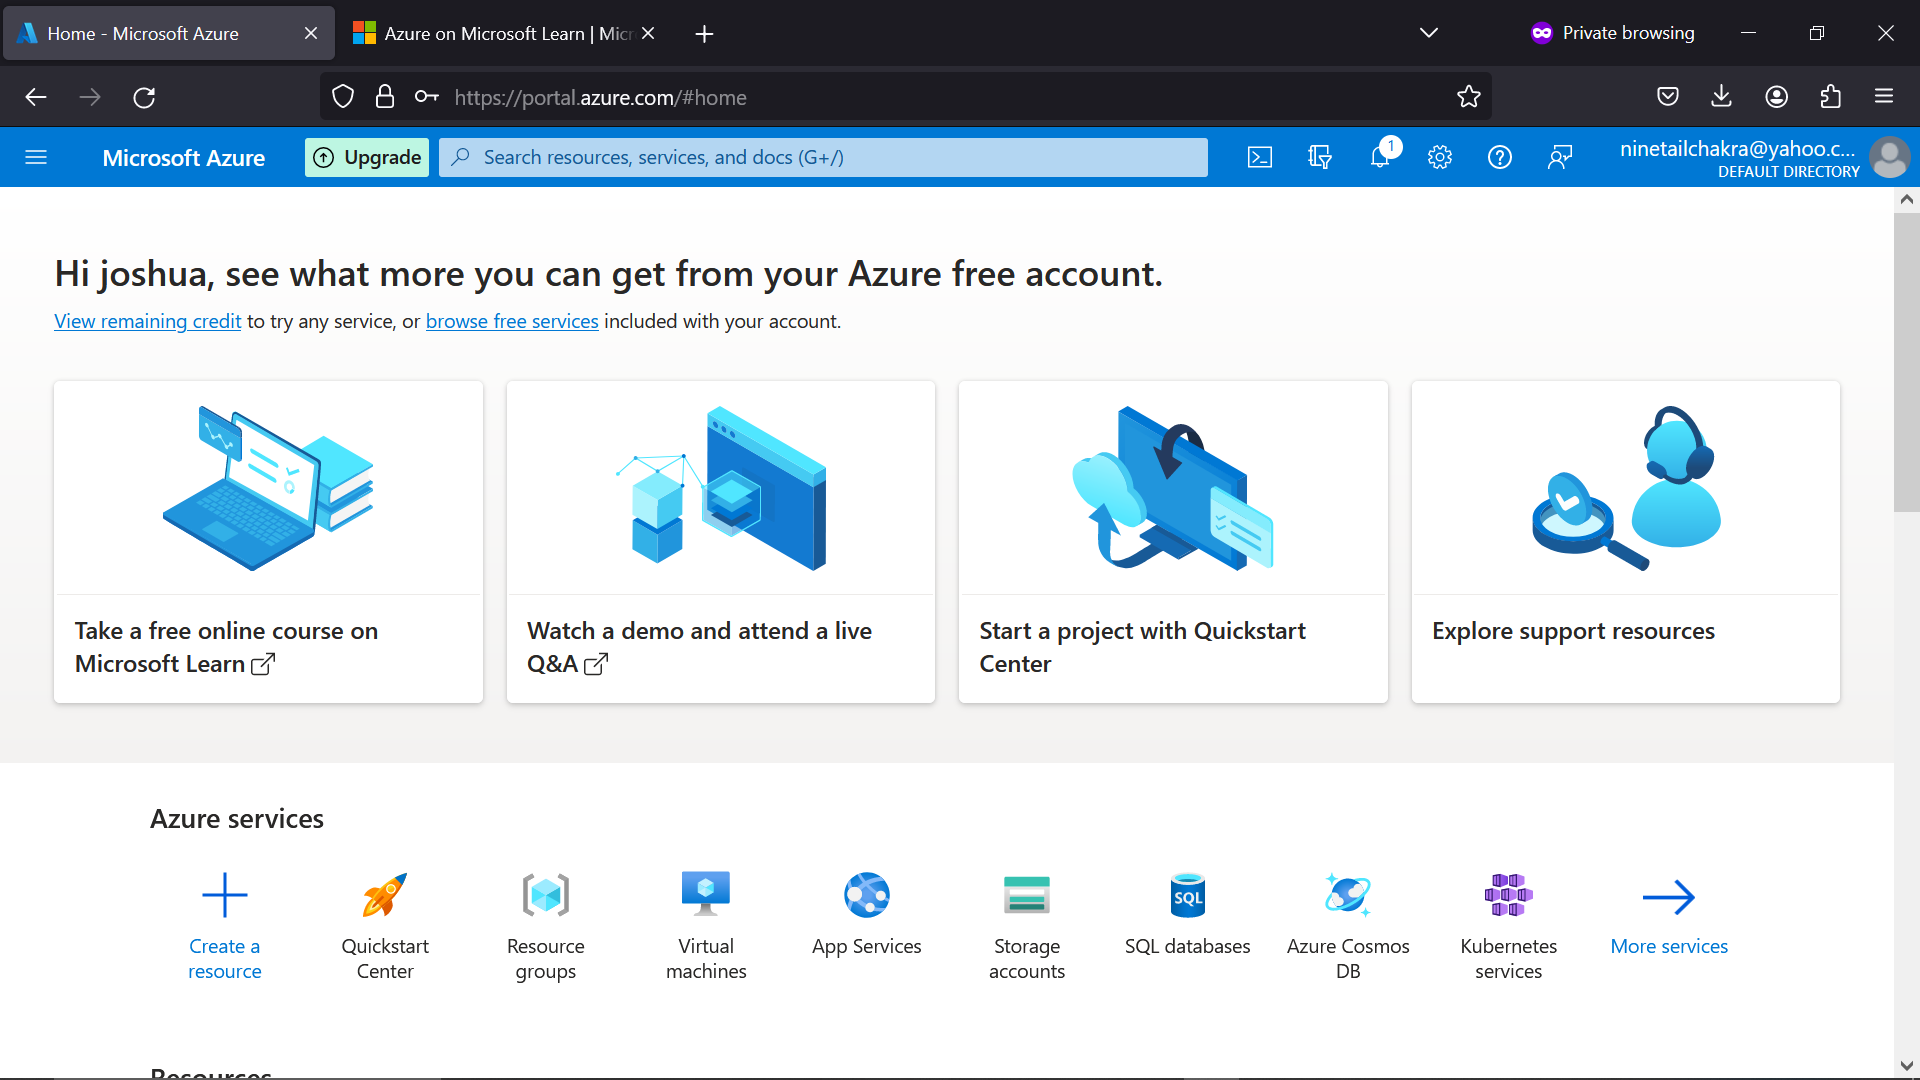
As every other resource in cloud computing, this virtual machine will be created inside a resource group (RG), if you don't have one yet, please create. And if you don't know how to create it, go to my article on Windows 11 virtual machine and follow the steps, i stated the steps to create a resource group.
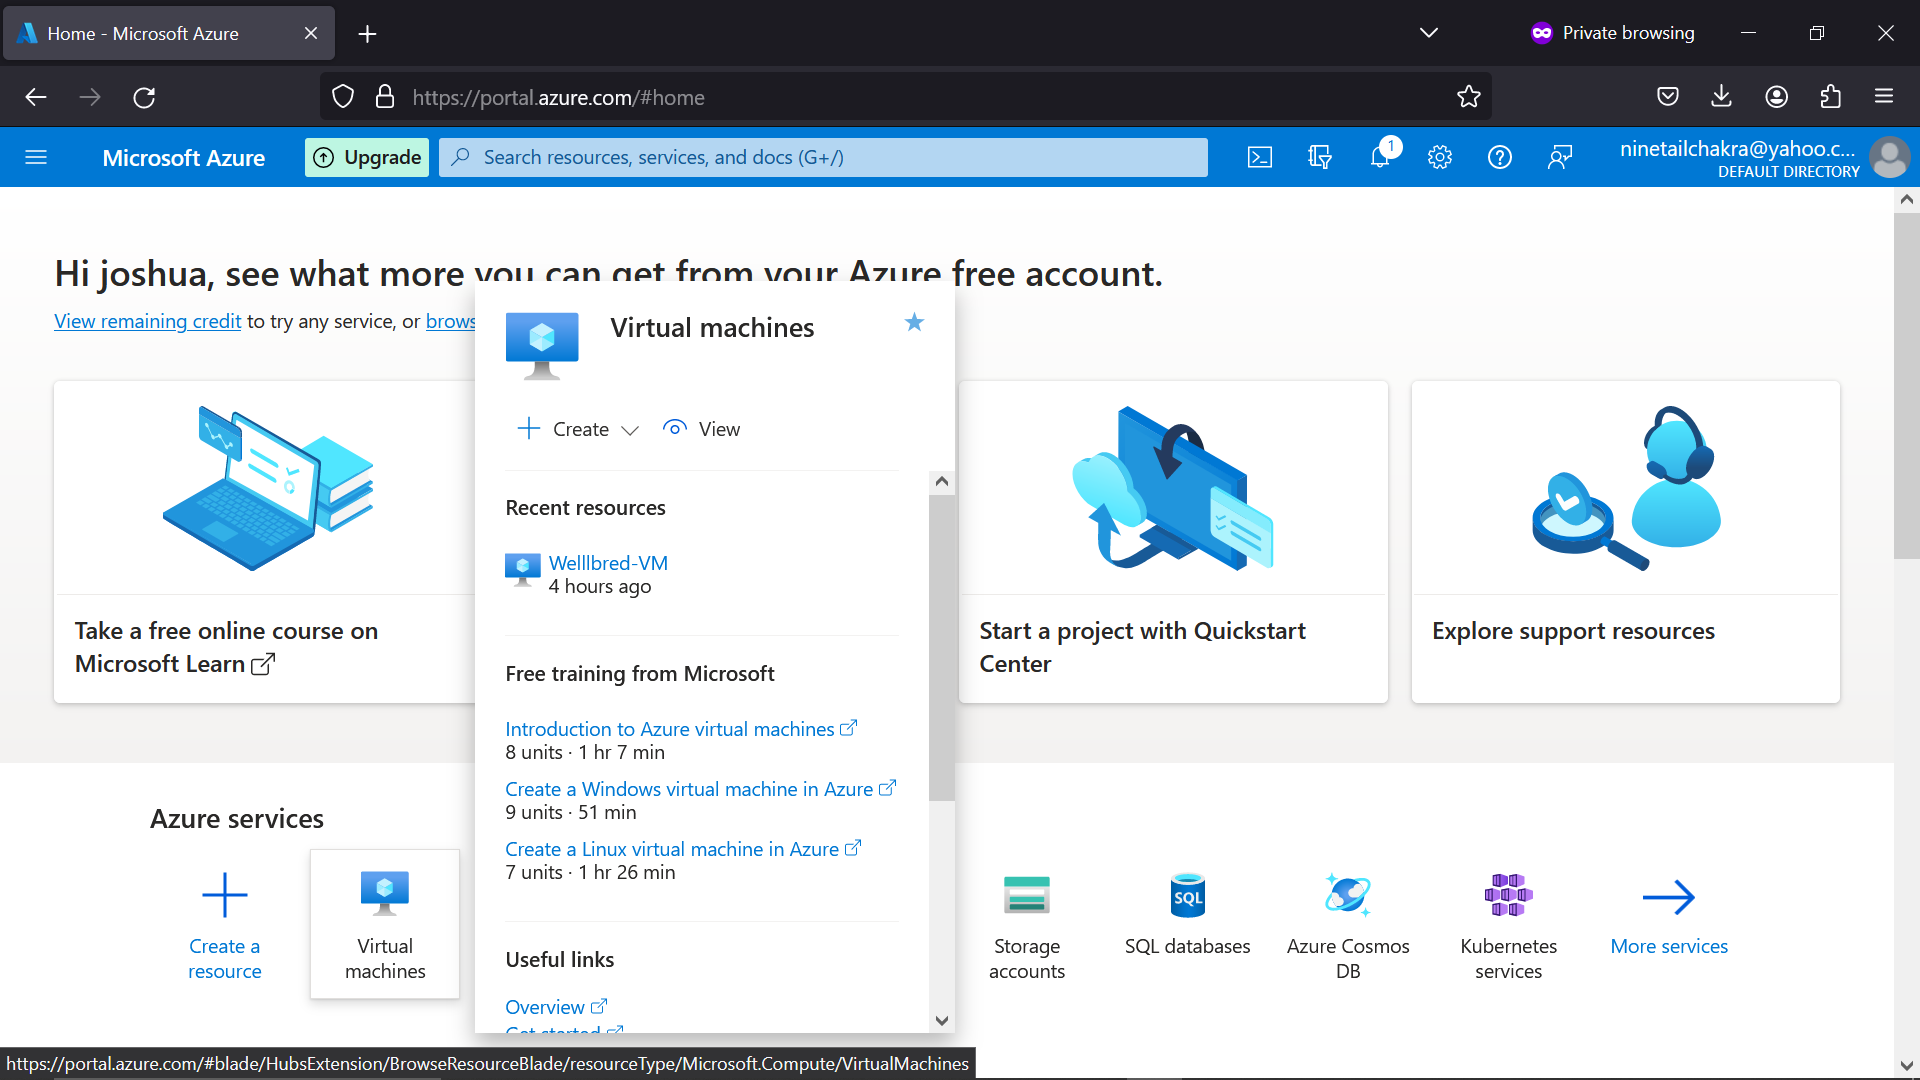
So lets proceed, while still on your azure home page, search virtual machine of locate it from this home page. Select create
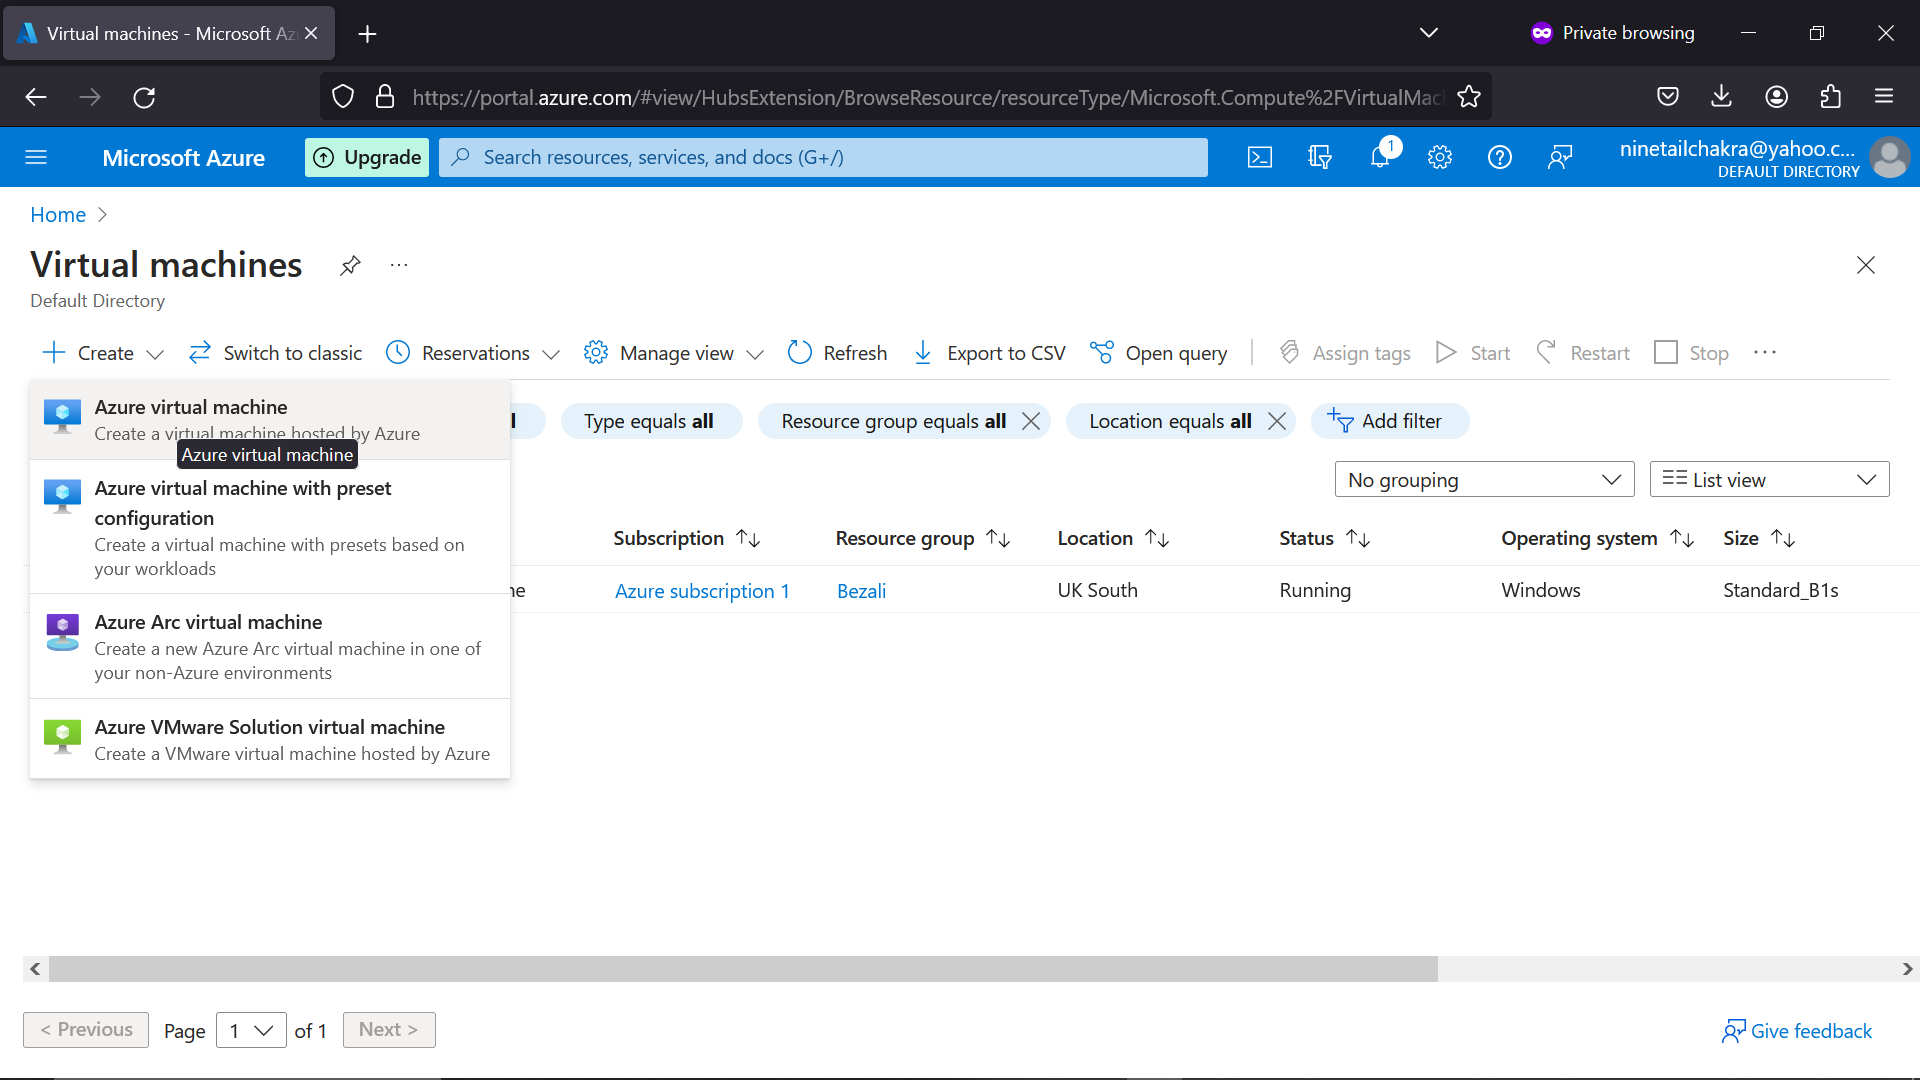
This should be the next page you land. Select "create" and then "Azure virtual machine".
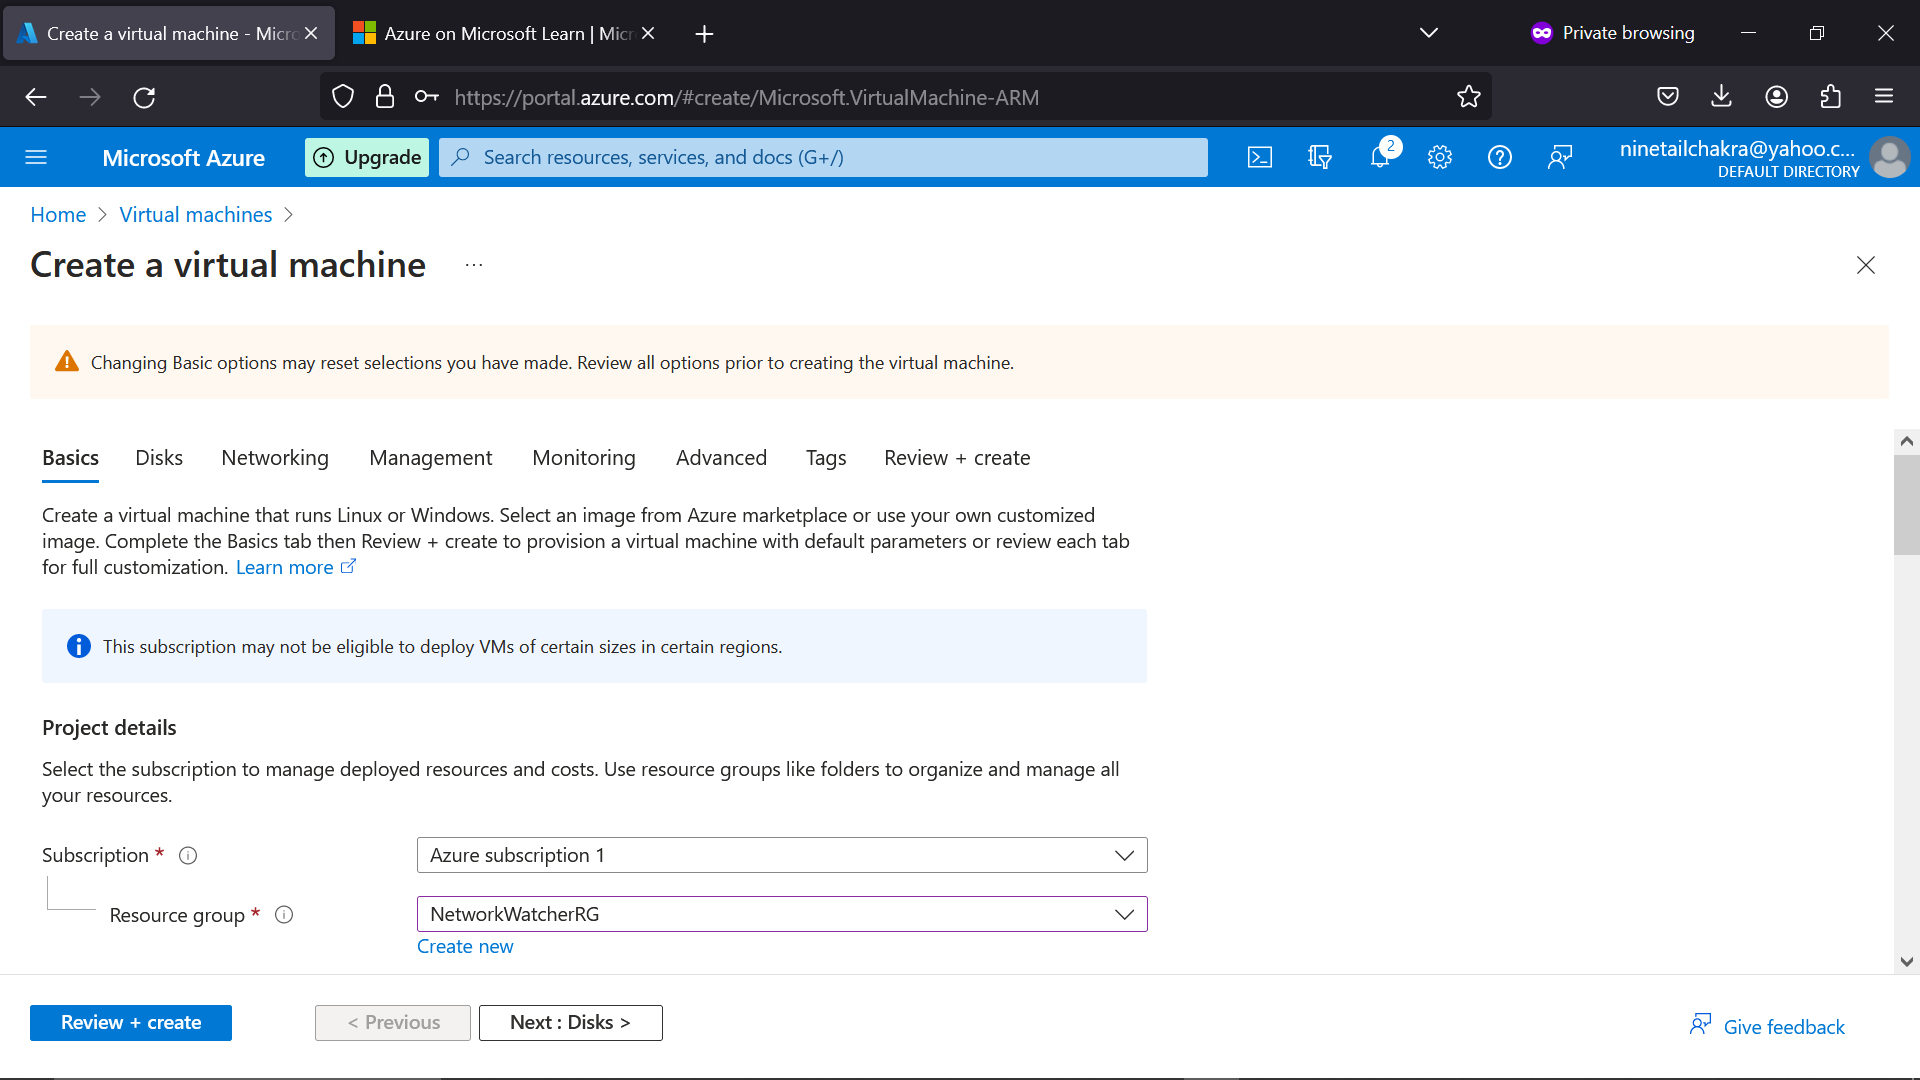
Fill out the Basics. select the available subscription, assign the machine to a resource group, if you don't already have one, click "create" to get one.
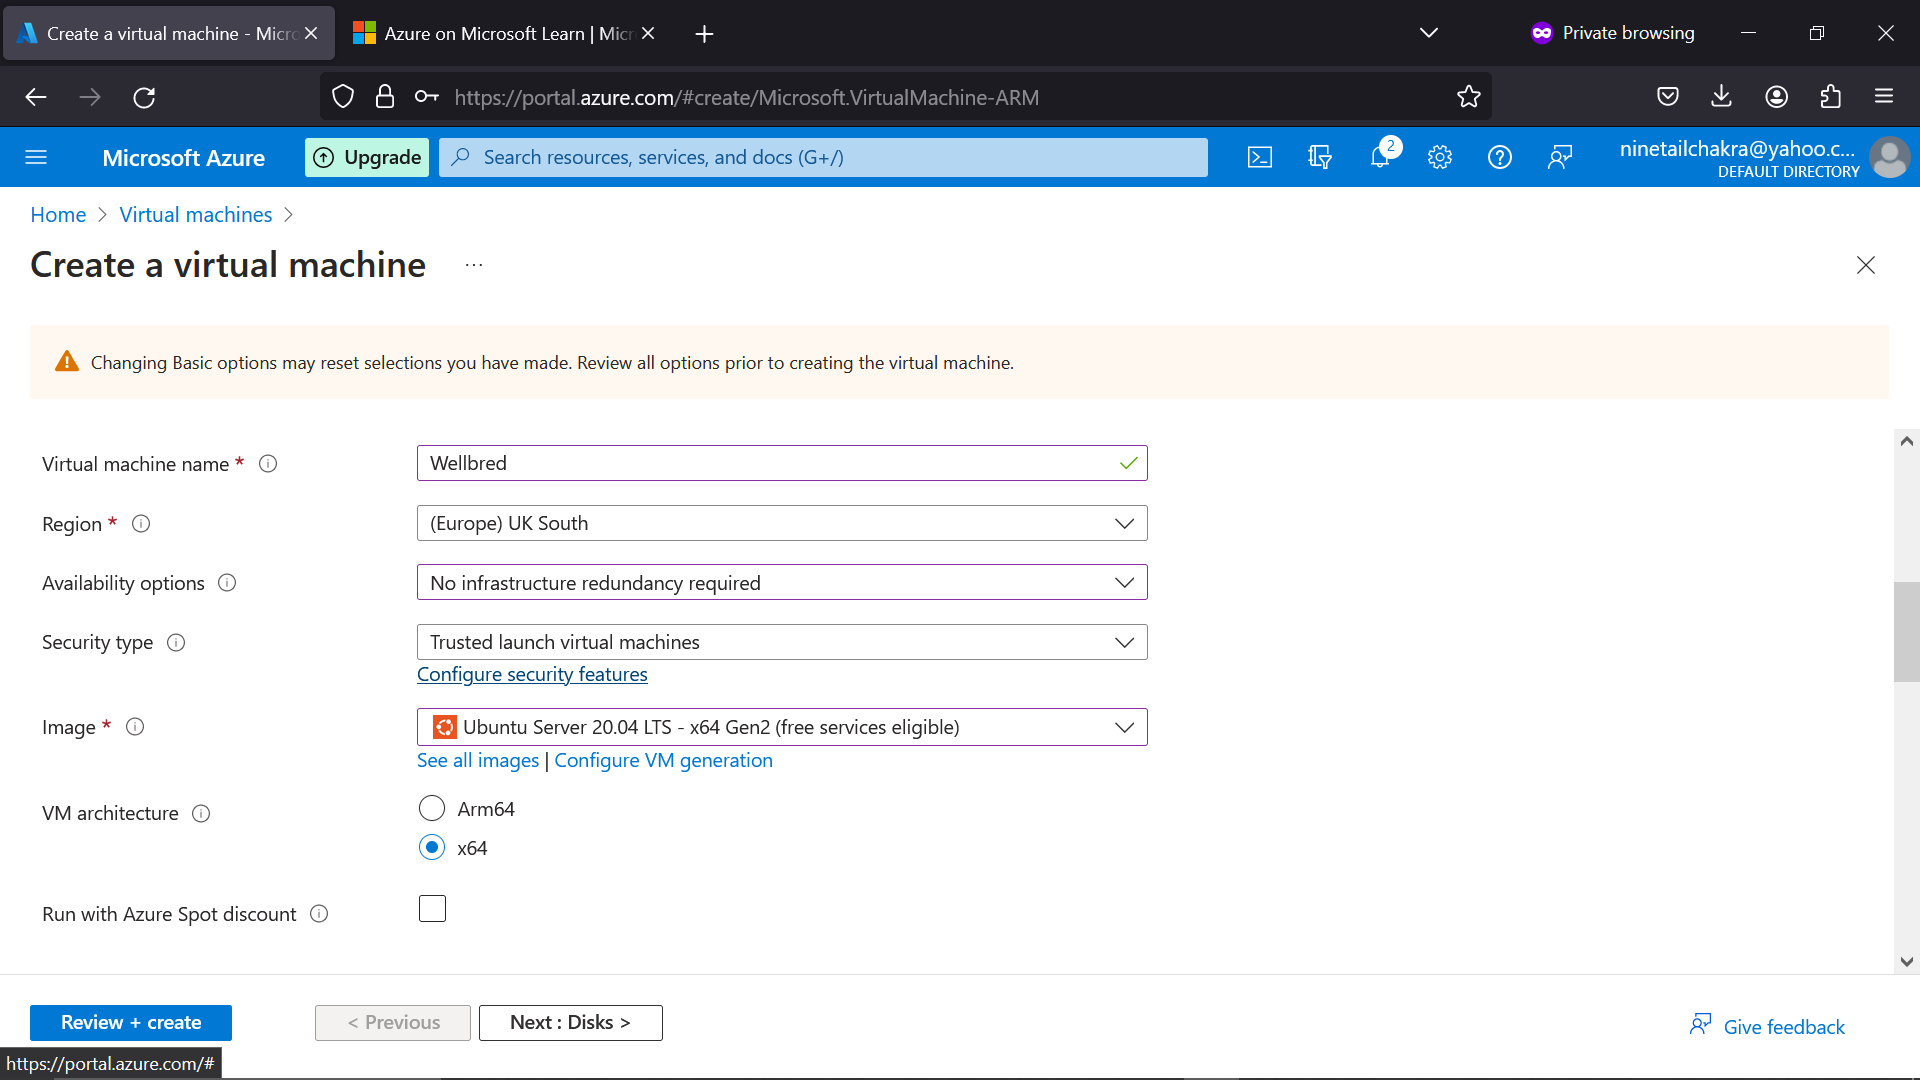
Choose a name for your virtual machine. Note that no two resource under a RG can share an exact name, choose a region that matches with that of the resource group. Other settings remains the same
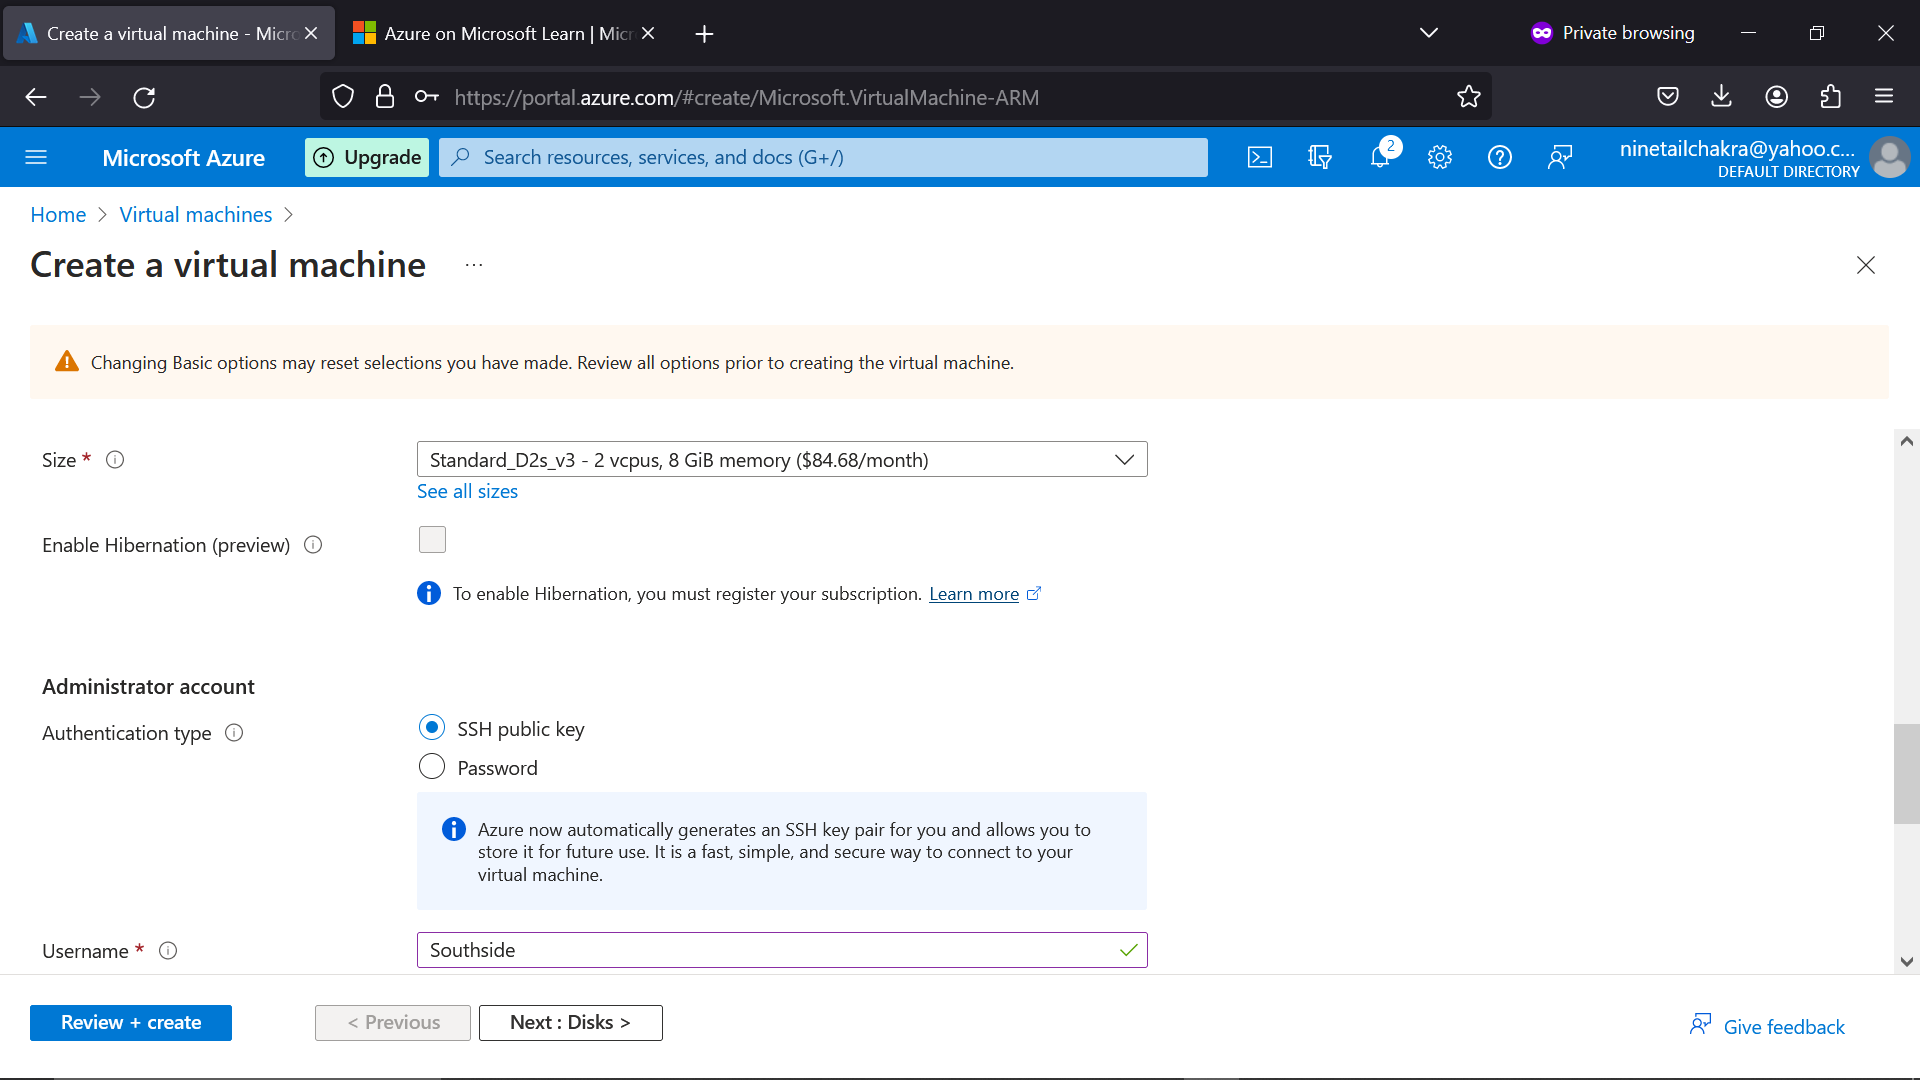
choose a unique username for your machine admin as i have chosen "southside" as mine
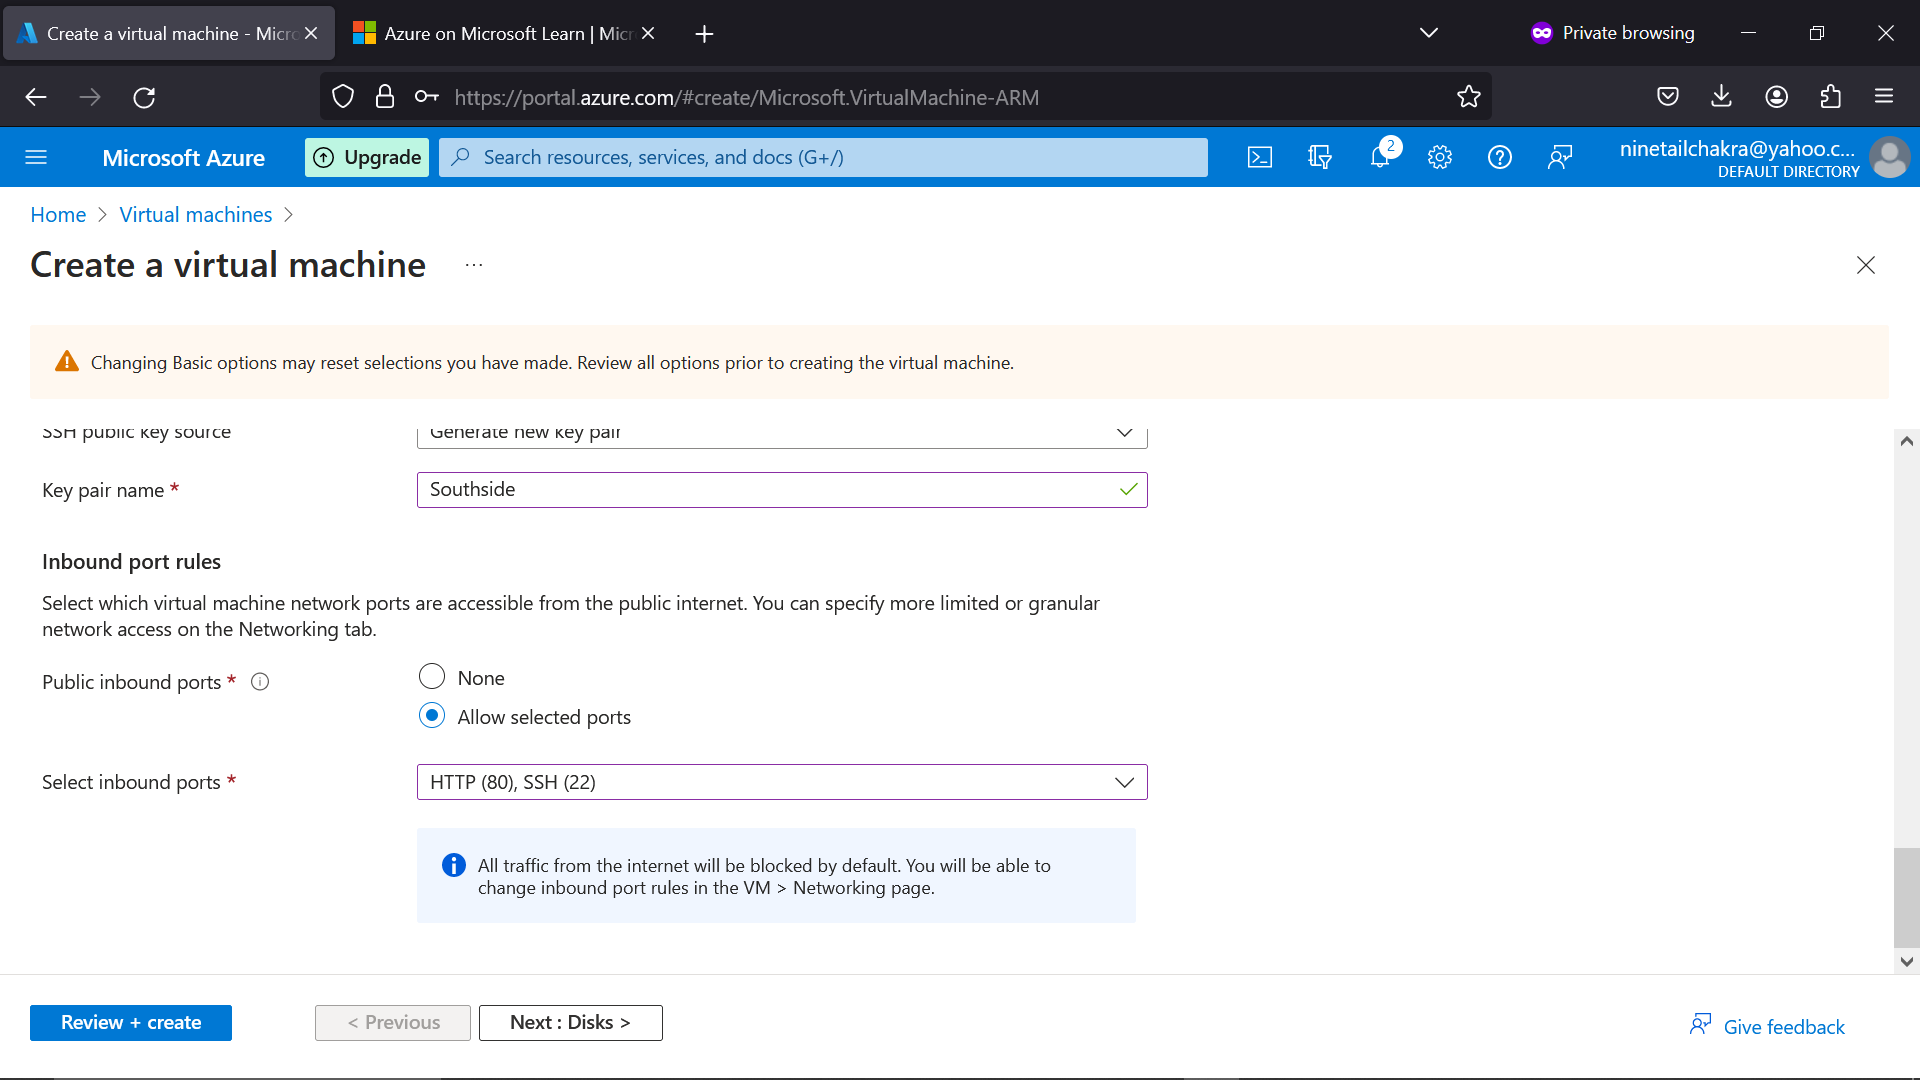
You should now proceed to click "review + create", you'd get a report saying "validation passed".
Proceed to select "create" on the bottom left
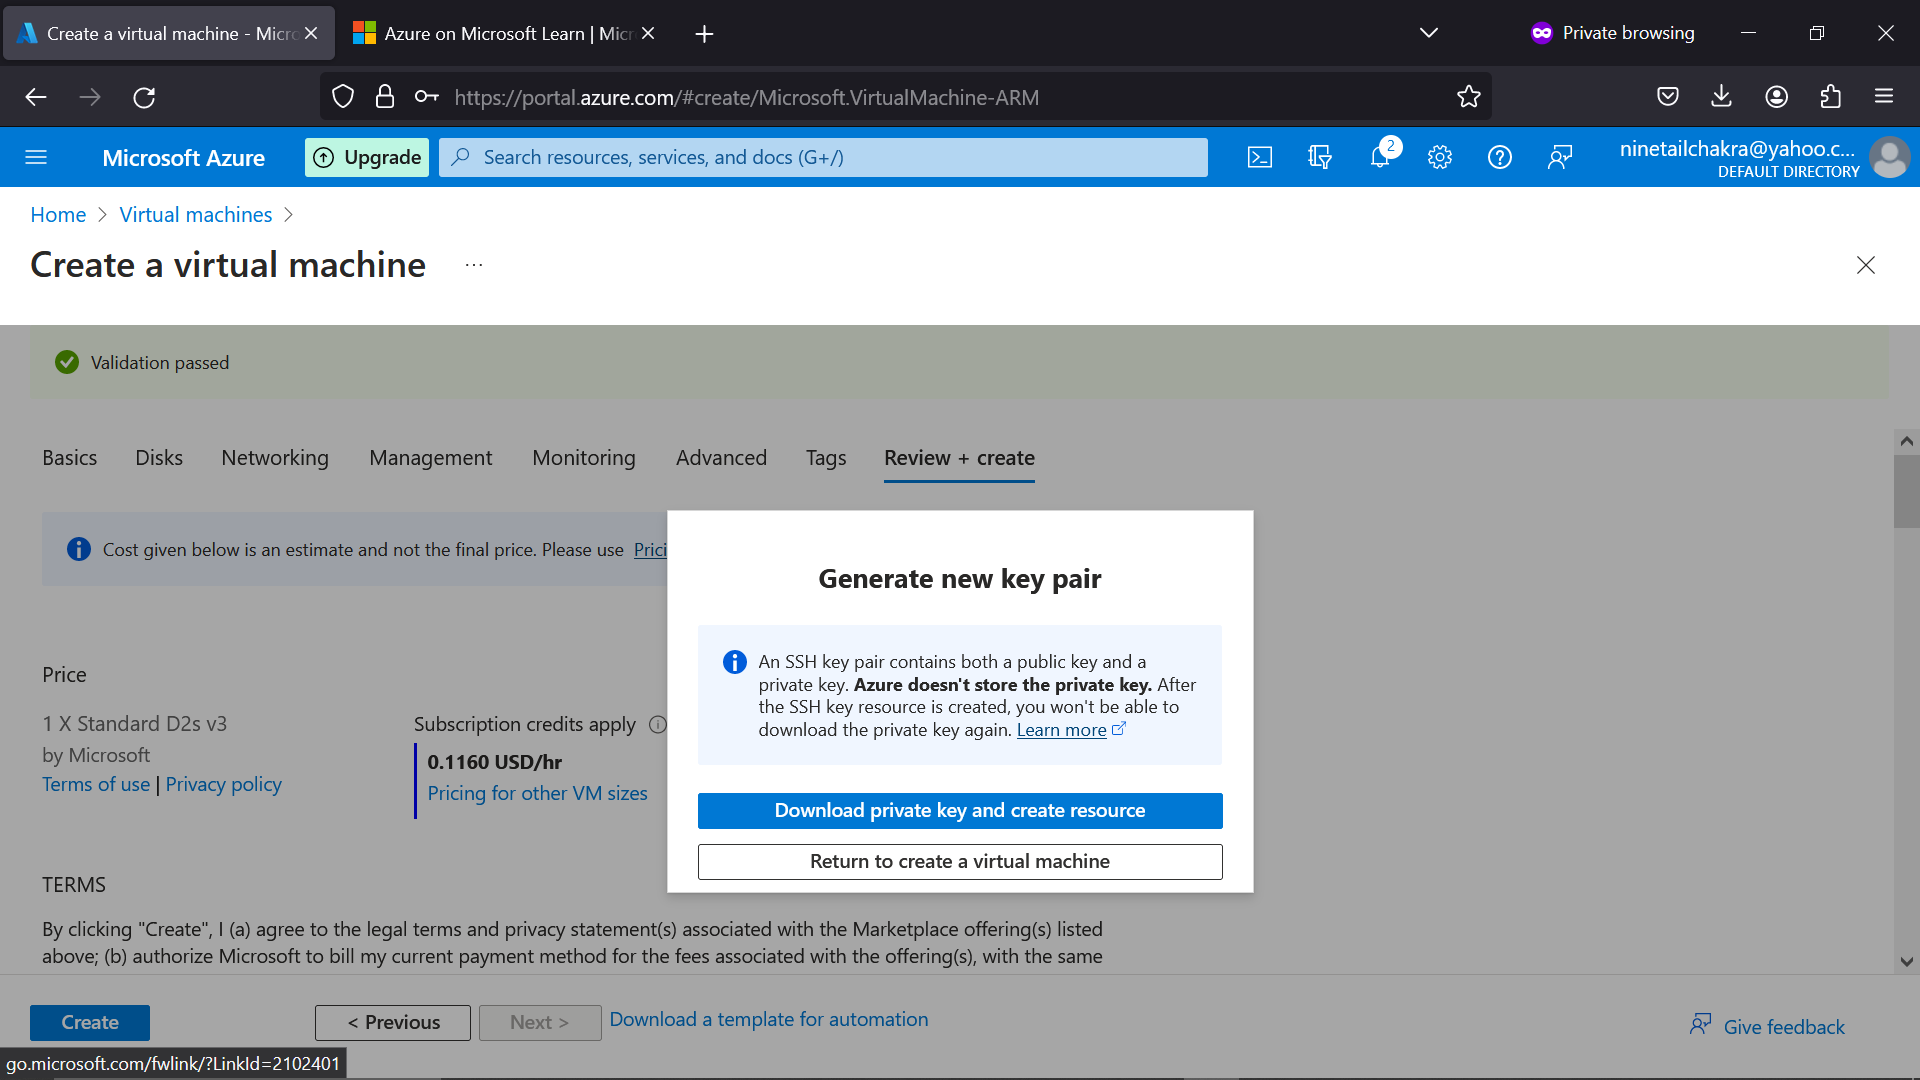
After selecting "create", you should get a pop-up asking you to download a "private key and create resource" .
Select "download" and you should find the file in the download section of your browser
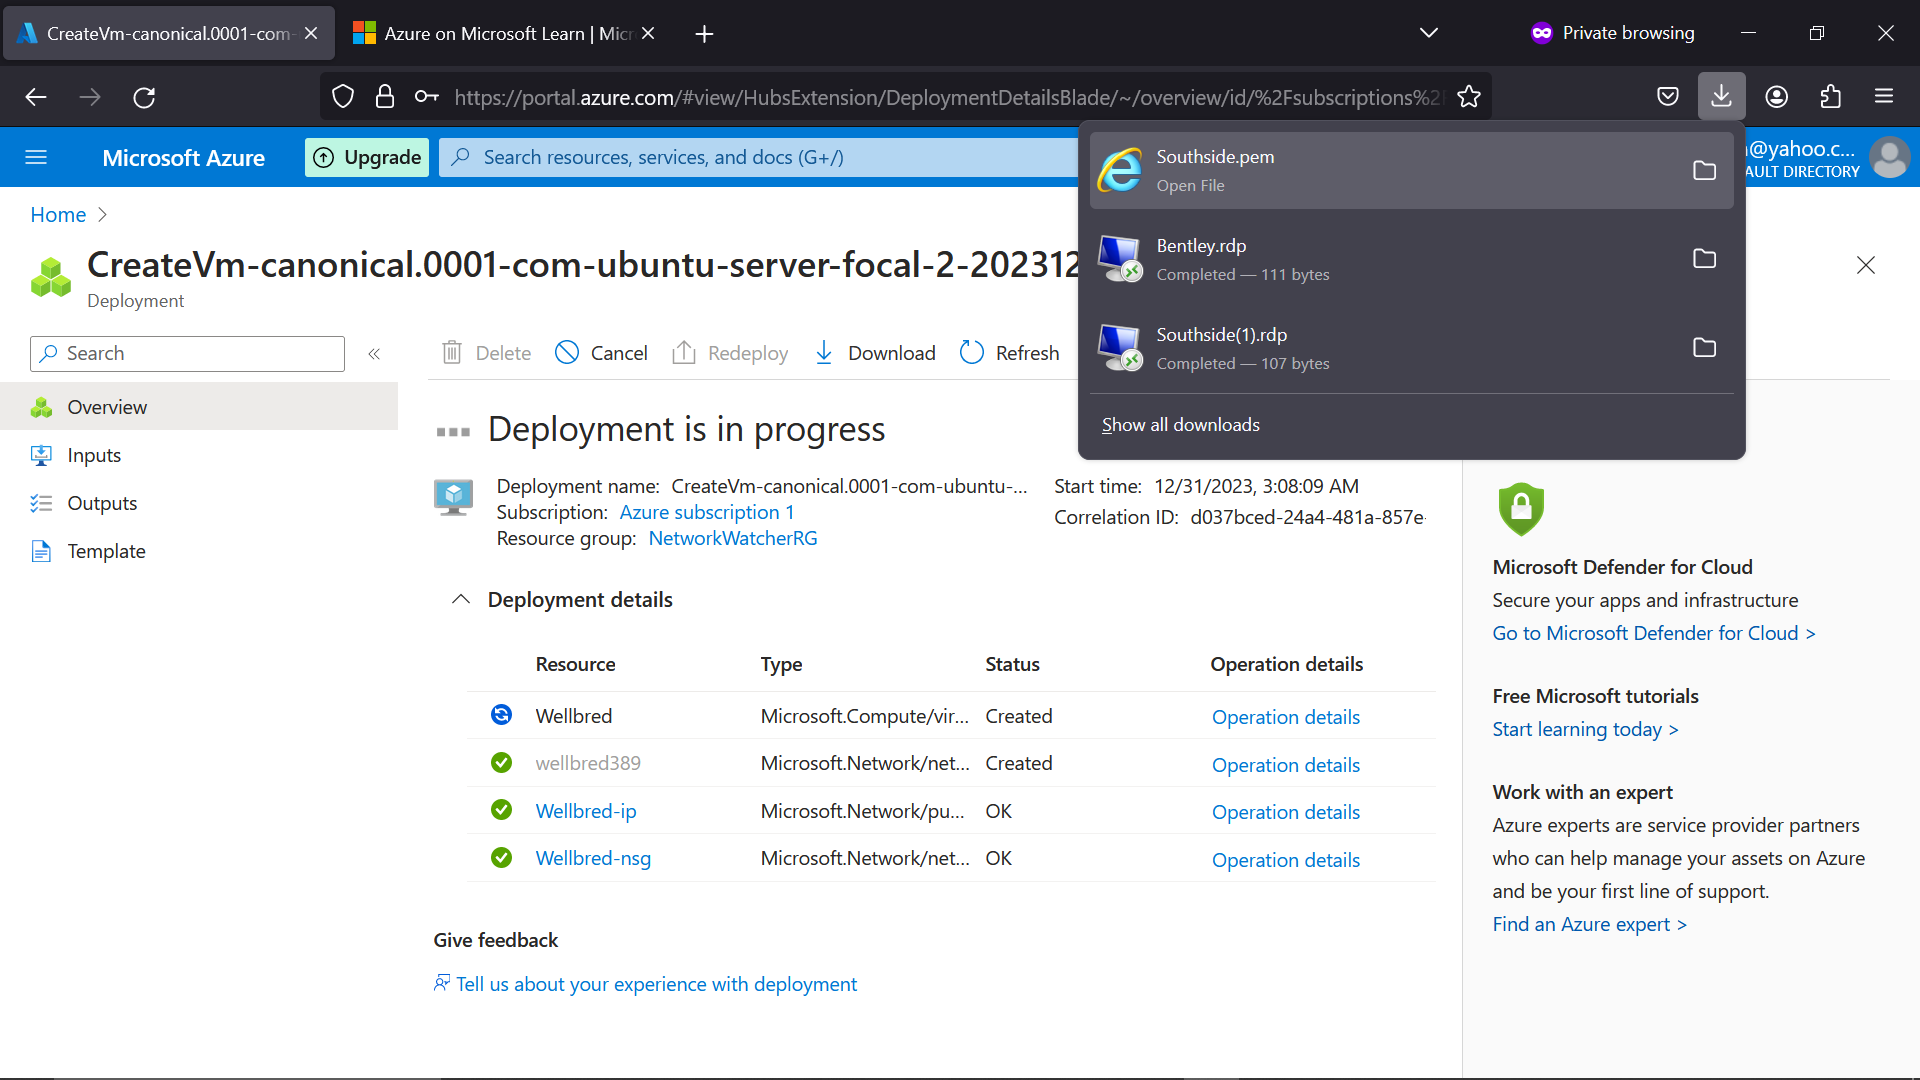
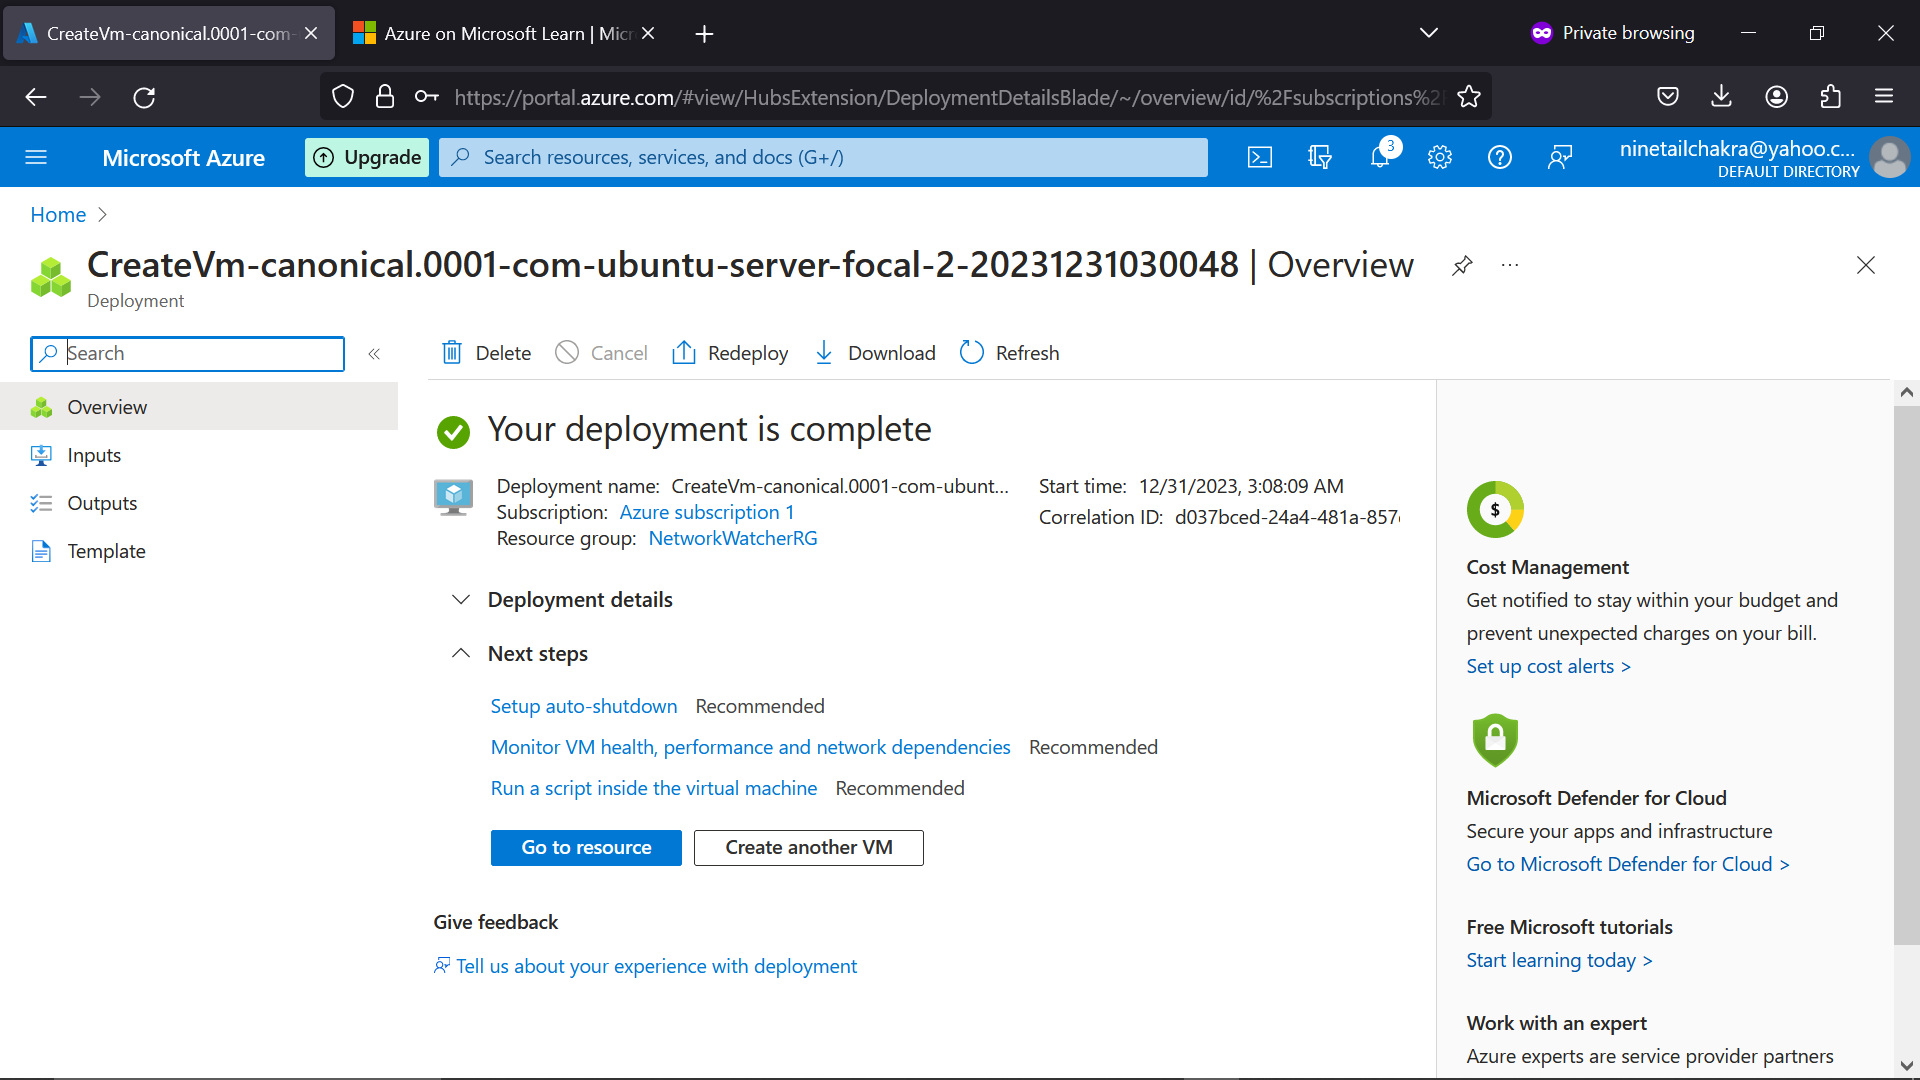
This is the next page you will land. While the machine is deploying, you will have to give it a few minutes to complete deployment. At the end of the deployment, select "go to resource" ,
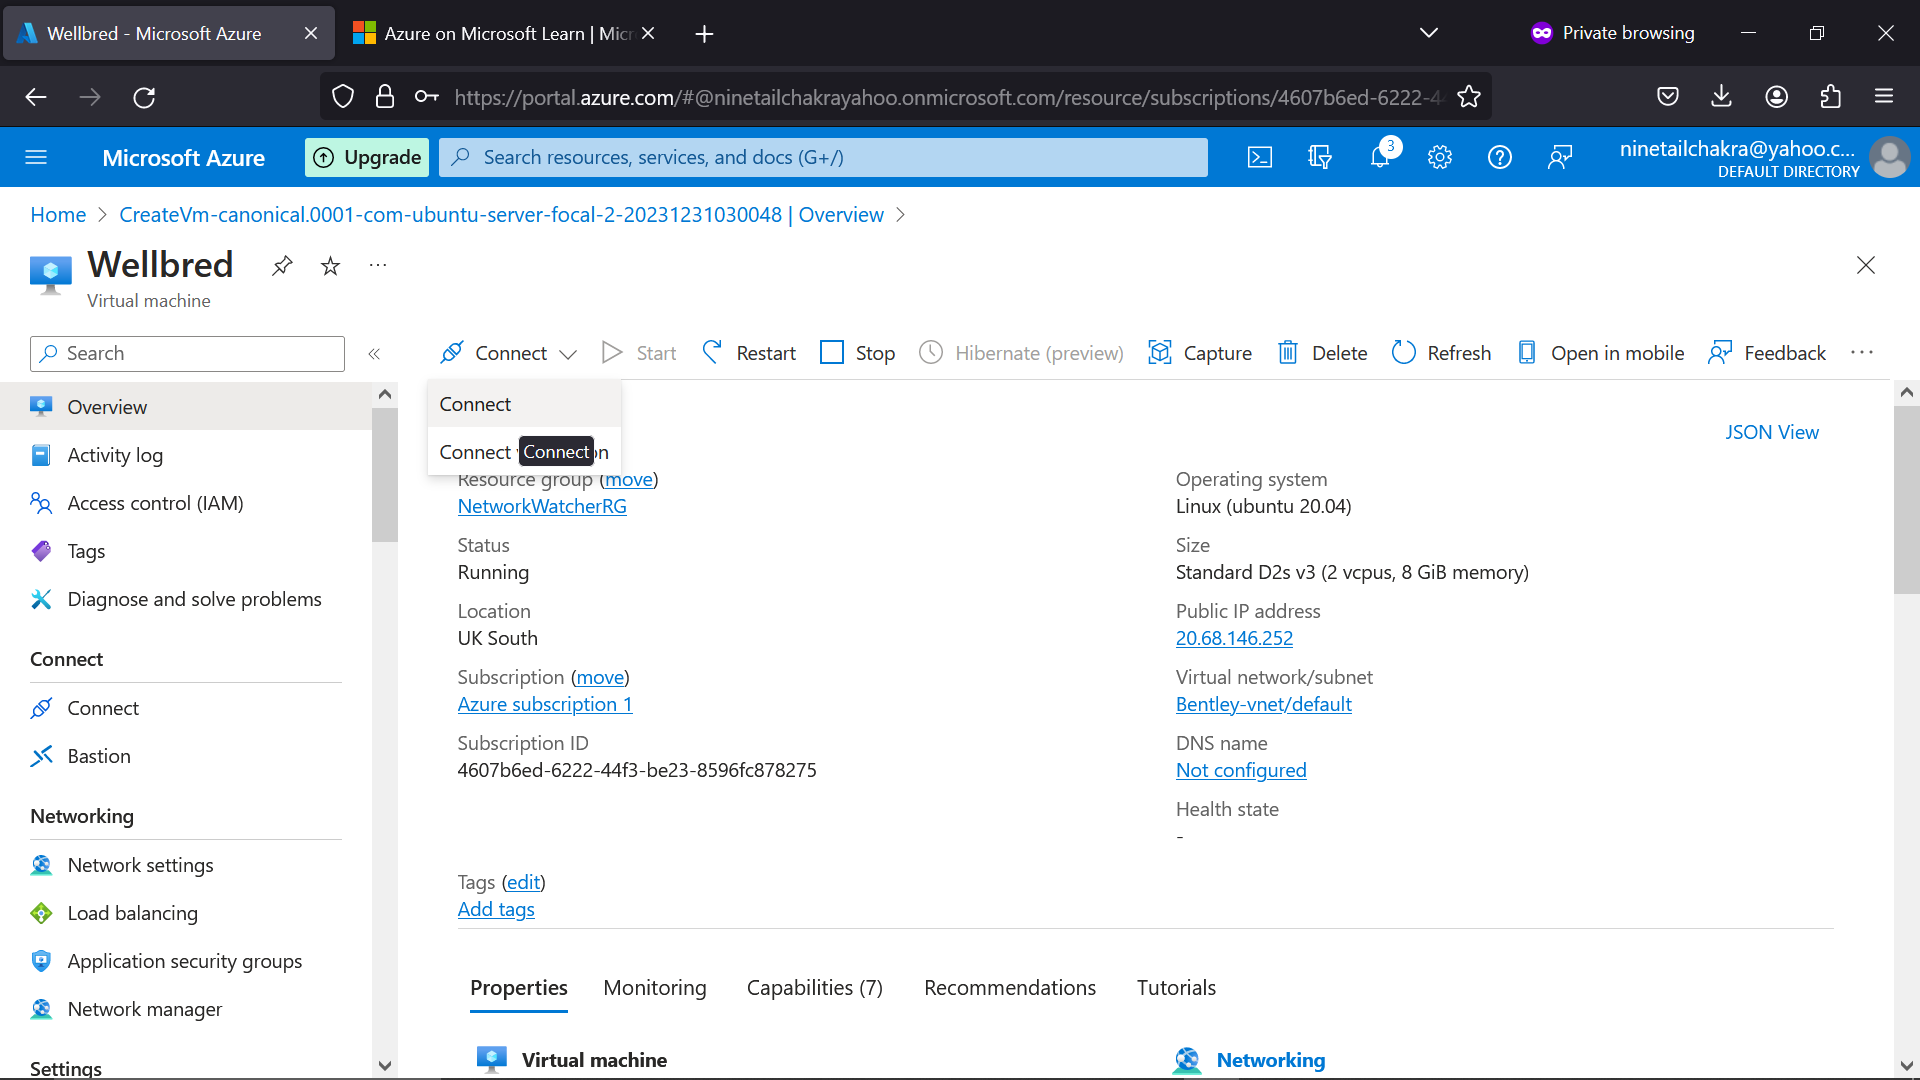
and you should land on this page, so go to your up left and select "connect",
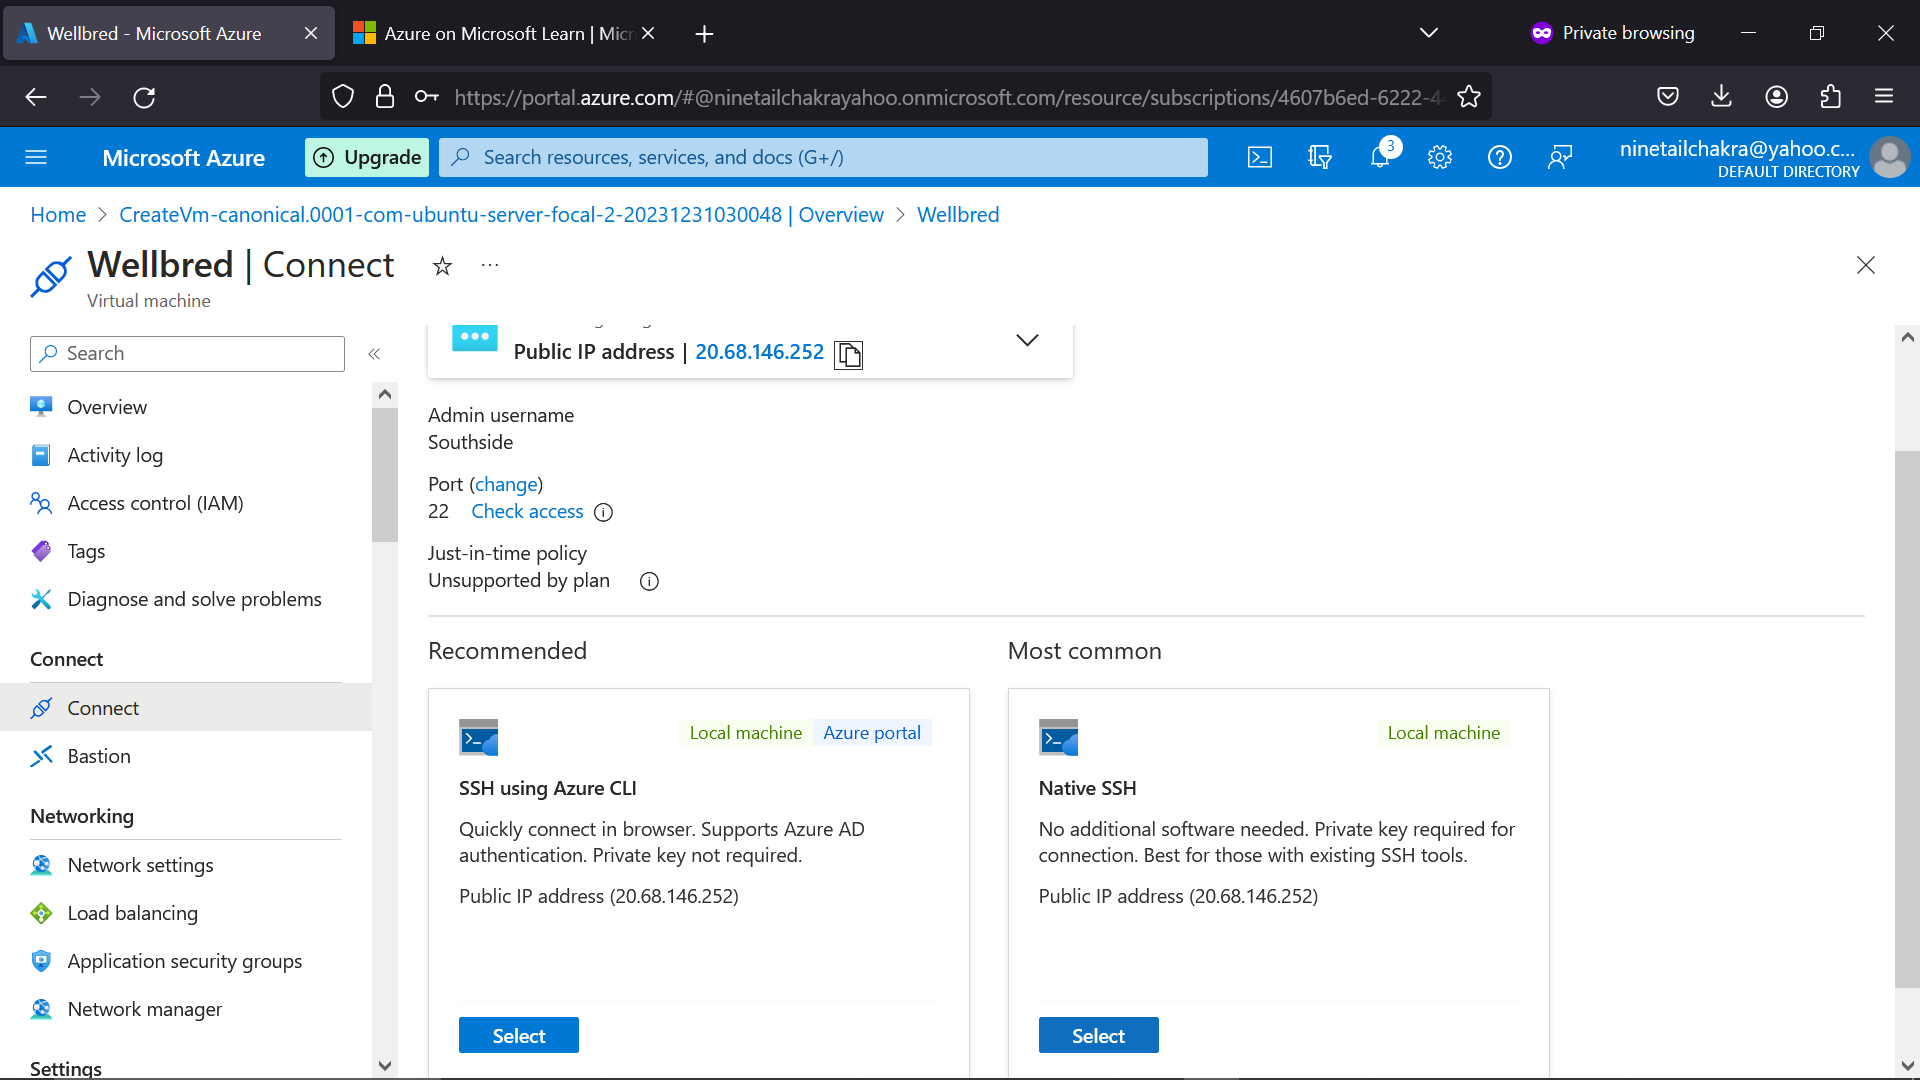
Copy out your IP address and click select on NATIVE SSH.
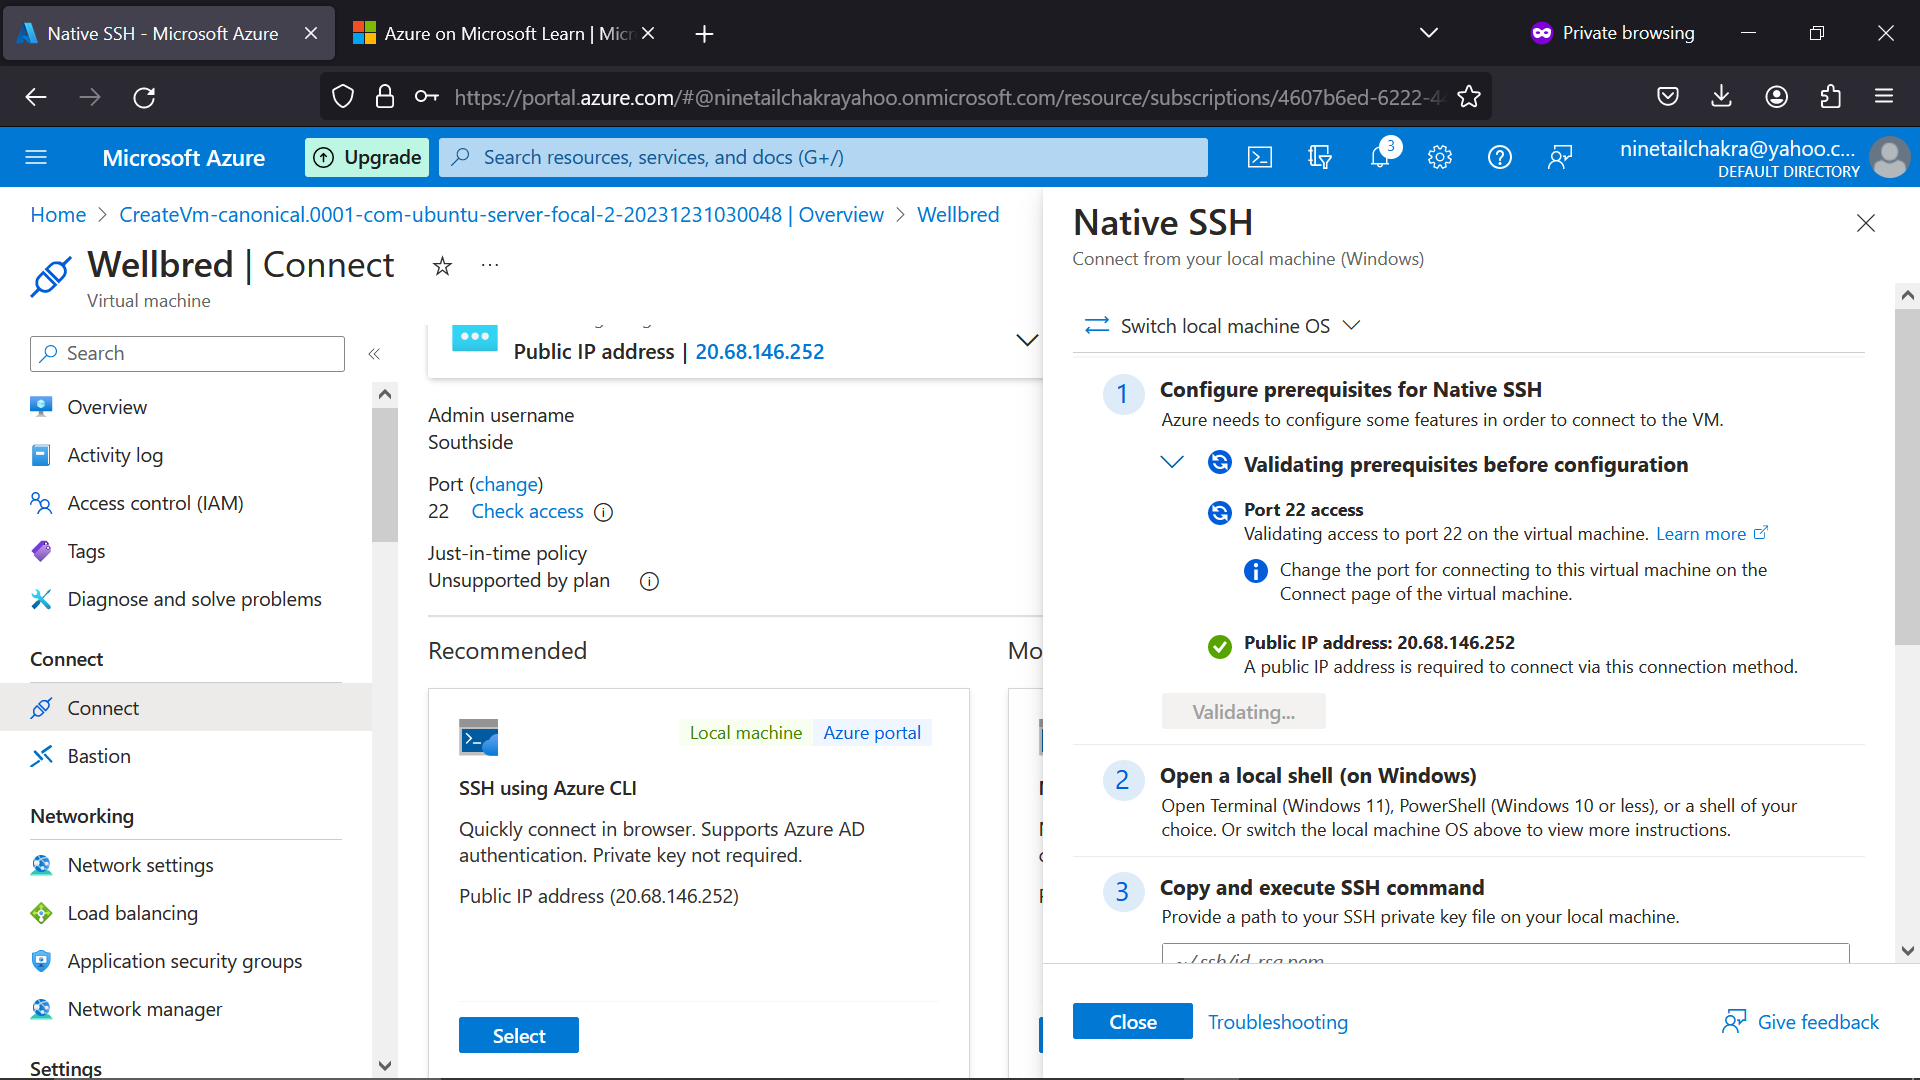
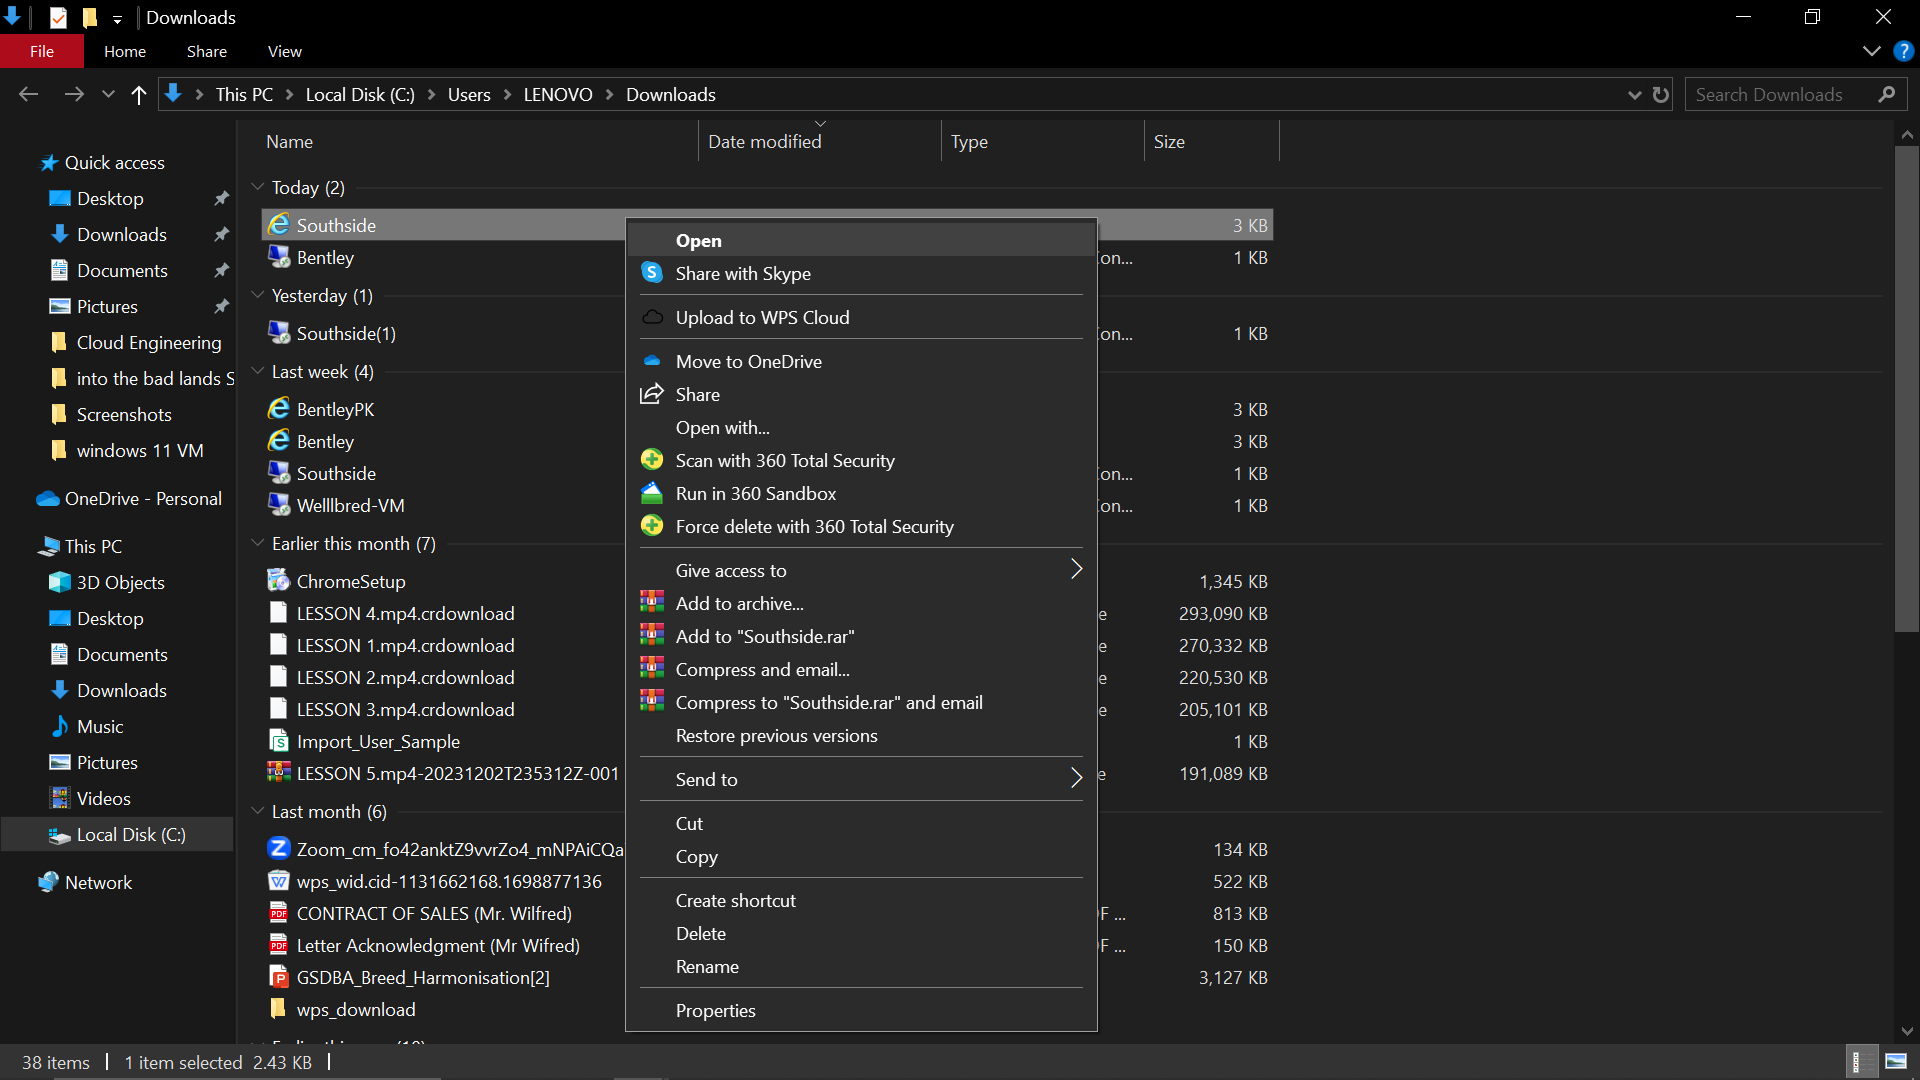
Now that you have done this, you should go to your downloads and open the private key you downloaded earlier, open the file via a browser.
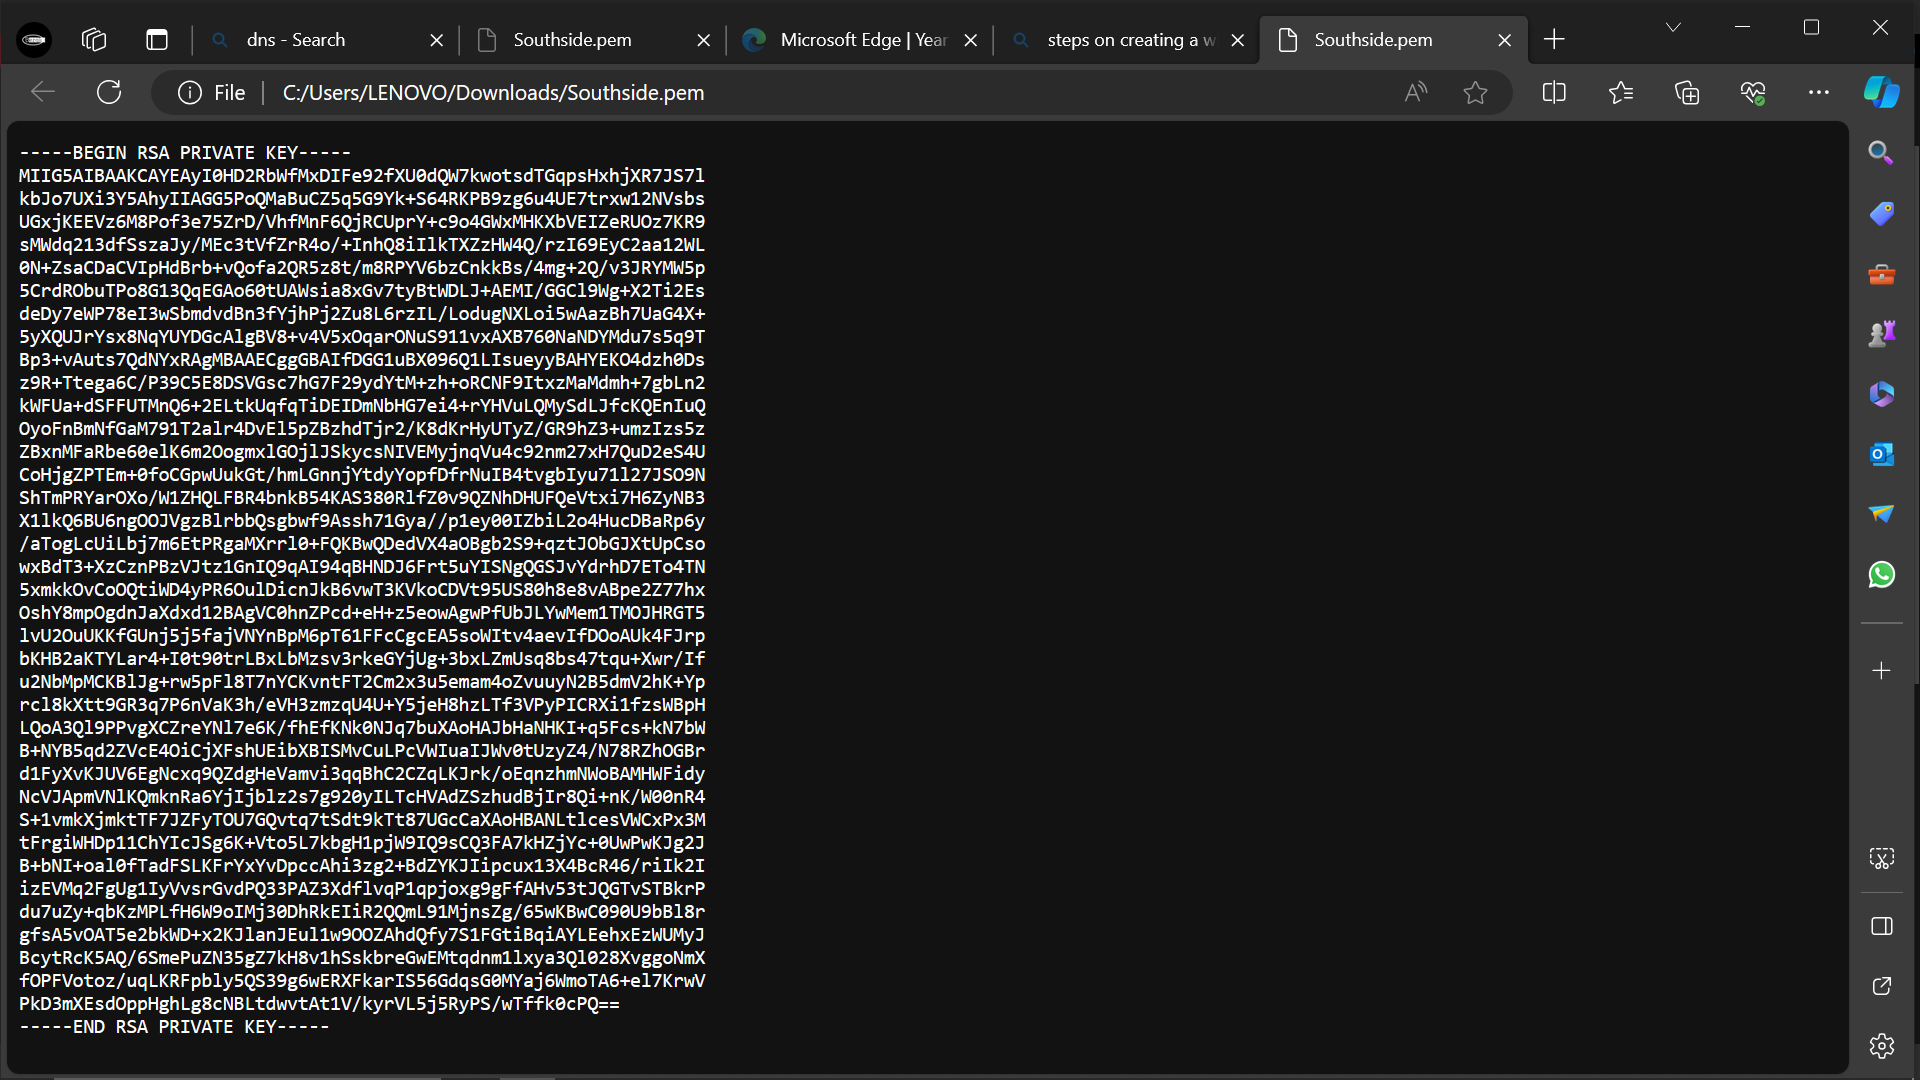
This should be the page you land after opening the private key you downloaded. Copy out the URL

Above is the URL for the one i created, yours should be unique
Next thing, open power shell on your PC and follow the series of instructions i will be dropping
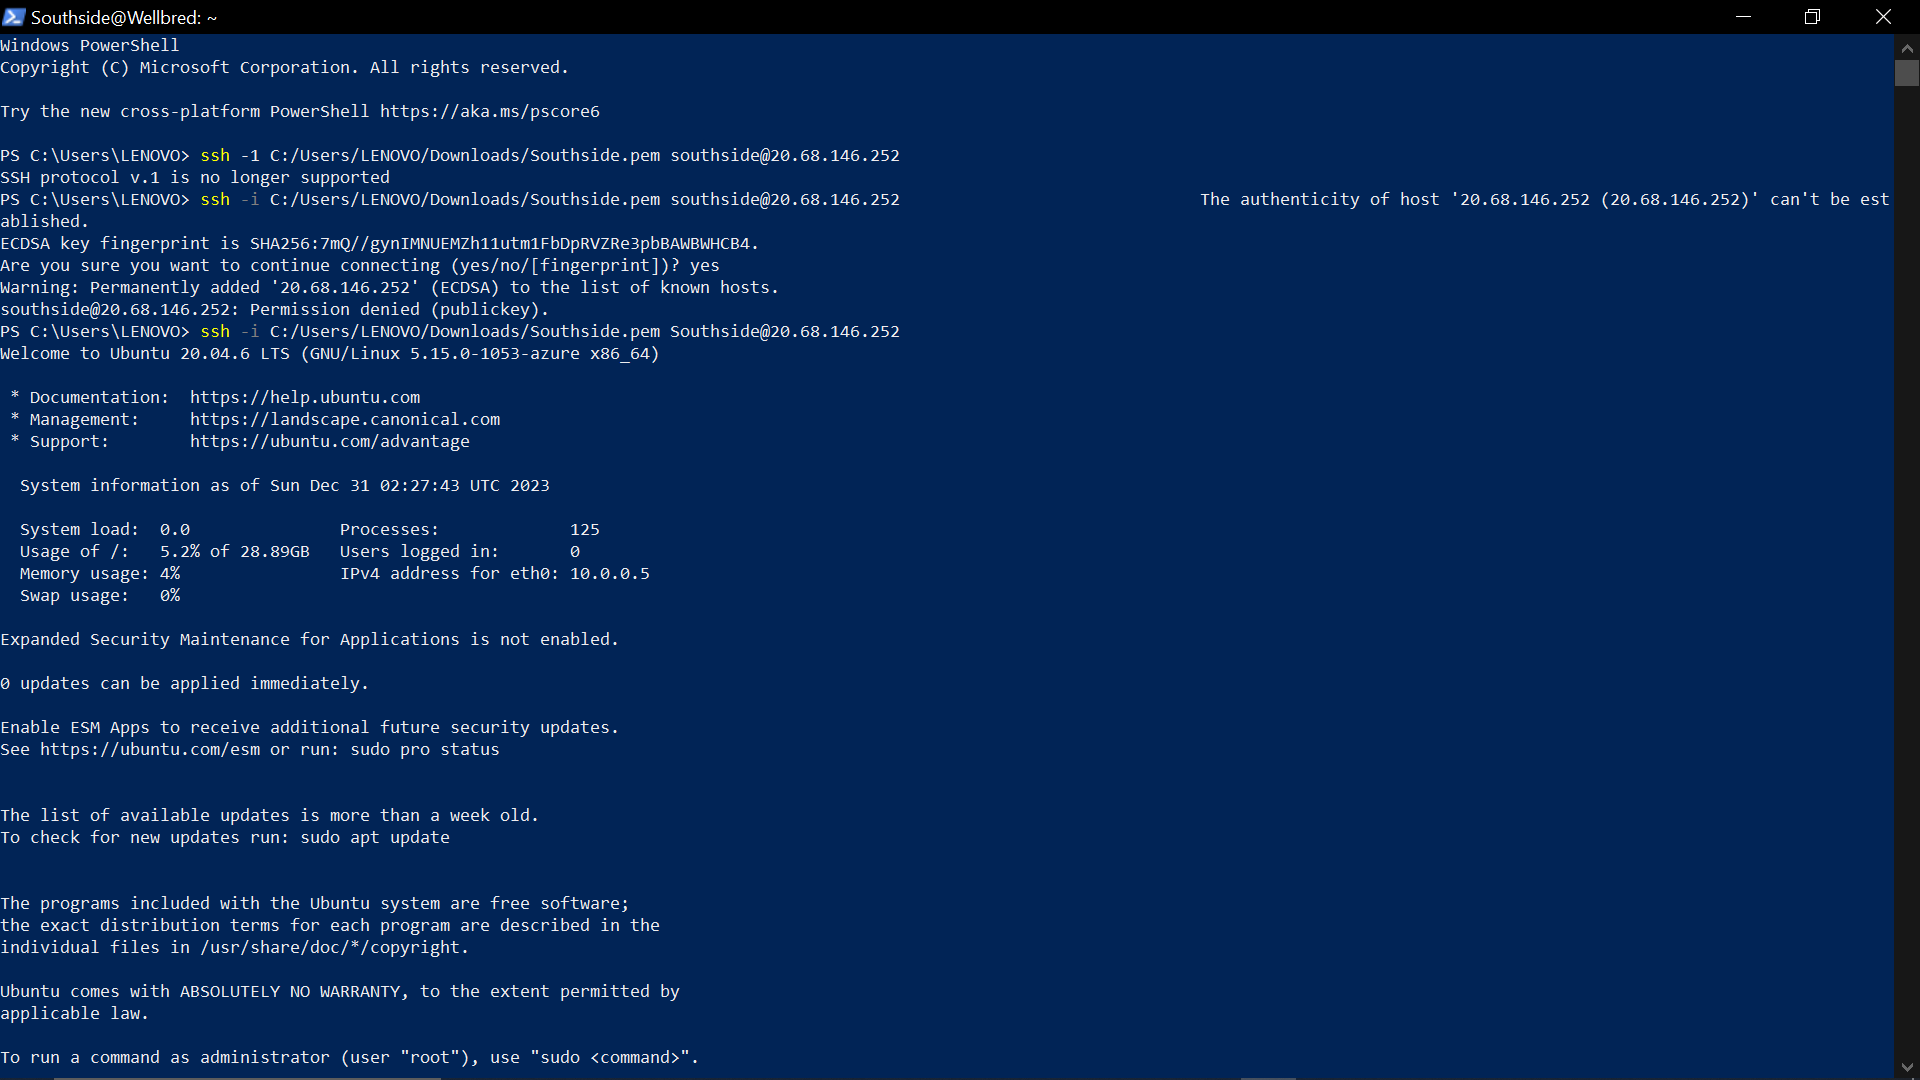
Now, recreate what you see here. Start by typing "ssh -i", give a space then paste the URL you copied, a space again and input the username of your VM as mine was "southside"@the IP address you copied. Click enter and you are good to good.
Your Linux is on and deployed.
On my next article, I will be showing us how to delete a VM and an RG..
Subscribe to my newsletter
Read articles from Wisdom Iyayinosa Bezaleel directly inside your inbox. Subscribe to the newsletter, and don't miss out.
Written by

Wisdom Iyayinosa Bezaleel
Wisdom Iyayinosa Bezaleel
Motivated and skilled Cloud Engineer with 12 months of hands-on experience in designing, implementing, and managing cloud infrastructure. Proficient in AWS and Azure platforms, with a strong foundation in networking, security, and automation. Adept at collaborating with cross-functional teams to deliver reliable and scalable cloud solutions.