How to Create a Counter App: React Custom Hooks
 Mishael Enyi
Introduction
A few weeks ago, I was given an exam to create a React Counter app, but the catch was to use a custom hook. Of course, then it seemed a bit difficult, but recently I decided to build it again, and this article discusses the approach I took to building it.
The counter app I built for my exams had a 404 page and an error boundary, which are not implemented in this one yet. A follow-up article will discuss this when it gets implemented, so make sure to follow so you don't miss it.
Prerequisites
To make sure you follow along and understand this article fully, I would advise you to have knowledge of the following:
Basic Understanding of React
JavaScript (ES6+)
Vite (or any tool you prefer—CRA, Parcel, gulp, etc)
An IDE (I use Visual Studio Code)
Setting Up
To start off, let's create a development environment using vite, or, like I said earlier, any one of your choice (so long as you know how to use it). To do so, you want to open a terminal, navigate to the destination folder (mine is a folder named GitHub), and run the following command: npm create vite@latest then follow the prompts to name your project, choose your framework, which in this case is React, and then select the language, JavaScript. Follow the instructions on the screen to finish the setup and open the folder in your IDE. When you open your IDE, your folder structure should look something like this:
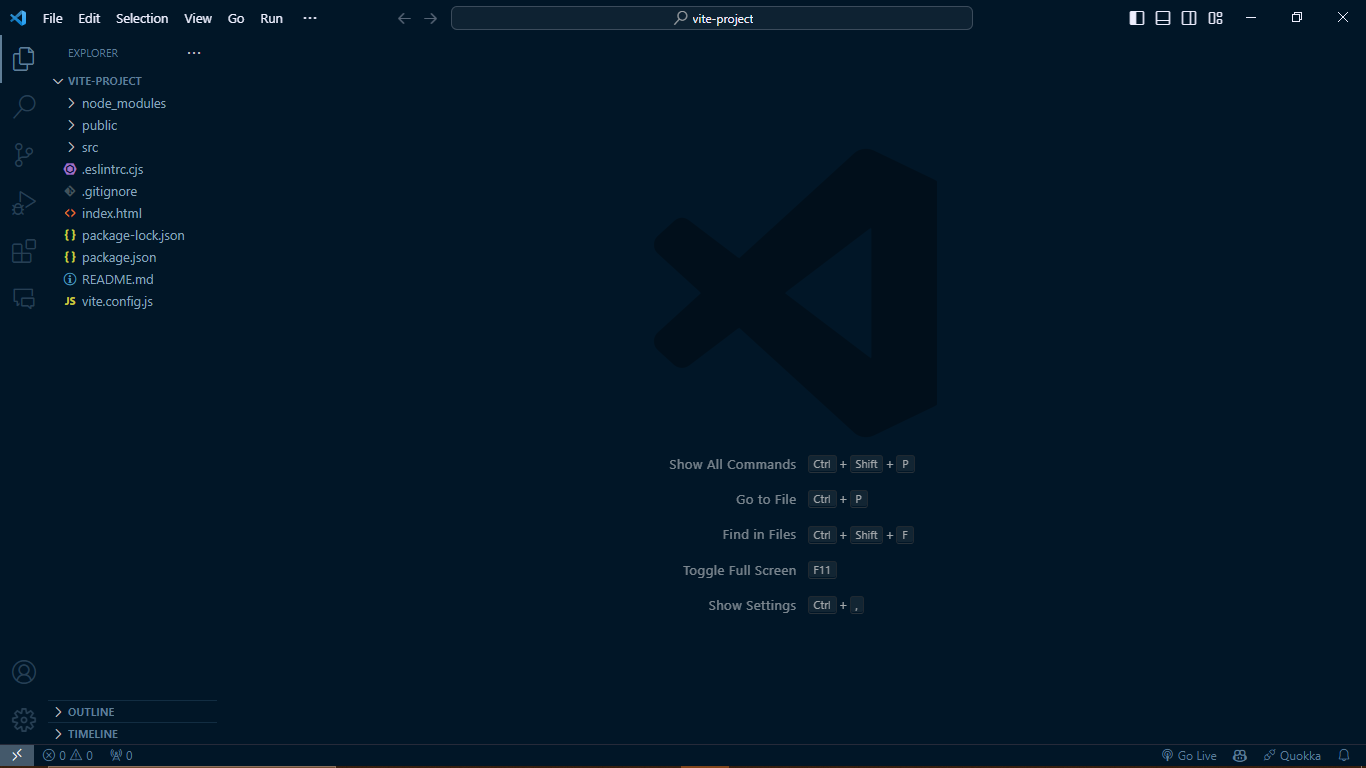
Then, get rid of the unnecessary styling and markup in your src folder. Locate App.jsx and add a heading. It can be anything you want but since we're building a counter app, I gave mine 'Counter App'.
In order to have a clean file structure, we are going to create two new folders inside our src folder. These folders will be named components and hooks. In the components folder, we are going to create a file called counter.jsx and in the hooks folder, we are going to create a file called useCounter.
Building the application
Creating the useCounter hook
Open the useCounter file, the first thing we'll need to do is to import the useState hook that comes default with react. Then create a function called useCounter. Like this:
import { useState } from "react";

const useCounter = () => {

}
What does a counter app need? Yes, an increment, decrement and reset button and a count value. Those are the four main features needed for a counter app. So first, we need to initialize the state or variable count in our useCounter function. We can do this by using the useState hook imported earlier to create the count variable along with a function setCount to update the count variable. So that line of code should look like this.
const [count, setCount] = useState(0)
Next, all we need to do is create the functions for each of those buttons. So altogether, it should look something like this:
import { useState } from "react";

const useCounter = () => {
    const [count, setCount] = useState(0);

    const increment = () => {
        setCount(count + 1)
    }
    const decrement = () => {
        setCount(count - 1)
    }
    const reset = () => {
        setCount(0)
    }
}
In addition to these basic functions, we also want to add a button to increment and decrement by 10 and an input field to directly set the value of count. So when you do all that and export the useCounter function, you should have something like this:
import { useState } from "react";

const useCounter = () => {
  const [count, setCount] = useState(0);

  const increment = () => {
    setCount(count + 1)
  }
  const decrement = () => {
    setCount(count - 1)
  }
  const reset = () => {
    setCount(0)
  }
  const incrementBy10 = () => {
    setCount(count + 10)
  }
  const decrementBy10 = () => {
    setCount(count - 10)
  }
  const setValue = (value) => {
    setCount(value)
  }

  return {count, increment, decrement, reset, incrementBy10, decrementBy10, setValue}
}


export default useCounter;
The return statement essentially provides a set of tools to manage and interact with the state count in counter.jsx component. The calling code can then use these properties to read the current state value or perform various operations on it.
Importing and Using the Counter Hook and Markup of the App
We import the counter hook the same way we import anything in React. import customHook from "file-path". In my case, import useCounter from "../hooks/useCounter" After importing it and creating the markup for the counter app, you should have something similar to this:
import useCounter from "../hooks/useCounter"

function counter(){
    return(
        <div>
            <p>{count}</p>
            <div>
                <button>Increment</button>
                <button>Decrement</button>
                <button>Reset</button>
                <button>Increment By 10</button>
                <button>Decrement By 10</button>
                <input type="number" placeholder="Enter a number" />
            </div>
        </div>
    )
}
In the above code block, we see a basic markup of a counter app with the count number, buttons and input field. It can be more complex but we'll stick to the basics for now. Now to actually use the custom hook we created, we need to use destructuring assignment to extract values from the object returned by the useCounter hook. Like this:
const {count, increment, decrement, incrementBy10, decrementBy10, reset, setValue} = useCounter()
Then we use these values returned in the Counter component. So we can replace '0' with the {count} variable so that it dynamically updates the state of the app. Then we'll call the functions returned on the buttons by using a click event. It should look like this:
<div>
    <p>{count}</p>
    <div>
        <button onClick={increment}>Increment</button>
        <button onClick={decrement}>Decrement</button>
        <button onClick={reset}>Reset</button>
        <button onClick={incrementBy10}>Increment By 10</button>
        <button onClick={decrementBy10}>Decrement By 10</button>
        <input type="number" placeholder="Enter a number" />
    </div>
</div>
As you can see, we still need to use the setValue function. We can't just call it directly on the input field because that would create unnecessary and unwanted bugs. So to use it, we would need to create a handleChange function to track when the value of the input field changes and update the state of count and also to utilize the maxLength property so as to limit the amount of numbers the count variable can accept. So to do that, these are the steps:
Add a
maxLengthproperty to your input field and give it a value. Mine is set to '15'Create a
handleChangefunction that takes a parameter.Extract the input value and the
maxLengthfrom the event object.Check if the input field has a value. If it doesn't, set the value to 0.
Check if the value exceeds
maxLengthand truncate it if it does.Parse and Set Value
Call the
onChangeevent on the input field and call thehandleChangefunction
This should be the output of the handleChange function:
const handleChange = (e) => {
  let value = e.target.value;
  let maxLength = e.target.maxLength;

  if (!value) {
    setValue(0);
  } else if (value.length > maxLength) {
    value = value.slice(0, maxLength);
    setValue(value);
  } else {
    setValue(parseInt(value, 10));
  }
};
And this of everything put together in the counter component.
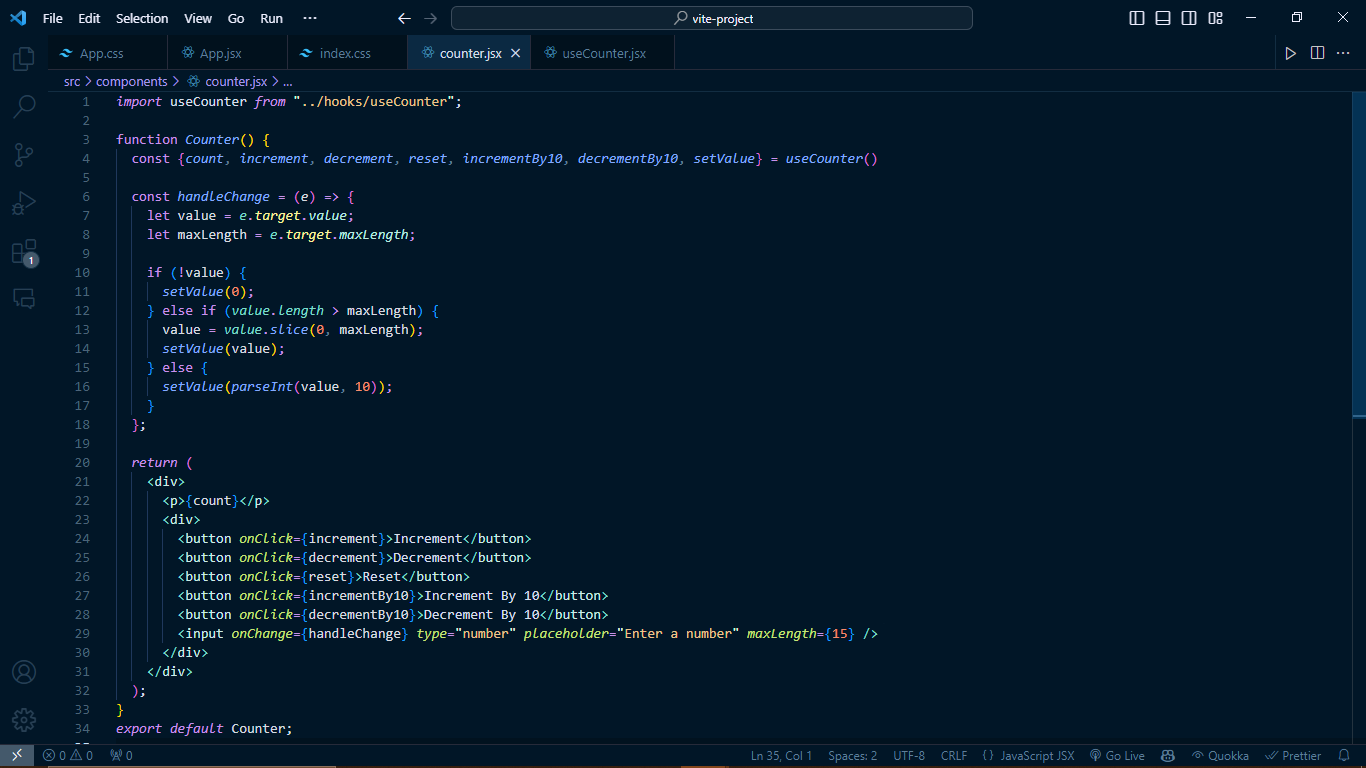
Make sure you export the Counter component and import it into App.jsx Then call it below the h1 element we created earlier. To call it, it should be in Pascal case and it should be a self-closing tag, Like this:
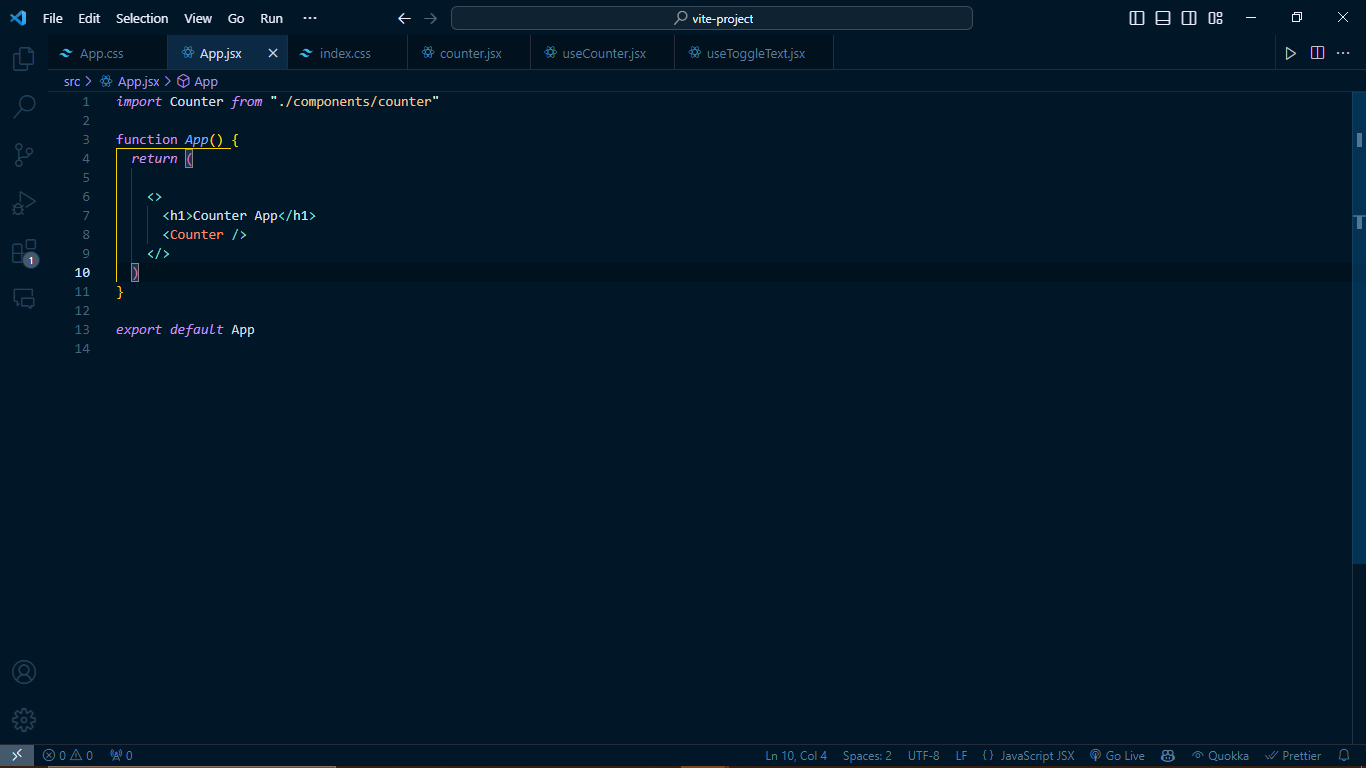
Open up a terminal and run npm run dev, open the link provided in your preferred browser and you should have something like this:
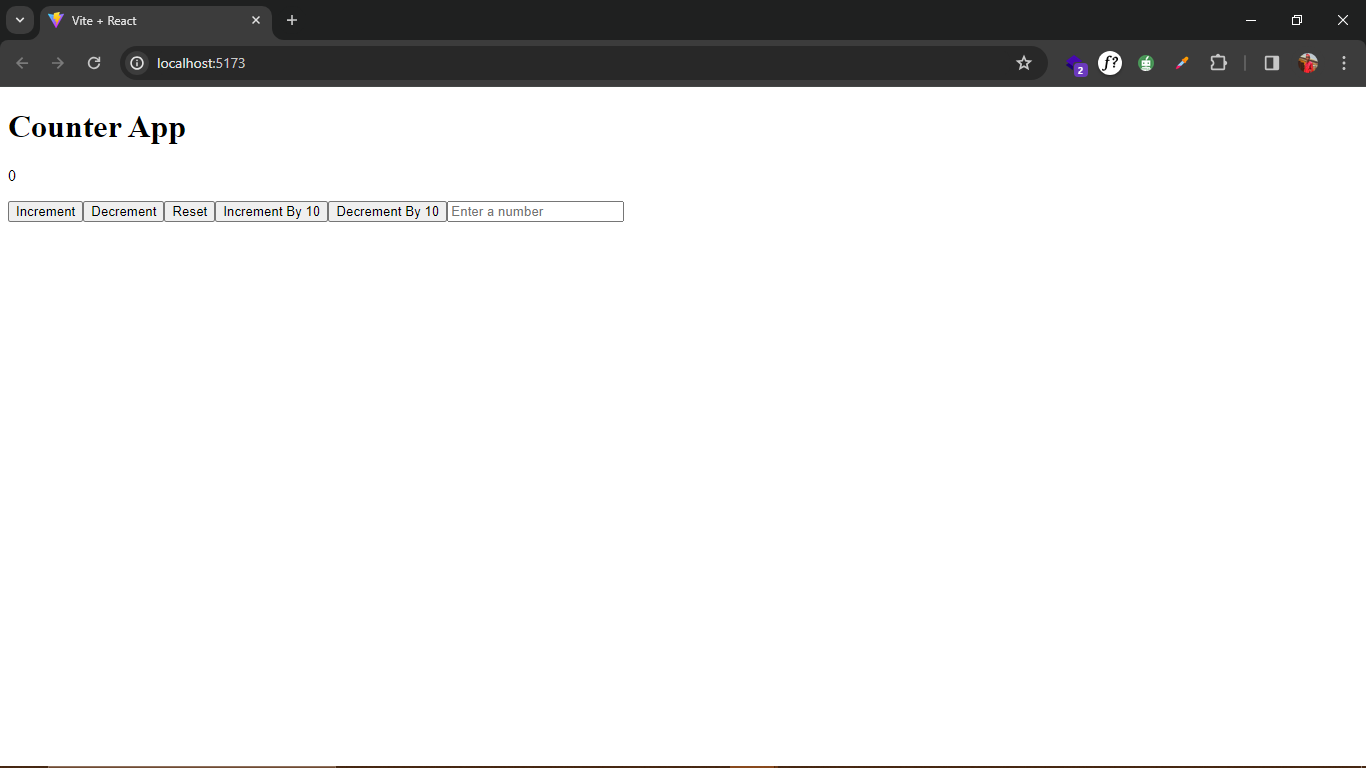
This has no styling at all cause I totally removed all the default styles that came with Vite. But at least you should have something similar to this. Eventually, I styled mine with TailwindCSS, so it looks like this:
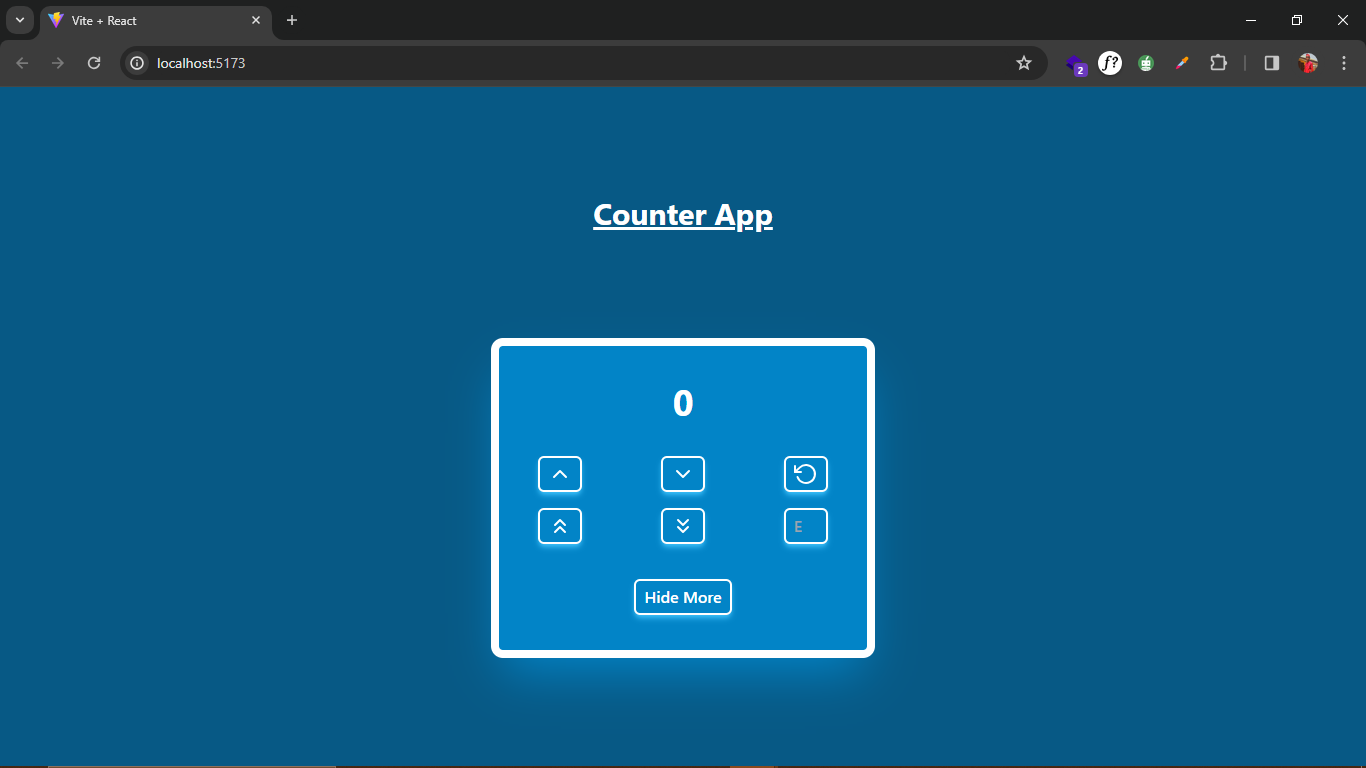
So basically, without the styling, this should be your code:
useCounter.jsx
import { useState } from "react";

const useCounter = () => {
  const [count, setCount] = useState(0);

  const increment = () => {
    setCount(count + 1)
  }
  const decrement = () => {
    setCount(count - 1)
  }
  const reset = () => {
    setCount(0)
  }
  const incrementBy10 = () => {
    setCount(count + 10)
  }
  const decrementBy10 = () => {
    setCount(count - 10)
  }
  const setValue = (value) => {
    setCount(value)
  }

  return {count, increment, decrement, reset, incrementBy10, decrementBy10, setValue}
}


export default useCounter;
counter.jsx
import useCounter from "../hooks/useCounter";

function Counter() {
  const {
    count,
    increment,
    decrement,
    reset,
    incrementBy10,
    decrementBy10,
    setValue,
  } = useCounter();

  const handleChange = (e) => {
    let value = e.target.value;
    let maxLength = e.target.maxLength;

    if (!value) {
      setValue(0);
    } else if (value.length > maxLength) {
      value = value.slice(0, maxLength);
      setValue(value);
    } else {
      setValue(parseInt(value, 10));
    }
  };

  return (
    <div>
      <p>{count}</p>
      <div>
        <button onClick={increment}>Increment</button>
        <button onClick={decrement}>Decrement</button>
        <button onClick={reset}>Reset</button>
        <button onClick={incrementBy10}>Increment By 10</button>
        <button onClick={decrementBy10}>Decrement By 10</button>
        <input
          onChange={handleChange}
          type="number"
          placeholder="Enter a number"
          maxLength={15}
        />
      </div>
    </div>
  );
}
export default Counter;
app.jsx
import Counter from "./components/counter"

function App() {
  return (
    <>
      <h1>Counter App</h1>
      <Counter />
    </>
  )
}

export default App
Conclusion
In this article, we have seen how to create a React Counter app and how to do so using a custom hook. Congratulations! I hope this article has been able to help you in one way or another. Do try this out, and let me know how it goes in the comment section with any successes, bugs, suggestions, or improvements you may have.
Like I mentioned before, we will be implementing the 404 and error boundary pages, probably along with some other features, in a future article. You can also check out my GitHub repository for the complete code with styling and some extra features.
Thanks for taking the time to read this. See you next time on Mishael's
Subscribe to my newsletter
Read articles from Mishael Enyi directly inside your inbox. Subscribe to the newsletter, and don't miss out.
Written by
