How to Create a WINDOWS 11 VIRTUAL MACHINE in Microsoft Azure
 Oche Abogonye
HOW TO CREATE A WINDOWS 11 VIRTUAL MACHINE IN AZURE
By: Oche Abogonye
INTRODUCTION
An Azure Virtual Machine is a virtual computing domain hosted in the cloud. It provides a scalable and reliable way to run applications and services. Azure Virtual Machines can be used to both create and run Windows and Linux operating systems.
The following are the steps to create a Windows 11 Virtual Machine
SIGN IN TO YOUR AZURE PORTAL
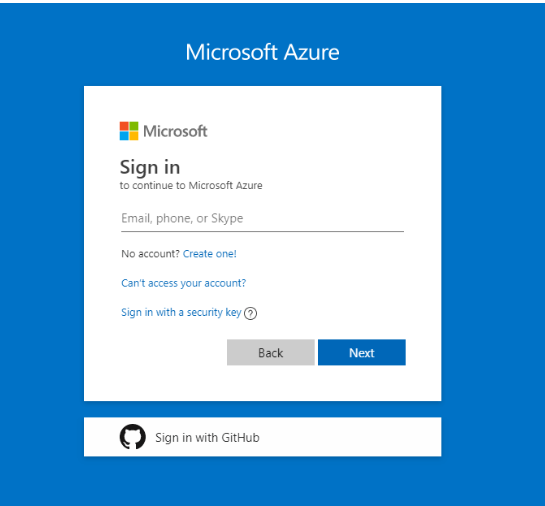
Sign in to Azure Portal with your email and password to gain access to the Azure portal.
CREATE YOUR VIRTUAL MACHINE
(a) Select "Virtual Machine" from the list of Azure services.
(b) Click on the "Create" button.
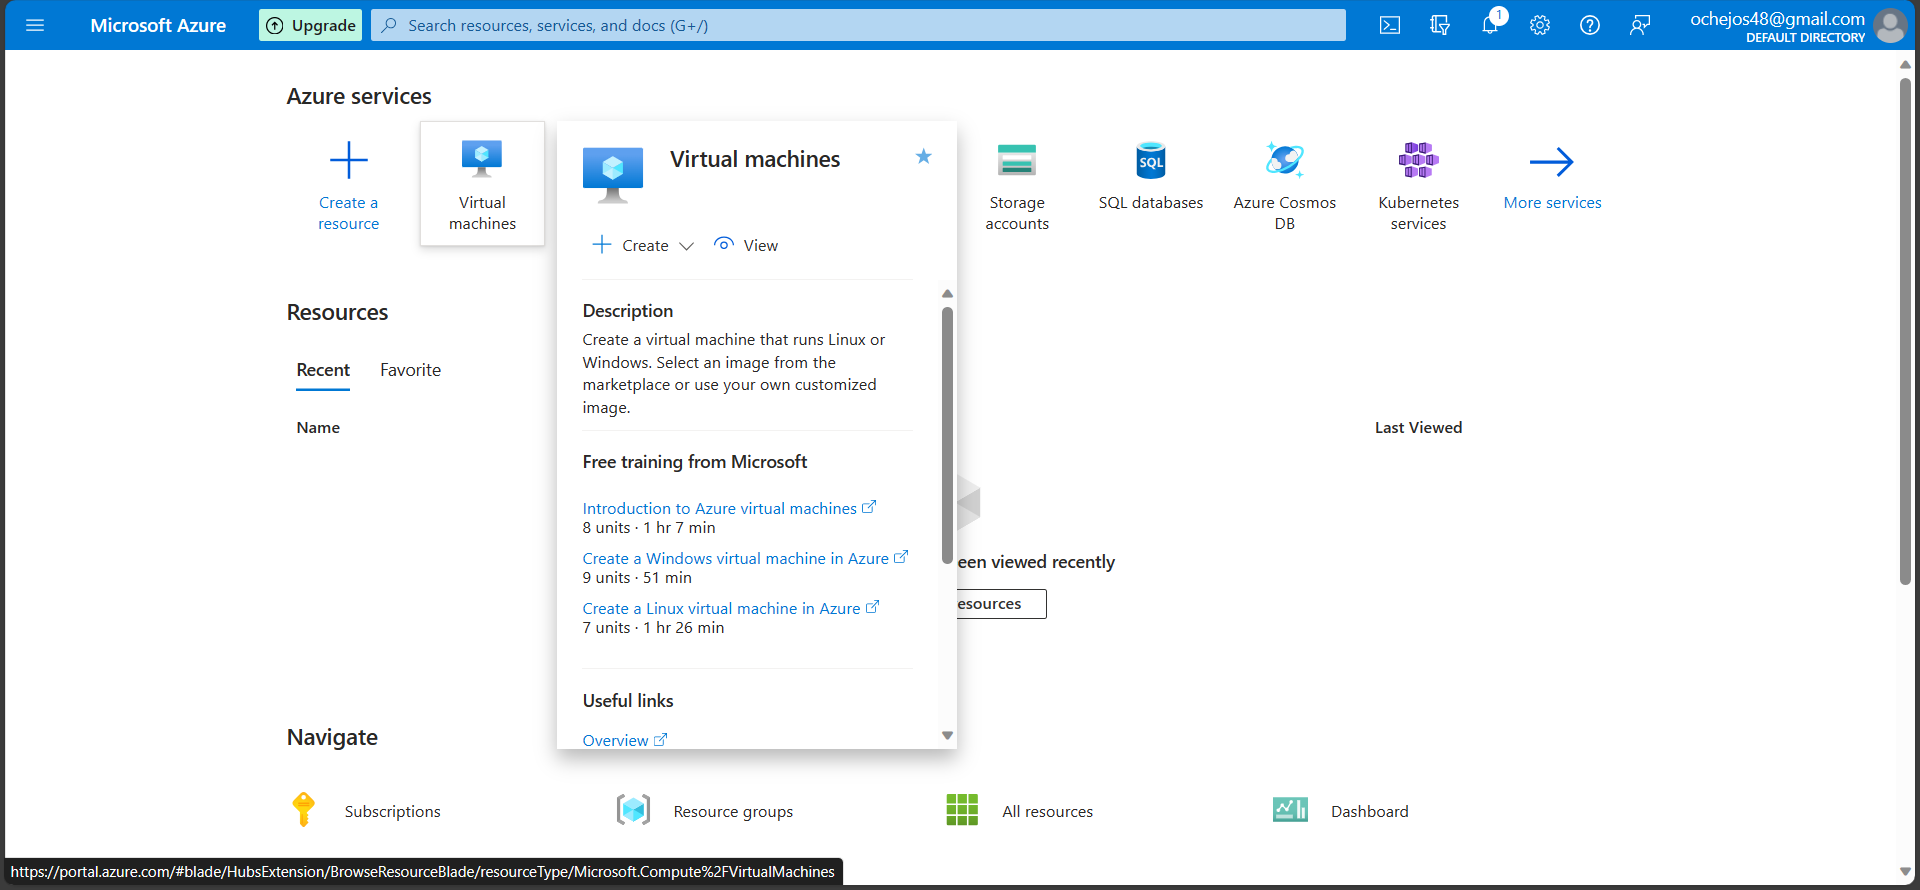
(c) Click "create" on the Virtual Machine pop up and you will be directed to the Virtual Machine Home page.
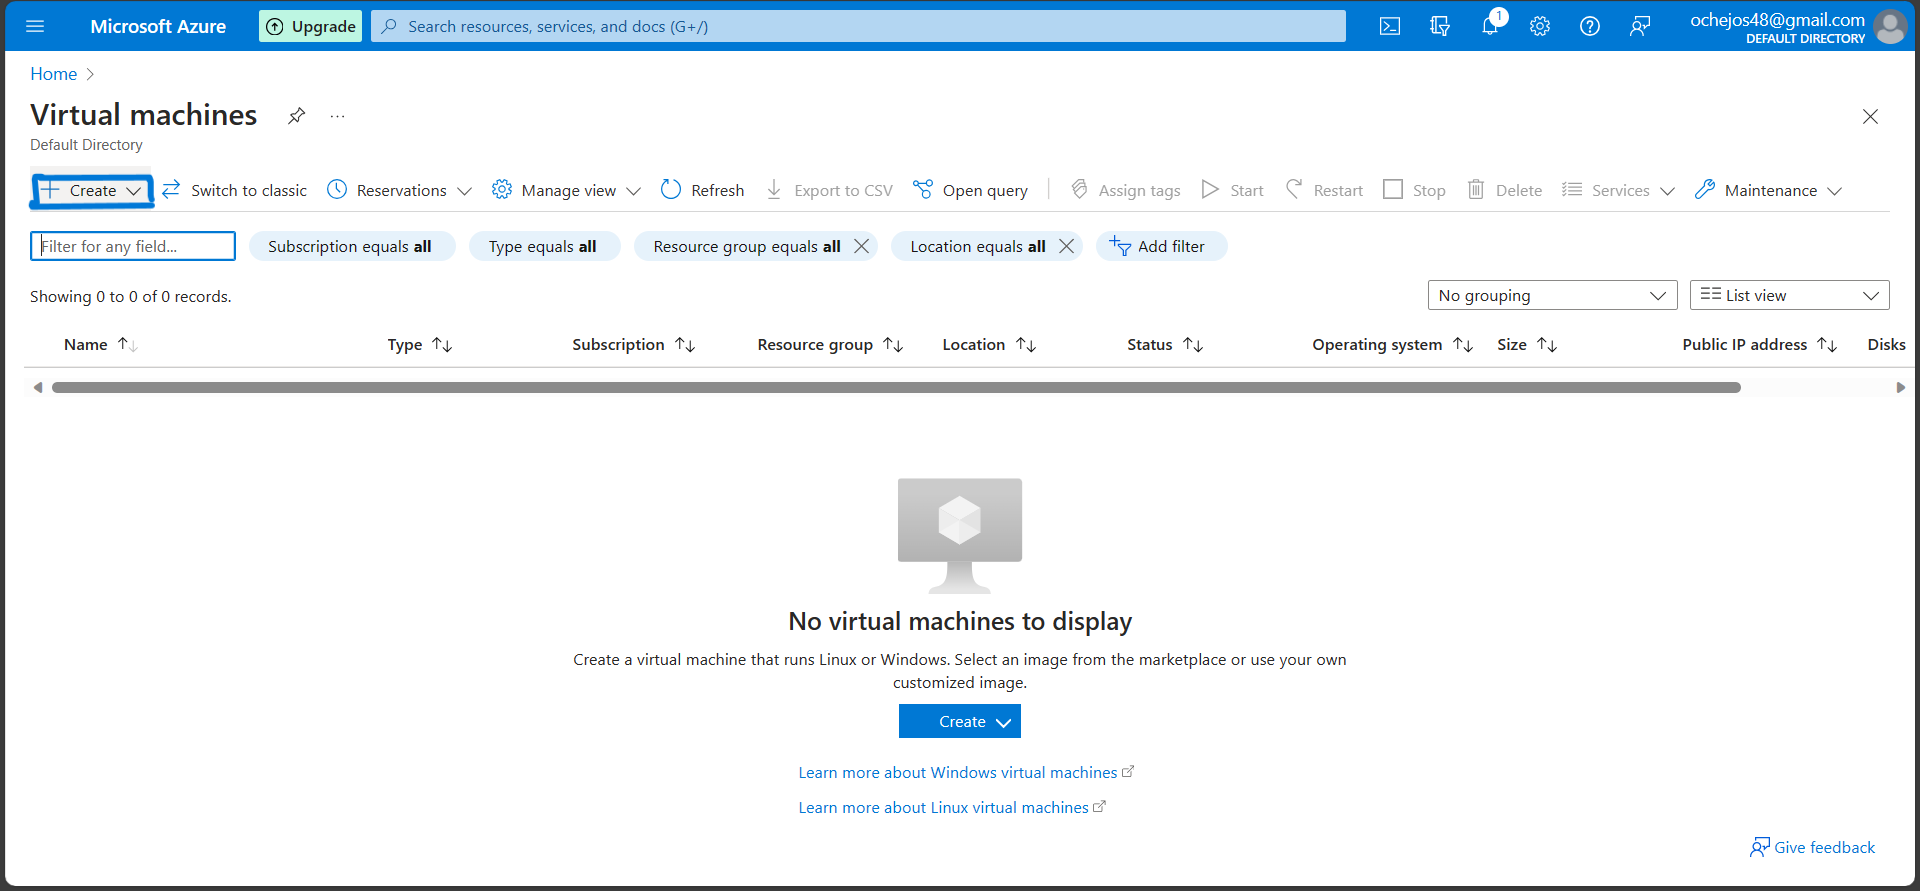
(d) Click "Create" as highlighted above and you will be directed to the to the "Basic" page .
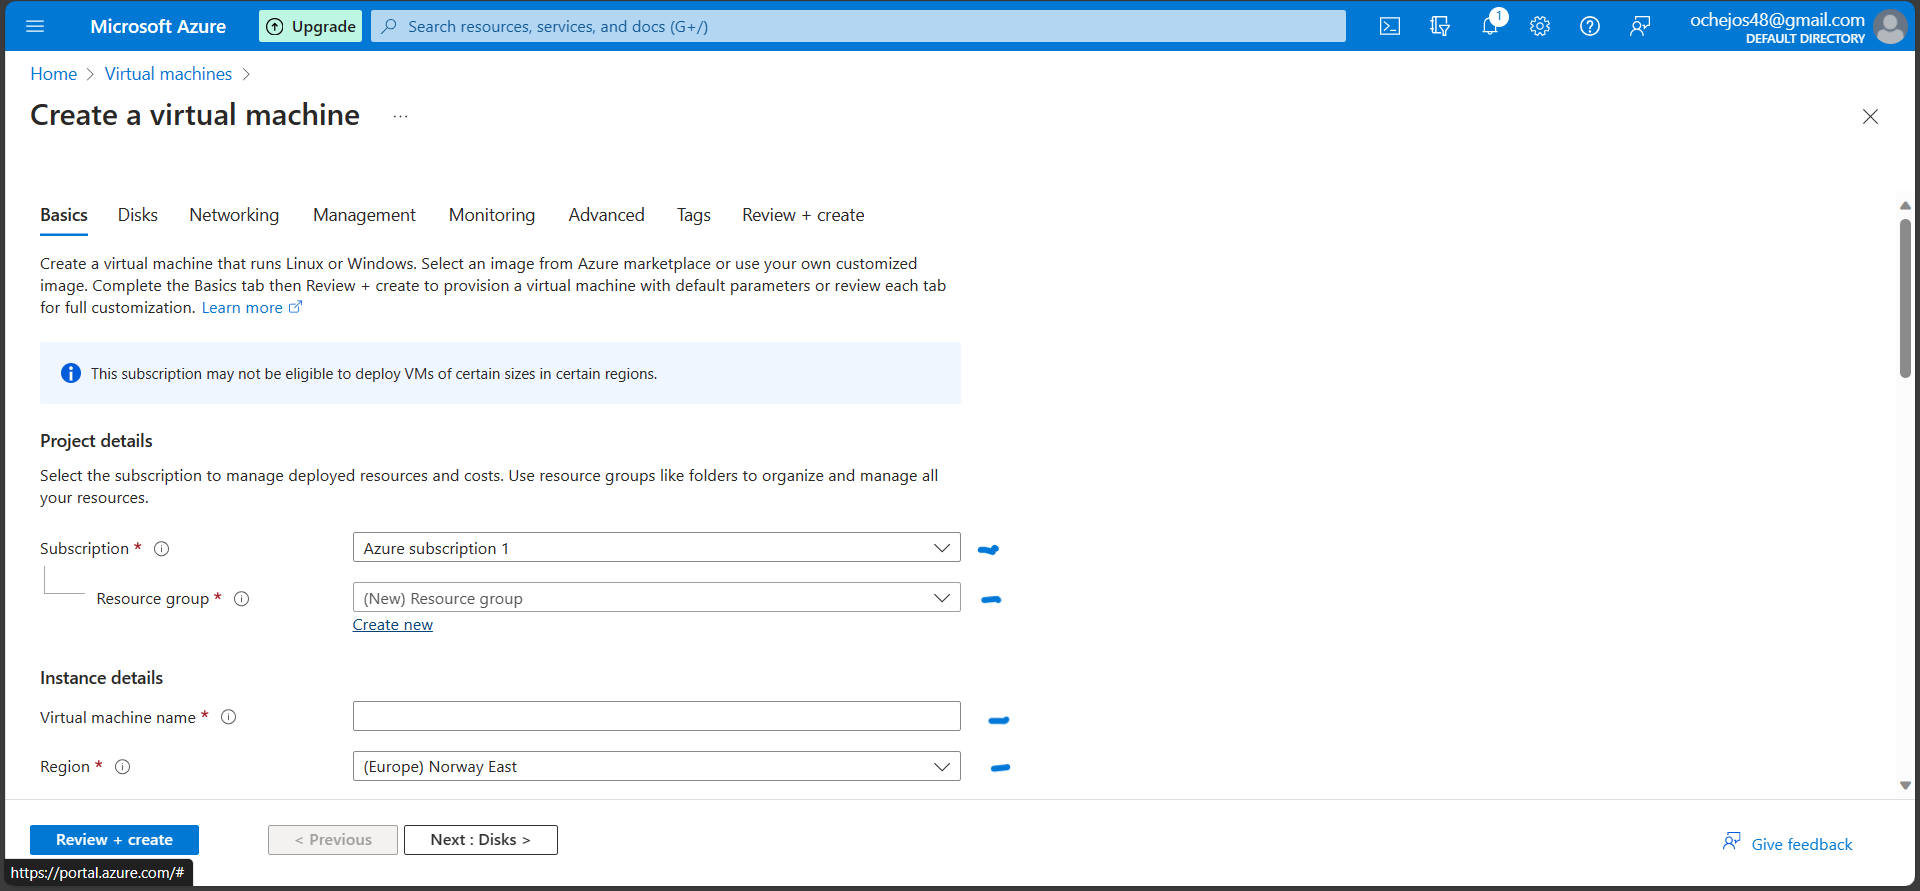
The basic page contains the "project details"
Project details
In the project details category, we have the "Subscription" and "Resource group"
(a) Subscription
An Azure subscription gives you access to Microsoft Azure services.
Click on the drop down button to choose your subscription.
(b) Resource Group
A resource group is a container that holds related resources for an Azure solution. Give your "Resource group" a name.
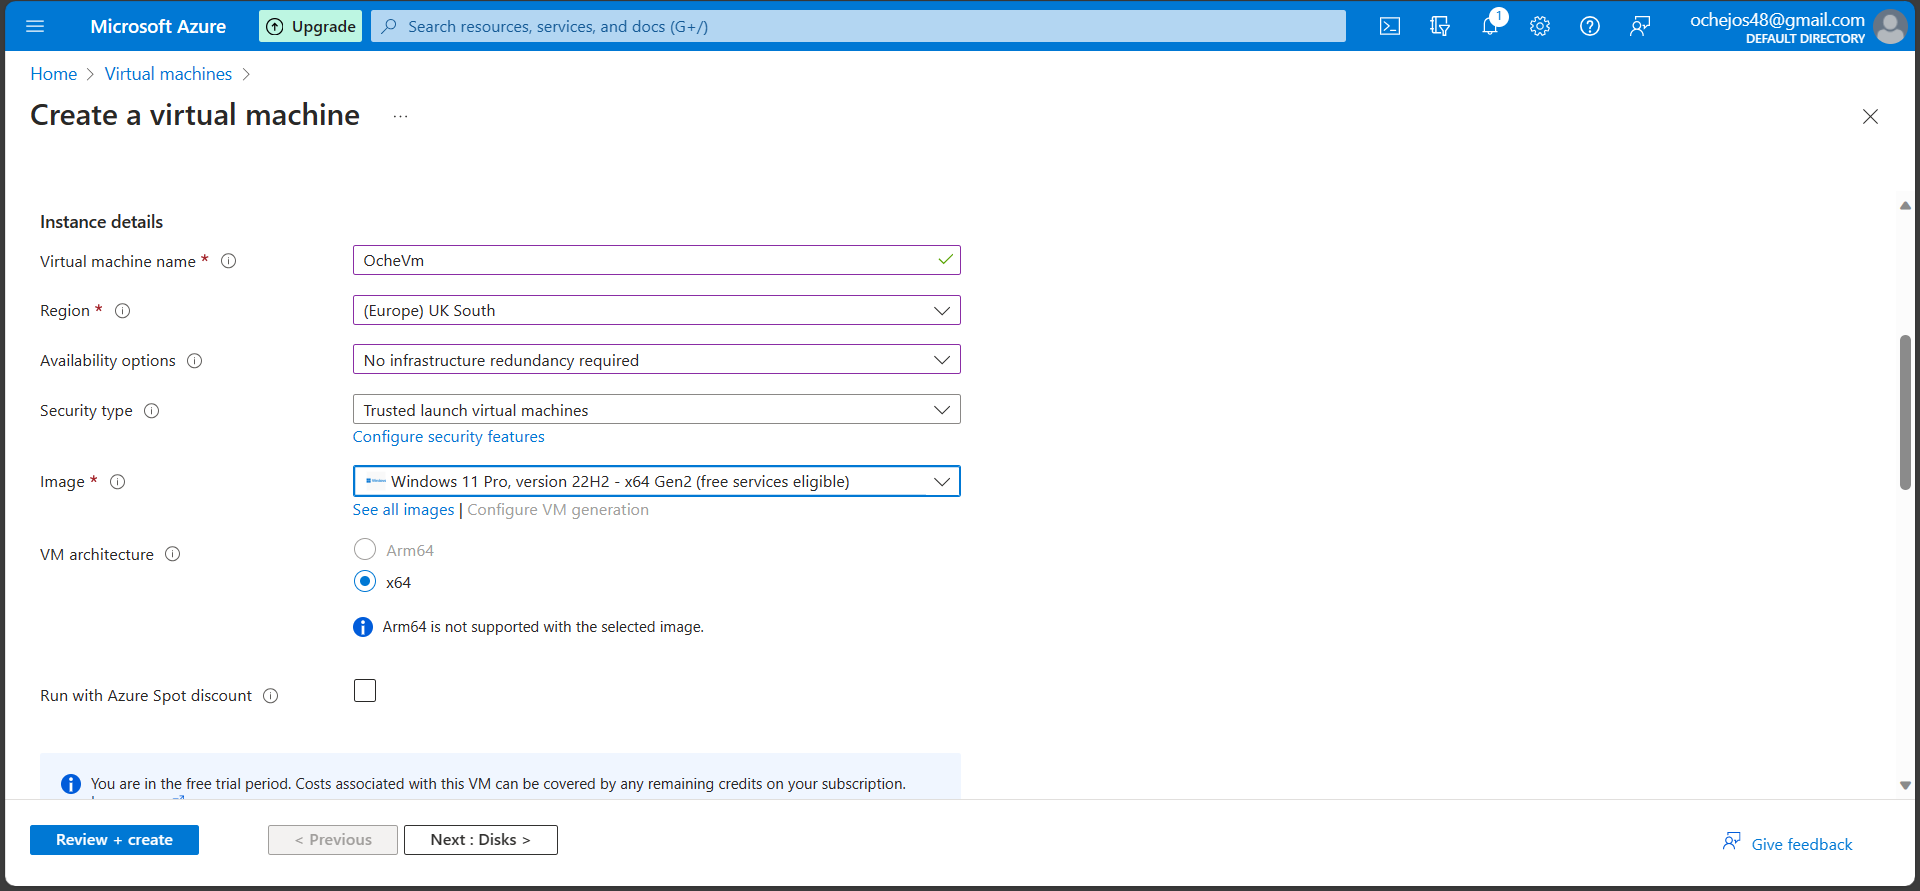
Instance details
(a) Give your Virtual Machine a name
(b) Select the "Region" you want your virtual machine to be.
(c) click on the drop down to select your "Availability zone"
(d) Select your "Security type" from the drop down.
(e) In the "Image" section, select Windows 11 Pro from the drop down.
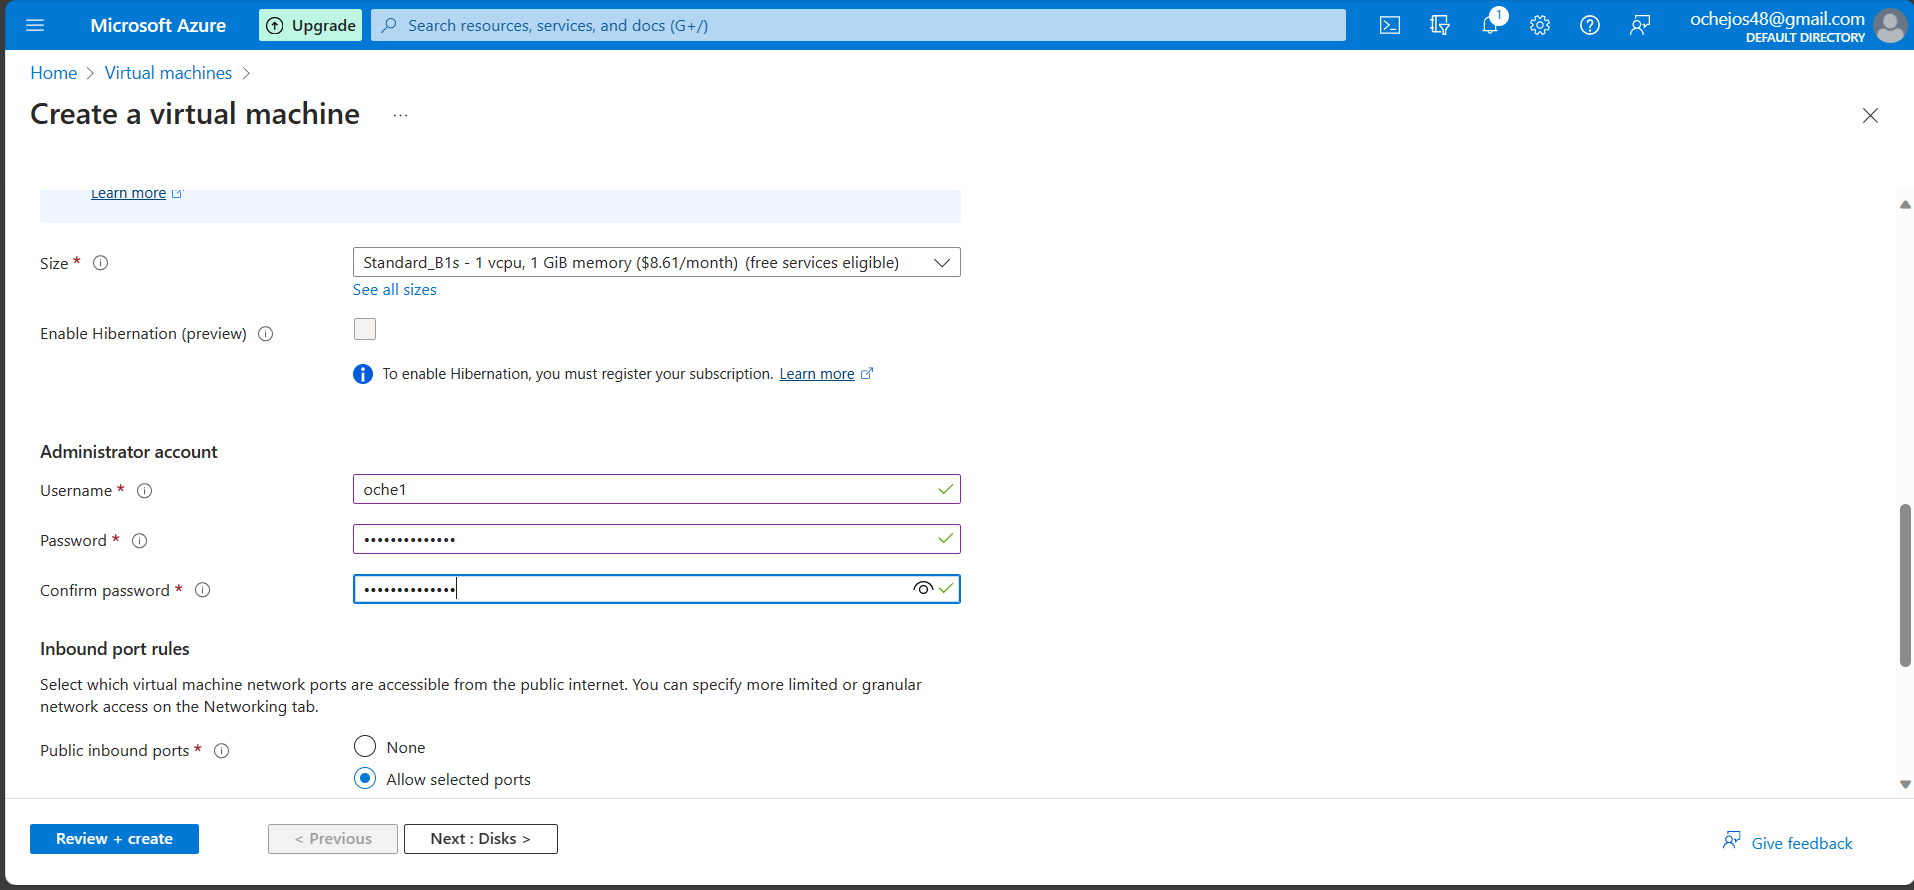
(f) In the "Size" section, click on see all sizes and leave the other information in it's default state.
See examples below
. Administrator Account
(a) Give your account a username and password. Confirm the password.
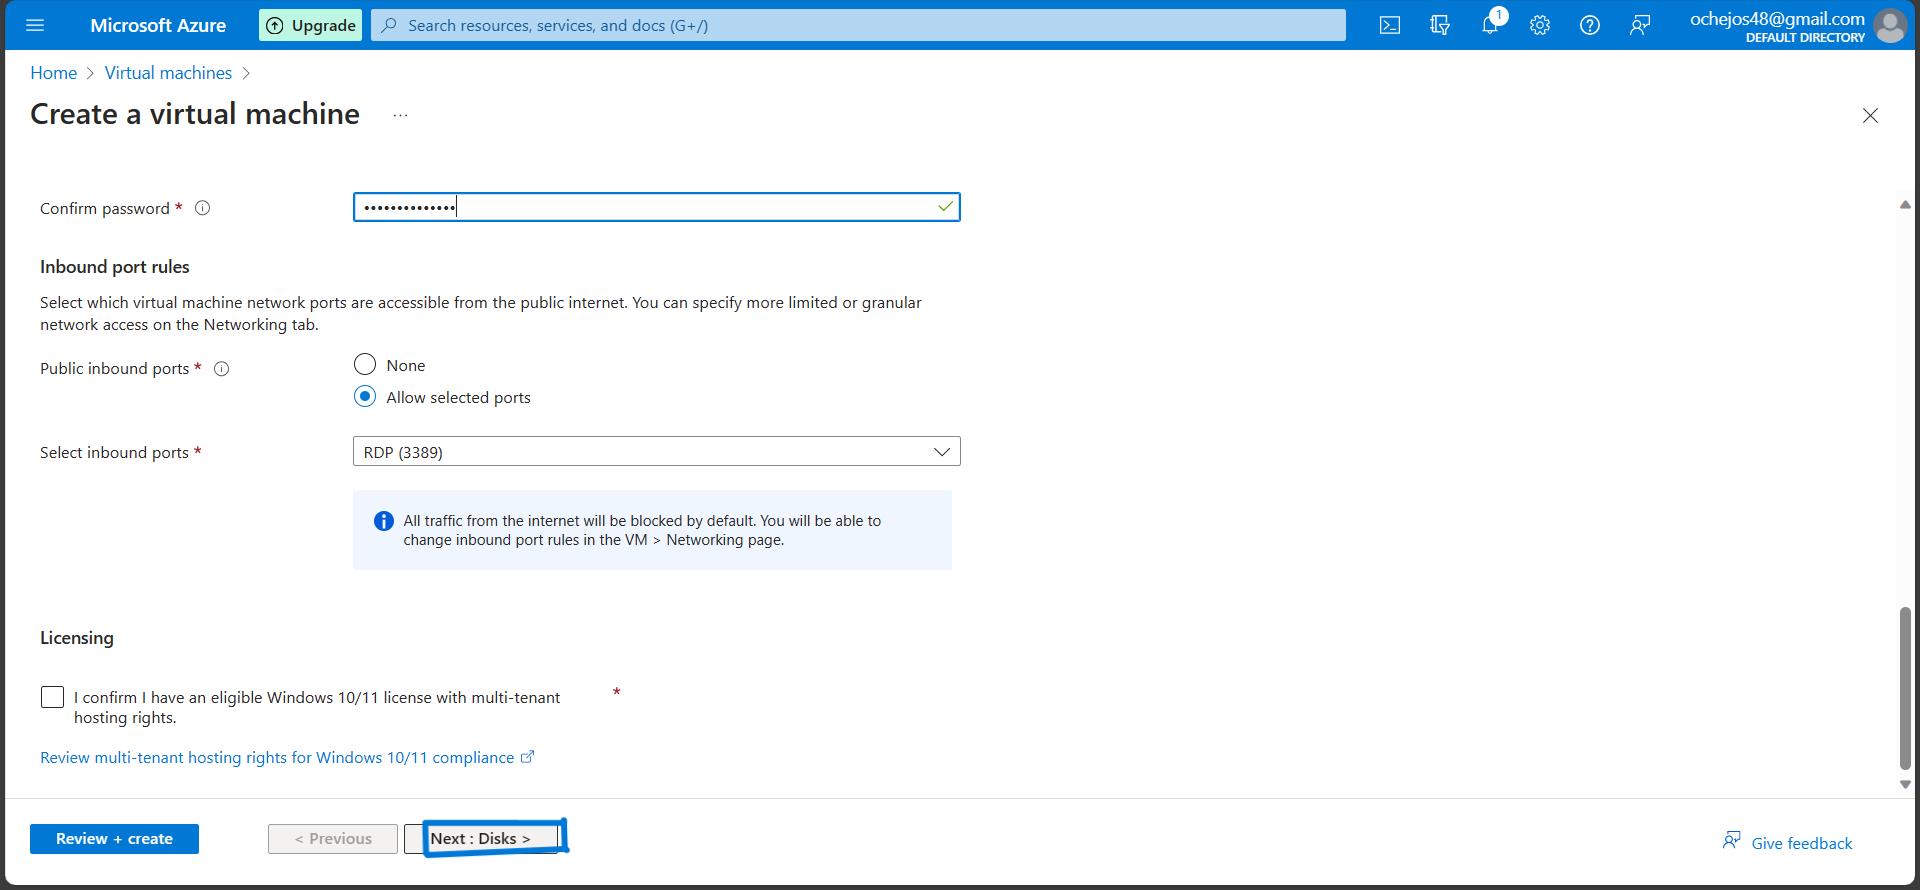
Inbound port rules
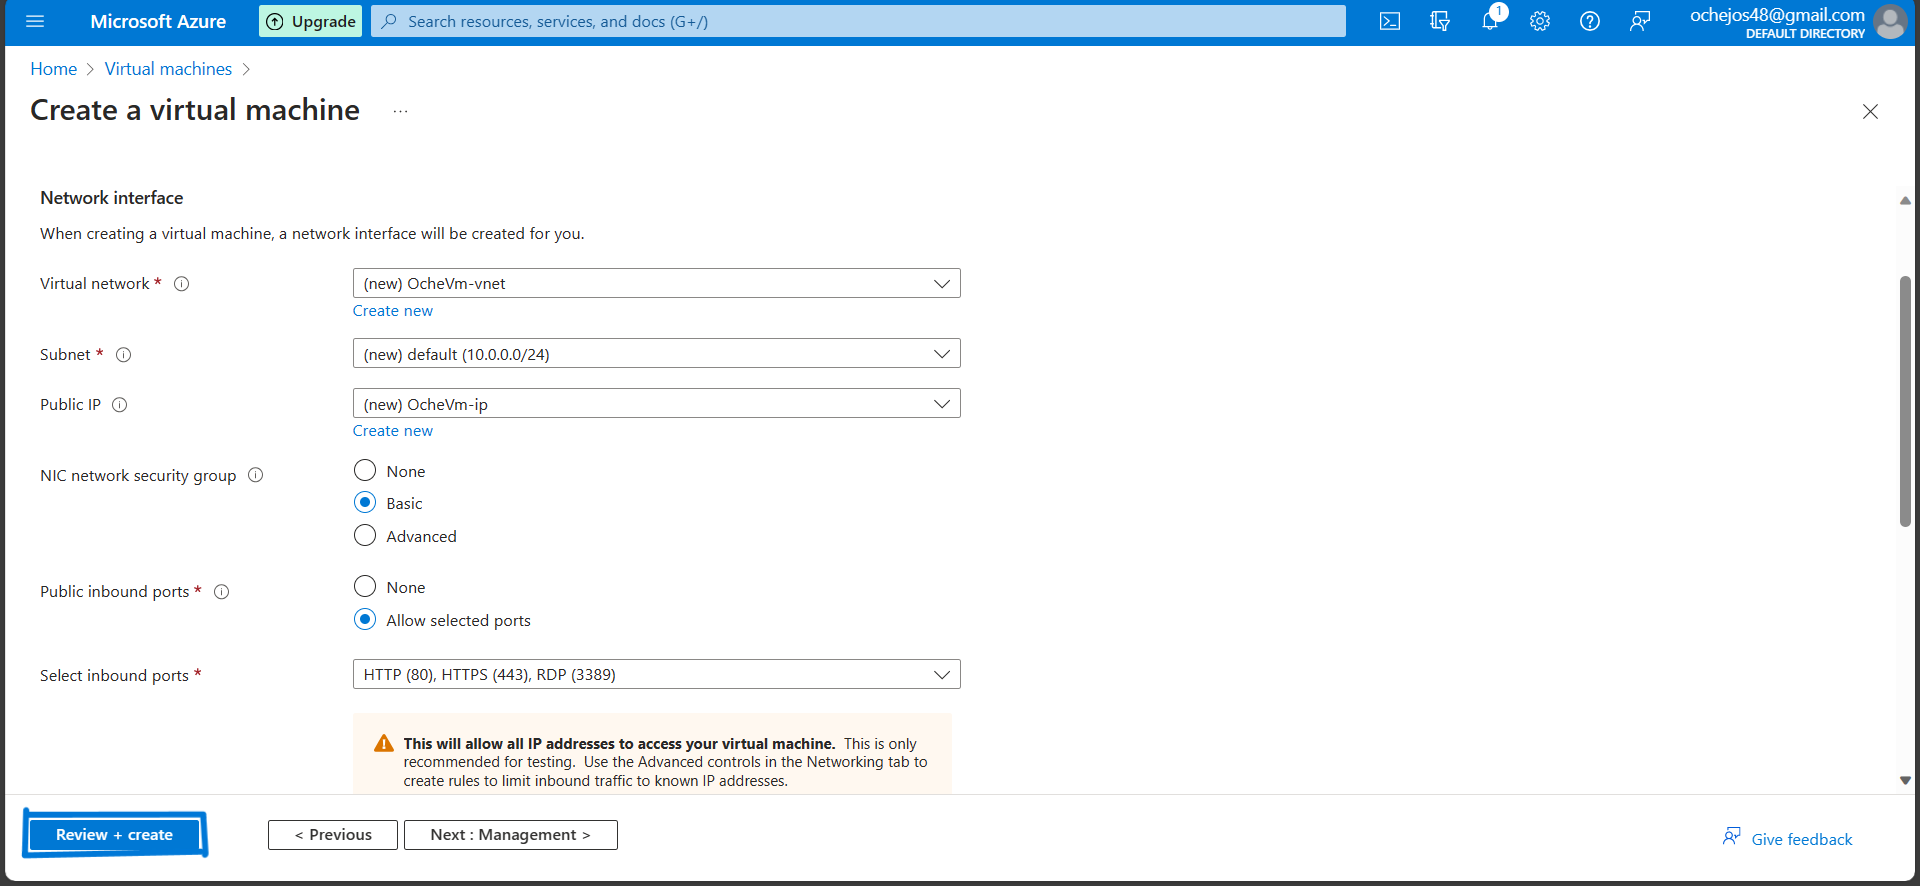
(a) In this section, select "Allow selected ports" and then select "RDP 3389"
This port will give you remote access to your physical work desktop computer.
(b) Click on "Next:Disk>" to direct you to the Disk page.
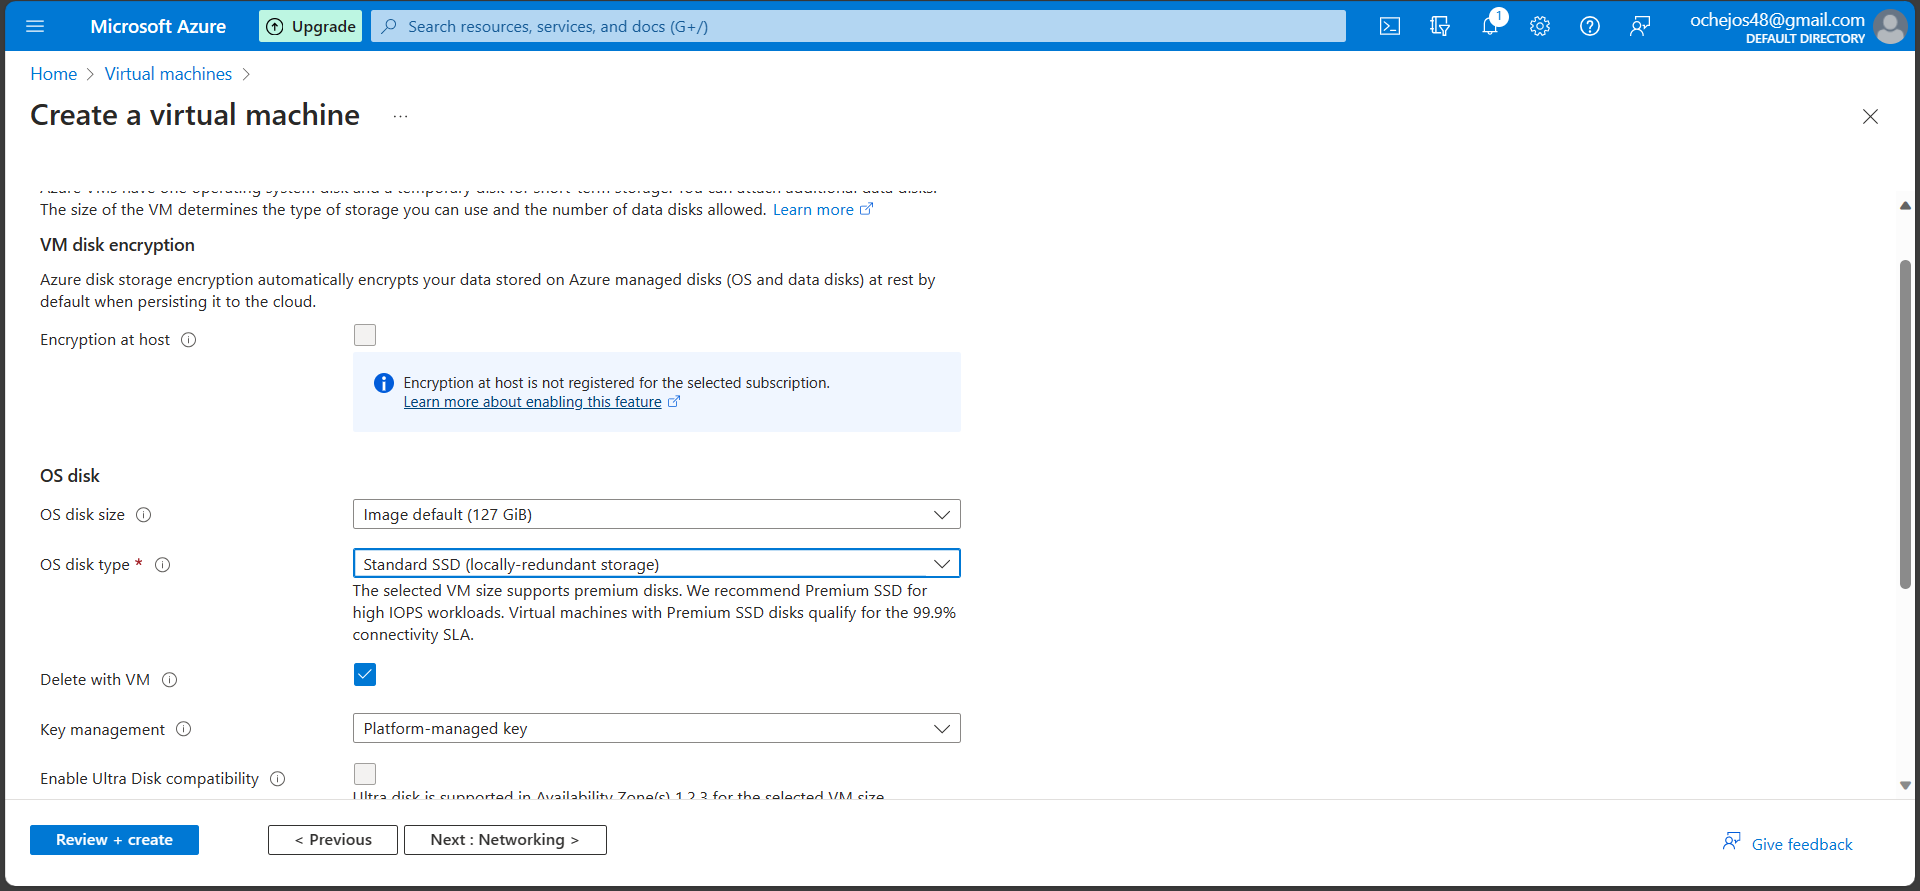
Disk page
(a) On this page, Click on the OS disk type dropdown and select "Standard SSD" or any disk type of your choice and leave the other columns as default.
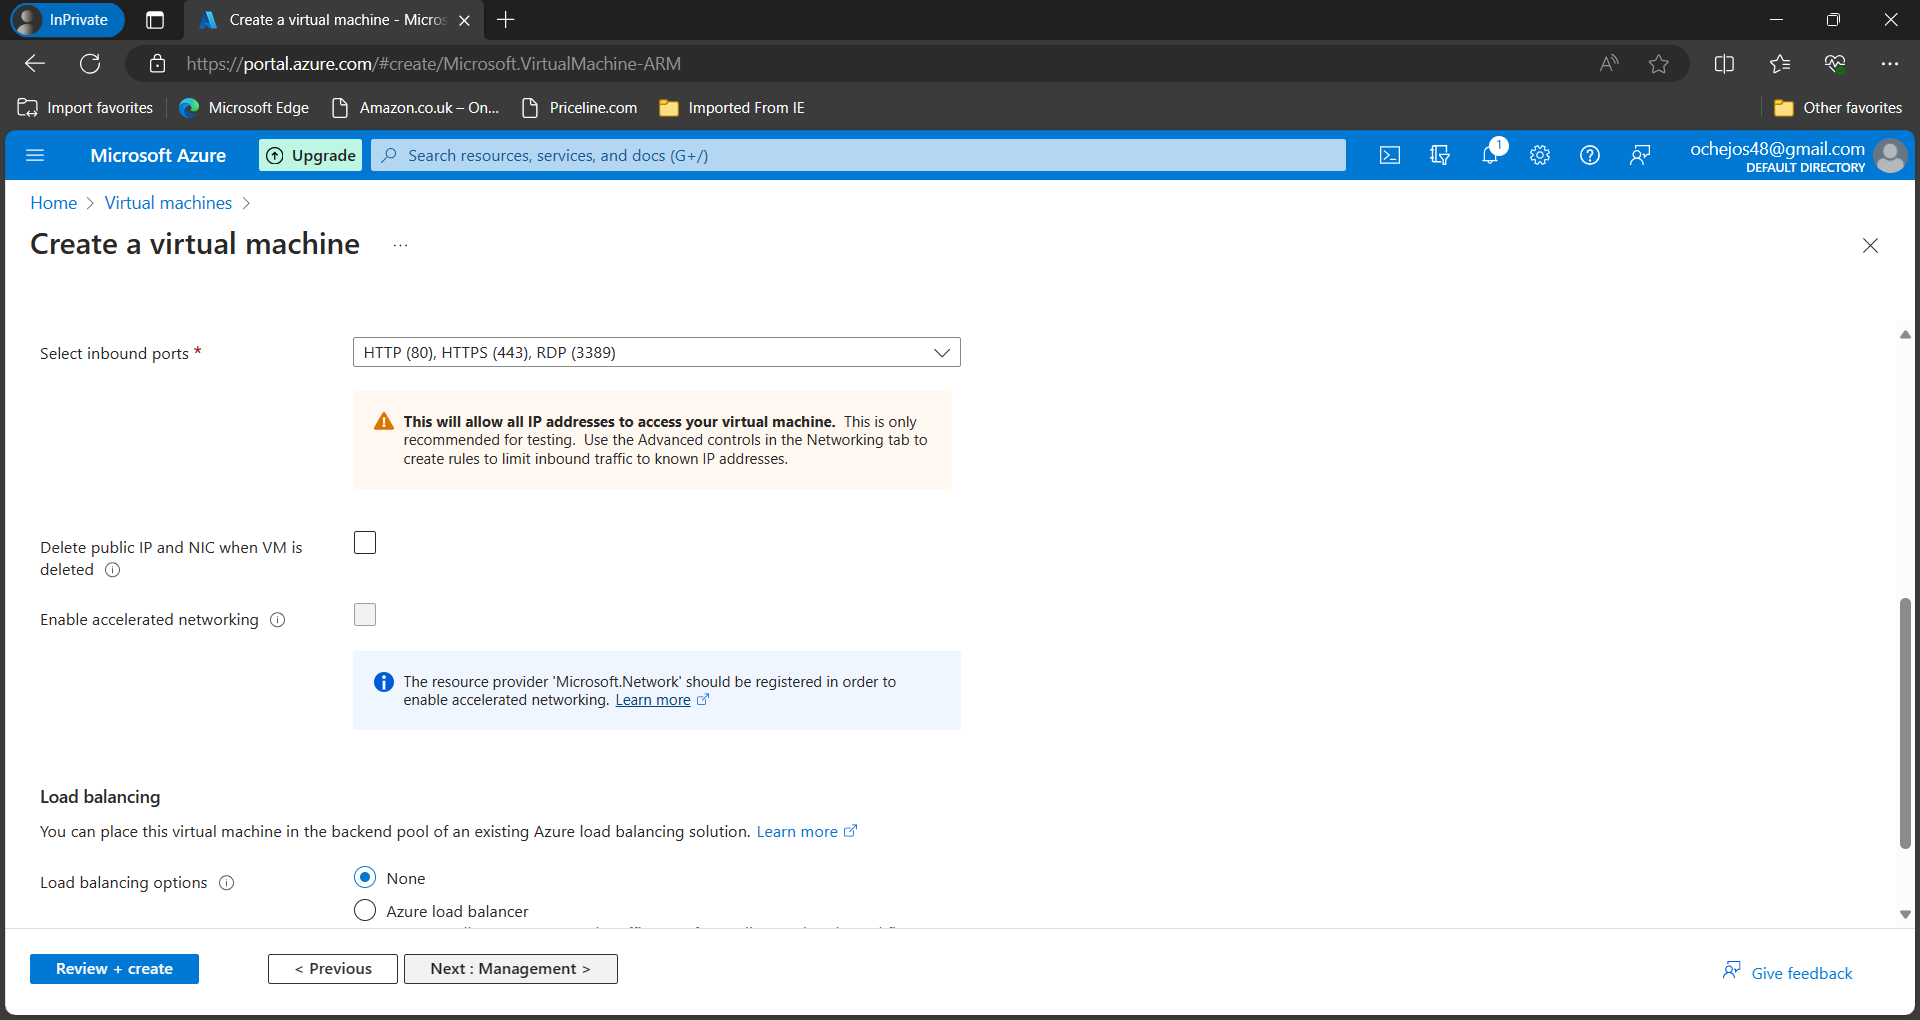
(b) Leave the networking, management, monitoring and advanced pages as default.
Skip to the Tag page.
Tag
(a) give your tag a name.
(b) Next, click on "Review + Create"
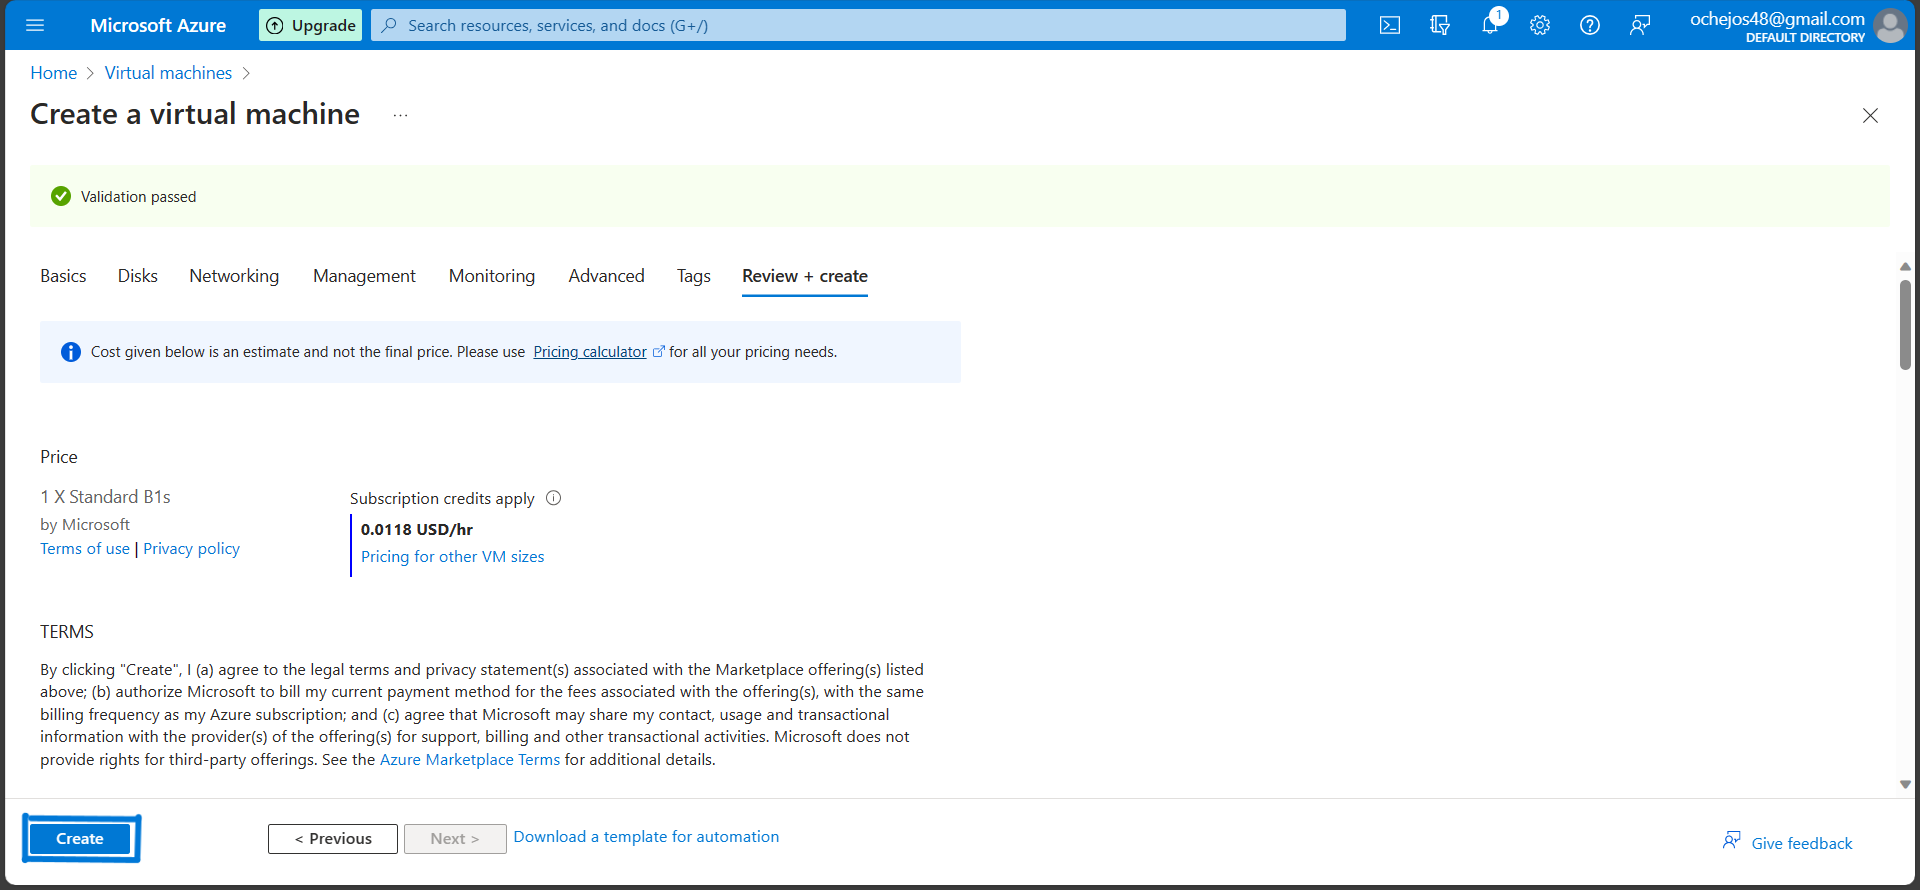
(c) Review the summary of your Virtual Machine configuration and click on the
Review + Create button to begin the deployment process.
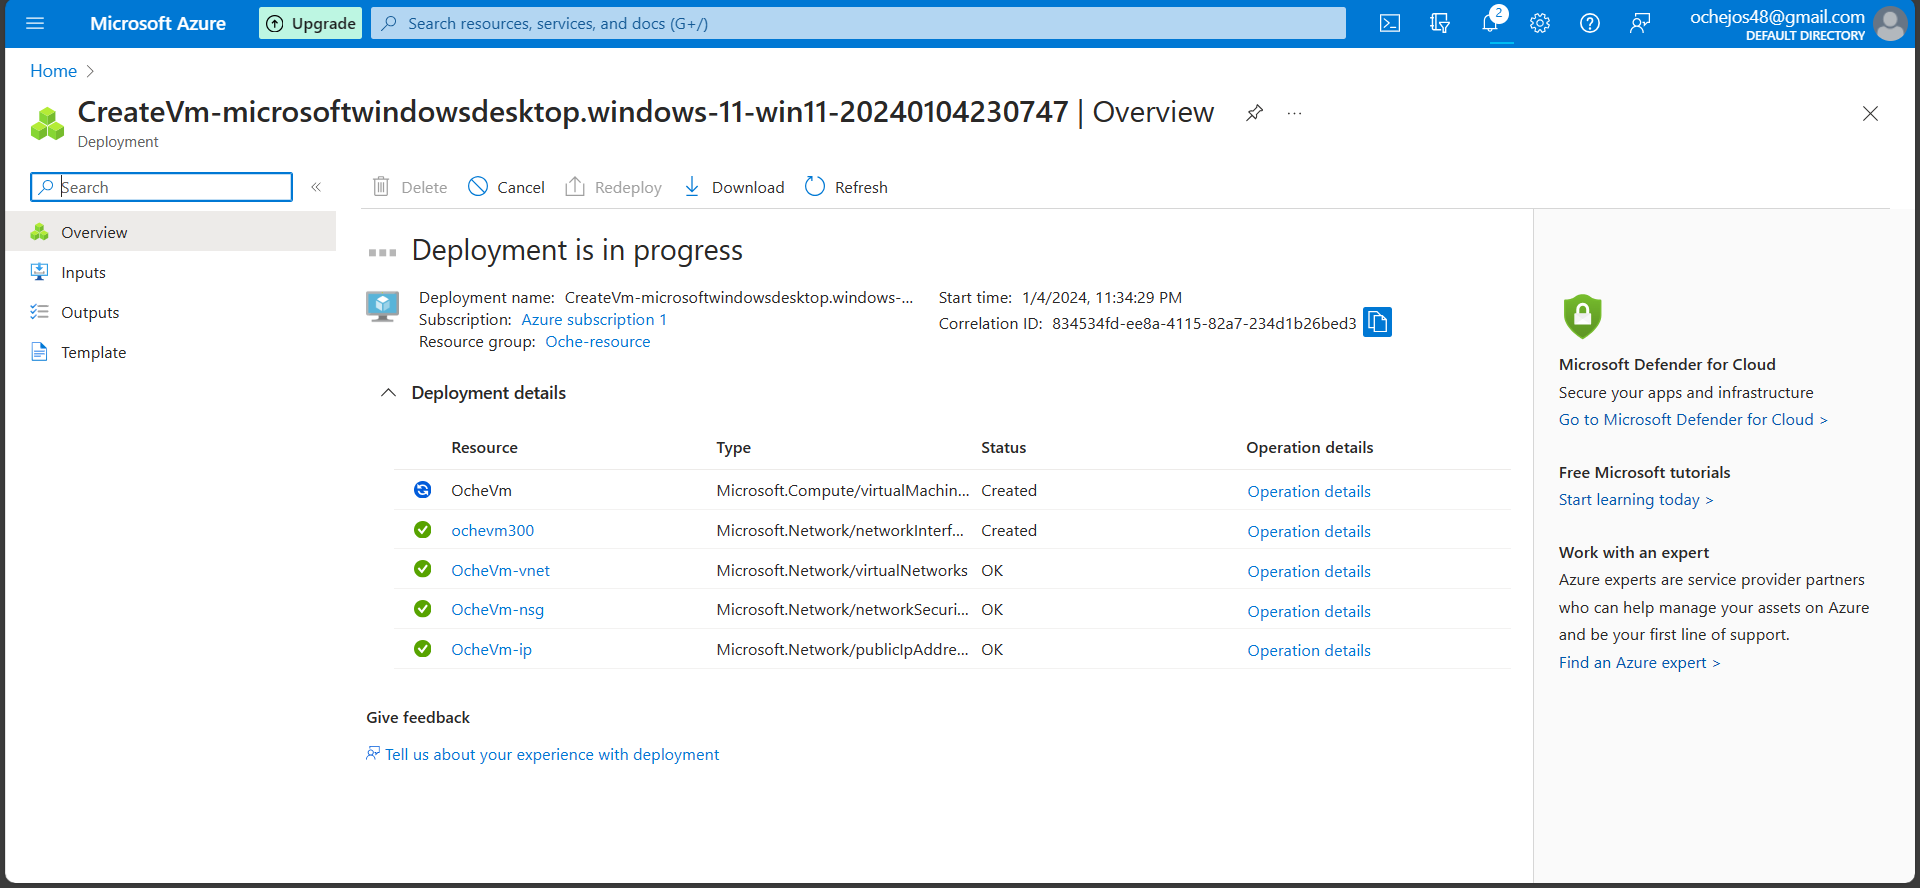
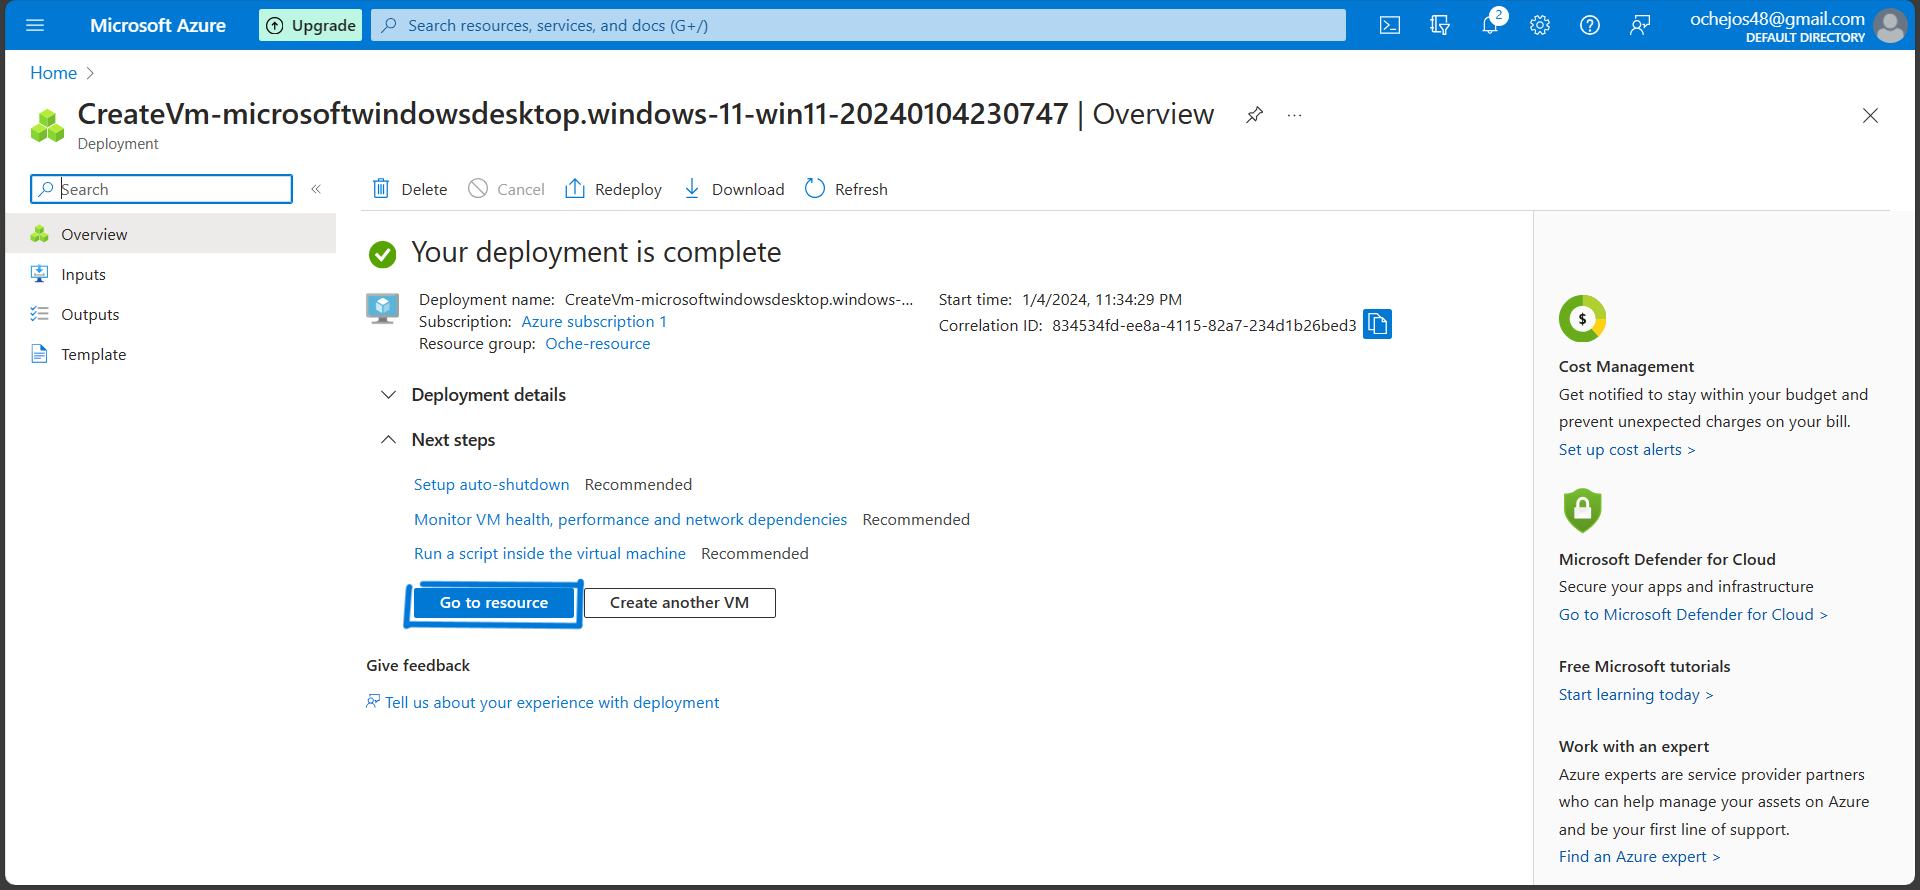
(d) Your deployment is complete. Go to resource.
Connect to Windows Virtual Machine
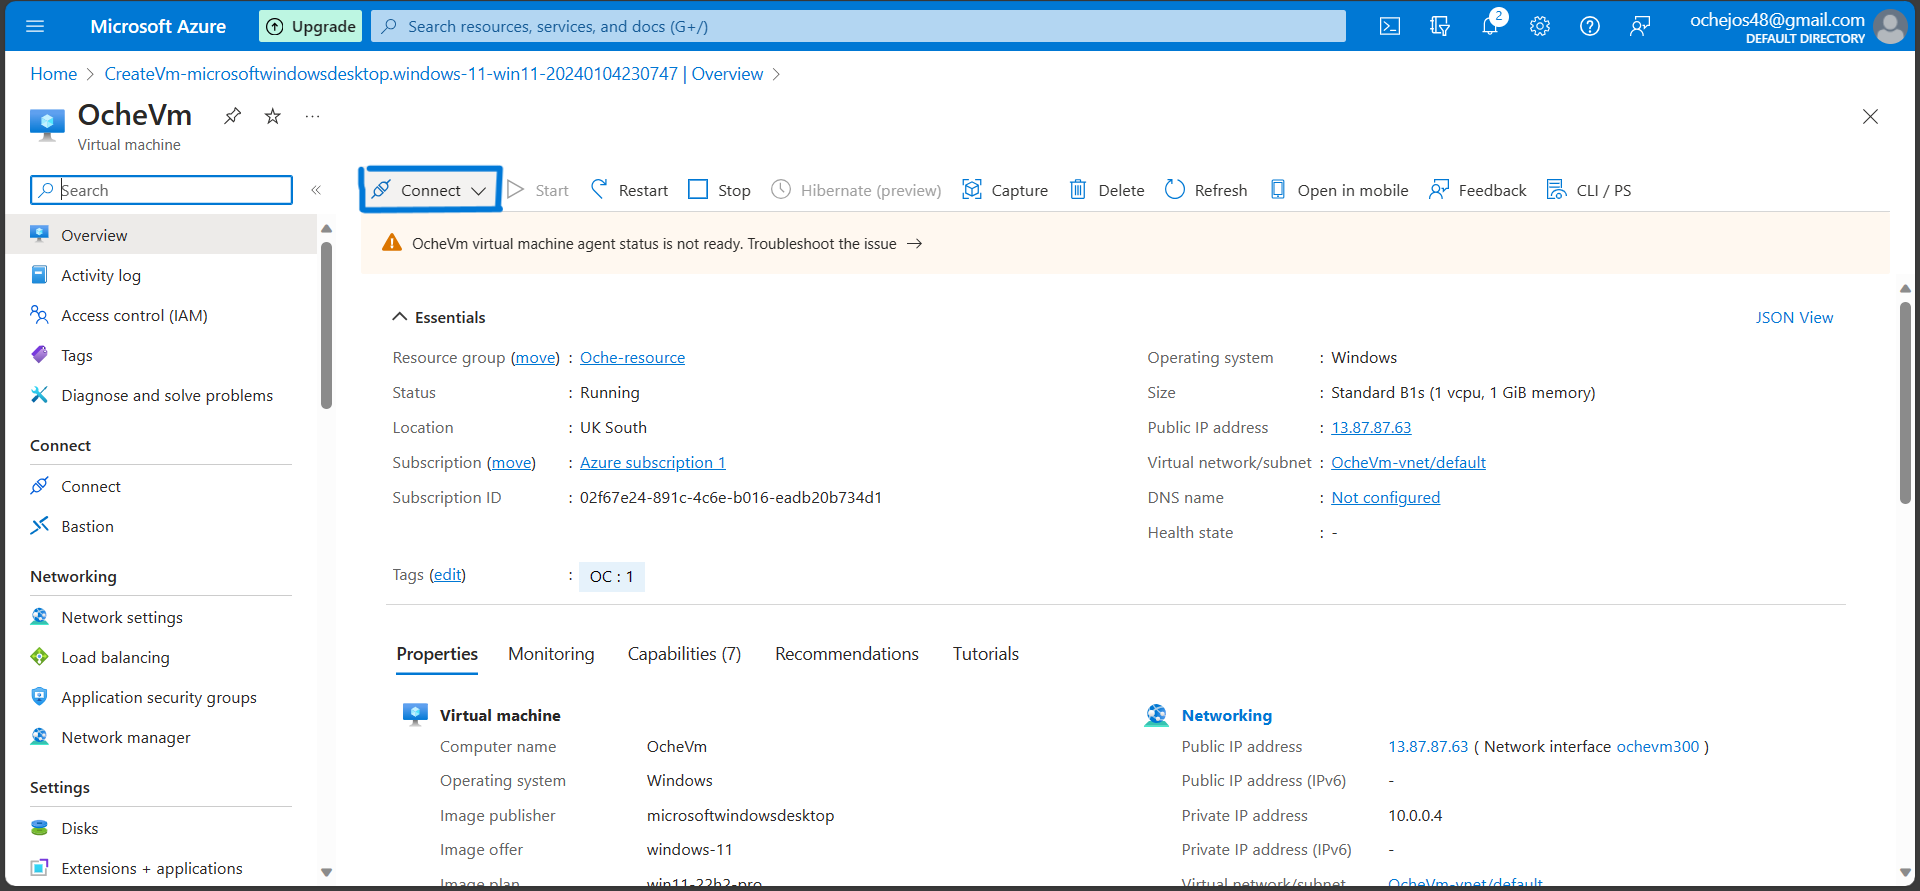
The following directions shows how to connect to your windows 11 operating system;
On the overview page of your virtual machine, click "connect"
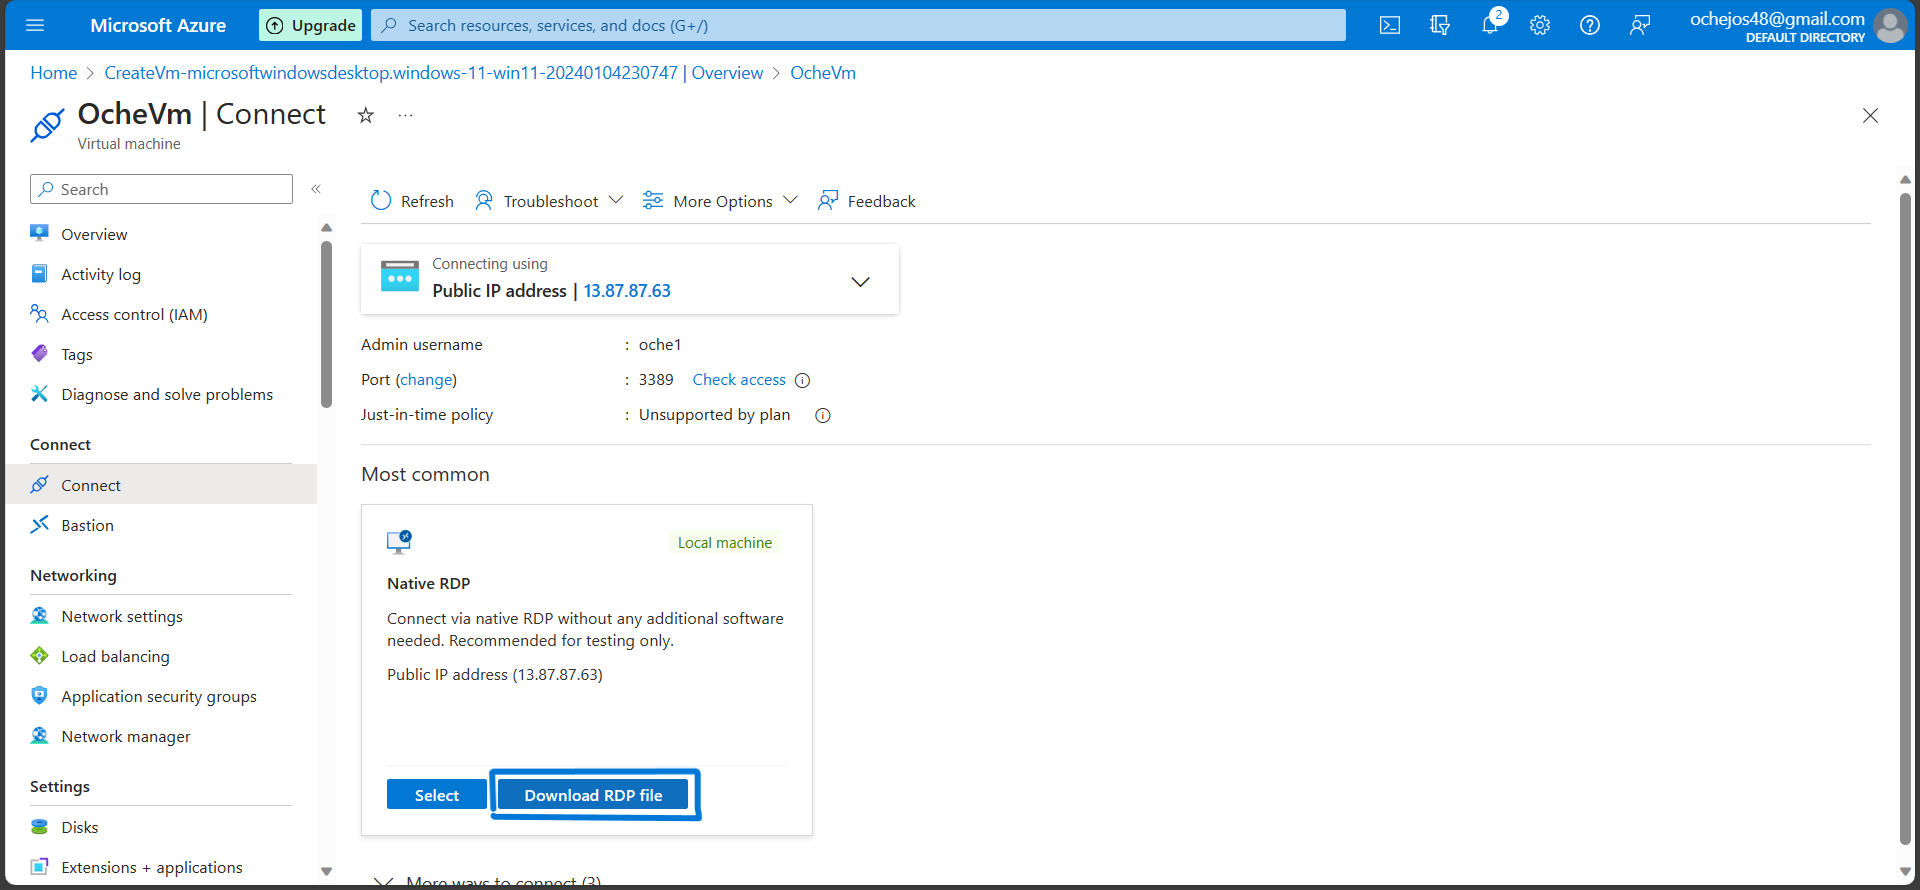
Connect with RDP, leave the default settings and click the download RDP file to your file.
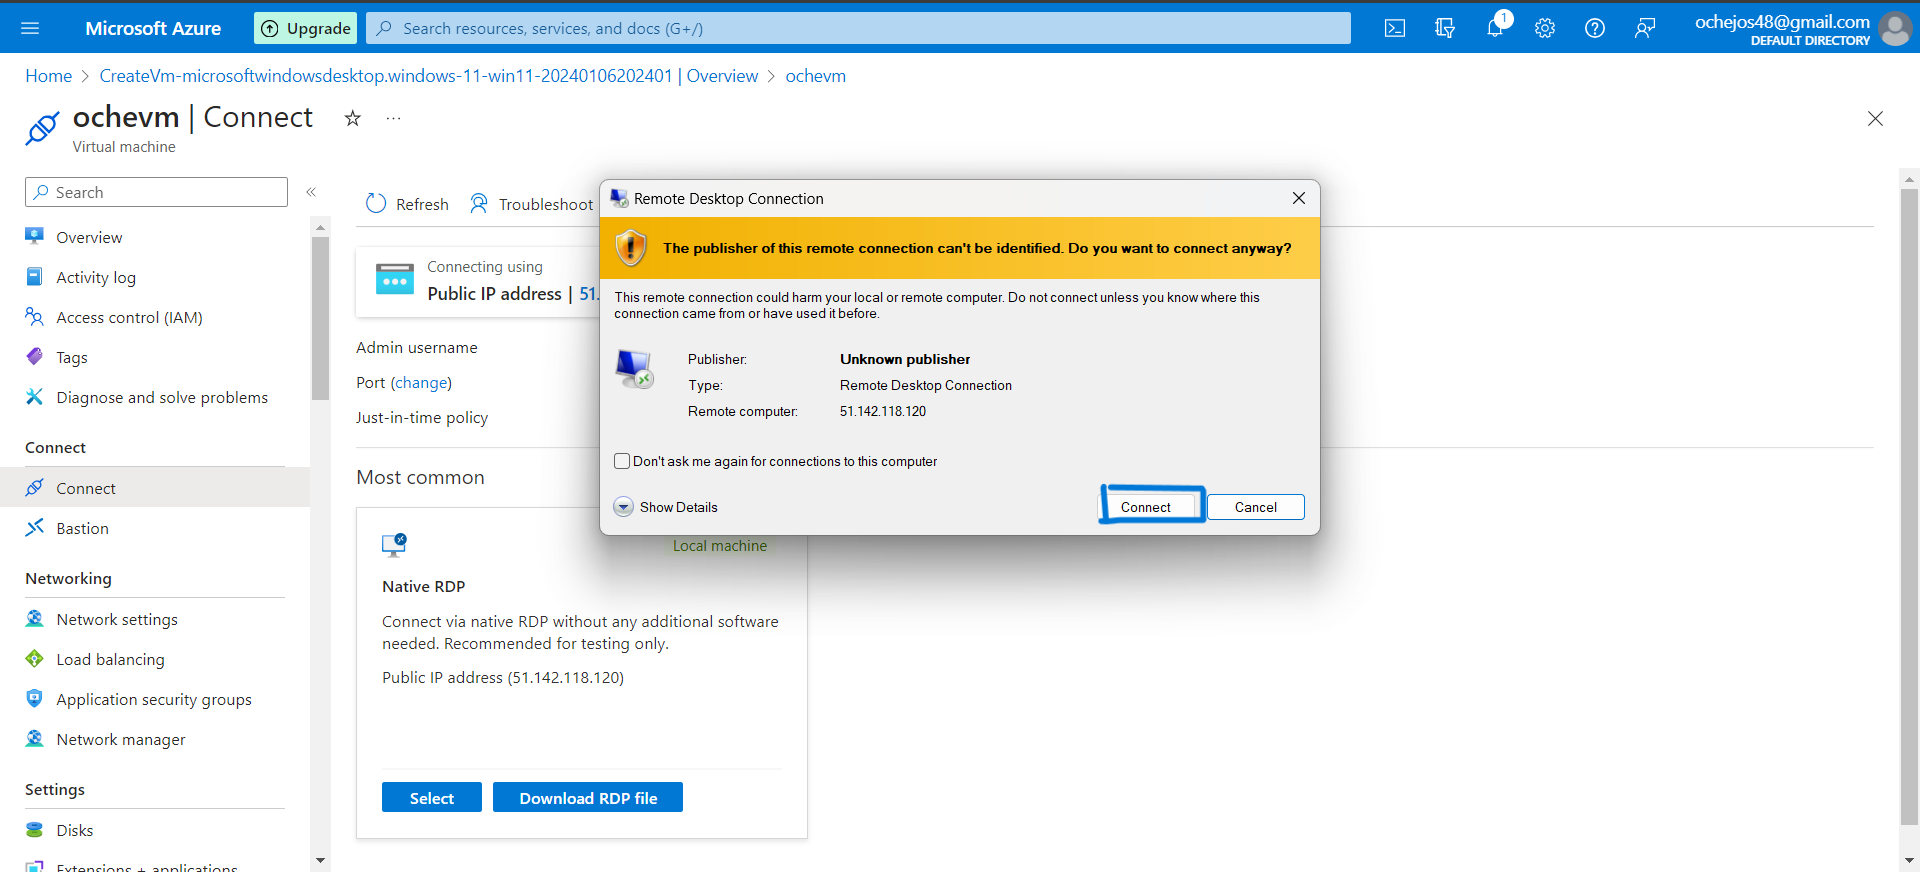
3. Open the downloaded RDP file and click "connect"
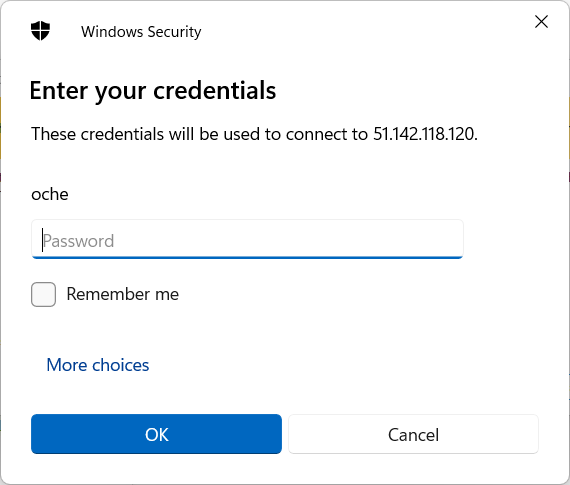
4. Input your username and password and click "okay"
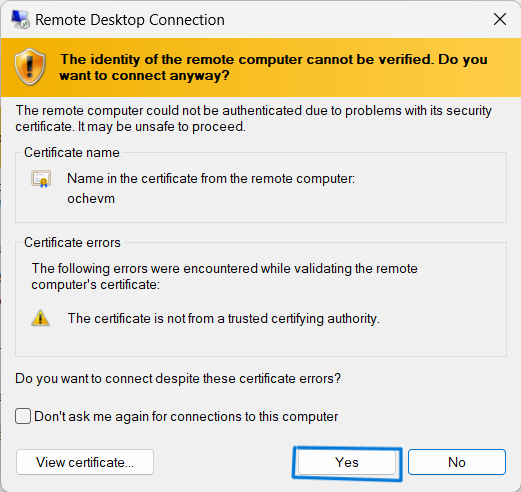
5. click "Yes" to prompt remote desktop connection
6. Welcome!
You are connected to windows 11 Pro
HOW TO DELETE YOUR RESOURCE GROUP OR VIRTUAL MACHINE AND IT'S DEPENDENTS
In running your virtual machine, it is important to consider saving cost, and one way to do it is to delete your resource group or virtual machine.
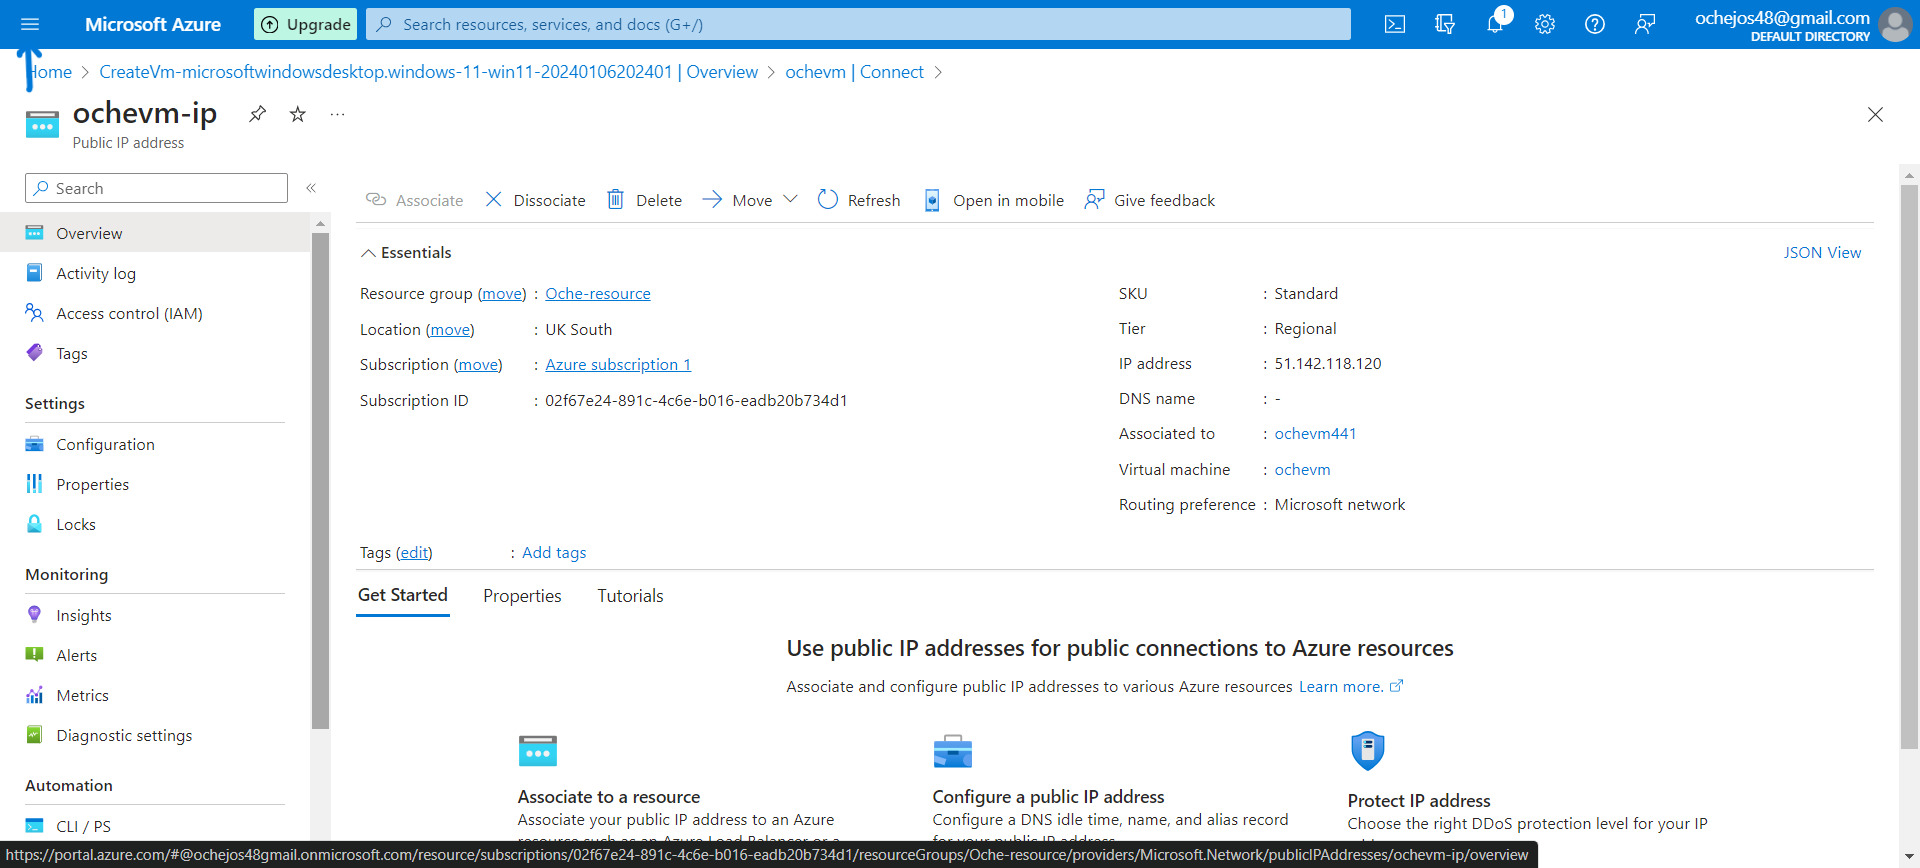
click on the Microsoft Azure menu as shown by the arrow below.
Click on Resource Group and checked all the resources in the resource group as shown below.
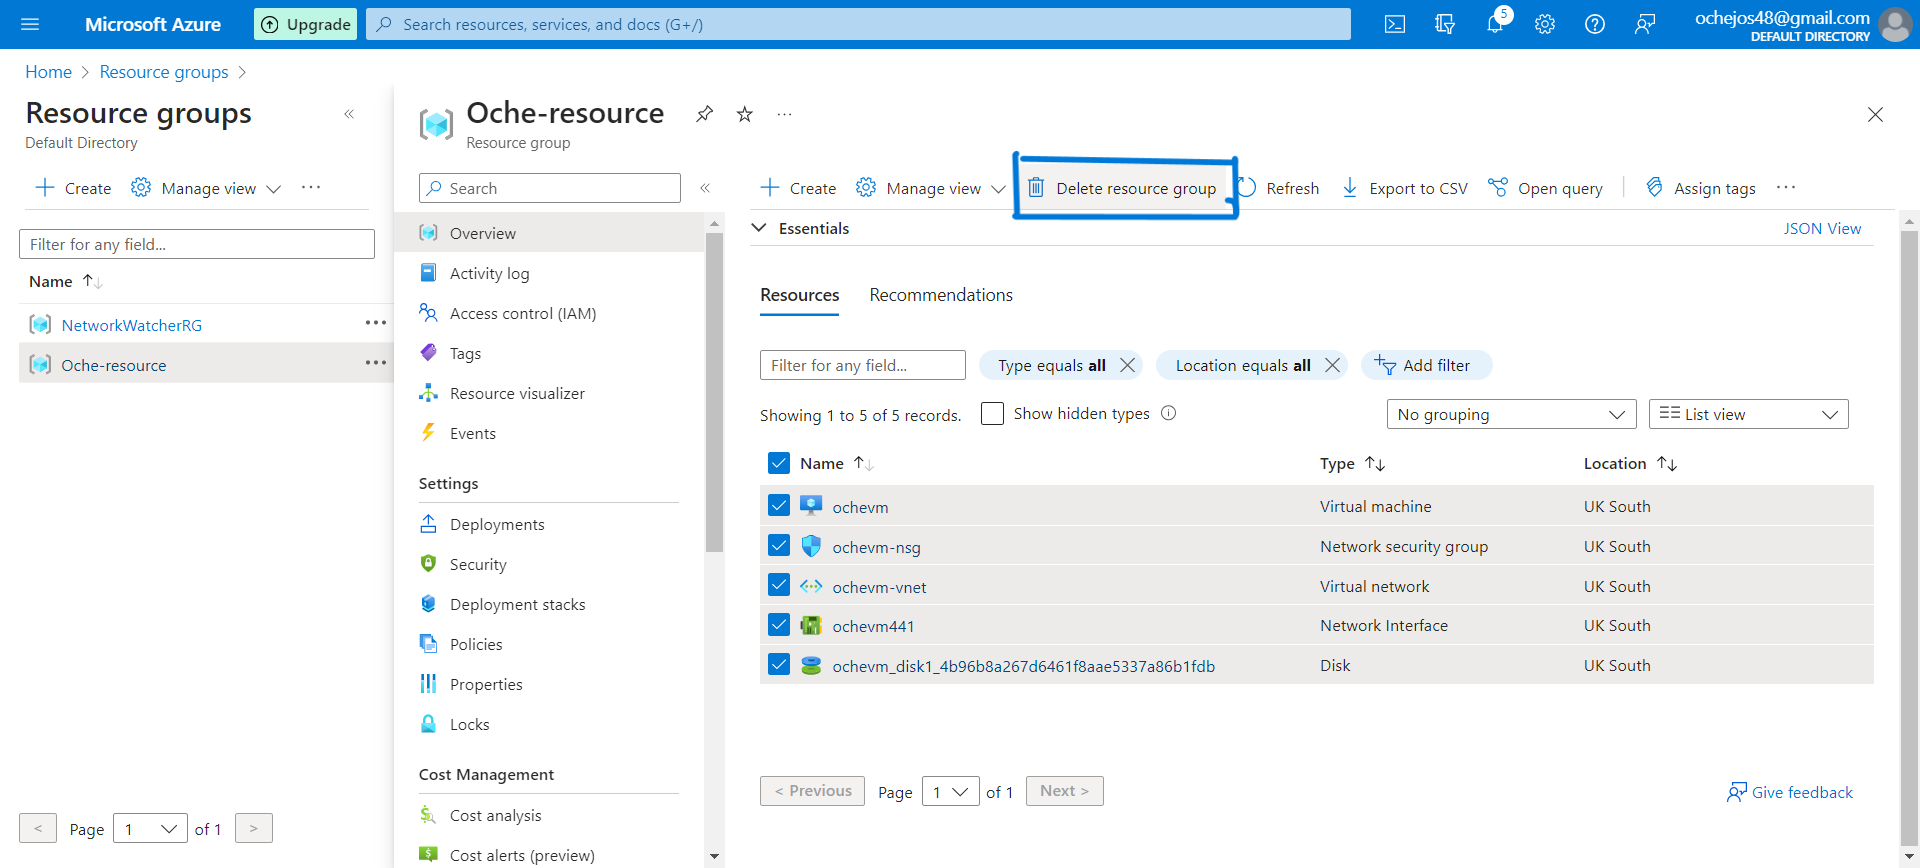
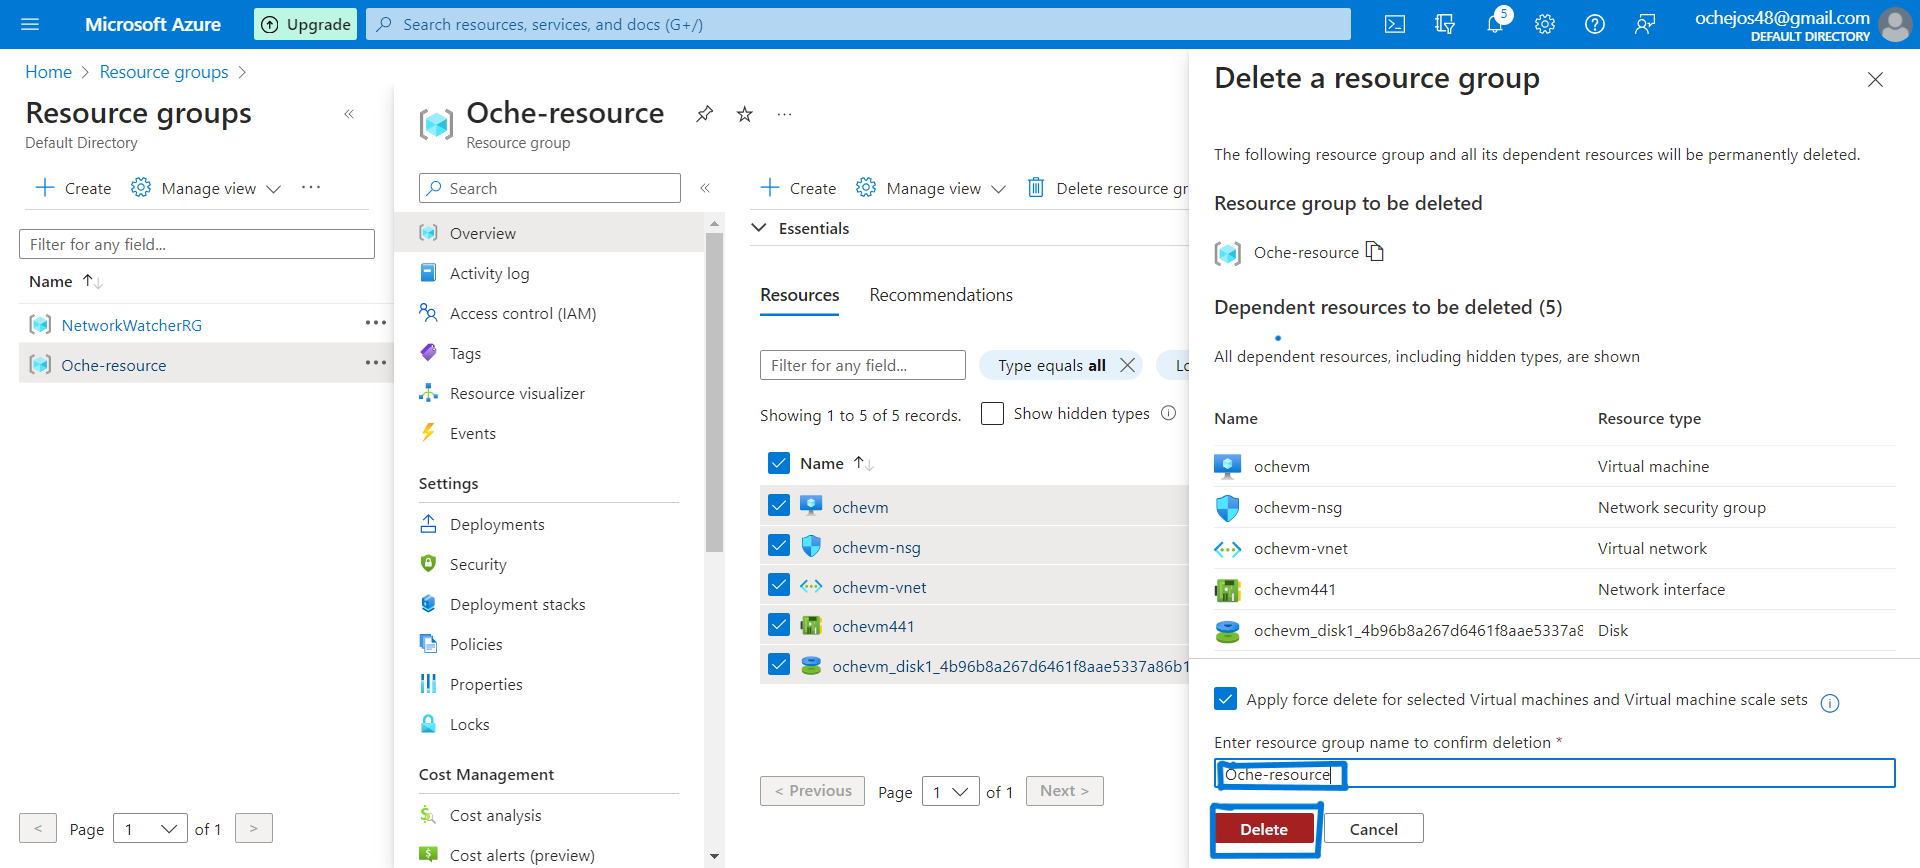
Click the "delete resource group" button and there will be a pop up.
(a) Click "apply force delete for selected virtual machine and virtual machine scale sets".
(b) Enter "the resource group" name to confirm deletion.
(c) Click the "delete" button and it is deleted.
Subscribe to my newsletter
Read articles from Oche Abogonye directly inside your inbox. Subscribe to the newsletter, and don't miss out.
Written by
