Automate JIRA Creation on a Github Event using Python
 Subash Neupane
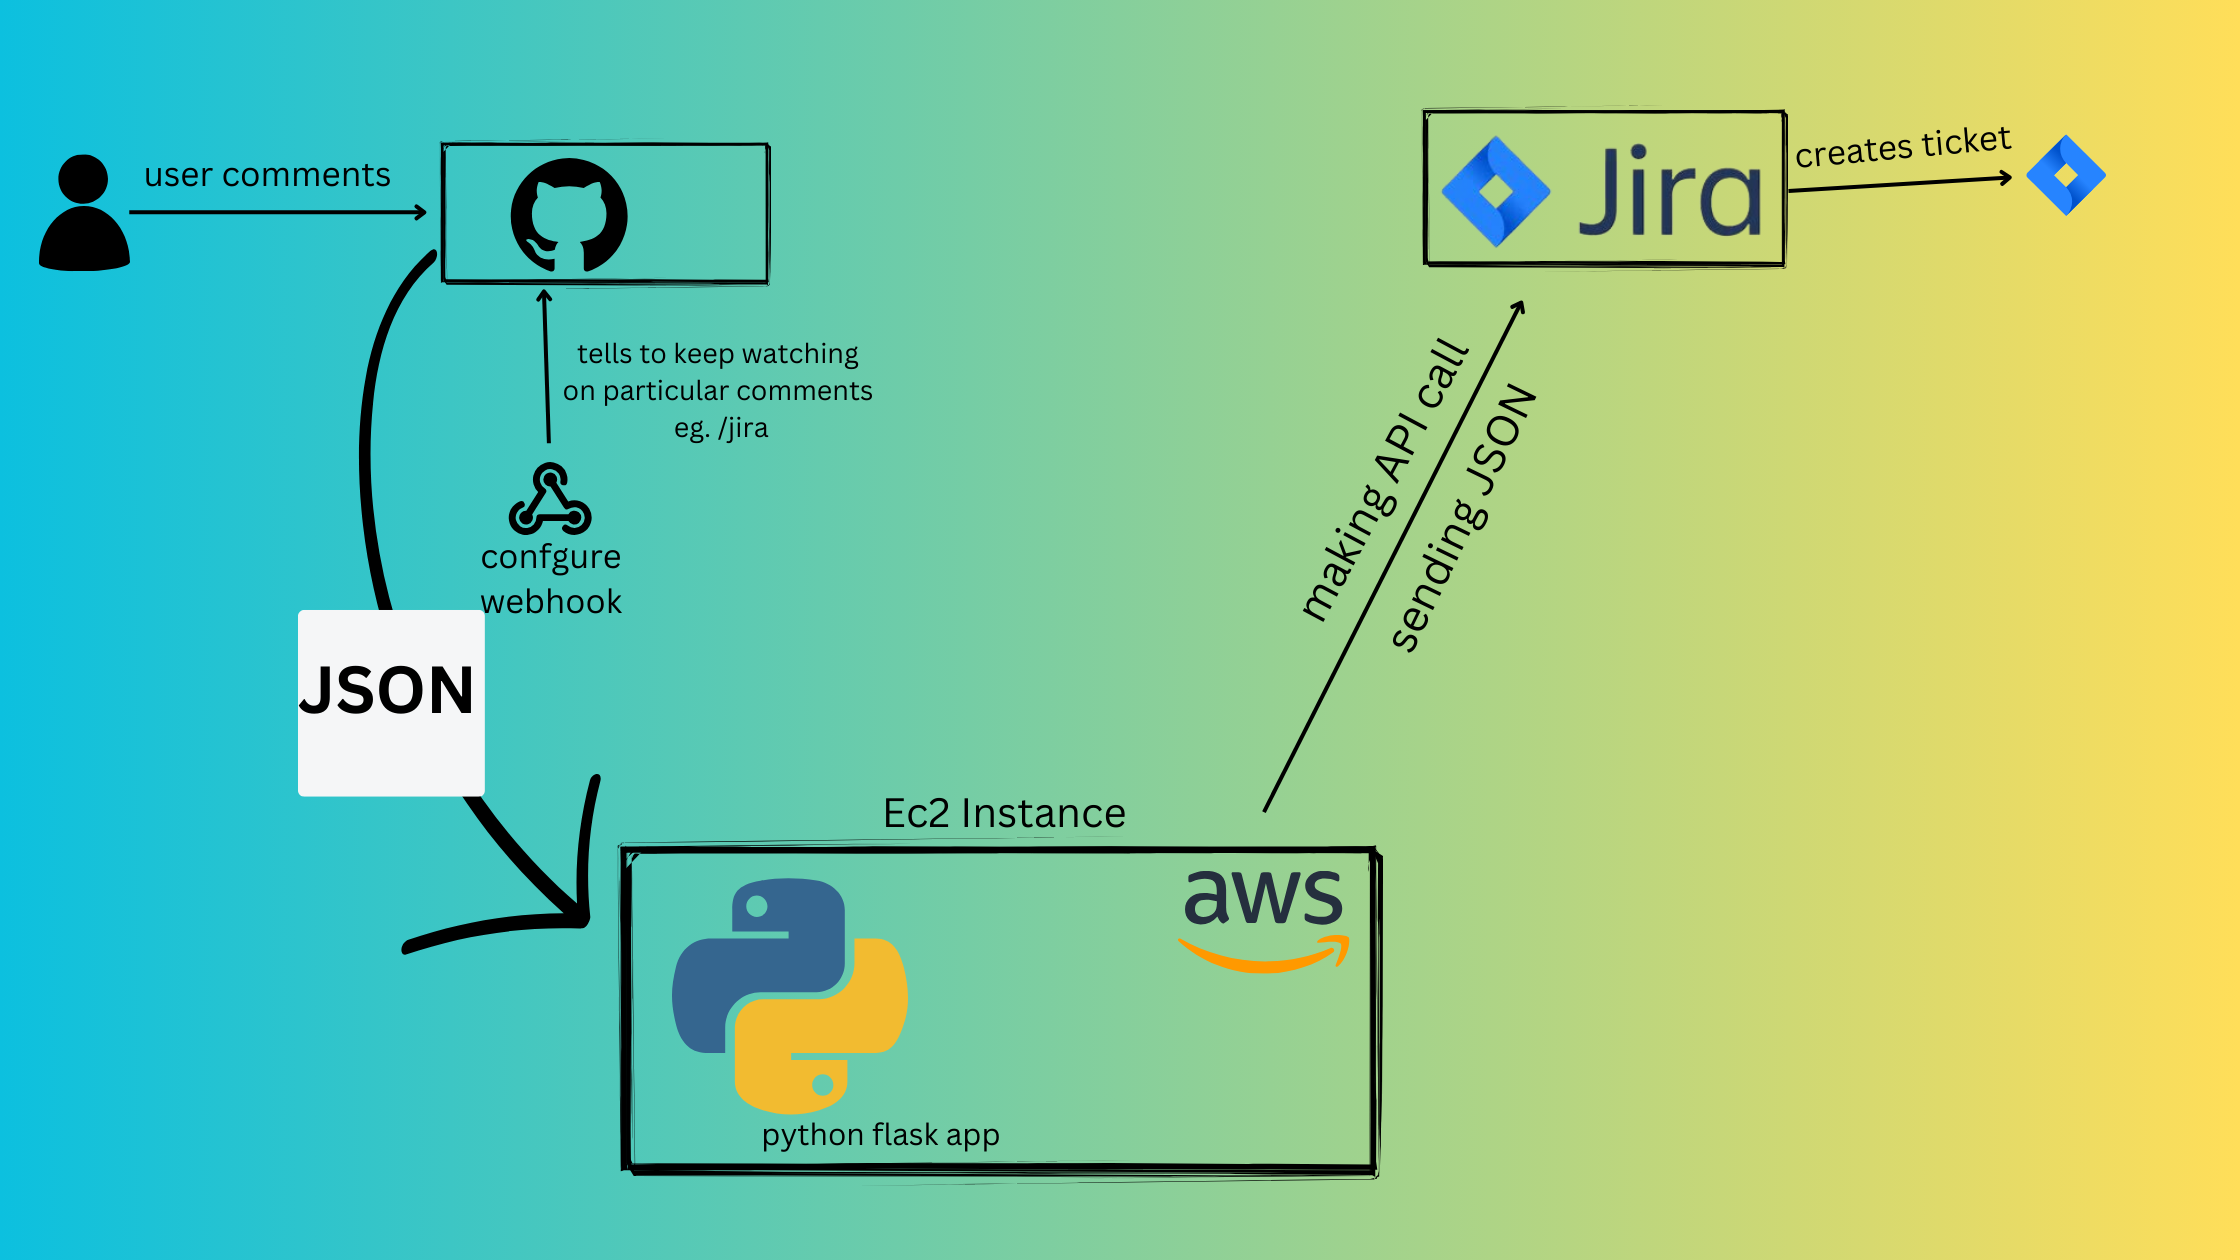
In this blog, we are going to know how the automation is done between Github and Jira so that when an issue is created in a GitHub repository and marked by a developer's comment—potentially a specific word like '/jira'—a corresponding ticket is automatically generated in Jira. But before diving into the process let's understand GitHub and Jira.
GitHub:
GitHub is a web-based platform for version control using Git. It provides different features such as code hosting, version tracking, and collaboration tools like pull requests and issues.
Jira
Jira is a versatile project management and issue-tracking software developed by Atlassian. It is widely adopted in software development as Jira allows teams to plan, track, and manage their work efficiently.
How we will integrate Github with Jira?
So, in this project, we will use Python API, and webhooks to communicate between GitHub and Jira.
Whenever an issue is created in the GitHub repository, webhooks tell GitHub to monitor a particular comment for eg: "/Jira" done by the developer or owners. Then the JSON parser provides the JSON file to the Python application which we created as an API whose URL is configured inside the webhooks. Then the Python API calls the Jira API by sending the JSON which was received from GitHub. ON receiving it, Jira creates the ticket automatically.
This streamlined process ensures that when developers or owners add a specific comment in GitHub, the Flask app acts as a bridge to communicate with Jira, triggering the automatic creation of a corresponding ticket.
Setup requirements:
Jira Setup
Flask app
ec2 instance
Github webhooks
Jira API
- Setup Jira
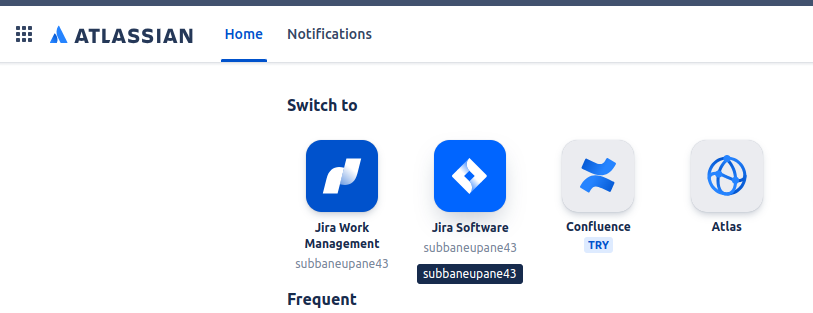
Anyone can simply create an account at https://www.atlassian.com/software/jira. Once creating the account click on your profile and choose Jira as the software.
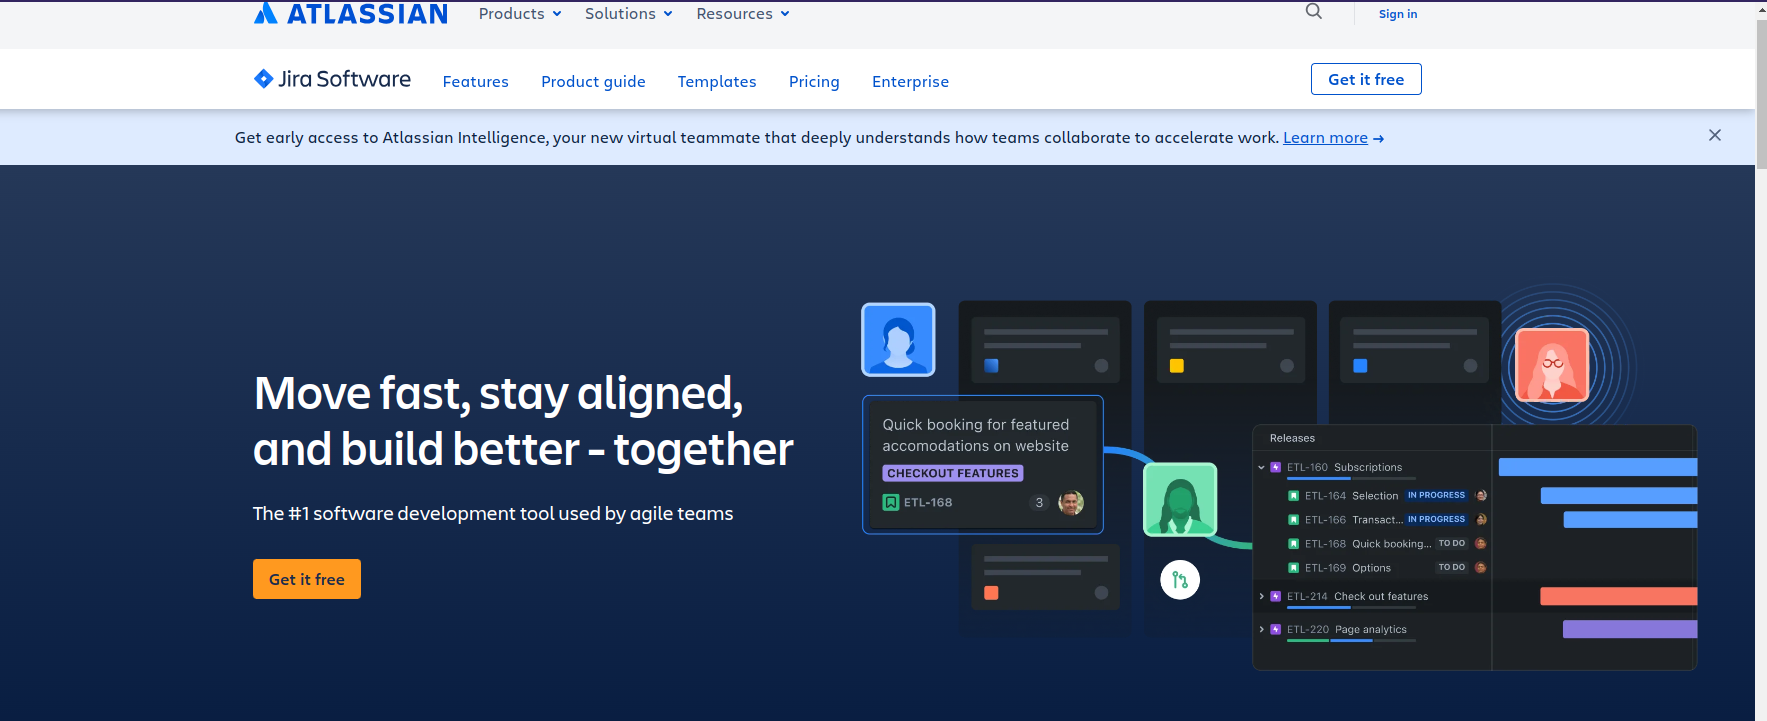
- Then click Get it for free
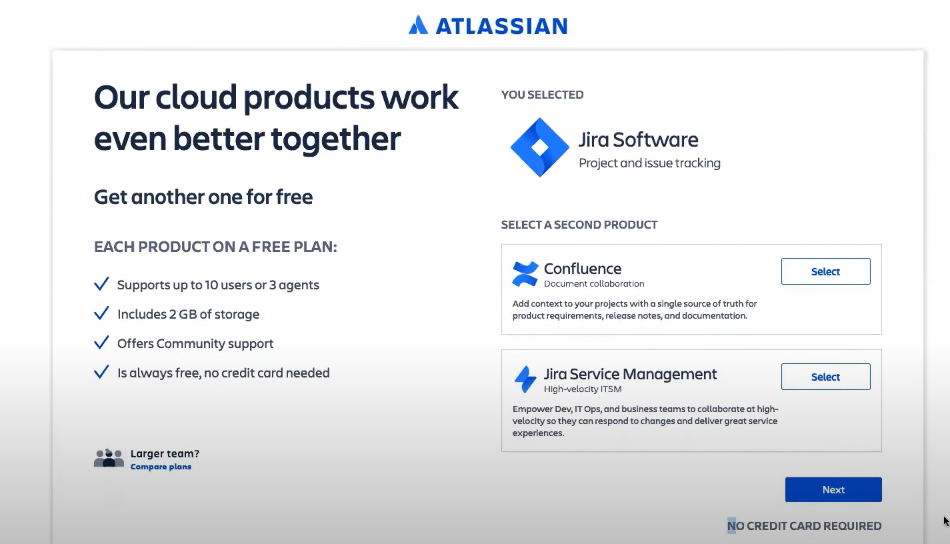
- A page will open and we do not need to do anything and simply Click on next.
On the next page enter the email and site name, the site name is automatically generated or you can customize the site name as per your desire.
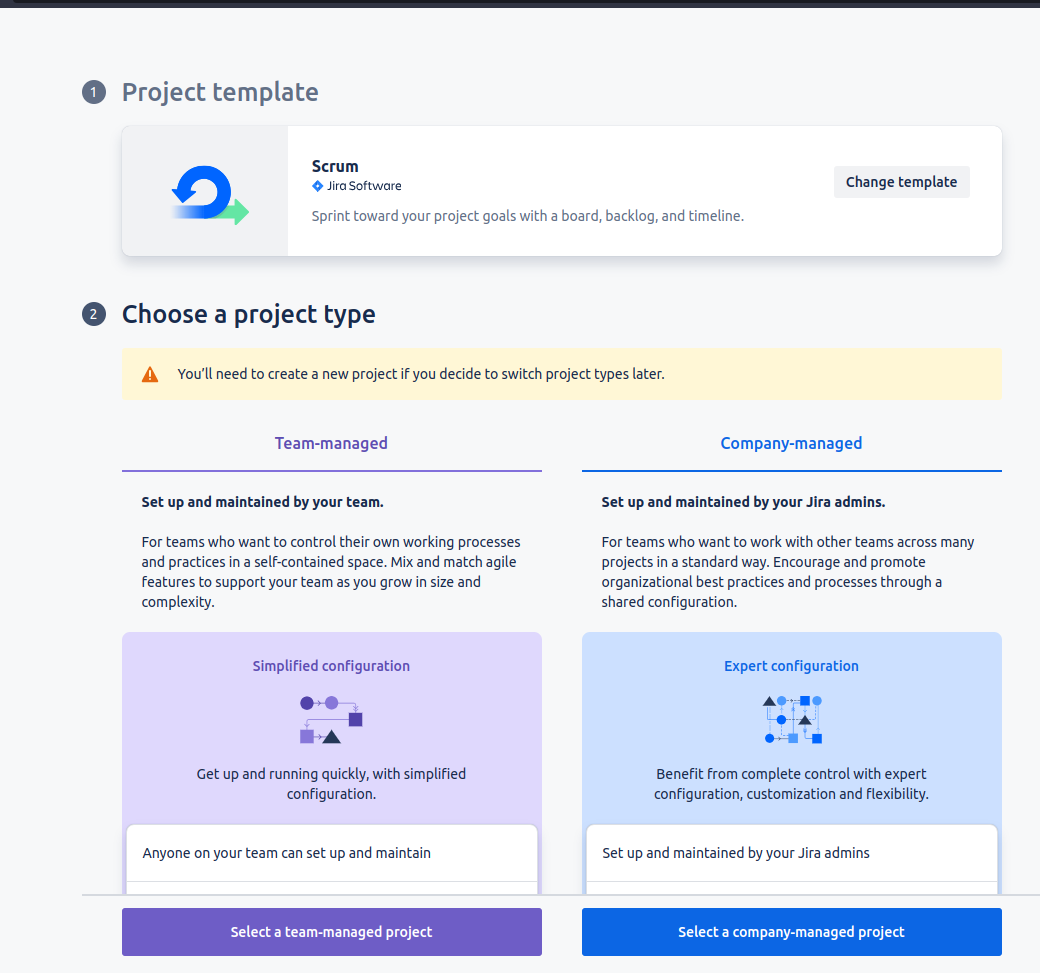
- After this choose Scrum as the template

- And Now choose "Select a team-managed project"
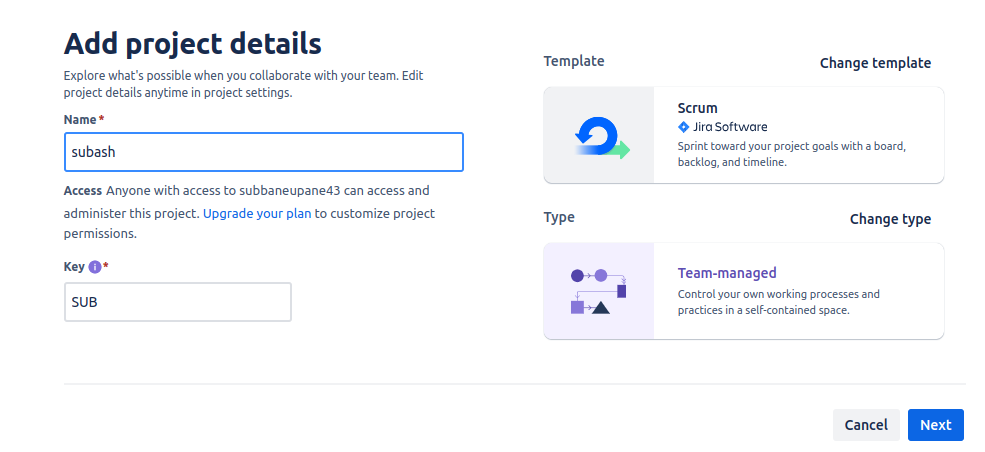
- Add the project details
- After configuring all these details, now our project is created.
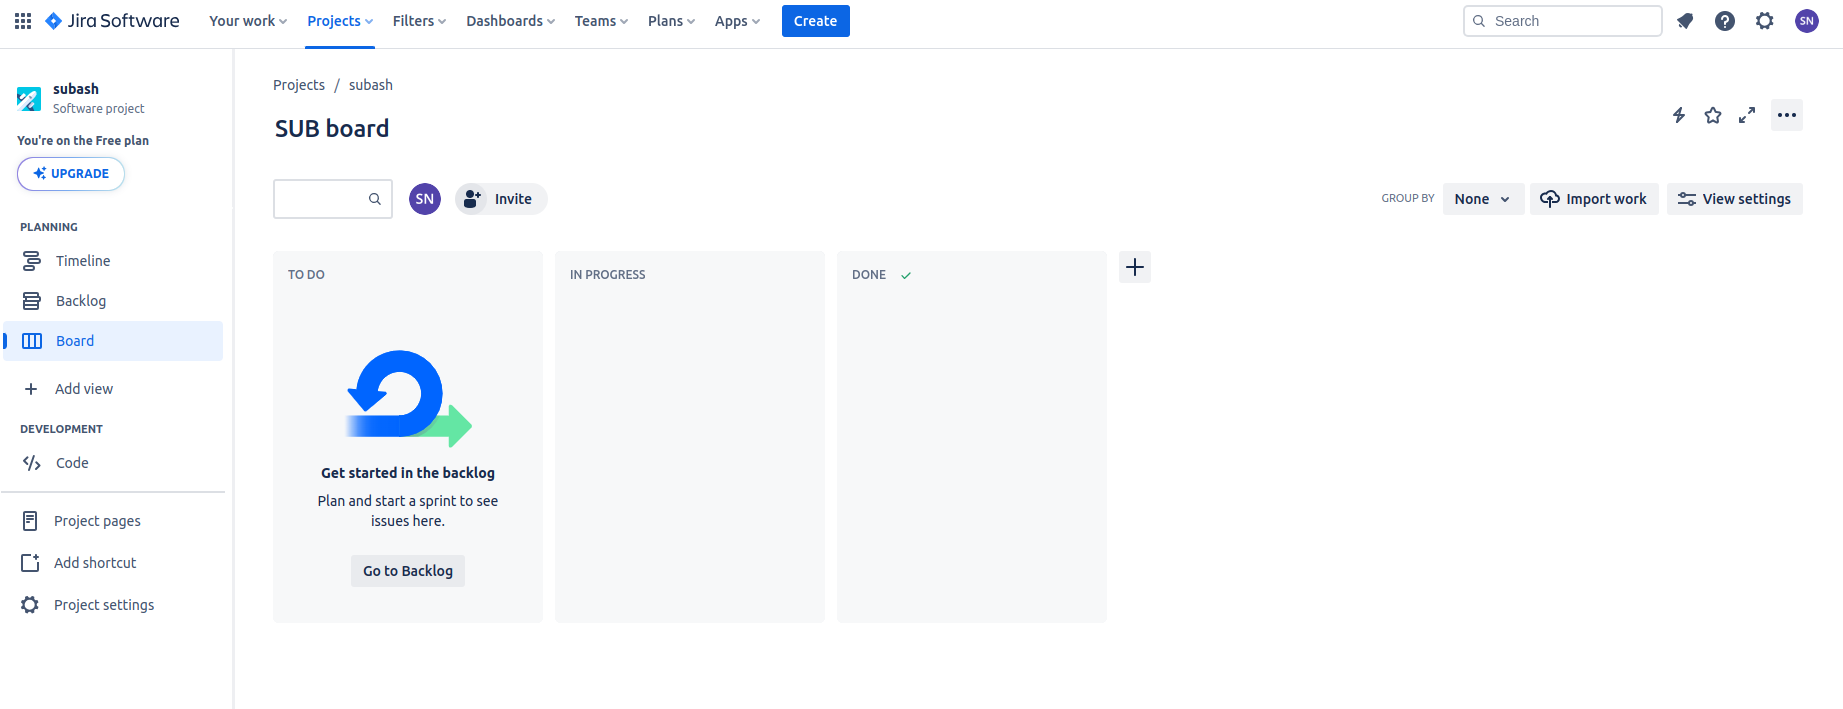
Now we have created our project and the Jira setup is done. To integrate our project with GitHub or to make communication between the two systems we need the API tokens.
Let's create the API token. In your profile Go to Security> click Create and manage API tokens >create API> copy the API token
Note: Keep safely the API token, the same token can't be generated again, else we need to generate the new API token.
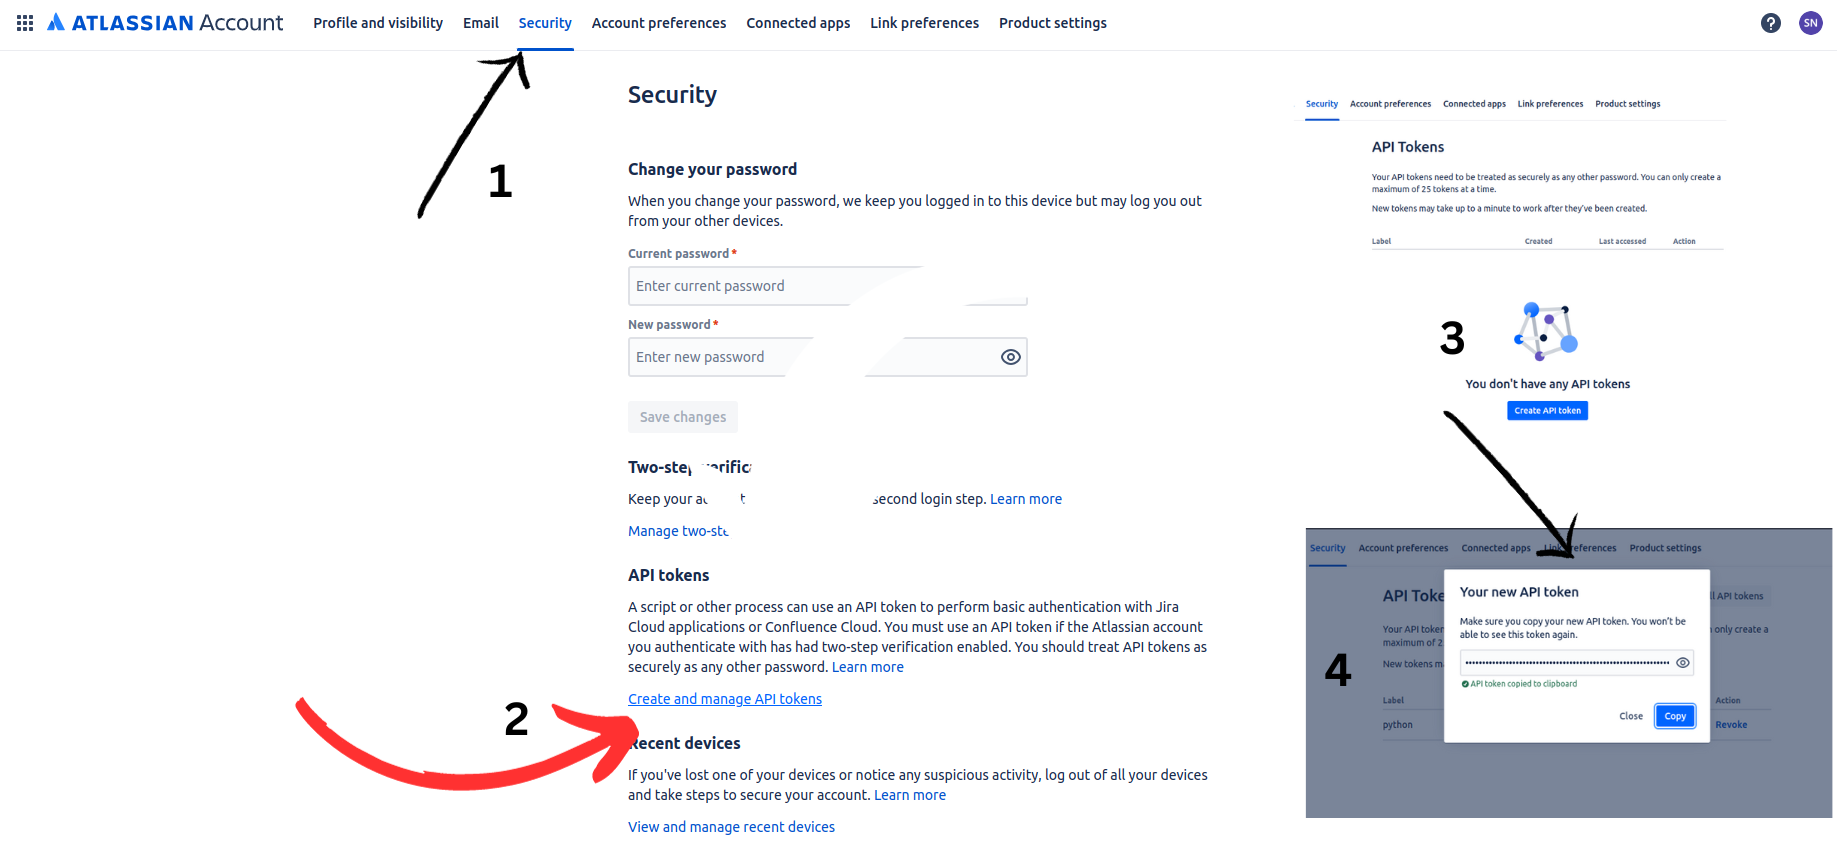
We have created the API token successfully.
- From Jira API documentation, we need to get the Python code to create an issue.
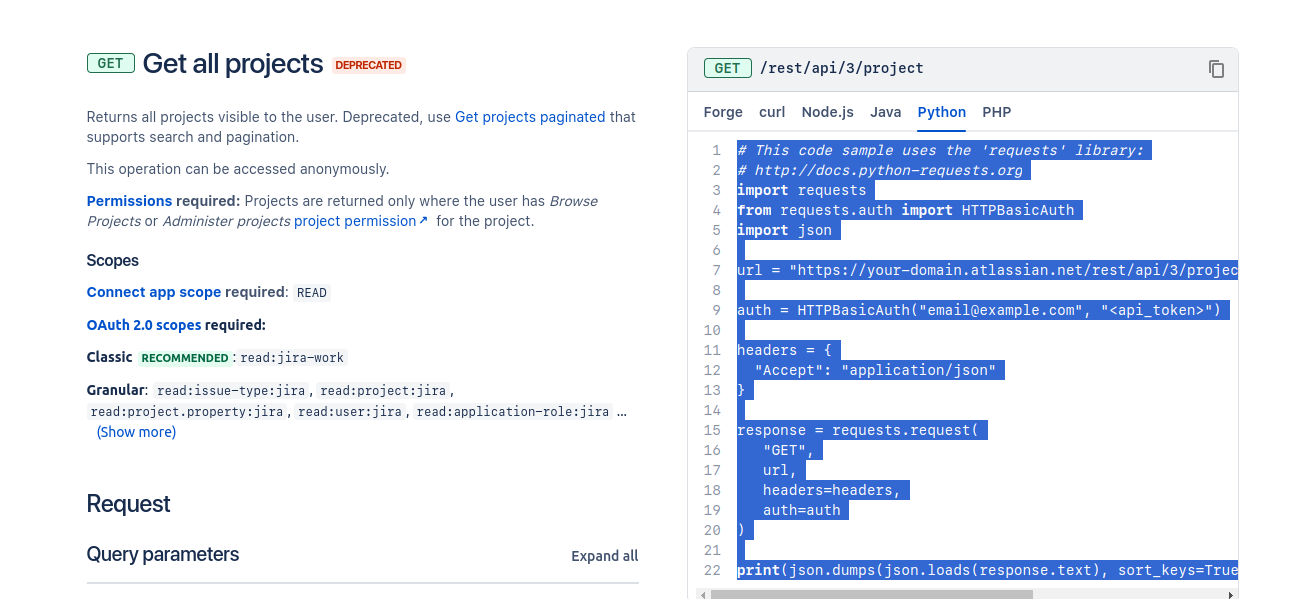
import requests
from requests.auth import HTTPBasicAuth
import json

url = "https://your-domain.atlassian.net/rest/api/3/issue" #add your url

auth = HTTPBasicAuth("email@example.com", "<api_token>")

headers = {
  "Accept": "application/json",
  "Content-Type": "application/json"
}

payload = json.dumps( {
  "fields": {
    "description": {
      "content": [
        {
          "content": [
            {
              "text": "My First Jira Ticket",
              "type": "text"
            }
          ],
          "type": "paragraph"
        }
      ],
      "type": "doc",
      "version": 1
    },
    "issuetype": {
      "id": "10007"
    },
    "project": {
      "key": "SUB" #add your key
    },
    "summary": "First Jira Ticket",
  },
  "update": {}
} )
response = requests.request(
   "POST",
   url,
   data=payload,
   headers=headers,
   auth=auth
)
print(json.dumps(json.loads(response.text), sort_keys=True, indent=4, separators=(",", ": ")))
I have removed the lines from the code as we don't need it. We only needed the project type*, issue type*, and summary* as they are the compulsory fields that need to be completed.
Note: In the above code insert the url replace "https://your-domain.atlassian.net", insert your email address used to login jira and finally the api token that you had earlier created, in project key, check the project it will be at the side of you project name inside (), and for the issue type, check their ids from project>board>3 dots(...)>configure board>issue types>choose any option>check id in url
- Once this is done, we can test our code whether the ticket is created or not.
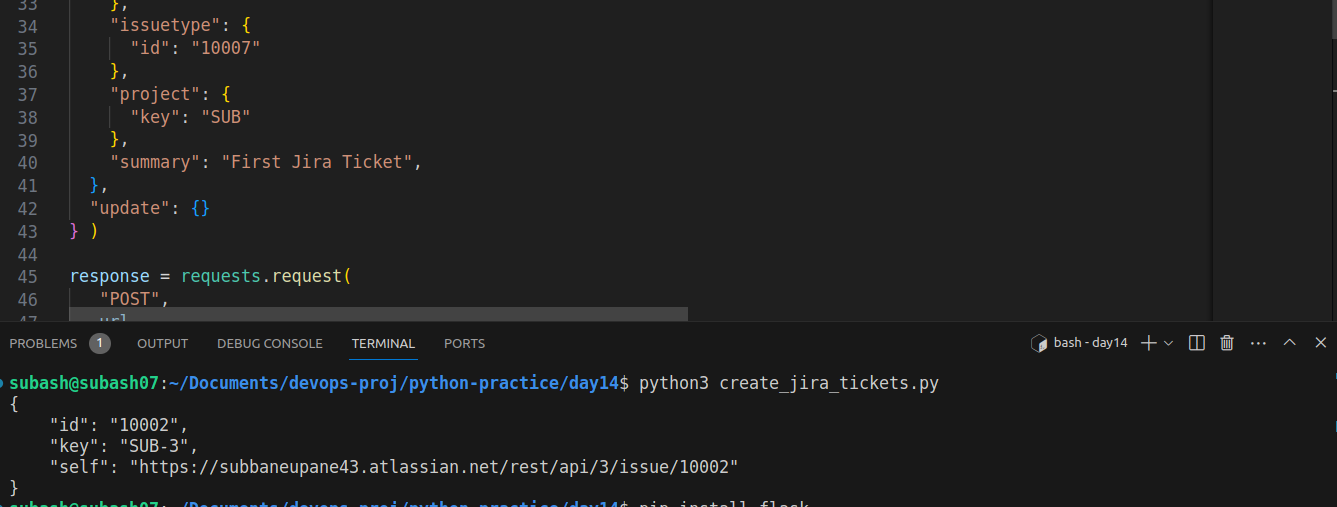
- Our code is successfully run and the ticket is created and now let's verify it in the Jira.

Here we can see the tickets being created. By the way, there are three tickets because I executed the code three times that's why three tickets are generated.
Our Jira API is finely working and created our first Jira ticket, now let's create a Python Flask app framework
note: It is a skeleton of the main code
import flask from Flask
import requests
from requests.auth import HTTPBasicAuth
import json
app = Flask(__name__)
"@app.route("/createJIRA", methods=['POST']"
def createJIRA():
  #jira_code here

app.run('0.0.0.0', port=5000)
- You can access the source code here in this GitHub link.
Now our Python application is also ready. We will create an ec2 instance in the AWS cloud.

- Access the instance using SSH protocol as our instance is ready
ssh -i ~/path-to-pemfile/pem_file user_name@ipv4address

- Create our flask application inside the instance along with .env file to store our API token details.
Since the API token is very sensitive content, we need to keep it secure so that no one can misuse it.

- Let's see whether our flask app runs or not.

Great! Our app is perfect working and now verify it using the GitHub Webhooks.
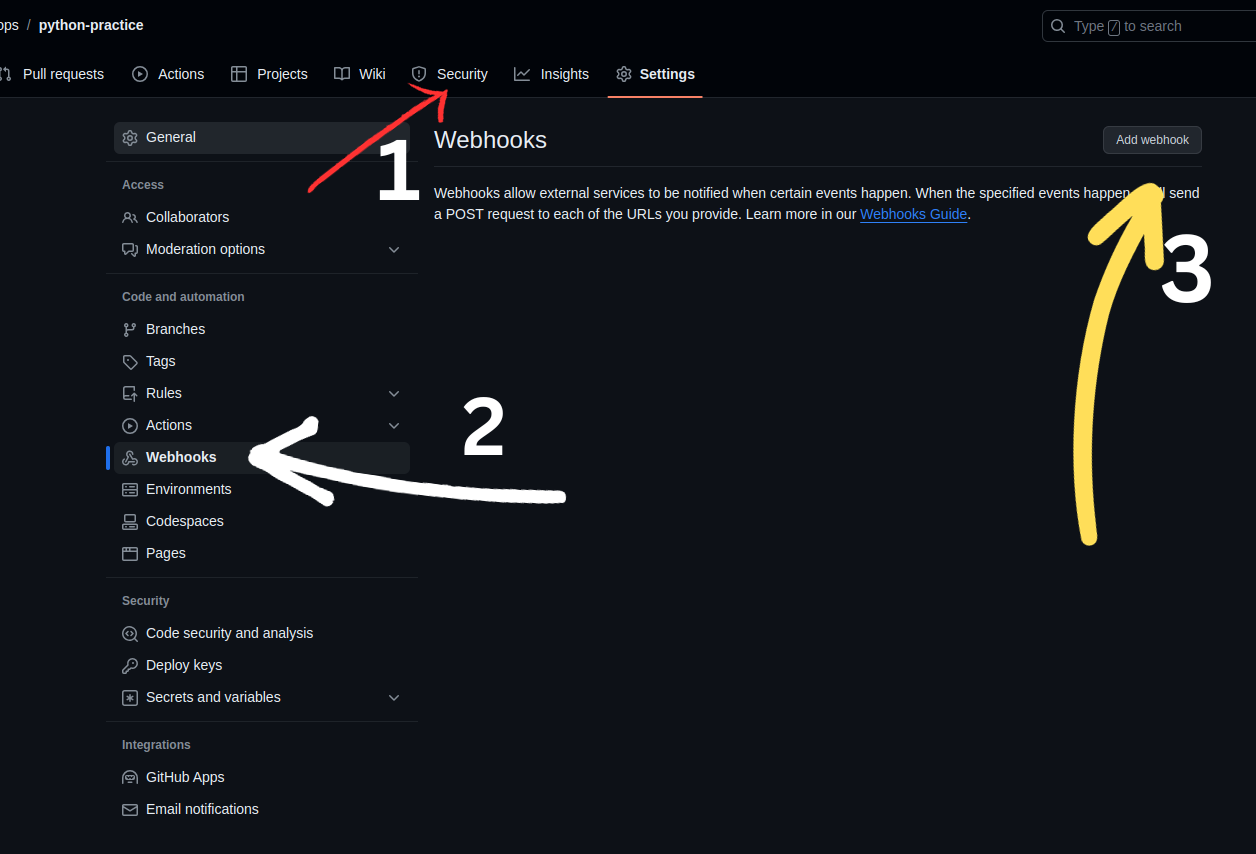
To create a webhook, first, we need to choose the repo for which we need to configure the webhook. In the same repository window, click on settings > click on webhooks > click on Add Webhooks.
- Then the following page will open.
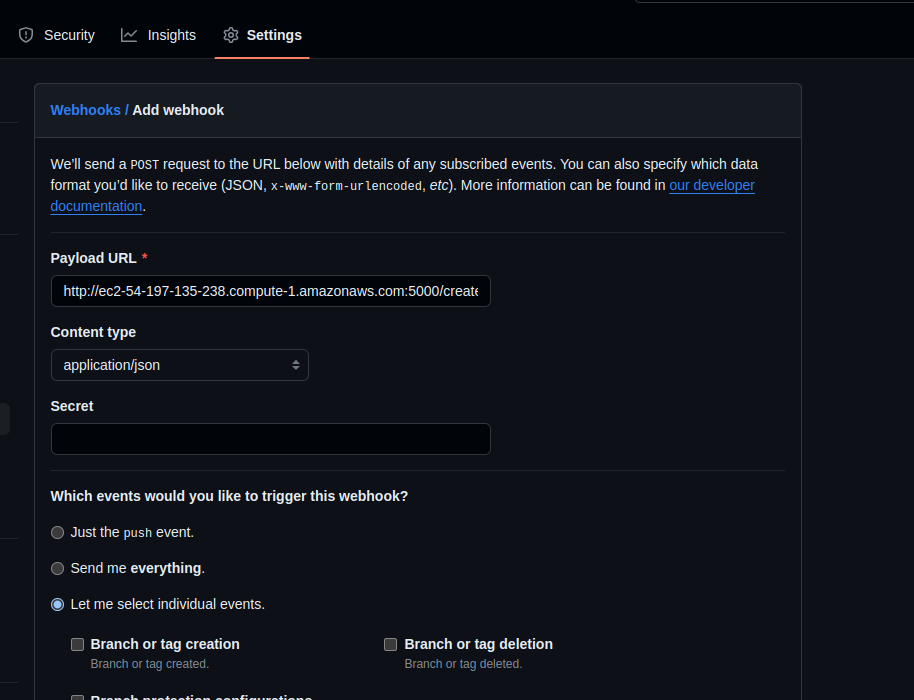
In this page enter the URL of your Python application and in Let Me select individual events choose ISSUES. Click on Add Webhook.
- Check whether the GitHub actions passed or not.
Note: Before testing the Github actions , you need to set the inbound rules for port 5000 in your ec2 instance otherwise the test will fail as it won't be able to access our python application as it is in the ec2 instance.
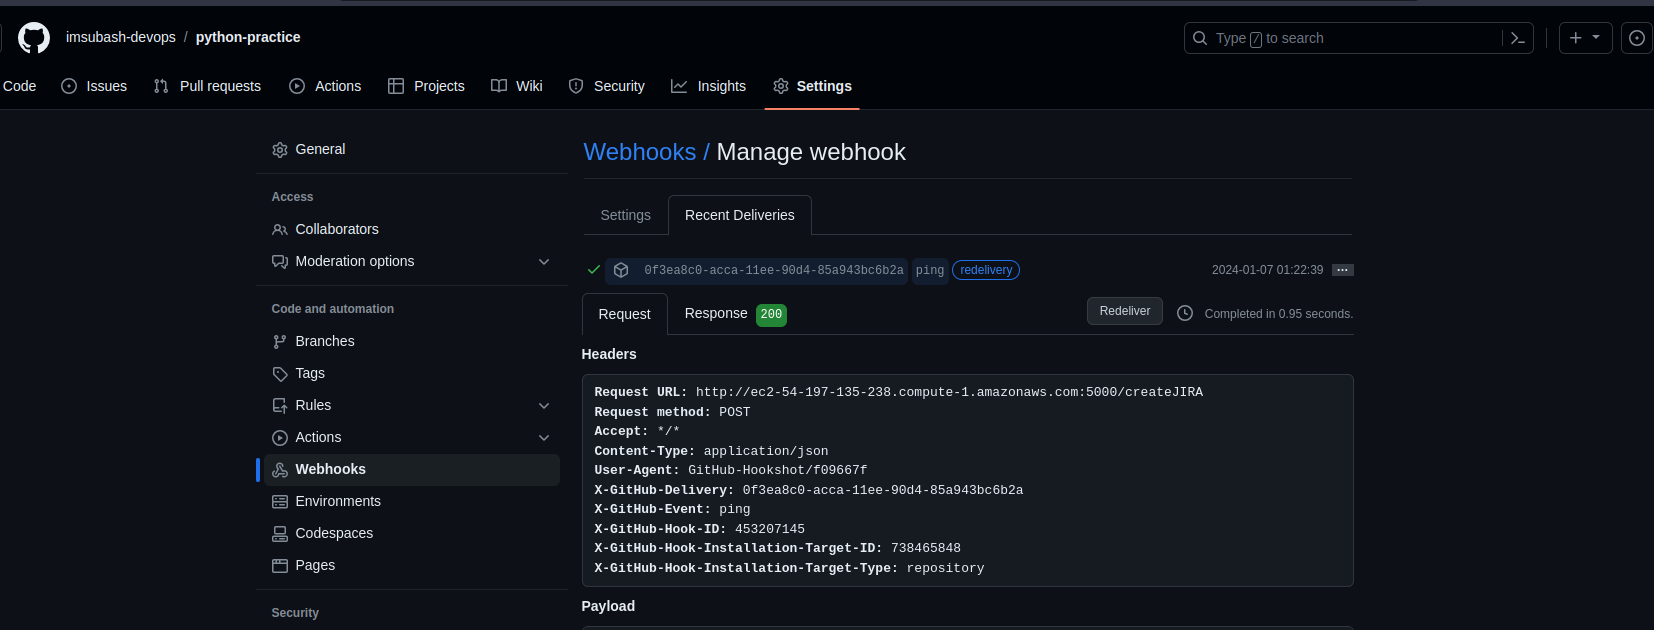
Success!!
- Let's do a comment on an issue and check in Jira whether a ticket is created or not.
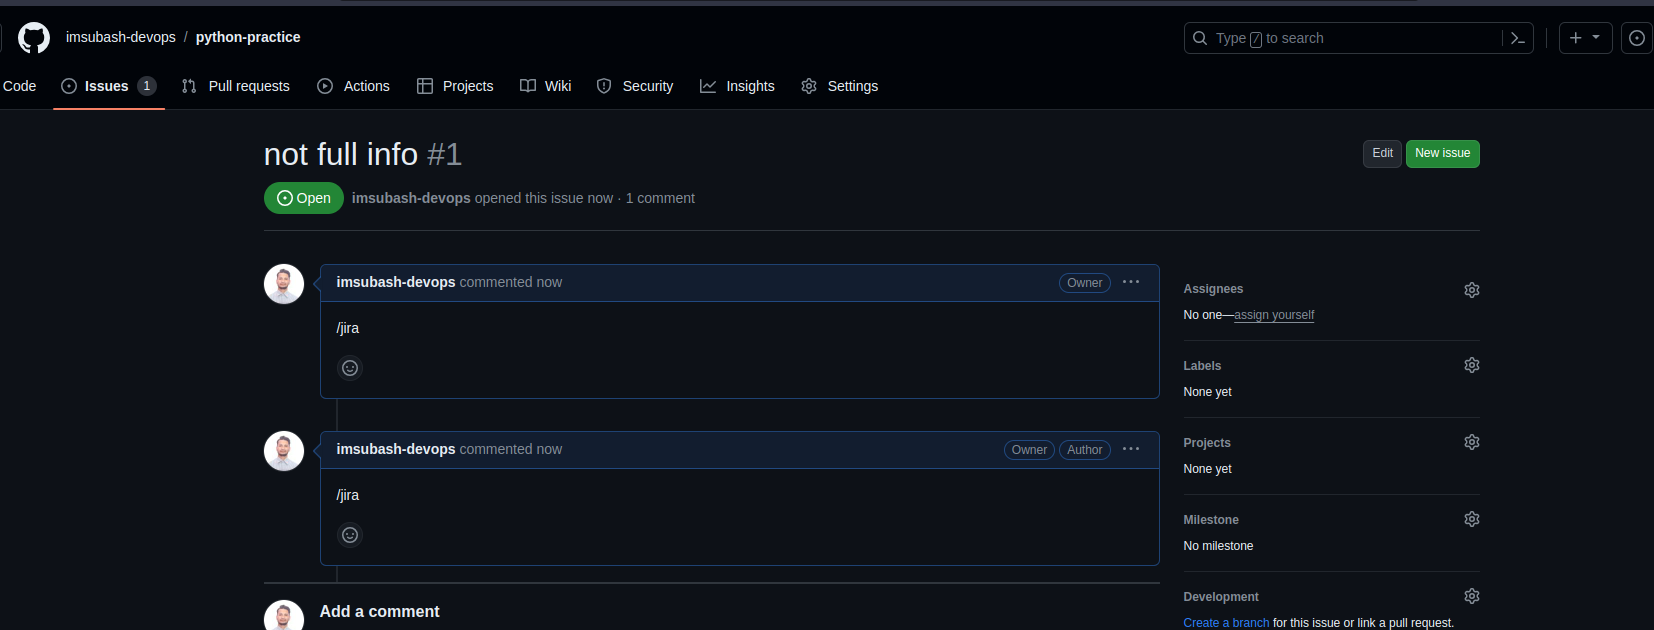
- Now let's verify in Jira.
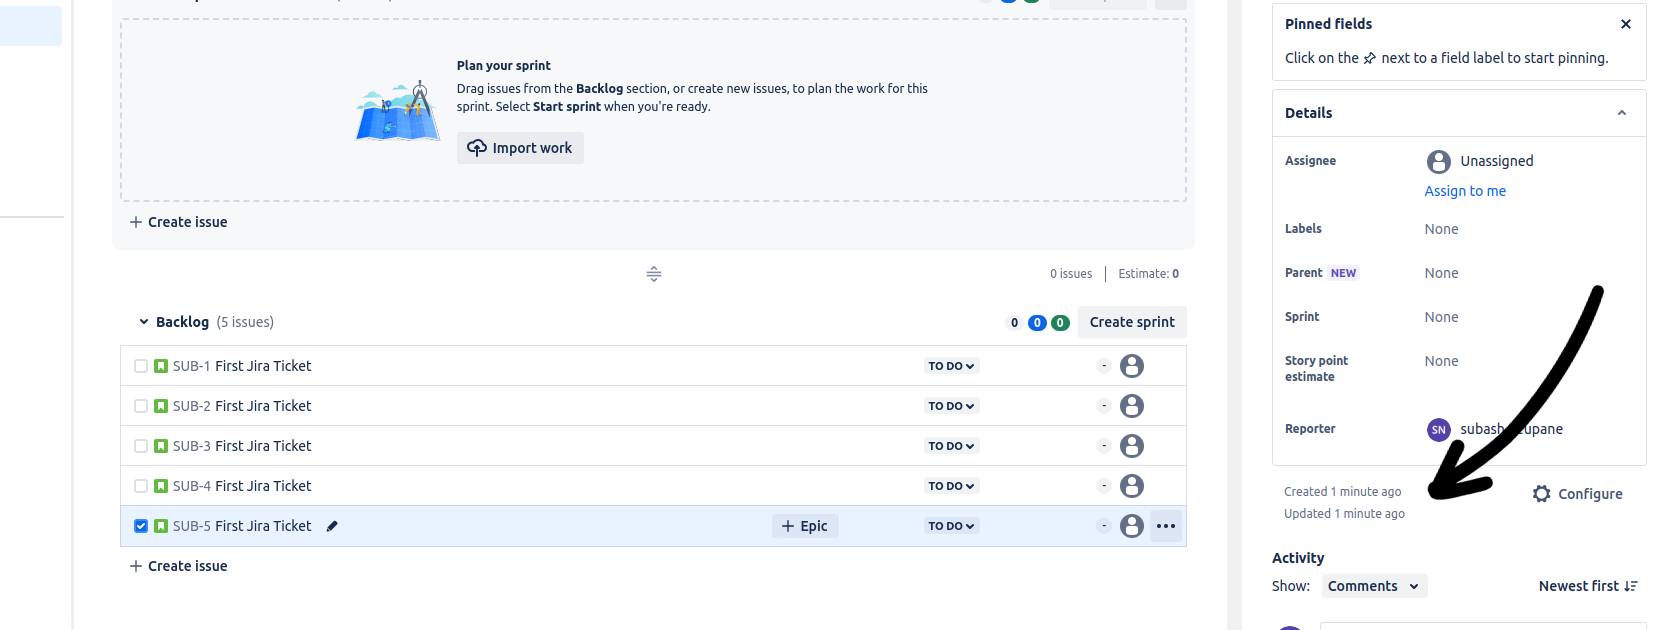
As there are multiple tickets but the latest ticket is SUB 5 which is created just a minute ago. This means our implementation is perfectly done.

Webhook actions show the issues created and opened as we opened it in Jira.
What if the developer comments something else in the issues, then the Jira will create a ticket if we don't mention our logic while making the API call.
 # Check if the condition is true before making the API request
    if "/jira" in request.json["issue"]["body"]:
        # Perform the API request only if the condition is true
        response = requests.post(url, data=payload, headers=headers, auth=auth)
    else:
        print("Comment should be /jira only")
We have added this logic so that whenever there is a comment in the issue, it verifies whether the comment is "/jira". If yes then only the API call will be made and Jira creates a ticket otherwise if there is another comment it will notify telling that the comment should be only /jira.
Congratulations, we have successfully implemented the project. Using different technologies like Python, Flask, and webhooks, we've streamlined the process, promoting efficiency. We have also performed security practices by keeping sensitive information hidden.
Happy coding! Keep learning!!
Subscribe to my newsletter
Read articles from Subash Neupane directly inside your inbox. Subscribe to the newsletter, and don't miss out.
Written by

Subash Neupane
Subash Neupane
Computer Science graduate