A Beginner's Guide to AWS VPC NAT Gateway: Understanding and Hands-On Lab
 Siddhartha Gaurav
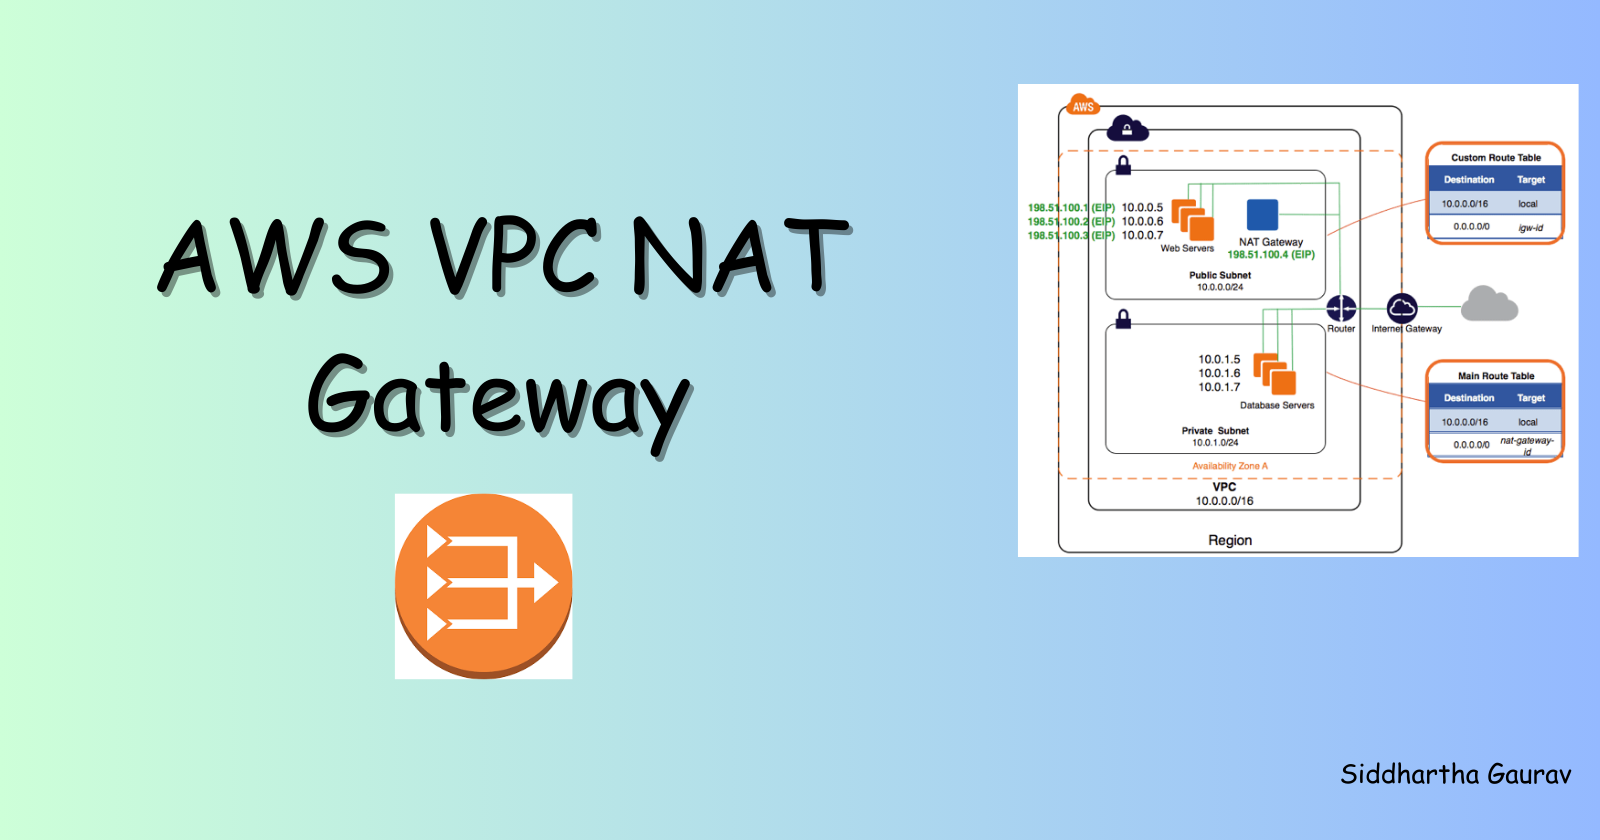
Amazon Web Services (AWS) offers a powerful networking service called Virtual Private Cloud (VPC), allowing users to create a private, isolated section of the AWS Cloud. In this guide, we will explore one crucial aspect of AWS VPC – the Network Address Translation (NAT) Gateway. We'll delve into the basics, understand its purpose, and walk through a hands-on lab to set up and test a NAT Gateway in your AWS environment.
Understanding NAT Gateway
What is NAT?
Network Address Translation (NAT) is a technique used to map private IP addresses to a public IP address. In the context of AWS VPC, NAT allows instances in private subnets to initiate outbound traffic while masking their private IP addresses.
Why Use NAT in AWS VPC?
Instances in private subnets lack direct internet access. NAT Gateway serves as a bridge, enabling these instances to communicate with the internet for tasks like downloading updates or accessing external resources while maintaining the security of the private subnet.
Hands-On Lab: Setting Up AWS VPC NAT Gateway
About lab
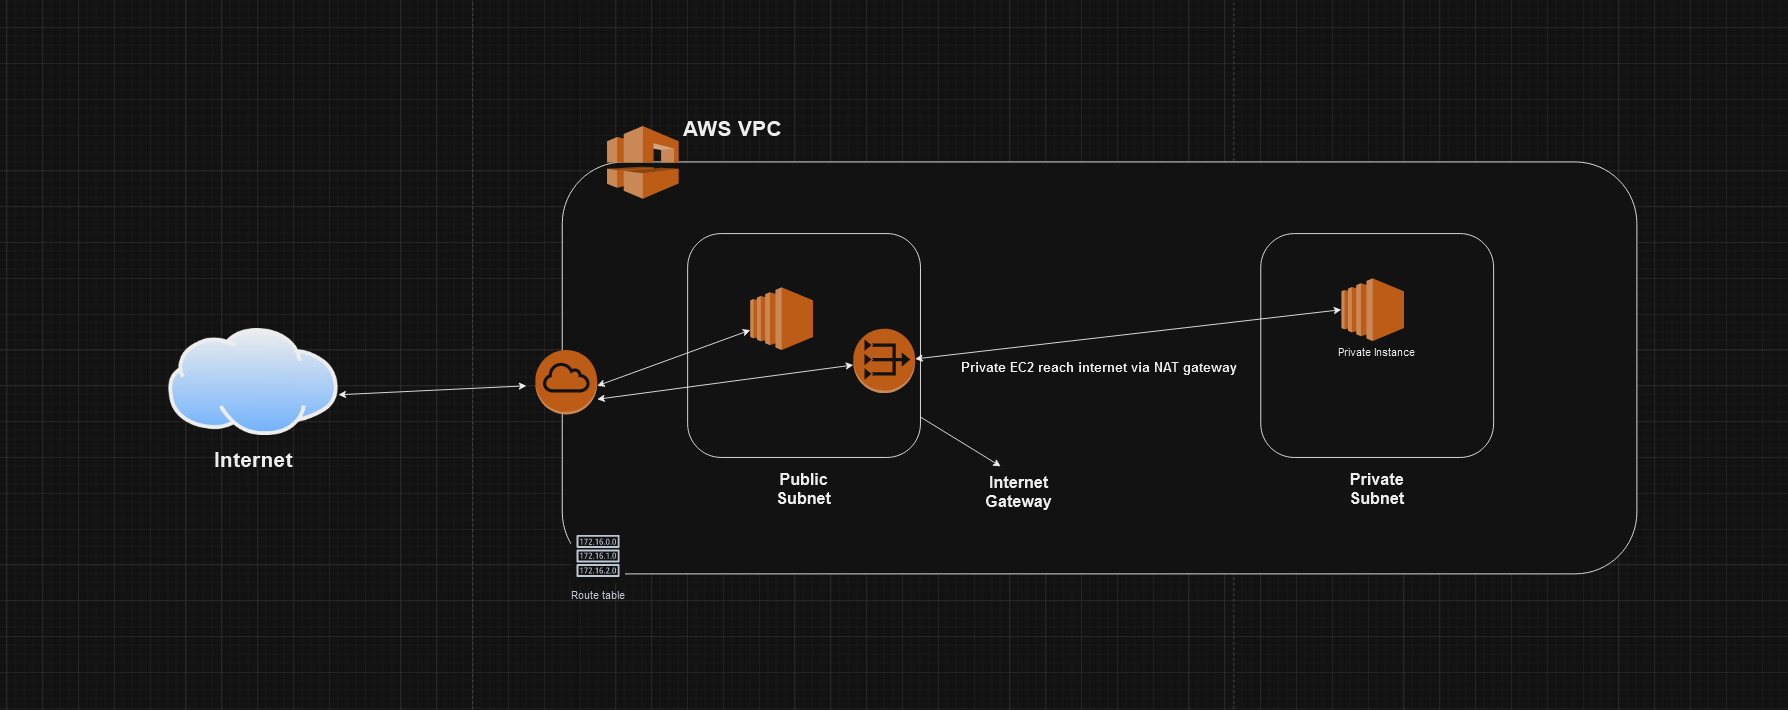
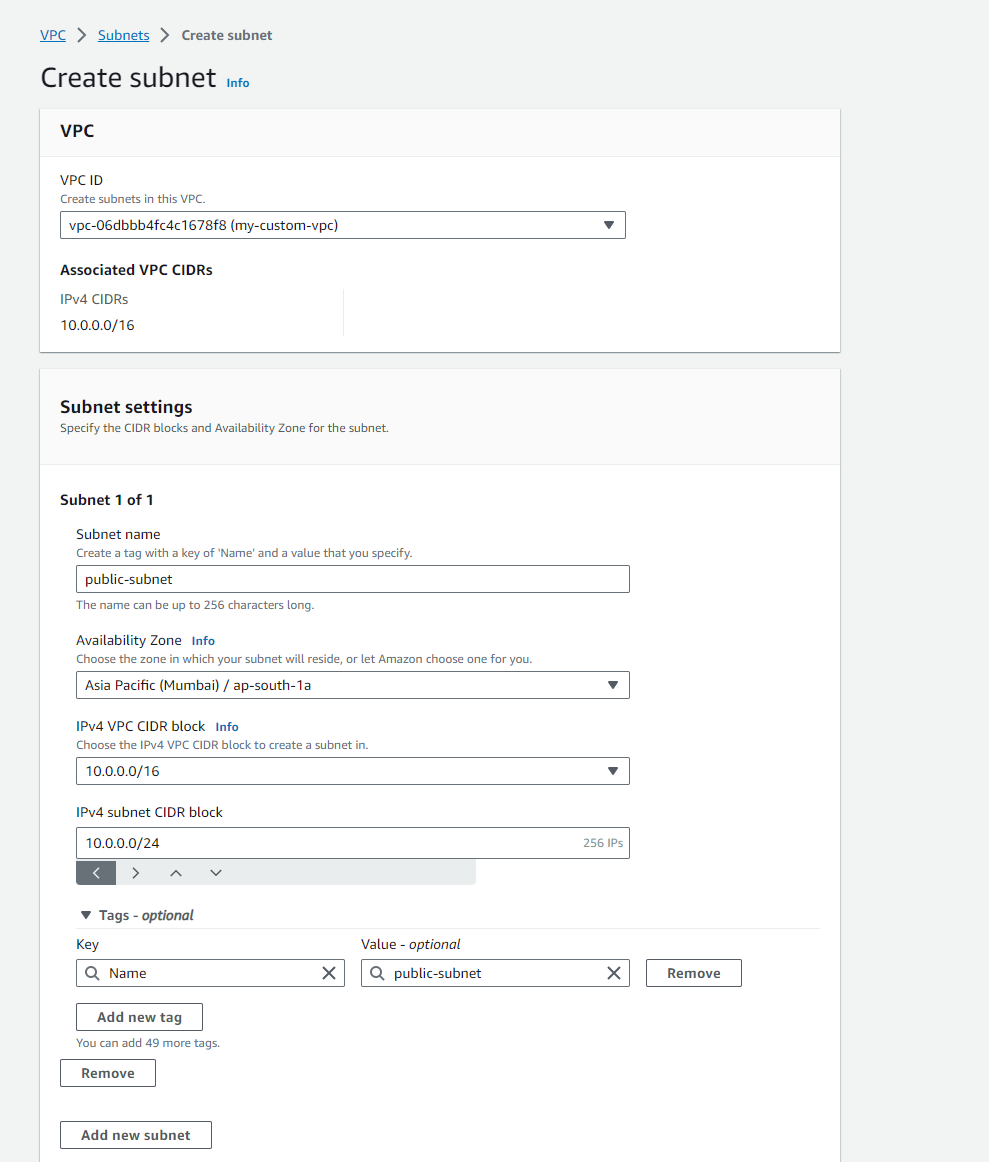
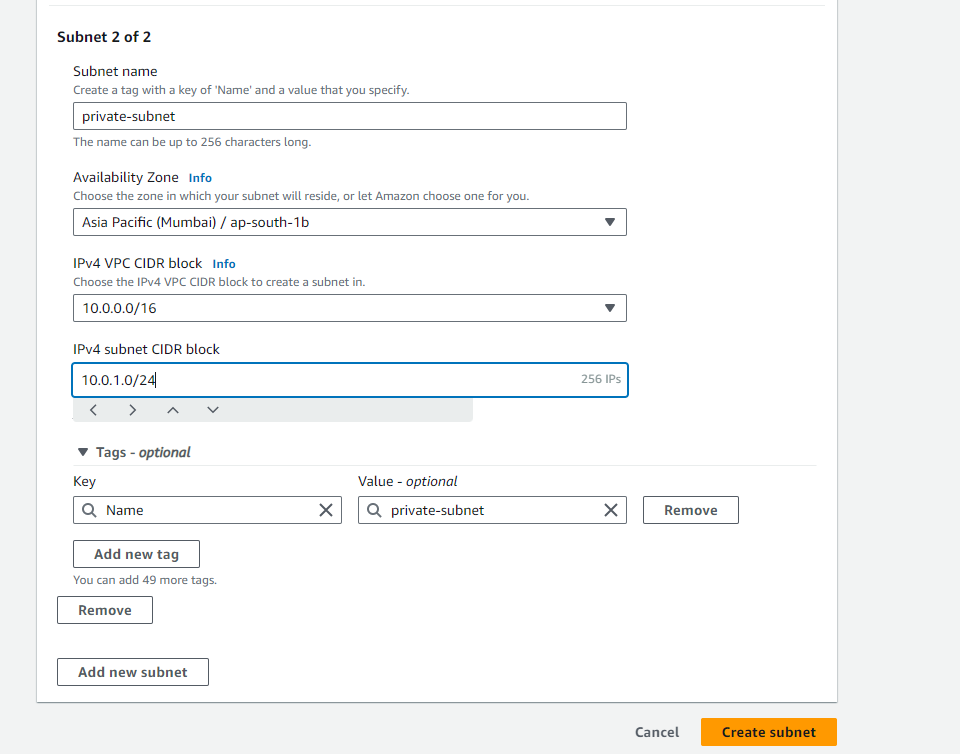
We are going to create a VPC with one Public Subnet and one Private Subnet. Instances in the Public subnet can access the internet, whereas instances in the Private subnet cannot.
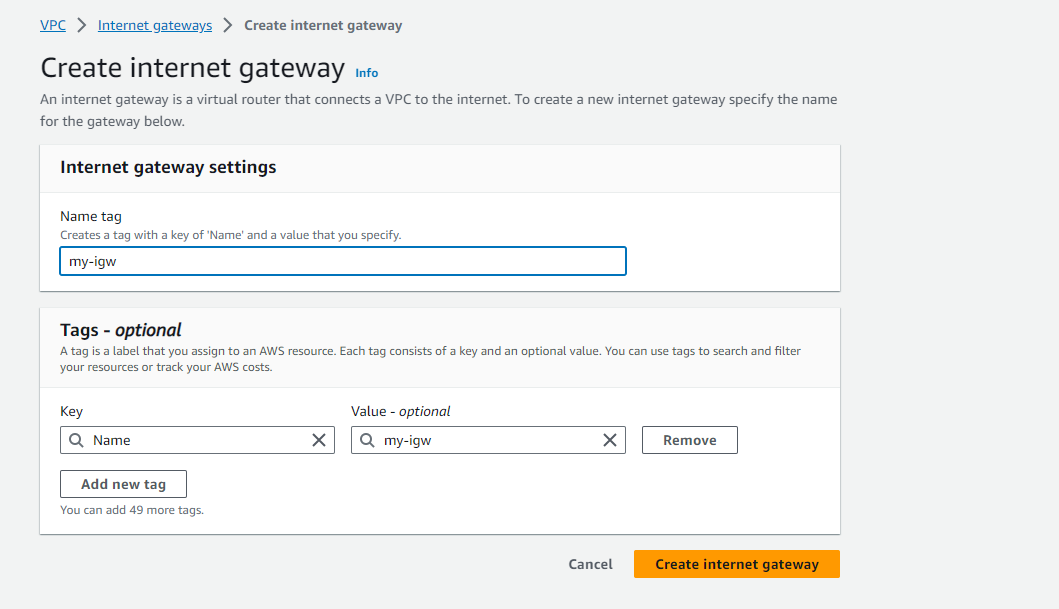
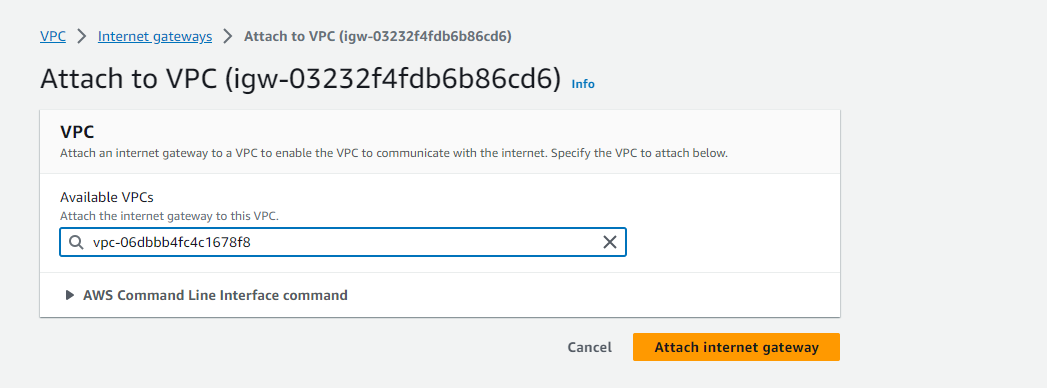
We will create an Internet Gateway and attach it to our VPC.
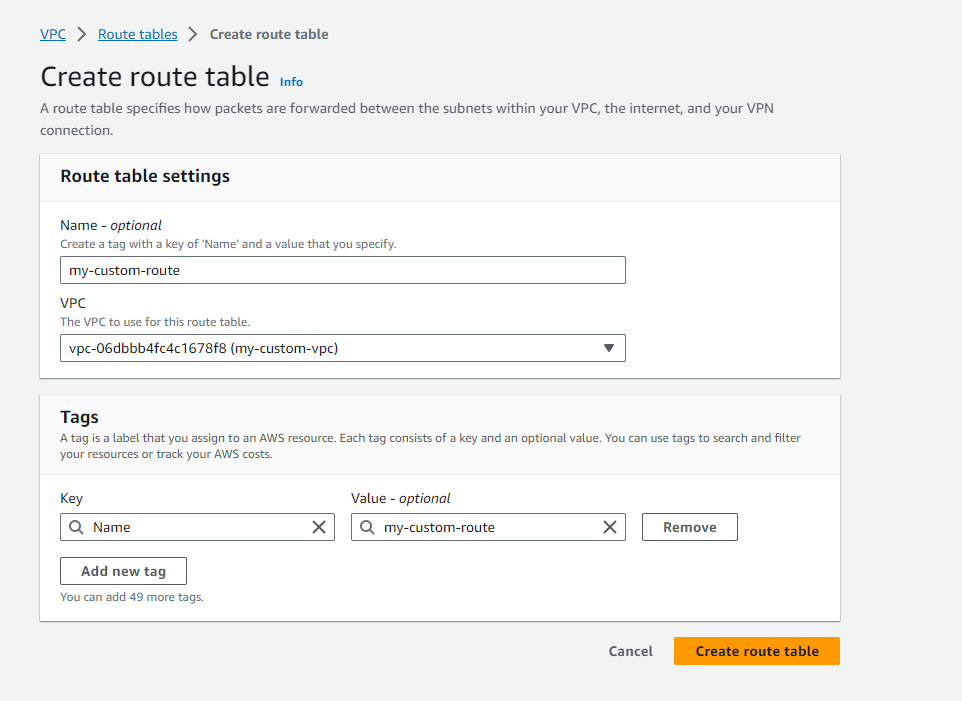
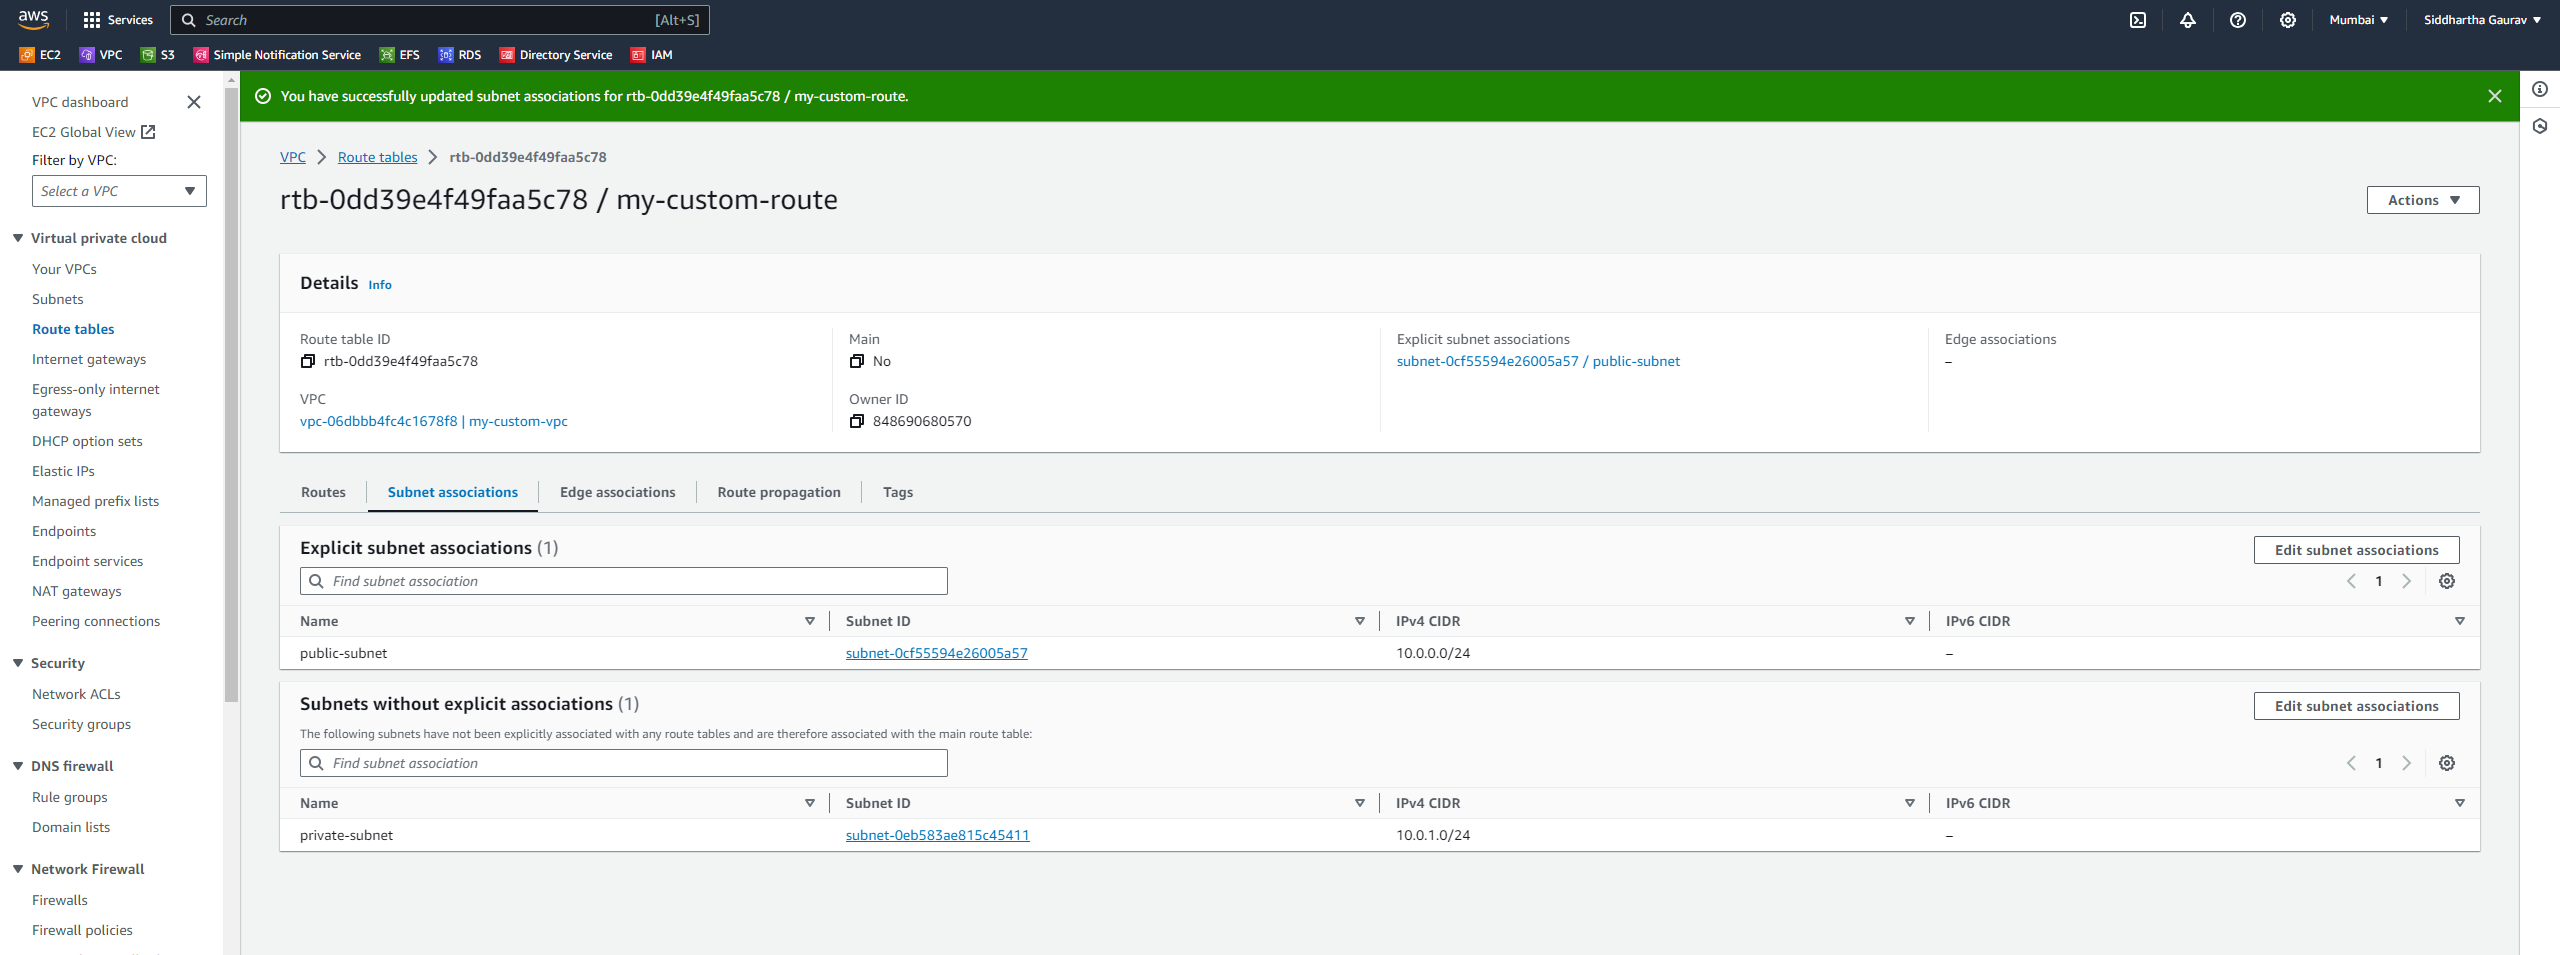
Next, we will create a custom route table and associate only the public subnet. This ensures that only the public subnet can reach the internet, and the private subnet remains isolated.
To enable internet access for instances in the private subnet, we will create a NAT Gateway. The NAT Gateway will be placed in the public subnet as it requires internet access and an Elastic IP. After creating the NAT Gateway, we will add a route to it in our VPC's main route table, allowing instances in the private subnet to reach the internet through the NAT Gateway.
Prerequisites
AWS Account: Ensure you have an AWS account with the necessary permissions.
VPC Configuration: Set up a VPC with at least one private subnet.
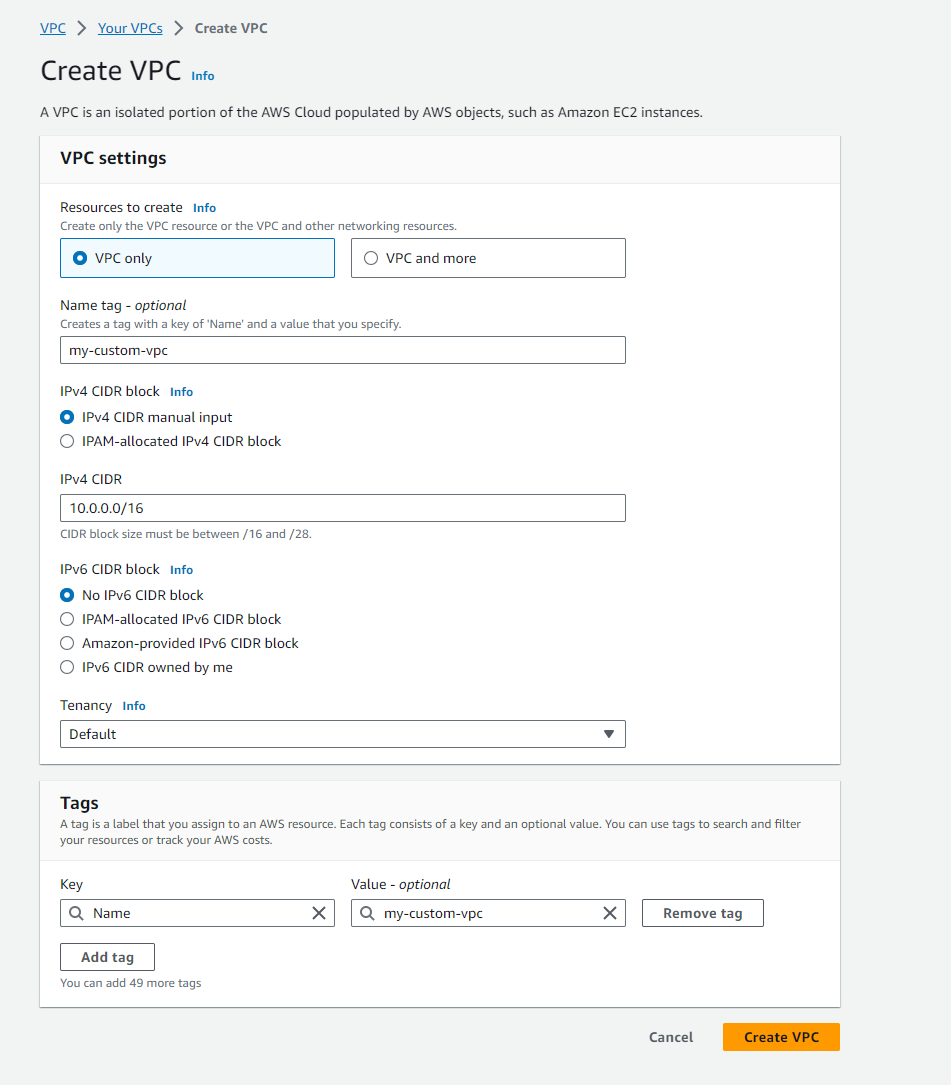
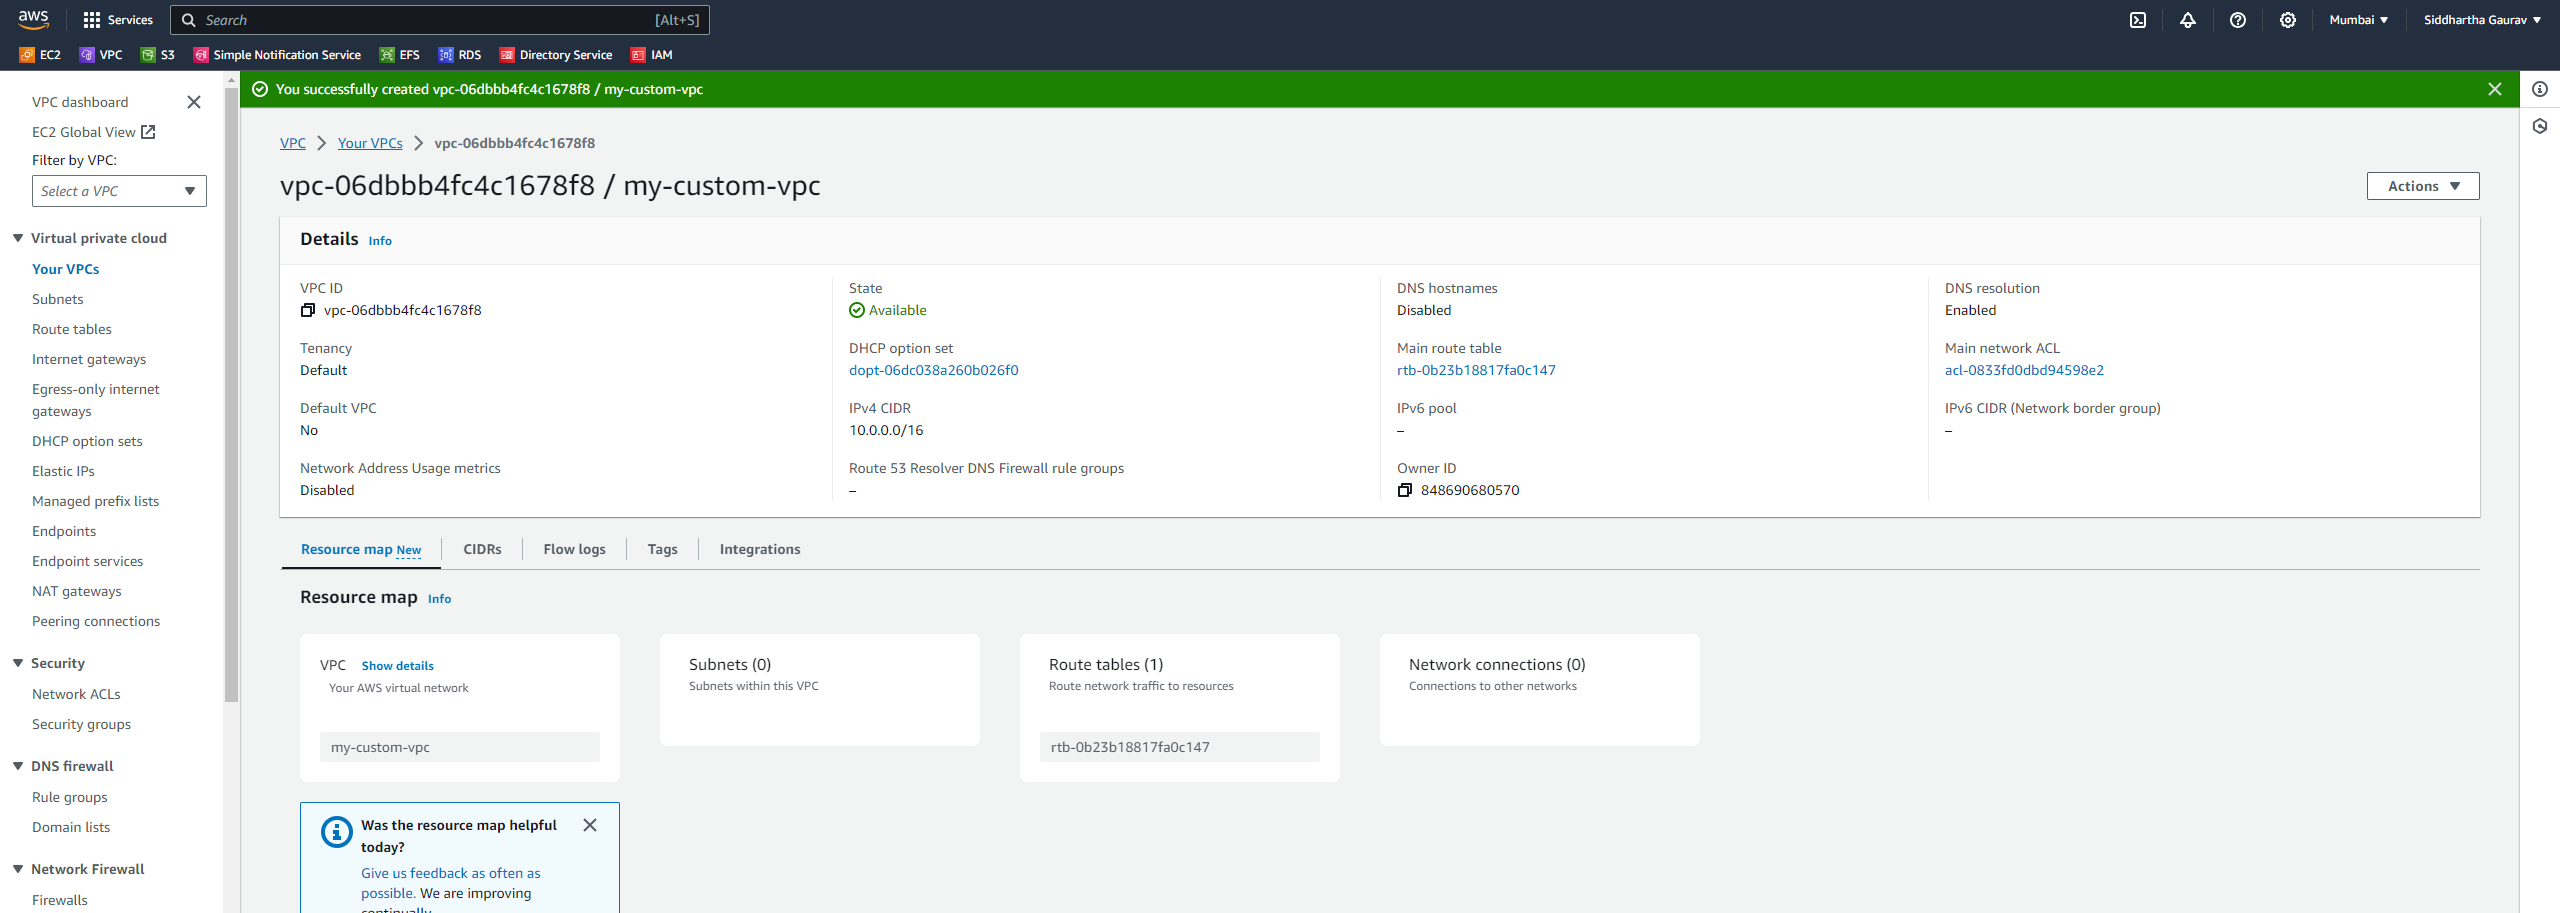
Step 1: Create VPC (all the required steps)
Create VPC.
Create Subnets - Public & Private.


Create an Internet Gateway and Attach it to the VPC.


Create a Route table and modify it.




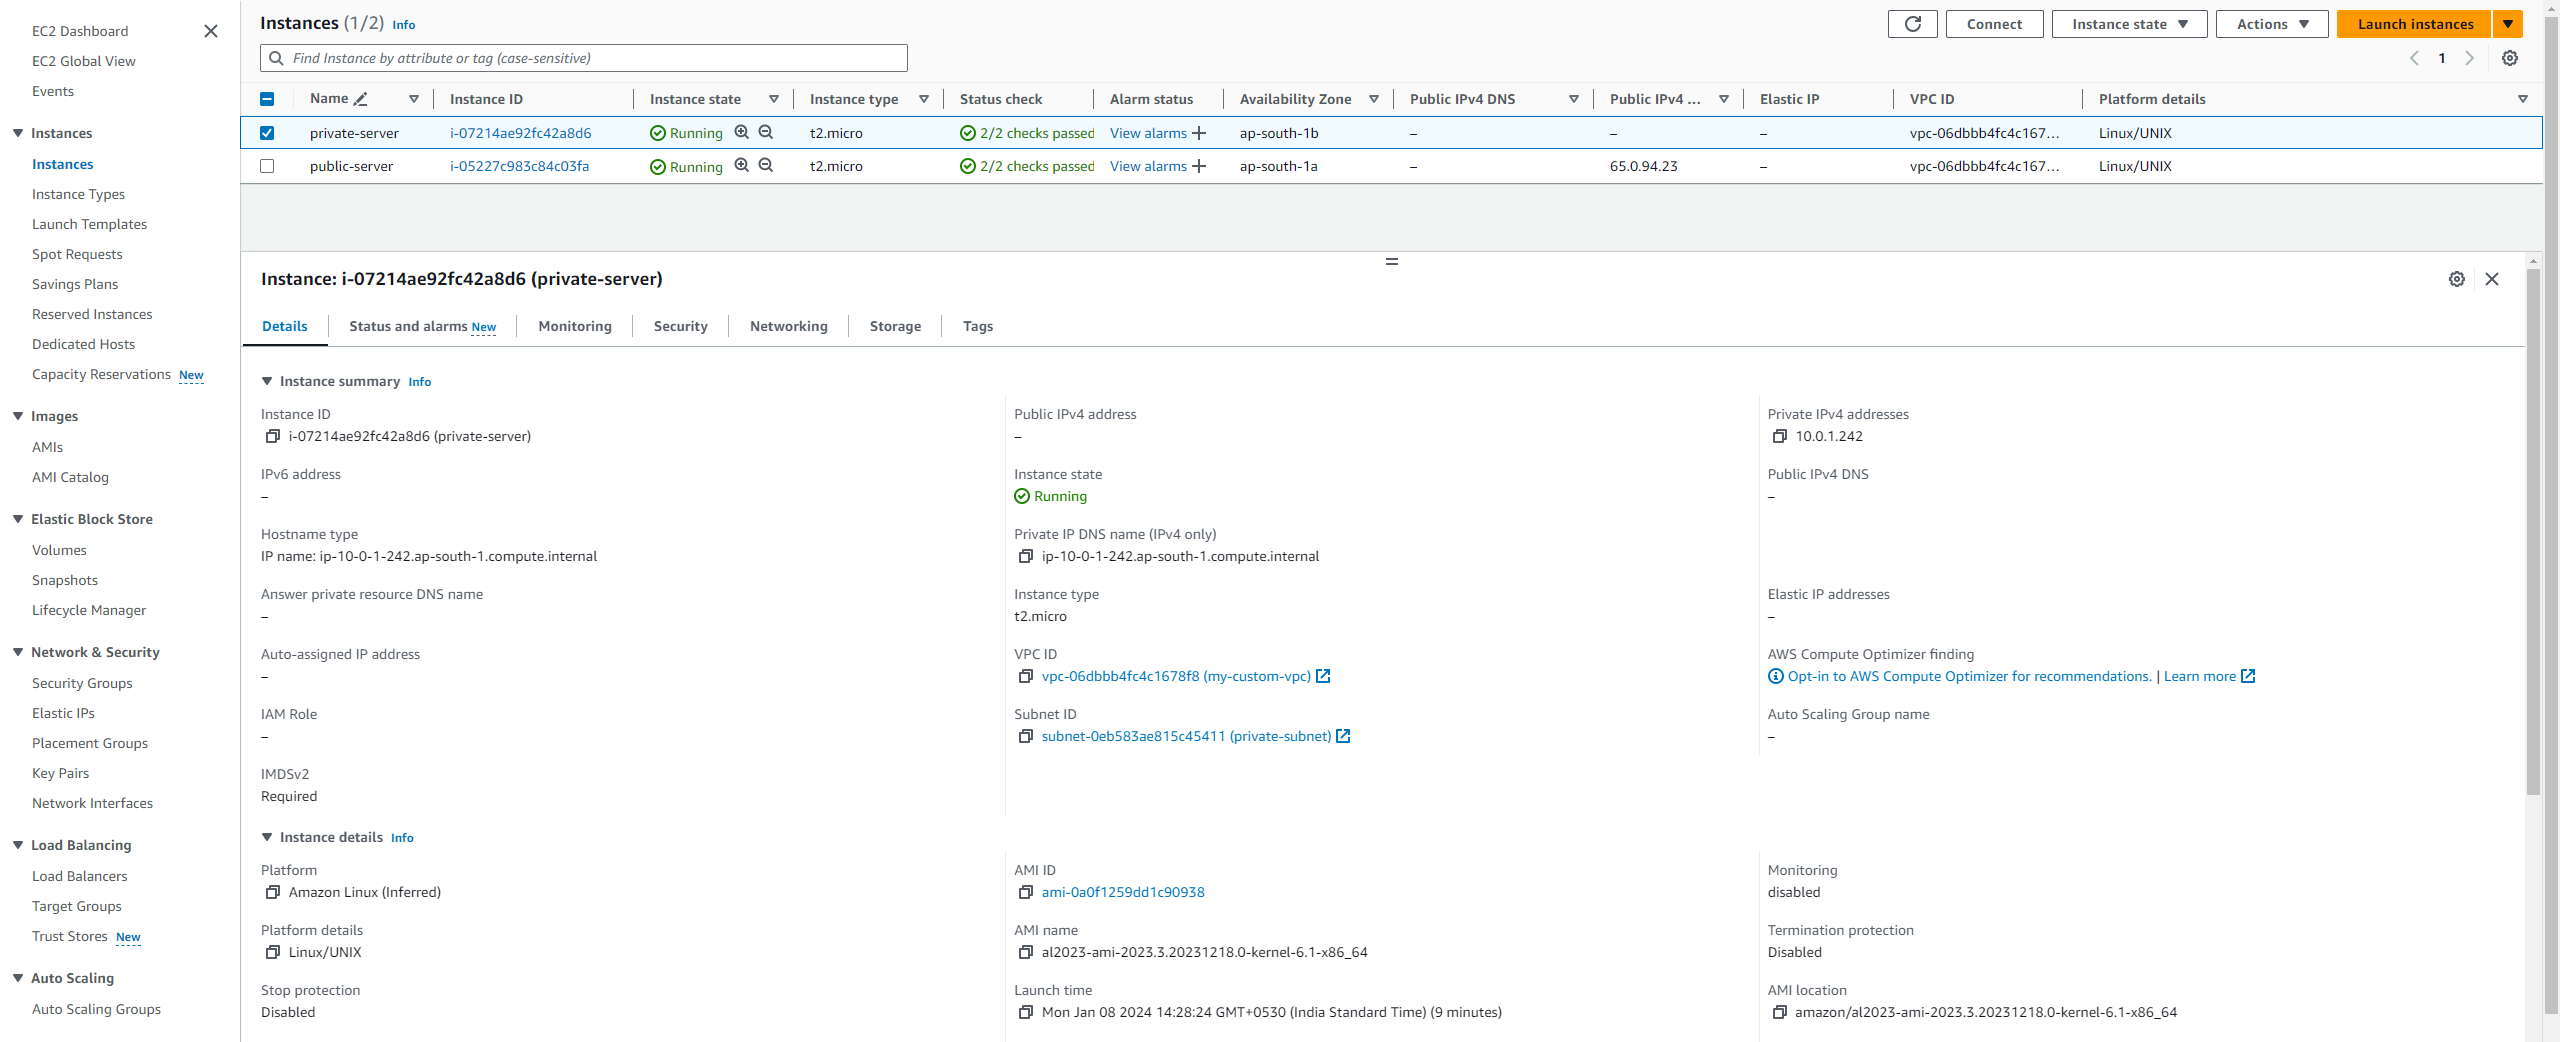
Step 2: Create EC2 Instances - one in Public and one in Private
Public Server - (Must have public IP)

Private Server - (Only have private IP)
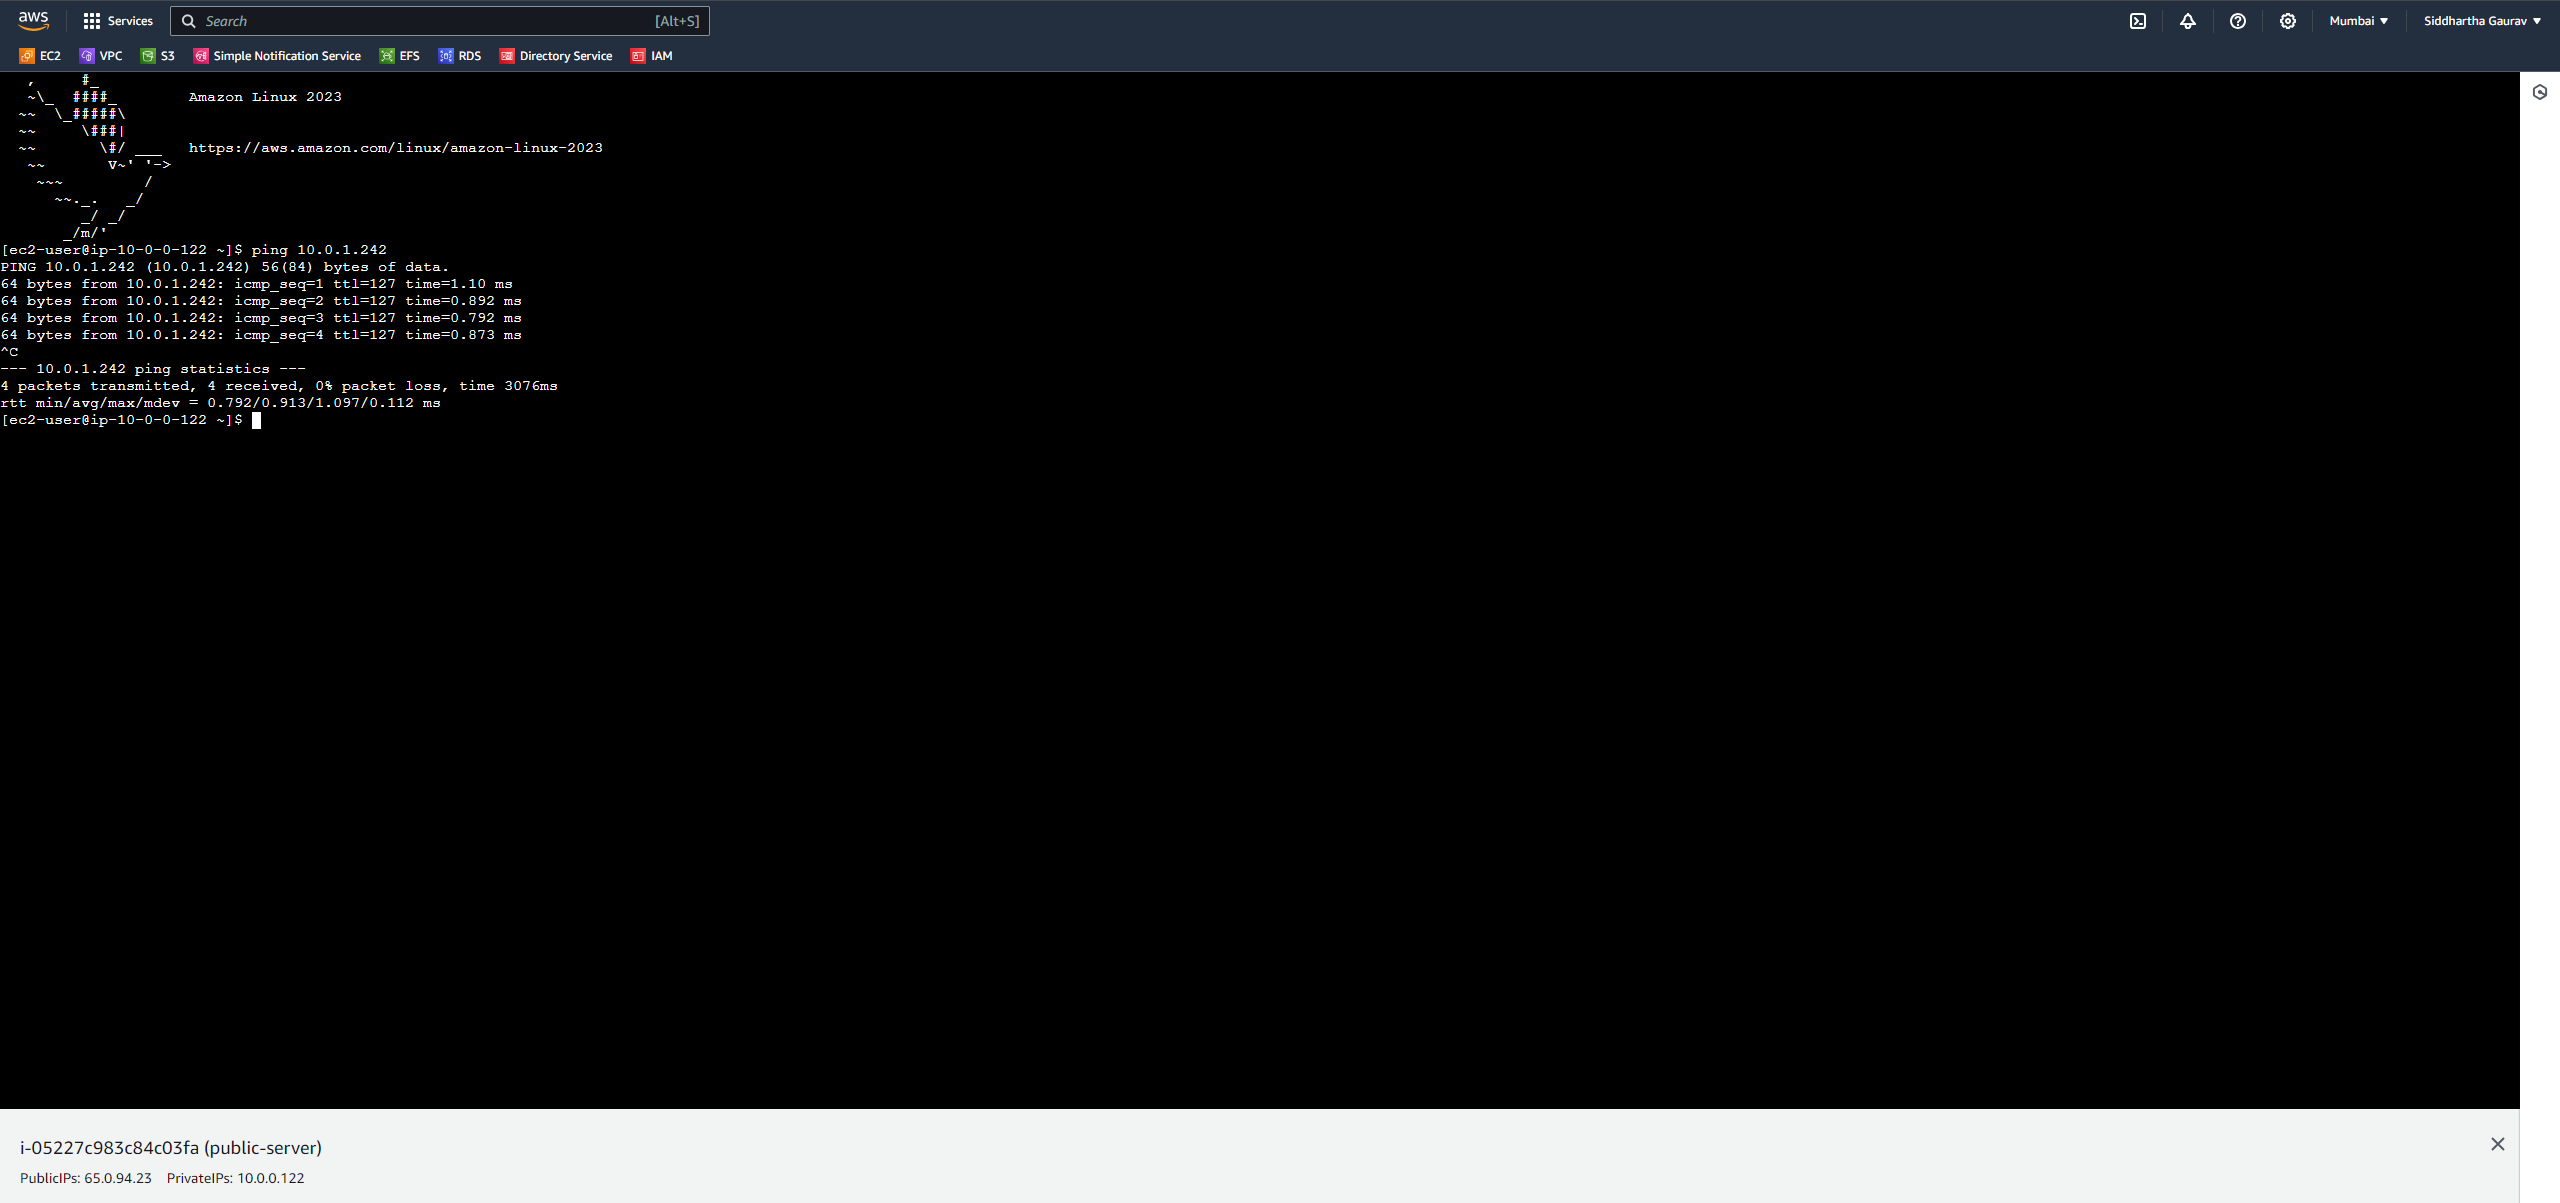
Step 3: Check Connectivity
Take console of Public server and try to ping the private server IP.
Let's try to take the console of private server.
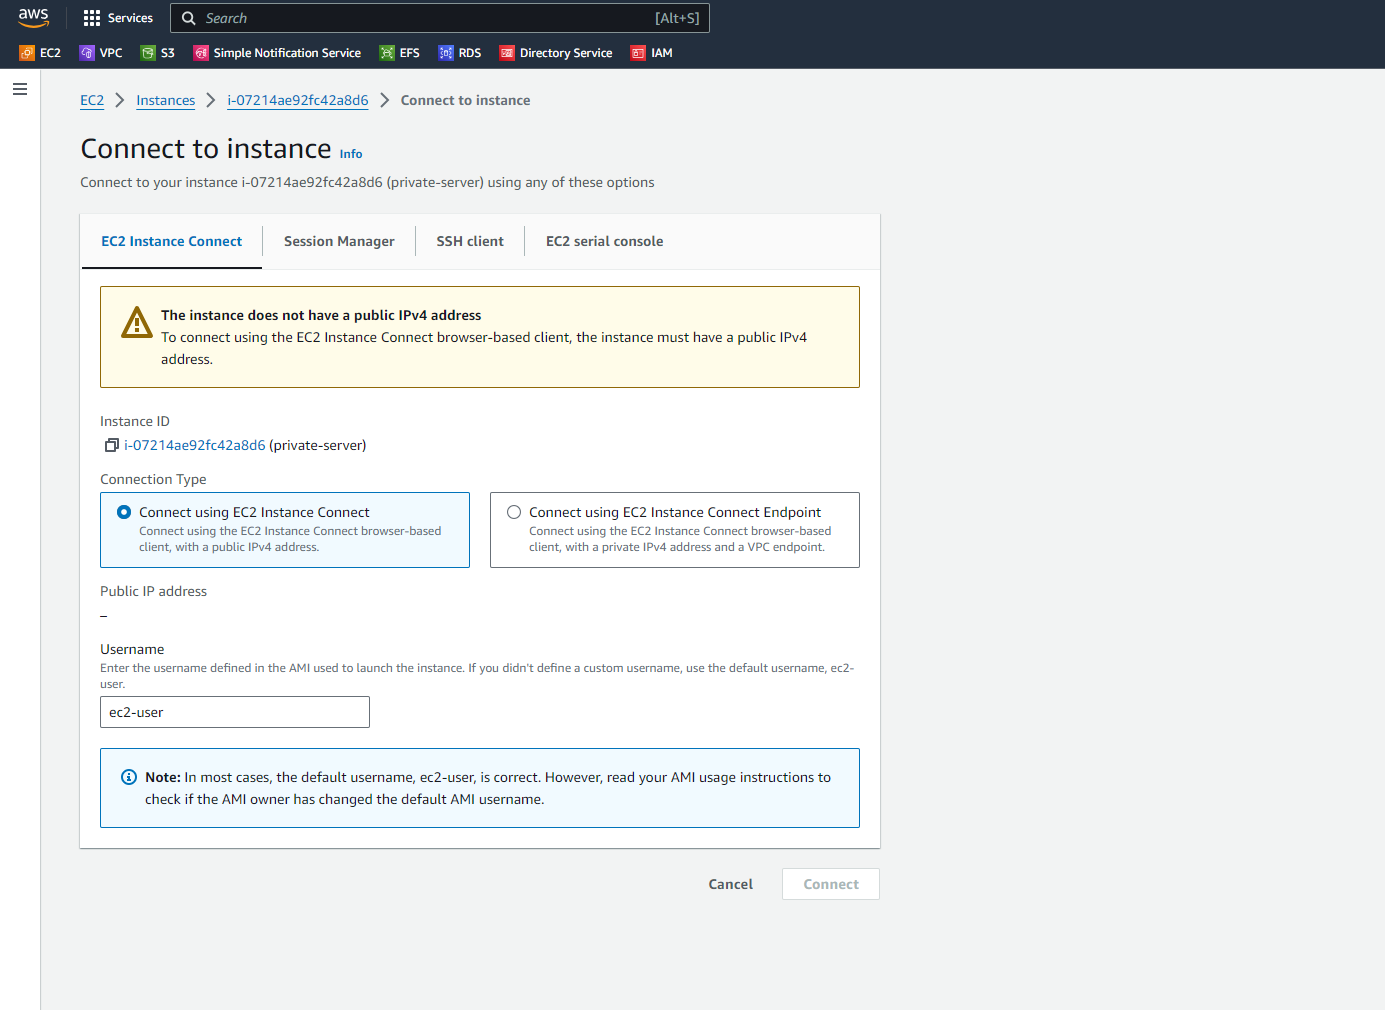
We can't take a remote console as this server does not have a Public IPv4 address.
Let's login to this private server by its private IP via the public server.
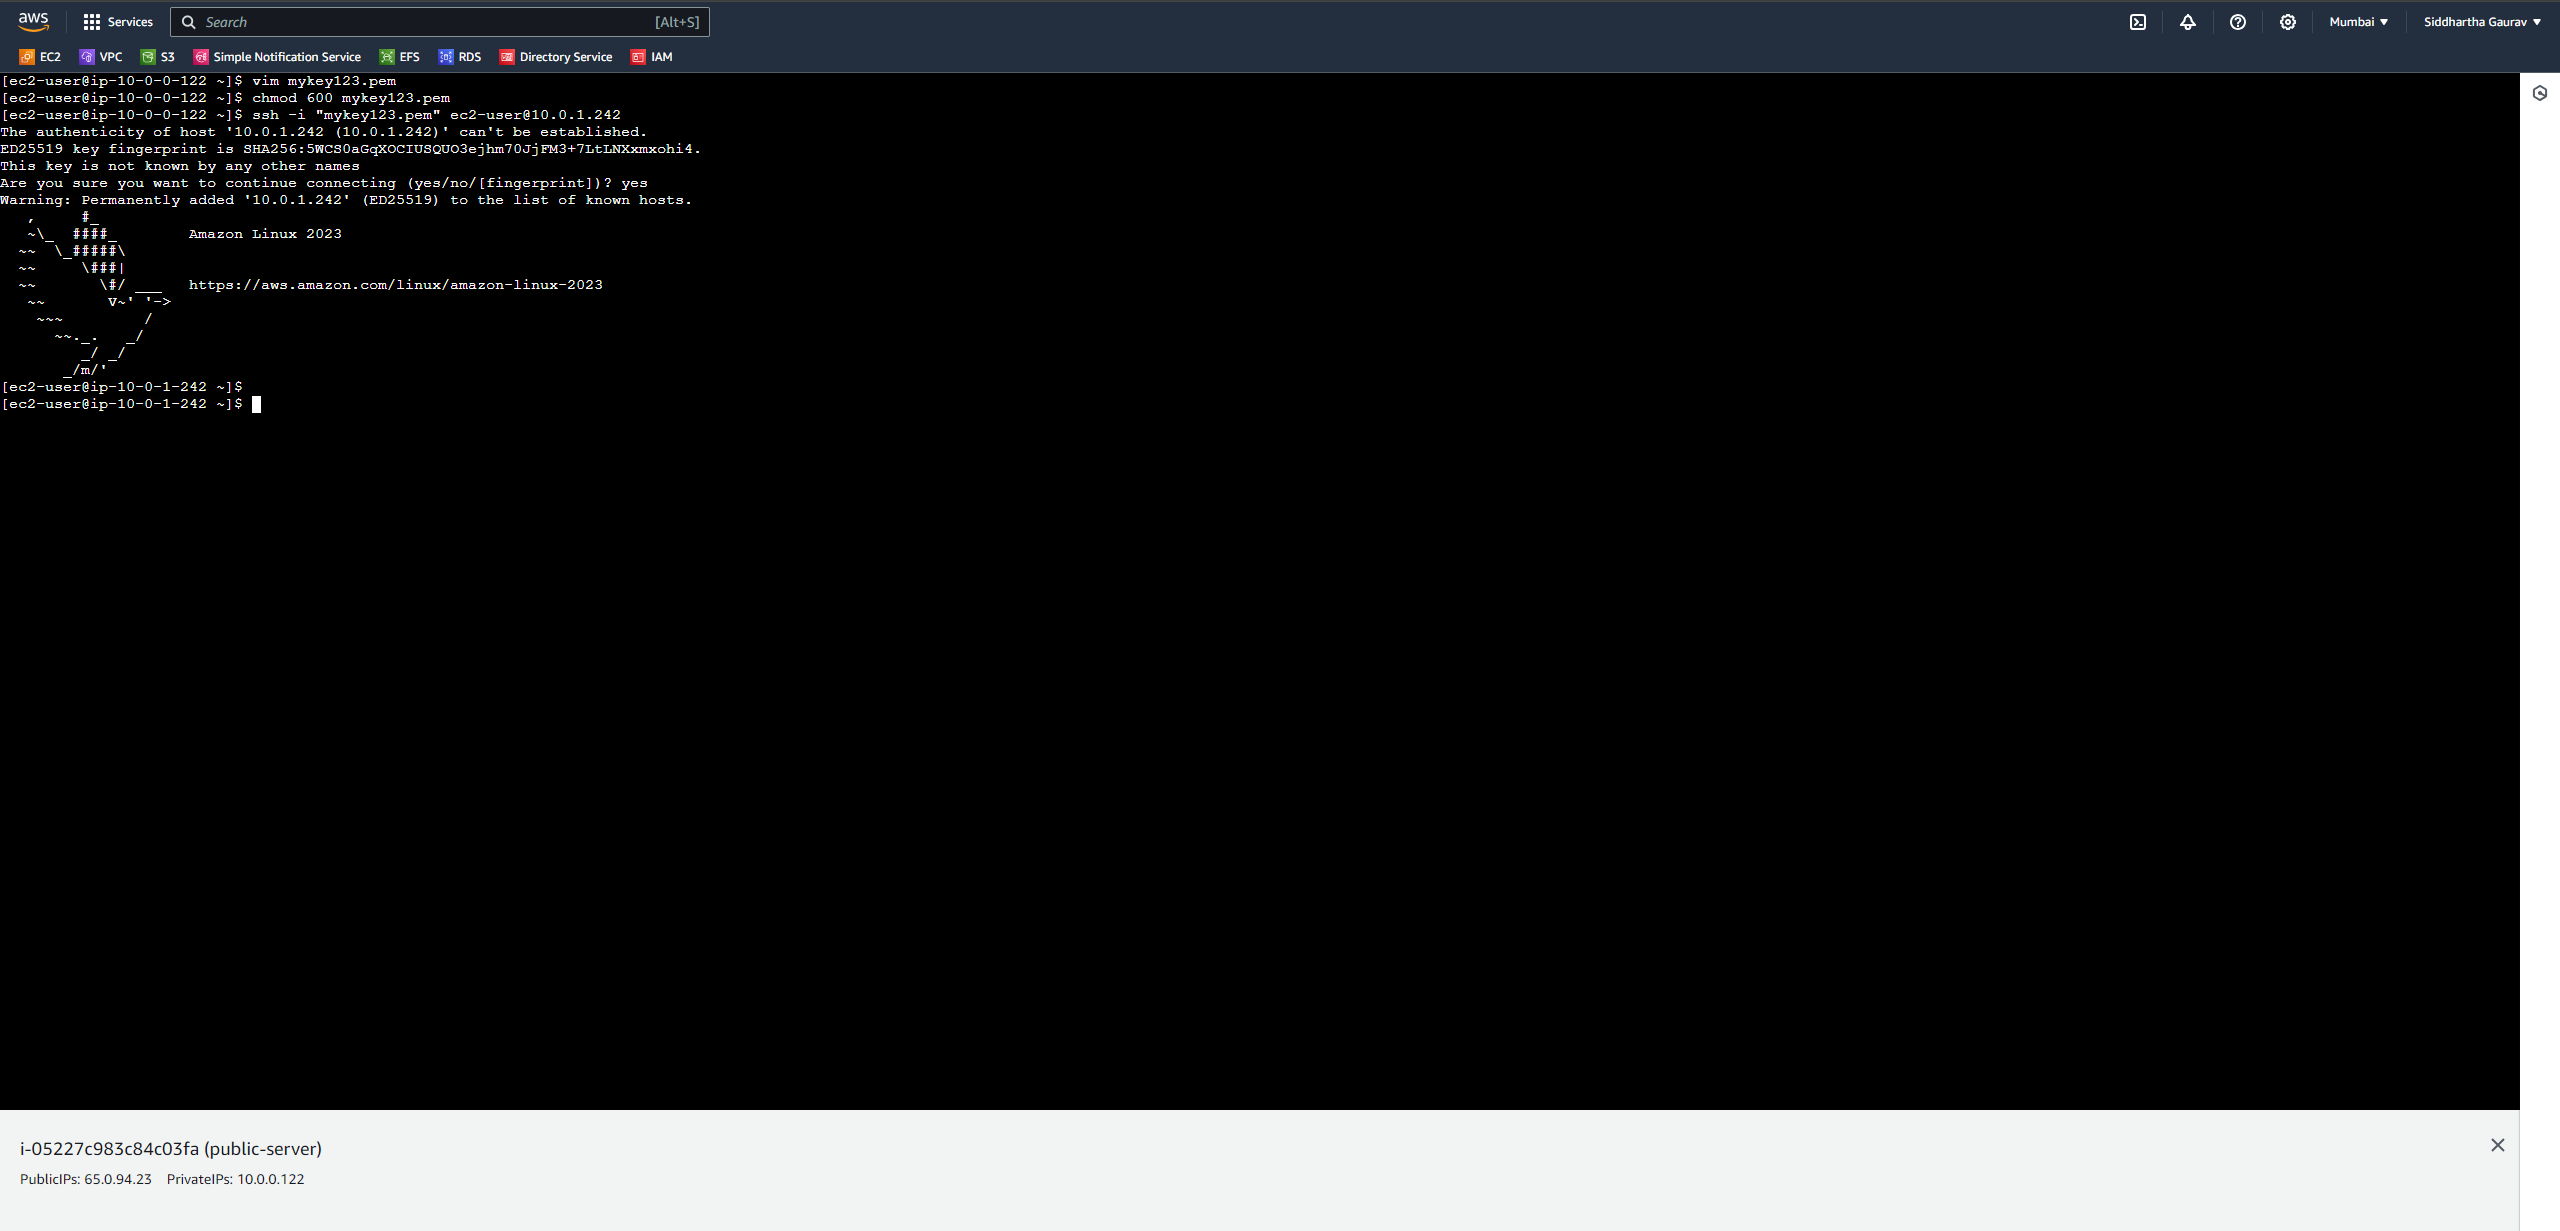
We successfully logged into the private server via the public server, technically known as a Jump server.
Now, attempt to ping google.com from the private server. It should not be reachable since this instance is created under a private subnet.
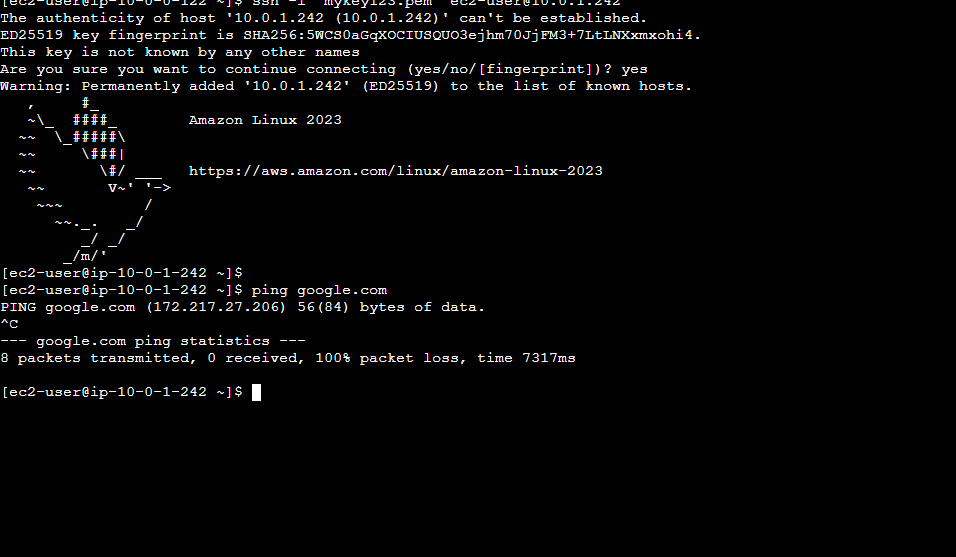
It is not able to reach the google.com or Internet.
So to resolve this issue, we have to create a NAT Gateway.
Step 4: Create NAT Gateway
Navigate to the VPC Console:
Log in to the AWS Management Console.
Go to the VPC Dashboard.
Create NAT Gateway:
Select "NAT Gateways" from the left pane.
Click "Create NAT Gateway."
Choose your VPC and a subnet for the NAT Gateway.
Allocate an Elastic IP address.

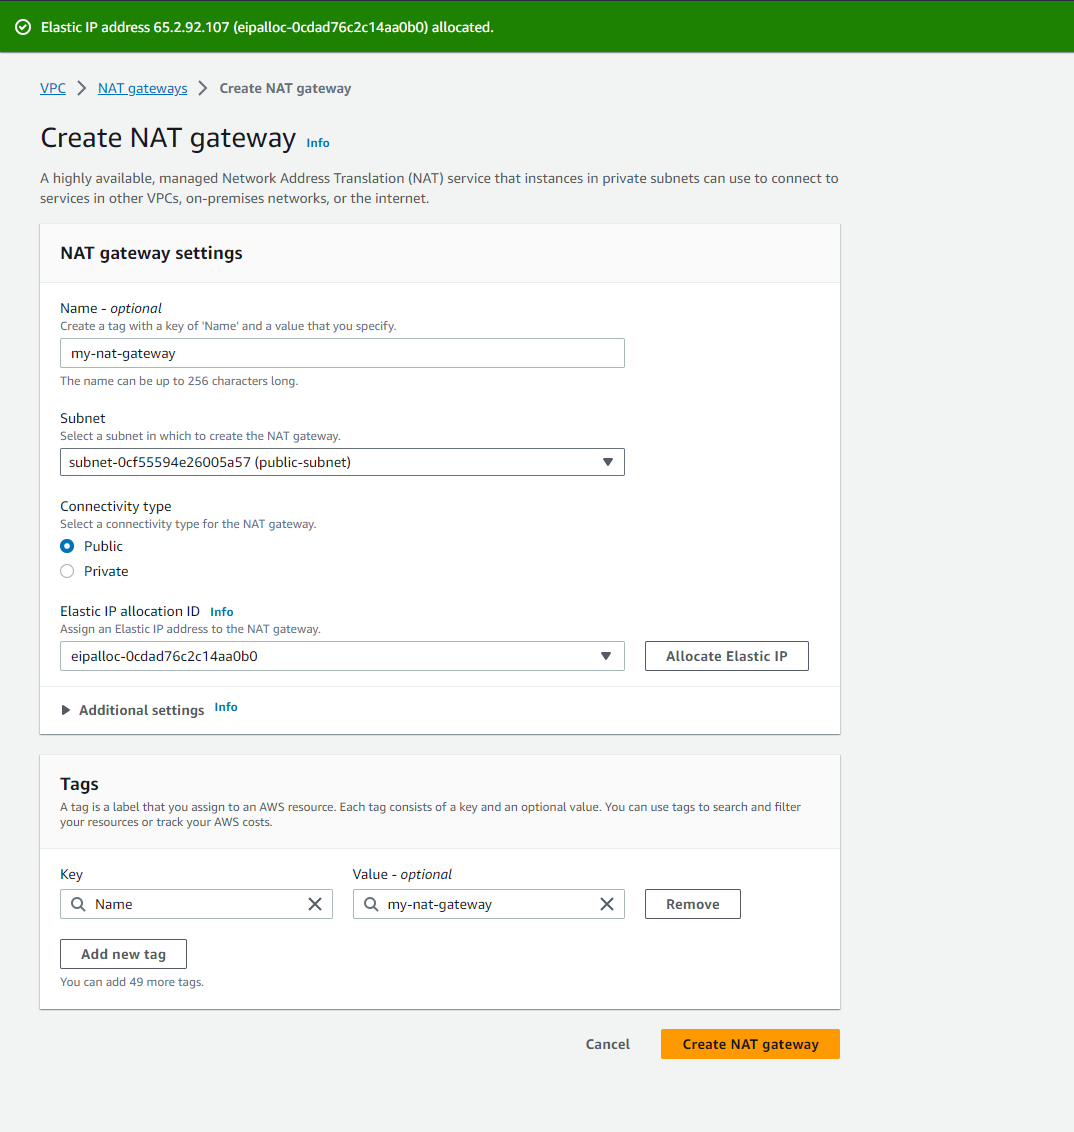
Review and Create:
Review your settings.
Click "Create NAT Gateway."
Wait for the NAT Gateway to be created.
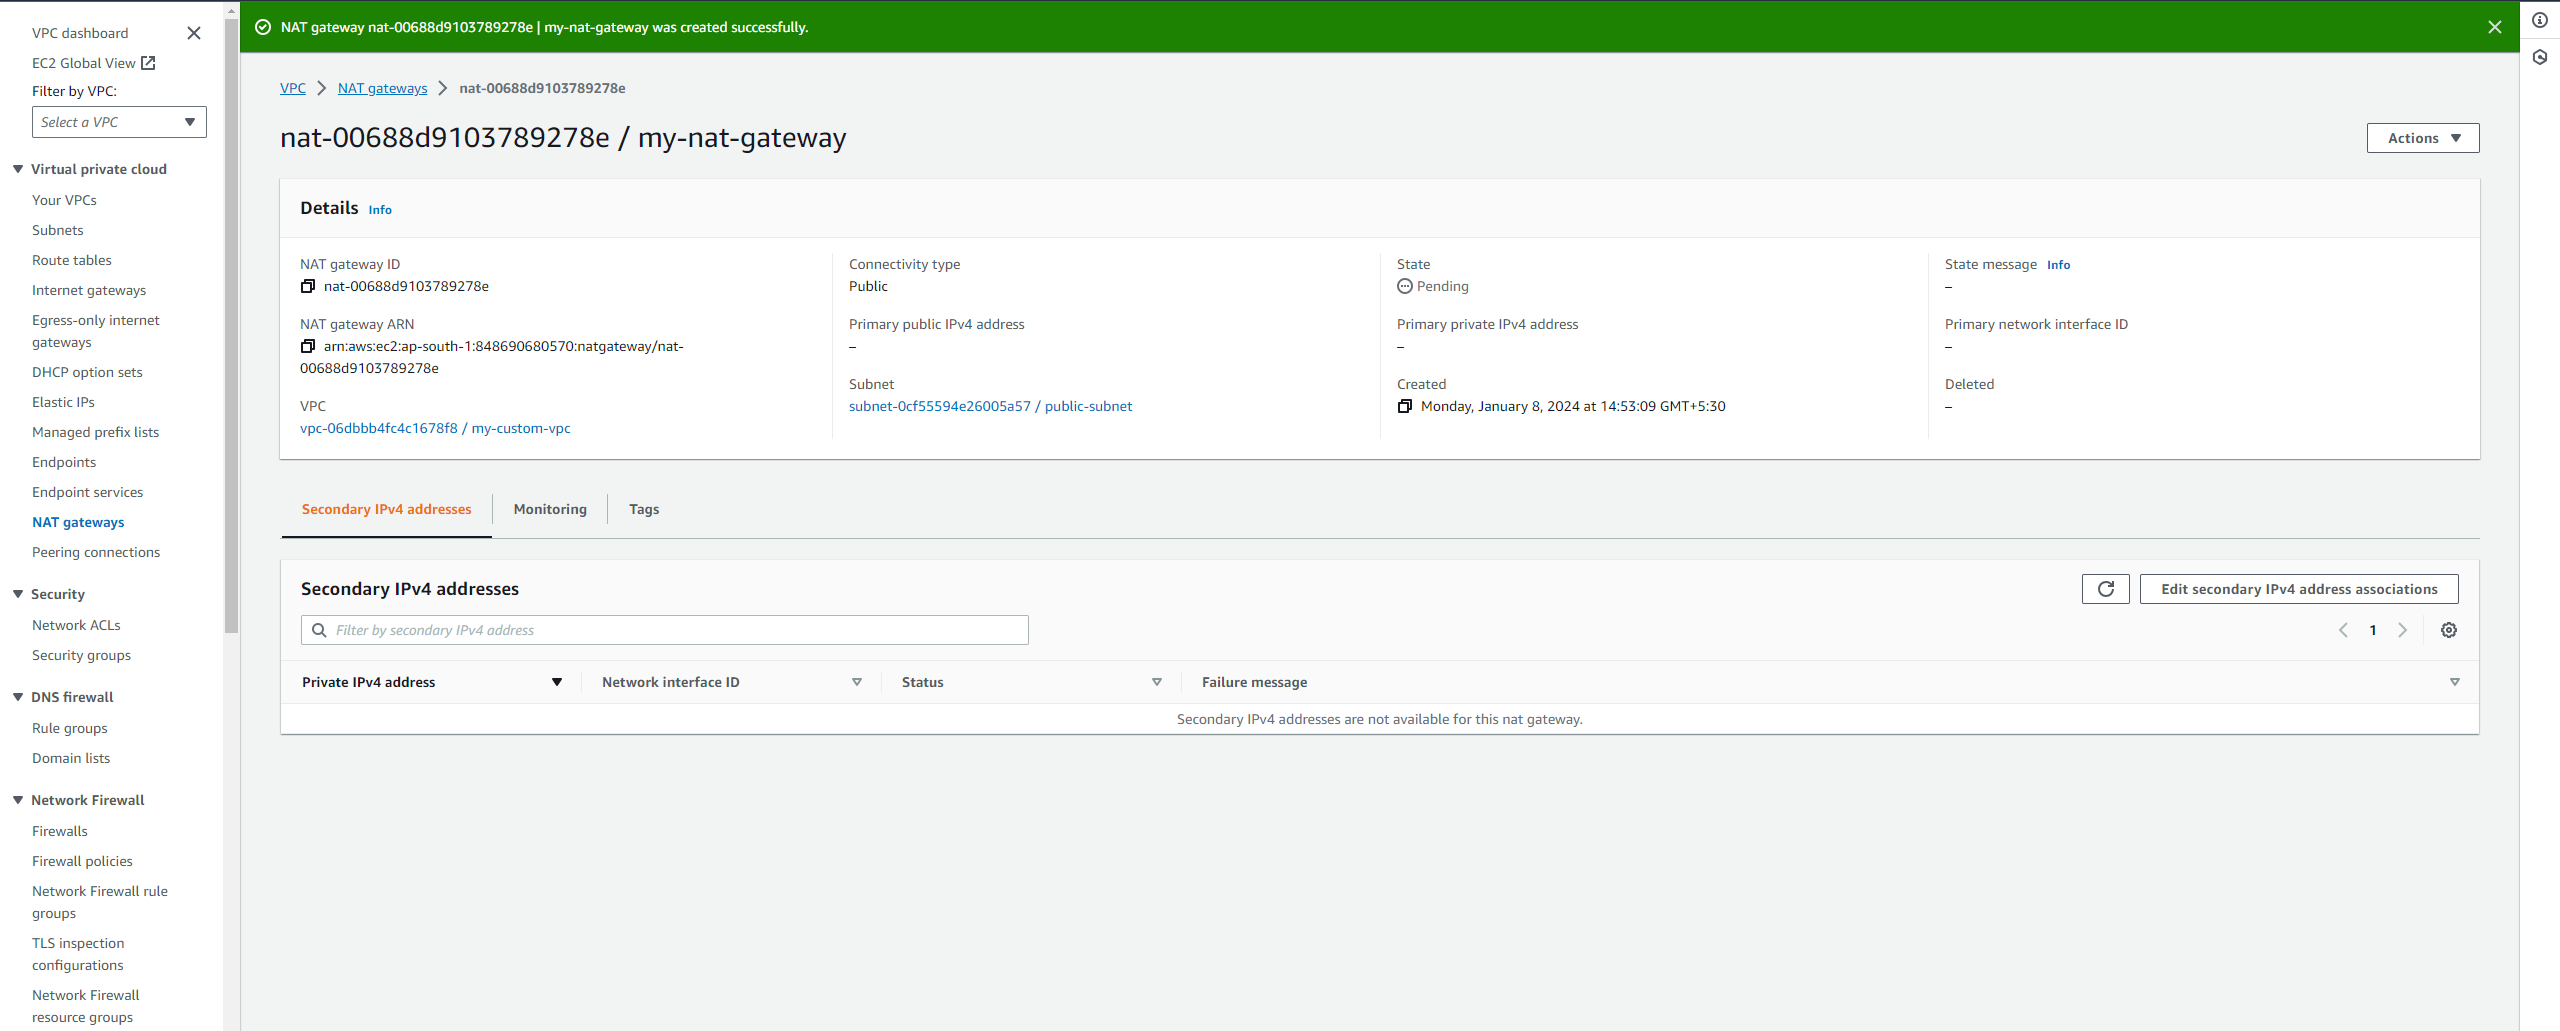
Step 5: Update Route Tables
Navigate to Route Tables:
- In the VPC Dashboard, select "Route Tables."

Update Route Table:
Edit the route table associated with your private subnet.
Add a route with the destination
0.0.0.0/0pointing to the NAT Gateway.


Step 6: Test the Configuration
Internet Access Test:
Connect to the private instance via public instance.
Ping google.com to check if the private server can now reach the internet.
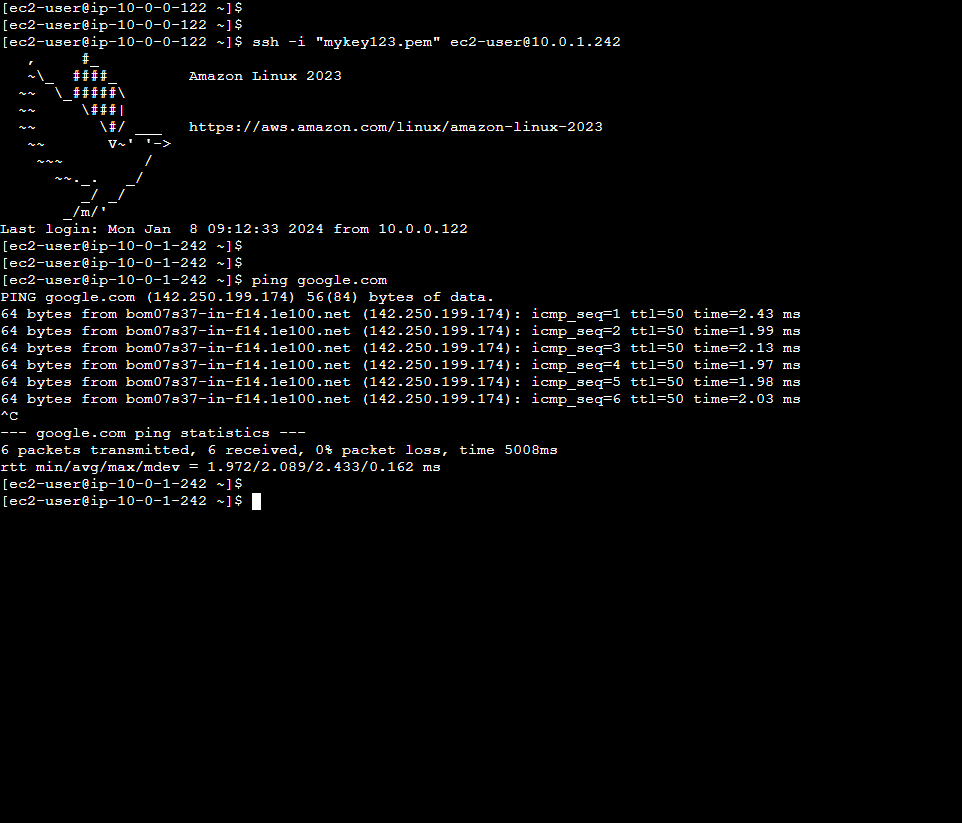
Hurray! we can reach to the internet via Private server with the help of NAT gateway.
Conclusion
Congratulations! You've successfully set up and tested an AWS VPC NAT Gateway. This essential networking component plays a crucial role in enabling outbound internet connectivity from private subnets, ensuring secure and controlled communication.
As you continue your AWS journey, consider exploring other VPC features and scenarios. Experiment with different configurations to gain a deeper understanding of AWS networking. Hands-on experience is key to mastering these cloud services.
Feel free to reach out to the AWS documentation and AWS community for further exploration. Happy learning, and may your cloud adventures be both educational and enjoyable!
Subscribe to my newsletter
Read articles from Siddhartha Gaurav directly inside your inbox. Subscribe to the newsletter, and don't miss out.
Written by

Siddhartha Gaurav
Siddhartha Gaurav
I'm a passionate DevOps engineer with a knack for streamlining development workflows and ensuring seamless deployment pipelines. With experience in managing cloud infrastructure, implementing DevOps best practices, and leveraging automation tools, I thrive on tackling complex challenges and driving efficiency in software delivery. Let's connect and explore how I can contribute to your projects!