End-to-End CICD Virtual Browser project
 Suresh Kumar S
Table of contents
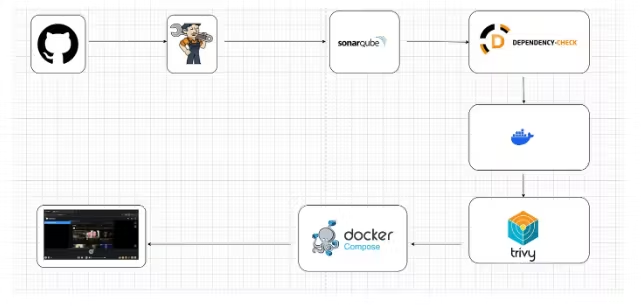
Introduction: In the ever-evolving realm of software development, Continuous Integration and Continuous Deployment (CICD) have emerged as indispensable practices for ensuring efficiency, reliability, and agility in the development lifecycle. The Full Stack CICD Virtual Browser Project is a groundbreaking initiative aimed at revolutionizing how developers test their applications across various browsers in a seamless and automated manner.
GitHub Repository: Virtual Browser Project on GitHub
Step-by-Step Implementation:
Step 1: Provisioning an EC2 Instance on AWS
AWS Console Sign-in:
- Navigate to the AWS Console and log in to your AWS Management Console.
Accessing the EC2 Dashboard:
- From the top menu, select "Services" and navigate to "EC2" under the Compute section.
Initiating Instance Creation:
- Click on the "Launch Instance" button to start the process of creating a new EC2 instance.
Choosing an Amazon Machine Image (AMI):
- In the "Choose an Amazon Machine Image" step, select an appropriate AMI, such as the Ubuntu image.
Selecting Instance Type:
- In the "Choose Instance Type" step, opt for t2.large as your instance type. Proceed by clicking "Next: Configure Instance Details."
Configuring Instance Details:
Set the "Number of Instances" to 1 (unless multiple instances are required).
Configure additional settings like network, subnets, IAM role, etc., if necessary.
For "Storage," add a new volume and set the size to 8GB (or adjust existing storage to 16GB).
Click "Next: Add Tags" when finished.
Adding Tags (Optional):
- Include any desired tags for your instance. This step is optional but helps in organizing instances effectively.
Configuring Security Group:
Choose an existing security group or create a new one.
Ensure the security group has the necessary inbound/outbound rules to allow access as required.
Reviewing and Launching:
- Examine the configuration details to ensure everything is set as desired.
Selecting Key Pair:
Select "Choose an existing key pair" and choose the key pair from the dropdown.
Confirm that you have access to the selected private key file.
Launching the EC2 Instance:
- Click "Launch Instances" to create the EC2 instance.
Accessing the EC2 Instance:
- Once the instance is launched, access it using the key pair and the instance's public IP or DNS.
Security Best Practices:
Ensure you possess the necessary permissions and adhere to best practices while configuring security groups and key pairs to maintain the security of your EC2 instance.

Step 2: Connect to Instance and Install Required Packages:
2A) Install Java:
bashCopy codesudo apt install openjdk-17-jre
wget https://get.jenkins.io/war-stable/2.426.2/jenkins.war
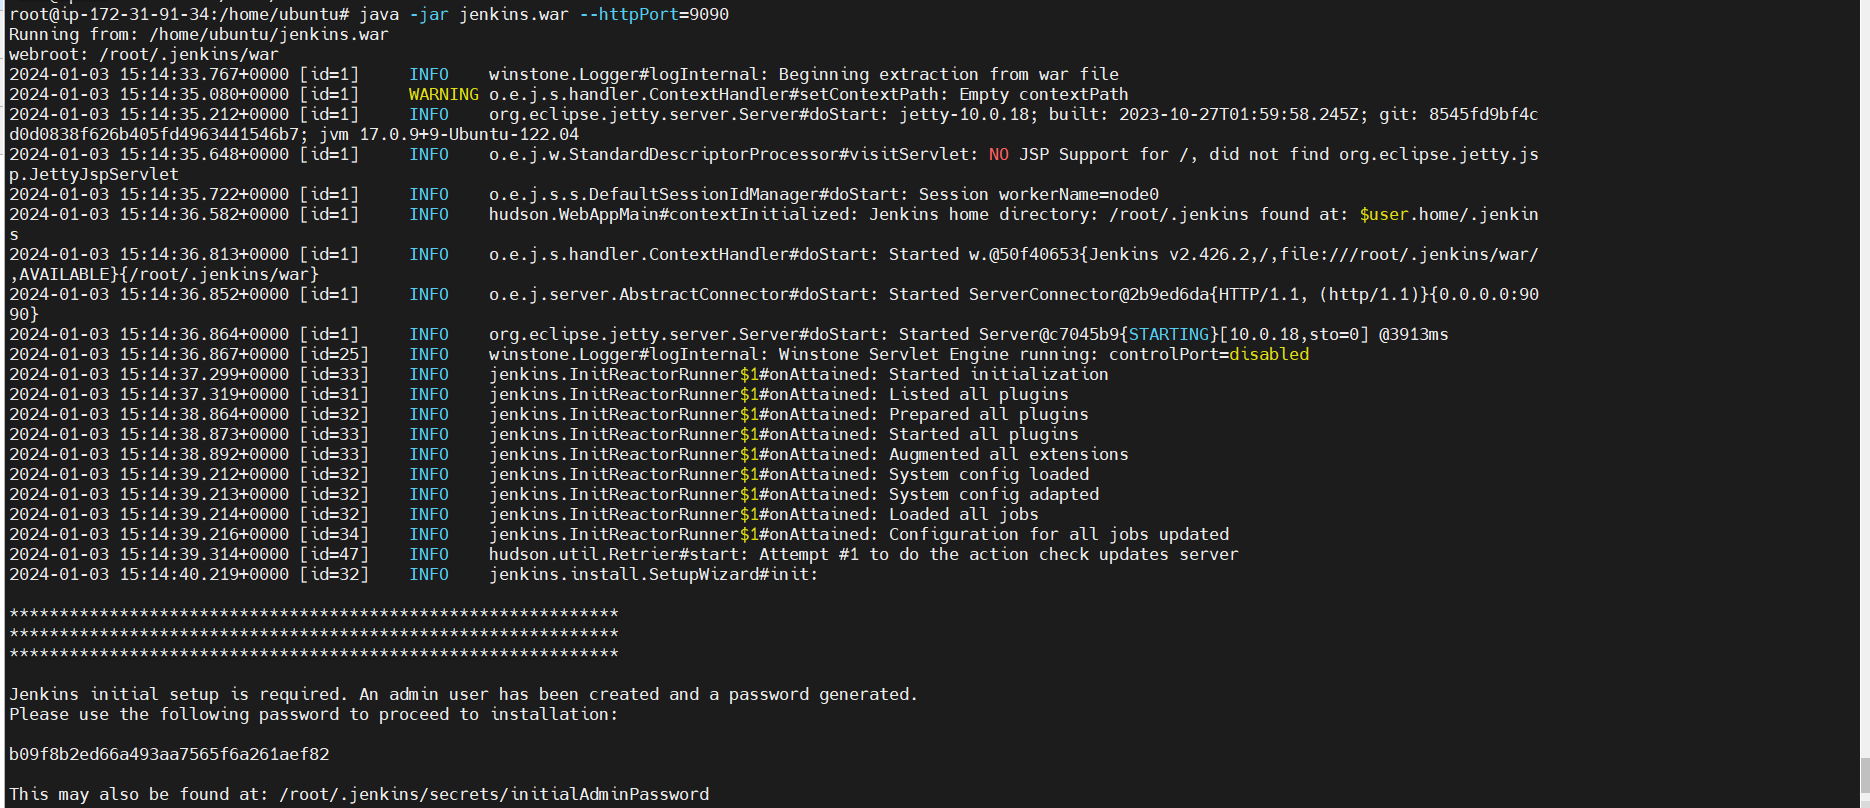
java -jar jenkins.war --httpPort=9090
(Jenkins is run on port 9090 in this demo).

2B) Install Docker:
bashCopy codesudo apt-get update
sudo apt-get install docker.io -y
sudo apt-get install docker-compose -y
sudo usermod -aG docker $USER
sudo chmod 777 /var/run/docker.sock
sudo docker ps
Create a Sonarqube container on port 9000.

Step 3: Install Plugins in Jenkins
3A) Install Plugins:
OWASP
SonarQube Scanner
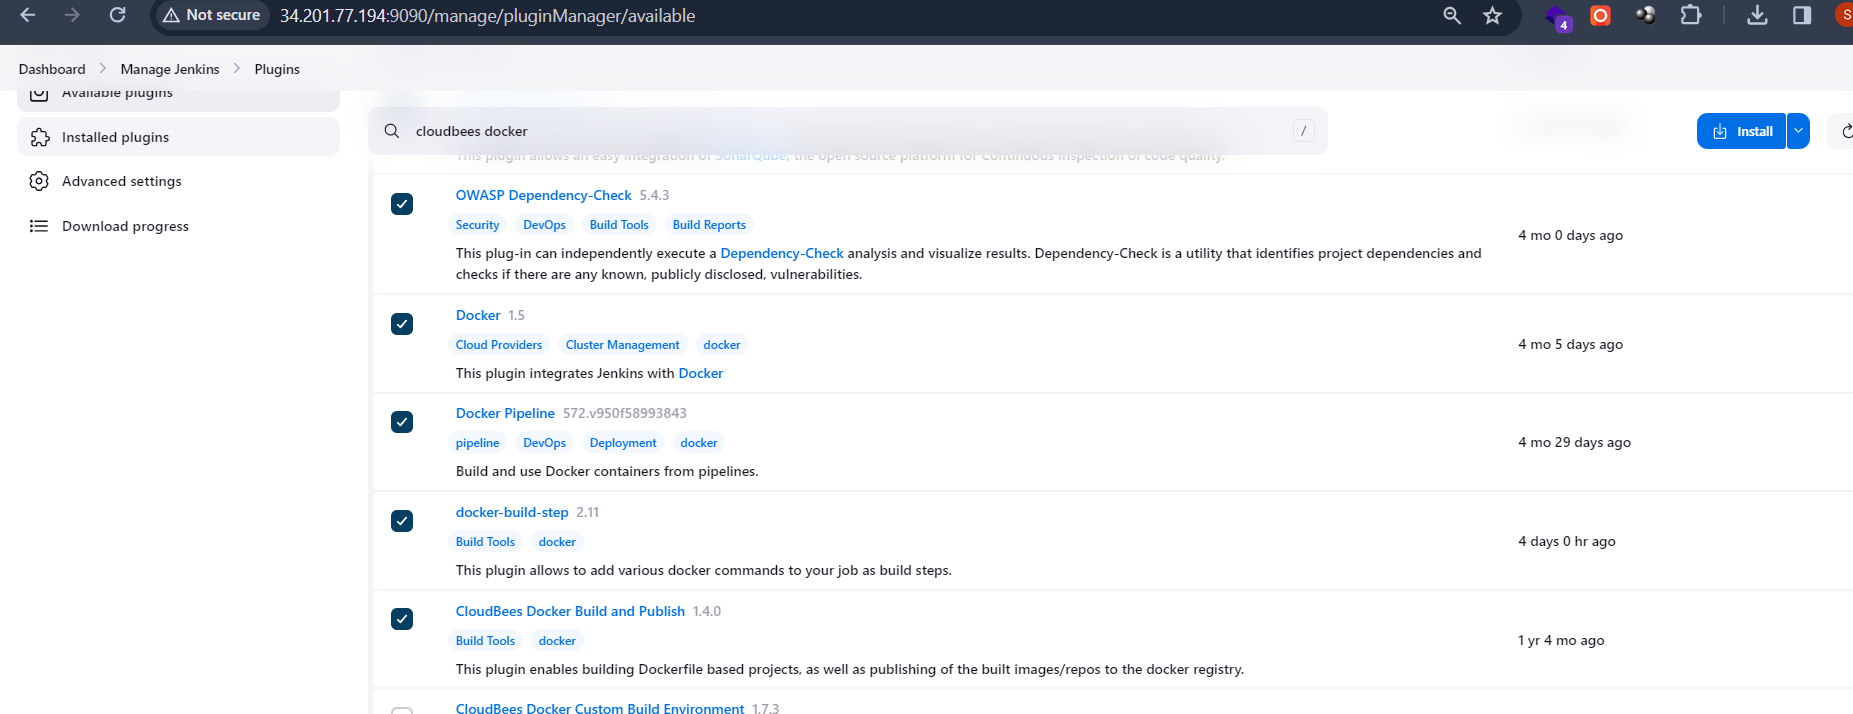
docker (docker, docker-pipleine , docker-build-step, cloudbees docker)
Goto Manage Jenkins → Plugins → Available Plugins → Install required plugins.
Step 4: Configure Tools in Jenkins:
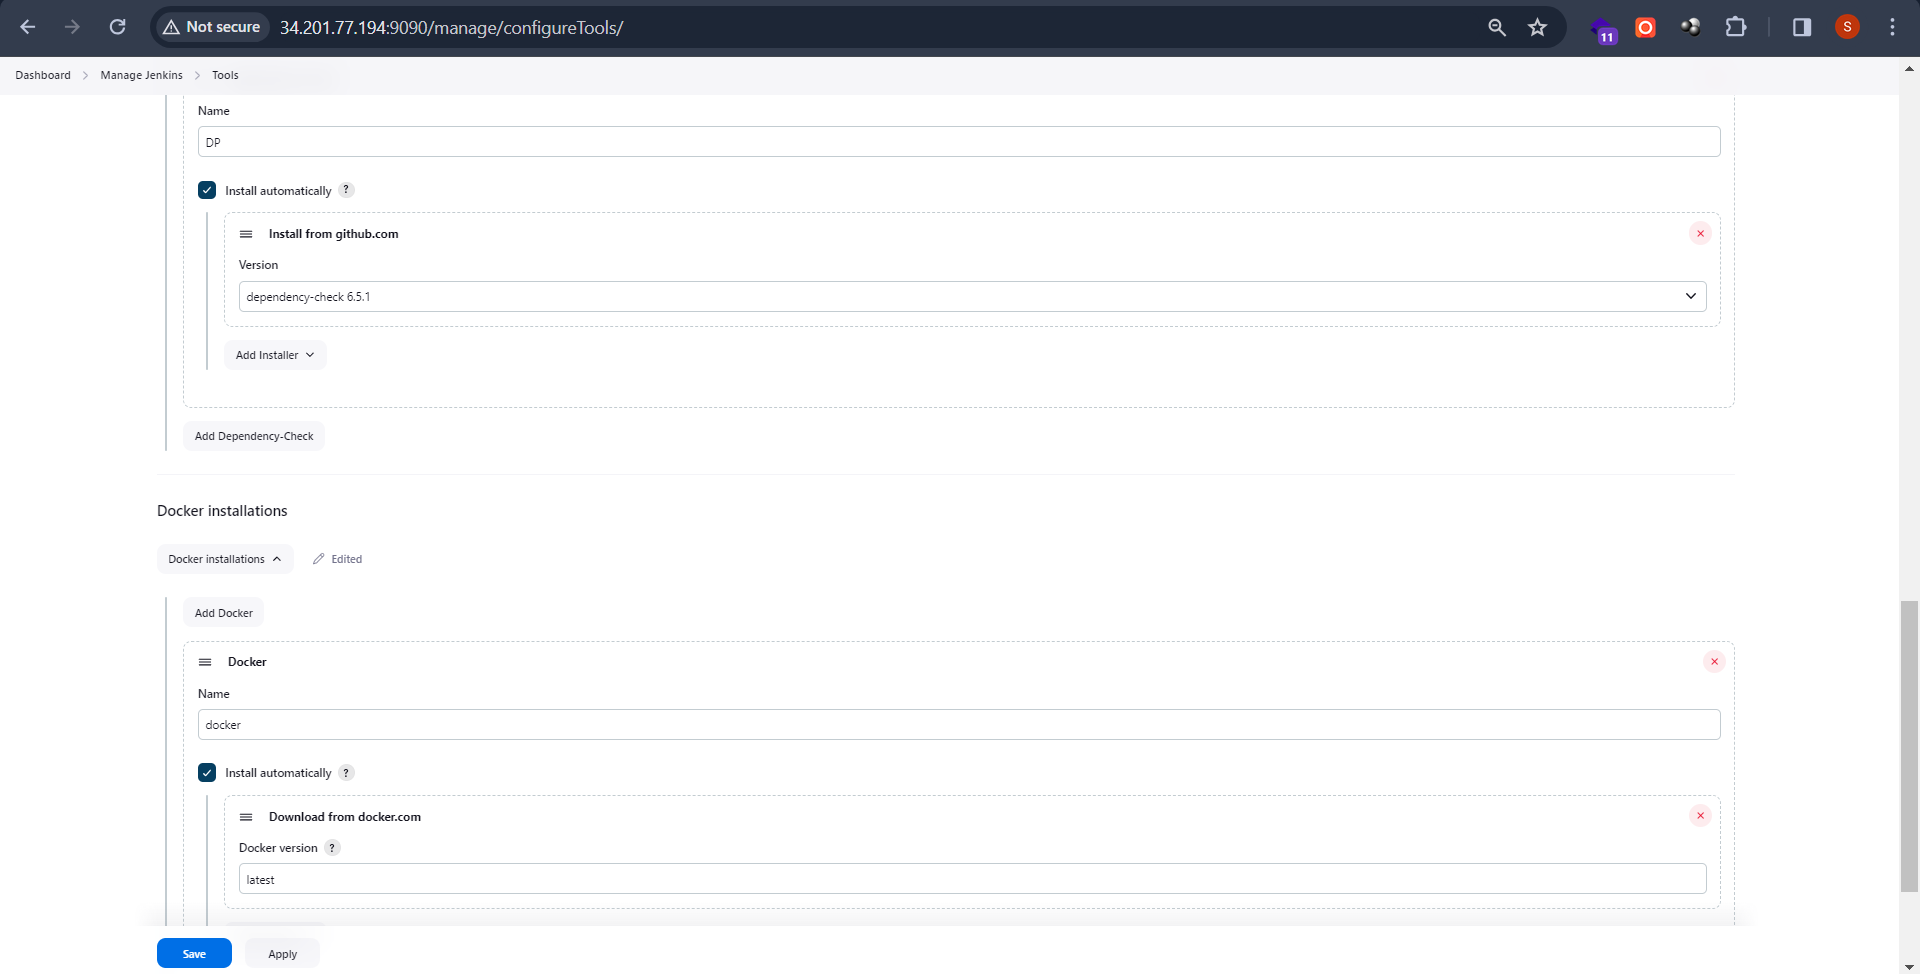
Goto Dashboard → Manage Jenkins → Tools and install OWASP, Docker, and Sonar-scanner tools versions.
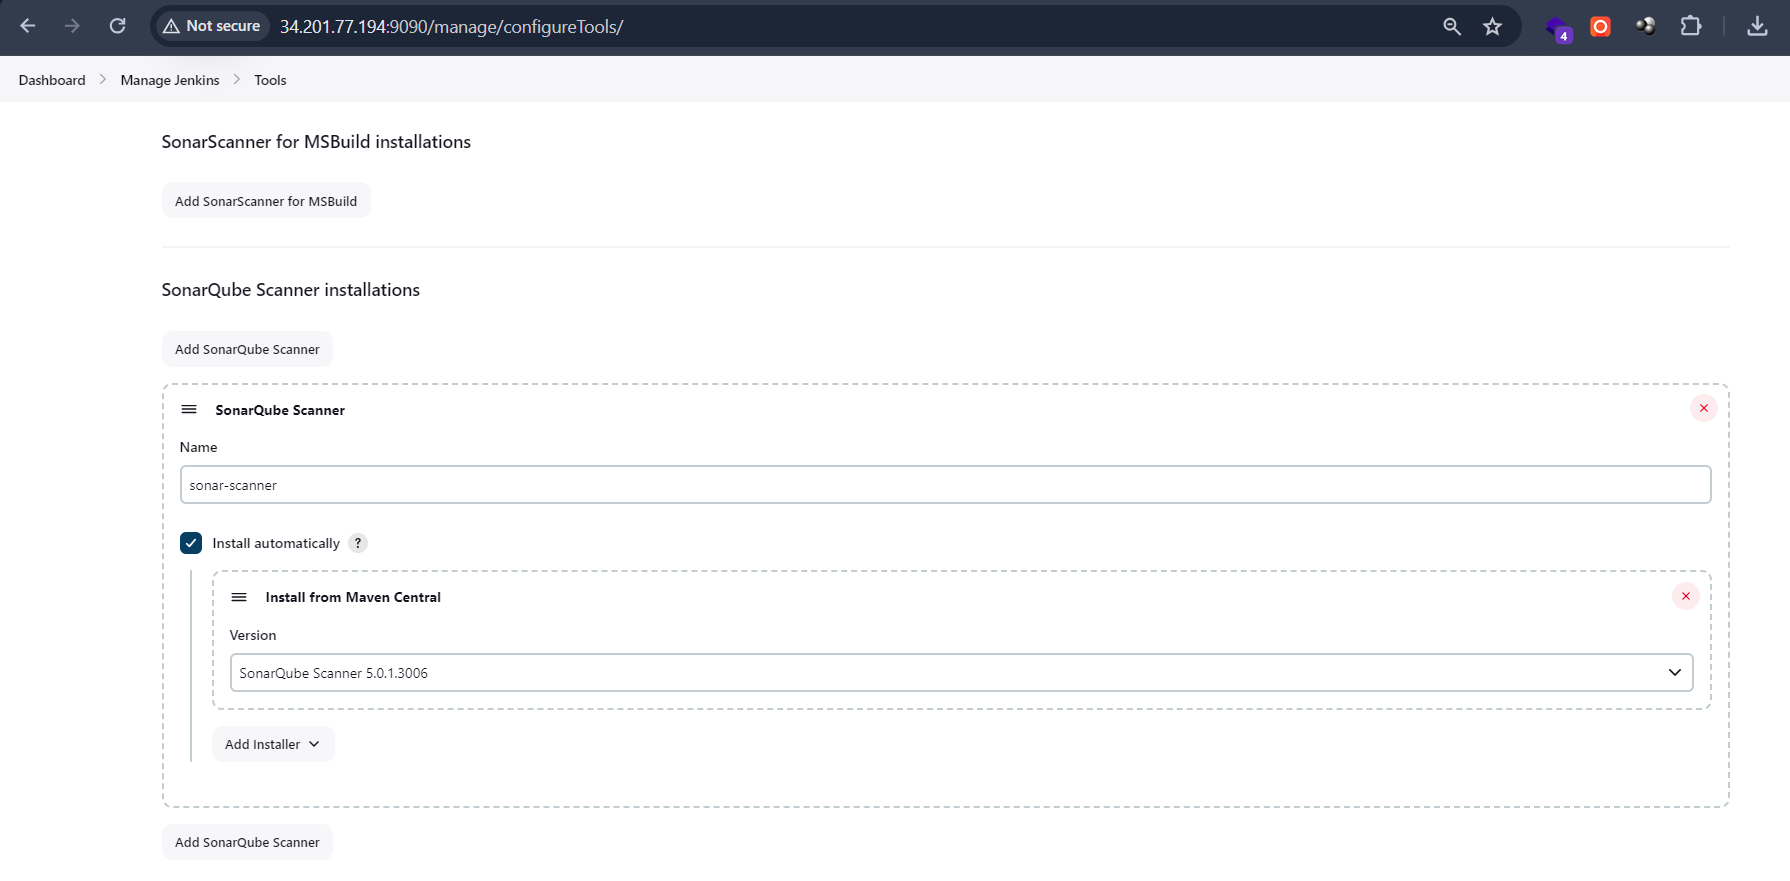
Step 5: Configure Sonar Server in Manage Jenkins
Grab the Public IP Address of your EC2 Instance, Sonarqube works on Port 9000 , sp <Public IP>:9000. Goto your Sonarqube Server. Click on Administration → Security → Users → Click on Tokens and Update Token → Give it a name → and click on Generate Token

Click on Update Token
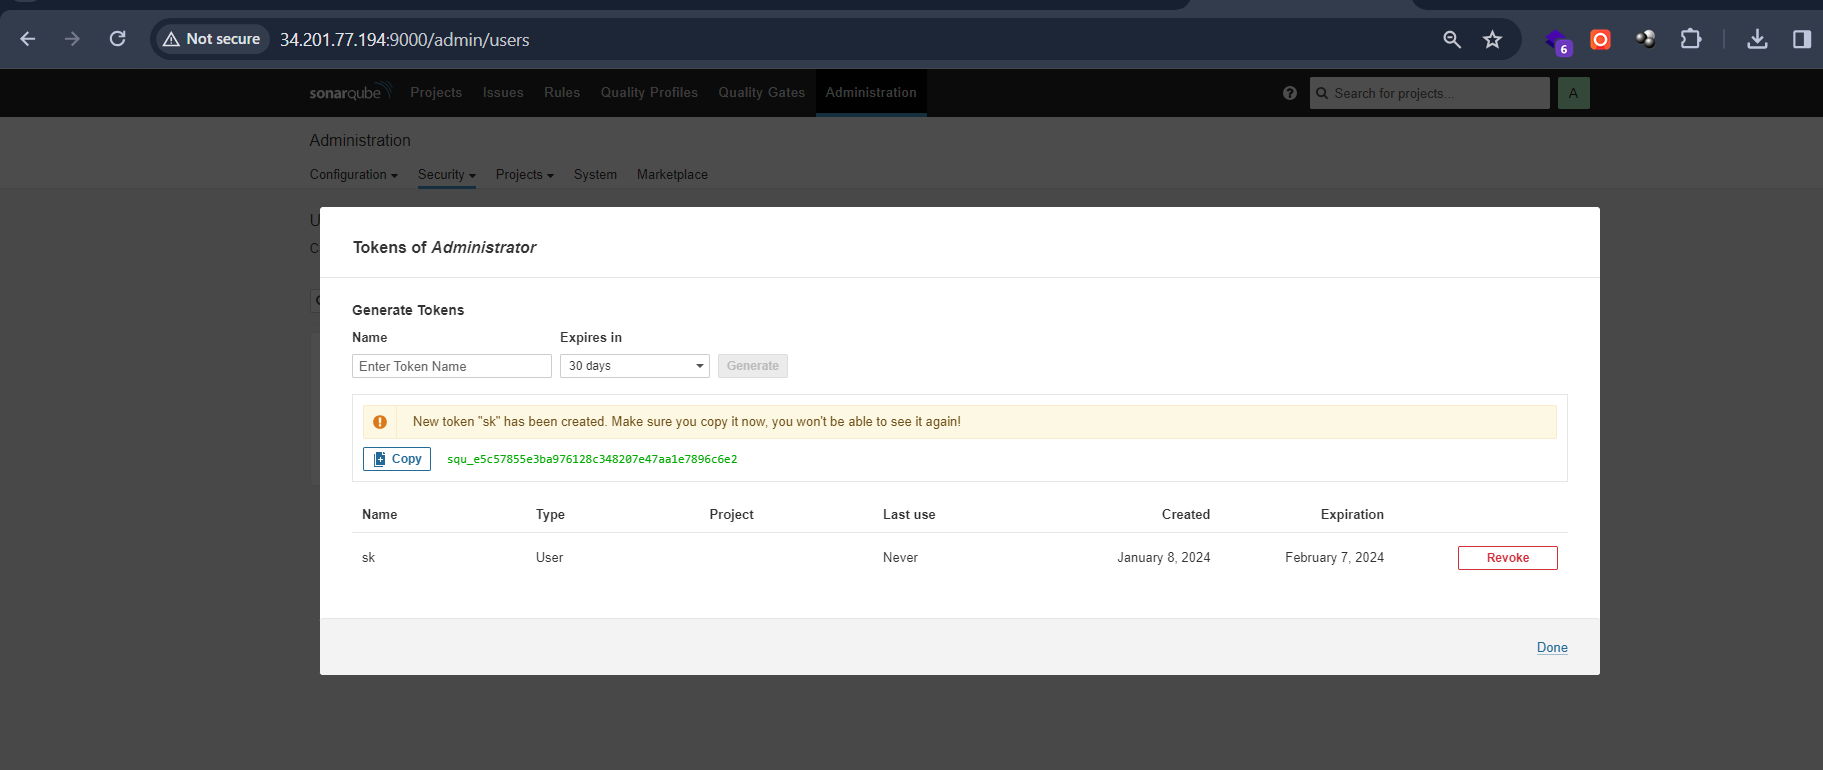
Copy this Token
Goto Dashboard → Manage Jenkins → Credentials → Add Secret Text. It should look like this
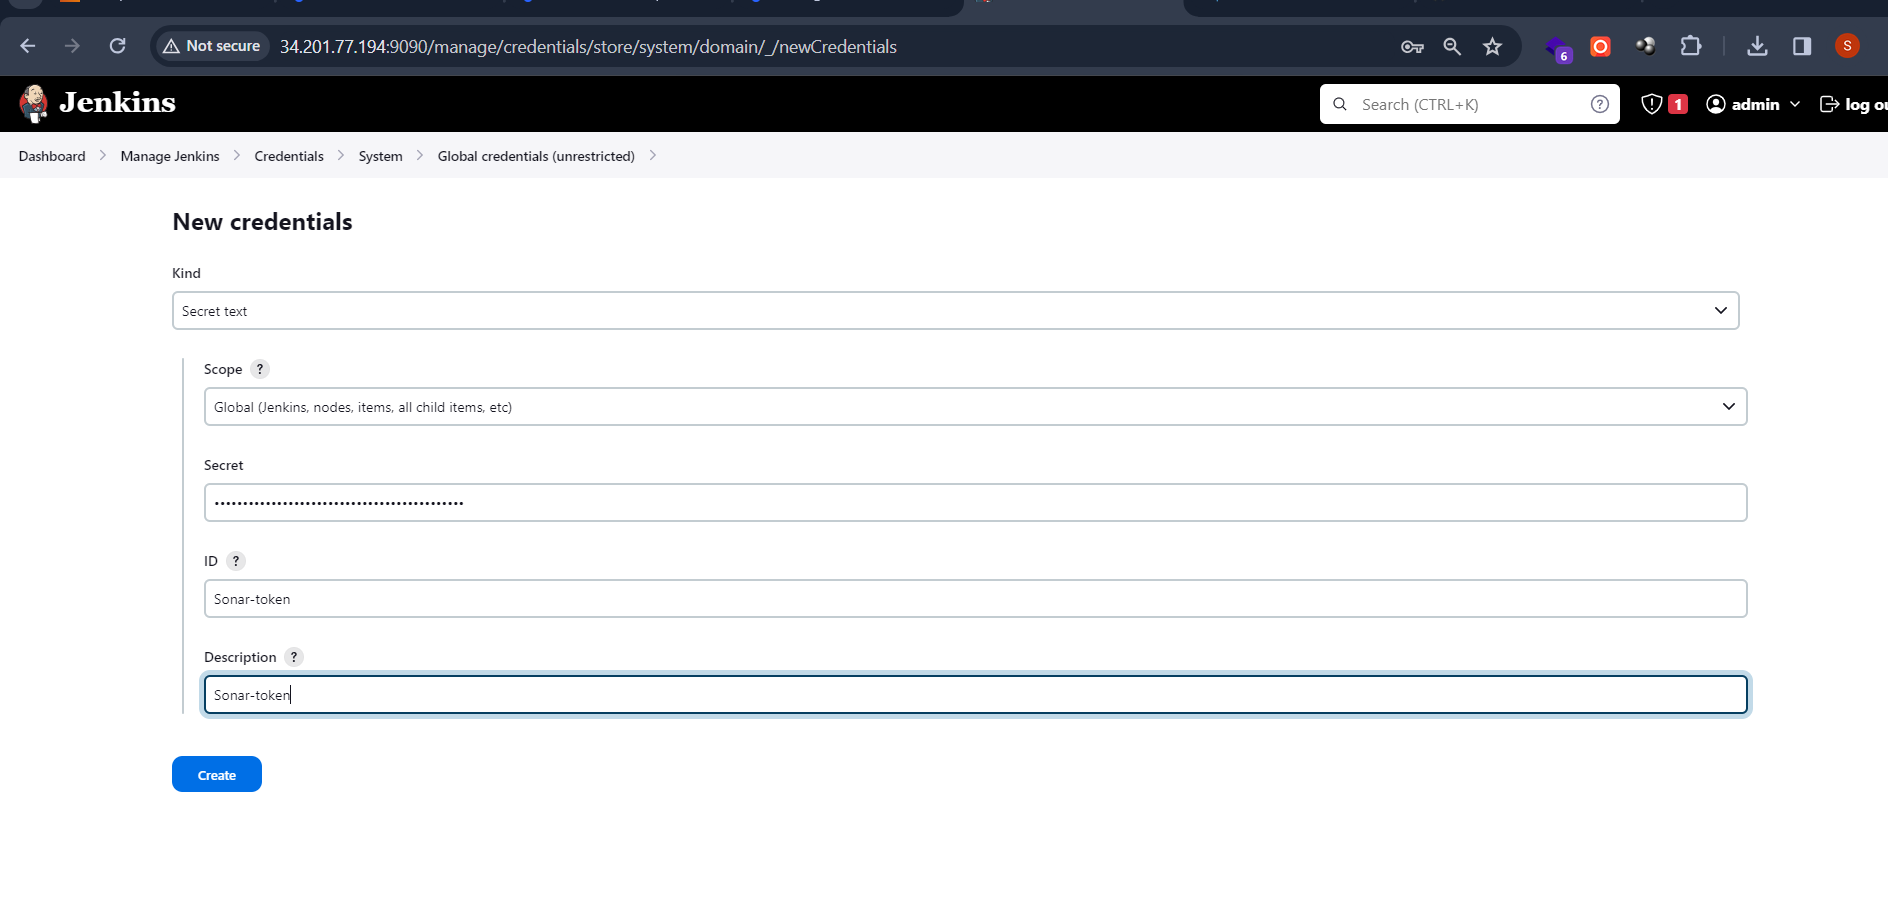
Now, goto Dashboard → Manage Jenkins → Configure System
Click on Apply and Save.

Add DockerHub Username and Password under Global Credentials.
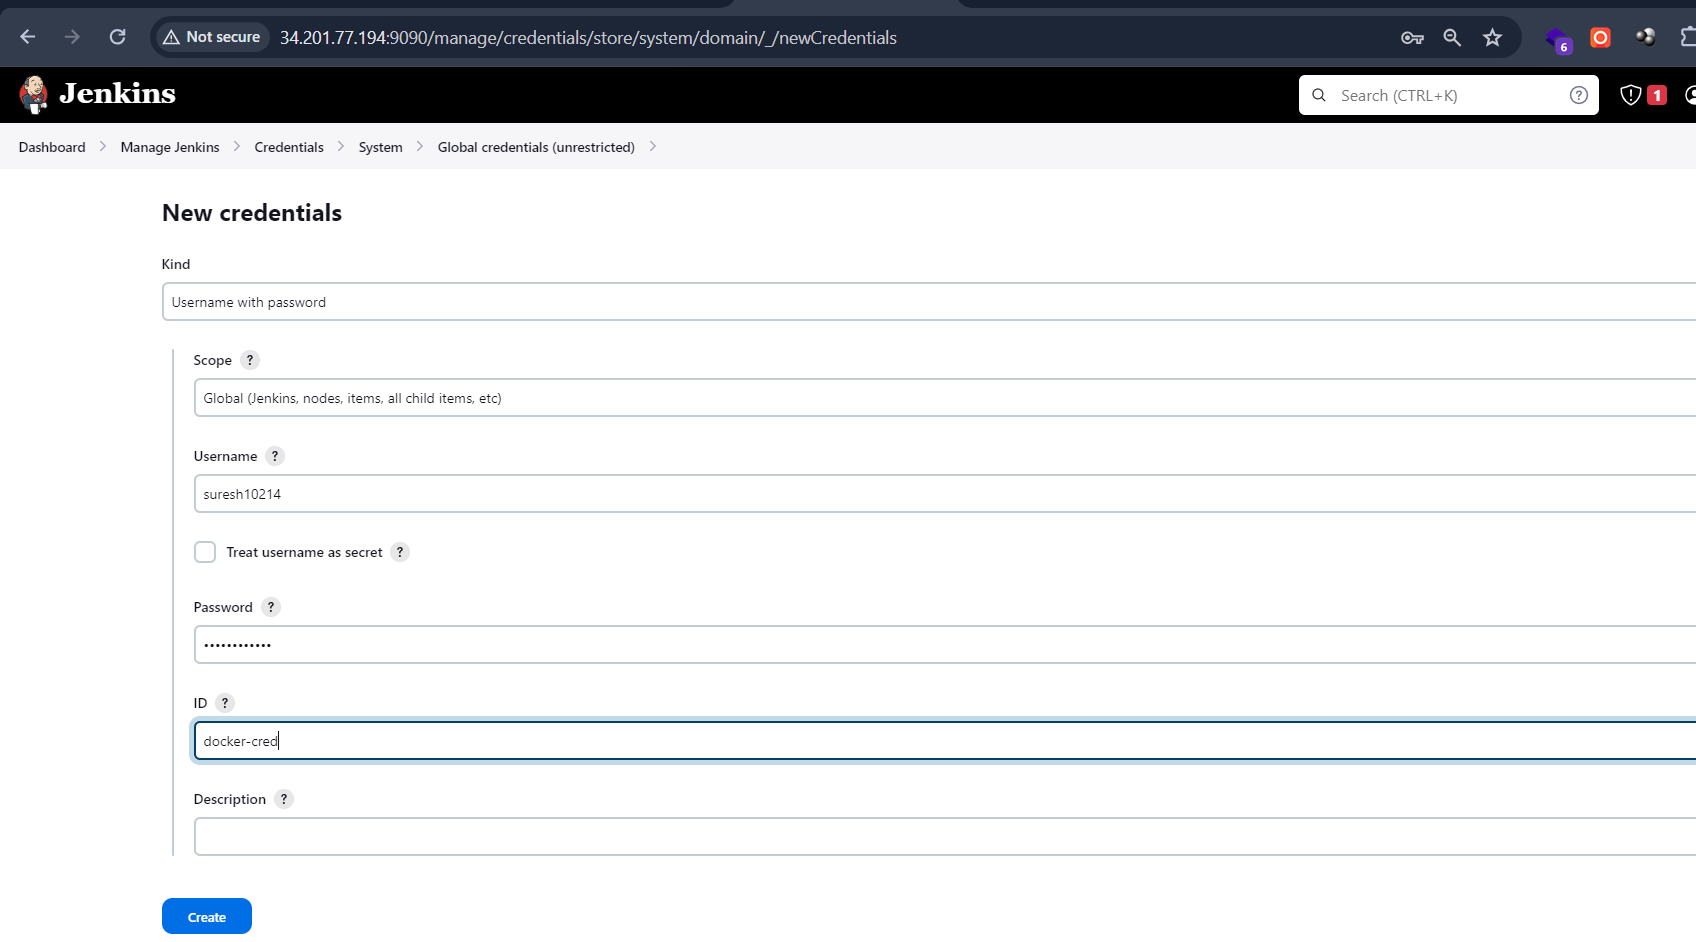
Step 6: Install Trivy
sudo apt-get install wget apt-transport-https gnupg lsb-release -y
wget -qO - https://aquasecurity.github.io/trivy-repo/deb/public.key | gpg --dearmor | sudo tee /usr/share/keyrings/trivy.gpg > /dev/null
echo "deb [signed-by=/usr/share/keyrings/trivy.gpg] https://aquasecurity.github.io/trivy-repo/deb $(lsb_release -sc) main" | sudo tee -a /etc/apt/sources.list.d/trivy.list
sudo apt-get update
sudo apt-get install trivy -y
Step 7: Create Jenkins Pipeline Job and Start Build
Lets goto our Pipeline and add Stages in our Pipeline Script
pipeline {
    agent any


   environment {
        SCANNER_HOME = tool 'sonar-scanner'
        WORKSPACE_DIR = '/home/ubuntu/jenkins-workspace/Vitual-Browser'
    }


   stages {
        stage('git Checkout') {
            steps {
               dir(WORKSPACE_DIR) {
                    git branch: 'main', url: 'https://github.com/suresh-subramanian2013/Vitual-Browser.git'
                }
            }
        }


       stage('Check User') {
            steps {
                script {
                    def currentUser = sh(script: 'whoami', returnStdout: true).trim()
                    echo "Current user running the job: ${currentUser}"
                }
            }
        }


       stage('Dependency Check') {
            steps {
                script {
                    dependencyCheck additionalArguments: '--scan ./', odcInstallation: 'DP'
                    dependencyCheckPublisher pattern: '**/dependency-check-report.xml'
                }
            }
        }


       stage('Sonar Scanner') {
            steps {
                script {
                    withSonarQubeEnv('sonar-server') {
                        sh "${SCANNER_HOME}/bin/sonar-scanner -Dsonar.projectKey=VirtualBrowser -Dsonar.projectName=VirtualBrowser"
                    }
                }
            }
        }


       stage('Docker Build and Tag') {
            steps {
                script {
                    withDockerRegistry(credentialsId: 'docker-cred', toolName: 'docker') {
                        dir("${WORKSPACE_DIR}/.docker/opera")  {
                            sh "docker build -t suresh10214/vb:latest ."
                        }
                    }
                }
            }
        }


       stage('Image Push') {
            steps {
                script {
                    withDockerRegistry(credentialsId: 'docker-cred', toolName: 'docker') {
                        sh "docker push suresh10214/vb:latest"
                    }
                }
            }
        }


       stage('Deploy') {
            steps {
                script {
                    sh "docker-compose up -d"
                }
            }
        }
    }
}
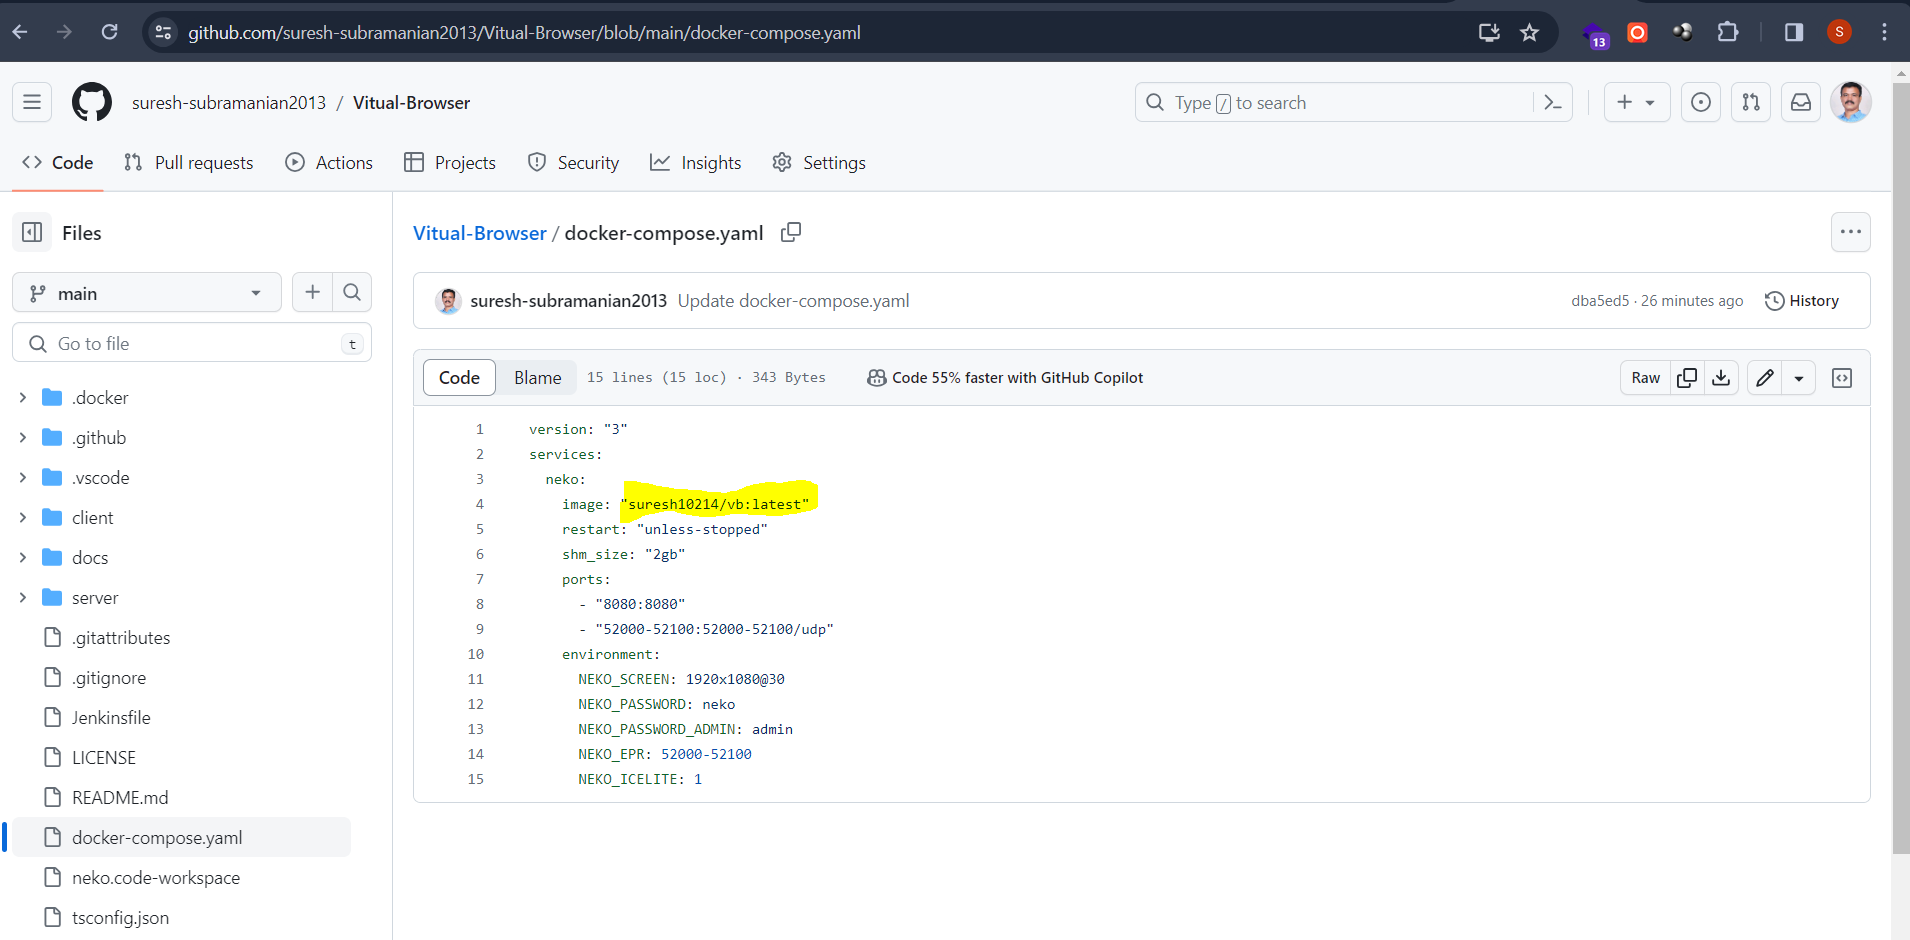
After that we can edit an docker-compose file in GitHub and we replace an old image to your new image.
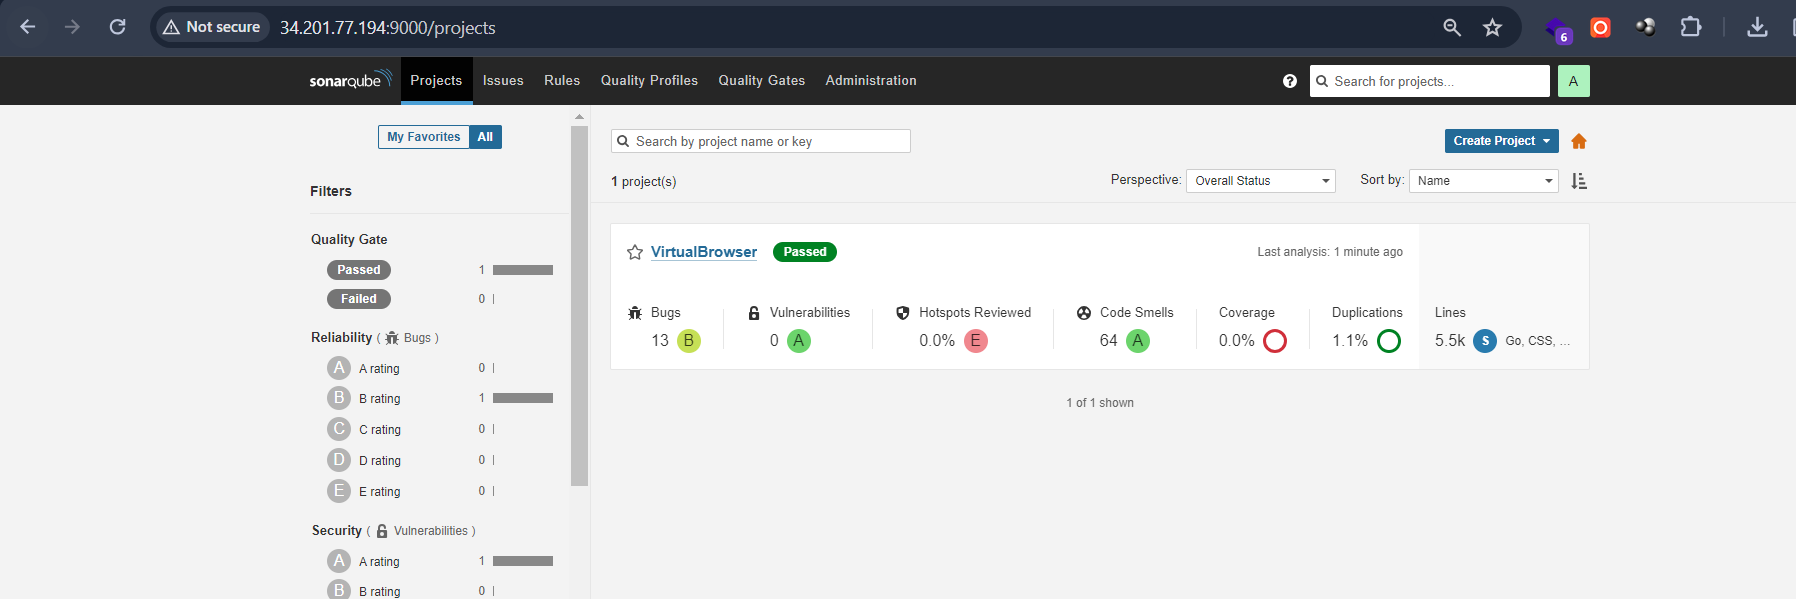
To see the report, you can goto Sonarqube Server and goto Projects.
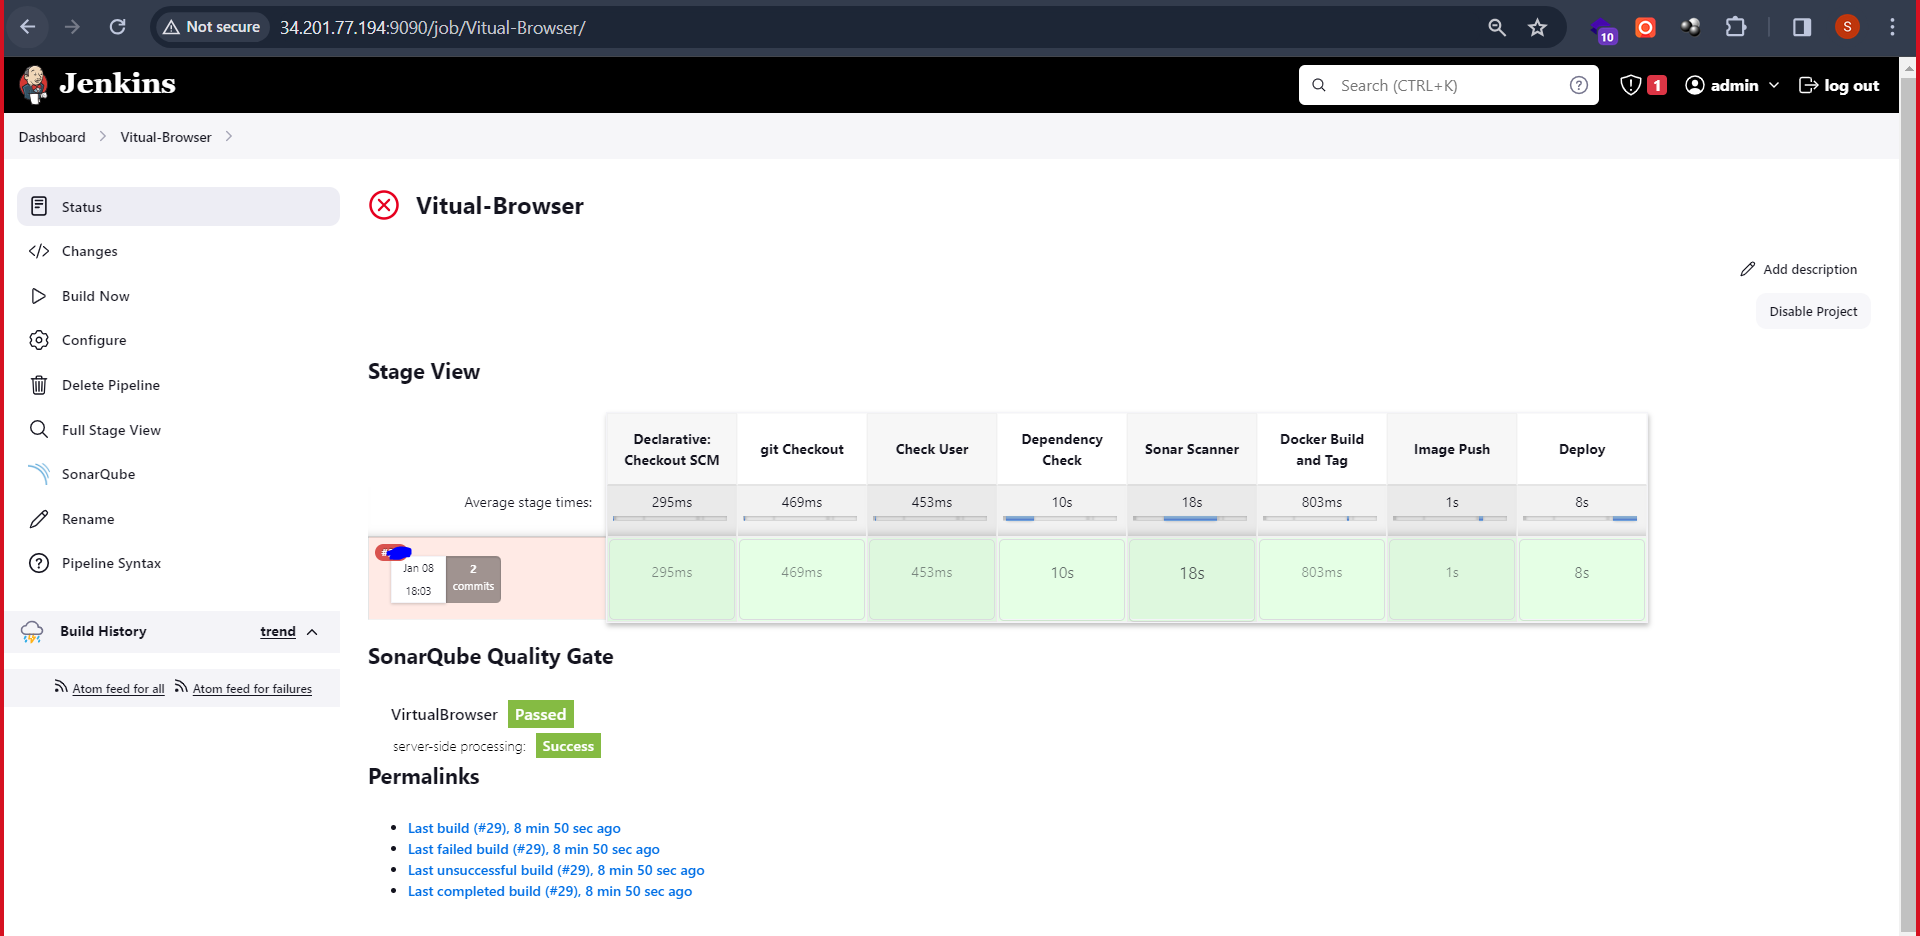
the complete stage view is,
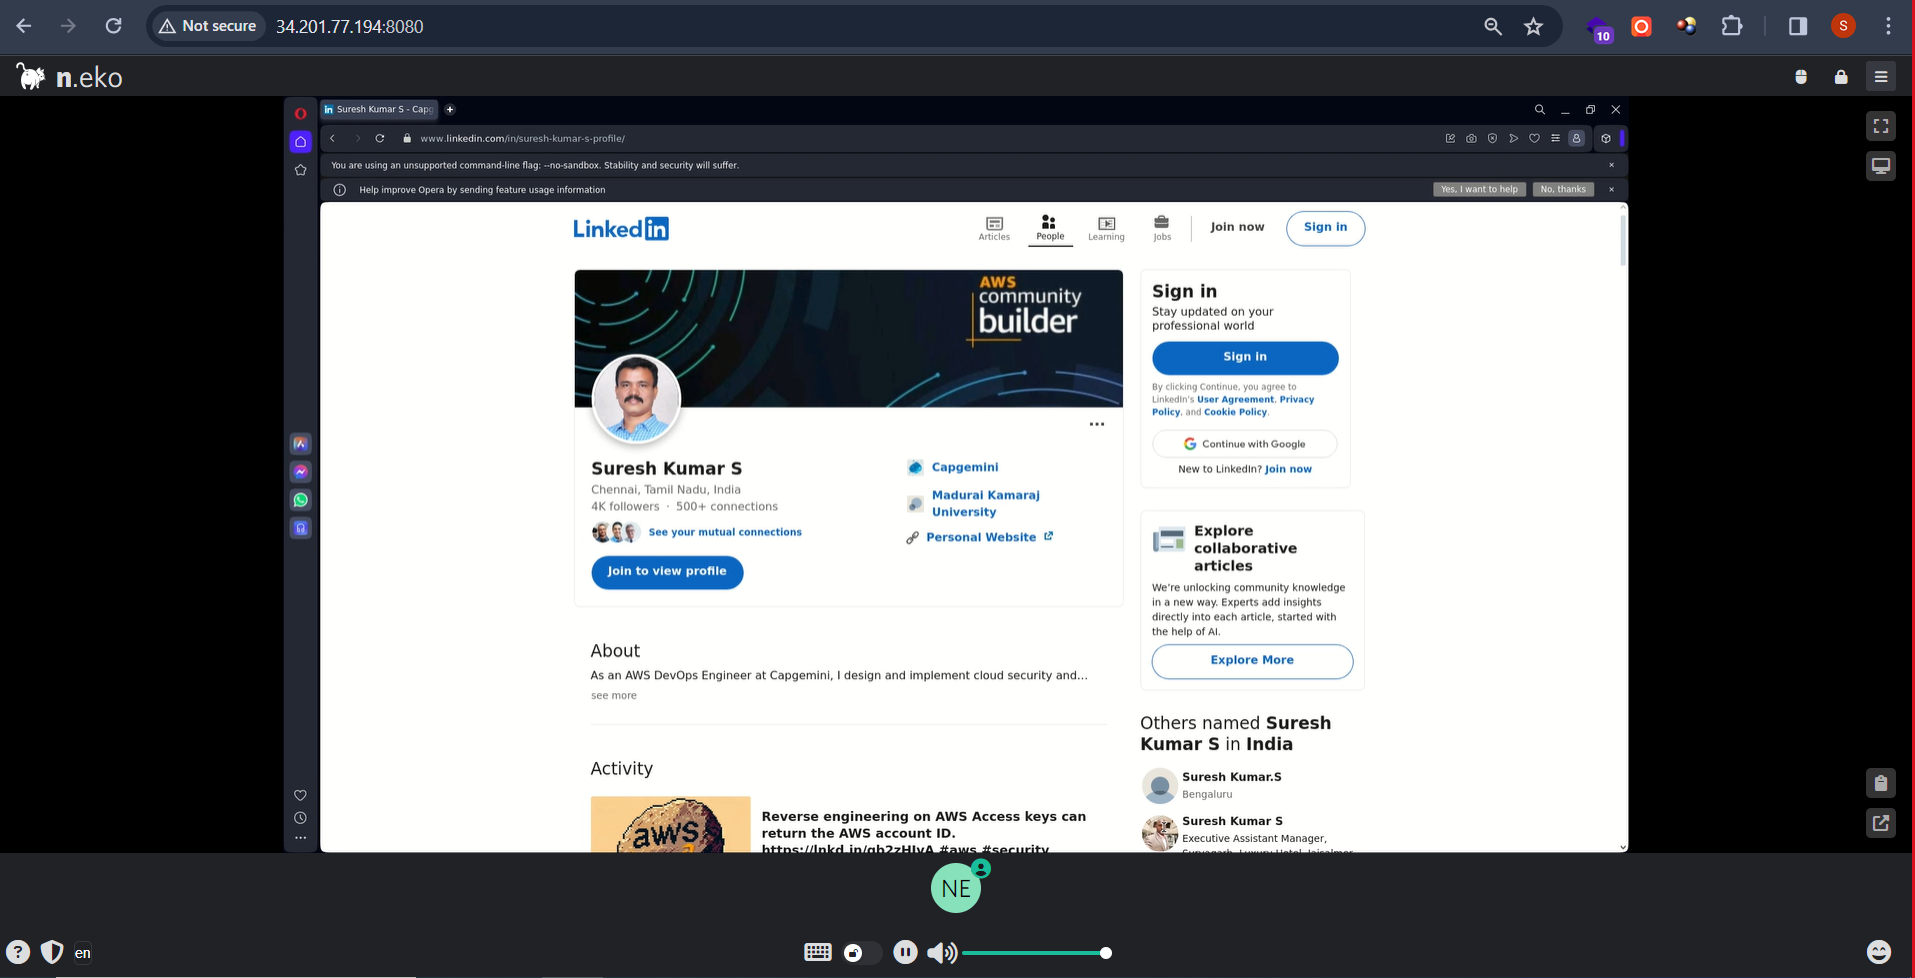
Goto <Public IP>:8080 and Check Opera Virtual Browser 🏆✅🎯🚀
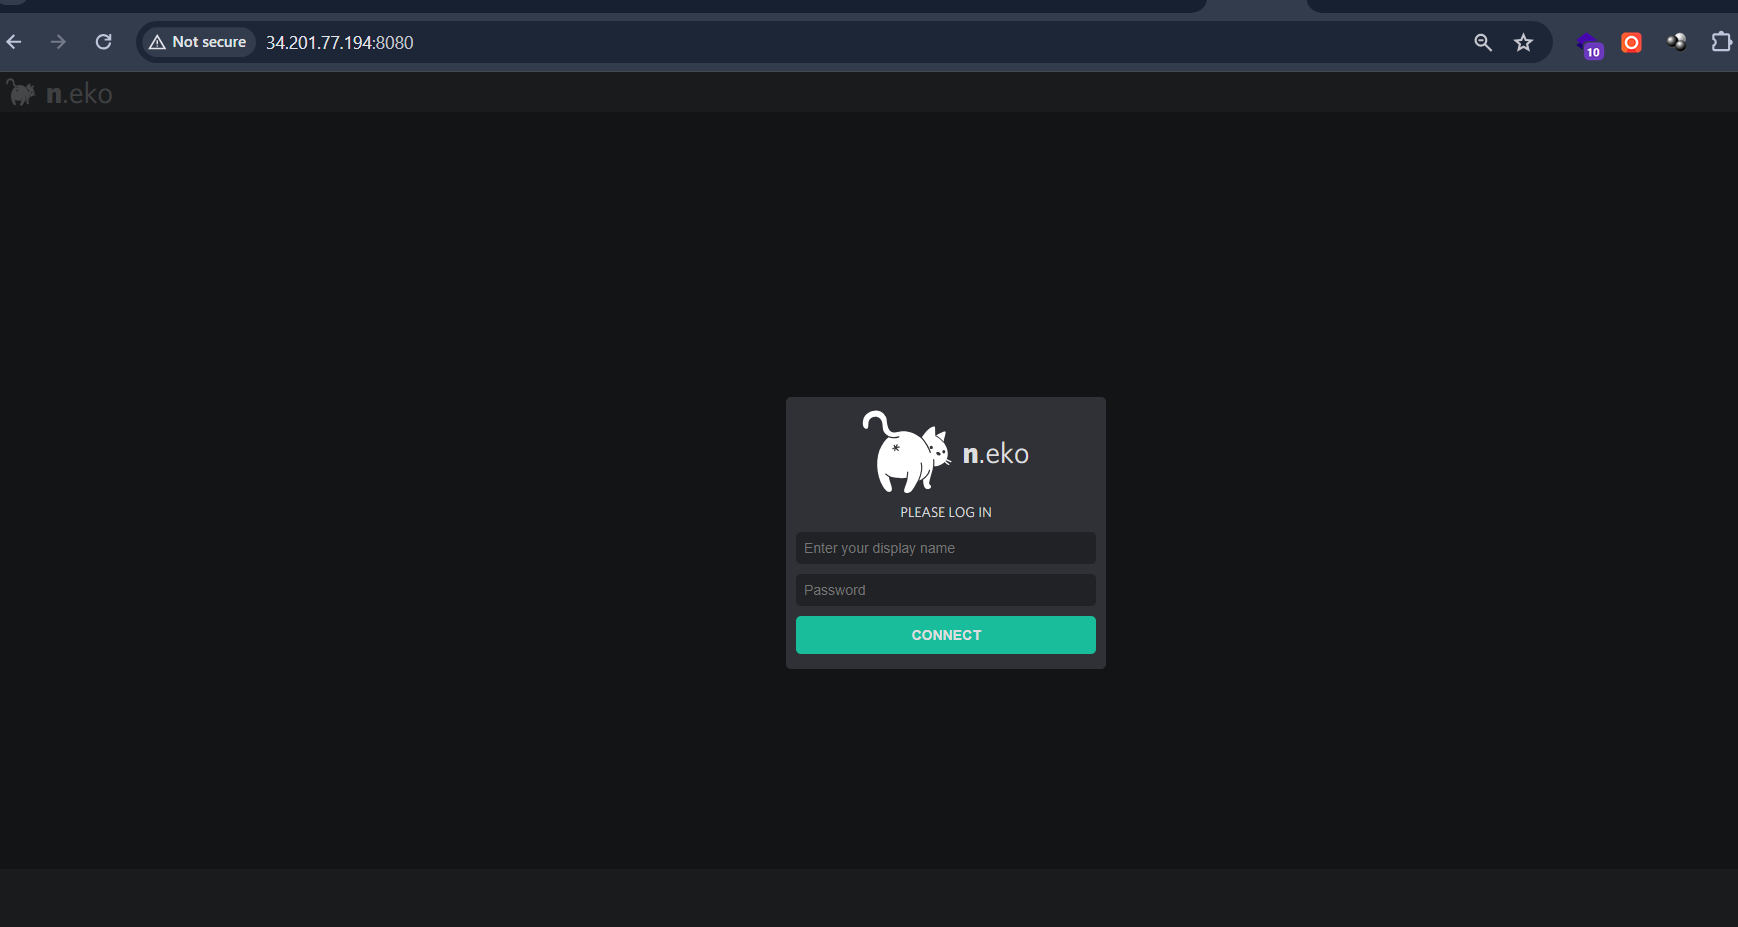
username : neko password : admin
Complete Pipeline Script in Github
https://github.com/suresh-subramanian2013/Vitual-Browser/blob/main/Jenkinsfile
Always open to suggestions!
Feel free to contact me via LinkedIn if you encounter any issues or need support.
Subscribe to my newsletter
Read articles from Suresh Kumar S directly inside your inbox. Subscribe to the newsletter, and don't miss out.
Written by

Suresh Kumar S
Suresh Kumar S
Experienced AWS DevOps Engineer with 9+ years in IT, specializing in AWS for over 5 years. Holder of 5 AWS certifications, adept at optimizing infrastructure and driving efficiency.