JS Node Application Deployment Project
 Ranjit Ramteke
TABLE OF CONTENTS
EC2 Service
Jenkins
GitHub Reposeroty
Source Code Management
Docker Container
CI-CD PipeLine.
Application Configuration & Deployed on Internet.
Step 1: Launch EC2 Instance
In the AWS Management Console, type "EC2" in the search bar or navigate to "Launch instance" > click on >" Launch Instance" Button.
Configure your instance settings:
Name: Jenkins Master
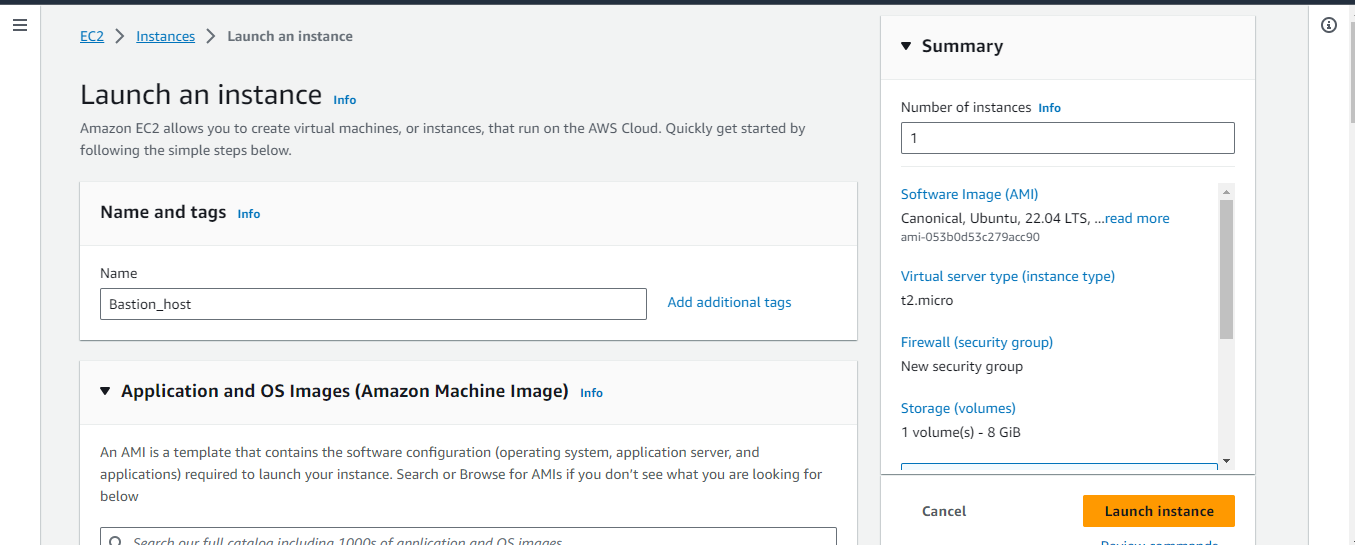
* AMI ID: Choose the Amazon Machine Image (AMI) for your instances. choose Ubuntu server 22.04 LTS
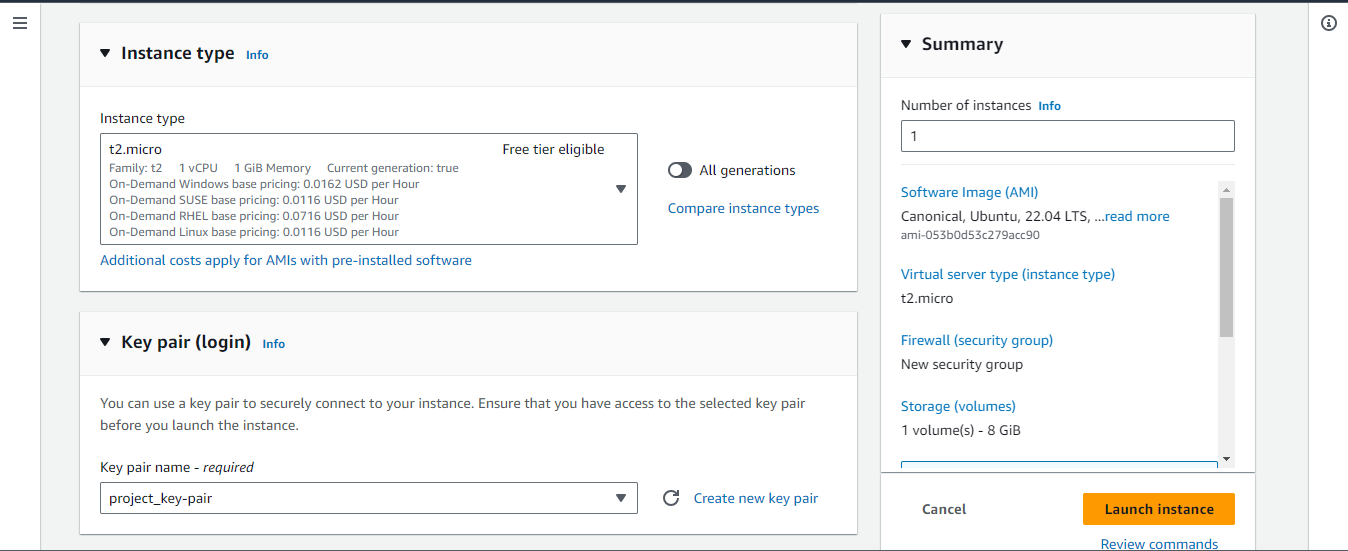
* Instance type: t2.micro
* Key pair: Choose a project key pair
* Network Setting: Choose the VPC that you create
Choose Public Subnet
Enable Public IP Address
Keep By default as it is.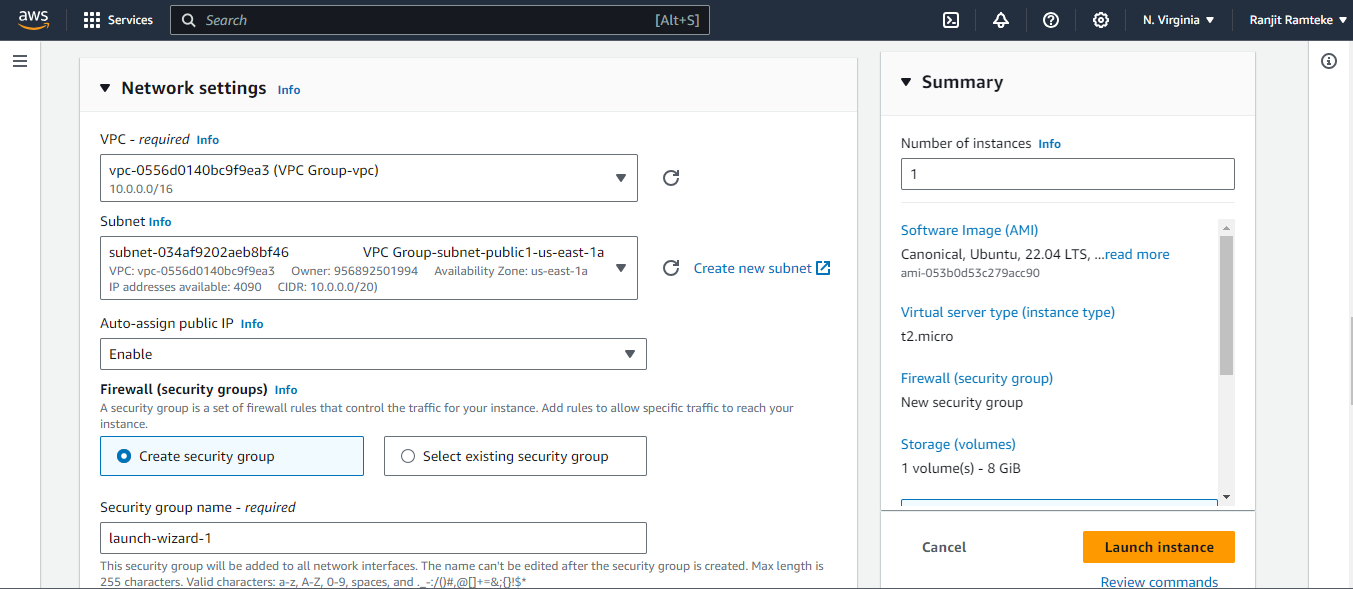
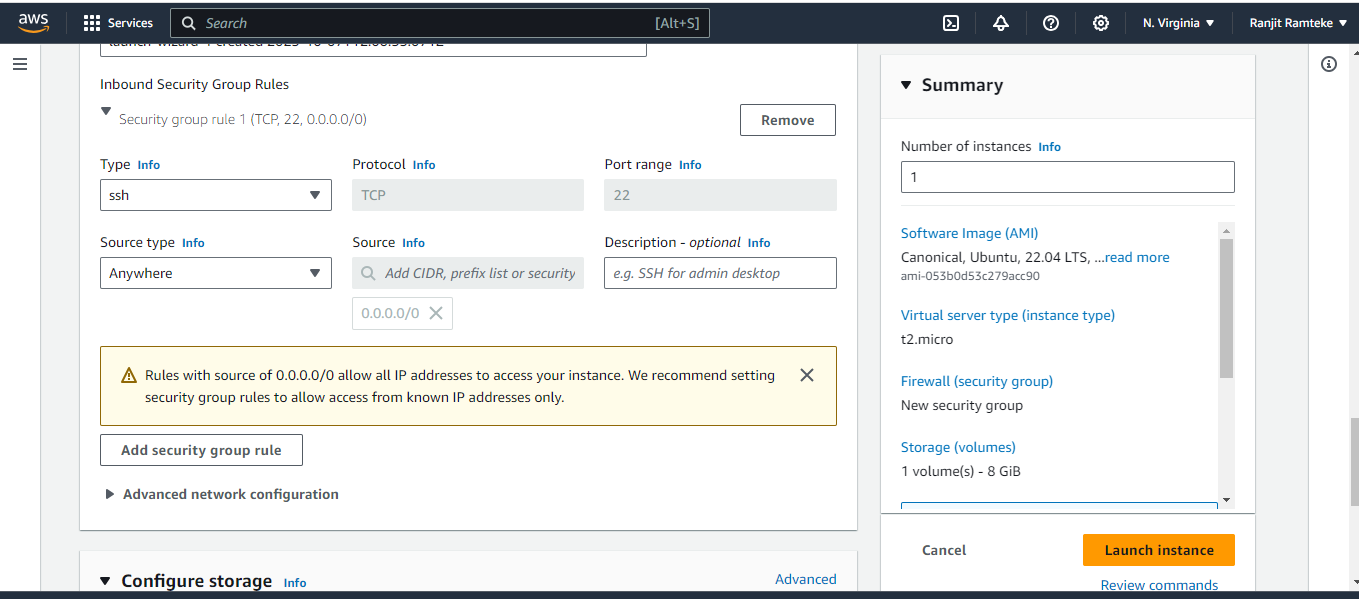
Click on Launch Instance.
Step 2: Connect to the EC2 Instance
- Run Following Command for Installing the Jenkins in the Ubuntu m/c
sudo apt-get update -y

sudo apt-get install openjdk-17-jre

java --version

sudo wget -O /usr/share/keyrings/jenkins-keyring.asc \
  https://pkg.jenkins.io/debian/jenkins.io-2023.key

echo deb [signed-by=/usr/share/keyrings/jenkins-keyring.asc] \
  https://pkg.jenkins.io/debian binary/ | sudo tee \
  /etc/apt/sources.list.d/jenkins.list > /dev/null


sudo apt-get update
sudo apt-get install jenkins
sudo systemctl enable jenkins
sudo systemctl start jenkins
sudo systemclt status jenkins

Sudo cat /var/lib/jenkins/secrets/initialAdminPassword
Note: make sure your port 8080 should be open in the security group
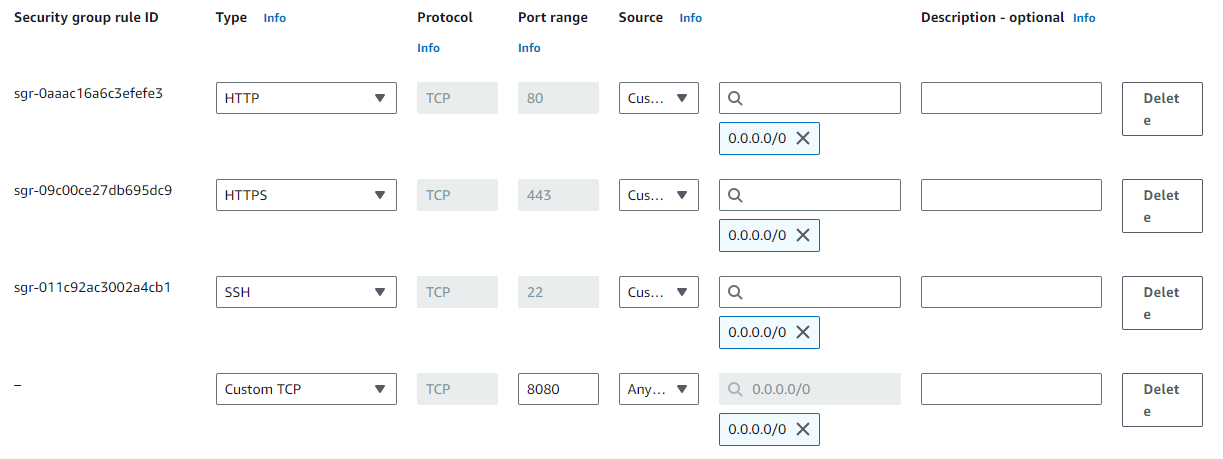
Step 3: Unlock the Jenkins
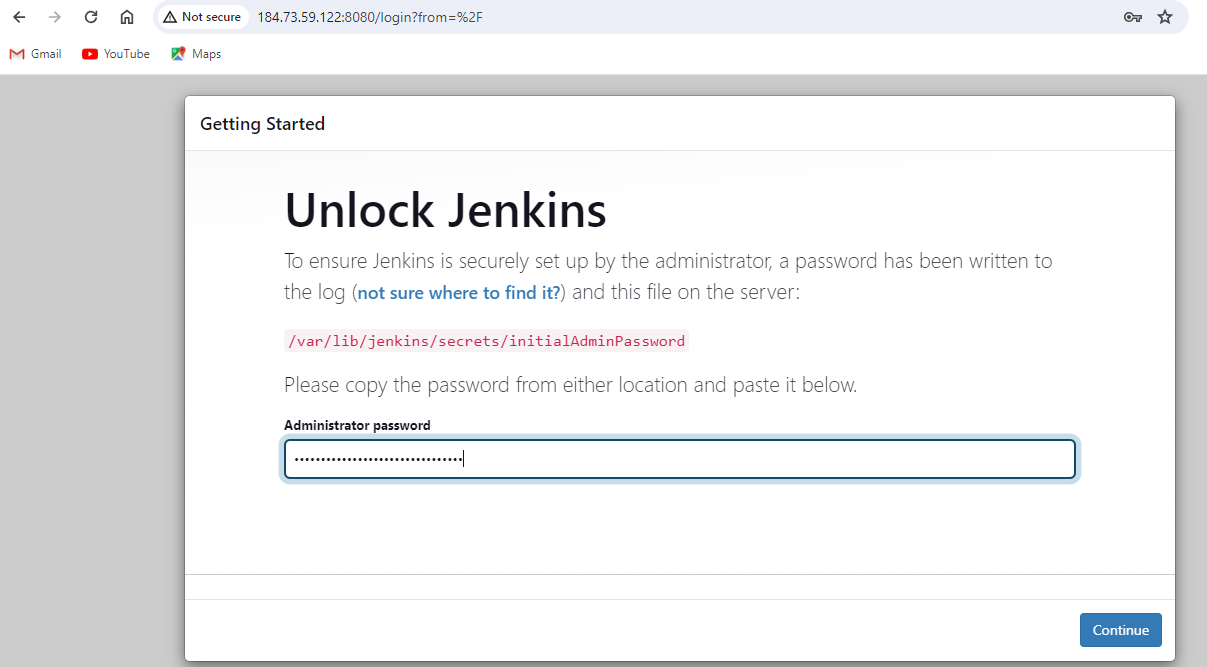
Now Hit the IP 184.73.59.122:8080 in Chrome Browser or Edge Browser.
so you can access the Jenkins Enviroment.Go into the Directory path i.e /var/lib/jenkins/secrets/initialAdminPassword in your Ec2 Ubuntu m/c & Take the password and paste it in the Jenkins . Install it with the Suggested Plugins. so you can access the Jenkins Enviroment. Now it will ask to set up the Login Creadentials so fill it with your own. Follow the on-screen instructions to set up Jenkins by installing recommended plugins or selecting plugins manually.
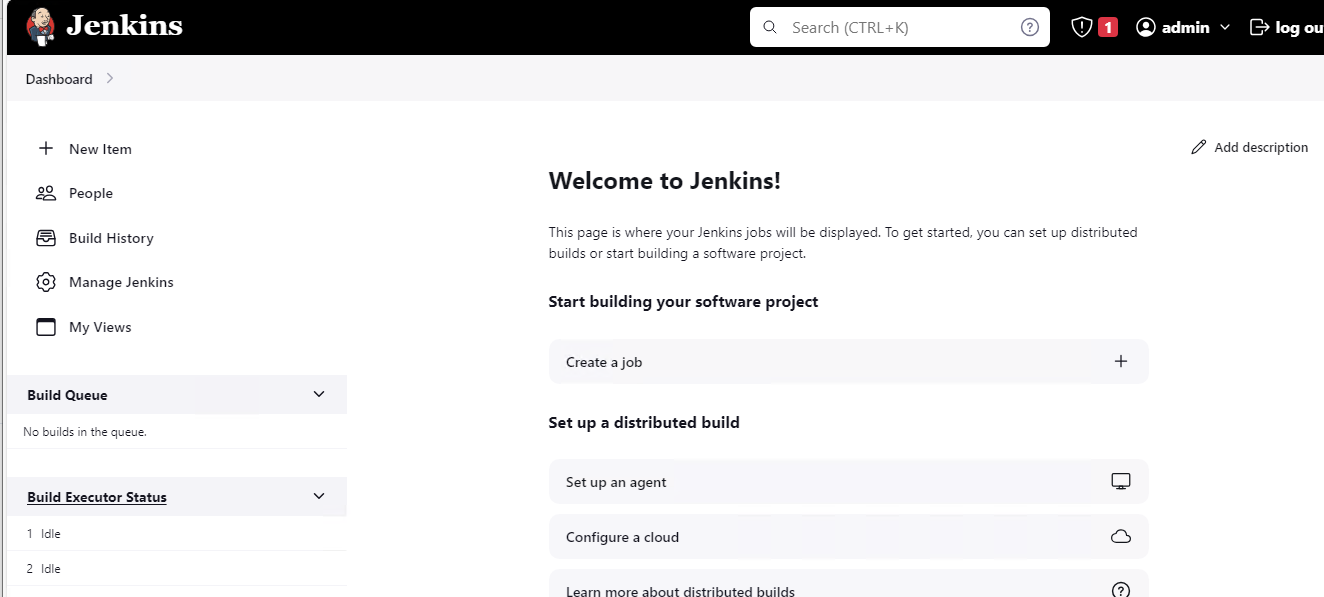
After setting the Login creadential , you will land up on the Jenkins Dasboard.
Step 4: Set Up GitHub Integration
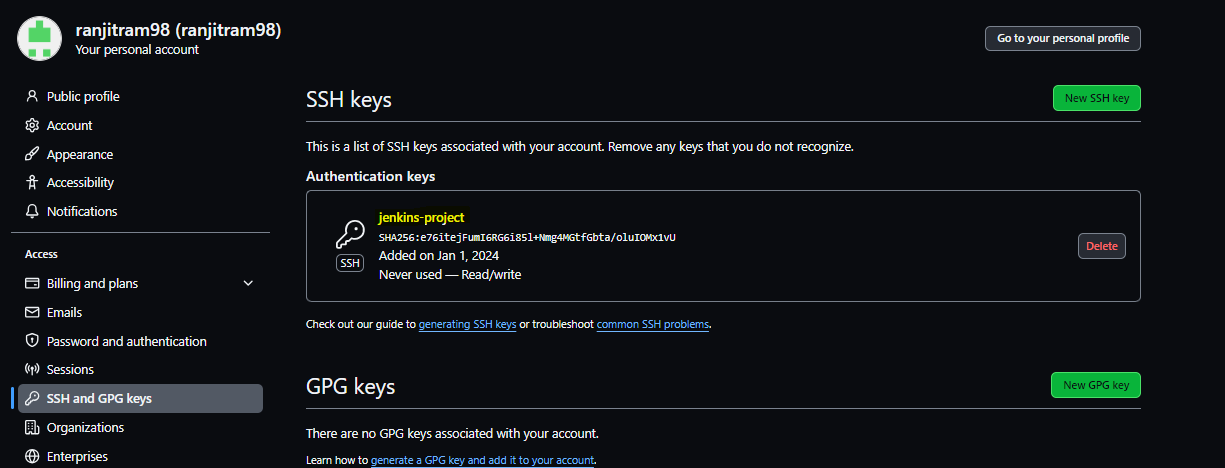
Navigate to "Setting" > "SHH Key & GPG Key" and add GitHub credentials (username/password, token, or SSH key) for authentication.
Configure your SSH key which is generated on your Ubuntu m/c by running the command ssh-keygen. Now you will have two key ie Public Key & Private Key.
Use Private key For Git-hub Configuration.
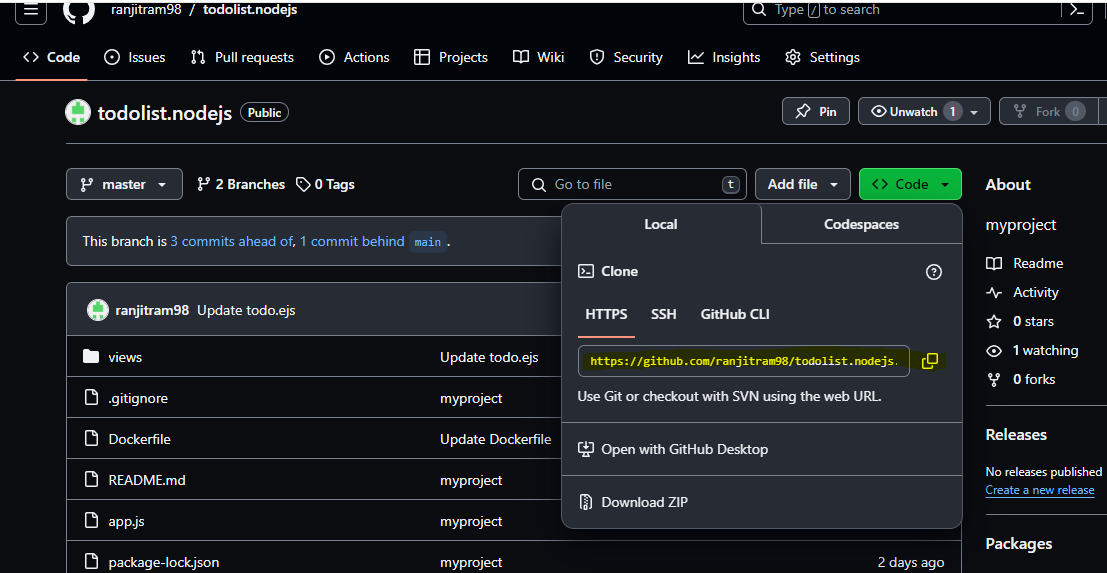
Now Nevigate in your Source Code File & Copy the URL of your Source Code Repository. So in Further step we can paste in the Jenkins configuratin & it will automatically clone the GitHub repository using the specified credentials and settings.
Step 5: Creating New Job in Jenkins
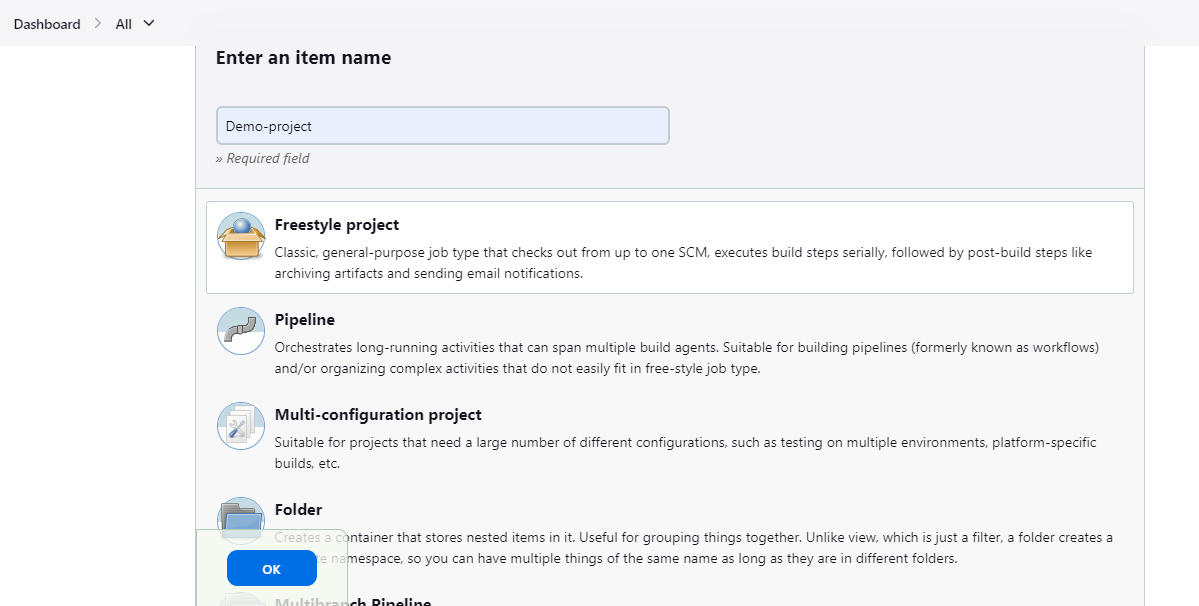
From the Jenkins dashboard, click on "New Item." Enter a name for your project i.e Demo-Project and select "Freestyle project," then click "OK." In the project configuration page, specify project details such as description and execution trigger.
Paste your GitHub repository Sorce Code URL in the box. means Jenkins will starts Pull the Code from the Github repository.
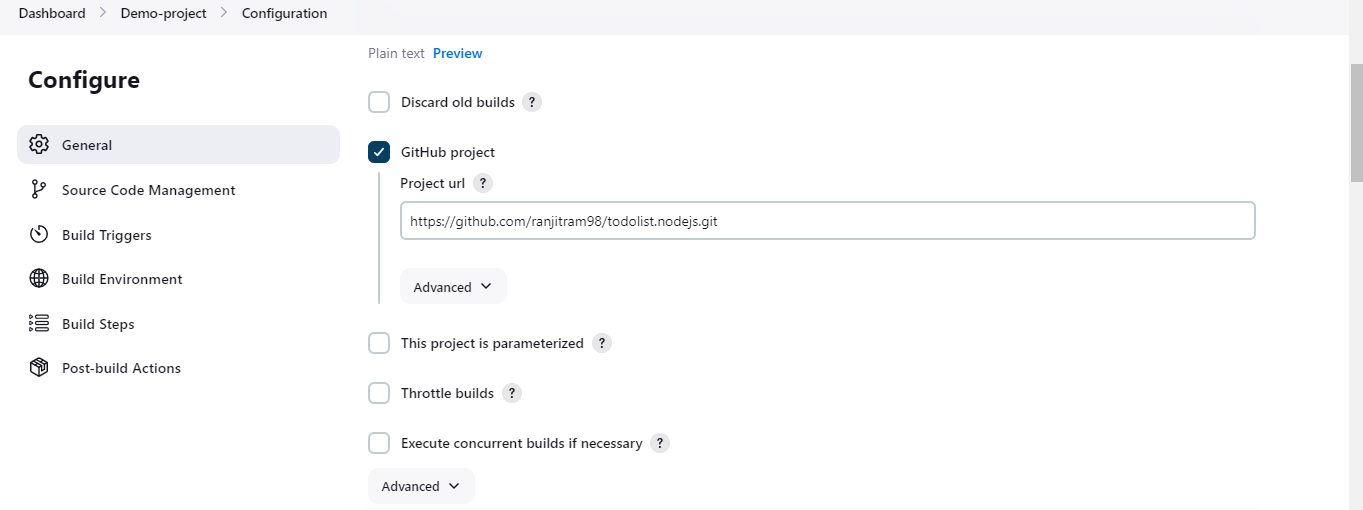
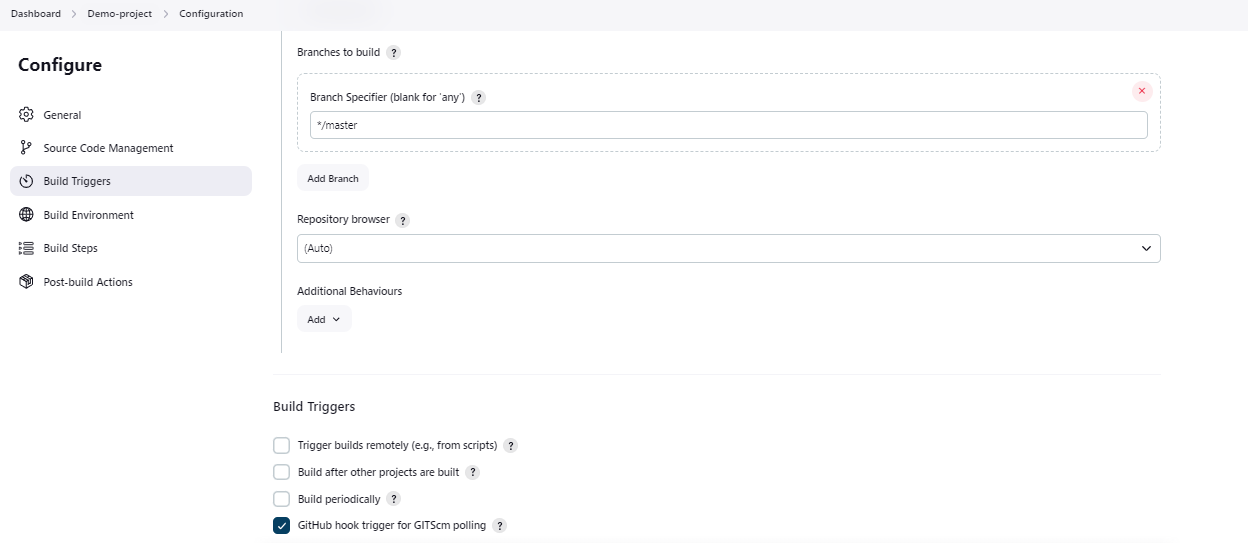
make sure your branch should be Master.
& Save All those things- & click on Apply.
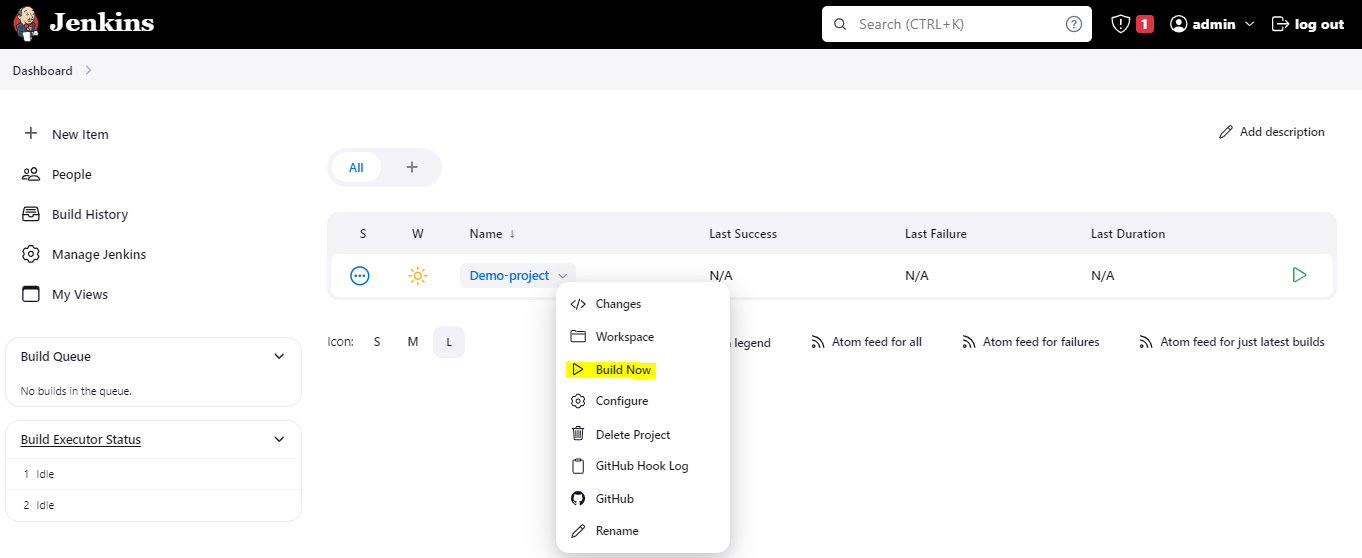
Now you Can manually trigger the Jenkins job by clicking "Build Now" on the project page. Monitor the build progress in the Jenkins dashboard. View build logs for details on each build step and to troubleshoot any issues. Test the setup by making changes in the GitHub repository to trigger automatic Jenkins builds.
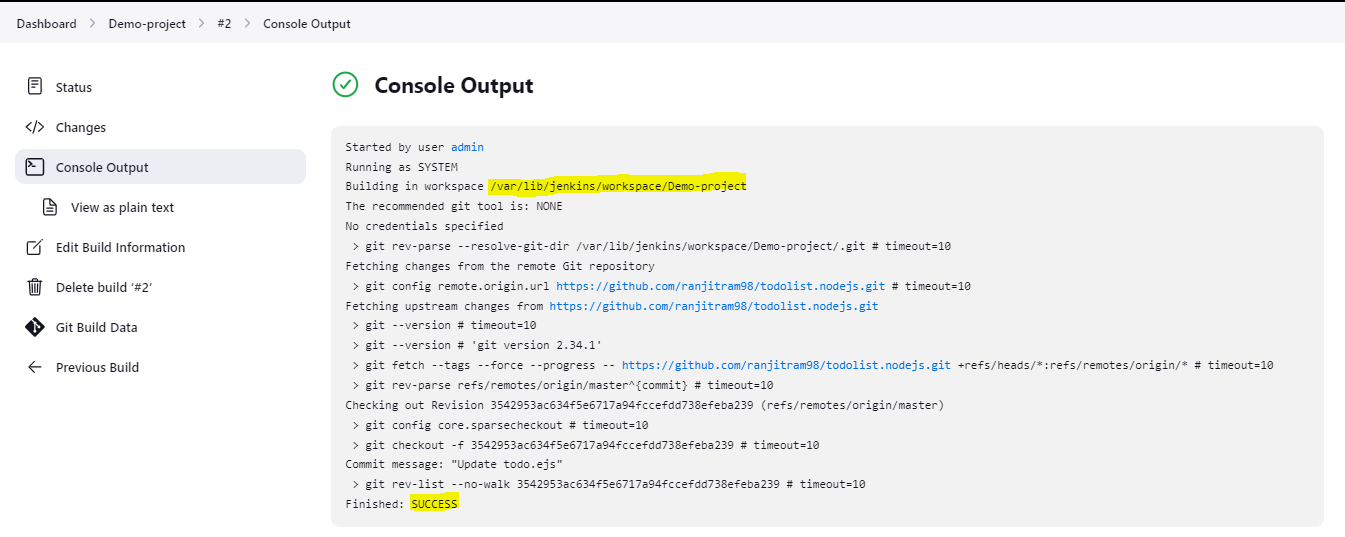
After the build process completes you will find all source code files from a Git repository into an EC2 Ubuntu machine. File path is /var/libjenkins/workspace/Demo-project
inside this path a README.md file will be present & read out this File.
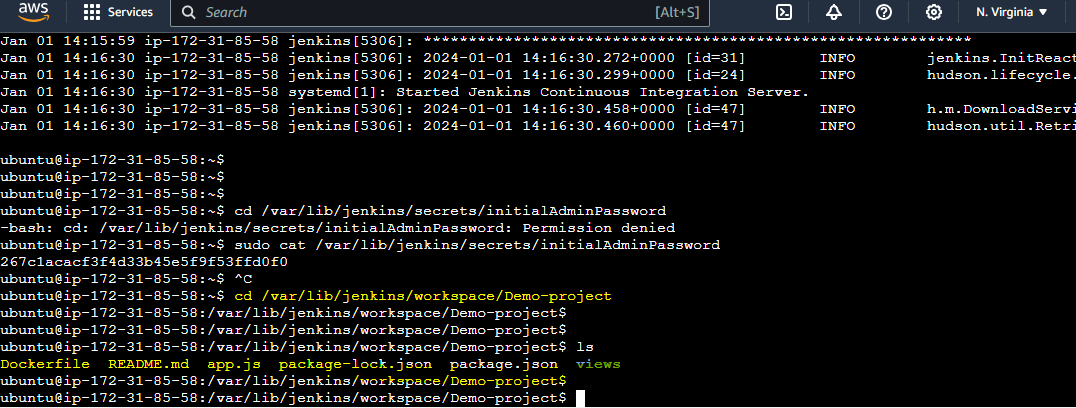
Run this Command which are in the README file with sudo permission in you Ec2 ubuntu m/c.
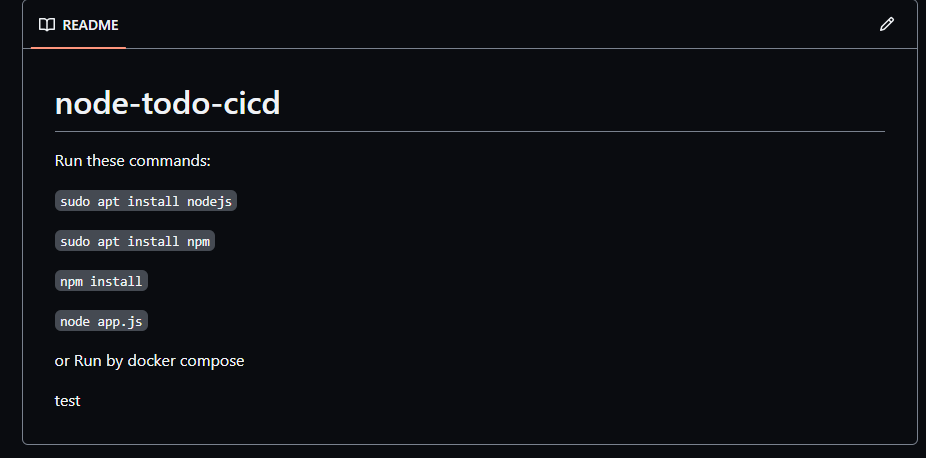
Step 5: Now Access Your Applicaton From Internet.
Now Application Binded on Port 8000 , so in the Security Group Opne the Port 8000 with Custom TCP protocall.
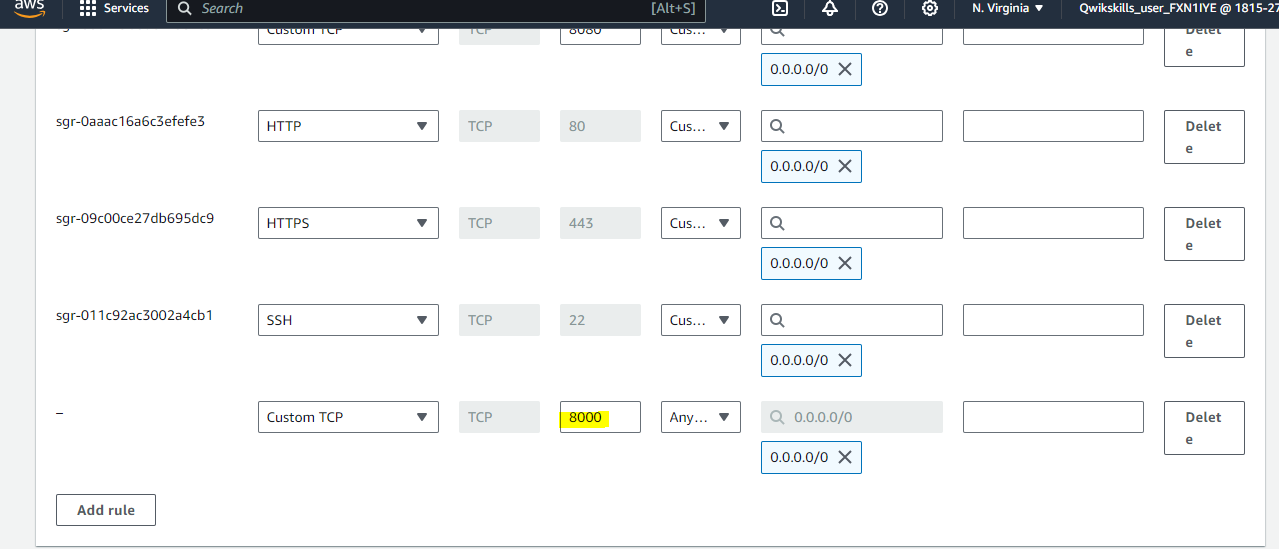
Copy the Instance IP & with :8000 you can access the application now.
I.e 184.73.59.122:8000 copy & paste it in the Chrome Browser or Edge Browser.
Now You Can Access Your Application From the Internet as Below seen.

Note: But here is one Biggest Problem, i.e When you Come out from the EC2 ubuntu m/c you application will no Longer to Accessiable. So that we need a Docker Container to provide a isolation Enviroment to make sure the Contionues running the Application & Accessible from any point of time.
Step 6: Installing the Docker Container.
Installing Docker on Ubuntu m/c enables you to leverage the power of containerization, allowing you to run applications in isolated environments called containers. This below commad need to run on Ubuntu m/c step-by-step. The process of installing Docker on your Ubuntu machine, enabling you to create, deploy, and manage containers seamlessly.
   1  sudo apt install docker.io
   2  sudo service docker start
   3  sudo usermod -aG docker $USER
   4  sudo docker images
   5  sudo docker build . -t to-do
   6  sudo docker images
   7  sudo docker run -d -p 8000:8000 --name mycontainer to-do
   8  sudo docker ps -a
Now Hit the same IP in the Browser So you can again Access the Application
you can see my comment as below "Added Docker Container"

Kill all running Docker Container by using below command b/c we need to Create the CI-CD pipe Line for Continueos Intrigarton & Contineous Deployment.
sudo docker kill c2a75715d903 #paste the container Id for Example c2a75715d903
Step 6: Building a CI CD Pipeline.
Defination: A CI/CD pipeline is a set of automated processes used in software development to continuously integrate code changes (CI) and deploy them to production (CD). It ensures that new code changes are smoothly tested, integrated, and delivered, allowing teams to build and release software faster, more reliably, and with fewer errors.
**
Means Whatever changes done by the Coder in Source Code File It Directly reflect in Running Application & in Production Enviroment.**
1) Lets Configure the CI Pipeline in the JEnkins
Now in the Same Running job i.e Demo-project > navigate into > Configuration
Now in the Build steps & choose the Execute shell and we have to write two commands in the shell.
docker build . -t to-do-app

docker run -d -p 8000:8000 --name app container to-do-app

click on save button & Build on it
It will give the Error due to perrminssion deficiency.
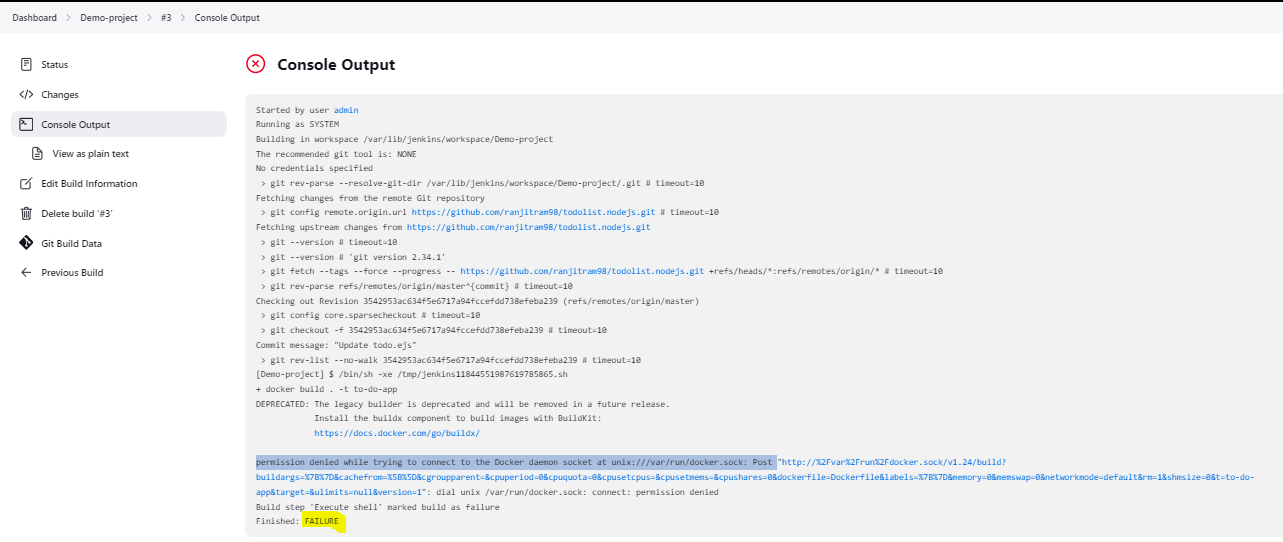
so run the Following Command in your Ec2 Ubuntu m/c. Here we are adding the jenkins in the default group of Docker. so Jenkins have permission to access the docker.
sudo usermod -aG docker jenkins
sudo systemctl restart jenkins

Wait for 2 min & Try log in again in the Jenkins. Now try to build it again
& you will get the Successfull output.
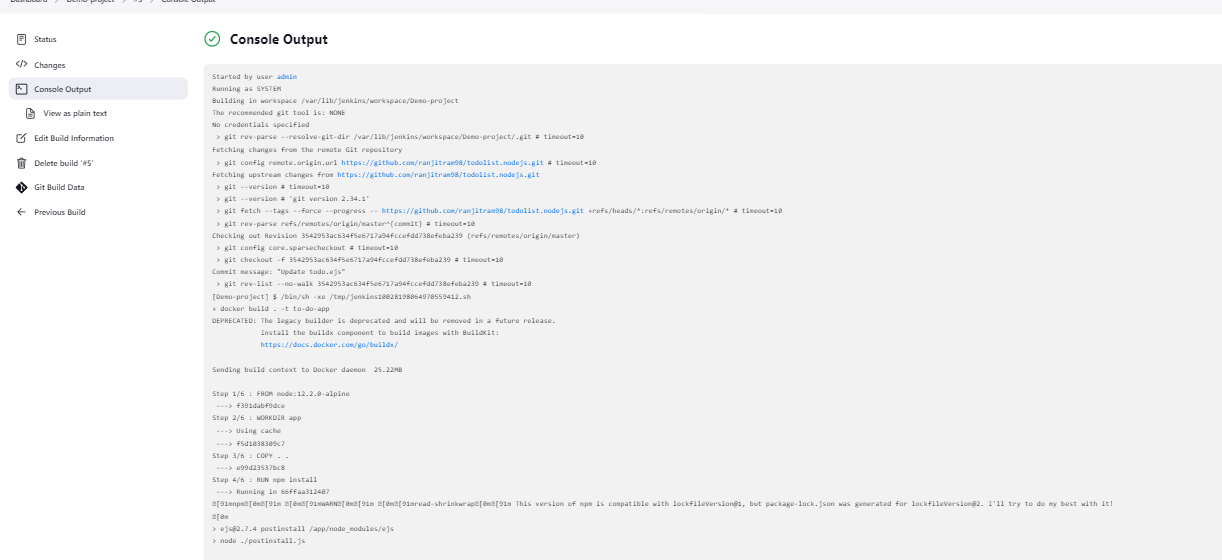
1) Lets Configure the CD Pipeline in the JEnkins
So if the coder do any changes in the code so it will direclty reflect in the Appliction/production
This all done through the WEBHOOK concept.
for that we need a plugin >Go into Manage Jenkins> search - "Github intrigration" -- install it without restart

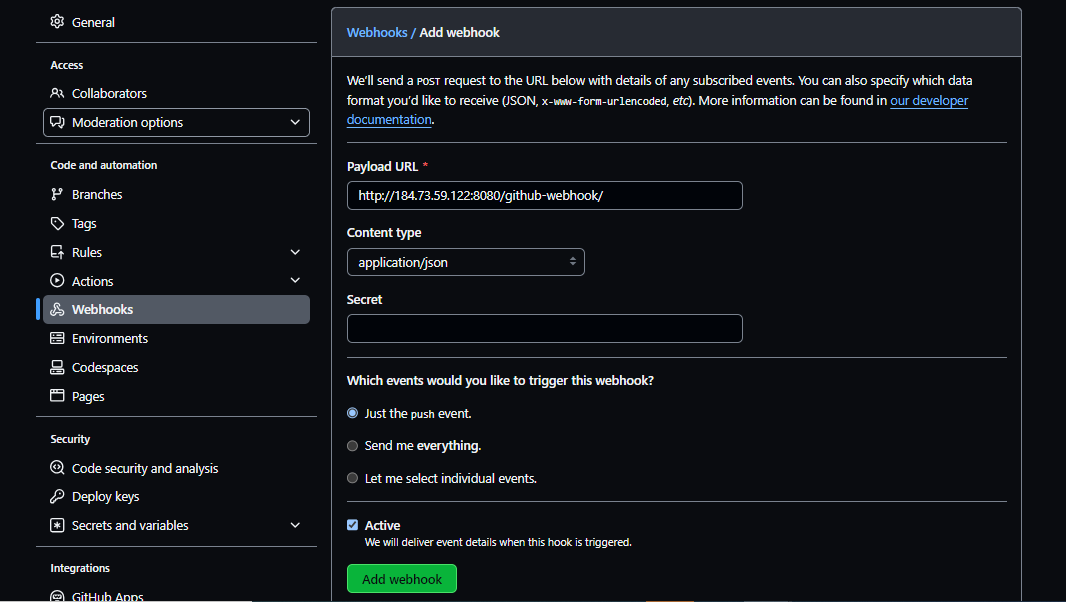
Now configure the Webhook > go into Github
Go to the reposetory setting {not in general setting} click on webhook > add webhook
give the Jenkins Payload URL -- https://134.23.45.11:8080/github-webhook/
there should be a tick mark. Make sure it would be there like as below
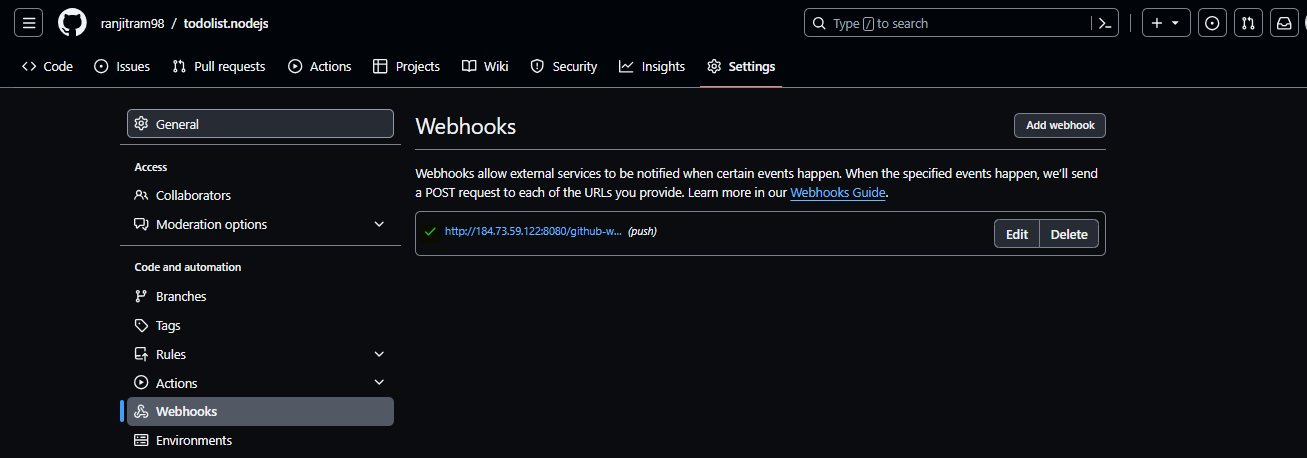
Now Go again in the Jenkins Configuration > Build Trigger > select check box GITHub hook trigger to GitSCM polling.
& save everything.
{make sure port 8080 should be accessiable from internet so check the security inboud Rule}
Now If you do any changes in the source code of JS node file & do commit it, the Pipeline will automatically trigger it . { here i write a two new word - "Code Changes" & this word can seen in the Live Application. }
{If you are getting any error then remove the Existing conatiner & do again.}
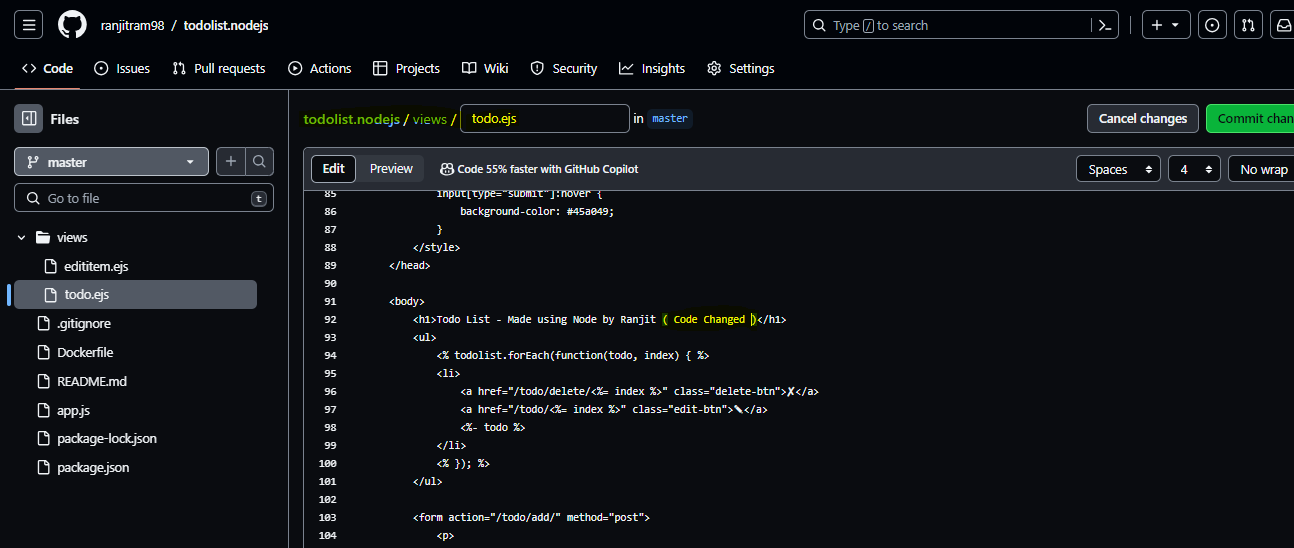
Hit on Commit the Changes & You can see now Changes reflacted as below.

-------- Finished --------
Subscribe to my newsletter
Read articles from Ranjit Ramteke directly inside your inbox. Subscribe to the newsletter, and don't miss out.
Written by
