Create a Mock Interviewer Bot with Amazon Lex V2
 Amelia Dutta

Introduction
Getting a job interview call is a positive sign, but the limited time to prepare can be nerve-wracking. It's said that "Prepare for the unknown by studying how others in the past have coped with the unforeseeable and the unpredictable." So having a job interview in front of a bunch of strangers or only one person is indeed unpredictable and overwhelming. But with a bit of preparation—googling common patterns, practicing mock interviews with friends or family—you can confidently face any scenario.
But what if there's insufficient time for extensive research or scheduling conflicts for mock drills? Imagine having a tiny friend with you 24x7 who gathers mock questions and practices with you! Sounds like that popular Japanese blue robot cat, isn't it?
In this article, I will explain how you can build your own Mock Interviewer Bot with the help of Amazon Lex.
What is a Bot?

Before creating the bot let me explain what a bot is. So according to the standard definition of bot —
"A bot is an automated software application that performs repetitive tasks over a network. It follows specific instructions to imitate human behavior but is faster and more accurate. A bot can also run independently without human intervention." [Click to read more about bots]
In simple words, you have an application that performs the predefined task(for example: paying electricity bills on 1st day of the month, giving reminders for medication on time, creating/arranging meetings according to the user's schedule, or helping you in doing your homework 😜) without the user's intervention. It's like having your personal secretary. Isn't it a bit exciting?
Okay! But what is Lex?
We will create our bot using Amazon Lex. Let's take a look at what it is!
"Amazon Lex is a fully managed artificial intelligence (AI) service with advanced natural language models to design, build, test, and deploy conversational interfaces in applications." [Click to read more about Lex]
Let's understand what it means. Lex is a service introduced by Amazon Web Services(AWS) that is created using natural language processing (NLP) and automatic speech recognition (ASR). You can create a lifelike bot using pre-built templates by defining the type or create from scratch, then build and test it on your console; after that publish the bot publicly. Example: Amazon Alexa.
Let's Start!
Excited to dive in? Great! Now that we have a clear picture of what we're aiming for, let's roll up our sleeves and bring our mock interviewer bot to life. Follow these simple steps, and you'll have your very own interactive chatbot ready to tackle job interview questions. Ready? Let's get started!
Account Creation :
Visit https://aws.amazon.com/free/ to create your free-tier AWS account. (Remember, your free-tier account is valid for 12 months from your account creation date.)
After creating your AWS account, log in using your "root user" credentials.

Creating a Lambda Function:
In your AWS management console search for
Lambdaand click on the Lambda option that appears in the search results.Once the Lambda console opens, locate and click on the "create function" button.
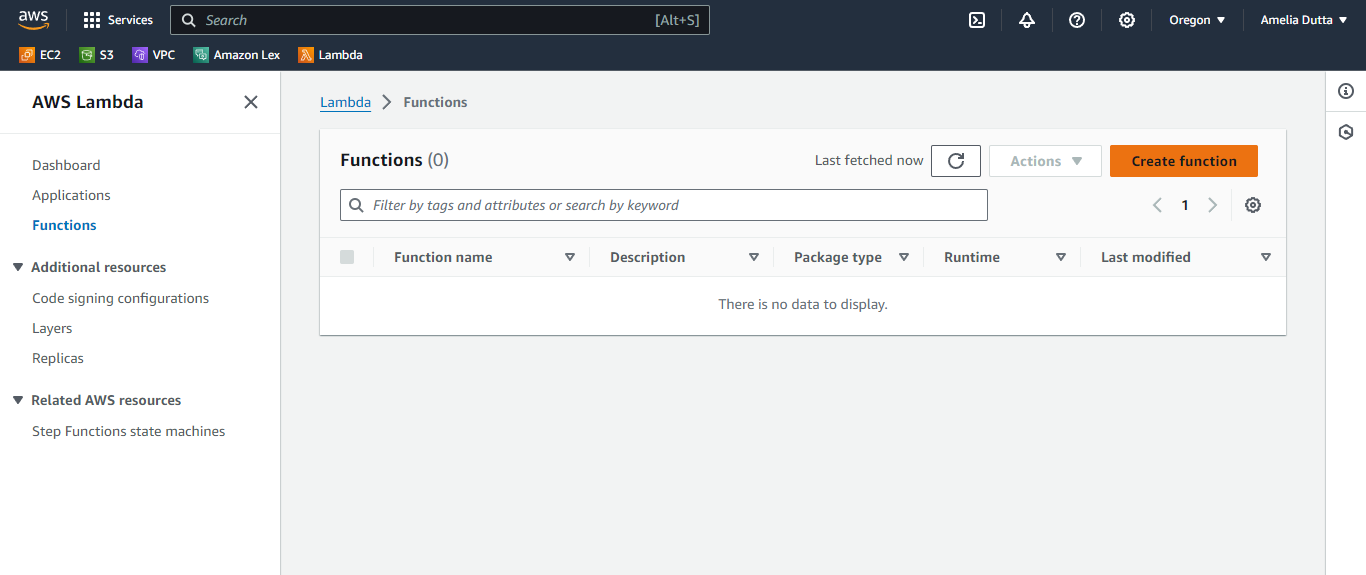
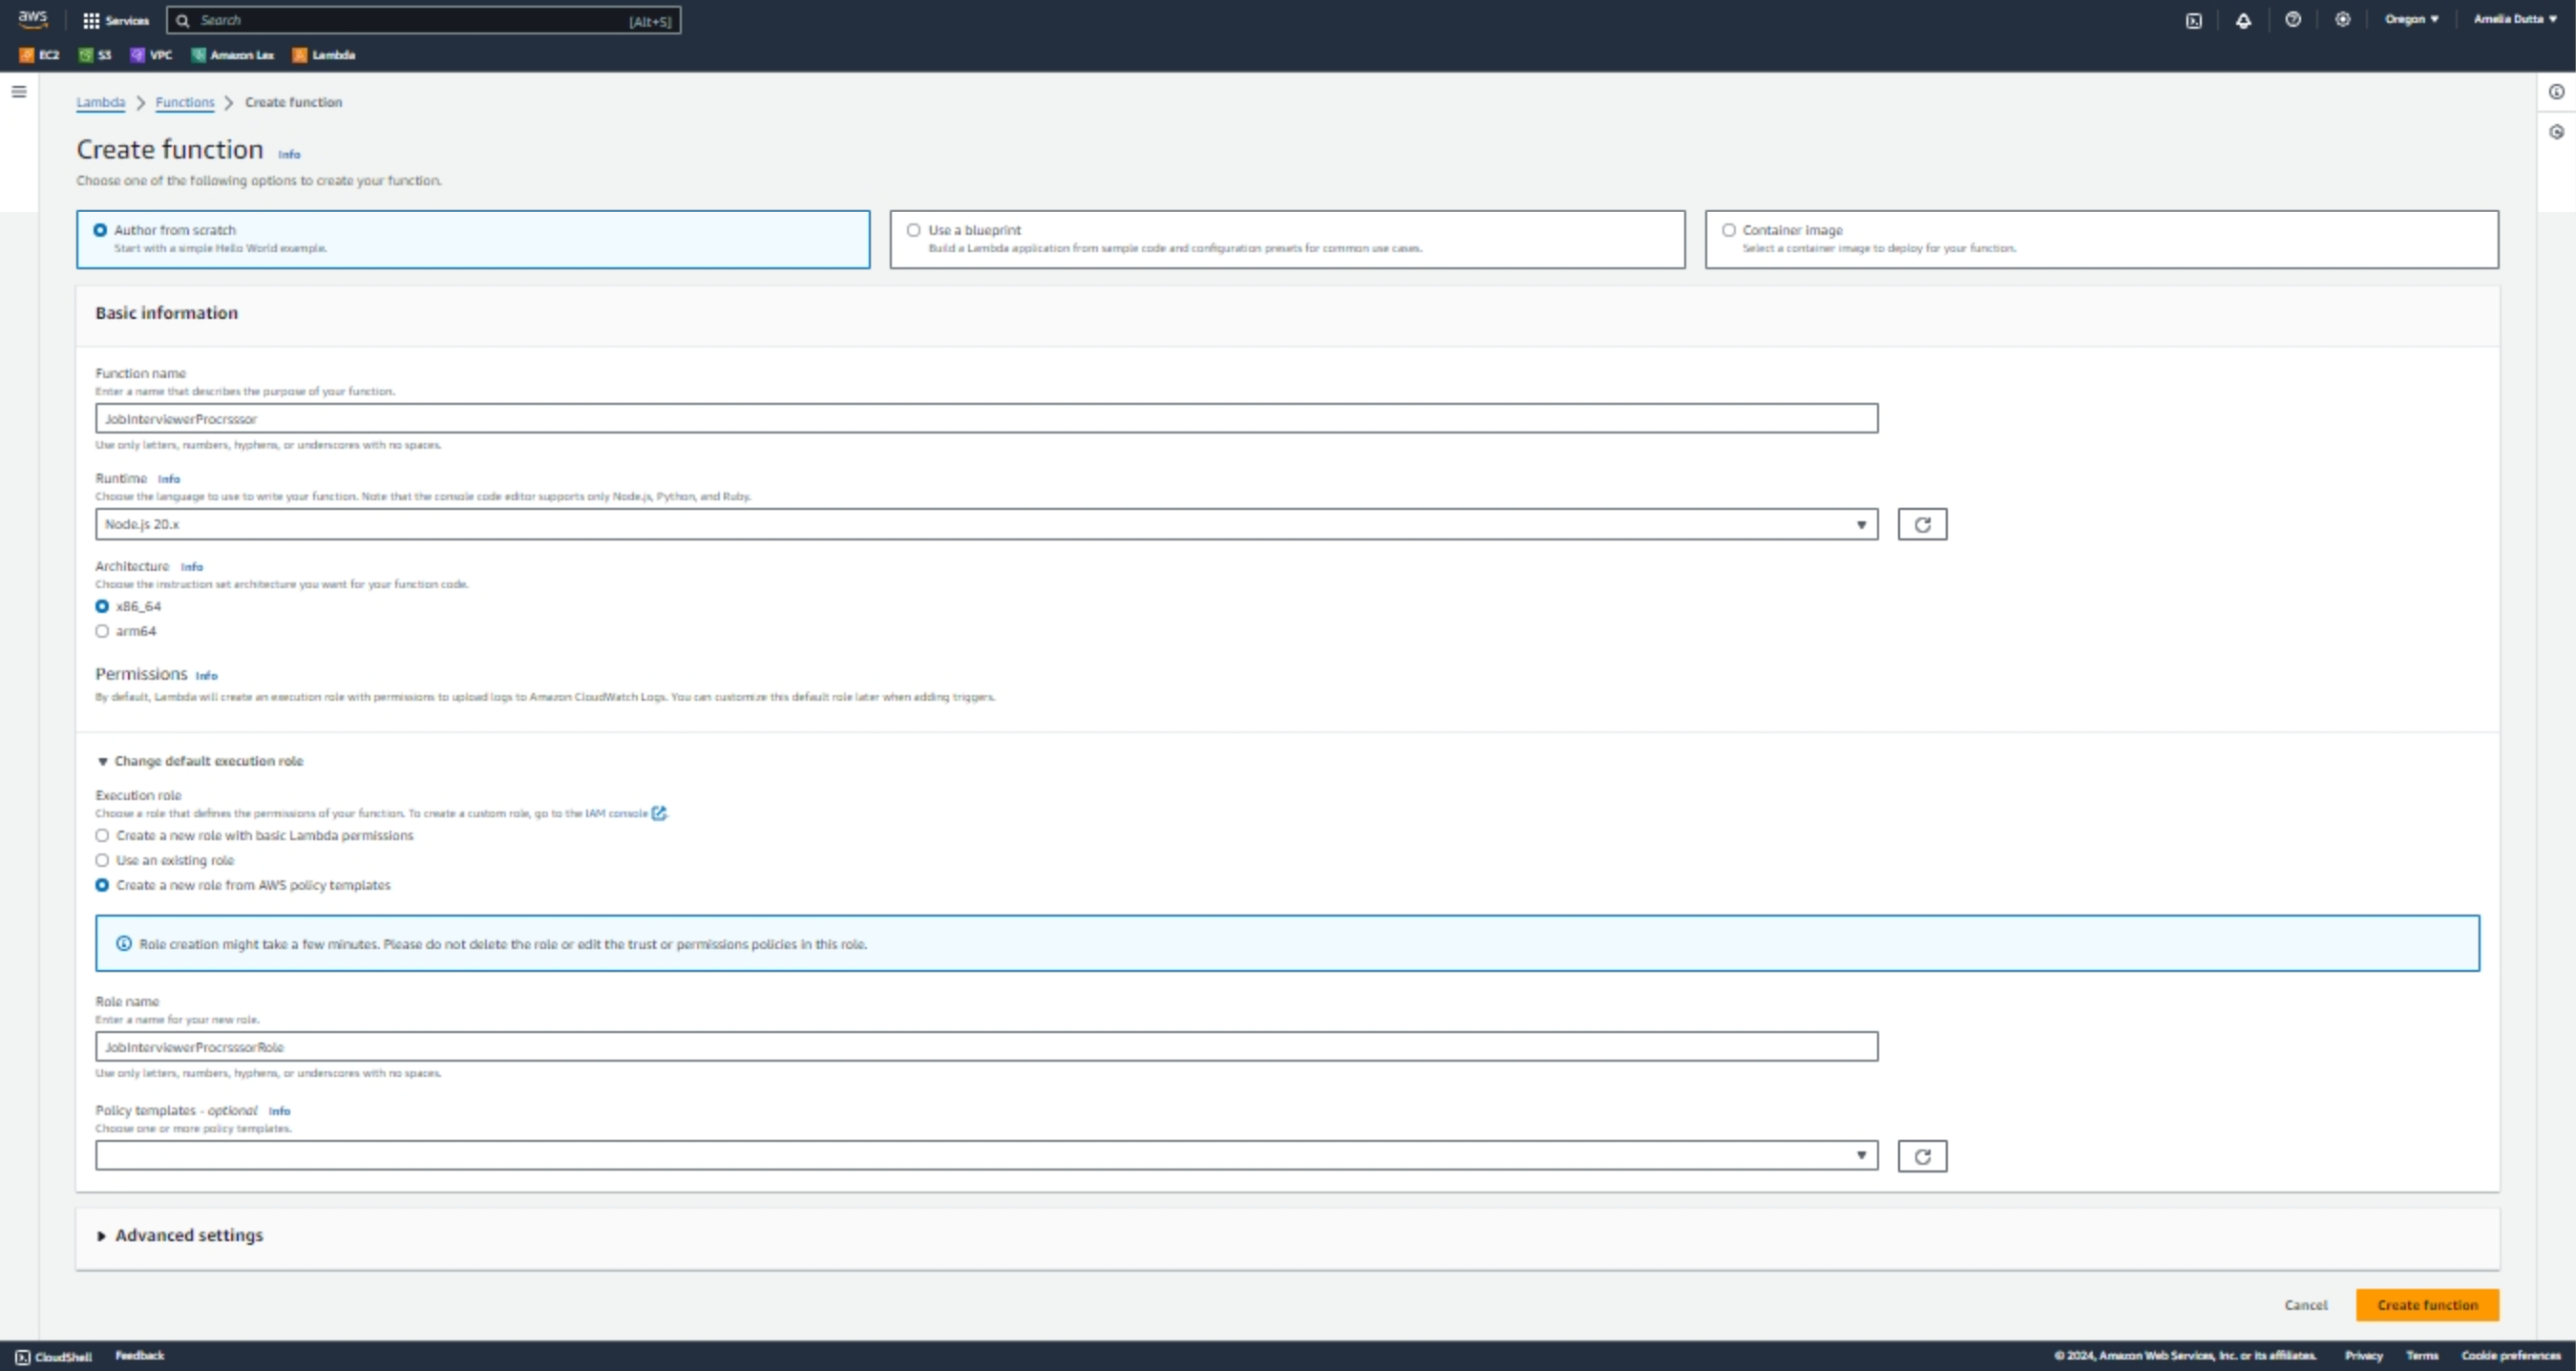
Now in the create function console:
Step 1: Click on the "Author from Scratch" option.
Step 2: Give a function name, for example:
JobInterviewerProcessorStep 3: Choose the current NodeJs version and leave all other settings as default.
Step 4: Click on the
Create a new role from AWS policy templatesoption and assign a role name, such asJobInterviewerProcrsssorRoleStep 5: Now click on "Create function" to finalize and create the Lambda function.
After successfully creating the
JobInterviewerProcessorfunction navigate to the code tab below and replace the existing code in index.mjs either copy the code provided below or write your own.
//needed to interact with Amazon Lex
import { LexModelsV2Client, PutBotCommand } from "@aws-sdk/client-lex-models-v2";

//creates a new instance of the LexModelsV2Client,change "YOUR REGION" before running the code
const client = new LexModelsV2Client({ region: "YOUR REGION" });

//exports a Lambda function named "handler"
export const handler = async (event) => {
  try {
    //parses the incoming event data from Lex
    const lexEvent = JSON.parse(event.body);

    //different cases for various intents (BehavioralInterview, TechnicalInterview etc.)
    //each case handles specific types of questions and provides responses or tips.
    switch (lexEvent.request.intent.name) {
      case "BehavioralInterview":
        //handle behavioral interview questions
        //provide responses, tips, etc.
        break;

      case "TechnicalInterview":
        //handle technical interview questions
        break;
        //you can add any different types of interviews as cases
      default:
        //handle unrecognized intents
        return {
          statusCode: 200,
          body: JSON.stringify({ message: "Intent not recognized" }),
        };
    }

    //you can customize the response
    const response = {
      statusCode: 200,
      body: JSON.stringify({ message: "Success" }),
    };

    return response;
  } catch (error) {
    //handle errors
    return {
      statusCode: 500,
      body: JSON.stringify({ error: error.message }),
    };
  }
};
Delete those comments before saving the code then click "Save".
Switch to the "Test" tab and perform the following steps to verify the functionality of your Lambda function:
Click on Create new event
Give your Event a name, for example:
BehavioralInterviewKeep all other settings as default but update the Event JSON with the provided code.
    {
      "body": "{\"request\":{\"type\":\"IntentRequest\",\"intent\":{\"name\":\"BehavioralInterview\"}}}"
    }
Now "Save" the test event and click on "Test" to check your function.

Create The Bot!
Now that we've configured our Lambda function, let's create our bot. Follow these steps:
Navigate to the Amazon Lex console(Here we're using Lex V2) in your AWS Management console.
Locate and click on the "create bot" button.
Note: If you are using Lex V1, the user interface may differ slightly from Lex V2, but the overall process remains the same.
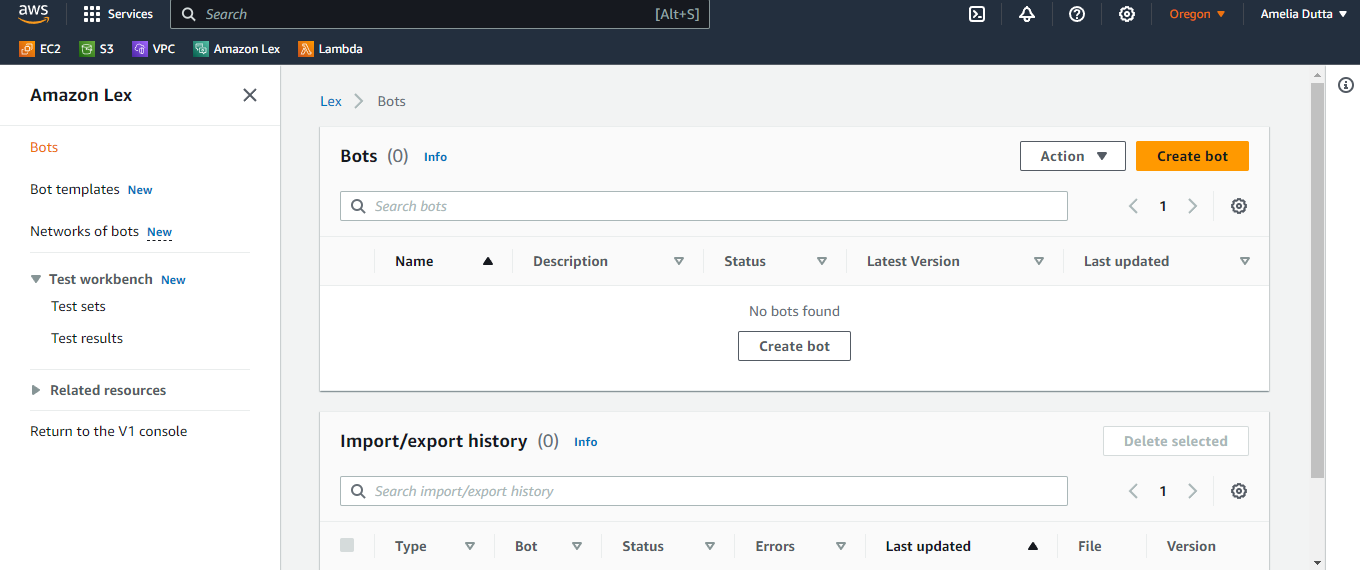
You can create a bot using AWS templates or start from scratch. To begin from scratch, select the "Create a blank bot" option.
Name your bot, such as
"JobInterviewerBot"and provide a suitable description.If it's your first time creating a bot in Lex, opt for "Create a role with basic Amazon Lex permission" or use an existing role.
Choose "Children’s Online Privacy Protection Act (COPPA)" based on your subject (I choose no).
Set Session Timeout to 5 minutes and click "Next".
Select language as "English(US)" or your preferred language and choose a voice interaction like "Sallie."
Leave everything as default and click "Create" to complete the bot creation.


Click on Intents in the left navigation and select "Add empty intent". Give it a name based on the bot's topic, such as "BehavioralInterview". Click on "Add."
In the "Utterance" section, add relevant phrases users might use to initiate the conversation with the bot, like
"Start interview"or"I want to practice some tech interview."etc.Move to the Response tab and write some suitable responses corresponding to the utterances, such as
"Let's start by introducing yourself."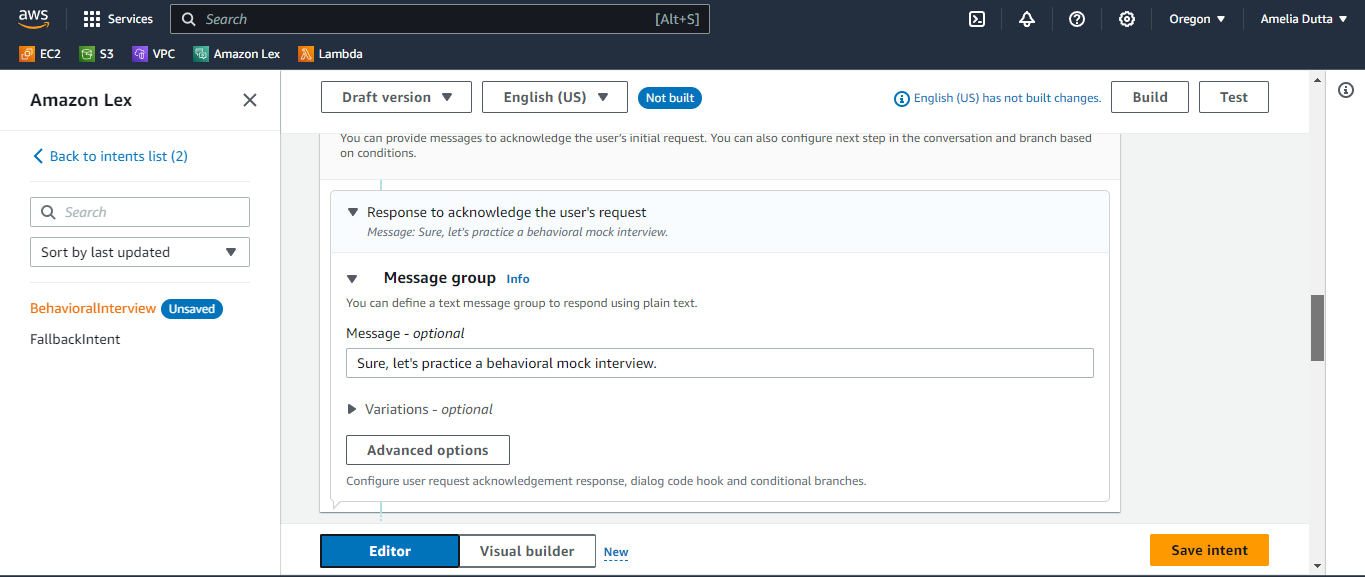
Navigate to the "Slots" section and click on "Add slot." Slots are user-provided values to fulfill the intent.
For the "BehavioralInterview" intent, consider adding questions or prompts based on "Challenge" or "Outcome" slot types. For technical intents, create slots like "Programming Language" or "Database." etc.
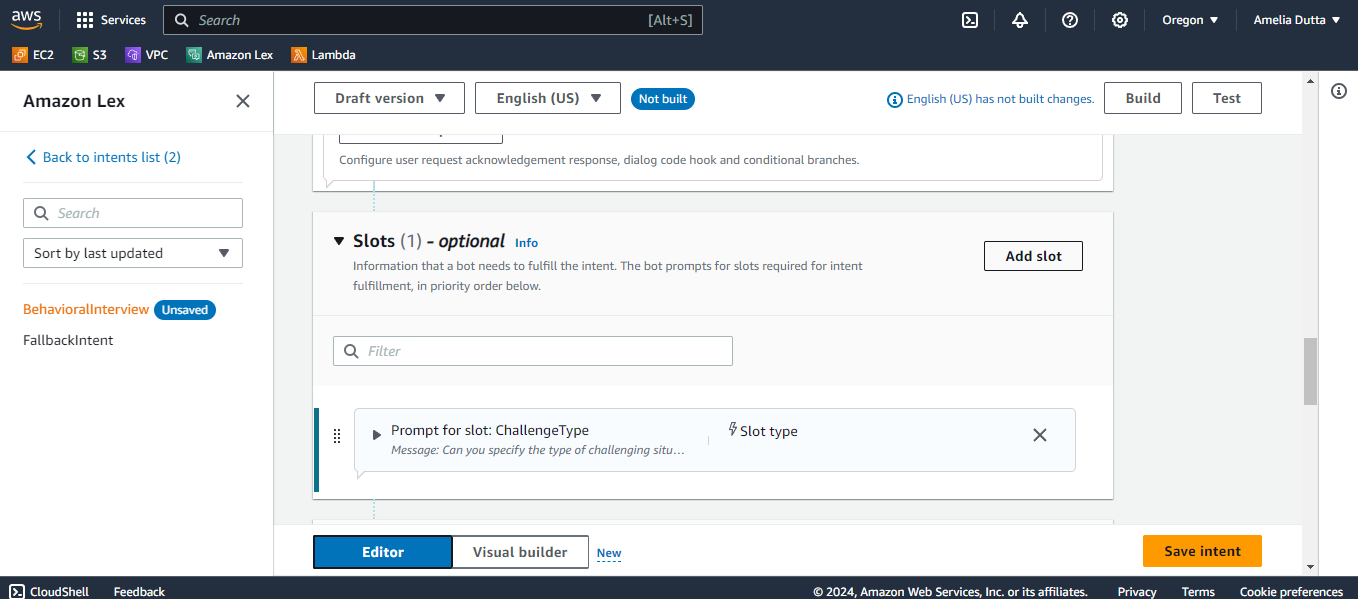
For Slot type, you can use in-built or customized slots and click Add.
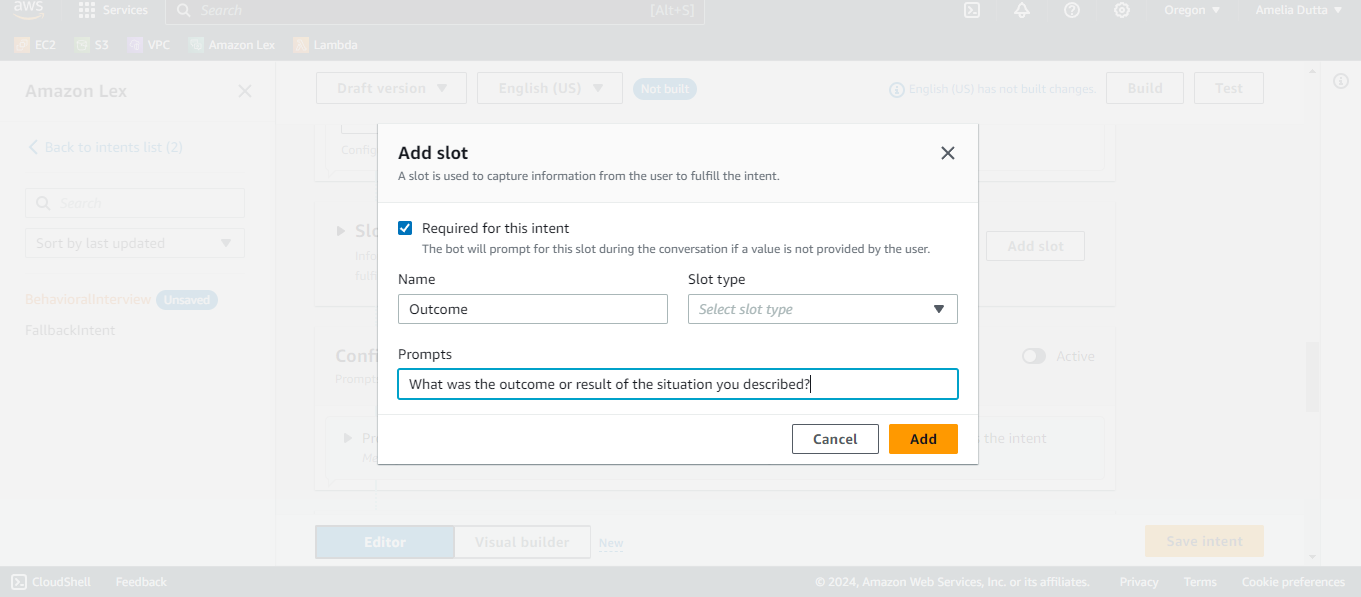
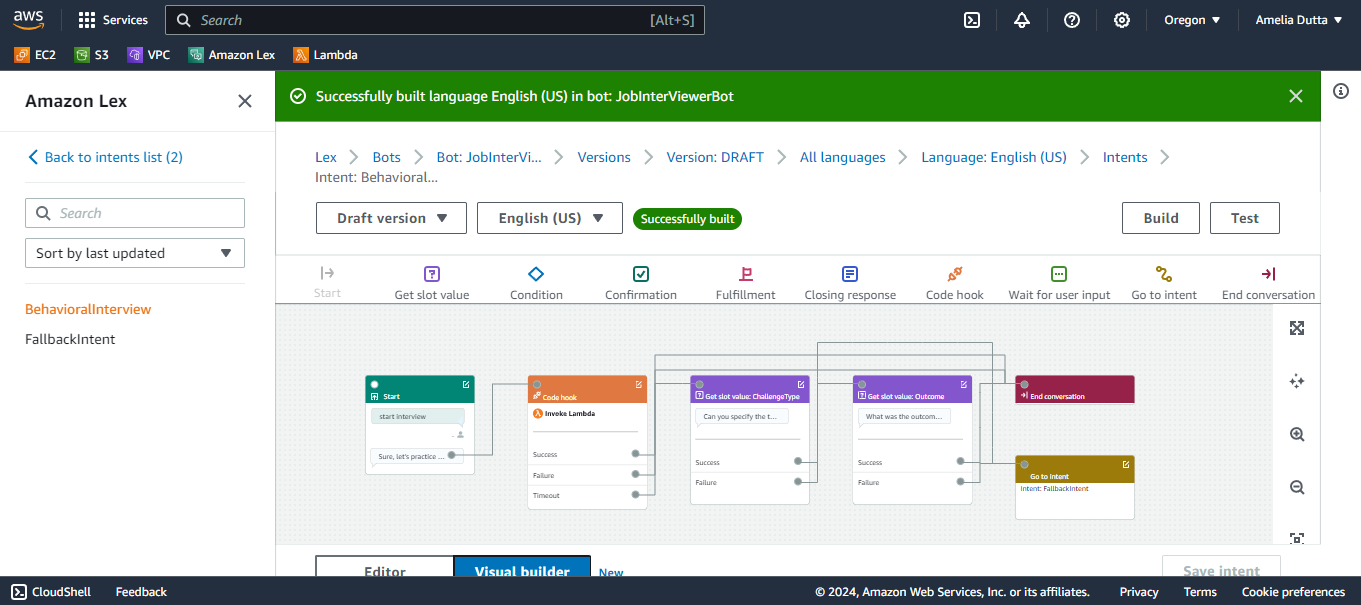
Build The Bot
- Now we have everything to need to create the bot so click on "Save Intent" and run the "Build" process to integrate your changes into the bot's functionality. Building the bot is crucial to reflect and implement the latest modifications.
Test The Bot
- Now it's time for the most interesting and long-awaited part - testing the bot! Click on "Test" and a demo chat-bot interface will appear on the screen. Write or speak any utterance that you've added to initiate the conversation and let the practice begin! Congratulations, you have successfully created your Mock Interviewer bot.🎉🎉

Publish bot in Amazon Lex V2
Remember until now we're chatting with the draft version of the Lex bot. If you want to publish the bot in amazon lex V2 follow these steps:
In your management console, go to Lex and click on the name of your bot.
In the Left Navigation menu select Bot version and choose Create version.
Name your version, for example, v1.0.0.
Under Deployment, click on "Alias" and create an alias with a suitable name like "production_1." Associate the alias with the version you just created.
Ta-da! 🎈 Give yourself a pat on the back—you've successfully published your bot.
Conclusion
Finally, I hope this article has helped you with a brief understanding of how bots work and guided you through the process of creating and publishing a chatbot in Amazon Lex V2. Happy coding! 🤖
Subscribe to my newsletter
Read articles from Amelia Dutta directly inside your inbox. Subscribe to the newsletter, and don't miss out.
Written by

Amelia Dutta
Amelia Dutta
Front-End Web Developer | React, JavaScript, HTML, CSS | AWS Certified | Creating Engaging User Experiences
