Setting Up a Kubernetes Cluster Using Kubeadm: A Step-by-Step Guide
 Pramoth Ravi
Introduction:
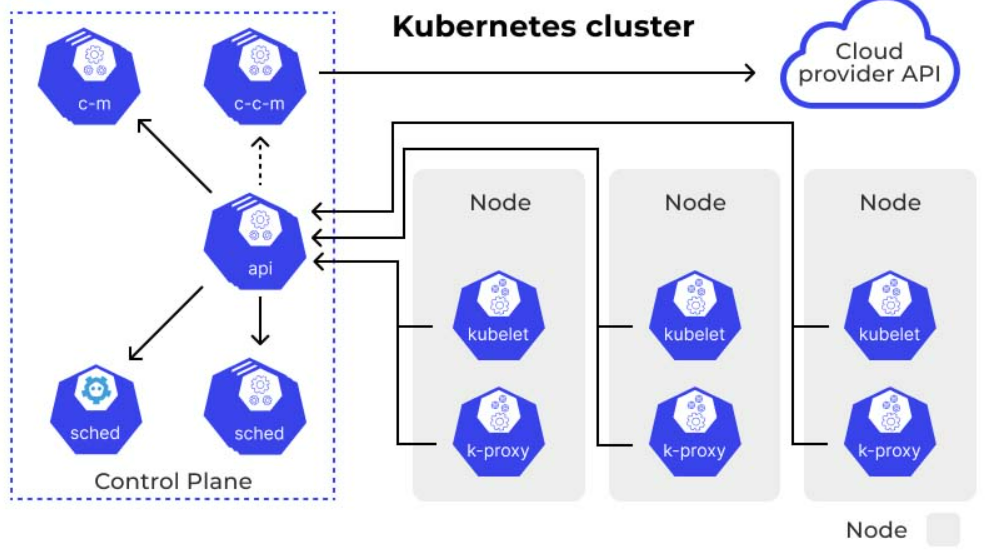
Building a Kubernetes (K8s) cluster is a fundamental step towards orchestrating containerized applications efficiently. In this guide, we'll walk through the process of setting up a Kubernetes cluster using Kubeadm on two Ubuntu 20.04 instances, designating one as the master and the other as a worker node.
Prerequisites :
- Two Ubuntu 20.04 instances (one master, one worker)
Step 1: Installing Kubectl on All Nodes To begin, ensure that your Ubuntu instances are up to date by running the following commands:
sudo apt update
sudo apt install curl -y
Next, install Kubectl on all nodes:
curl -LO https://dl.k8s.io/release/$(curl -L -s https://dl.k8s.io/release/stable.txt)/bin/linux/amd64/kubectl
sudo install -o root -g root -m 0755 kubectl /usr/local/bin/kubectl
kubectl version --client
Step 2: Installing Docker
Install Docker on all nodes:
sudo apt-get update
sudo apt-get install -y docker.io
sudo usermod -aG docker ubuntu
newgrp docker
sudo chmod 777 /var/run/docker.sock
Step 3: Installing Kubernetes Components Add the Kubernetes repository and install the required components:
sudo curl -s https://packages.cloud.google.com/apt/doc/apt-key.gpg | sudo apt-key add -
sudo tee /etc/apt/sources.list.d/kubernetes.list <<EOF
deb https://apt.kubernetes.io/ kubernetes-xenial main
EOF

sudo apt-get update
sudo apt-get install -y kubelet kubeadm kubectl
sudo snap install kube-apiserver
Step 4: Initializing the Kubernetes Master Run the following commands on the master node:
sudo kubeadm init --pod-network-cidr=10.244.0.0/16
mkdir -p $HOME/.kube
sudo cp -i /etc/kubernetes/admin.conf $HOME/.kube/config
sudo chown $(id -u):$(id -g) $HOME/.kube/config
kubectl apply -f https://raw.githubusercontent.com/coreos/flannel/master/Documentation/kube-flannel.yml
Step 5: Joining the Worker Node After initializing the master, you will receive the kubeadm join command. Execute this command on the worker node:
sudo kubeadm join <master-node-ip>:<master-node-port> --token <token> --discovery-token-ca-cert-hash <hash>
Step 6: Verification From the master node, verify that the worker node has joined the cluster:
kubectl get nodes
Conclusion:
Congratulations! You have successfully set up a Kubernetes cluster using Kubeadm, allowing you to orchestrate containerized applications seamlessly. This cluster can now be used as a robust foundation for deploying and managing your containerized workloads.
Feel free to contact me via LinkedIn if you encounter any issues or need support.
Subscribe to my newsletter
Read articles from Pramoth Ravi directly inside your inbox. Subscribe to the newsletter, and don't miss out.
Written by
