Installing Krita 5.2+ Image Editor for ComfyUI.
 Brian King
TL;DR.
This post provides a step-by-step guide on how to set up the Krita 5.2+ image editor so it connects to a Local ComfyUI Server running on my Ubuntu distro. It also covers the downloading and setup of the Generative AI plugin for Krita, running the plugin script that it installs all the Models, and using the ComfyUI Manager to install the Custom Nodes. This guide also shows the results of my tests.
Attributions:
https://github.com/Acly/krita-ai-diffusion#installation ↗, and
https://github.com/Acly/krita-ai-diffusion/blob/main/doc/comfy-requirements.md#-download-script ↗.
An Introduction.
As I mentioned in a previous post, ComfyUI and SDXL (Stable Diffusion XL) are a Big Deal, but an image editor adds a new level of AWESOME to local, AI image generation.
The purpose of this post is to add an image editor to a local, AI image generator.
The Big Picture.
There is an adage that declares "A picture is worth a thousand words." This statement means "Seeing something is better for learning than having it described." Using AI images in my posts and projects might add "worth" to my work, especially if these pictures help my "learning" process.
Prerequisites.
A Linux-based distro (I use Ubuntu),
Anaconda, and
ComfyUI.
Downloading the Krita 5.2+ Image Editor.
- I visit the homepage and download the Krita AppImage package:
https://krita.org/en/download/krita-desktop/
NOTE: An AppImage contains an app and the files it needs to run. It has no dependencies other than what is in the targeted base operating system(s).
- I change to the
Downloadsdirectory:
cd ~/Downloads
- I make the AppImage package an executable file:
chmod u+x krita-5.2.2-x86_64.appimage
- I create a
symlink(symbolic link) from the AppImage package to theDesktop:
ln -s /media/brian/Downloads/Ubuntu/Krita/krita-5.2.2-x86_64.appimage ~/Desktop/'Krita 5.2.2'
NOTE: This symlink is crafted to work with the location of the AppImage package.
I run Krita by right-clicking on the Desktop symlink and selecting "Run as a program" from the pop-up menu. (As a result, certain directories are made.)
I exit Krita.
Installing Generative AI for Krita.
- I download the plugin for Krita:
https://github.com/Acly/krita-ai-diffusion/releases/latest
- I unpack the zip file to the (newly made)
pykritadirectory, e.g.:
unzip /media/brian/Downloads/Ubuntu/Krita/krita_ai_diffusion-1.12.0.zip -d ~/.local/share/krita/pykrita
NOTE 1: Again, this command is unique to my setup.
NOTE 2: I installed unzip in an earlier post (
sudo apt install -y unzip).
Installing the ComfyUI Custom Nodes.
I start the (comfyui) environment:
conda activate comfyui
- I start the ComfyUI server:
python3 main.py
- I open ComfyUI in a browser:
http://127.0.0.1:8188
I open the Manager and click on the "Install Custom Nodes" button.
I install these custom nodes:
ComfyUI's ControlNet Auxiliary Preprocessors (search: fann),
ComfyUI_IPAdapter_plus (search: cubiq),
UltimateSDUpscale (search: ssitu), and
ComfyUI Nodes for External Tooling (search: acly).
Installing the ComfyUI Models for Krita.
- I stop the ComfyUI server:
CTRL + C
- I install the dependencies:
python -m pip install aiohttp tqdm
- I change to the
ai_diffusiondirectory:
cd ~/.local/share/krita/pykrita/ai_diffusion
- I run the
download_models.pymodule and add those models to theComfyUIinstallation:
python ./download_models.py ~/ComfyUI
NOTE: It took me approximately 15-minutes to download these models.
- I exit the (comfyui) environment:
conda activate
- I return to the (comfyui) environment:
conda activate comfyui
- I start the ComfyUI server:
python3 main.py
Setting Up Krita.
I run Krita by right-clicking on the Desktop symlink and selecting "Run as a program" from the pop-up menu.
I enable the plugin in Krita:
Settings ‣ Configure Krita ‣ Python Plugins Manager
I restart Krita.
I create a new document.
I enable the plugin dock:
Settings ‣ Dockers ‣ AI Image Generation
I click the gears icon in the top-right of the "AI Image Generation" dock.
I click the "Connection" option in the left panel.
I choose the "Connect to external Server (local or remote)" radio button.
I set the "Server URL" to
127.0.0.1:8188and click the "Connect" button.
NOTE: This is the same URL for displaying ComfyUI in a browser.
- I test Krita when the green "Connected" message shows.
NOTE: The Server URL and green message may already be set up.
- I click the "OK" button.
Testing Krita.
I click the drop-down menu in the top-left of the "AI Image Generation" dock and select the "Live" option (which looks like a play button.)
I click the actual "Live" button called "Start/stop live preview."
I add a prompt.
I draw on the canvas and watch the "AI Image Generation" dock interpret my drawing.
The Results.
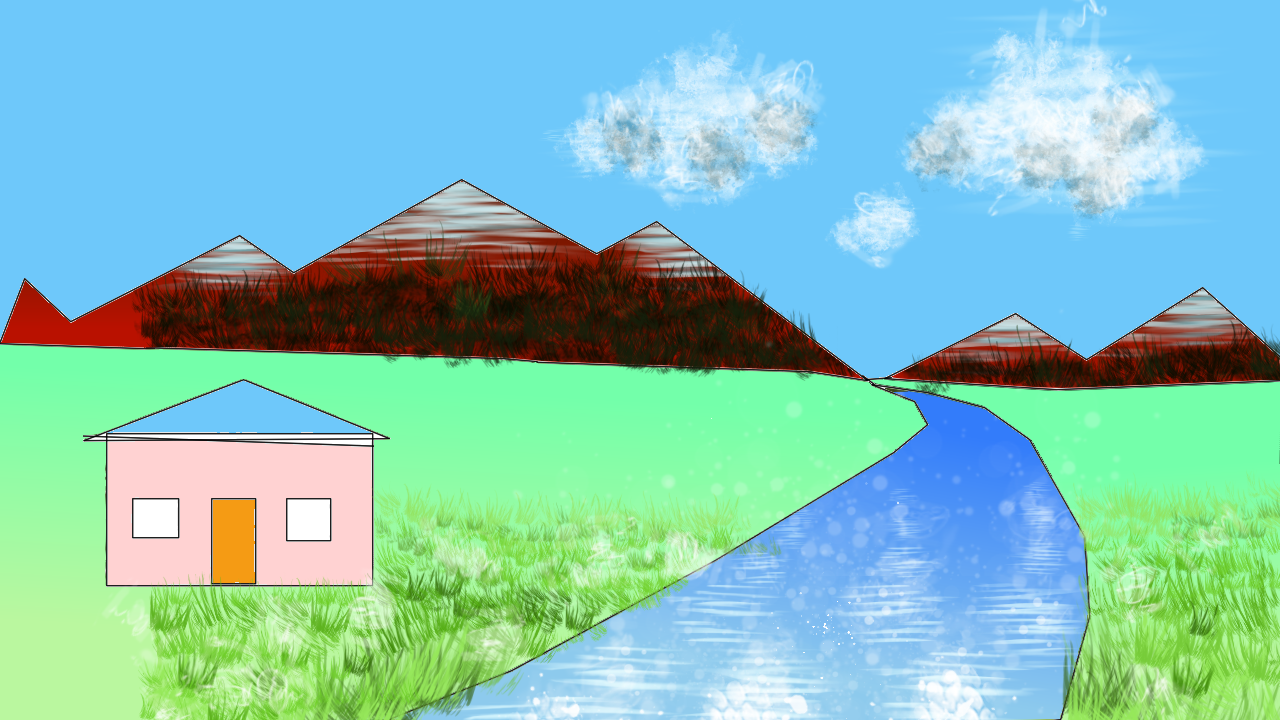
I sat down and drew a quick sketch.
Before.
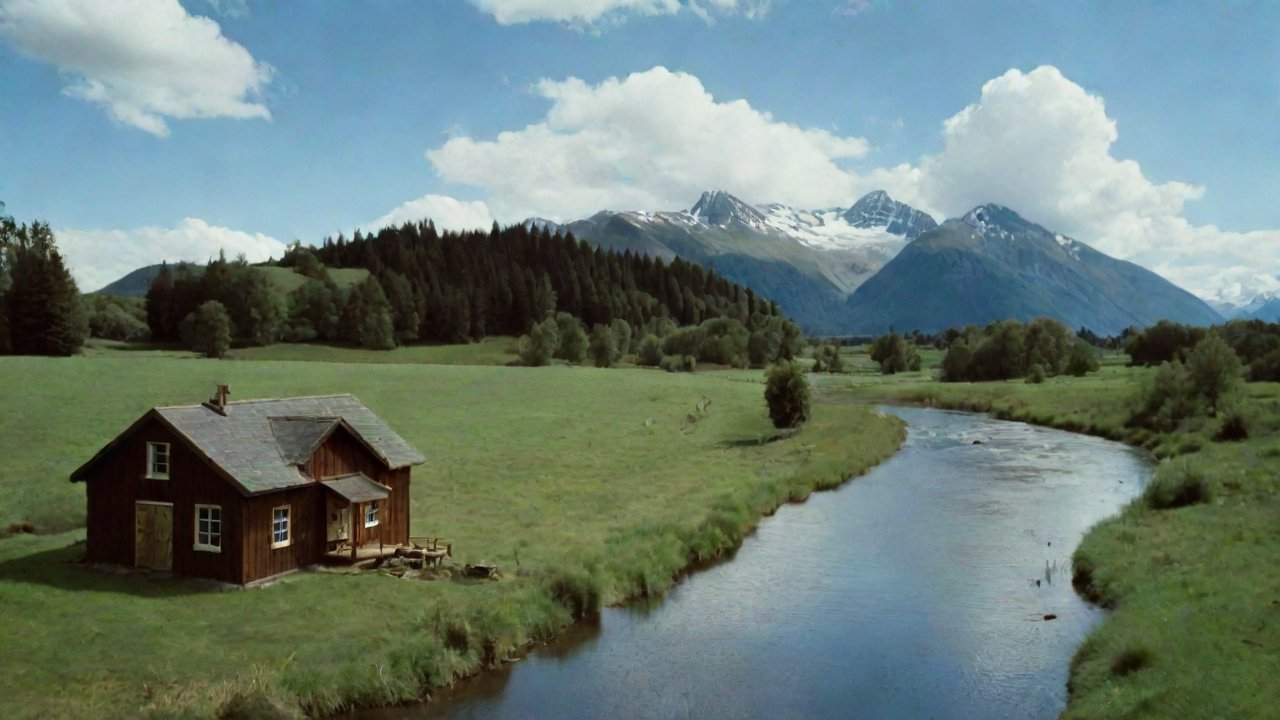
Here's the prompt that goes with my quick sketch:
a cabin, in a green field, by a river, mountains in the background, blue skies, fluffy clouds...

After #1: Cabin by the River.
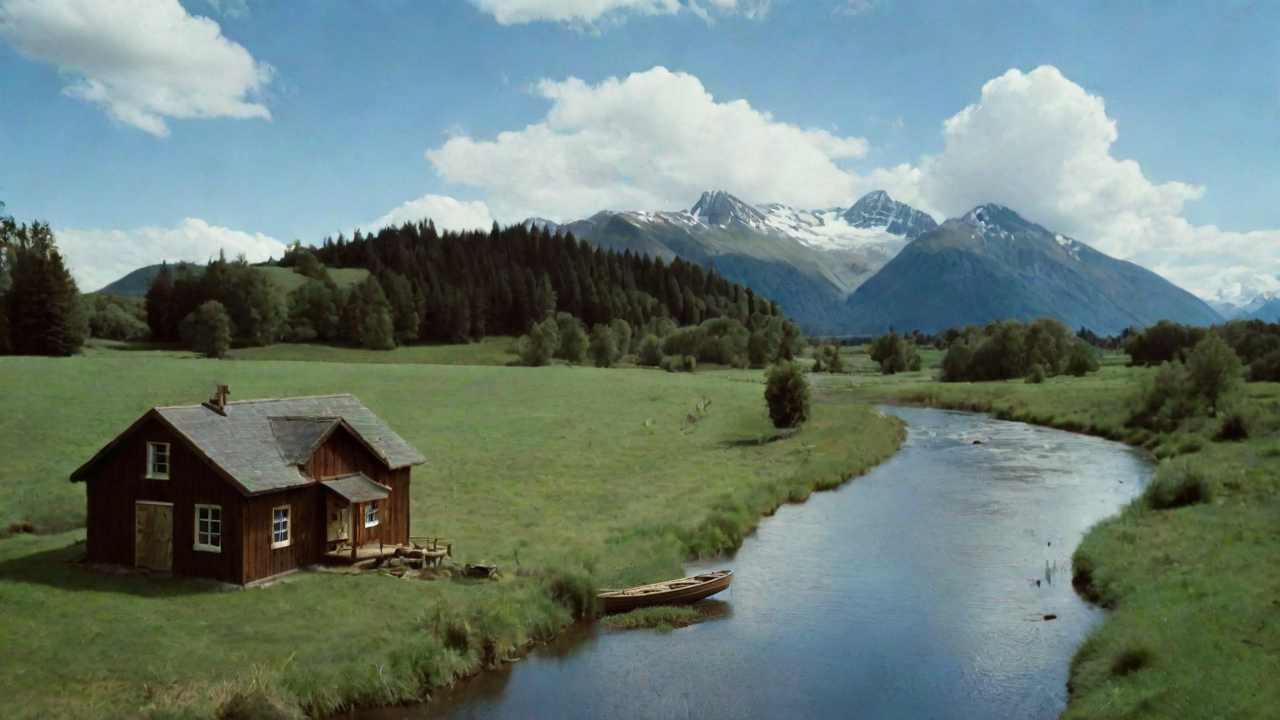
...and here's (one of) the results. But I want to include a row boat, too.

After #2: Row Boat by the Cabin.
With a little bit of scaling and tiny touch of feathering, I now have a row boat.

In Conclusion.
This is how I added a new level of AWESOME to my locally-generated AI images. I set up the Krita 5.2+ image editor and connected it to a local ComfyUI Server running on my Ubuntu workstation. The results have changed the game for me. Combining Krita, ComfyUI and SDXL is a Big Deal. They've taken my workflow to a whole new level, especially if I use AI images in my posts and projects. All I did was download, and set up, the Generative AI plugin for Krita, installed all the Models, and used the ComfyUI Manager to install the Custom Nodes.
My test results were mind-melting! A quick sketch of a cabin by the river transformed into a stunning AI-generated image. I'm now ready to bring more value to my work, thanks to these tools.
Have you levelled up your AI image generation game? Are you using AI images? Does it make a difference to your workflow? Leave your thoughts below!
Until next time: Be safe, be kind, be awesome.
Subscribe to my newsletter
Read articles from Brian King directly inside your inbox. Subscribe to the newsletter, and don't miss out.
Written by

Brian King
Brian King
Thank you for reading this post. My name is Brian and I'm a developer from New Zealand. I've been interested in computers since the early 1990s. My first language was QBASIC. (Things have changed since the days of MS-DOS.) I am the managing director of a one-man startup called Digital Core (NZ) Limited. I have accepted the "12 Startups in 12 Months" challenge so that DigitalCore will have income-generating products by April 2024. This blog will follow the "12 Startups" project during its design, development, and deployment, cover the Agile principles and the DevOps philosophy that is used by the "12 Startups" project, and delve into the world of AI, machine learning, deep learning, prompt engineering, and large language models. I hope you enjoyed this post and, if you did, I encourage you to explore some others I've written. And remember: The best technologies bring people together.