Streamlining Node.js Development and Deployment: A Jenkins CI/CD Pipeline on AWS
 Diksha Jadhav
Table of contents
- Introduction:
- Key Achievements:
- What is a CI/CD Pipeline?
- Step 2: Install Jenkins on the server
- Step 3: To access Jenkins
- Can You Use GitHub + Jenkins?
- How to Set Up the Jenkins + GitHub Integration
- To connect your Jenkins job with a GitHub repository, follow these steps:
- To enable Jenkins integration with GitHub, follow these guidelines:
- Conclusion:
- References:
Introduction:
In the fast-paced world of software development, continuous integration and continuous deployment (CI/CD) have become essential practices to ensure agility, reliability, and efficiency in the development lifecycle. This article will guide you through the process of deploying a Node.js application on an Amazon EC2 instance and establishing a Jenkins-based CI/CD pipeline. In this project, we successfully implemented a Jenkins-based CI/CD pipeline to automate the deployment of a Node.js application on an EC2 instance. Through the seamless integration of AWS, GitHub, Docker, and Jenkins, we transformed our development and deployment processes, achieving unparalleled efficiency and reliability.
Key Achievements:
Automated Code Integration, Testing, and Deployment:
- Leveraging Jenkins, we automated the entire development lifecycle, from code integration to testing and deployment. This not only saved time but also enhanced the overall reliability of our application.
AWS Integration for Scalability:
- The incorporation of AWS services allowed us to harness the scalability and flexibility of the cloud. Our EC2 instance served as a robust foundation for hosting and running our Node.js application.
Docker for Application Portability:
- Docker played a pivotal role in ensuring application portability. The use of containers facilitated consistent deployment across various environments, mitigating potential compatibility issues.
GitHub Webhooks for Seamless Automation:
- GitHub webhooks were set up to enable seamless automation. This meant that every code push triggered the CI/CD pipeline, resulting in automatic testing and deployment. This not only accelerated our development cycle but also reduced manual intervention.
Faster Updates and Improved Reliability:
With the CI/CD pipeline in place, updates were delivered at an accelerated pace. This not only kept our application current but also contributed to enhanced reliability through automated testing.
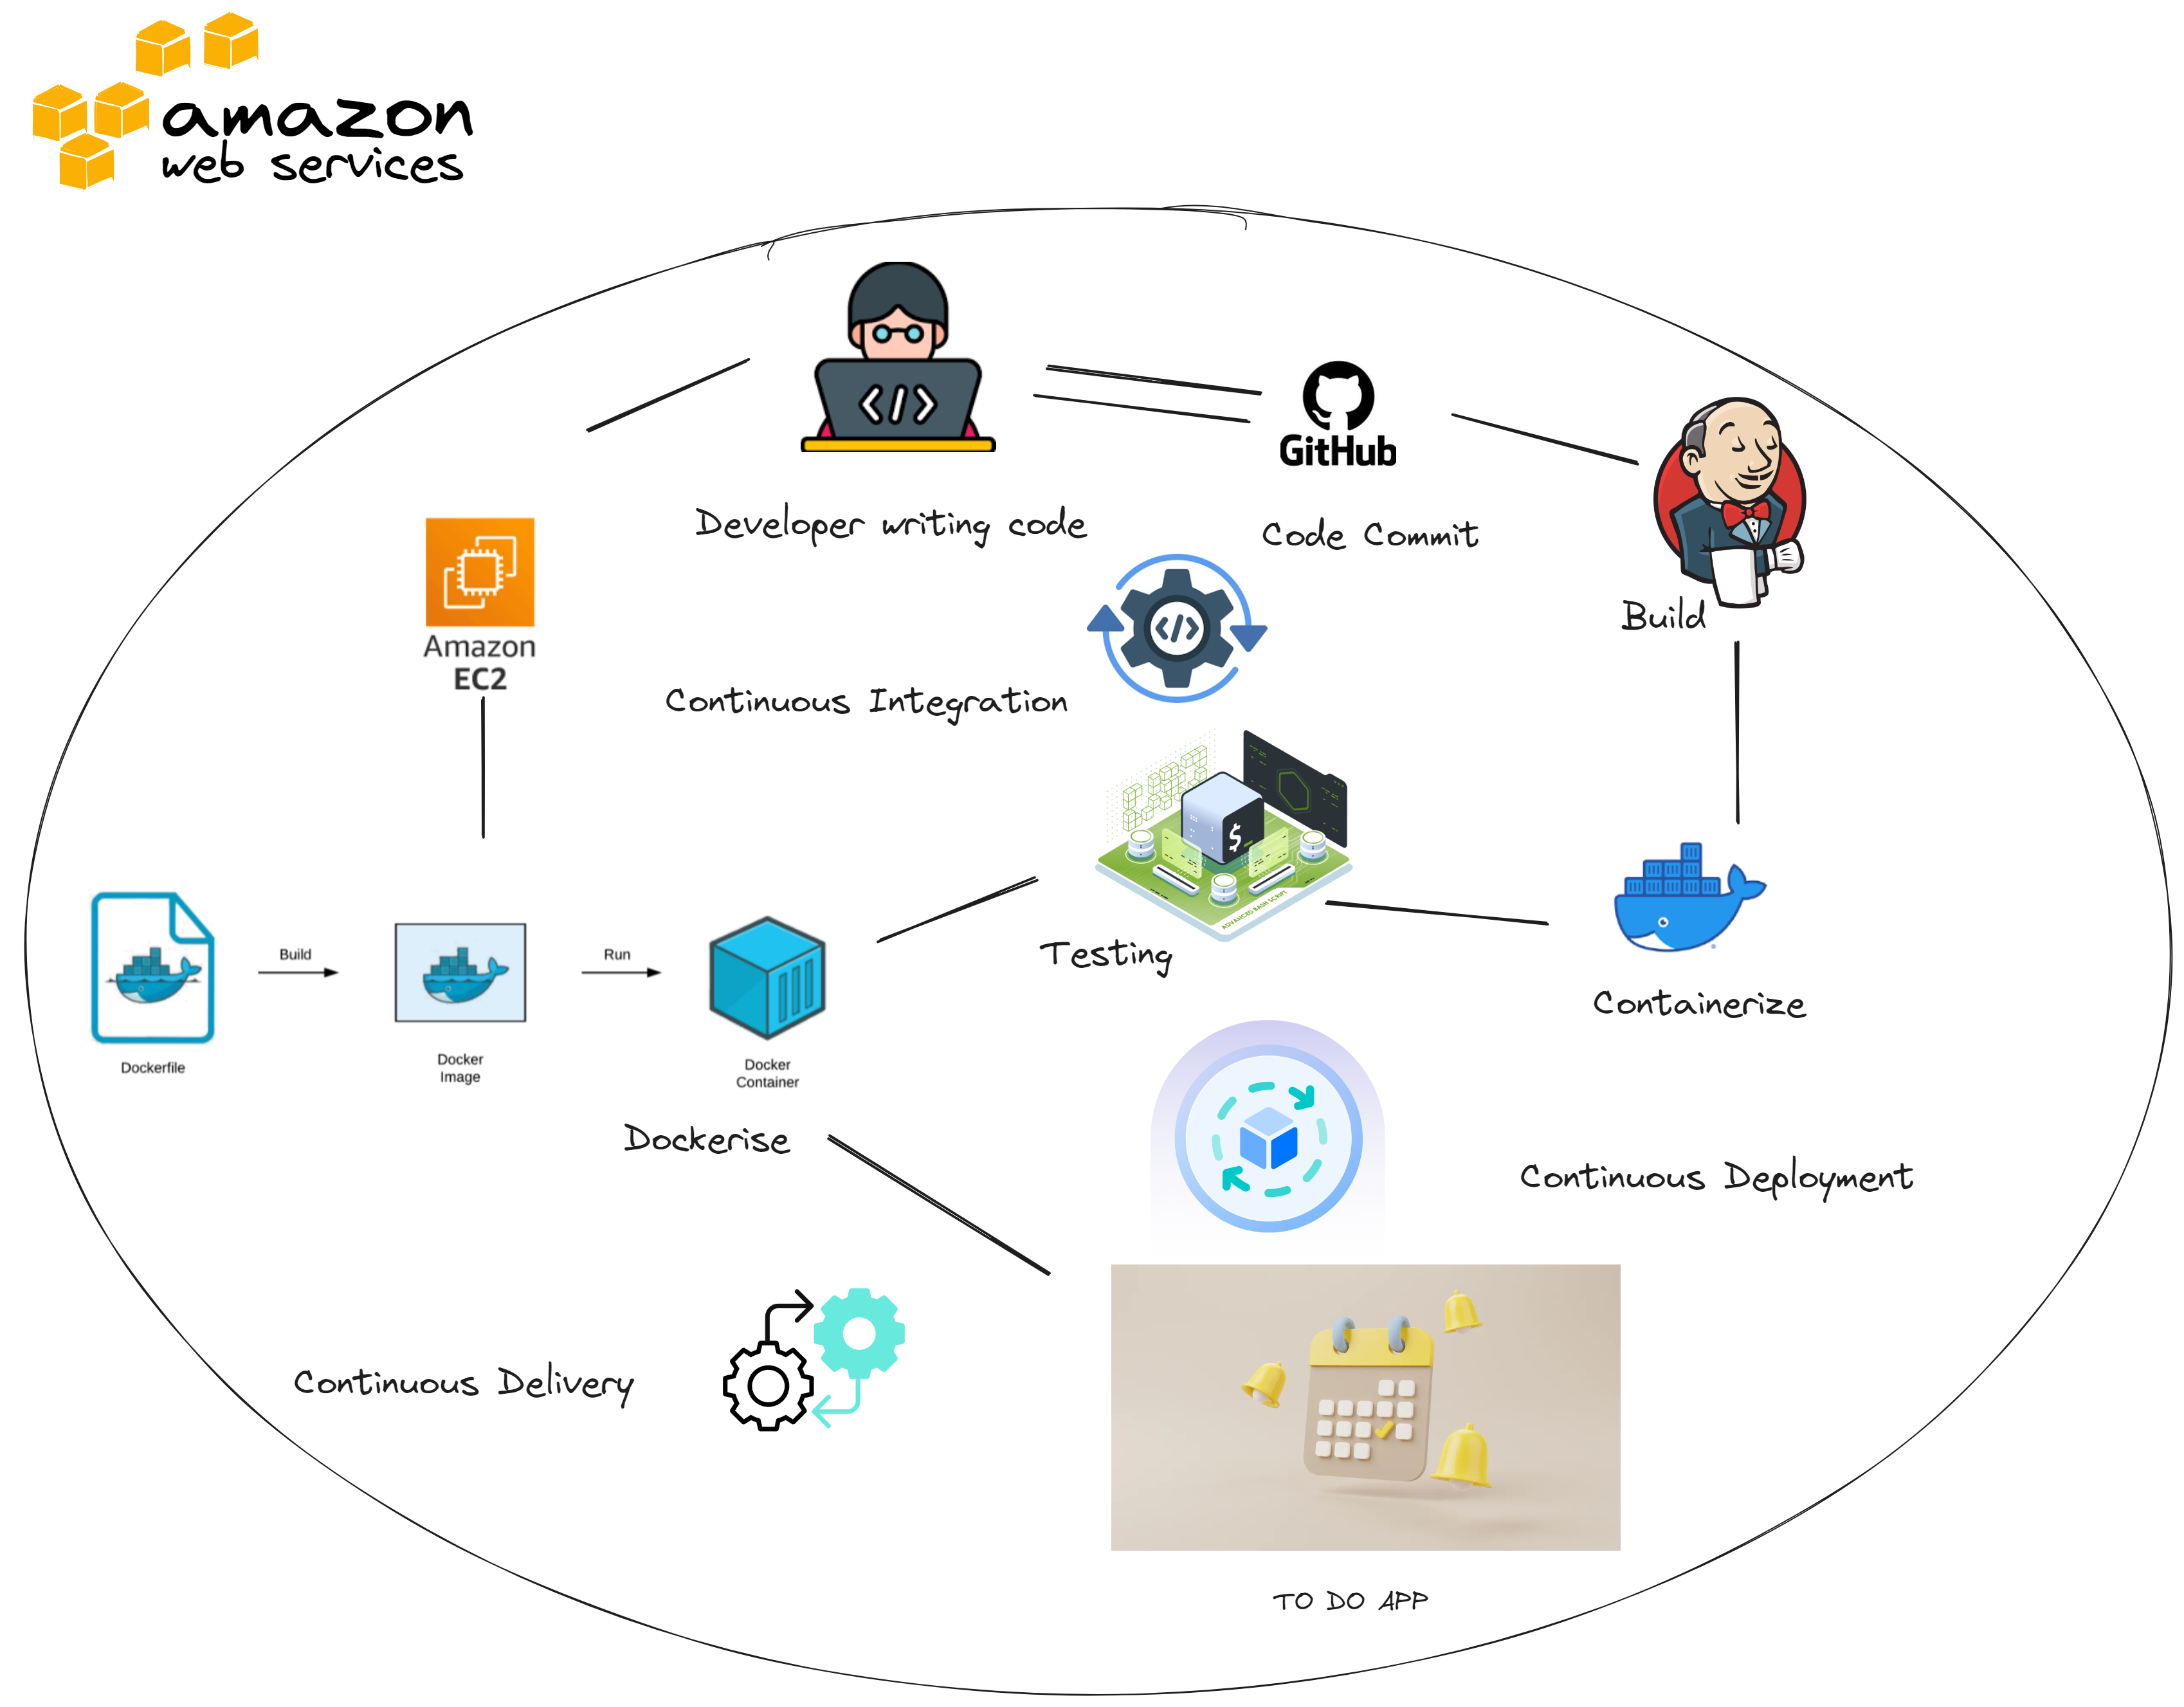
What is a CI/CD Pipeline?
A pipeline is a process that drives software development through a path of building, testing, and deploying code, also known as CI/CD. By automating the process, the objective is to minimize human error and maintain a consistent process for how software is released.
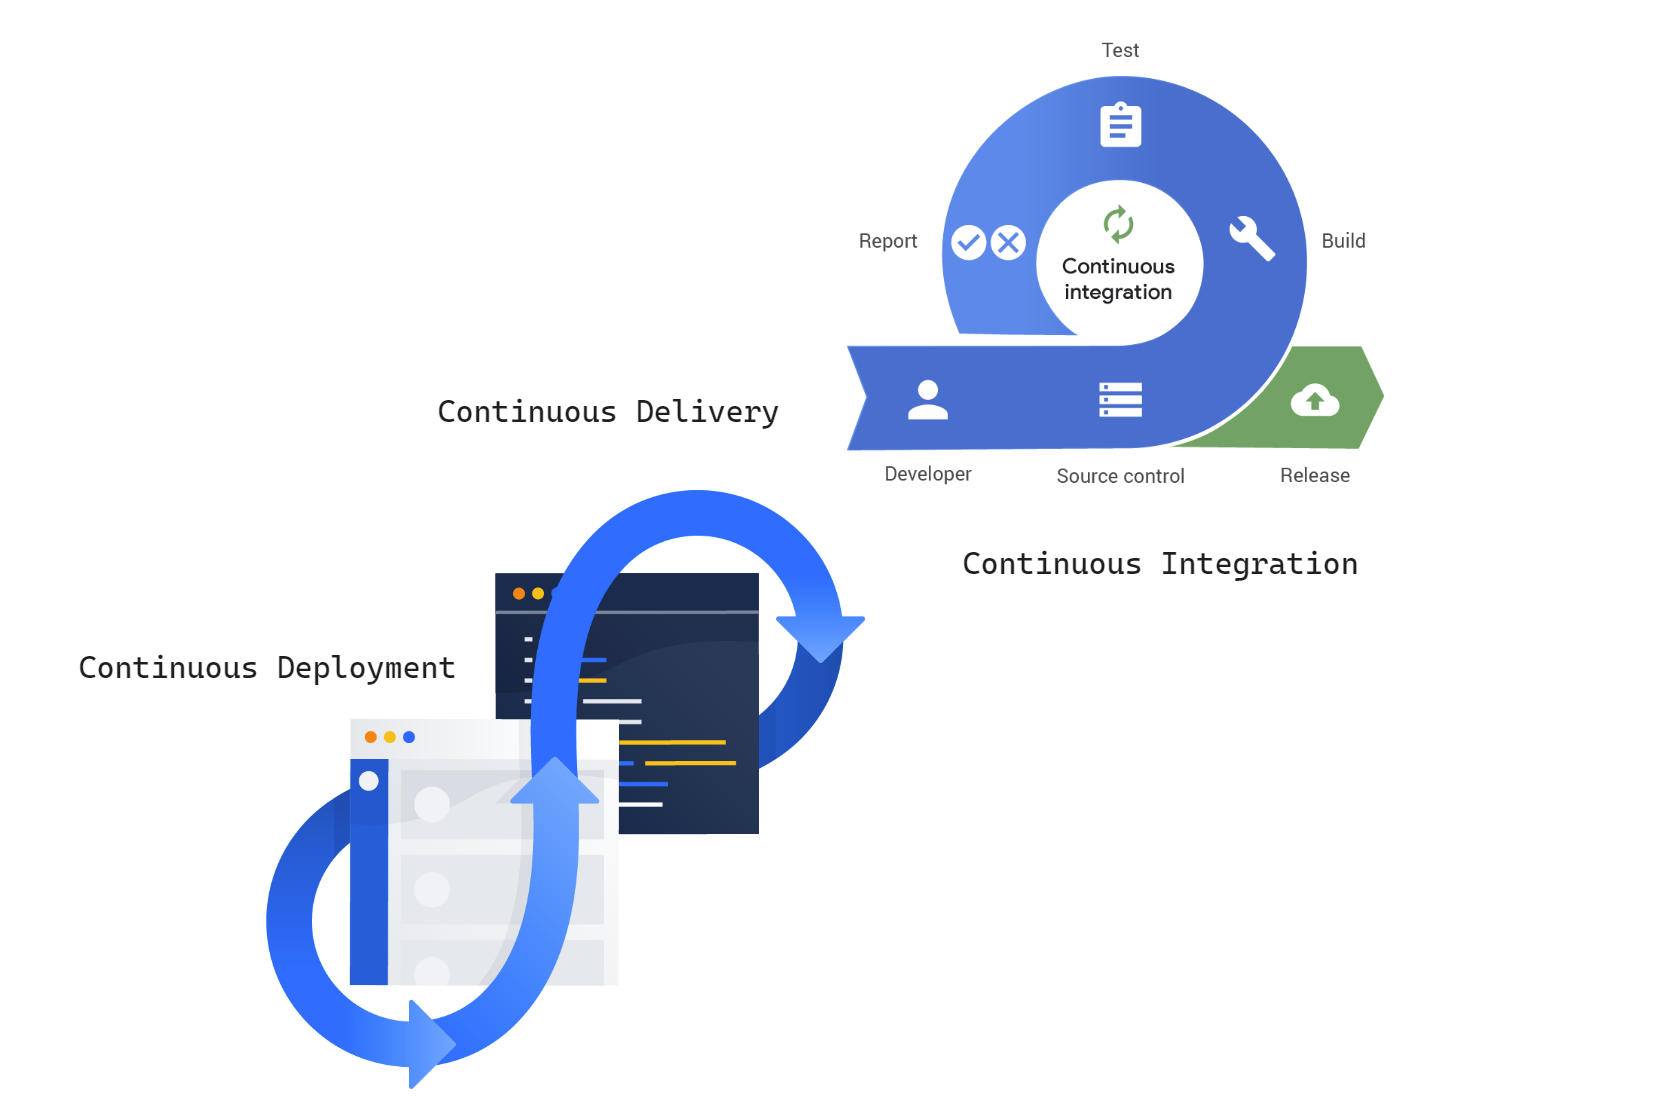
What are the differences between continuous integration, continuous delivery, and continuous deployment (CI/CD)?
Continuous integration
Developers practicing continuous integration merge their changes back to the main branch as often as possible. The developer's changes are validated by creating a build and running automated tests against the build. By doing so, you avoid integration challenges that can happen when waiting for release day to merge changes into the release branch.
Continuous integration puts a great emphasis on testing automation to check that the application is not broken whenever new commits are integrated into the main branch.
Continuous delivery
Continuous delivery is an extension of continuous integration since it automatically deploys all code changes to a testing and/or production environment after the build stage.
This means that on top of automated testing, you have an automated release process and you can deploy your application any time by clicking a button.
In theory, with continuous delivery, you can decide to release daily, weekly, fortnightly, or whatever suits your business requirements. However, if you truly want to get the benefits of continuous delivery, you should deploy to production as early as possible to make sure that you release small batches that are easy to troubleshoot in case of a problem.
Continuous deployment
Continuous deployment goes one step further than continuous delivery. With this practice, every change that passes all stages of your production pipeline is released to your customers. There's no human intervention, and only a failed test will prevent a new change to be deployed to production.
Continuous deployment is an excellent way to accelerate the feedback loop with your customers and take pressure off the team as there isn't a "release day" anymore. Developers can focus on building software, and they see their work go live minutes after they've finished working on it.
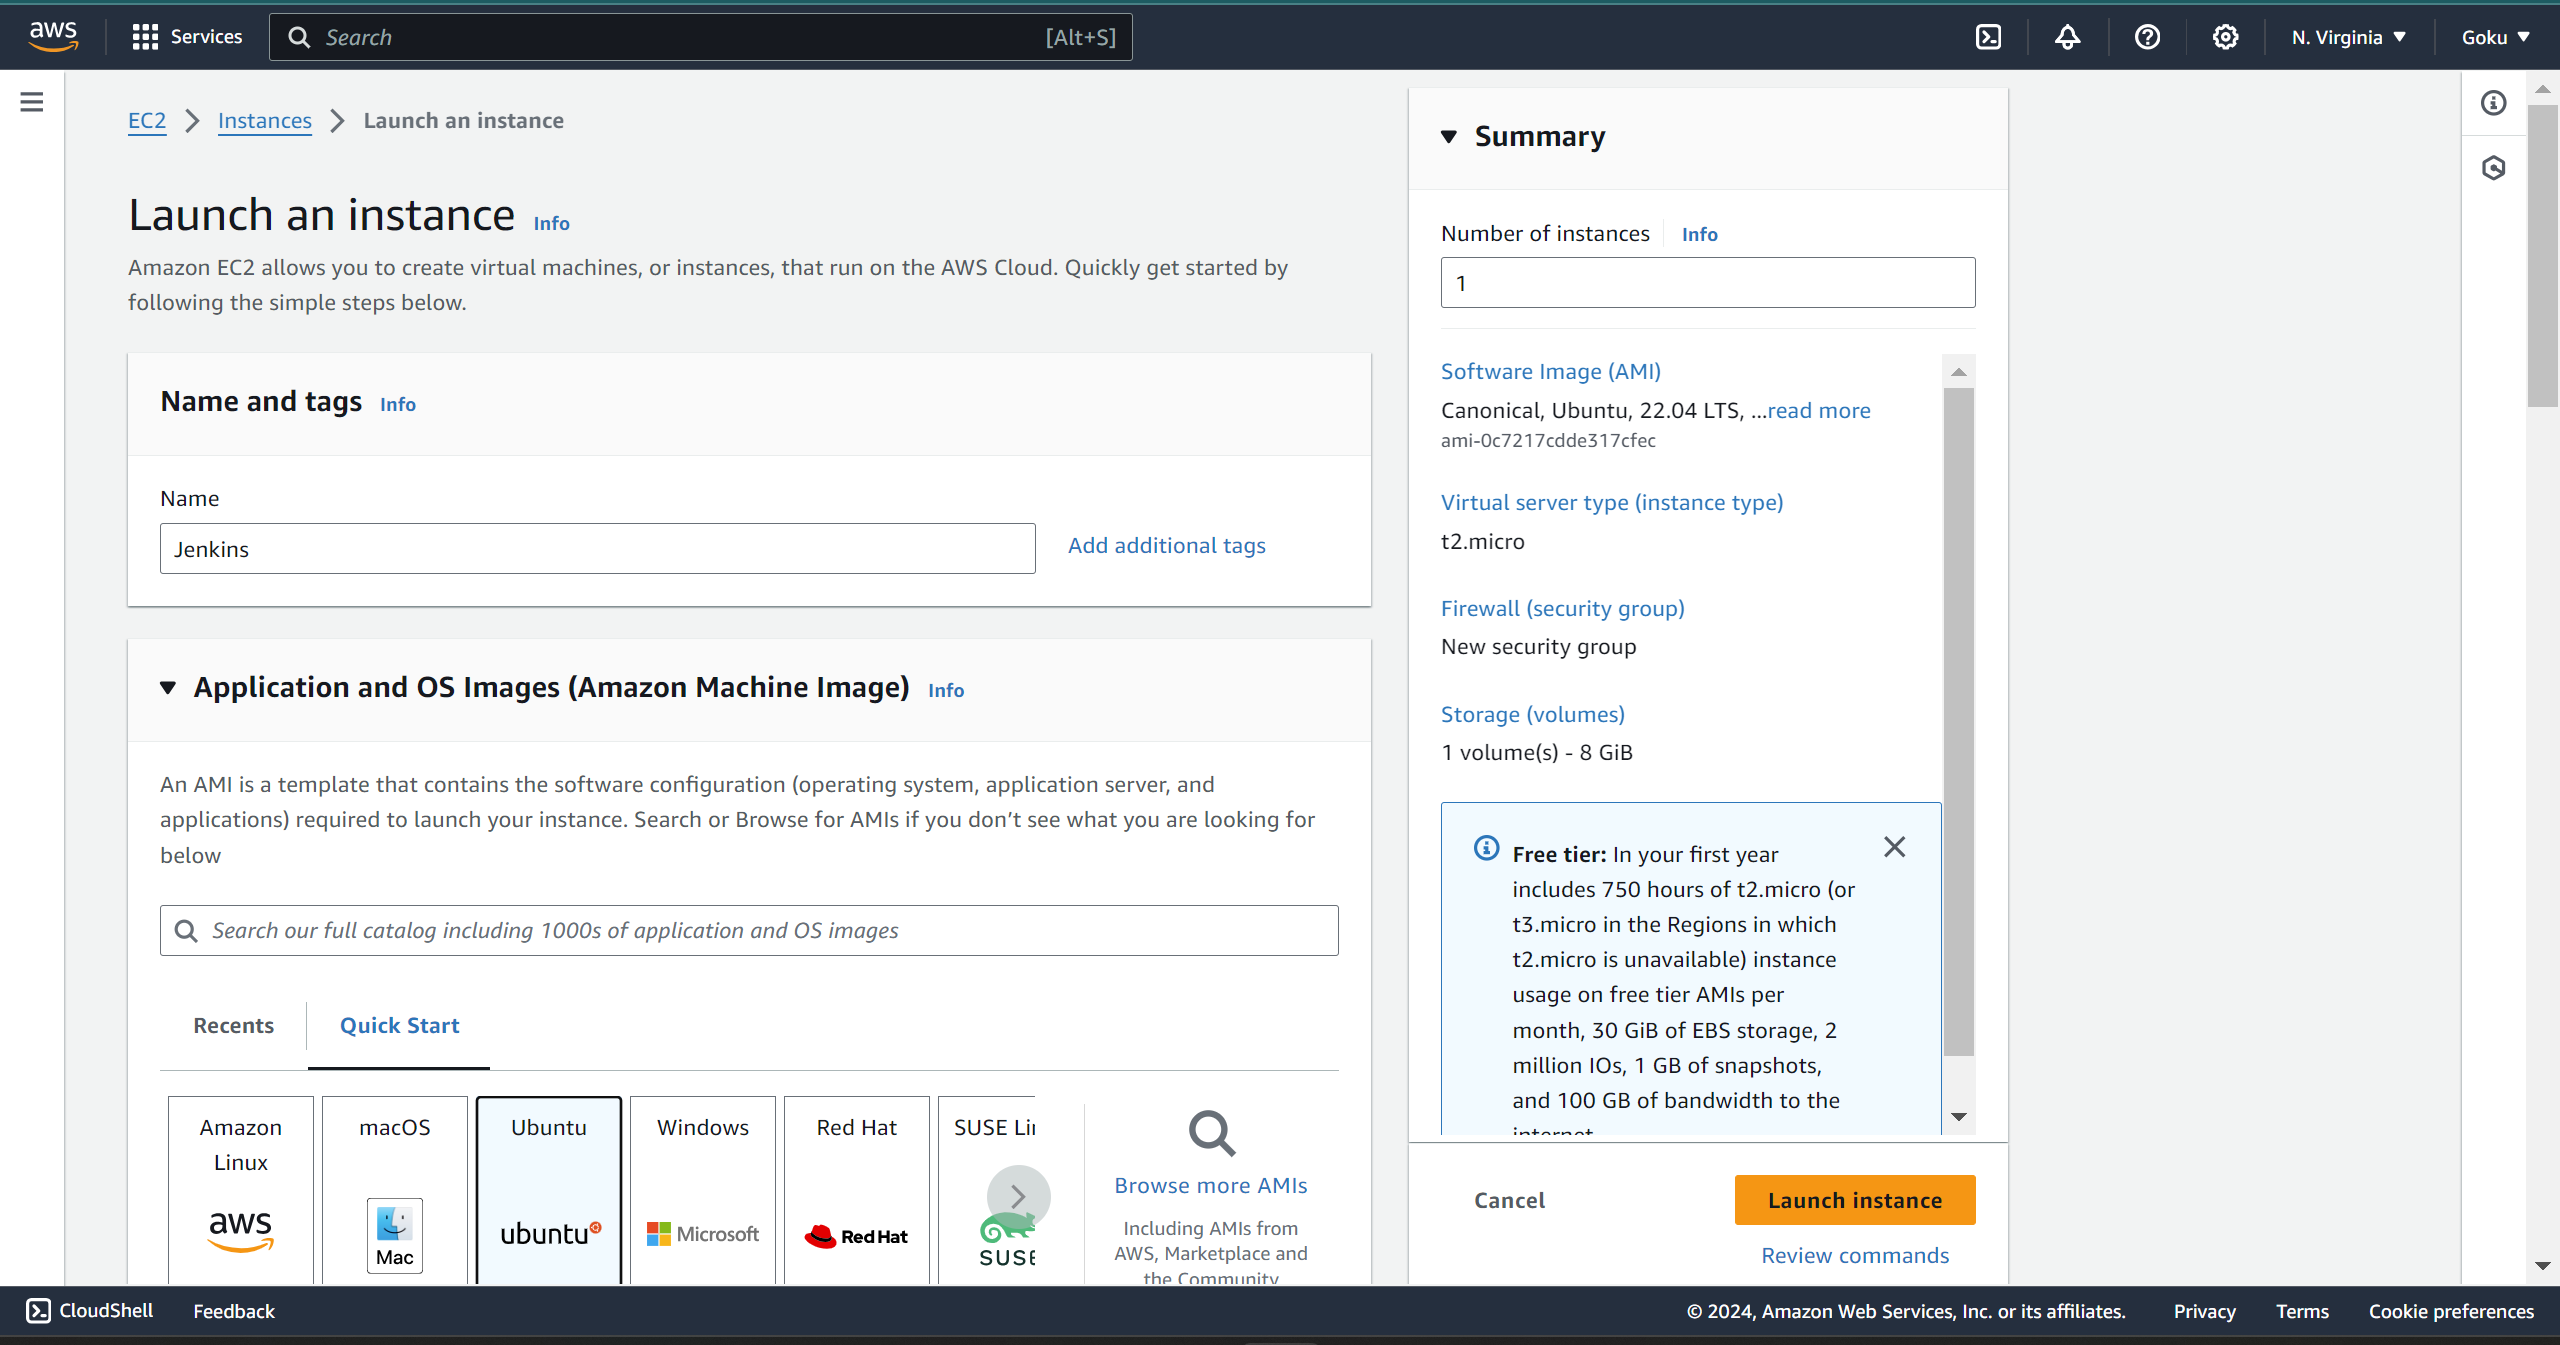
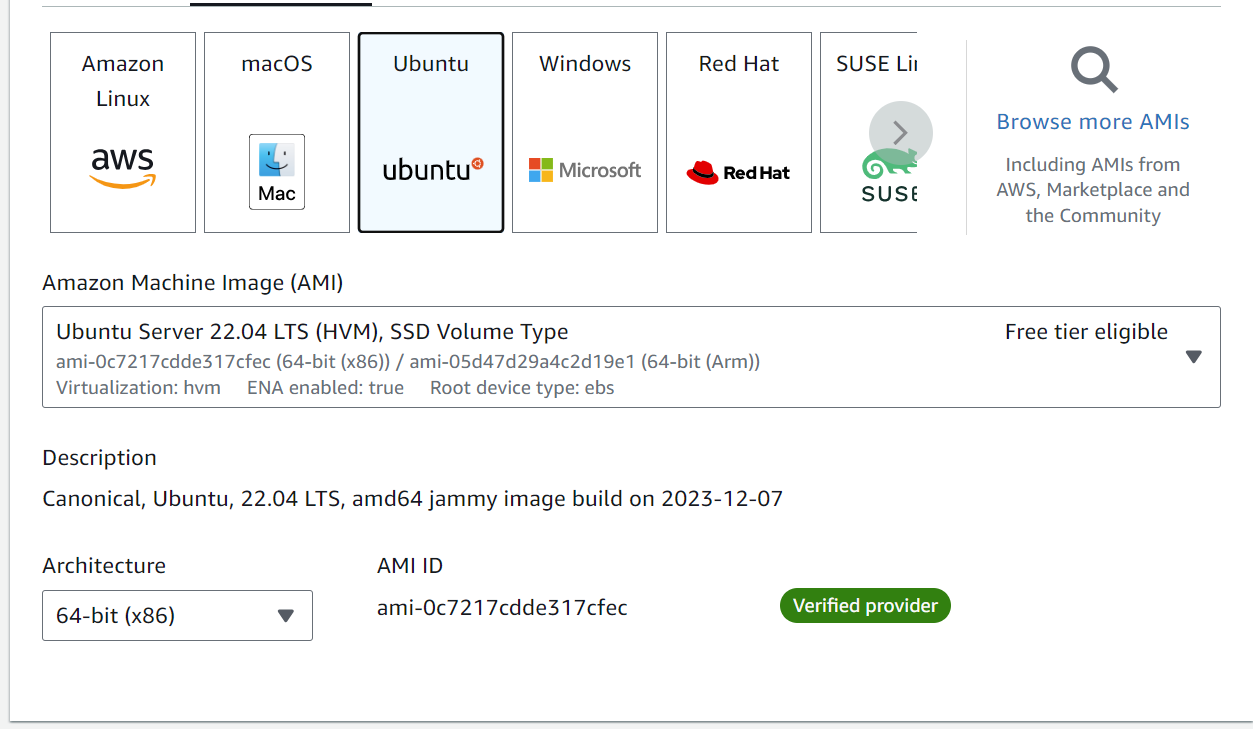
Step 1: Set up an EC2 instance and establish an SSH connection to it.
go to was console then select EC2 > Instances > Launch Instance
create a key pair

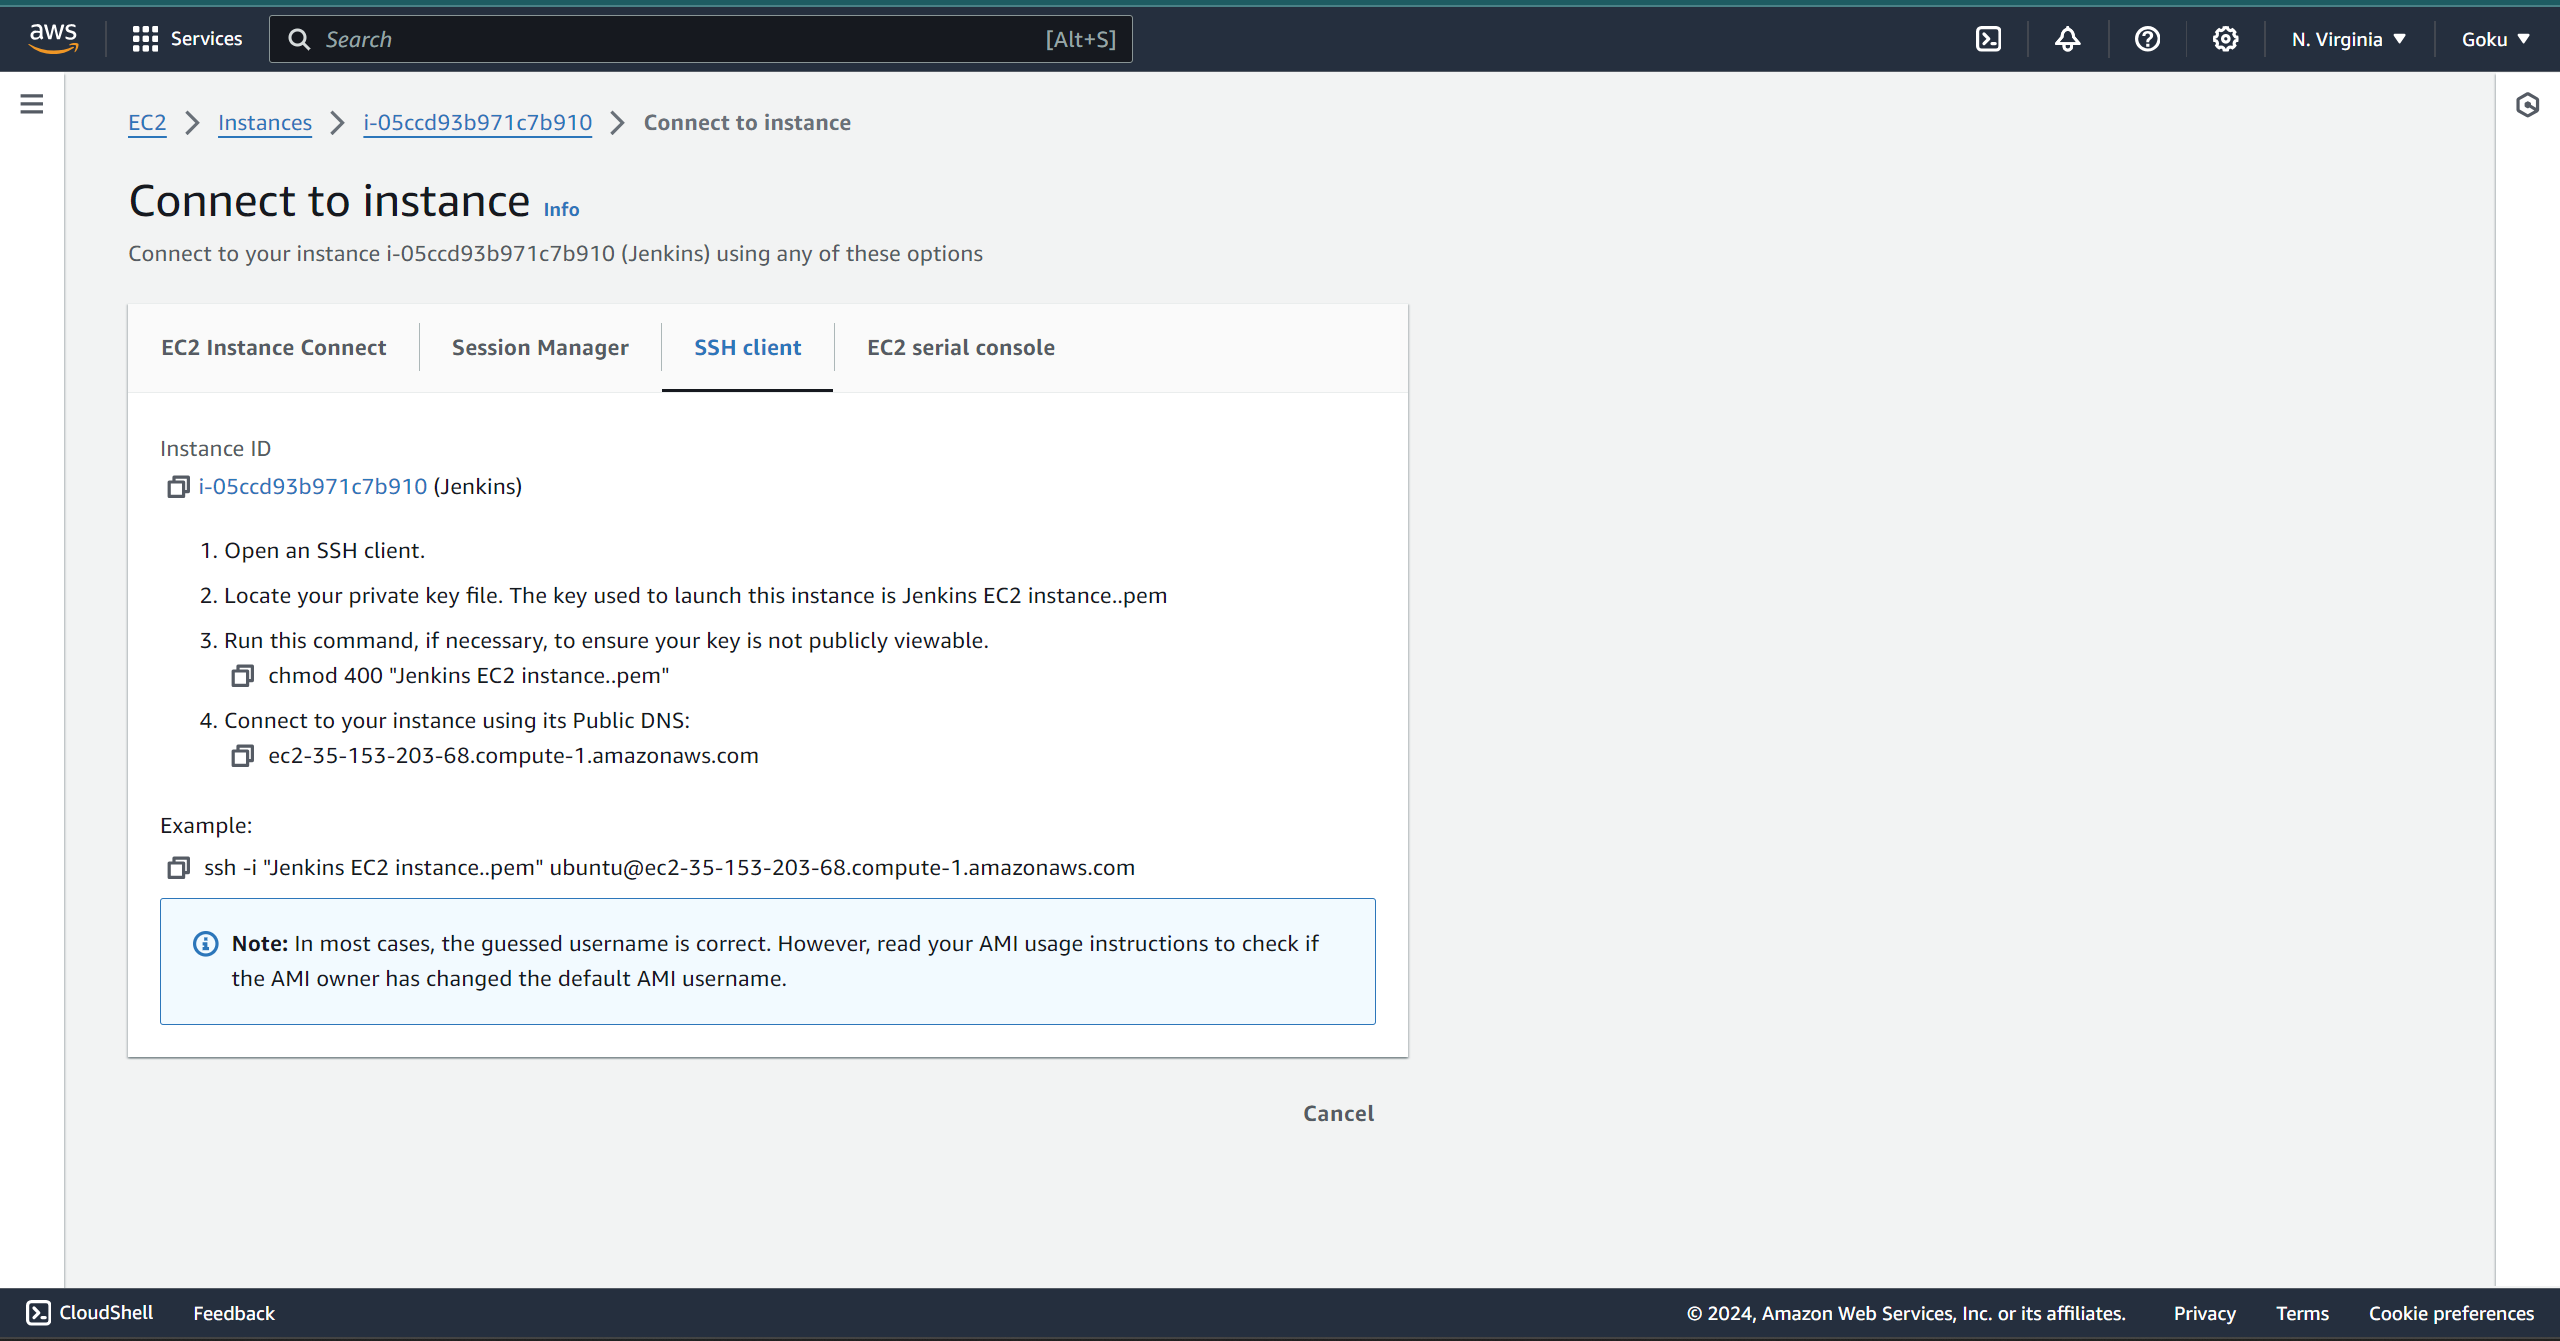
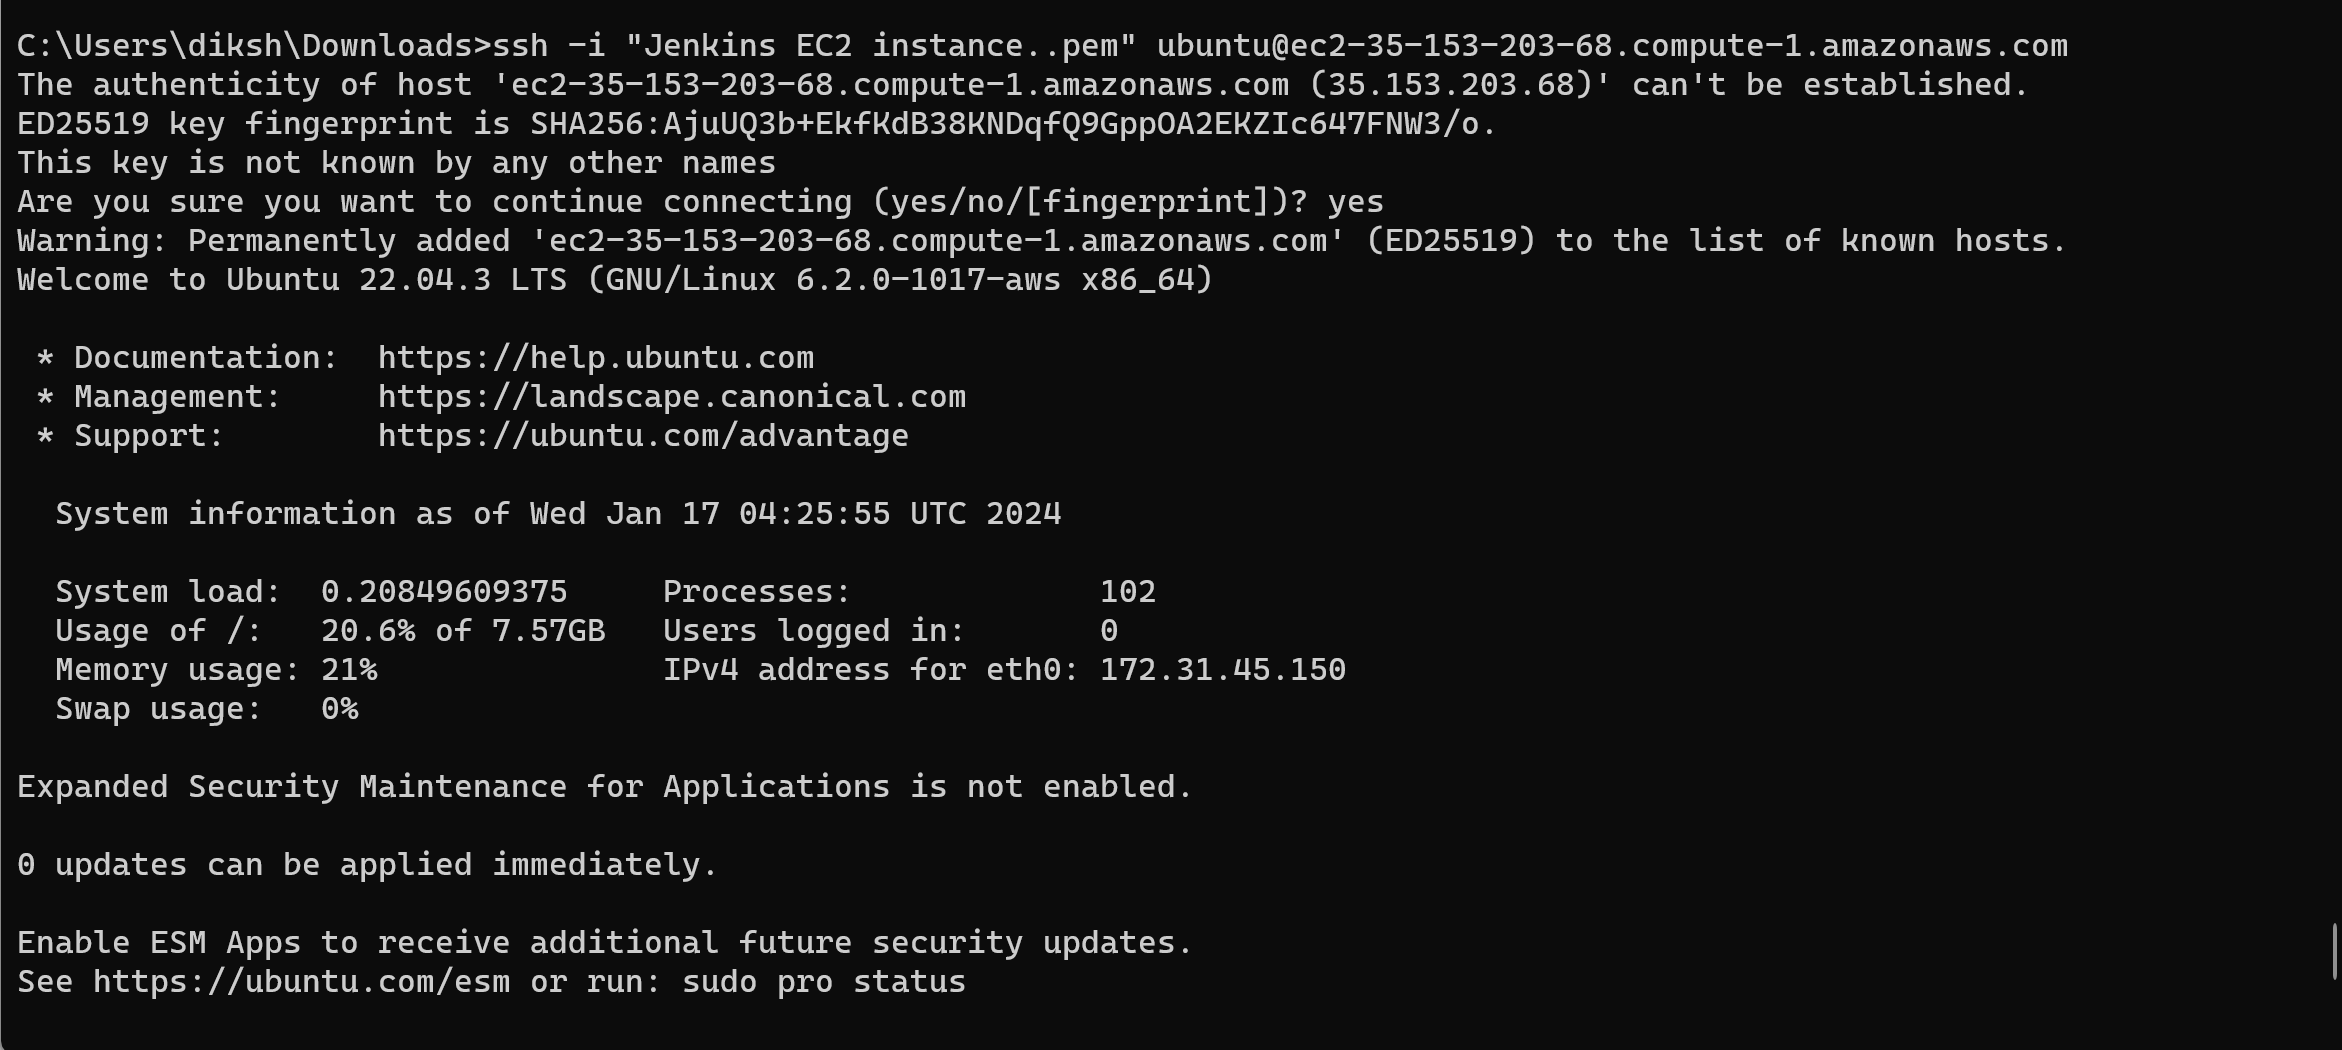
now launch instance, while the instance is being setup you can open up your editor and try making a connection

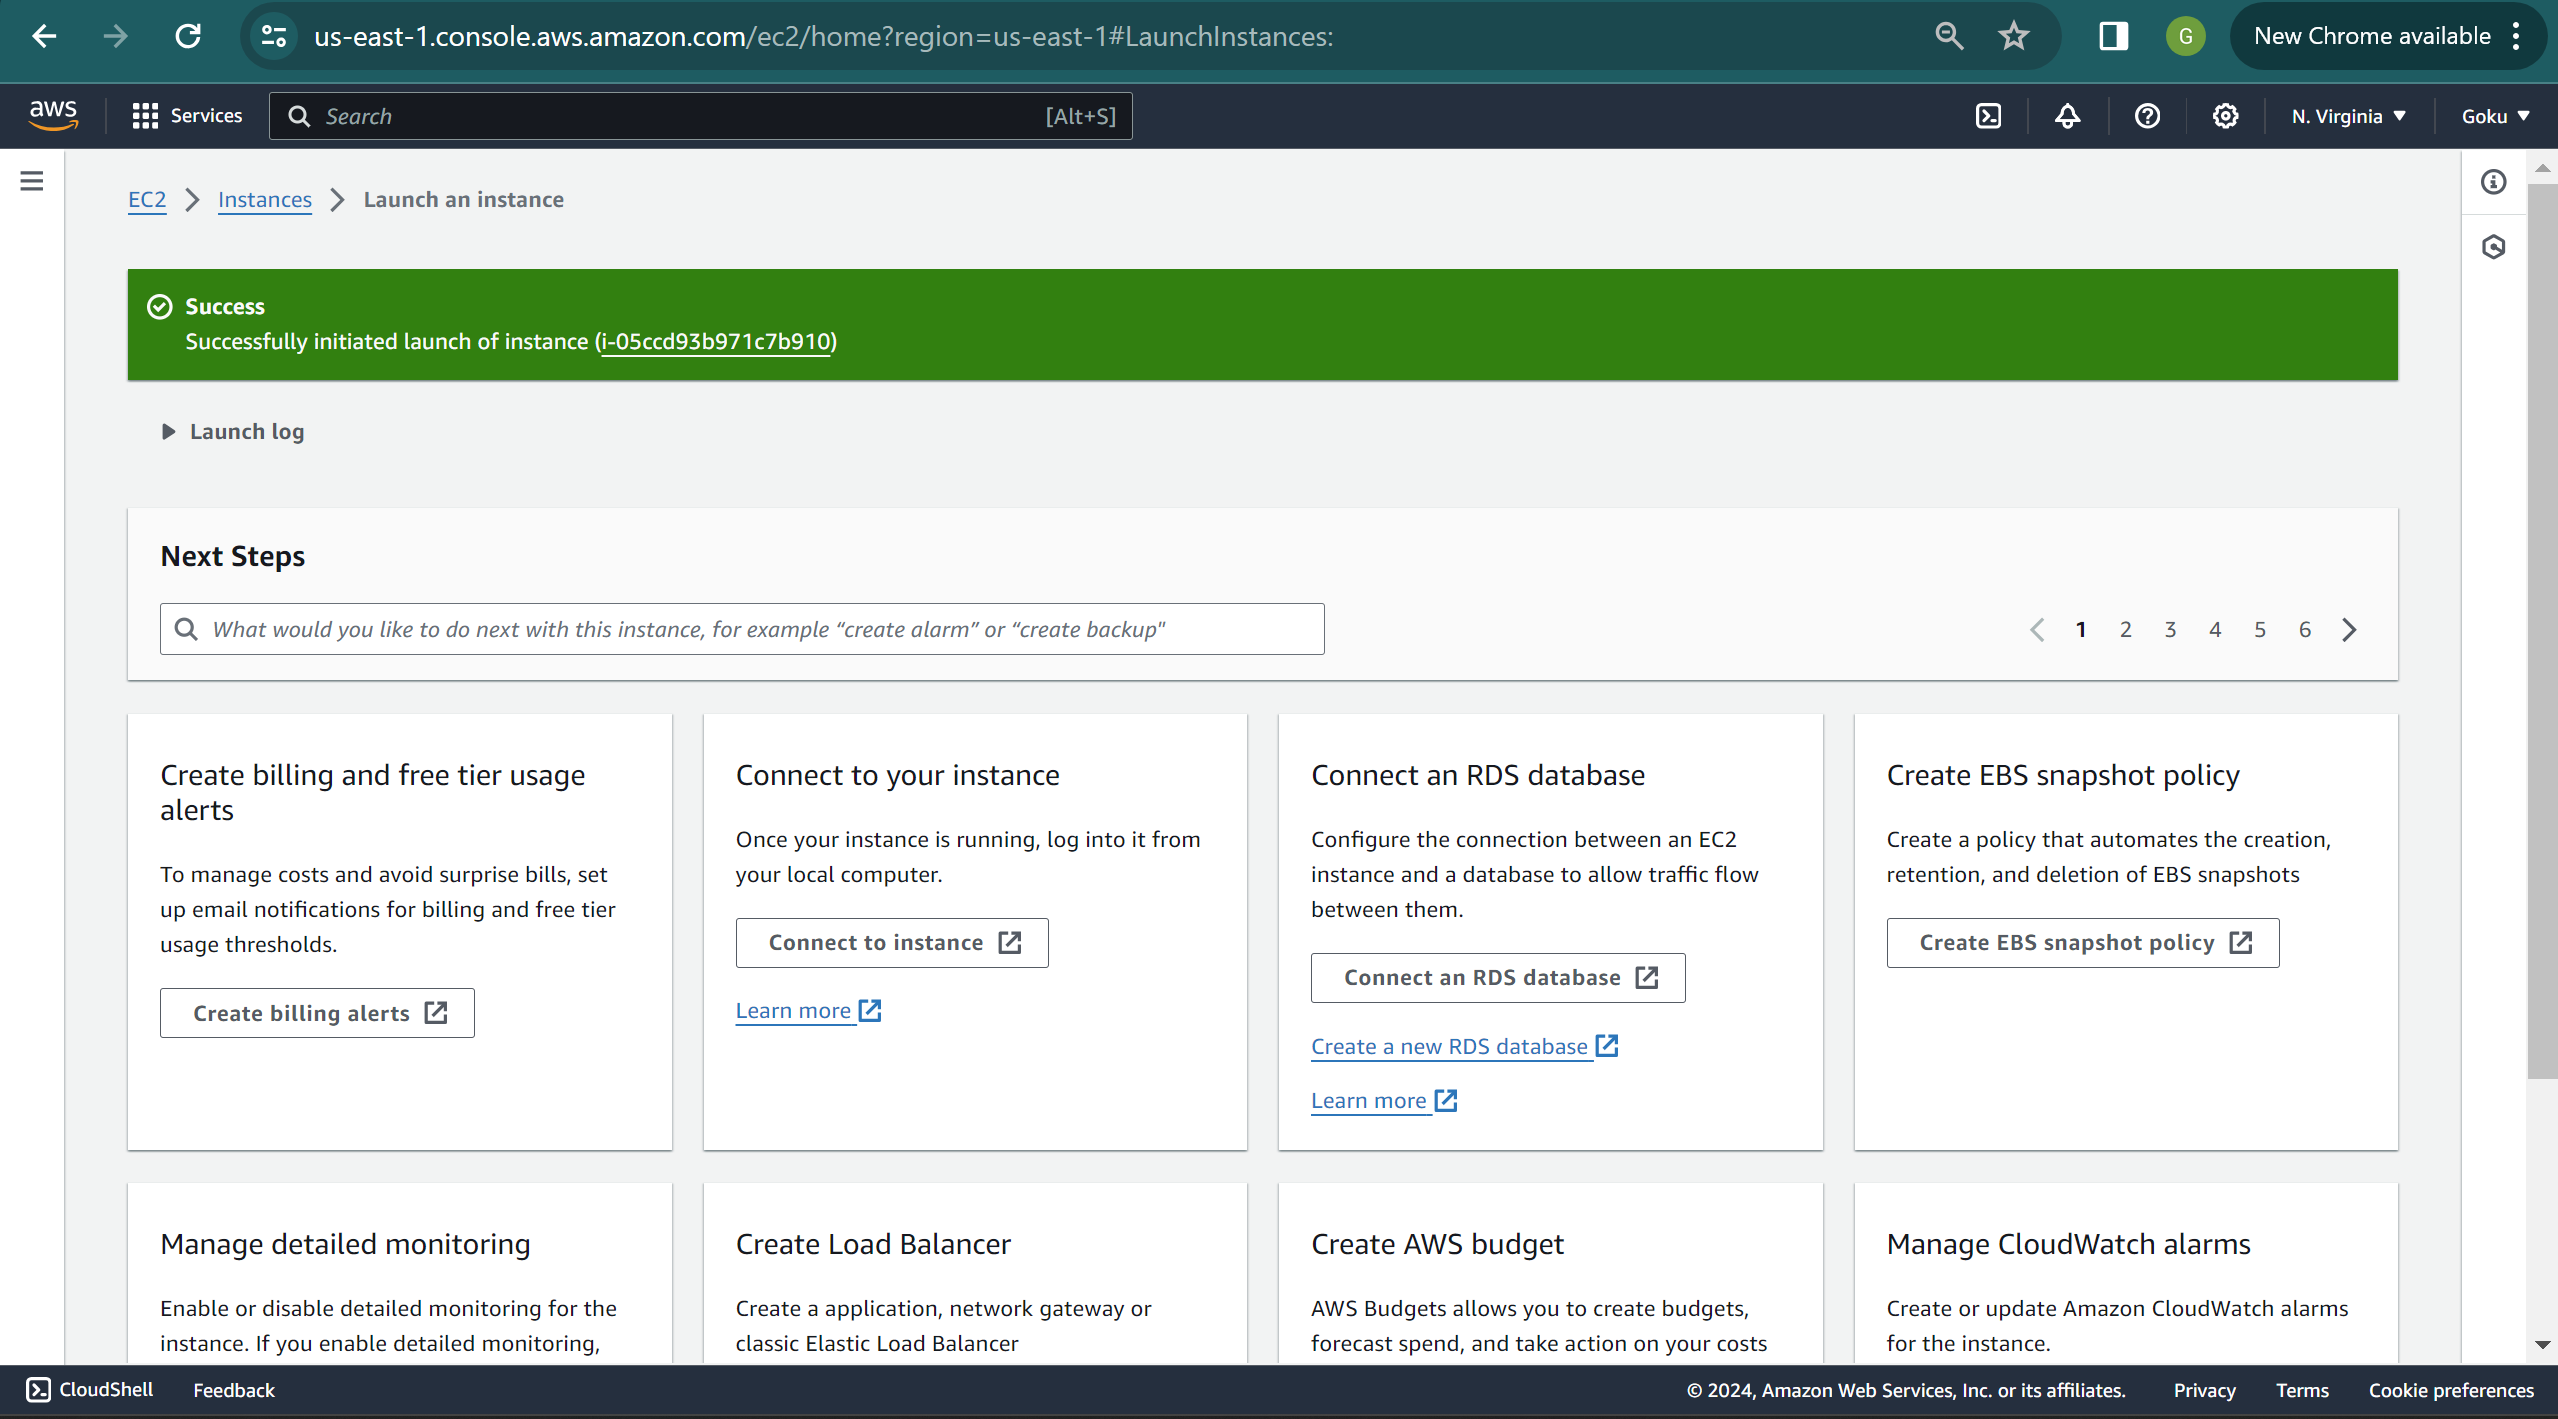
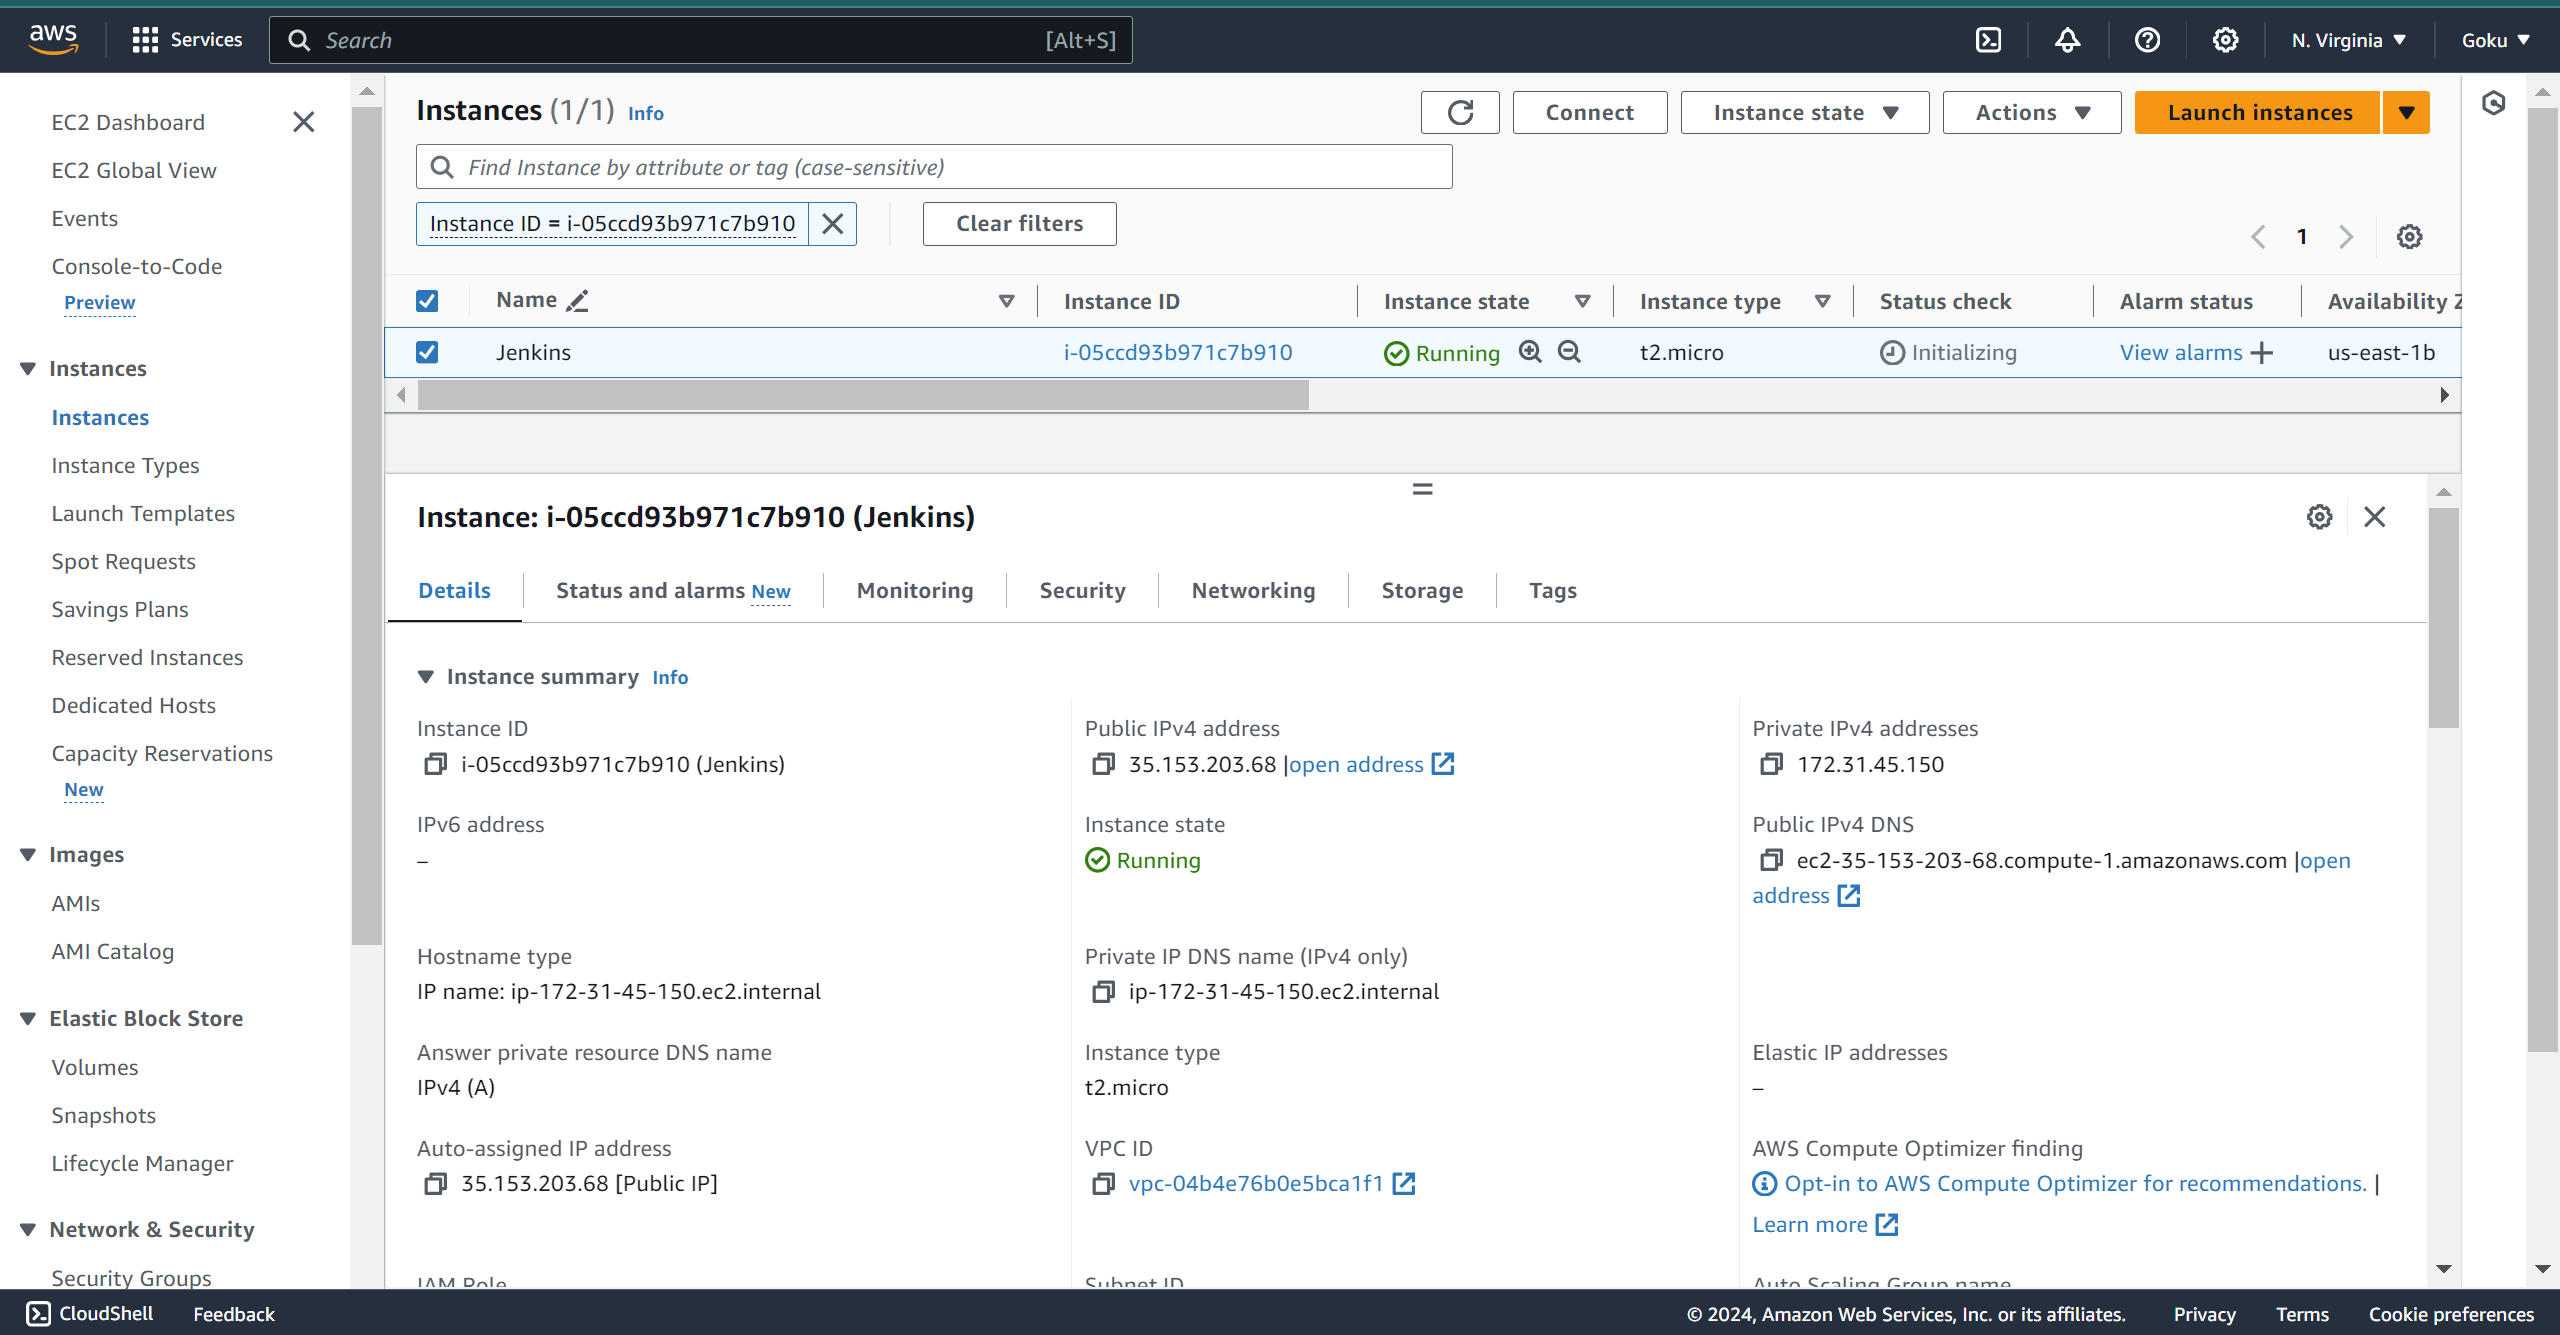
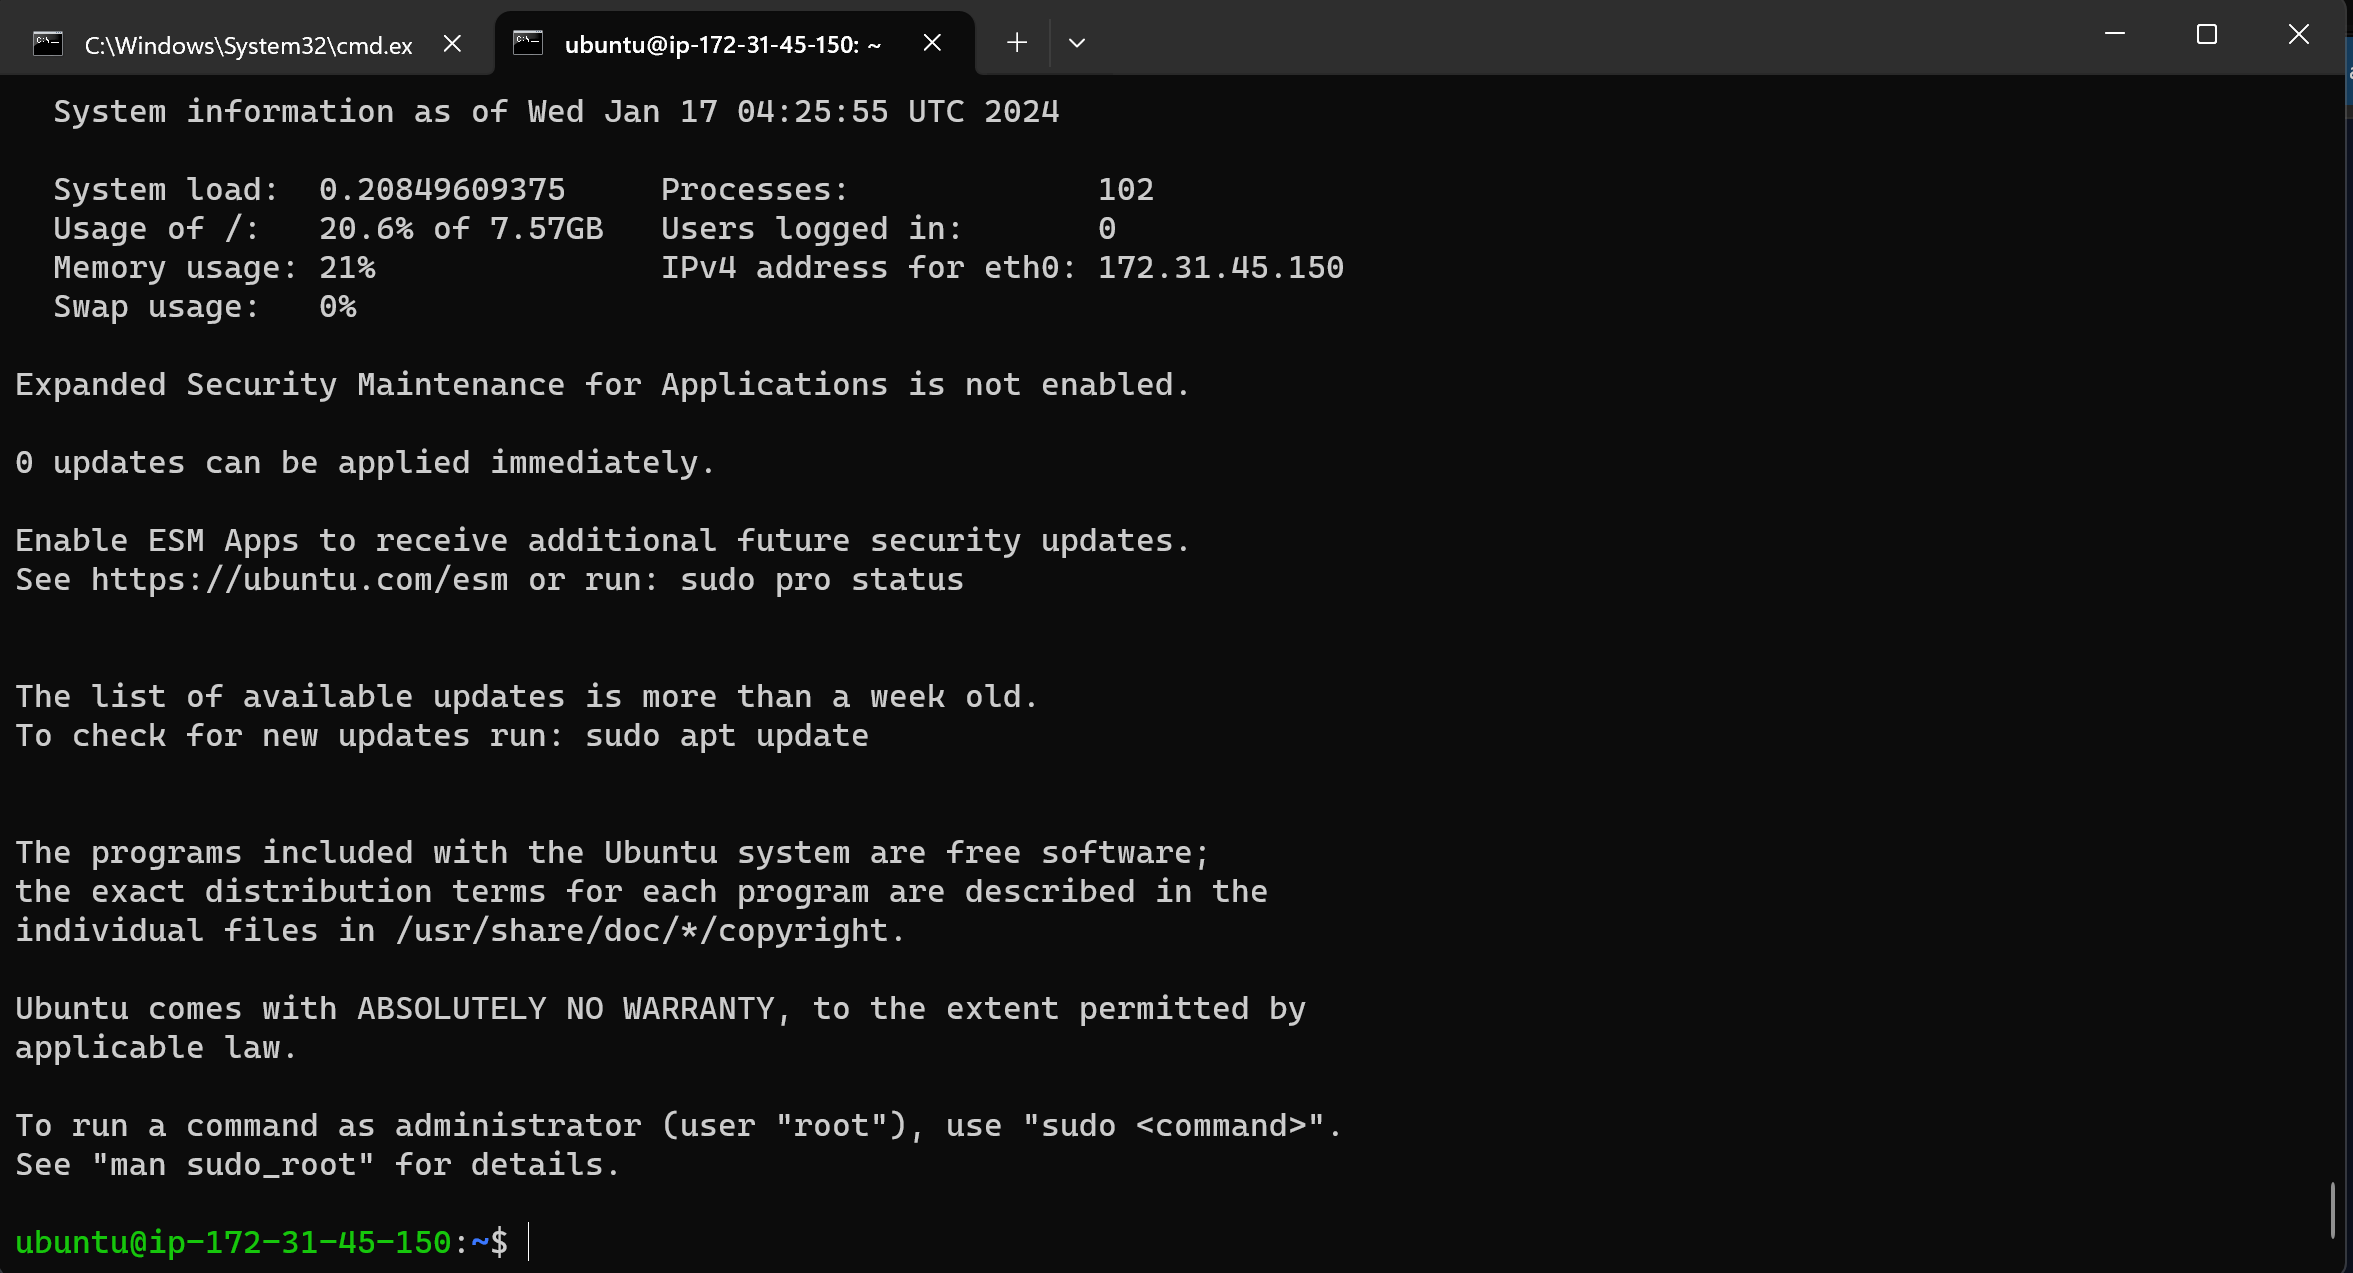
connect to your instance
Step 2: Install Jenkins on the server
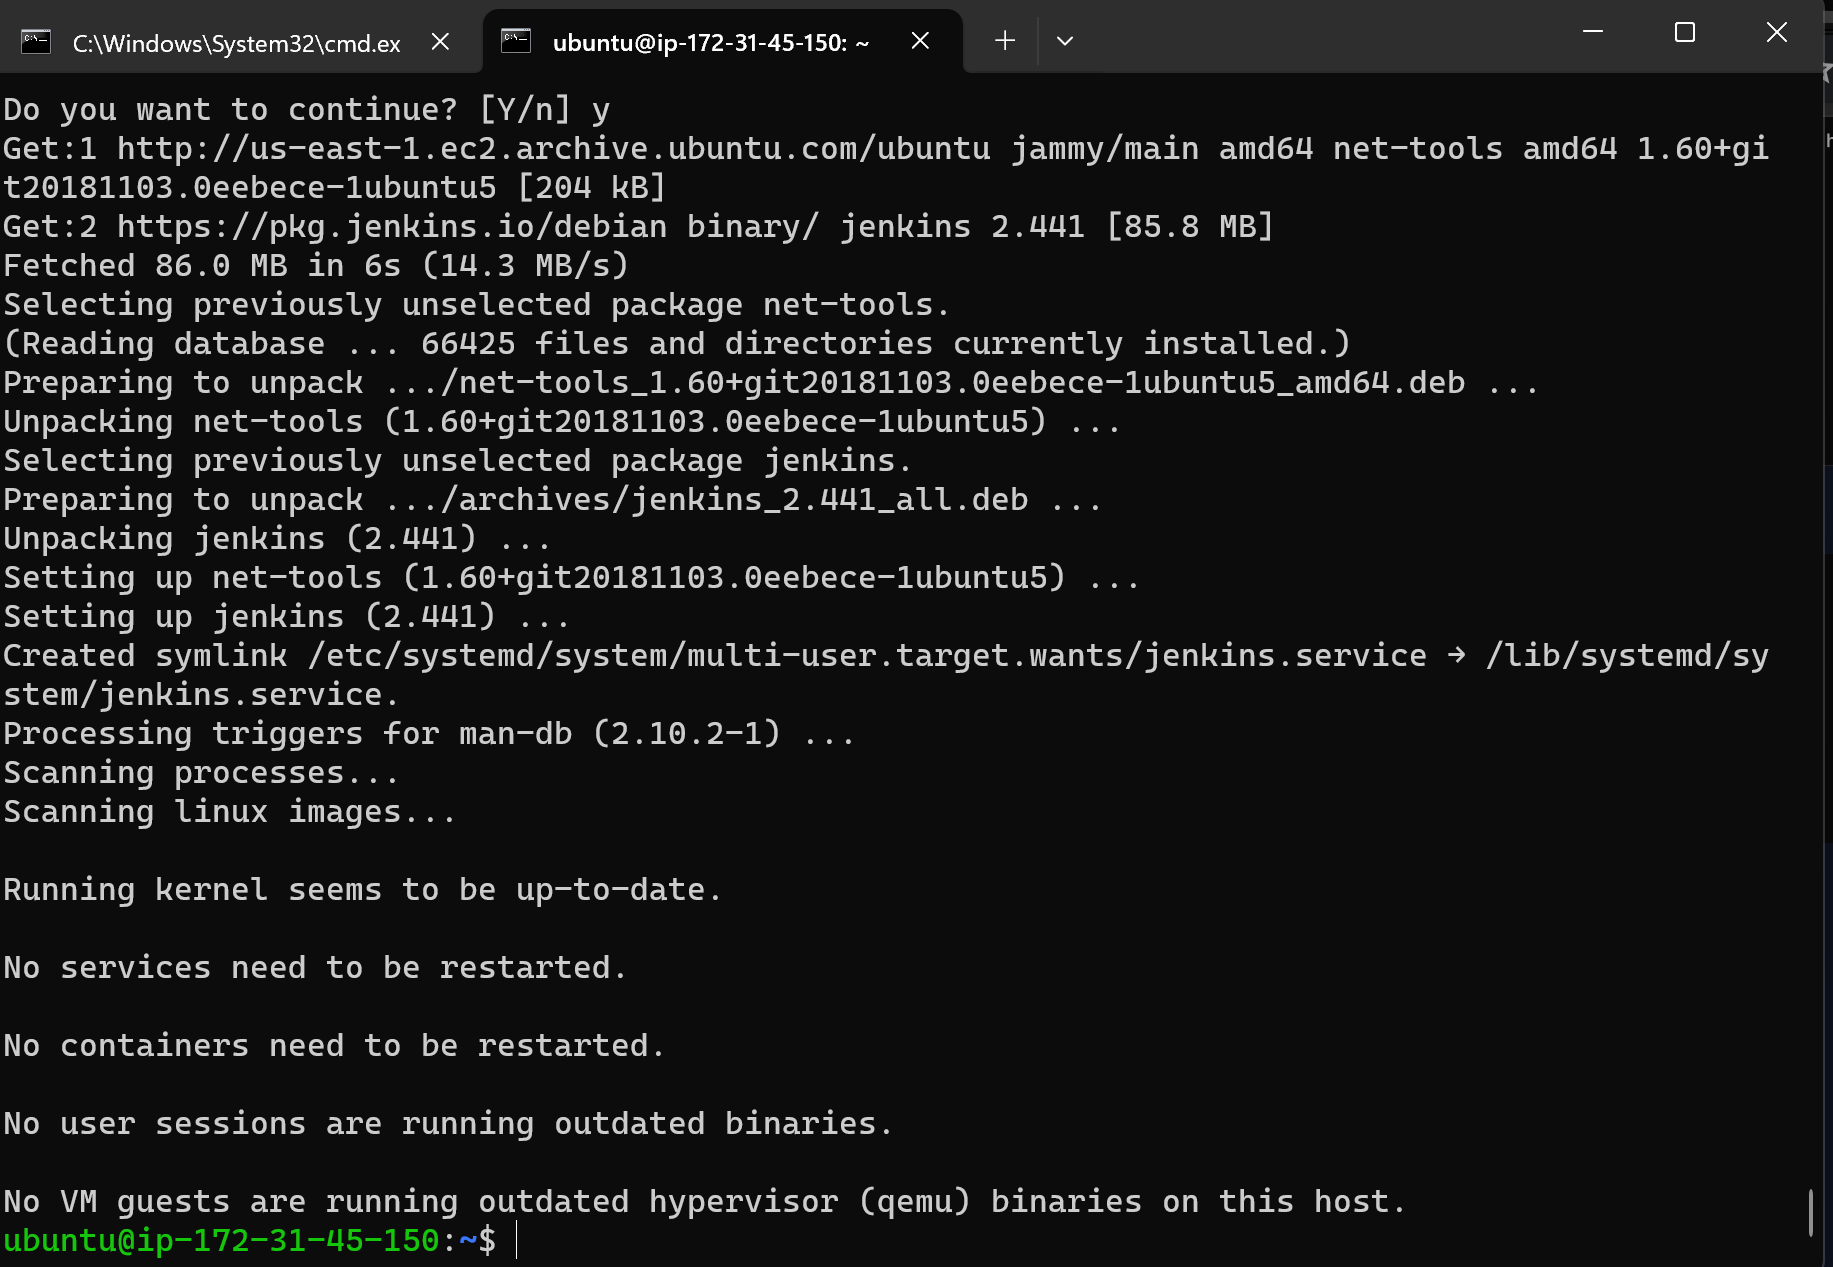
so since we are using Ubuntu, we'll be using these commands,
Ubuntu/Debian:
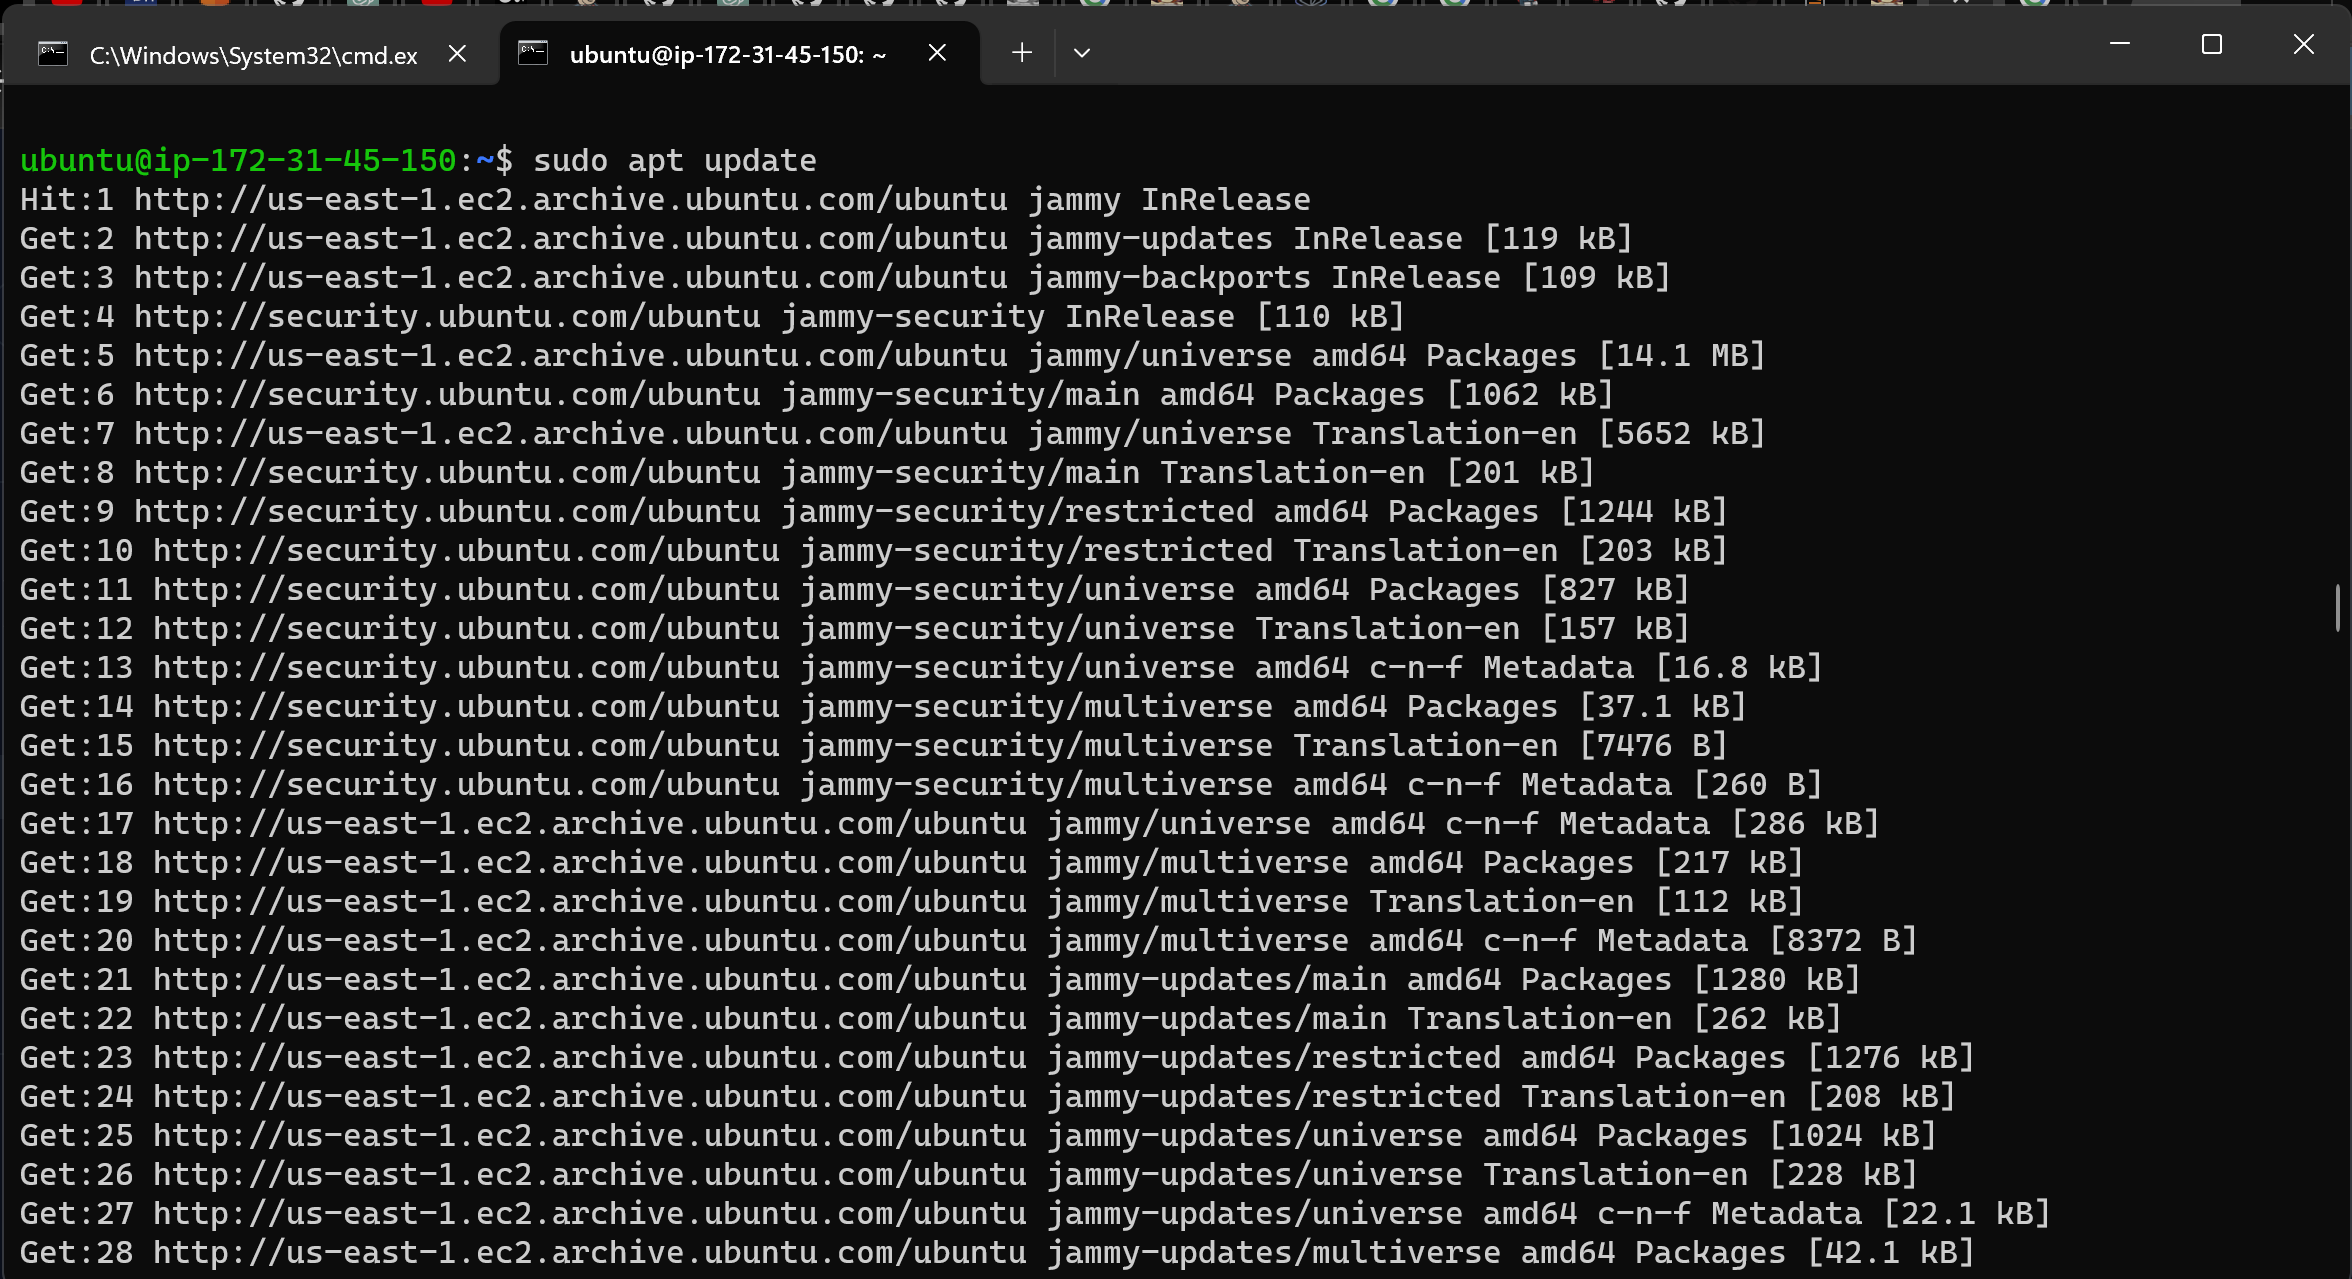
bashCopy codesudo apt update
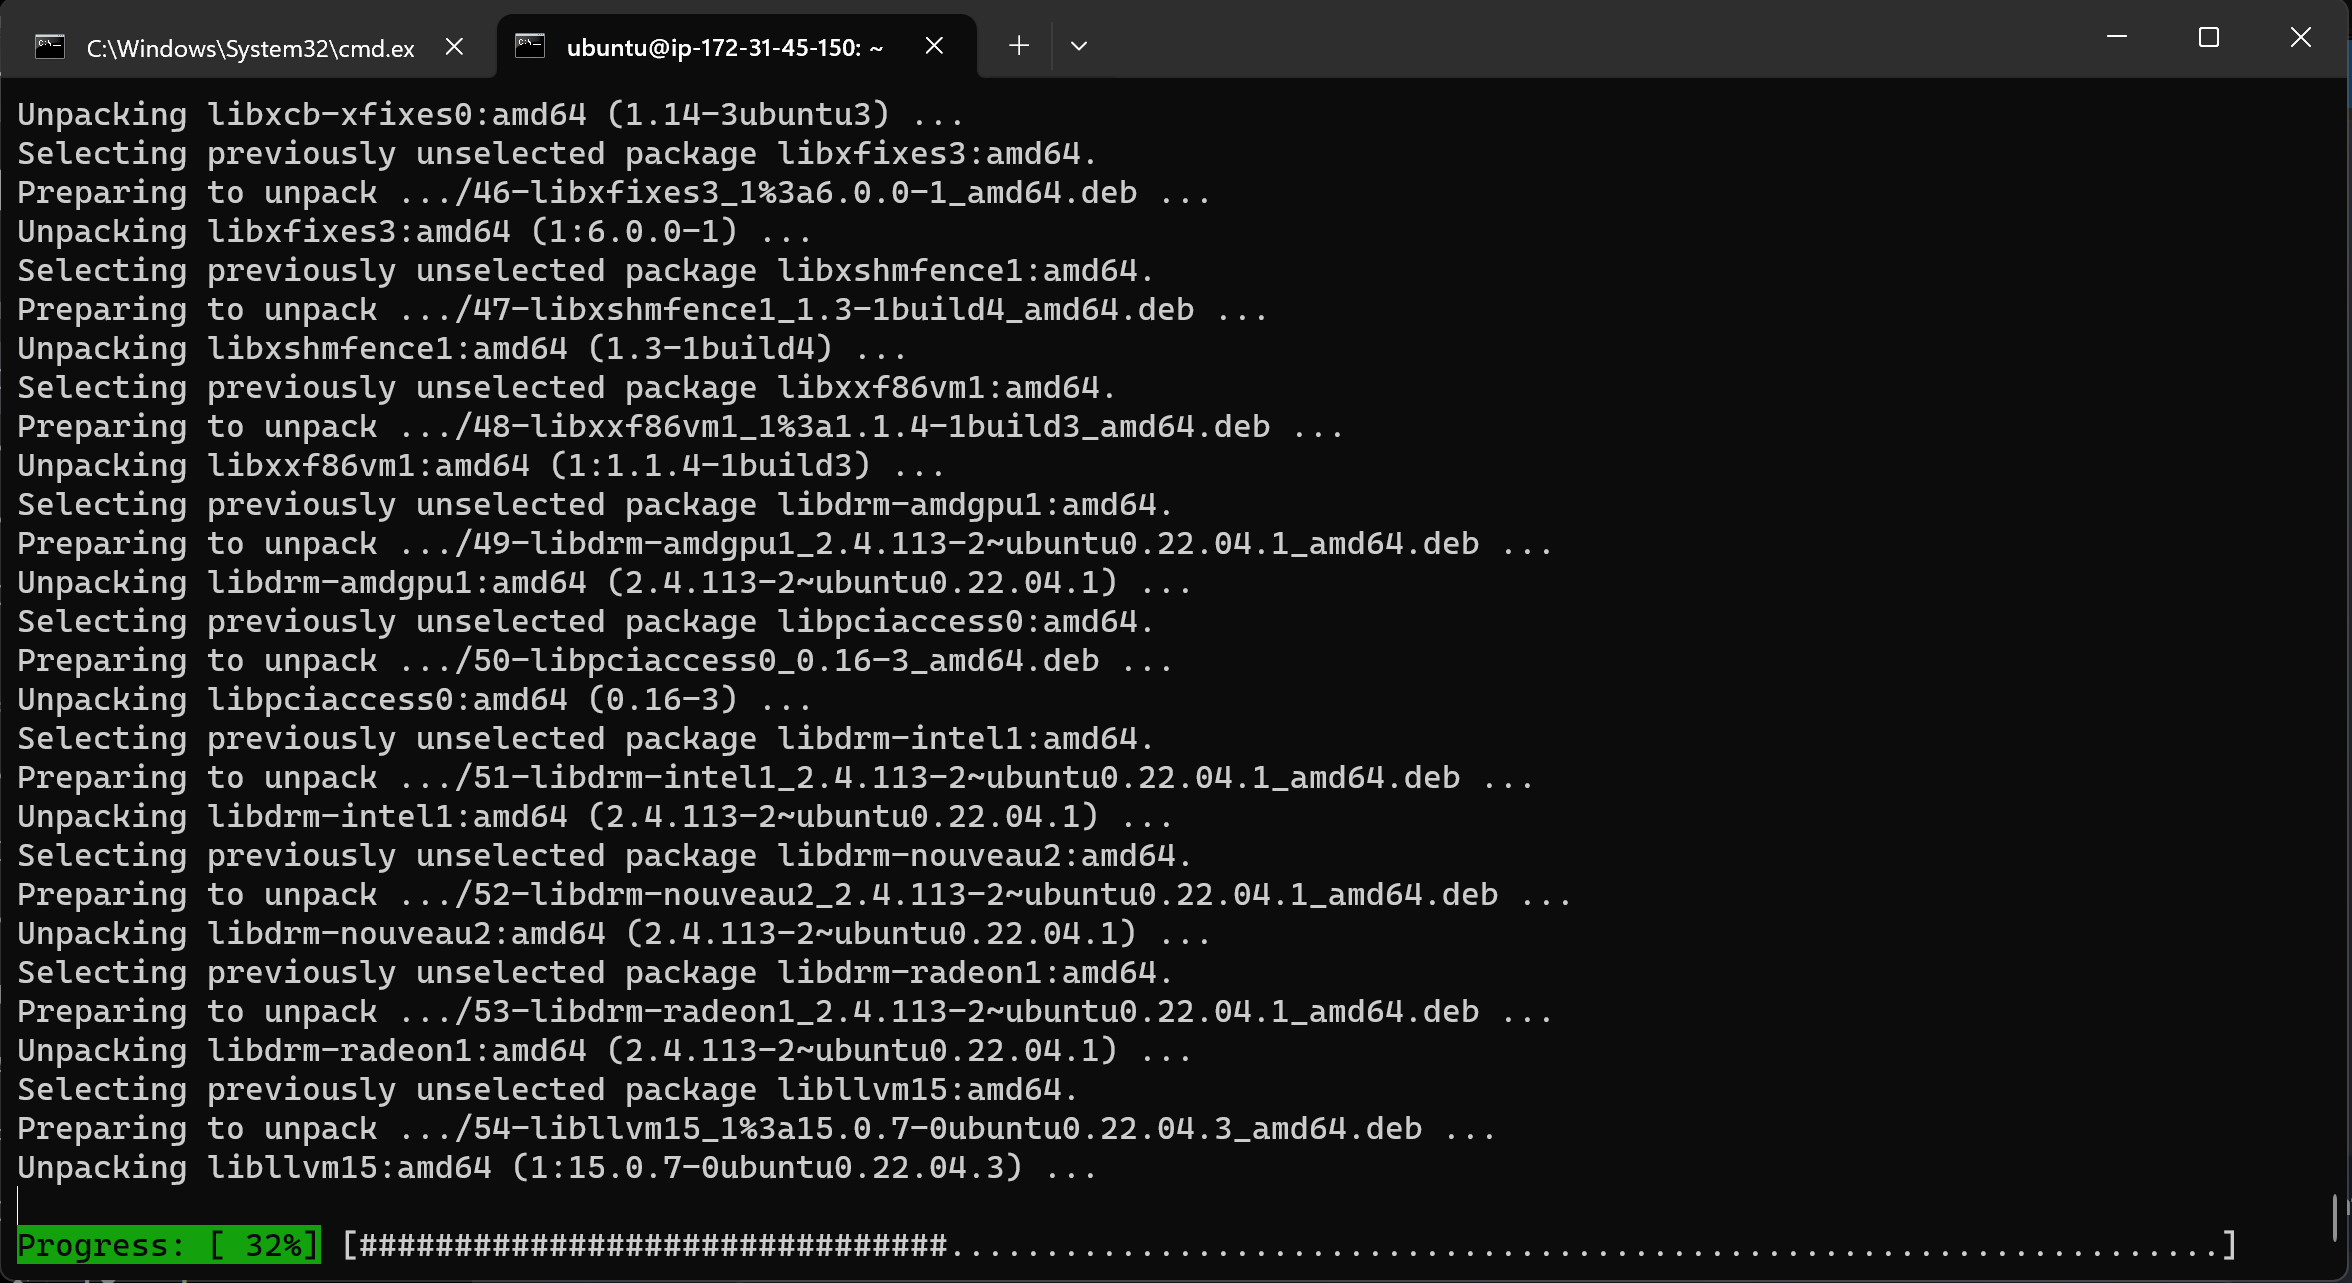
sudo apt install openjdk-11-jre
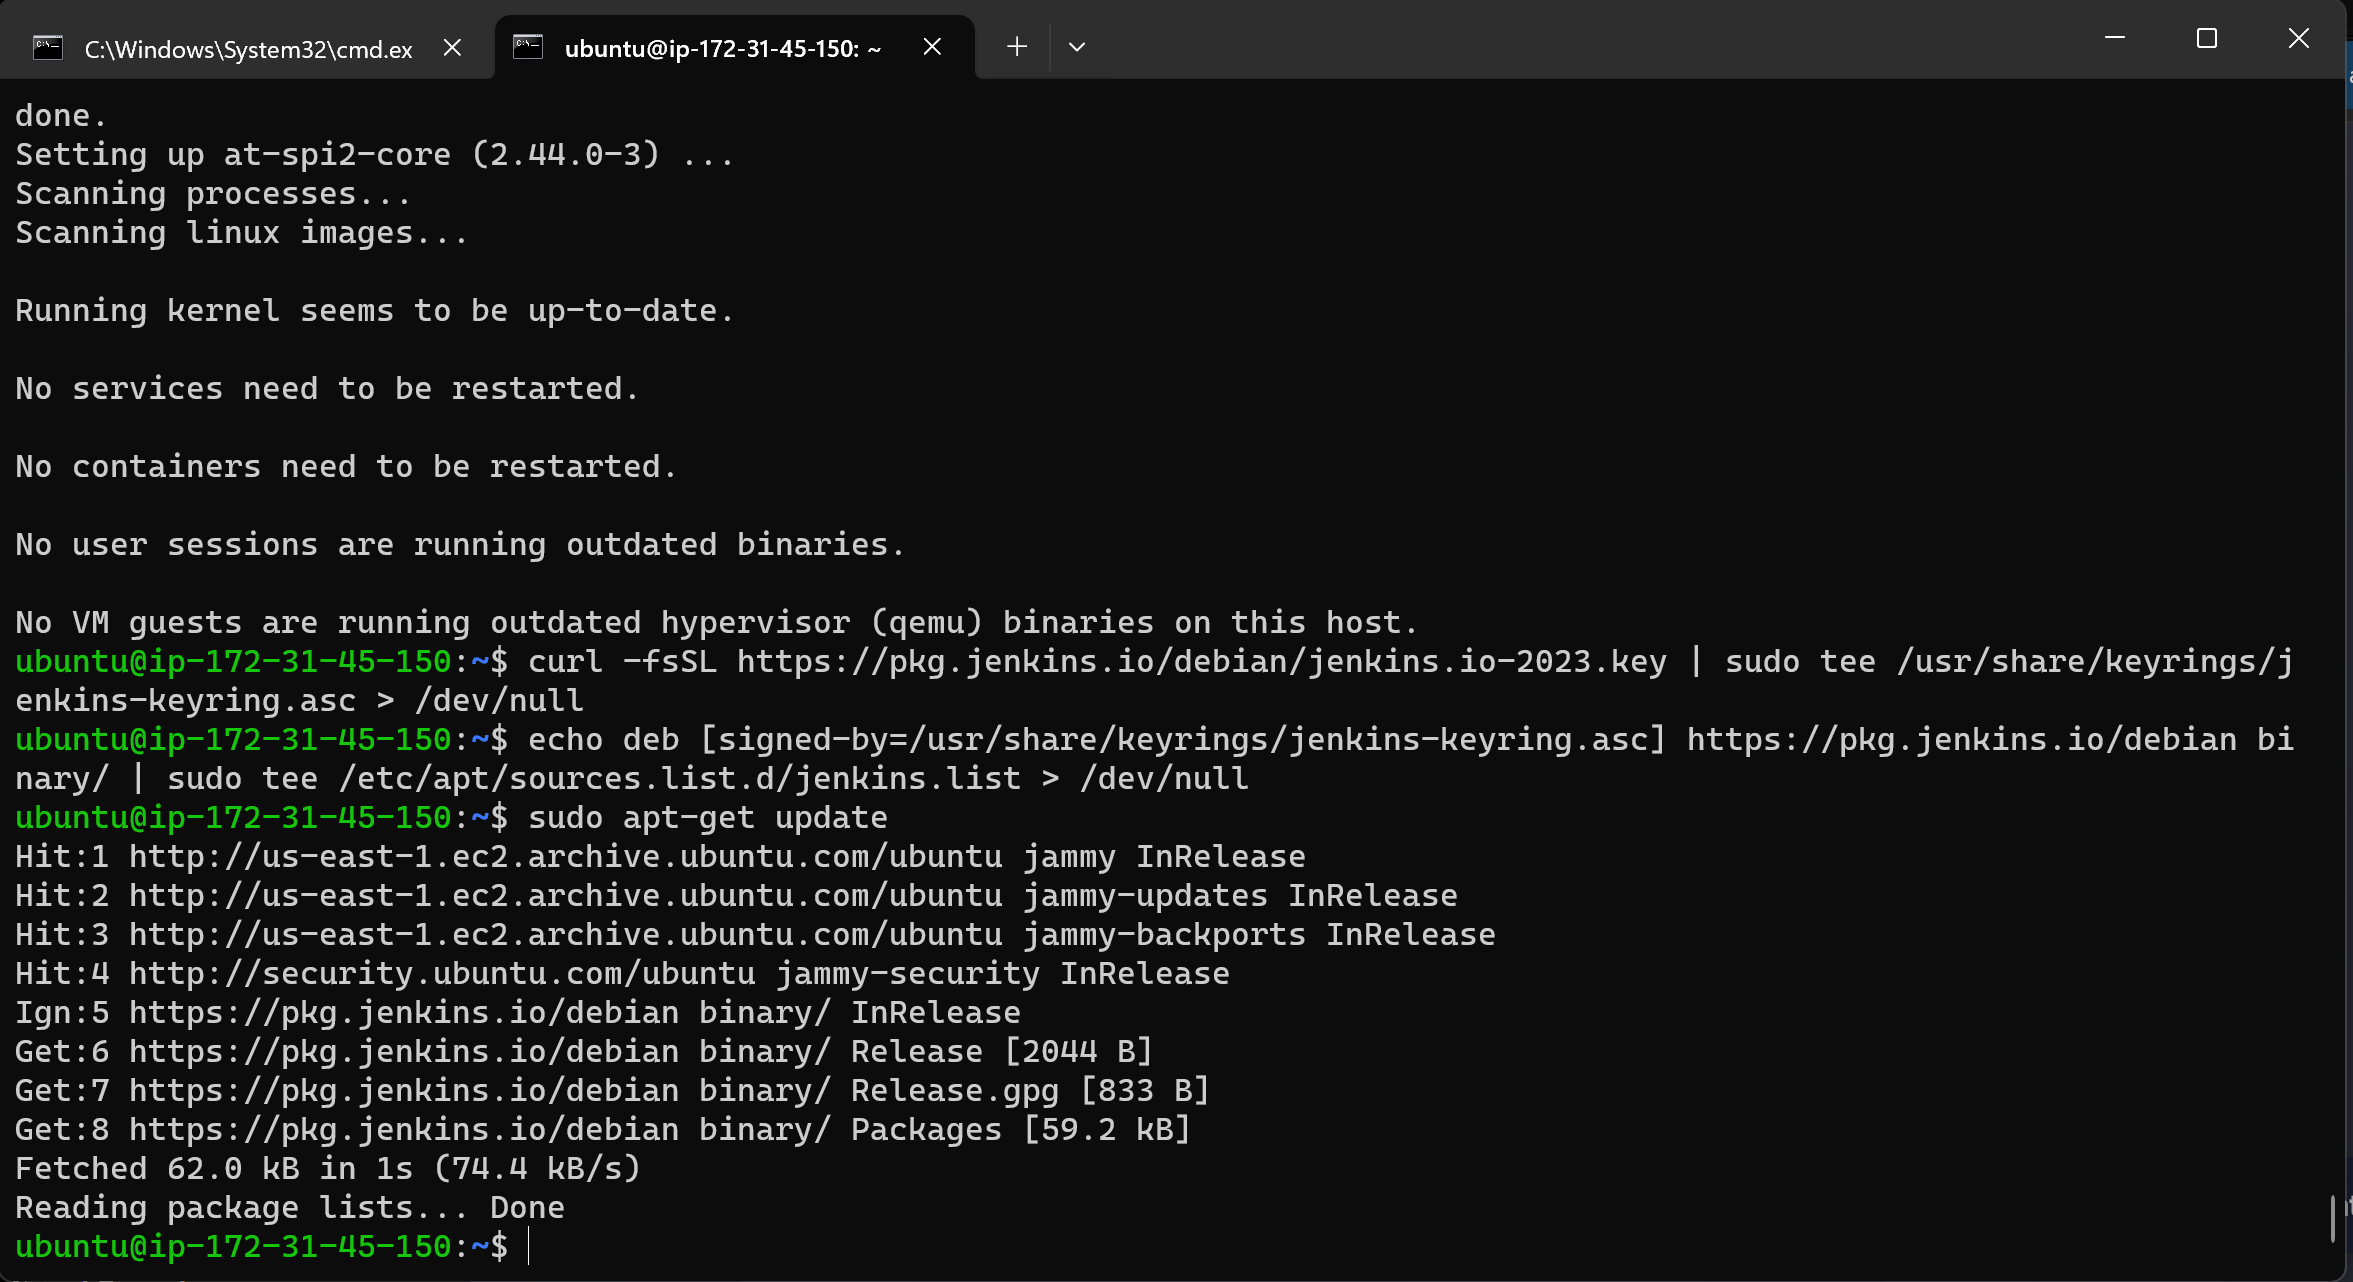
curl -fsSL https://pkg.jenkins.io/debian/jenkins.io-2023.key | sudo tee /usr/share/keyrings/jenkins-keyring.asc > /dev/null
echo deb [signed-by=/usr/share/keyrings/jenkins-keyring.asc] https://pkg.jenkins.io/debian binary/ | sudo tee /etc/apt/sources.list.d/jenkins.list > /dev/null
sudo apt-get update
sudo apt-get install jenkins
sudo systemctl enable jenkins
sudo systemctl start jenkins
sudo systemctl status jenkins
Save to grepper
Explanation:
Update package information.
Install OpenJDK 11, which is required to run Jenkins.
Download and add the Jenkins GPG key to the keyring.
Add the Jenkins repository to the system's software sources.
Update package information again to include the new Jenkins repository.
Install Jenkins from the newly added repository.
Enable Jenkins to start on boot.
Start the Jenkins service.
Check the status of the Jenkins service.
Arch Linux:
bashCopy codesudo pacman -Syu
sudo pacman -S jenkins
sudo systemctl enable jenkins
sudo systemctl start jenkins
sudo systemctl status jenkins
Save to grepper
Explanation:
Update the system with the latest package information.
Install Jenkins using the Arch Linux package manager (pacman).
Enable Jenkins to start on boot.
Start the Jenkins service.
Check the status of the Jenkins service.
CentOS/Amazon Linux/Red Hat:
bashCopy codesudo yum install java-11-openjdk
sudo wget -O /etc/yum.repos.d/jenkins.repo https://pkg.jenkins.io/redhat-stable/jenkins.repo
sudo rpm --import https://pkg.jenkins.io/redhat-stable/jenkins.io.key
sudo yum install jenkins
sudo systemctl enable jenkins
sudo systemctl start jenkins
sudo systemctl status jenkins
Save to grepper
Explanation:
Install OpenJDK 11, required for Jenkins.
Download and add the Jenkins repository configuration.
Import the Jenkins GPG key.
Install Jenkins using the YUM package manager.
Enable Jenkins to start on boot.
Start the Jenkins service.
Check the status of the Jenkins service.
These commands ensure that Jenkins is installed and configured correctly on different Linux distributions, facilitating the setup of our CI/CD environment.

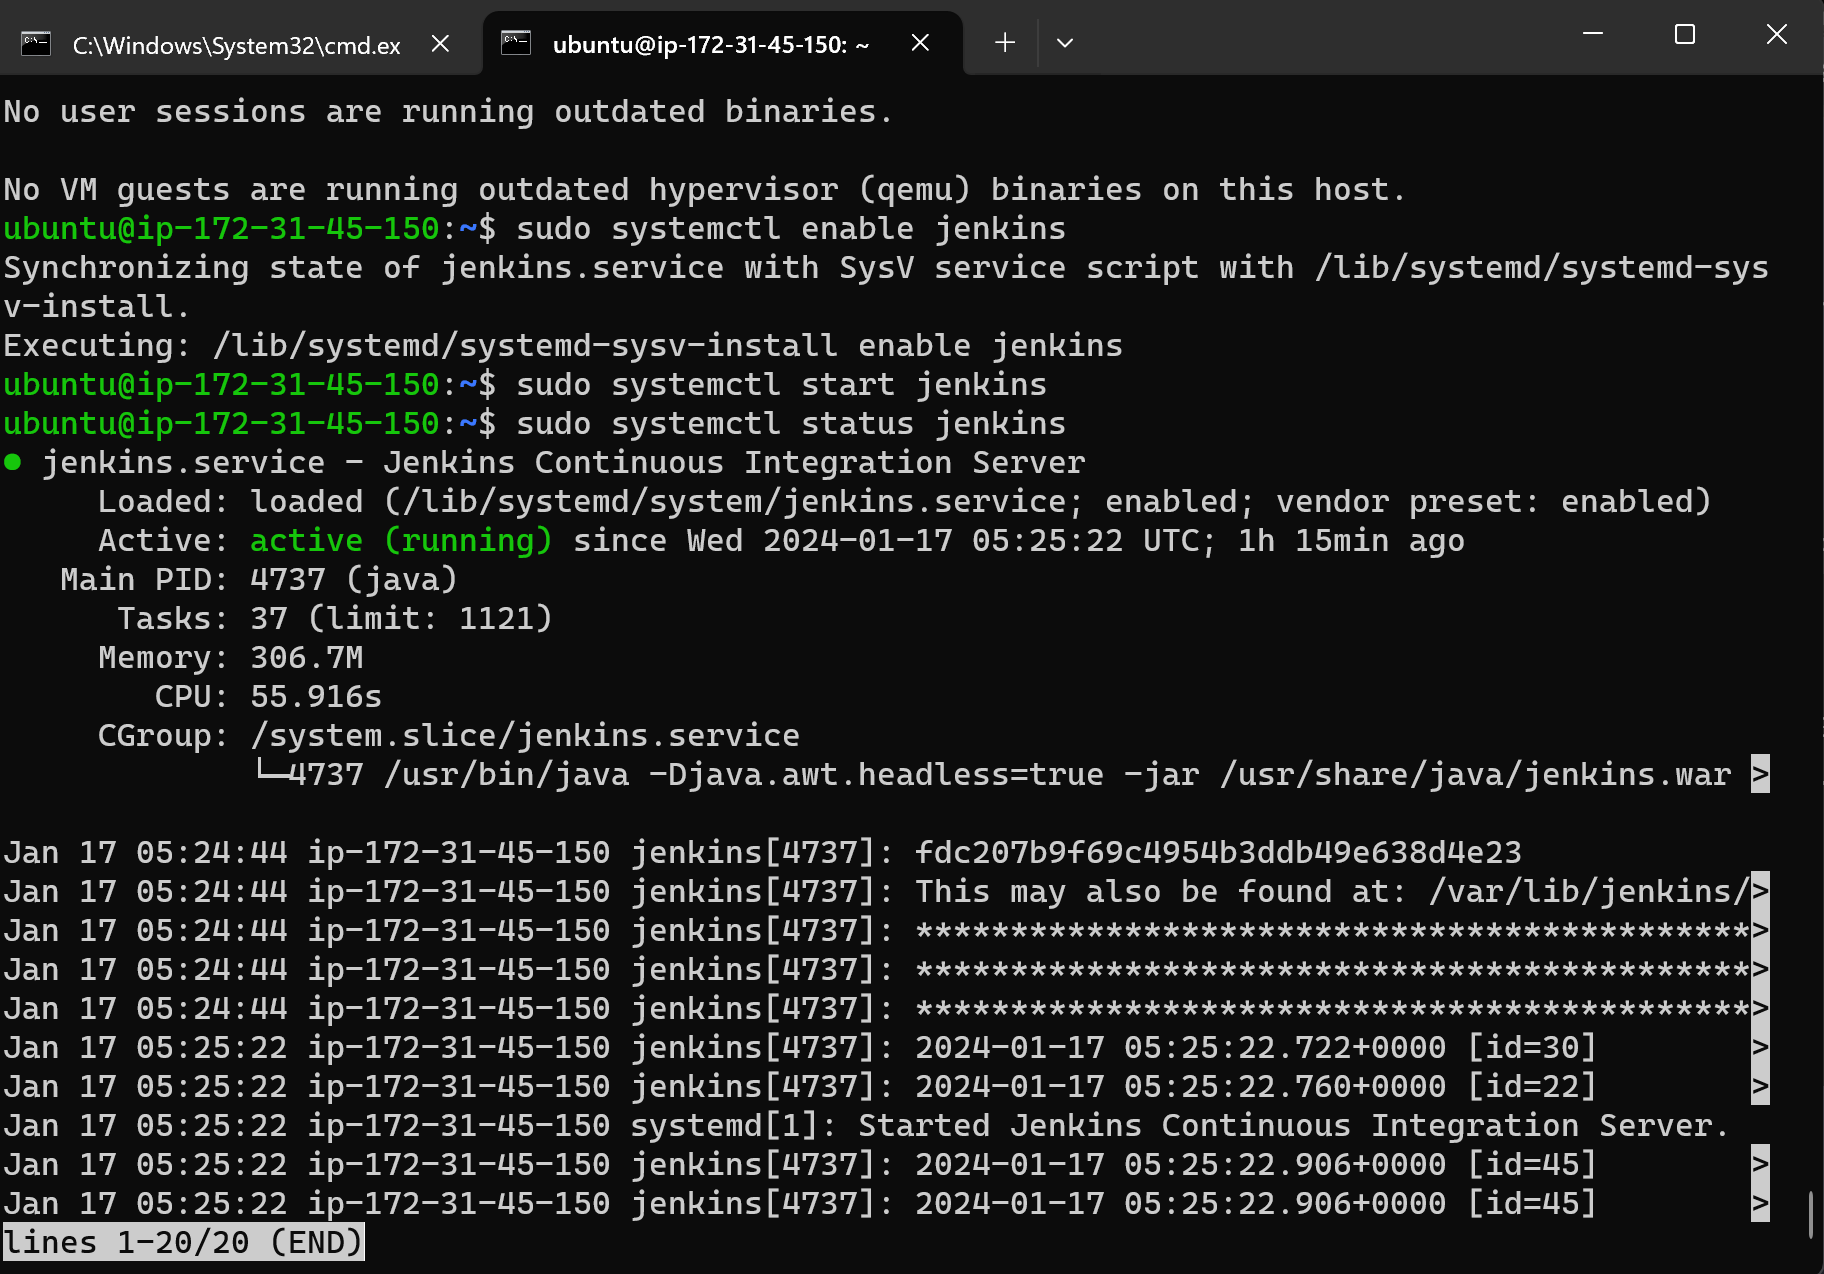
Step 3: To access Jenkins
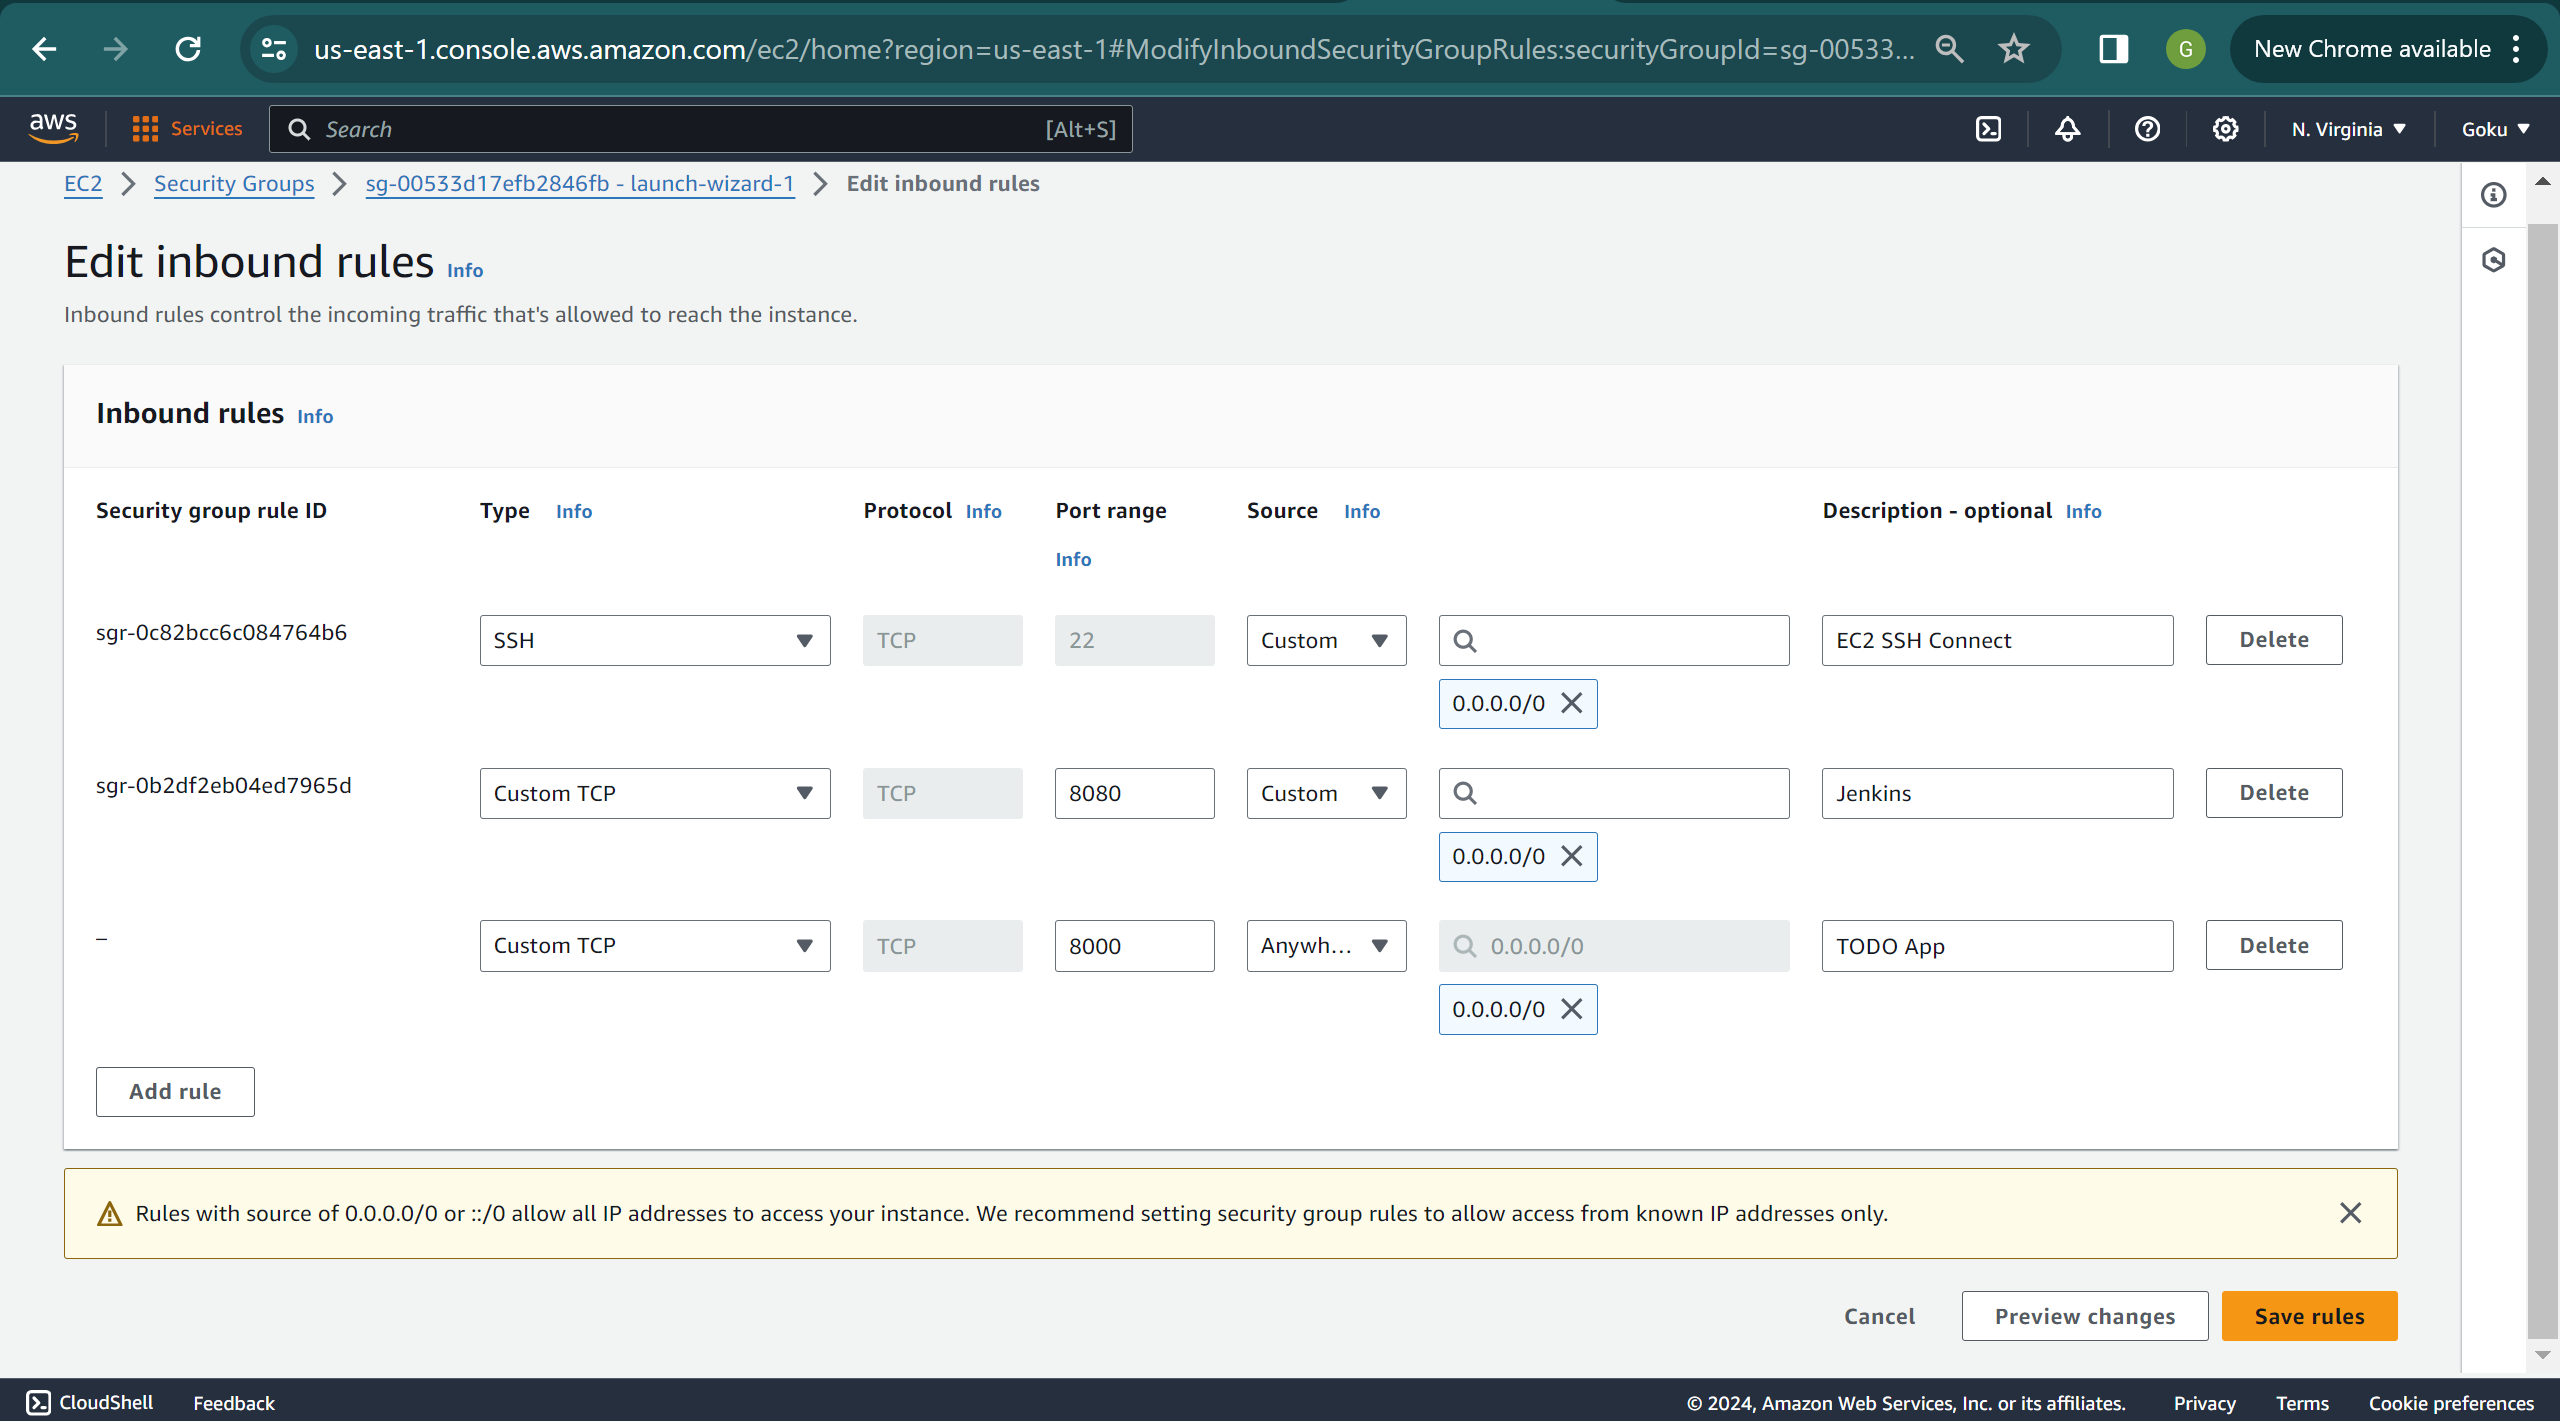
make sure to enable port 8080 in your EC2 instance’s security group.
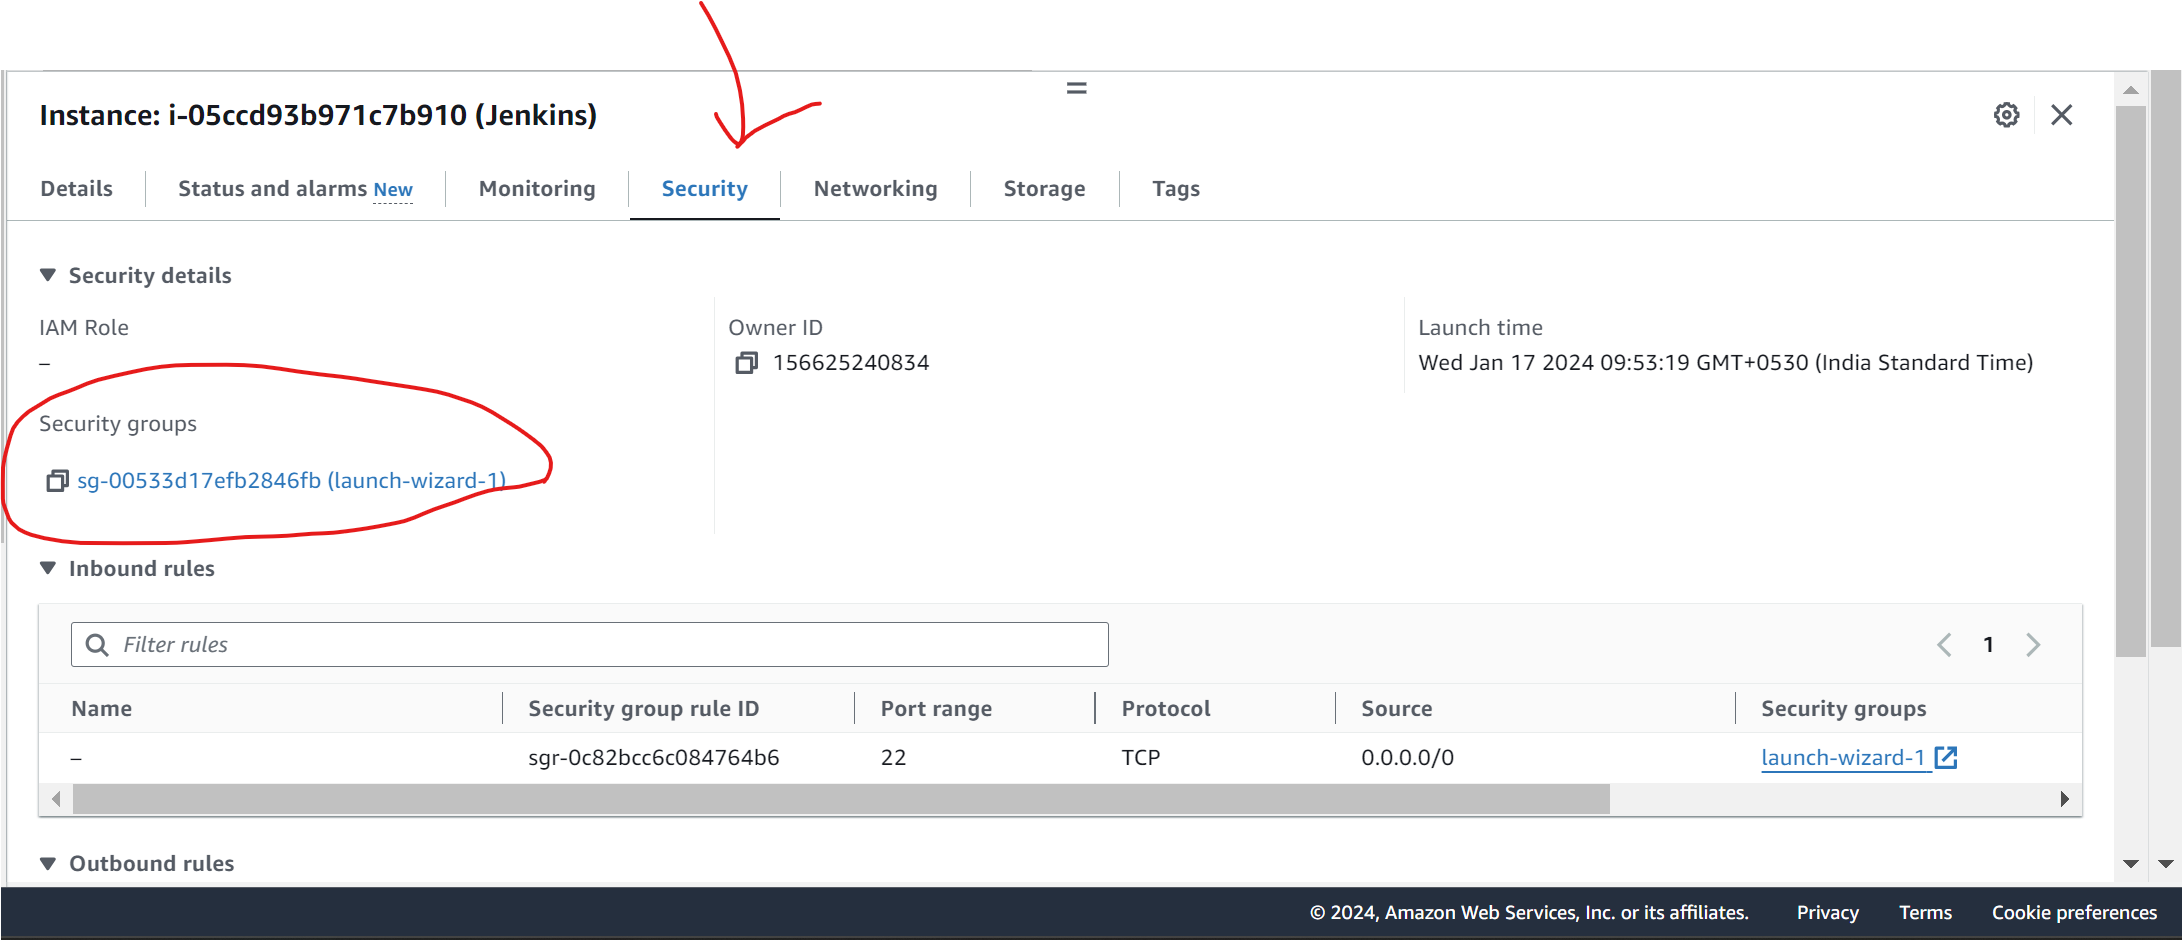
go to the security tab then click on the security group,
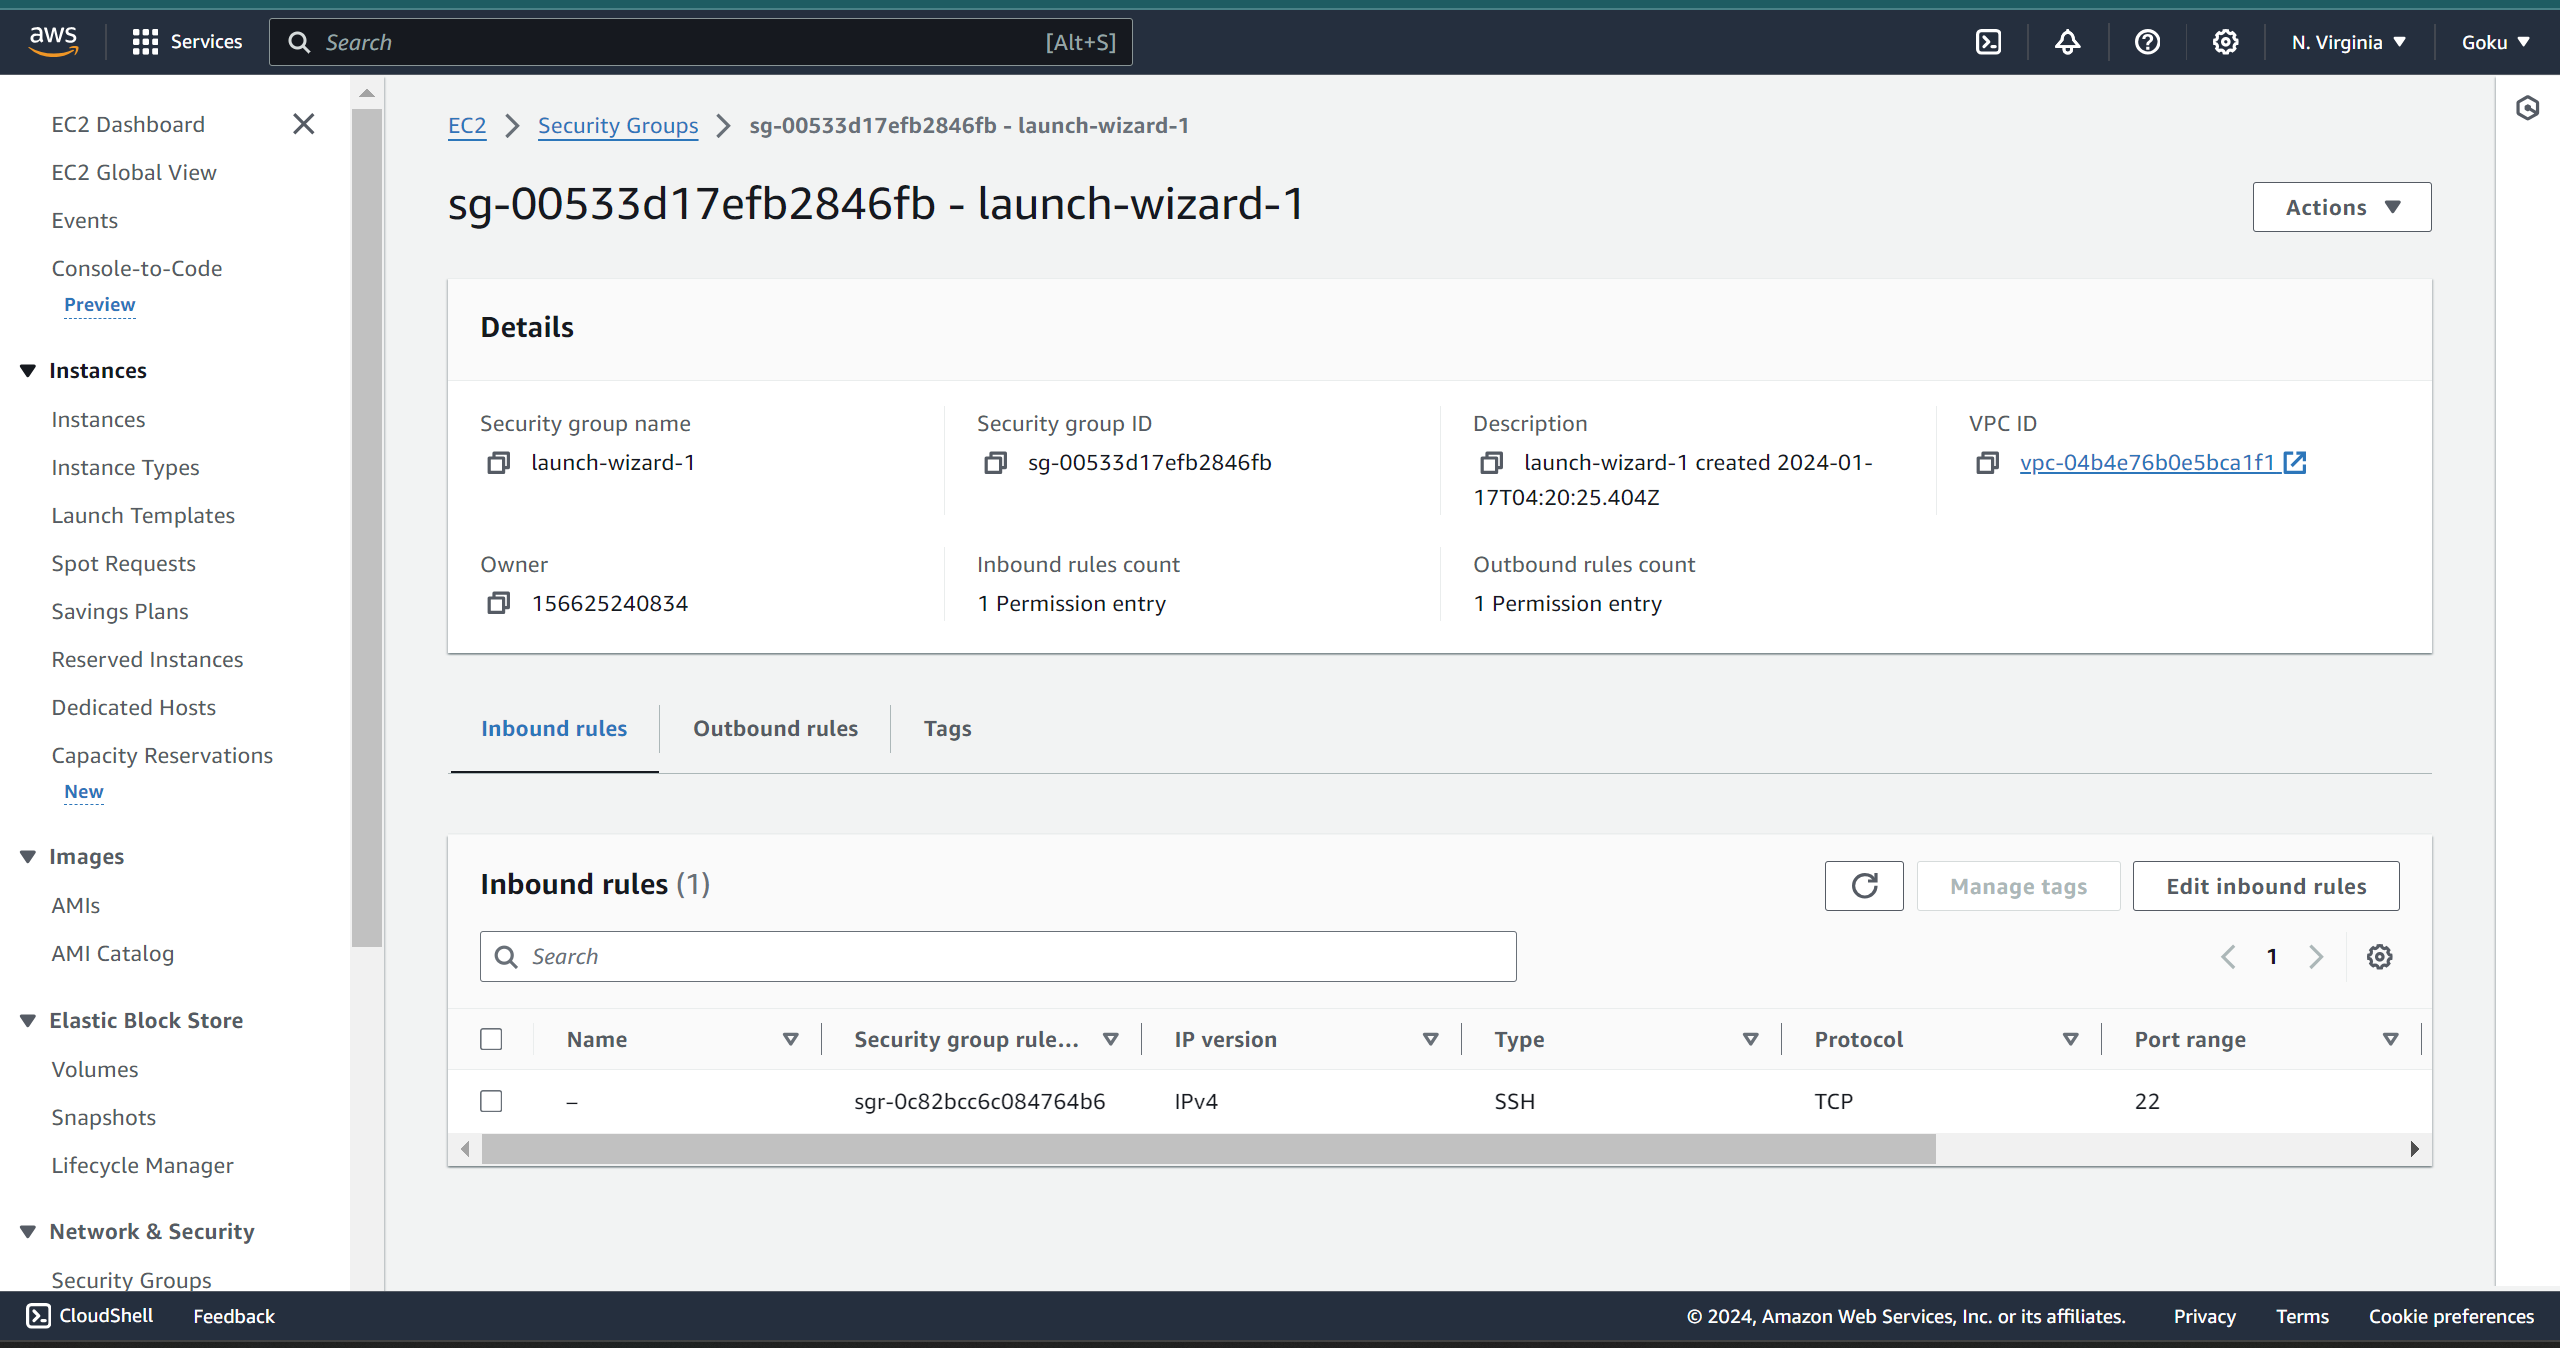
edit inbound rules
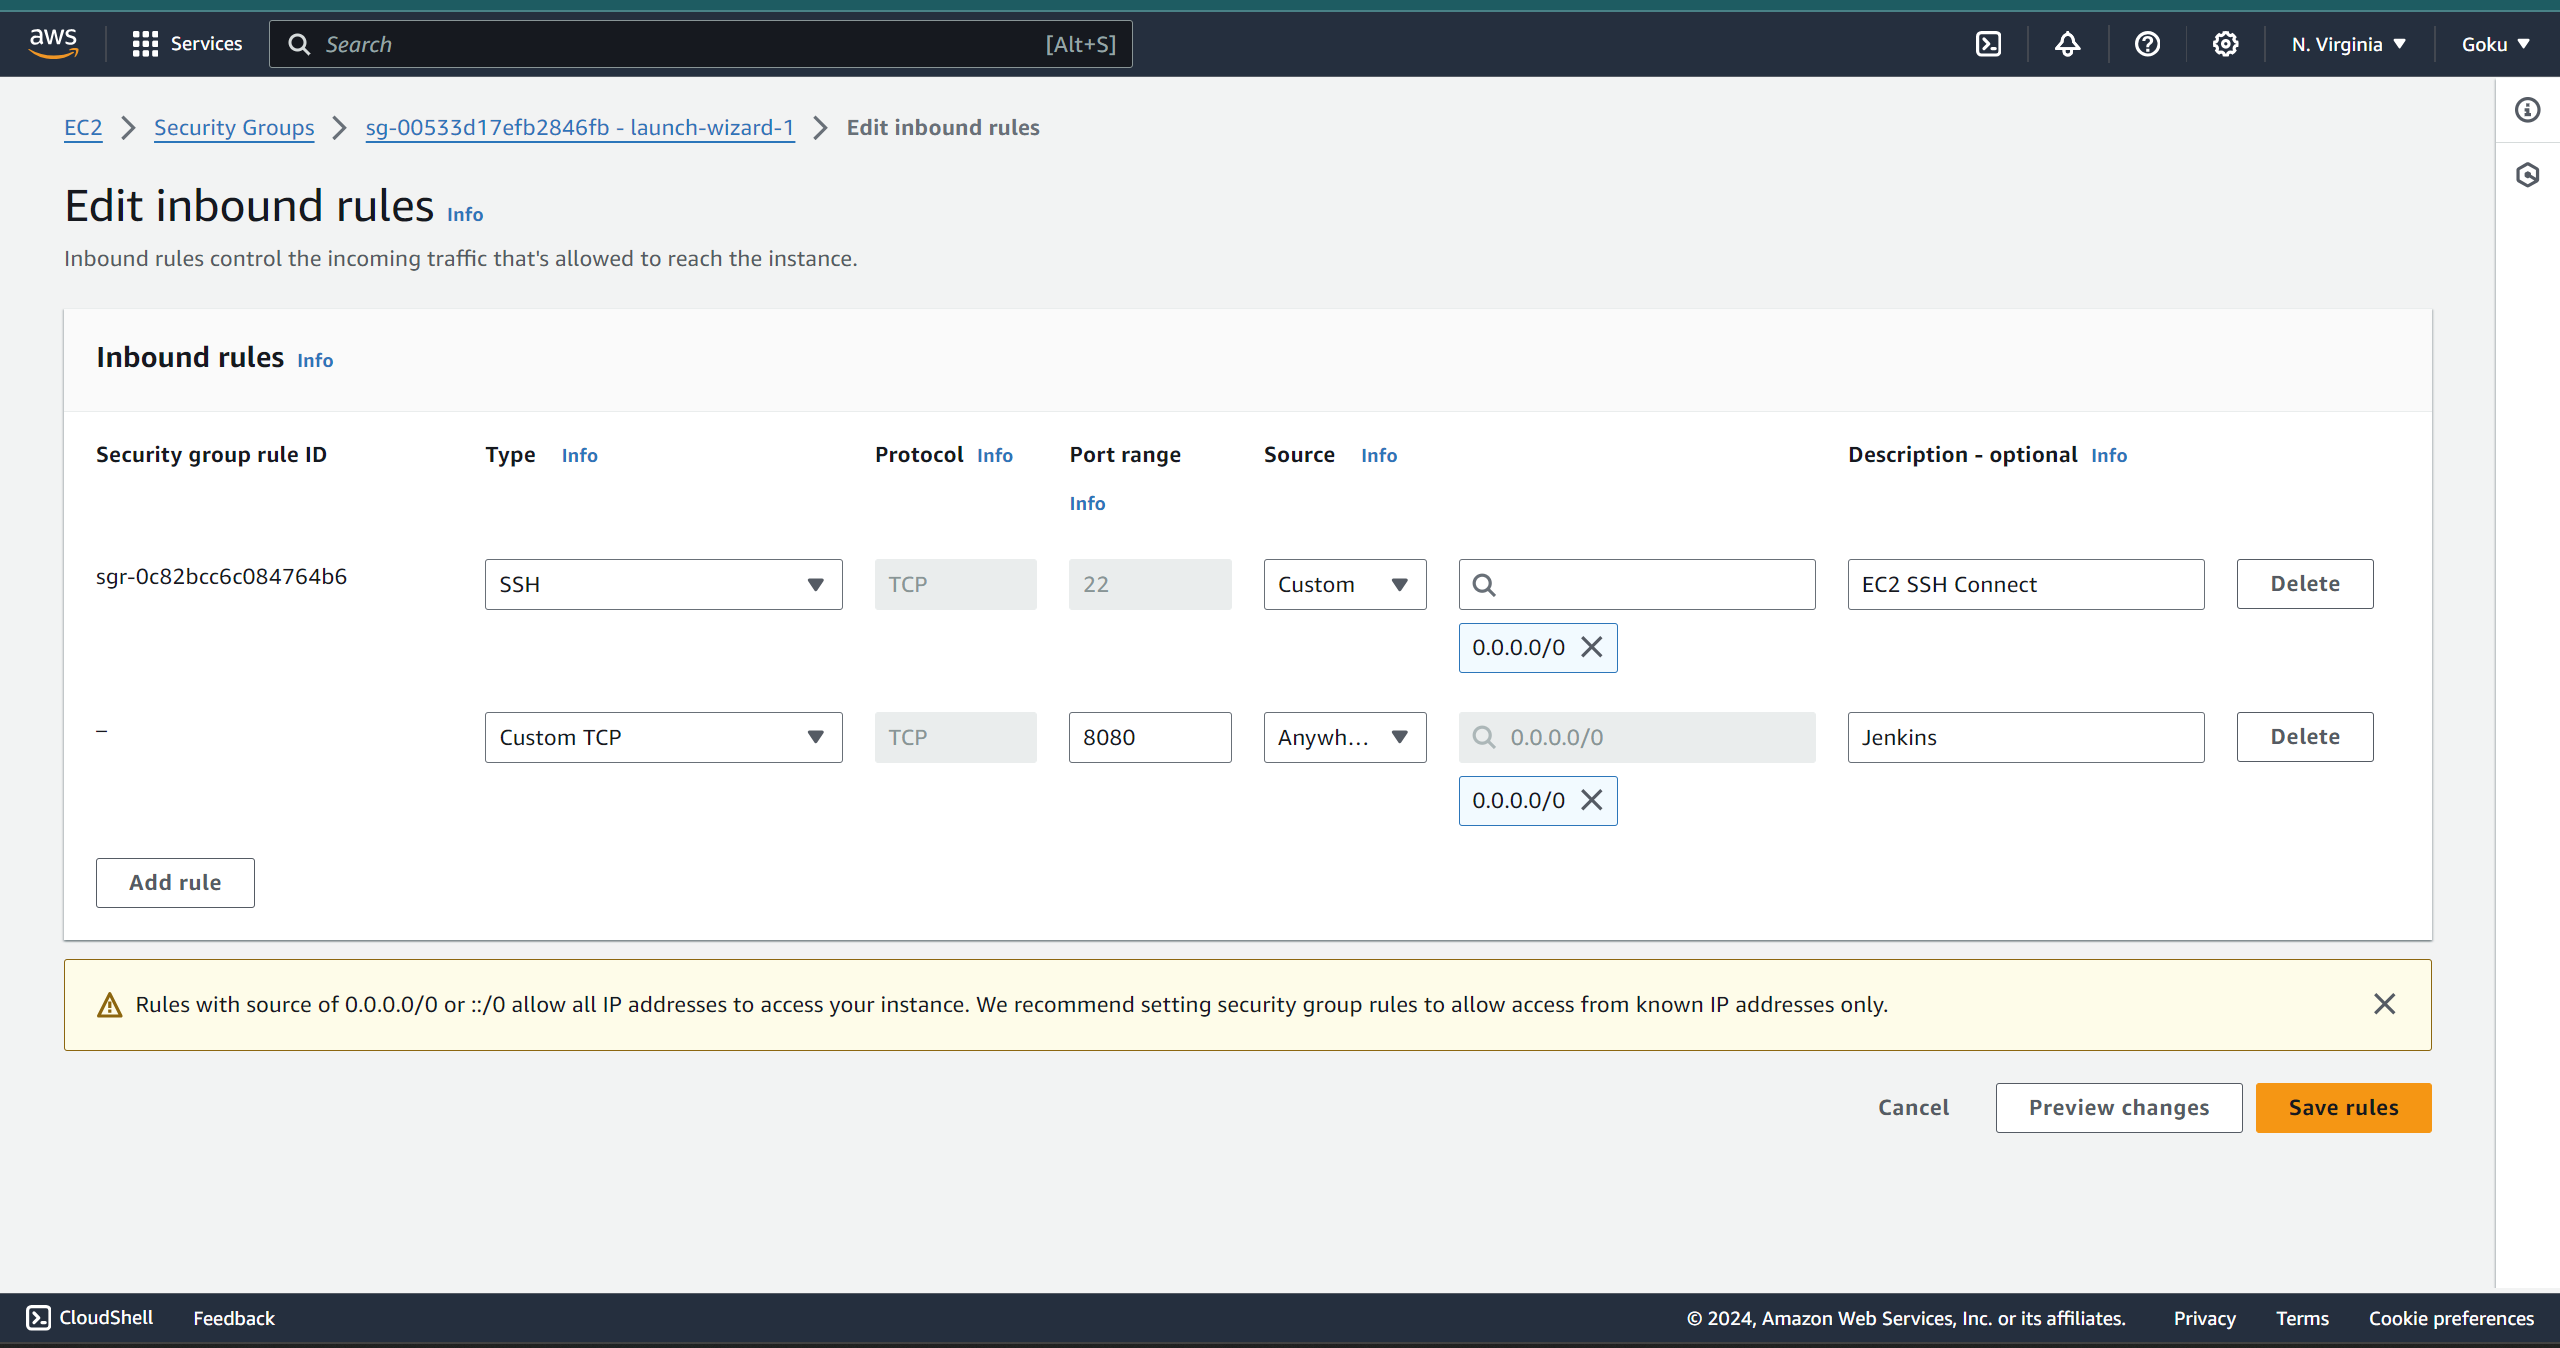
save rules and voila you are done!!
You can access the application using the format “public-ip:8080”, where “public-ip” is the public IP address of your instance.
To access the Jenkins on a browser, copy the public IP address of your EC2 instance and go to the port 8080. Upon accessing Jenkins, you will be directed to a page where you can obtain the password.
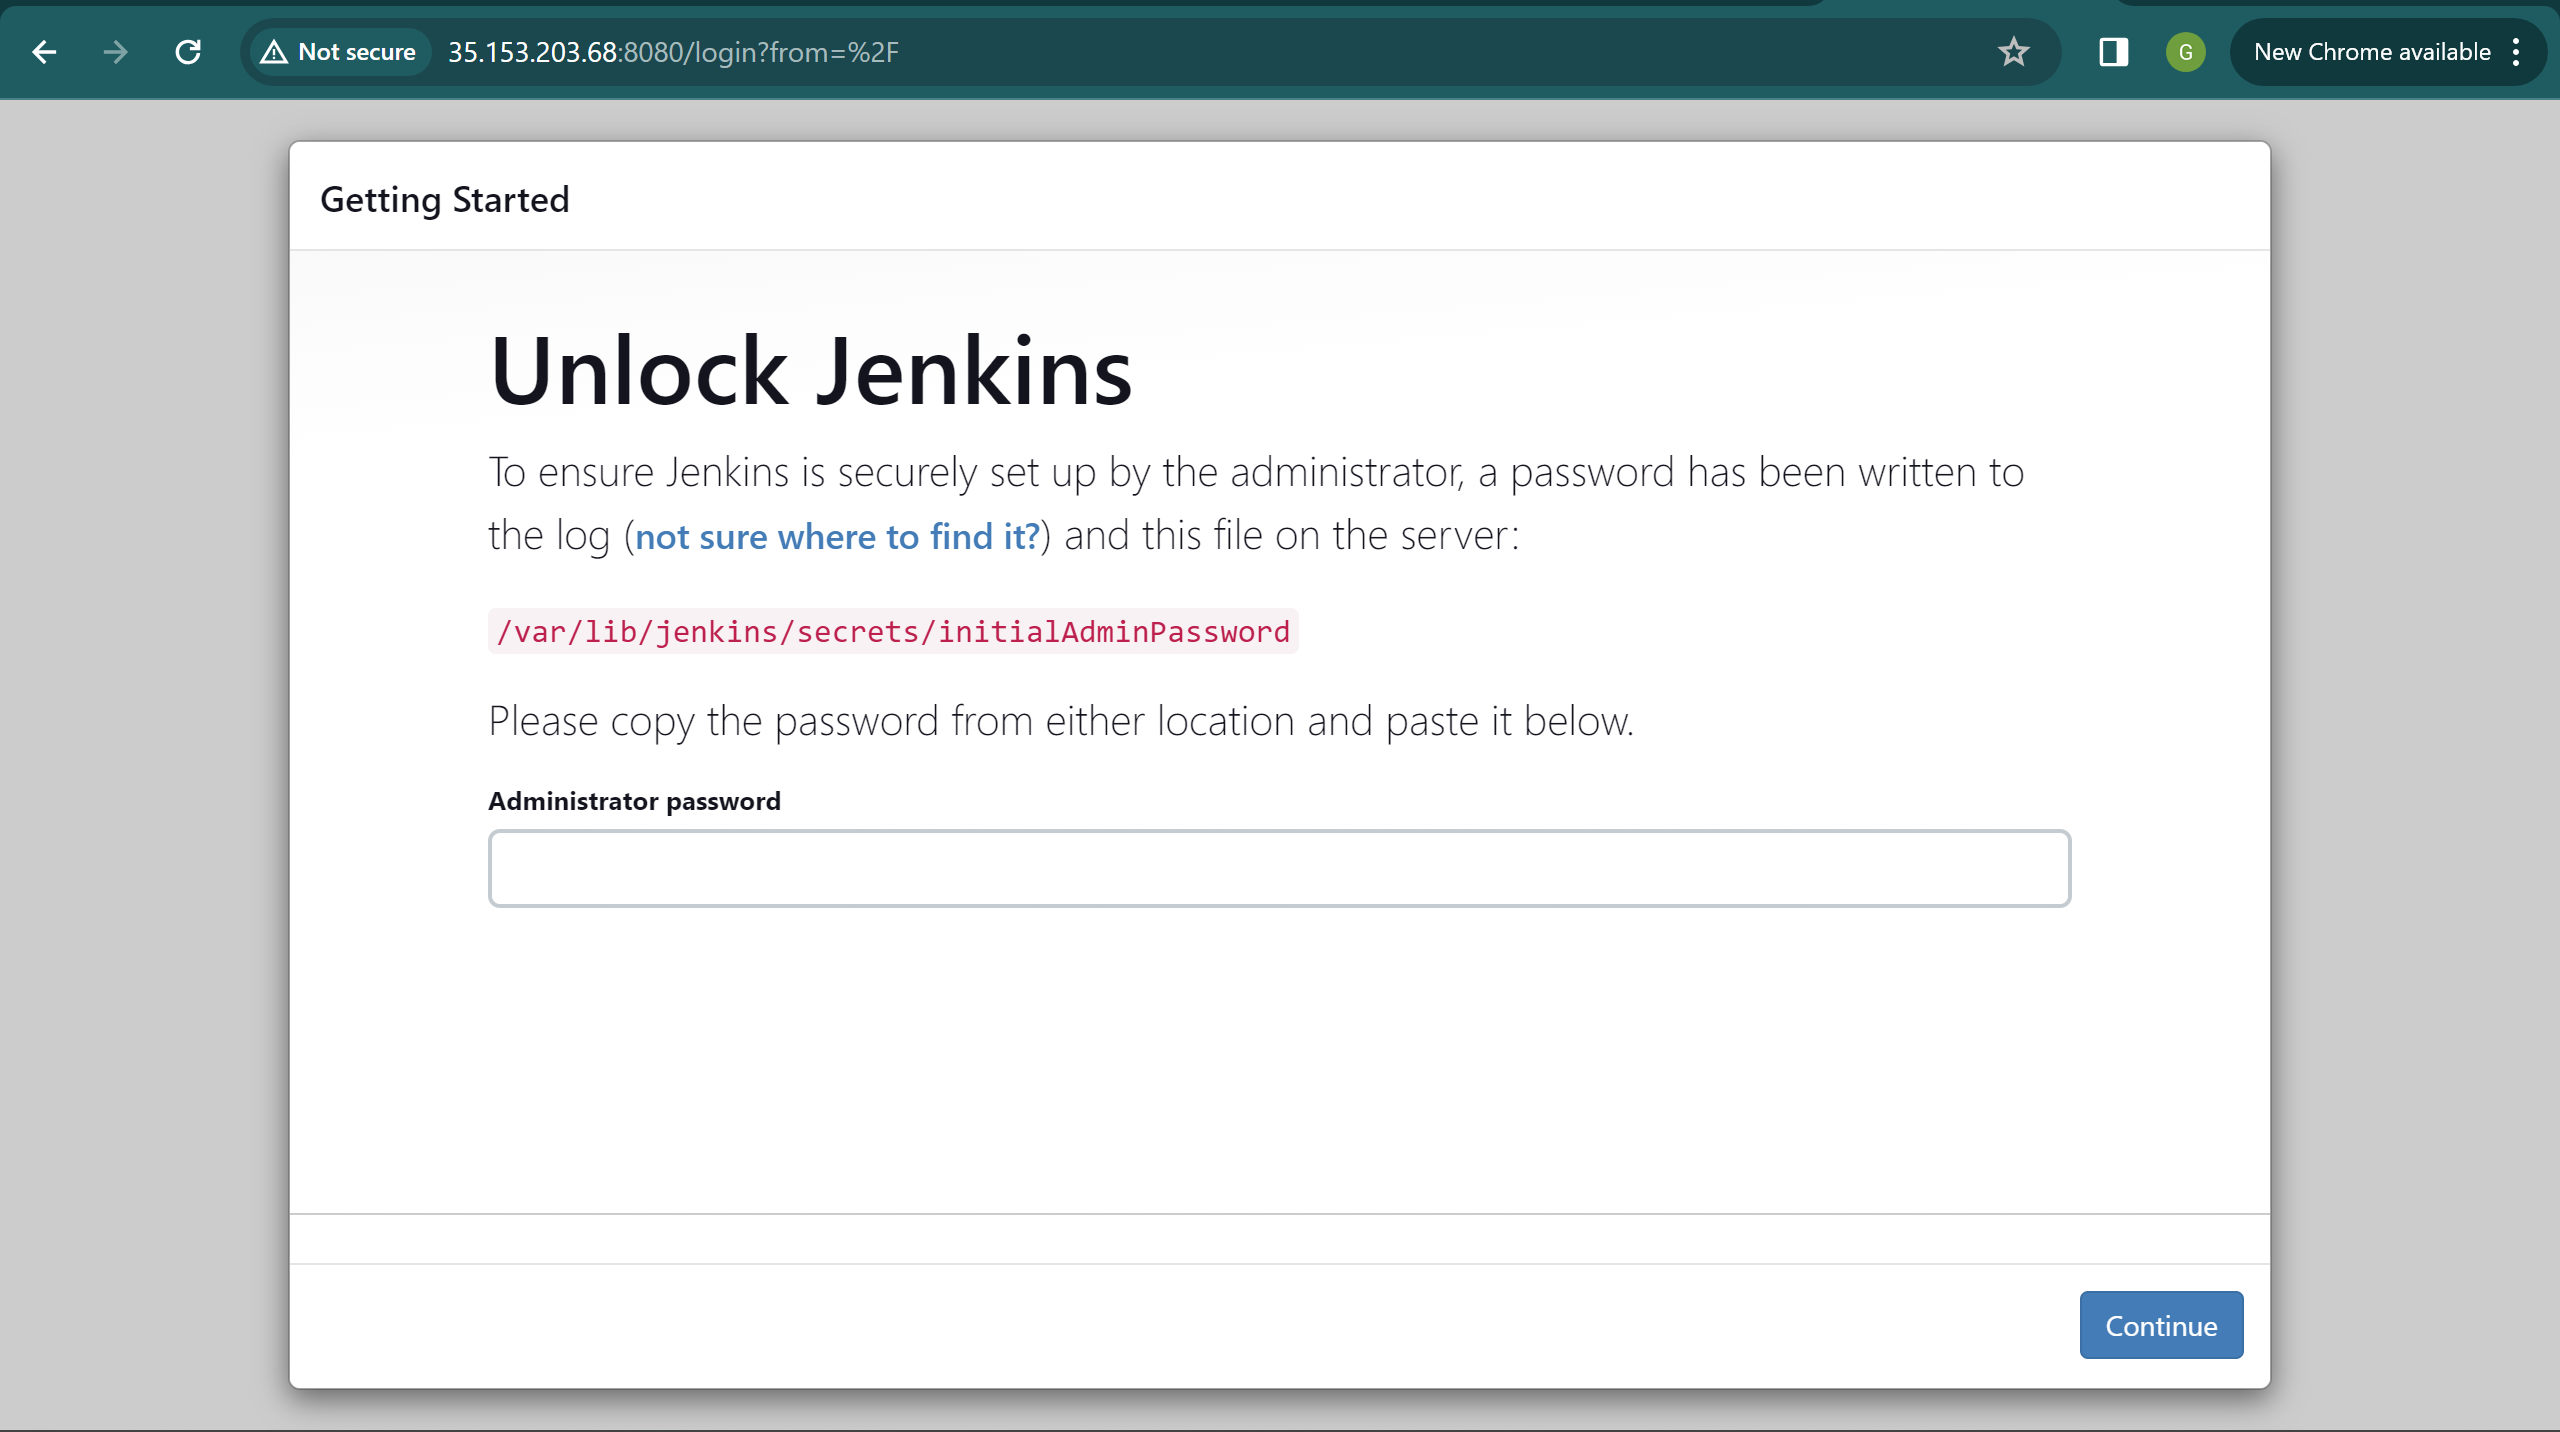
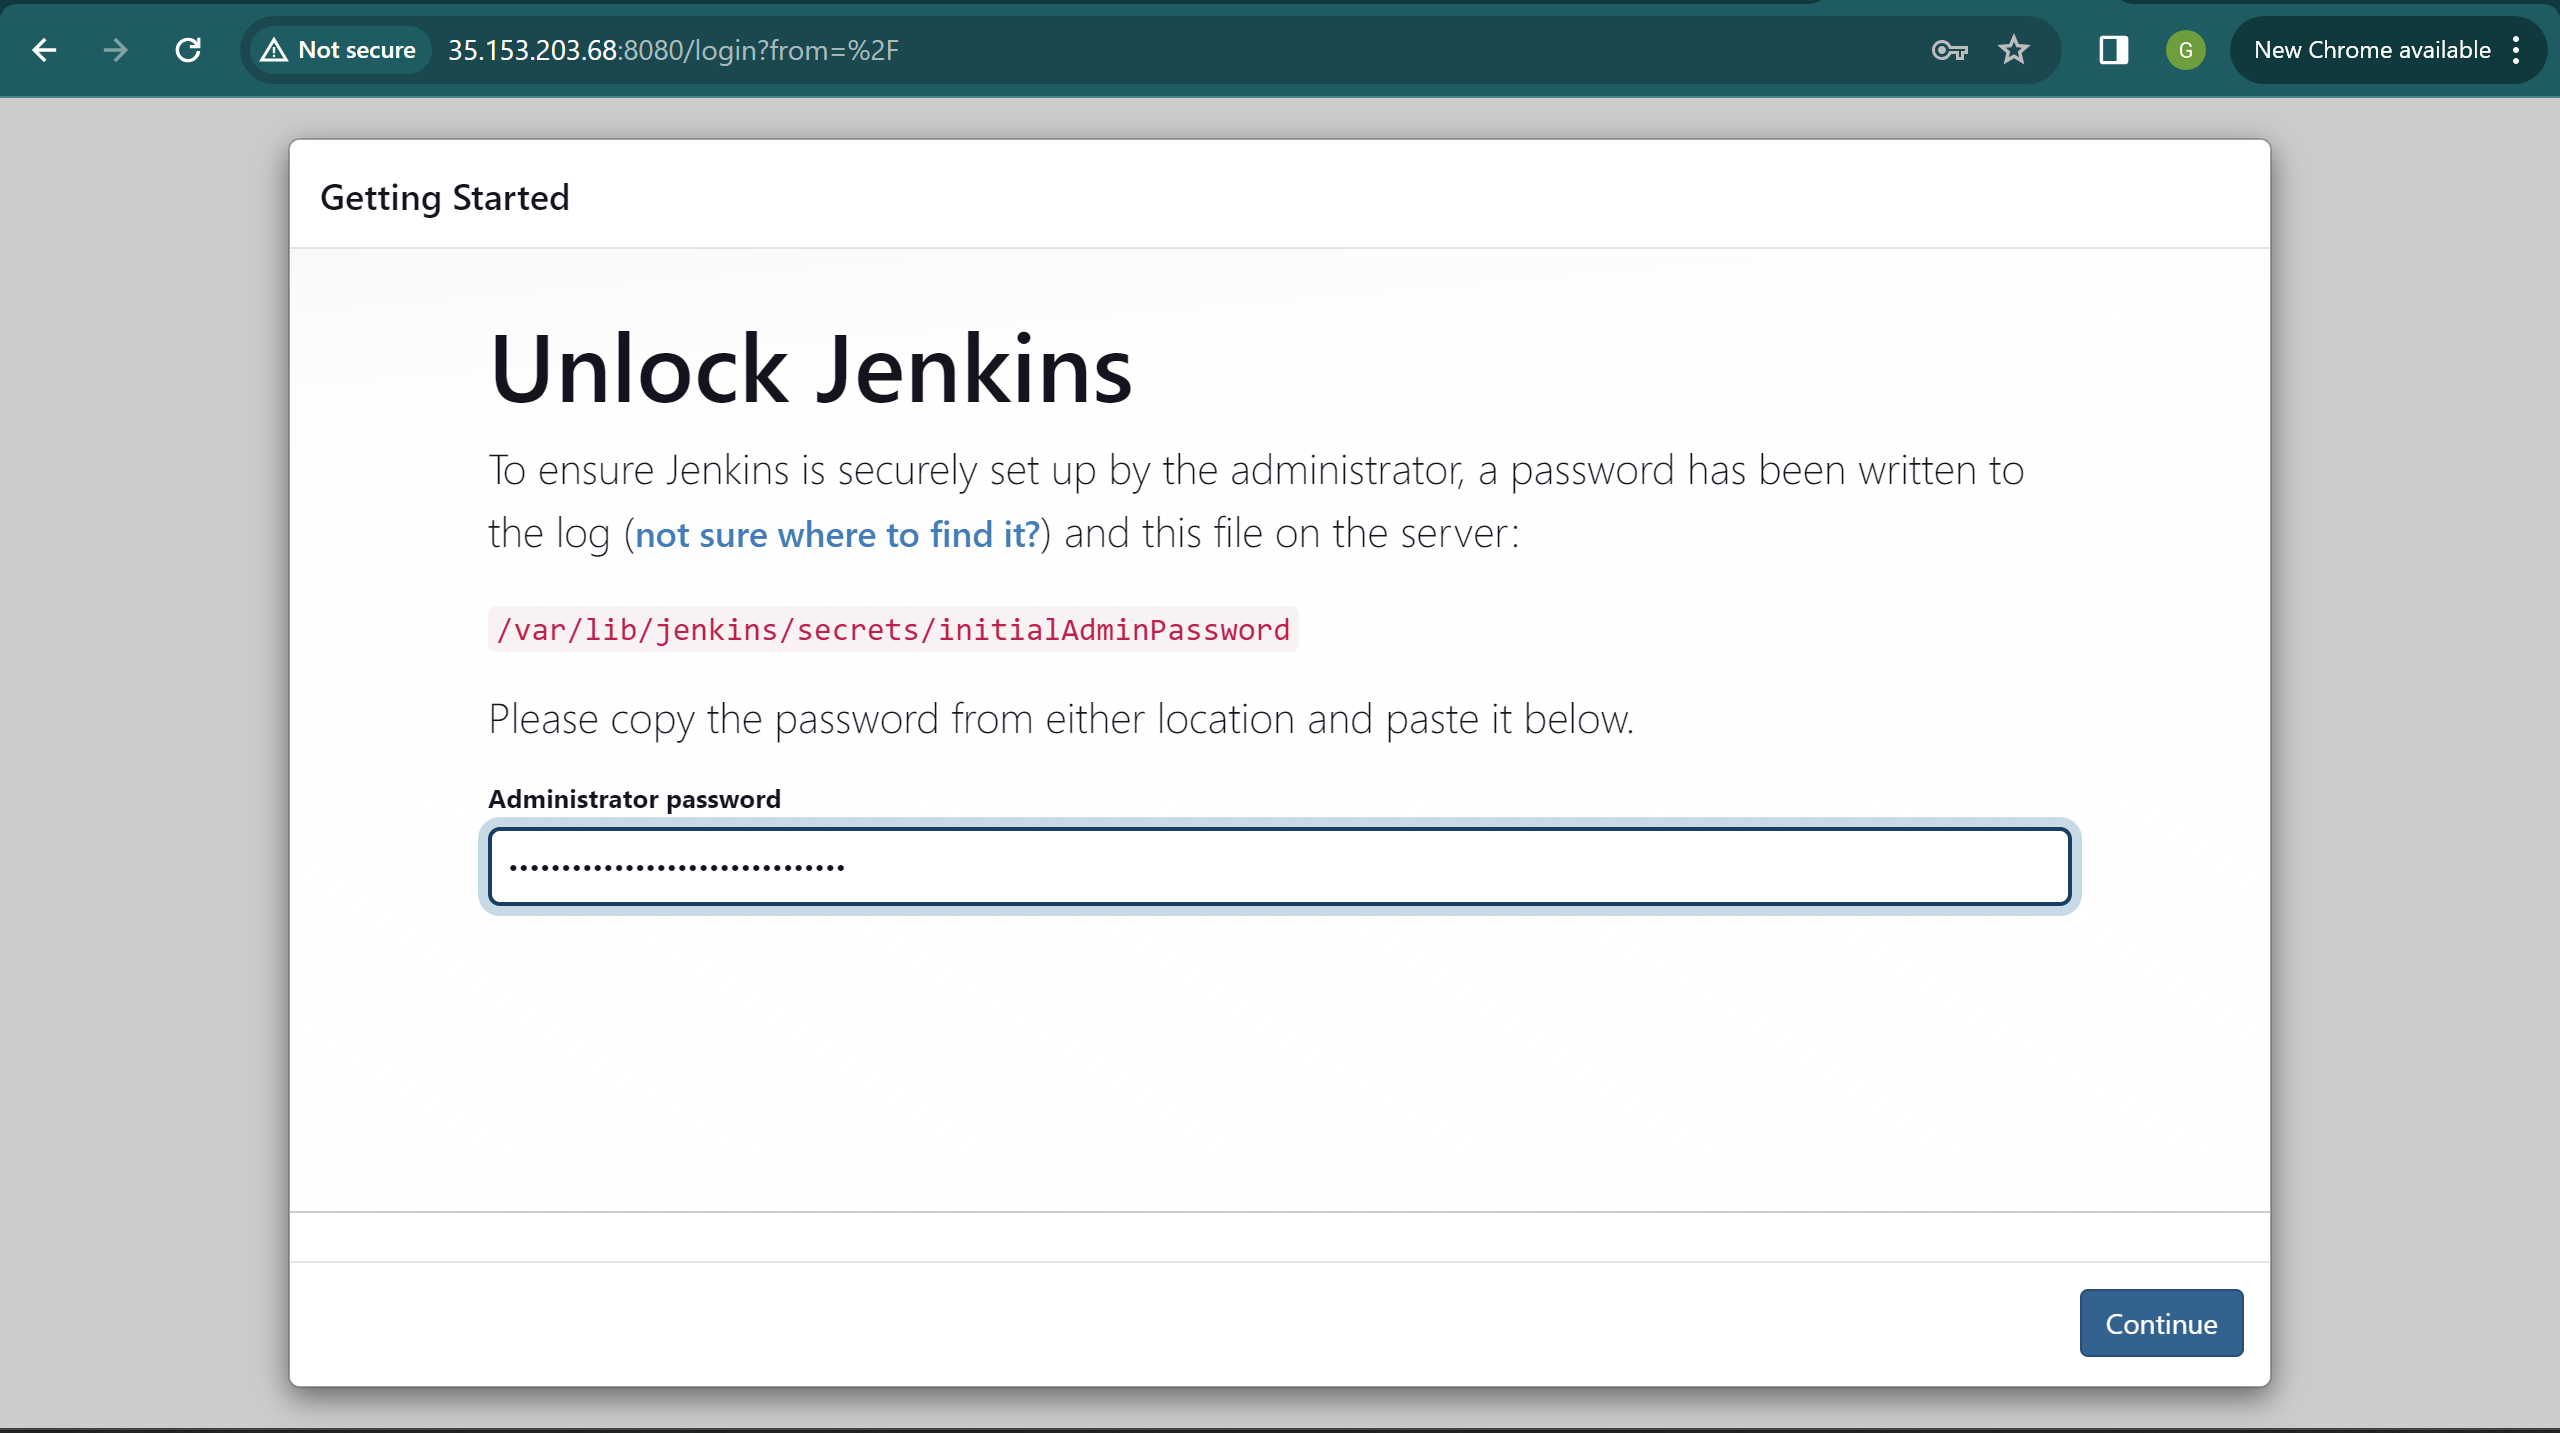
Use the “cat” command with the provided path on that page to retrieve the password. Install suggested plugins. We just need to create a first admin user and we are ready to play with Jenkins now.

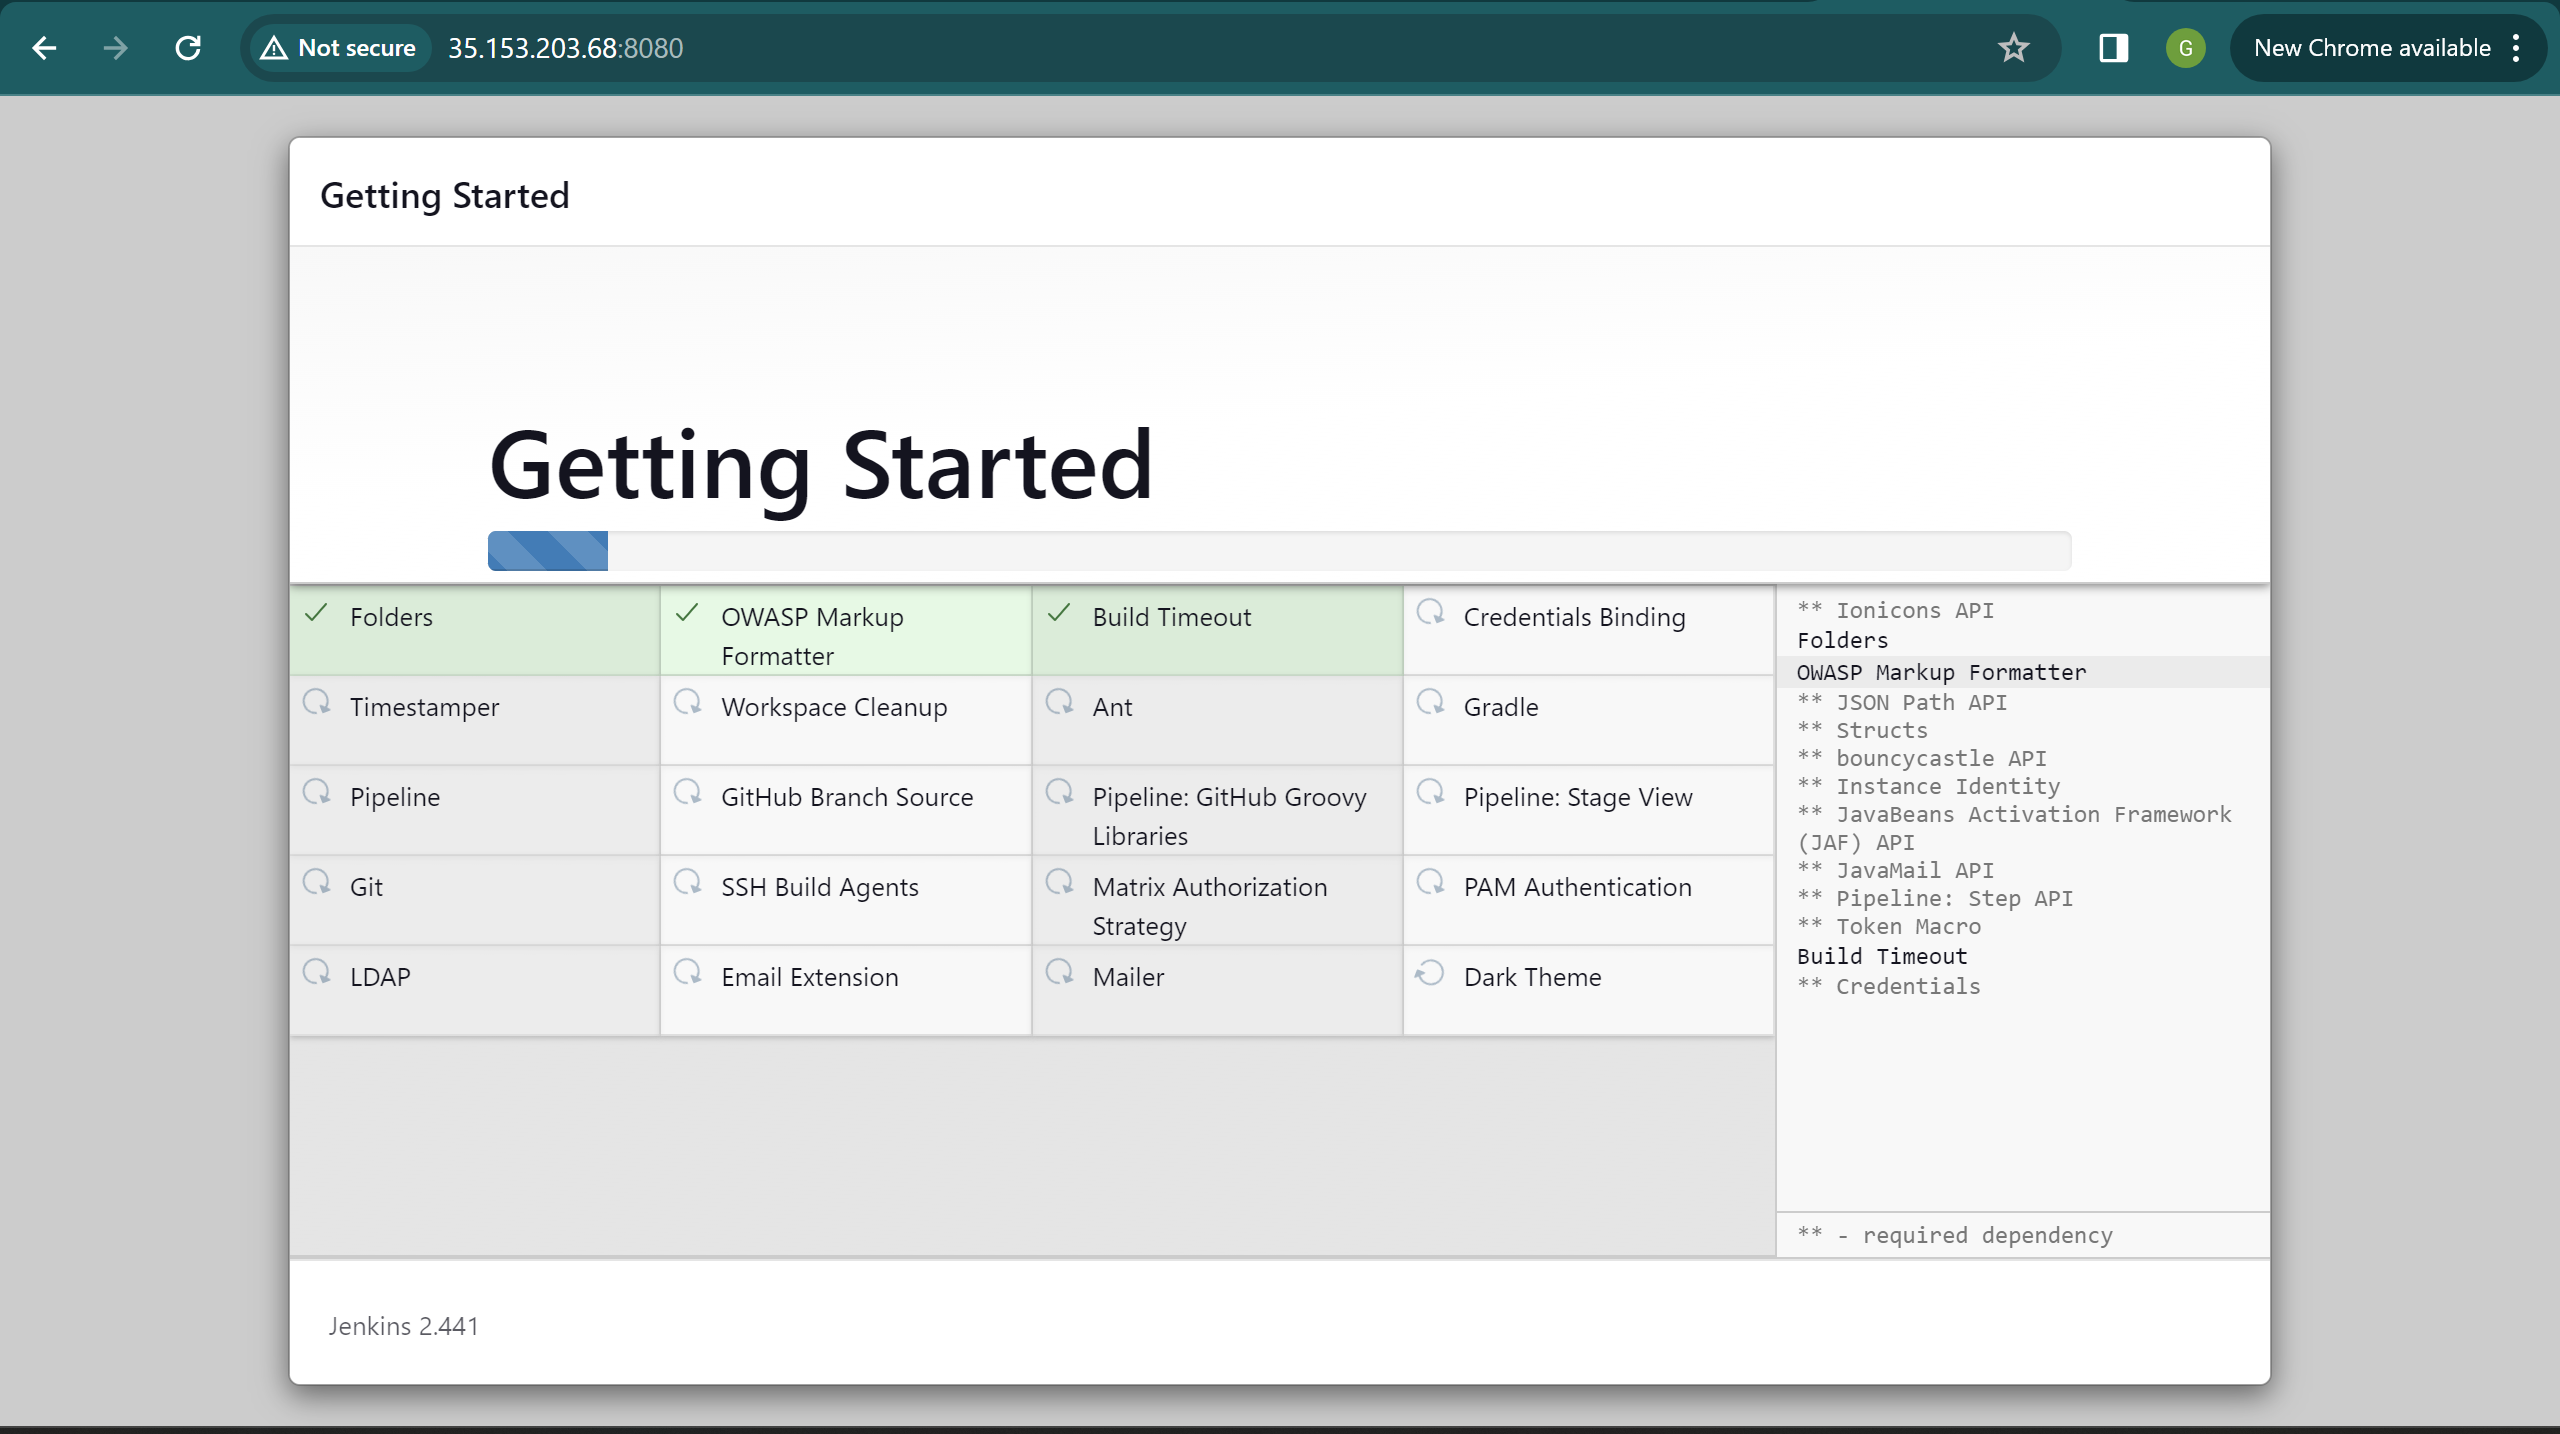
select install suggested plugins
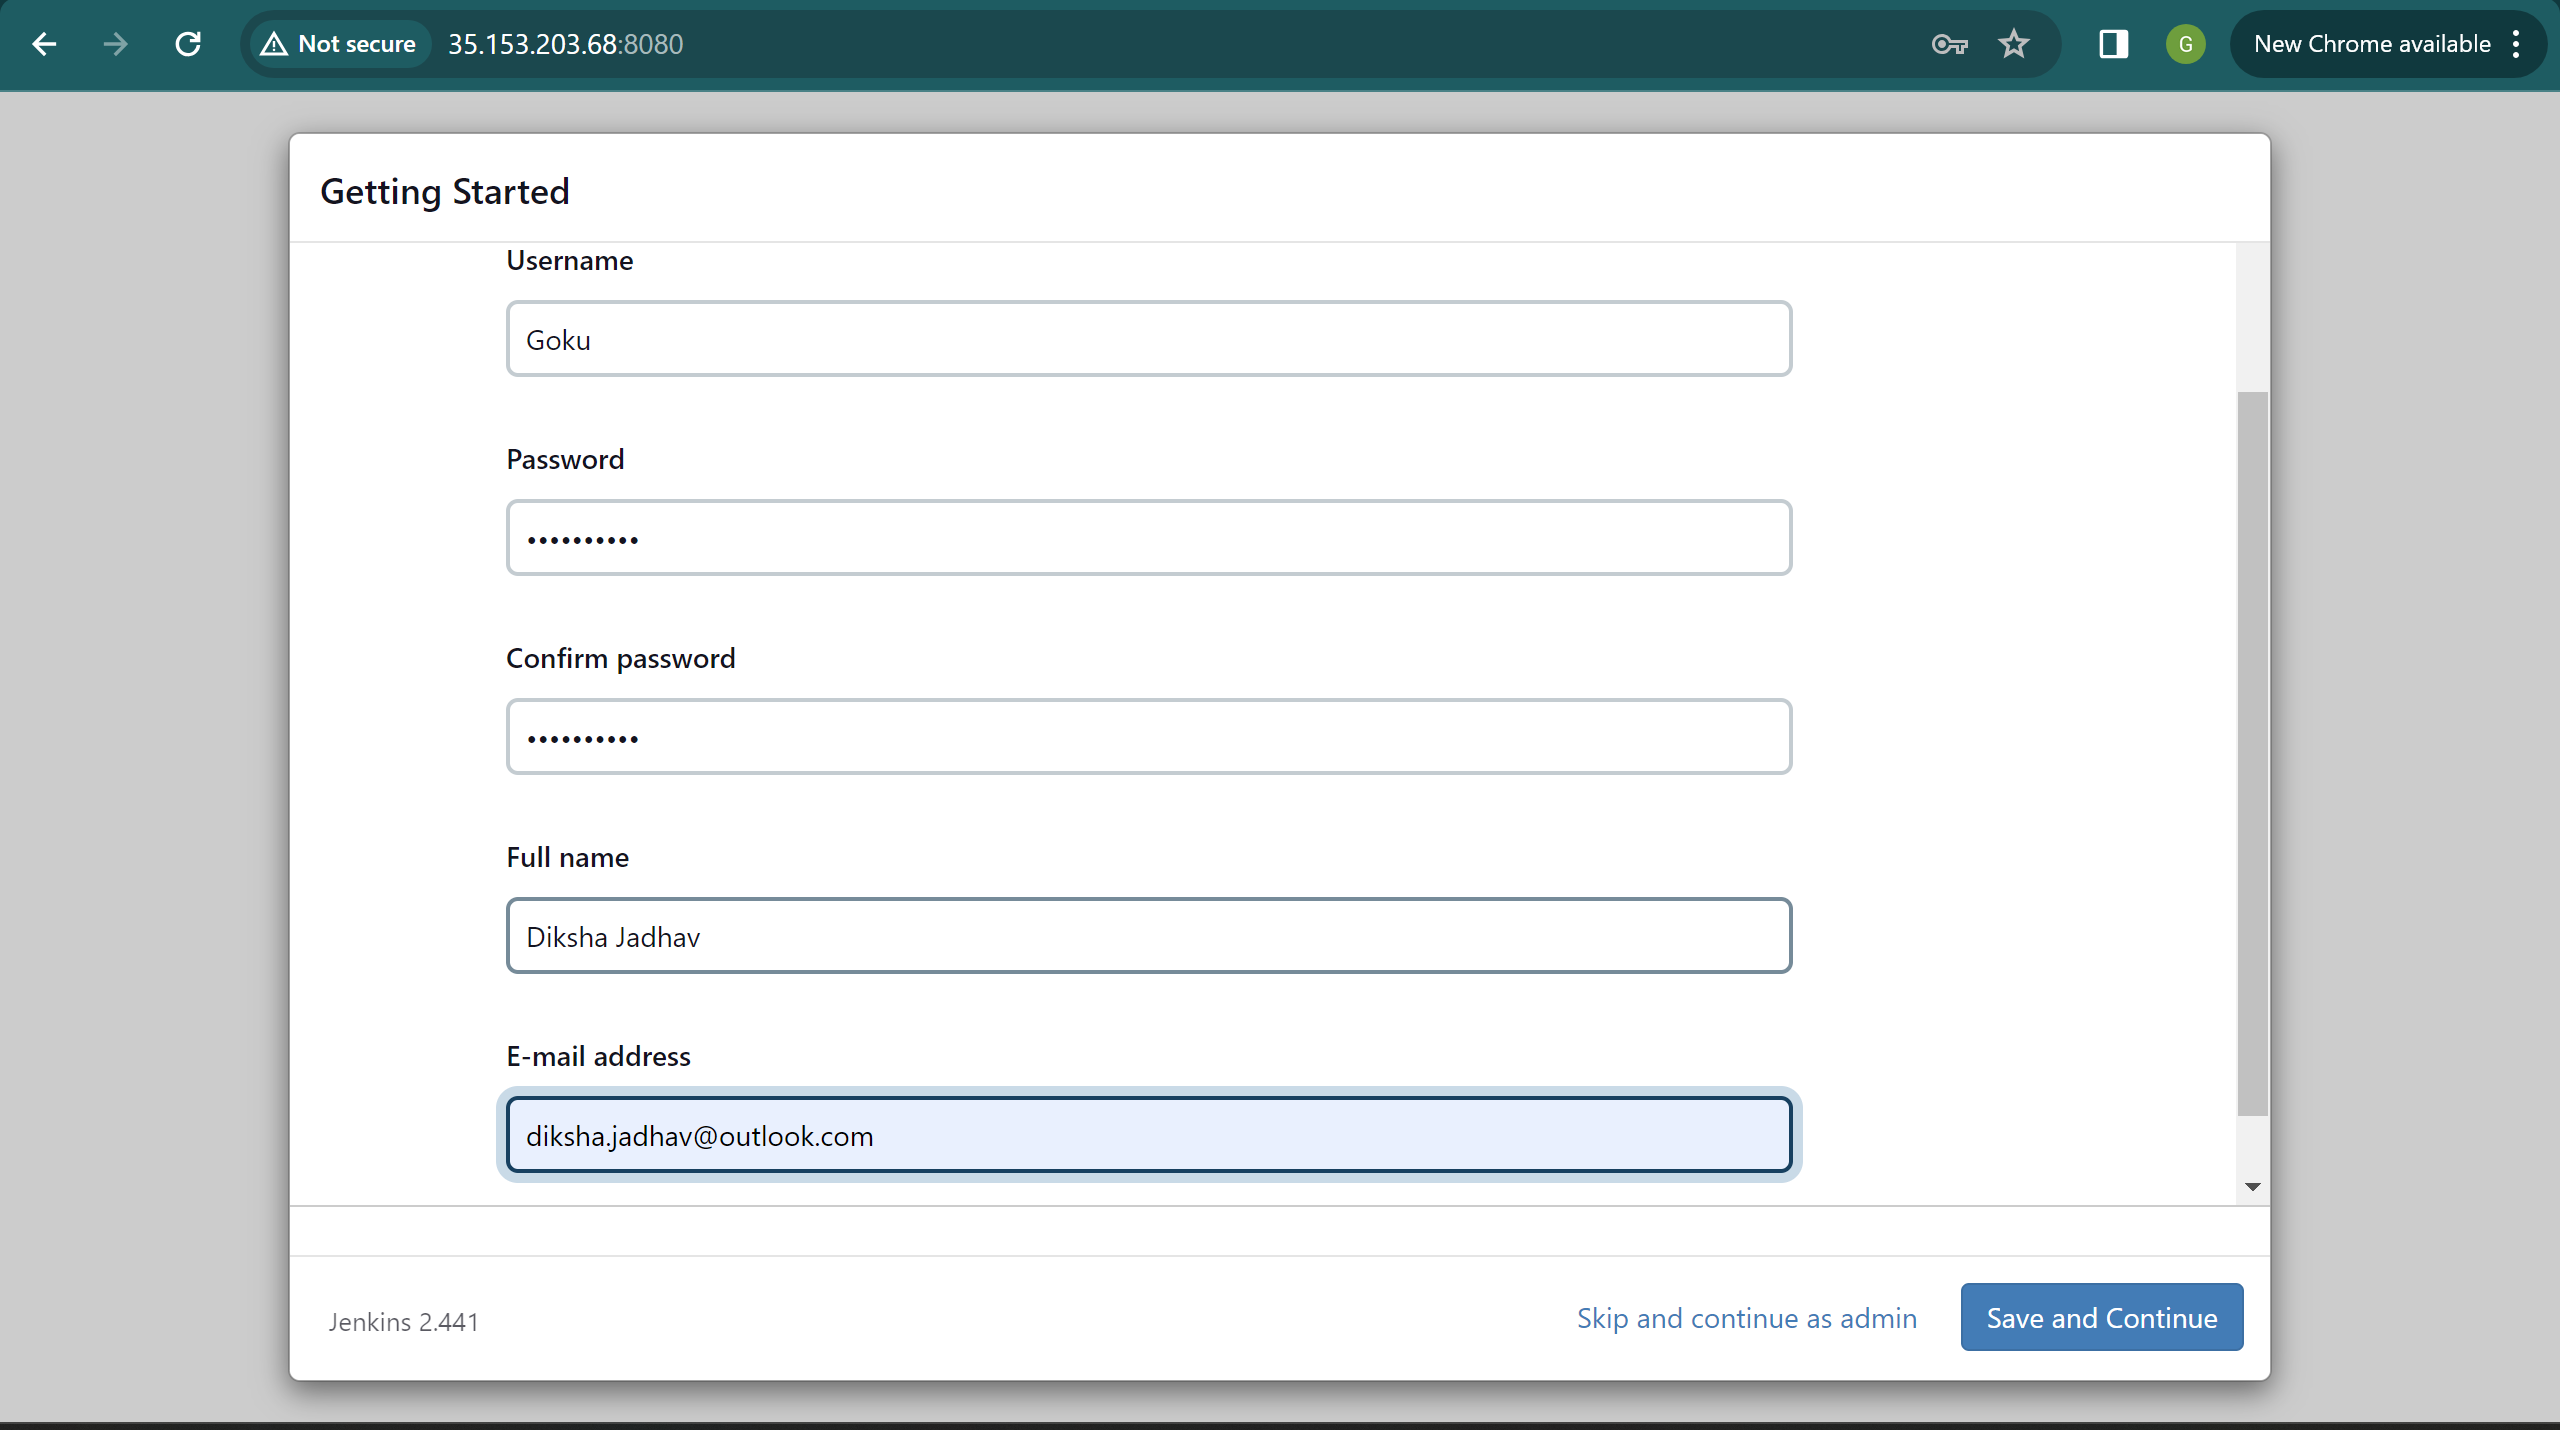
well since we are following the best practises we will create a user but if you are a rookie trying to learn you can actually skip this step not a big deal
ANYWAYS DRINK WATER

moving forward this step is completely optional
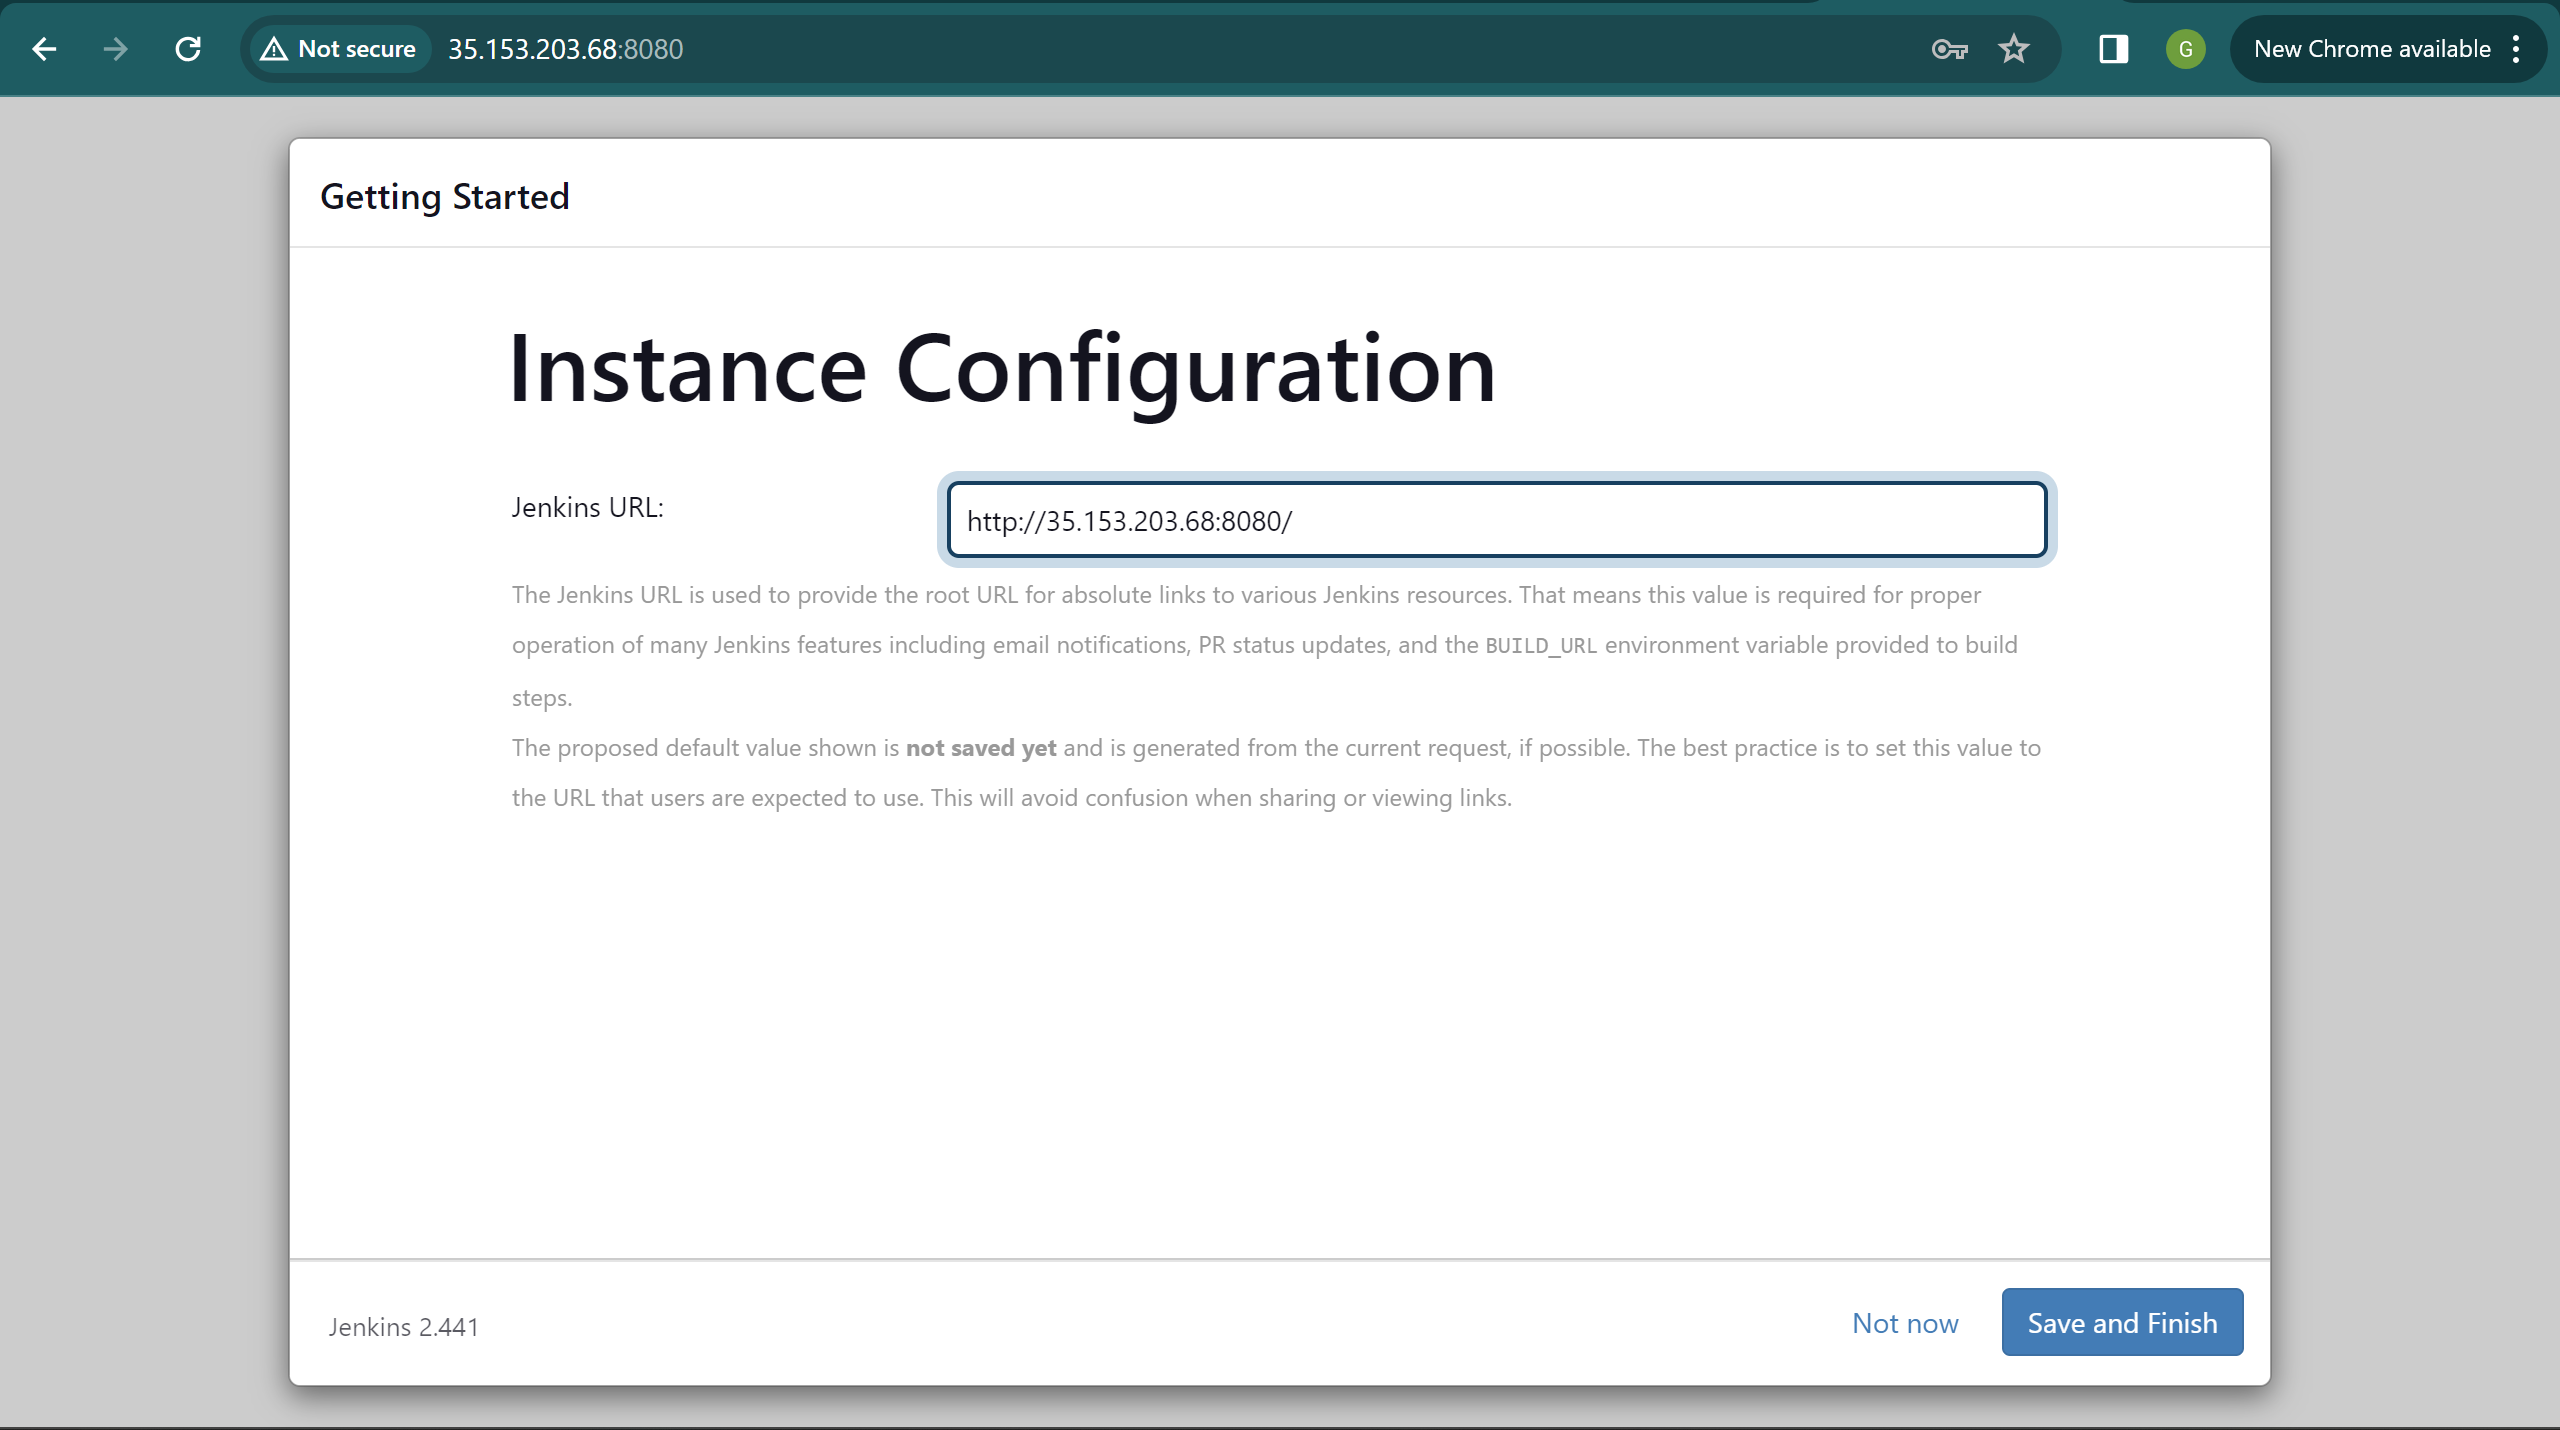
you can just do save and finish
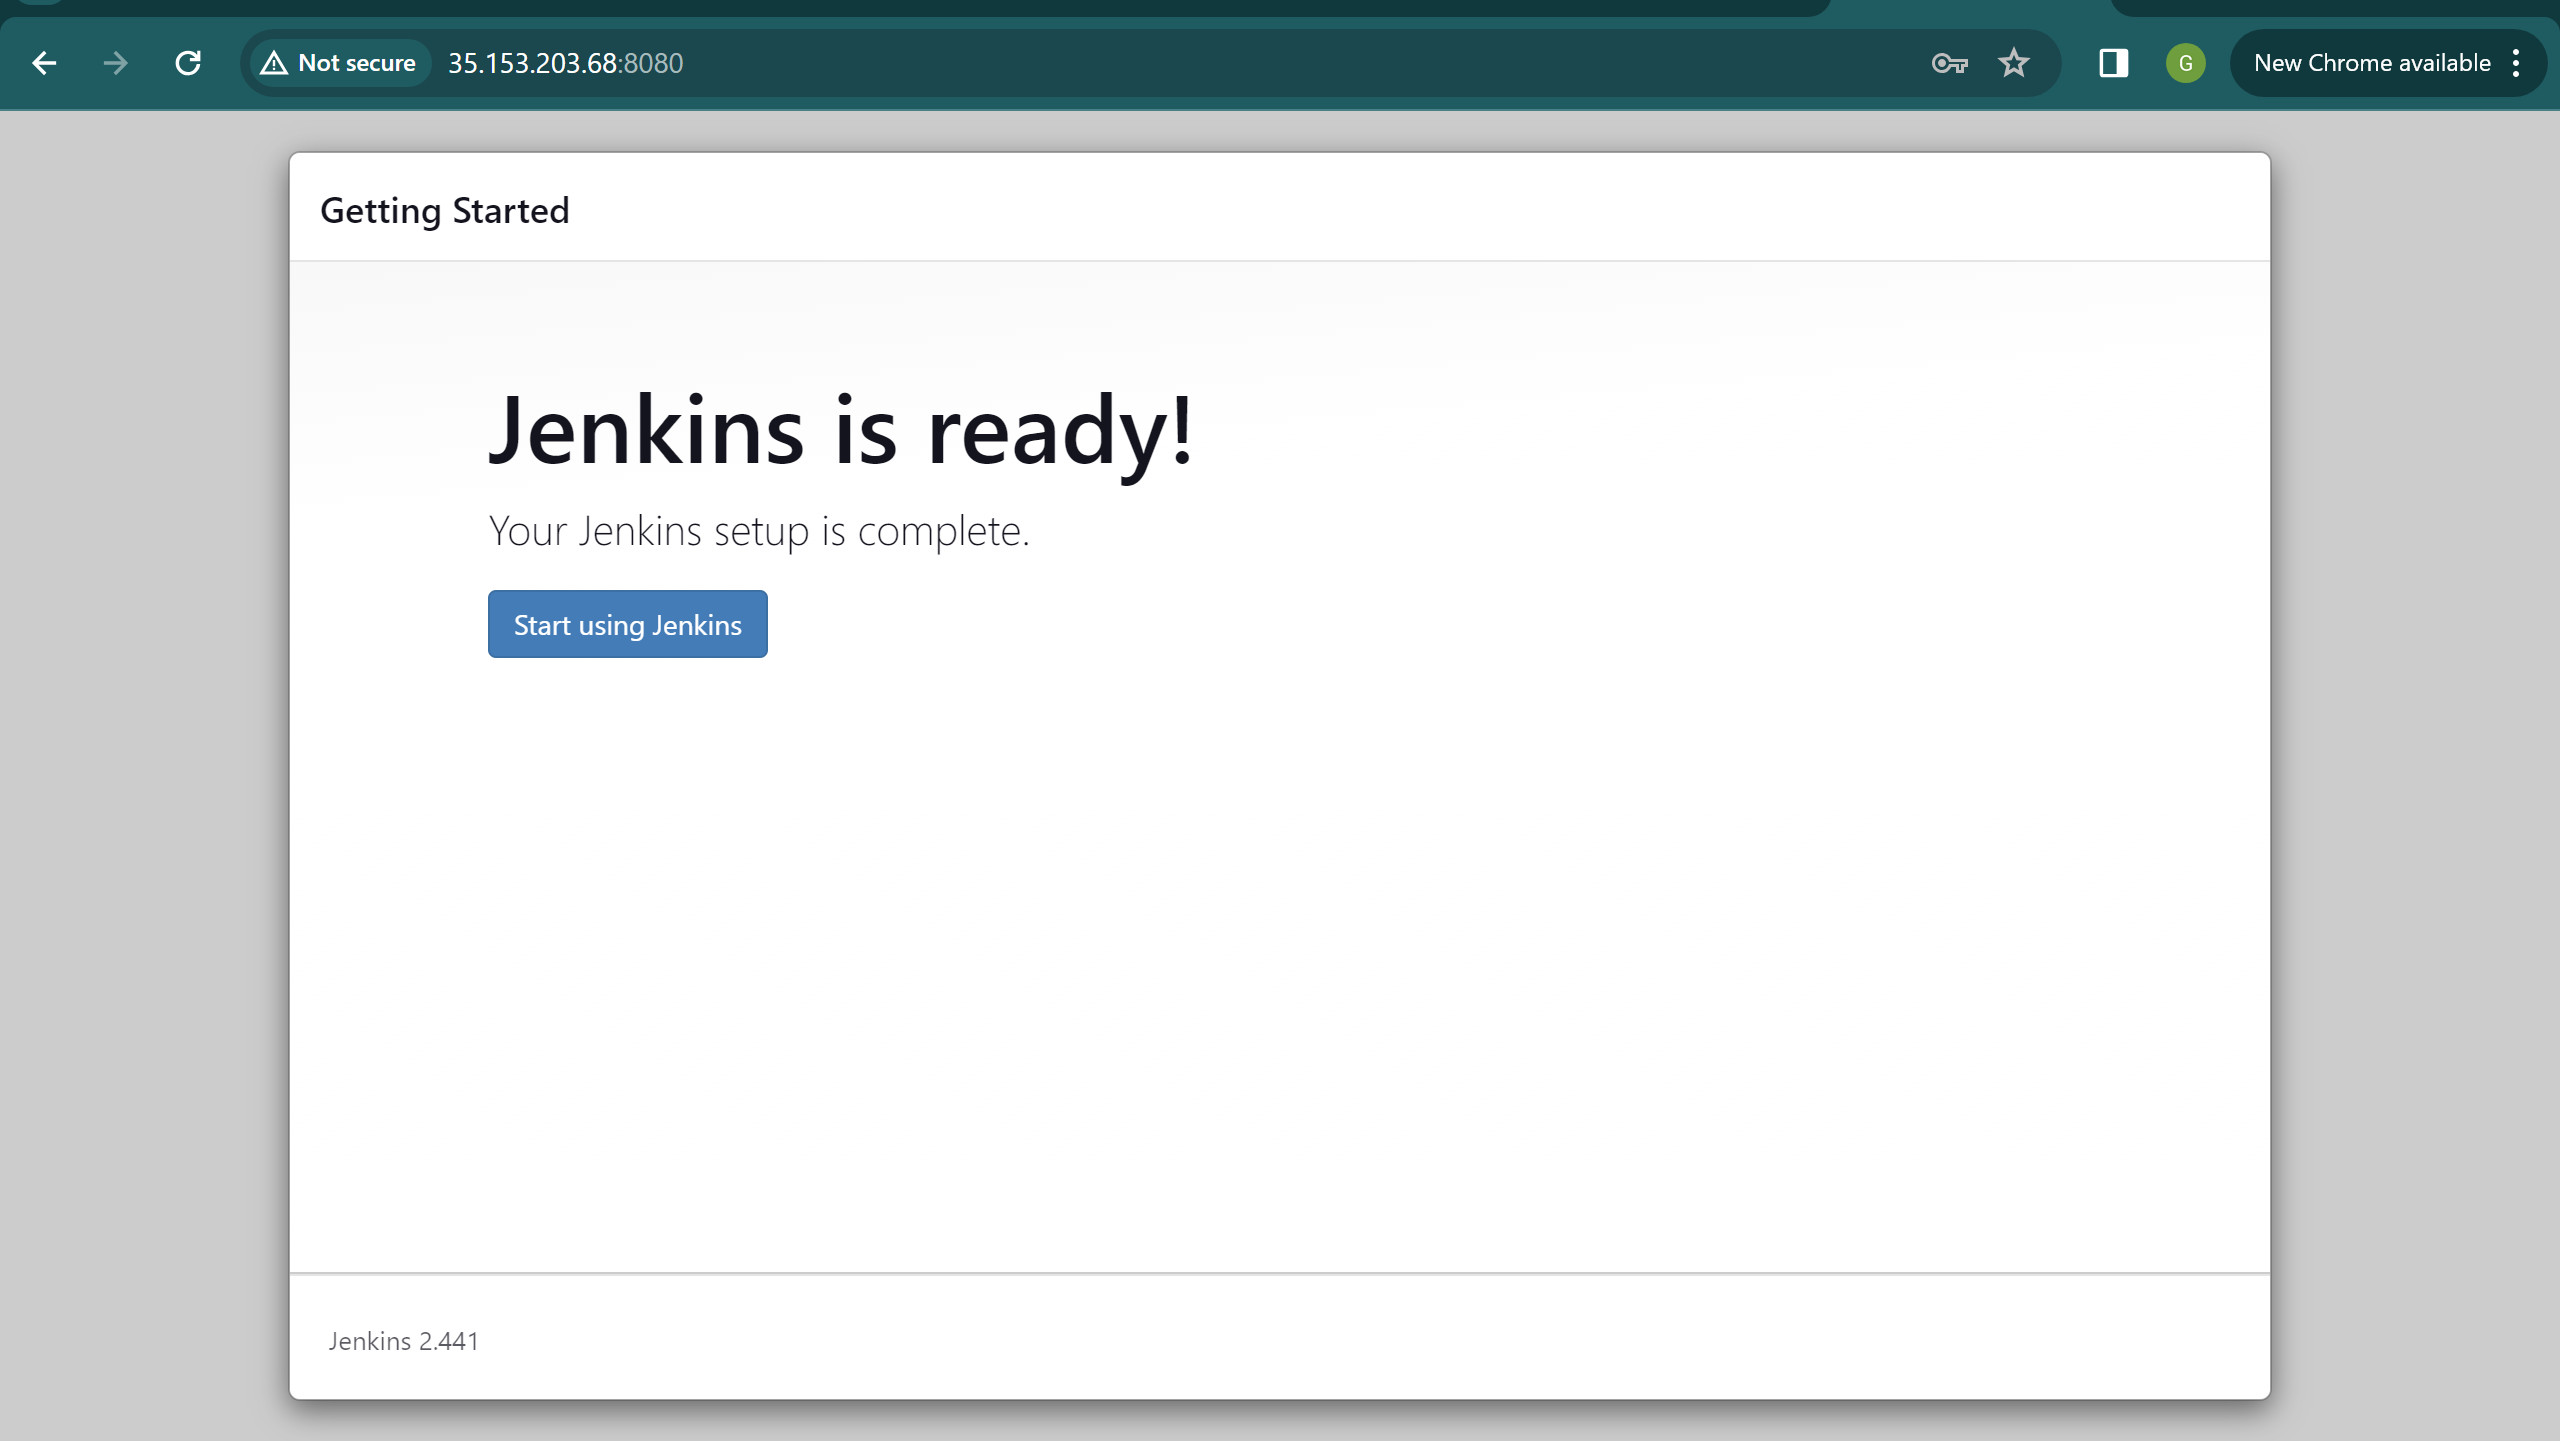
start using jenkins
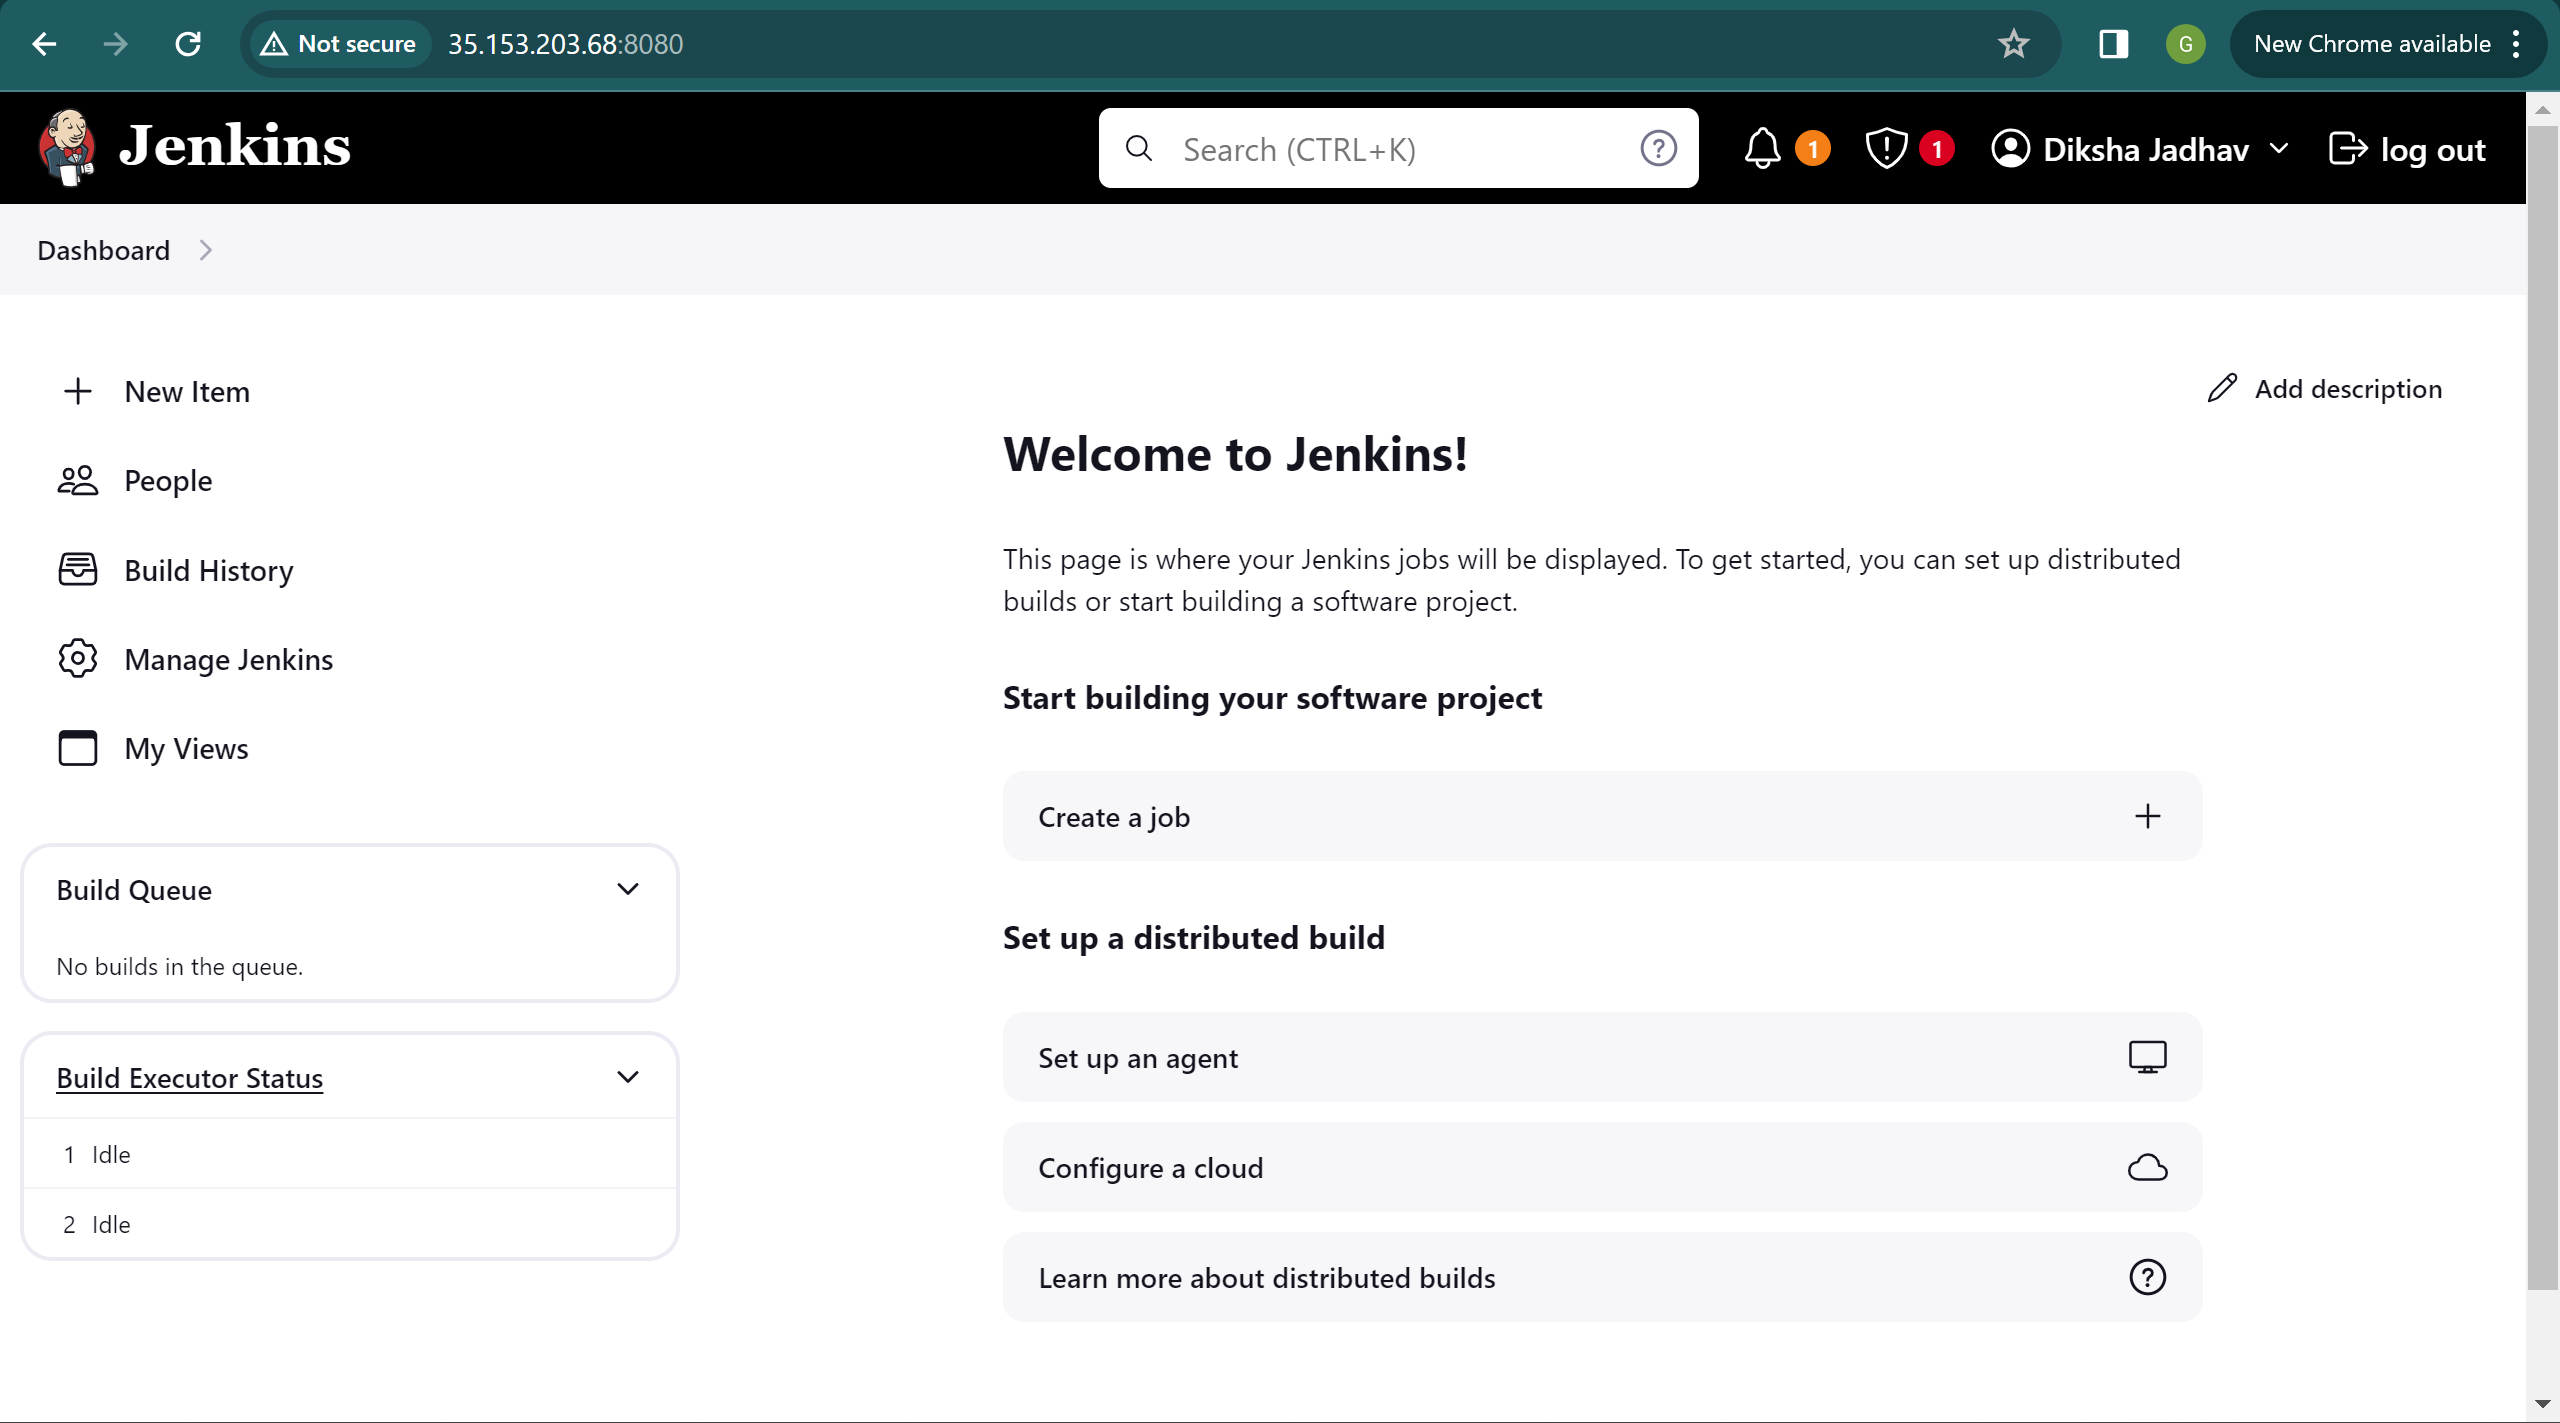
Can You Use GitHub + Jenkins?
You can and should use Jenkins with GitHub to save time and keep your project up-to-date.
One of the basic steps of implementing CI/CD is integrating your SCM (Source Control Management) tool with your CI tool. This saves you time and keeps your project updated all the time. One of the most popular and valuable SCM tools is GitHub.
What is GitHub?
GitHub is a Git-based repository host, commonly used for open-source projects. GitHub enables code collaboration, hosting, and versioning.
What is Jenkins?
Jenkins is an open-source Continuous Integration and Continuous Deployment (CI/CD) tool for automating the software development life cycle (SDLC). With Jenkins testing, teams can automate the building, testing, and deploying of code.
Why Integrate GitHub + Jenkins?
A Jenkings integration with GitHub will improve the efficiency of building, testing, and deploying your code.
The integration presented in this blog post will teach you how to schedule your build, pull your code and data files from your GitHub repository to your Jenkins machine, and automatically trigger each build on the Jenkins server after each Commit on your Git repository.
But first, let’s configure the Jenkins and GitHub integration.
How to Set Up the Jenkins + GitHub Integration
Configuring GitHub
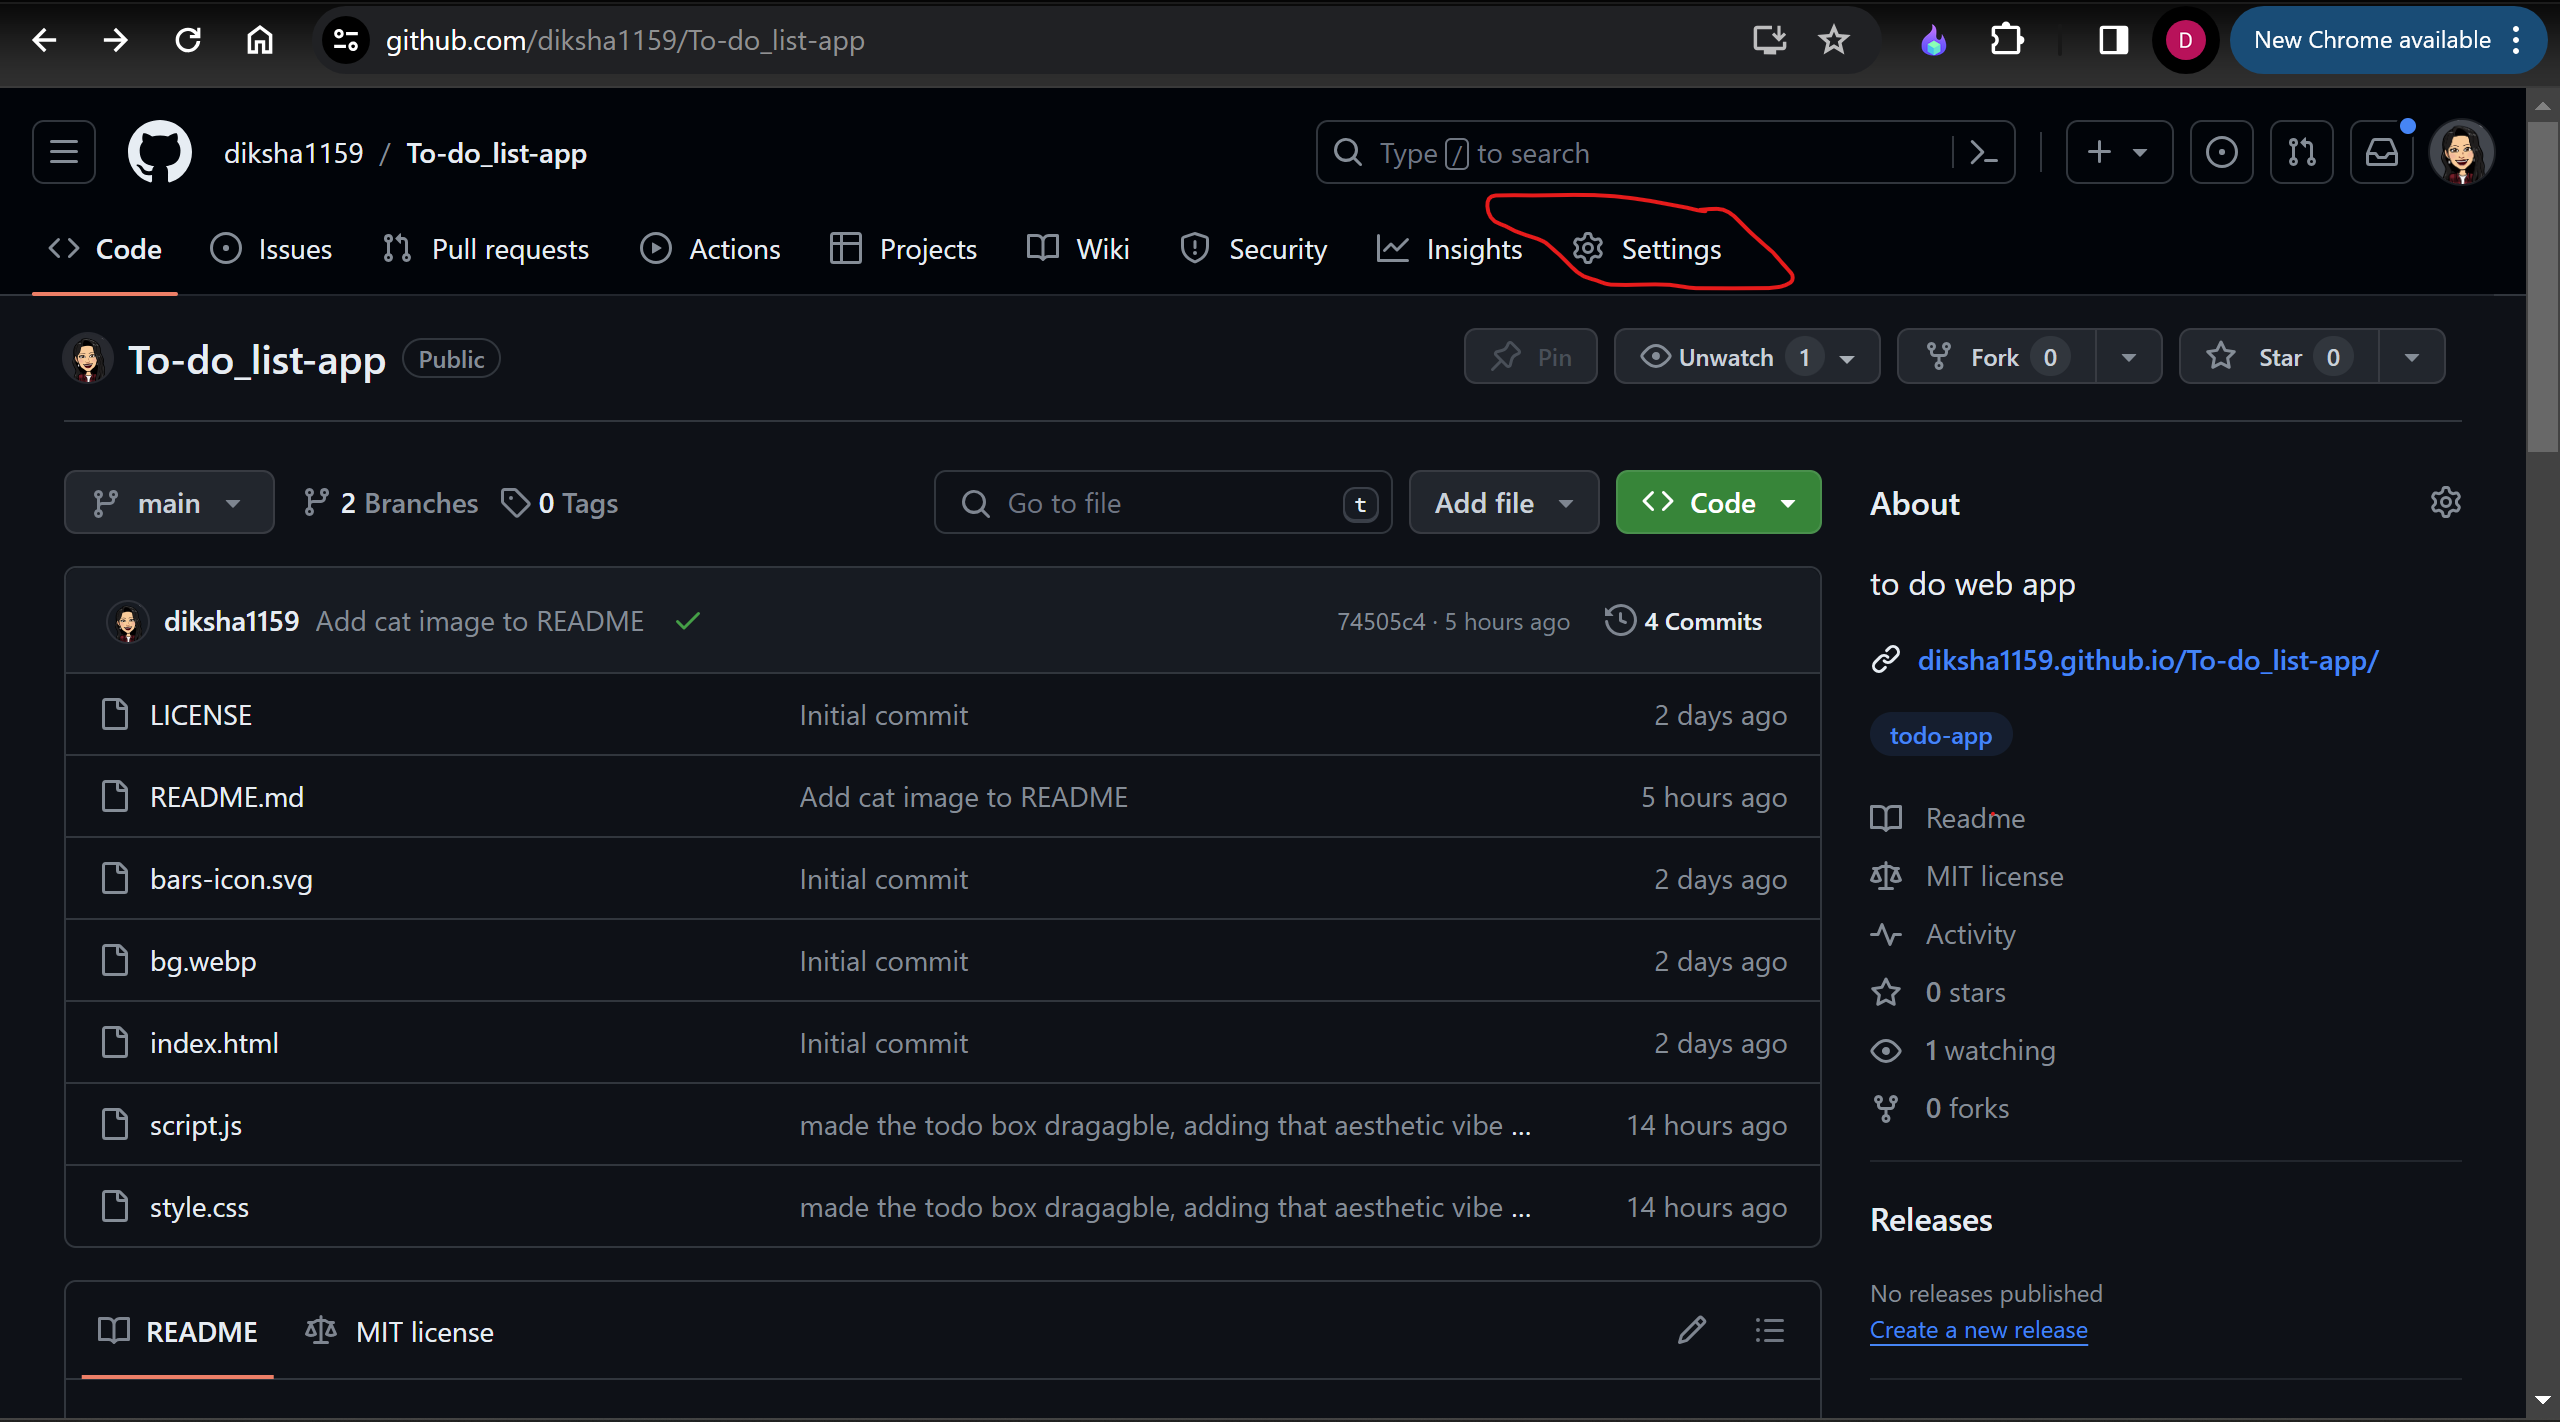
Step 1: go to your GitHub repository and click on ‘Settings’.
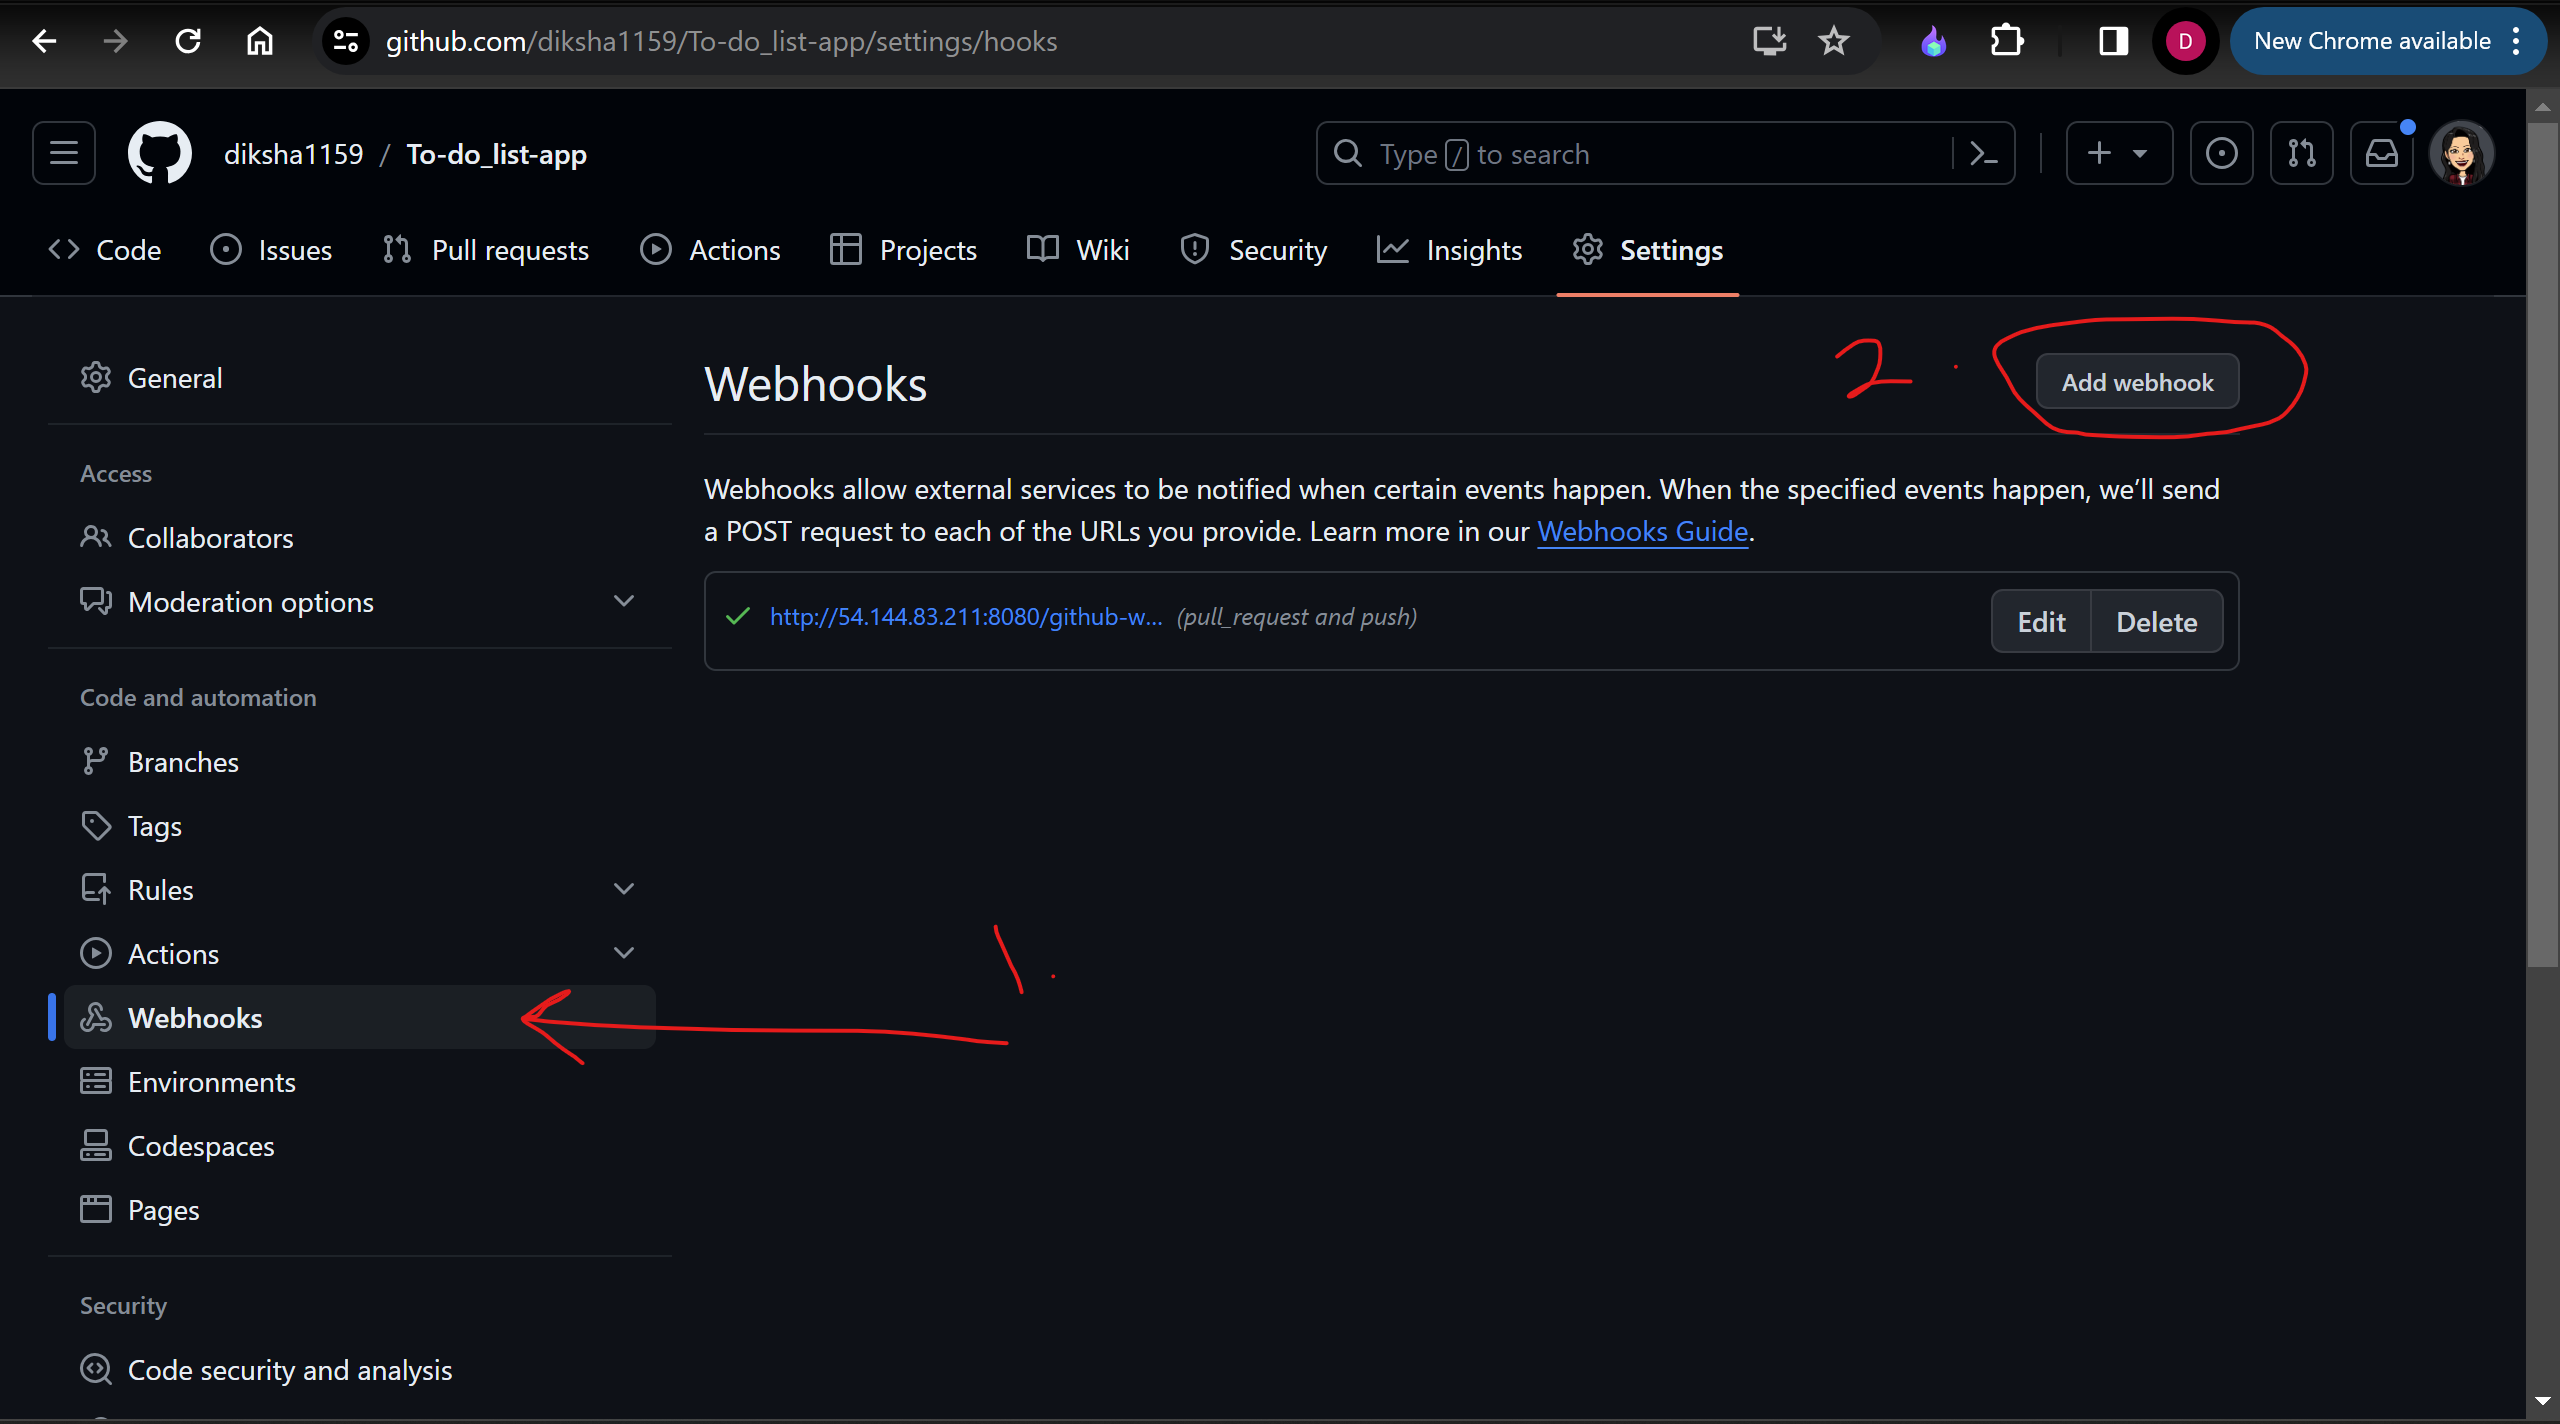
Step 2: Click on Webhooks and then click on ‘Add webhook’.
Step 3: In the ‘Payload URL’ field, paste your Jenkins environment URL. At the end of this URL add /github-webhook/. In the ‘Content type’ select: ‘application/json’ and leave the ‘Secret’ field empty.

Step 4: scroll down on the page ‘Which events would you like to trigger this webhook?’ choose ‘Let me select individual events.’ Then, check ‘Pull Requests’ and ‘Pushes’. At the end of this option, make sure that the ‘Active’ option is checked and click on ‘Add webhook’.


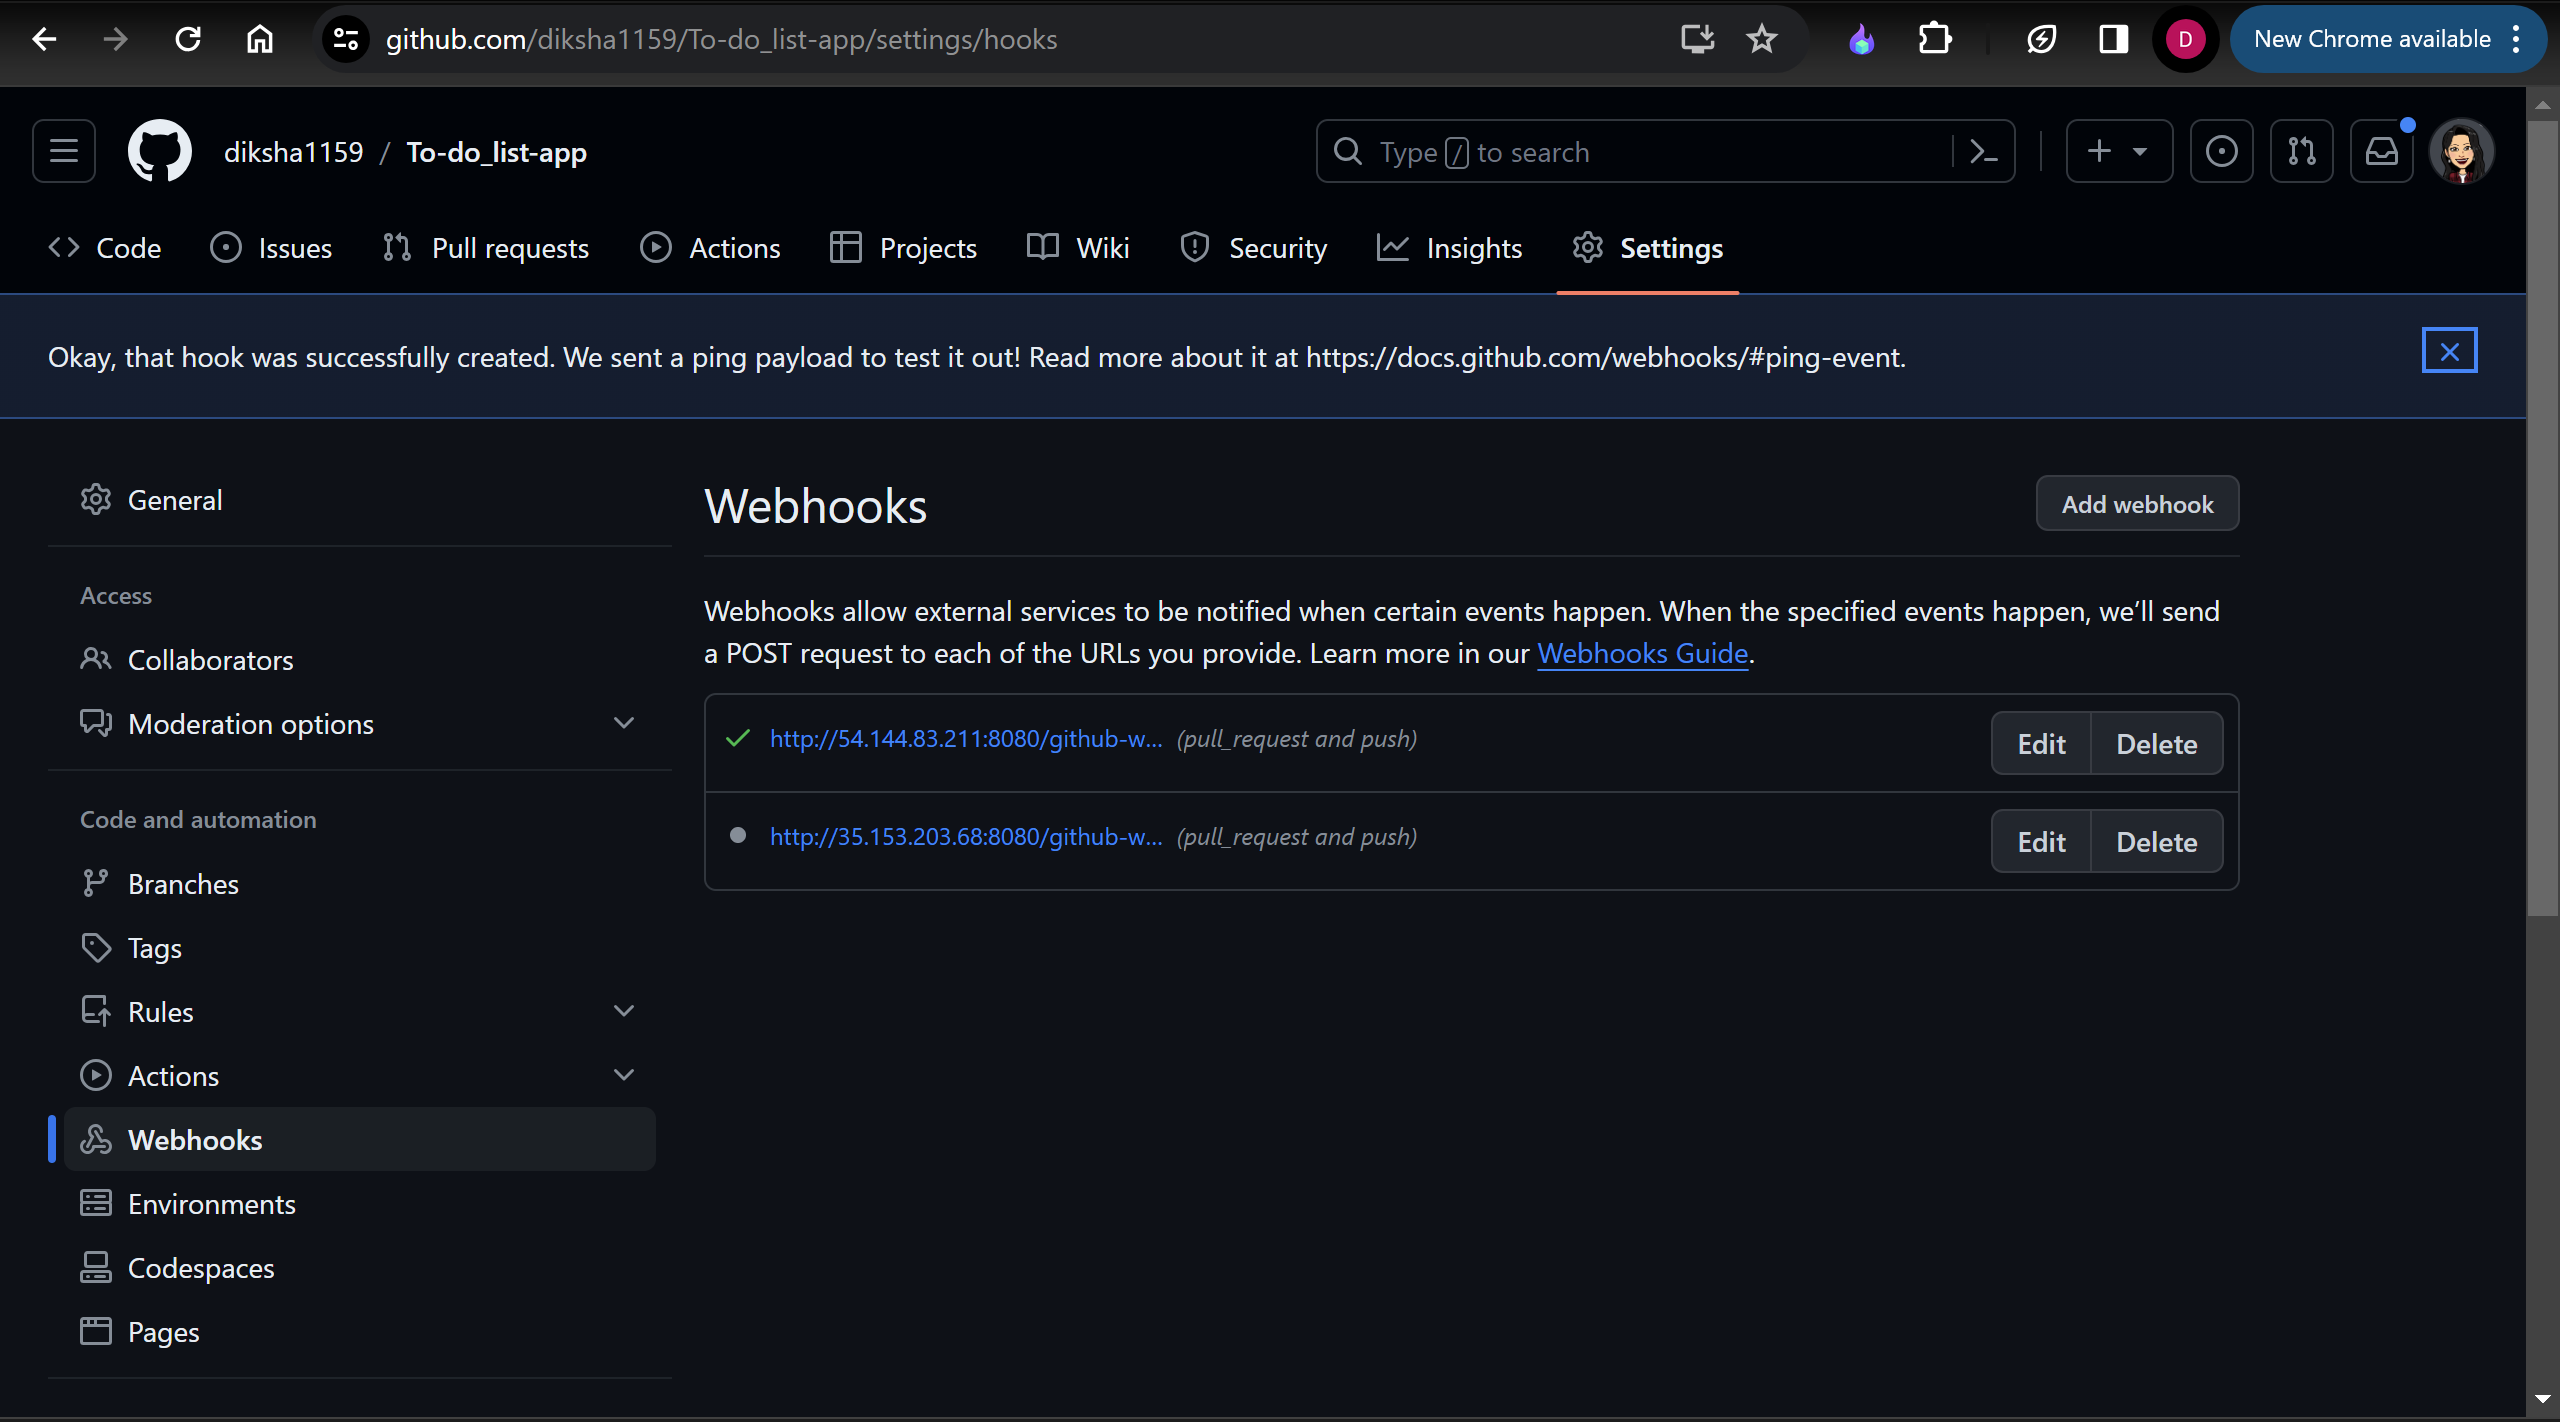
We're done with the configuration on GitHub’s side! Now let's move on to Jenkins.
oh but before that,
To connect your Jenkins job with a GitHub repository, follow these steps:
Before configuring Jenkins, you must add the public key to facilitate communication between Jenkins and GitHub. This allows Jenkins to access the source code from the GitHub repository.
Generate an SSH key pair
ssh-keygen
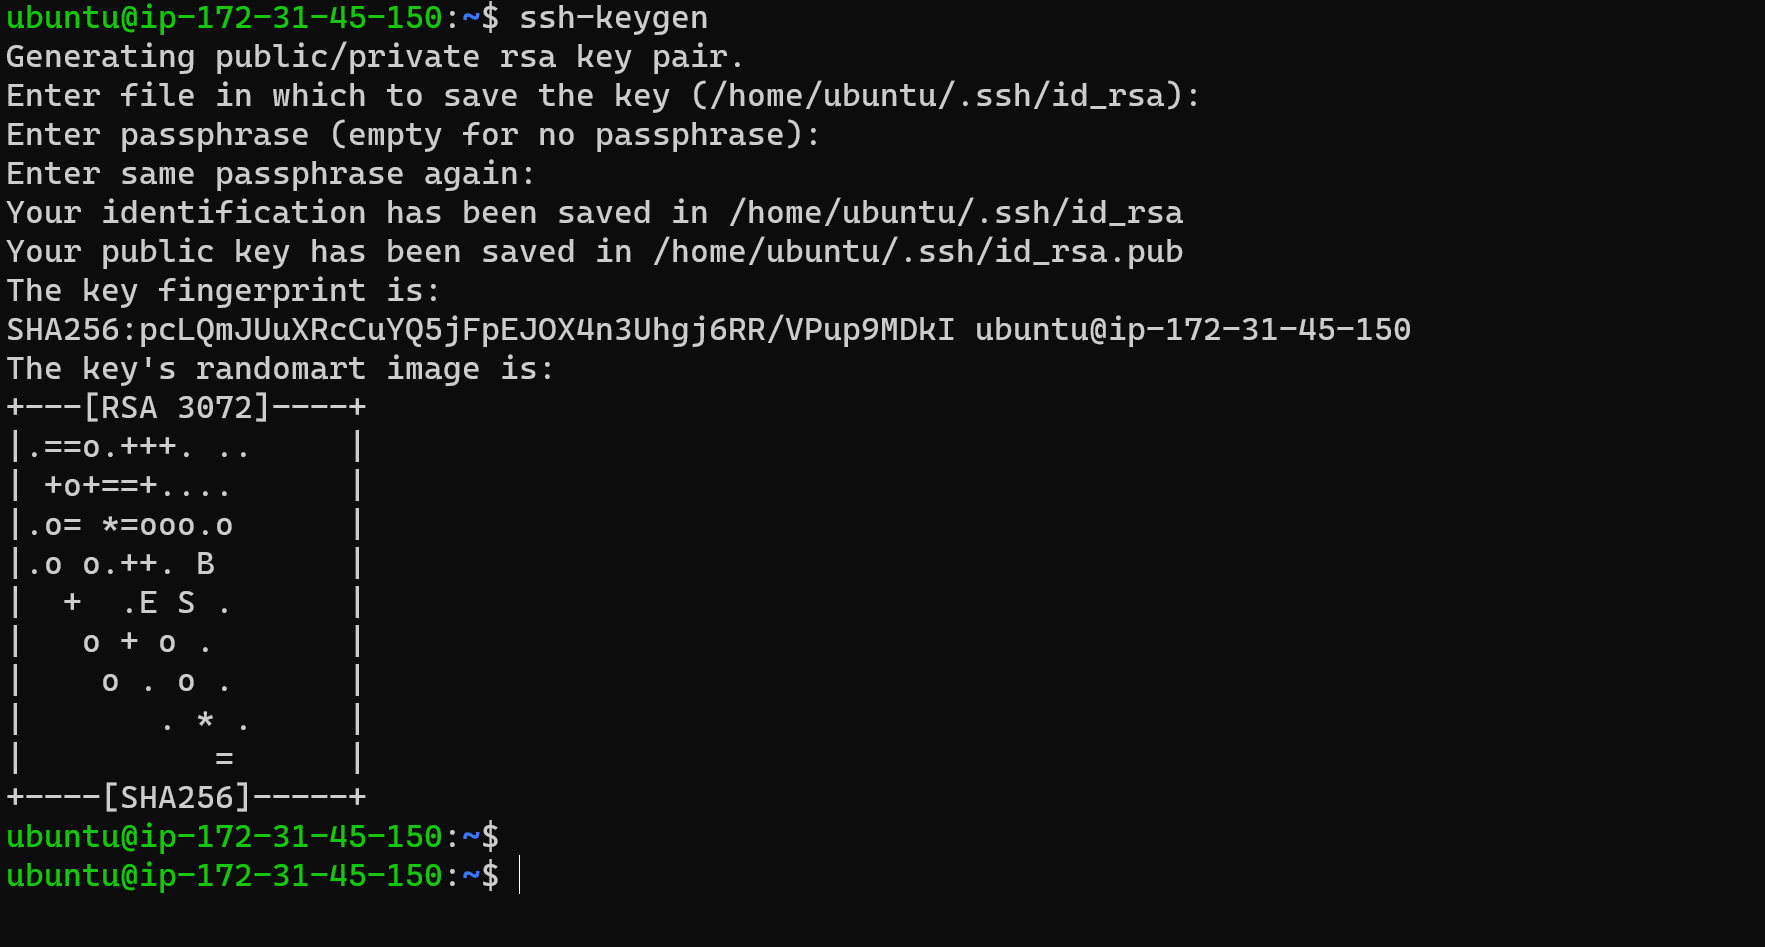
The “ssh-keygen” command will generate both a public key and a private key.

To enable Jenkins integration with GitHub, follow these guidelines:
Open your GitHub account settings.
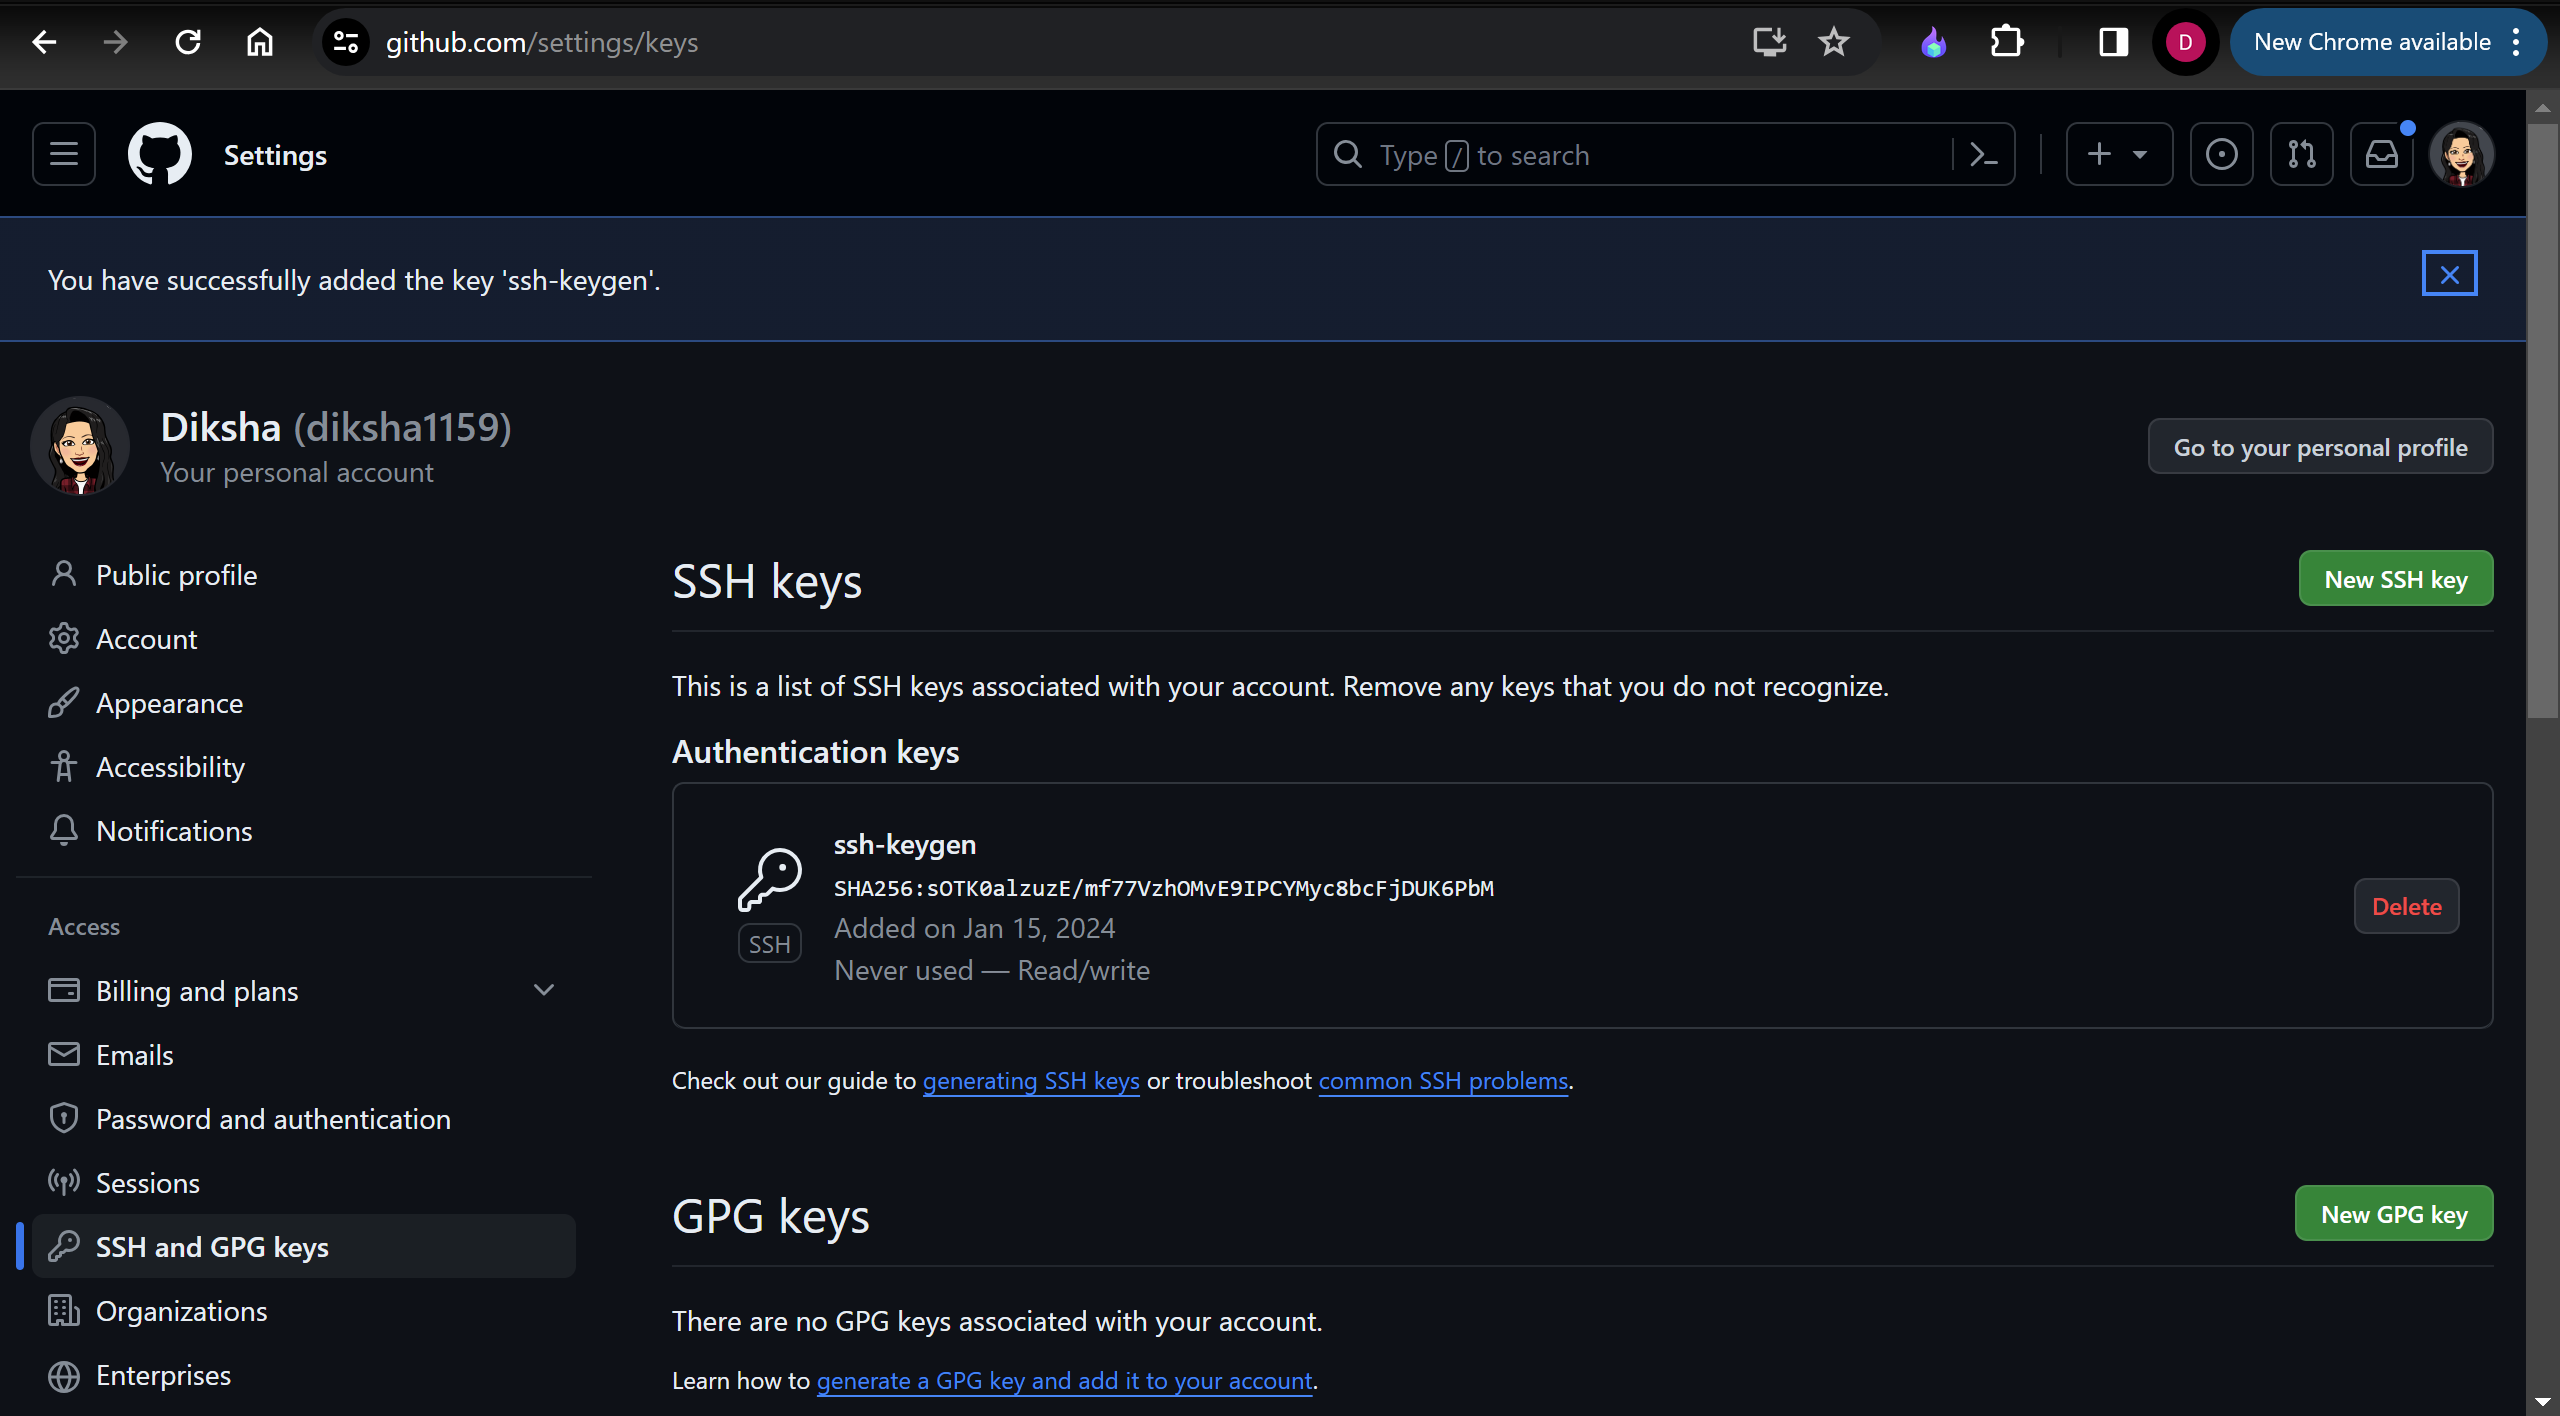
Find and access the “SSH and GPG keys” section.
Insert the public key generated using the “ssh-keygen” command. Be sure to choose the correct key-type, like “Authentication key.”

Now let's Configuring Jenkins
Step 5: In Jenkins, click on ‘New Item’ to create a new project.
Step 6: Give your project a name, then choose ‘Freestyle project’ and finally, click on ‘OK’.
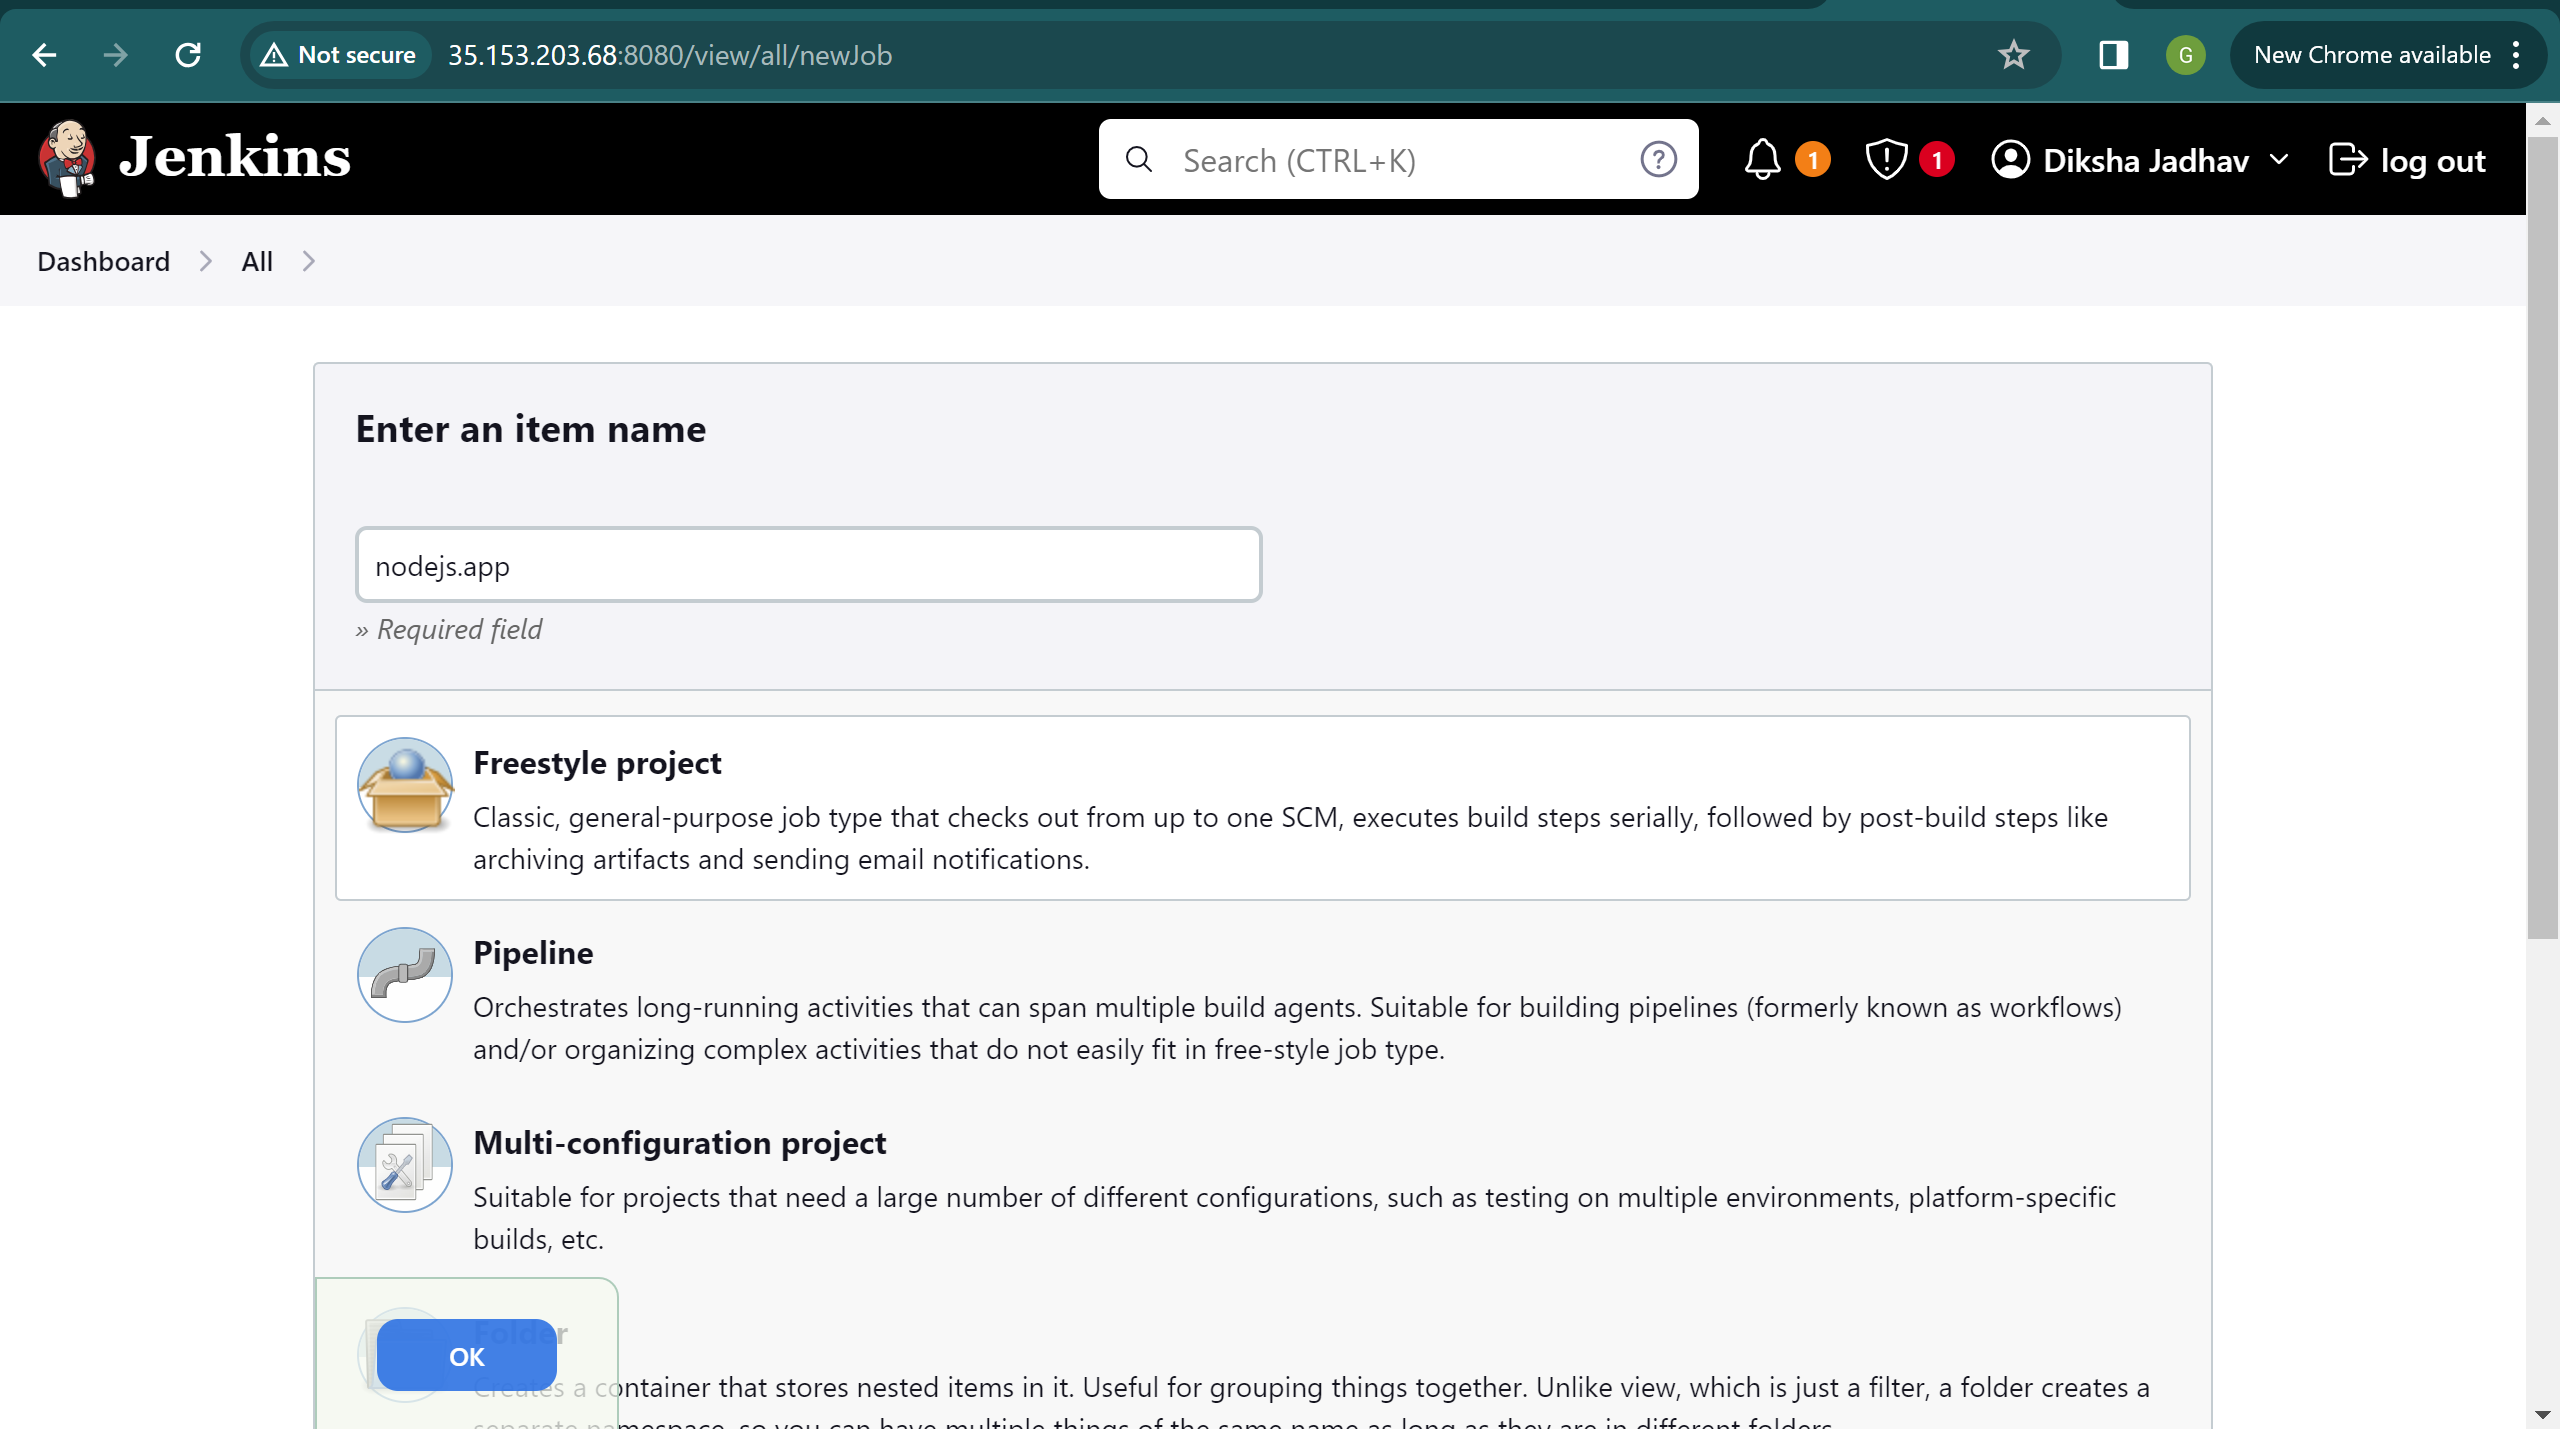
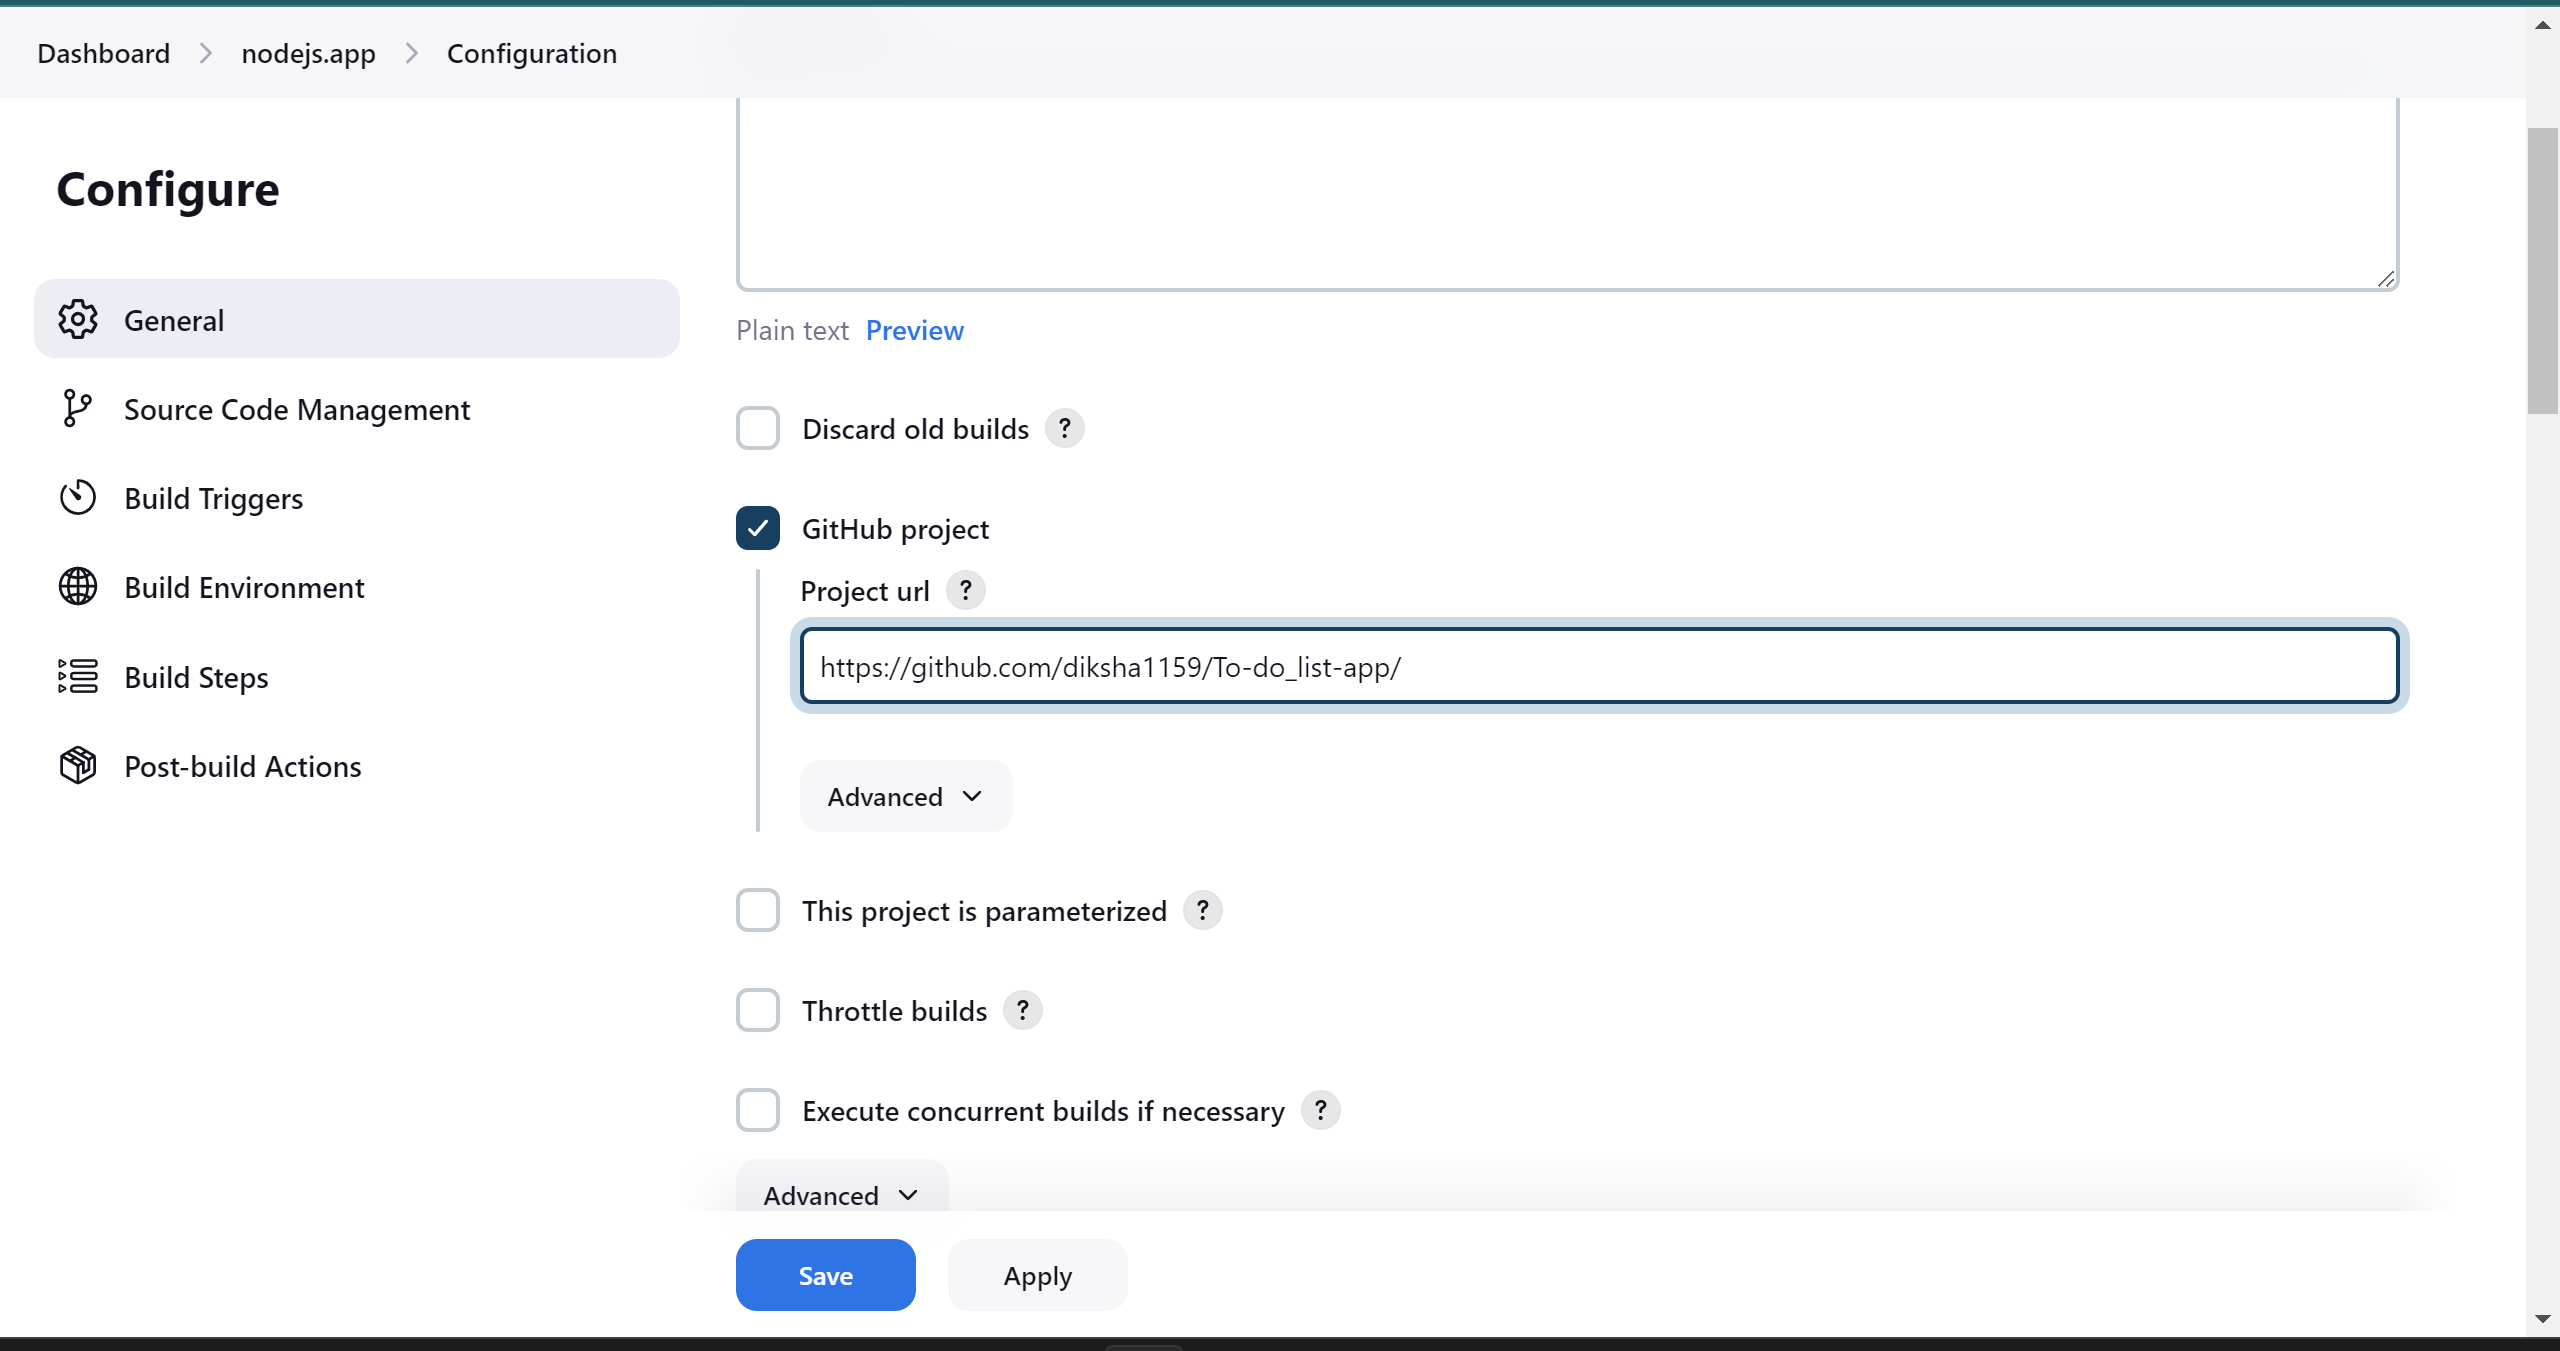
Step 7: Click on the ‘Source Code Management’ tab.
Step 8: Click on Git and paste your GitHub repository URL in the ‘Repository URL’ field.
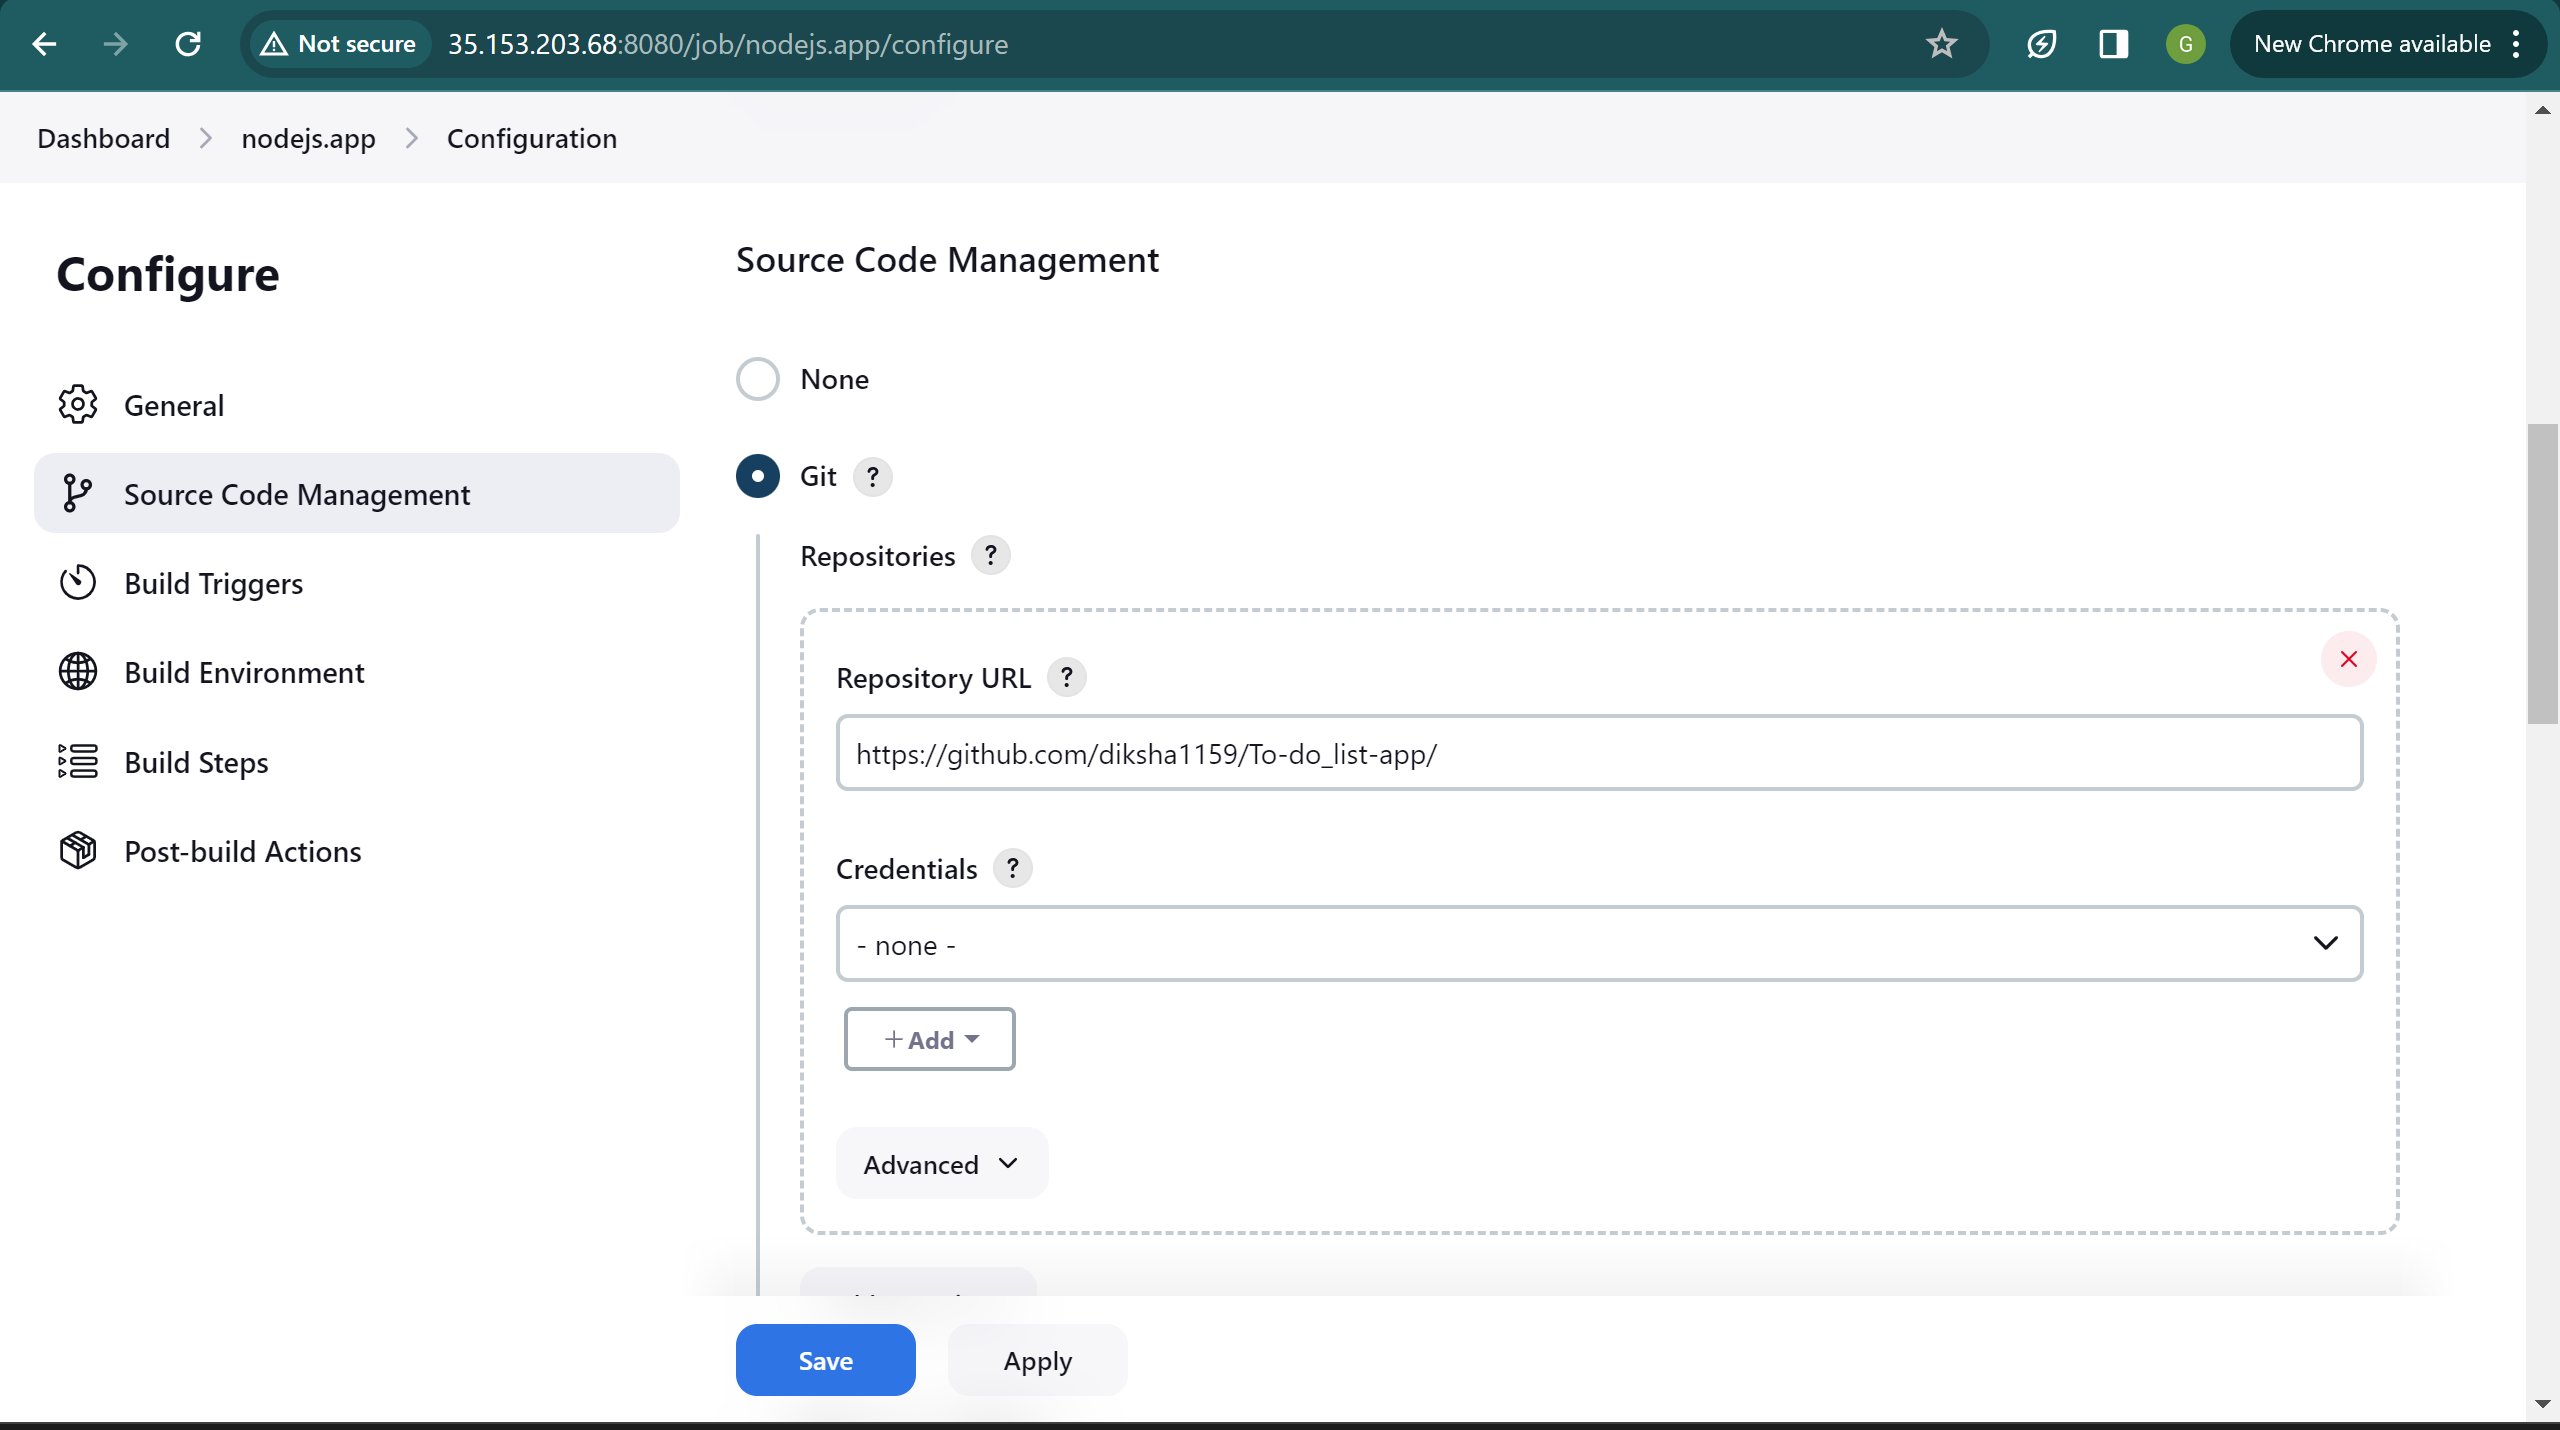
now here add credentials,


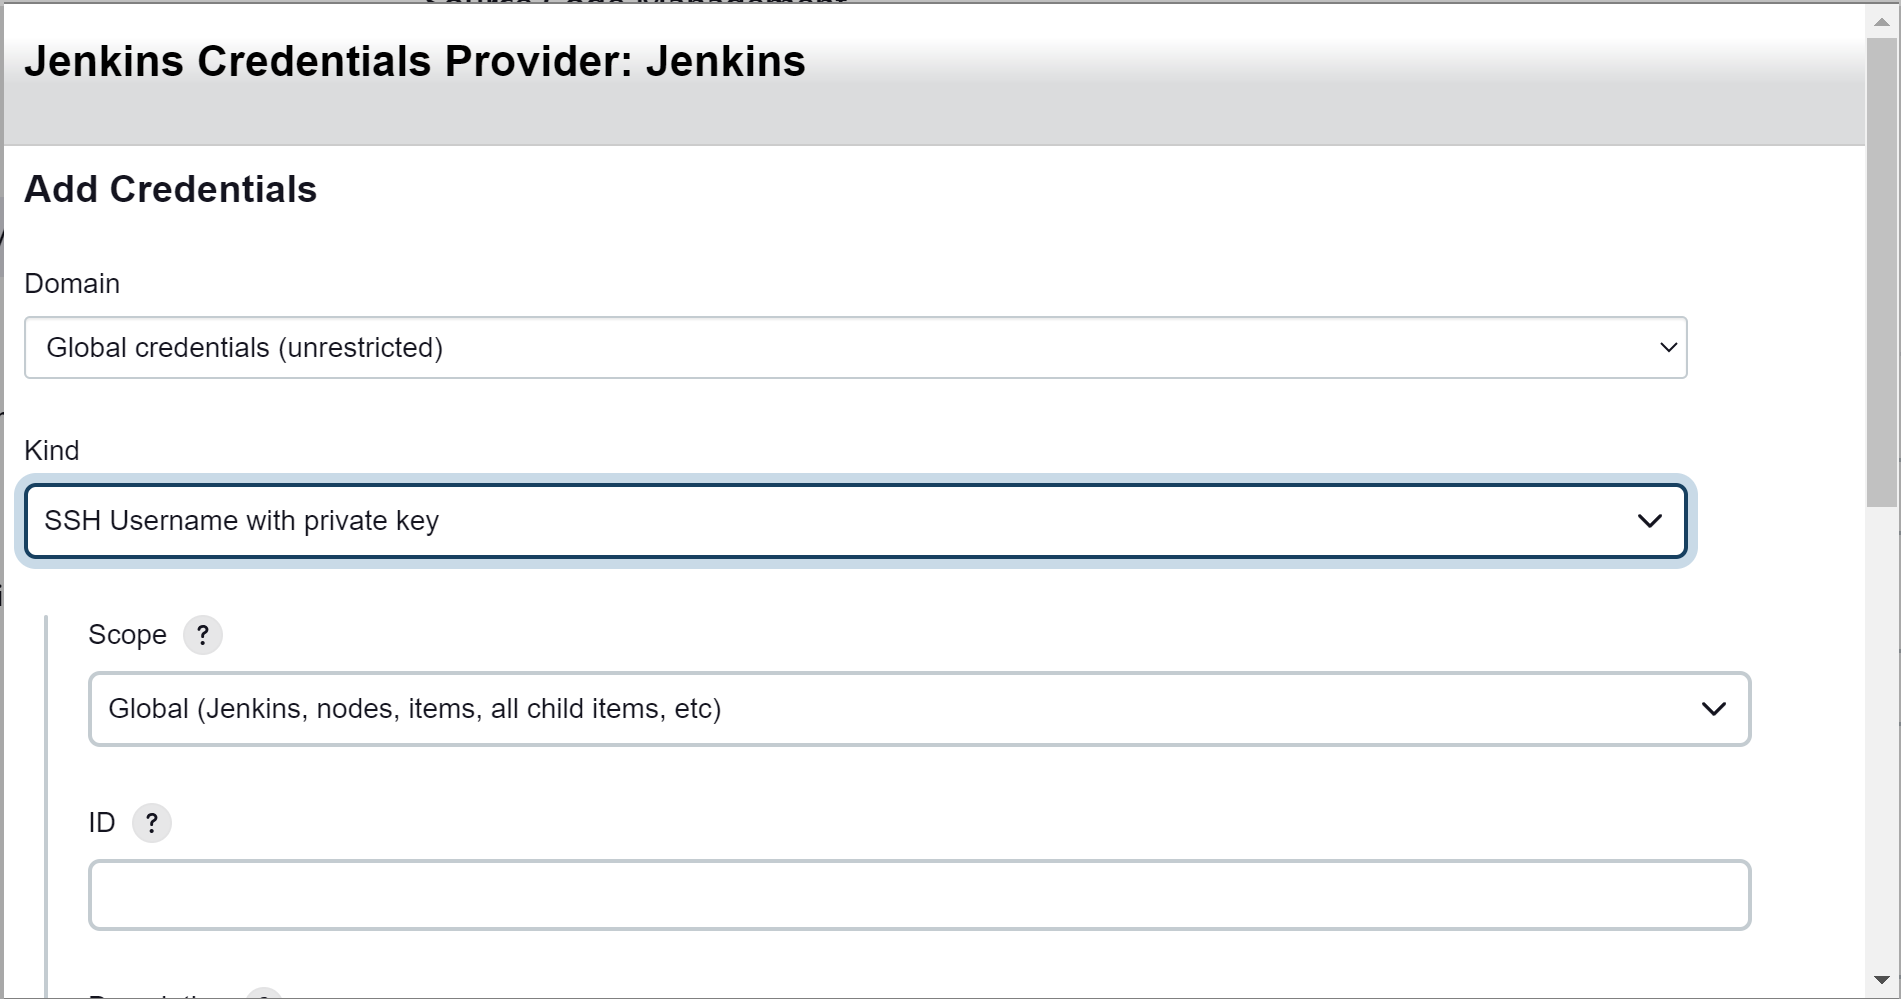
Click “Add” and input the private key generated with “ssh-keygen” as the authentication method.
Provide a unique ID and description for the credentials. Paste the private key in the “Private Key” field and add the passphrase if applicable. Click “Add” to save the credentials.
Save the project configuration.
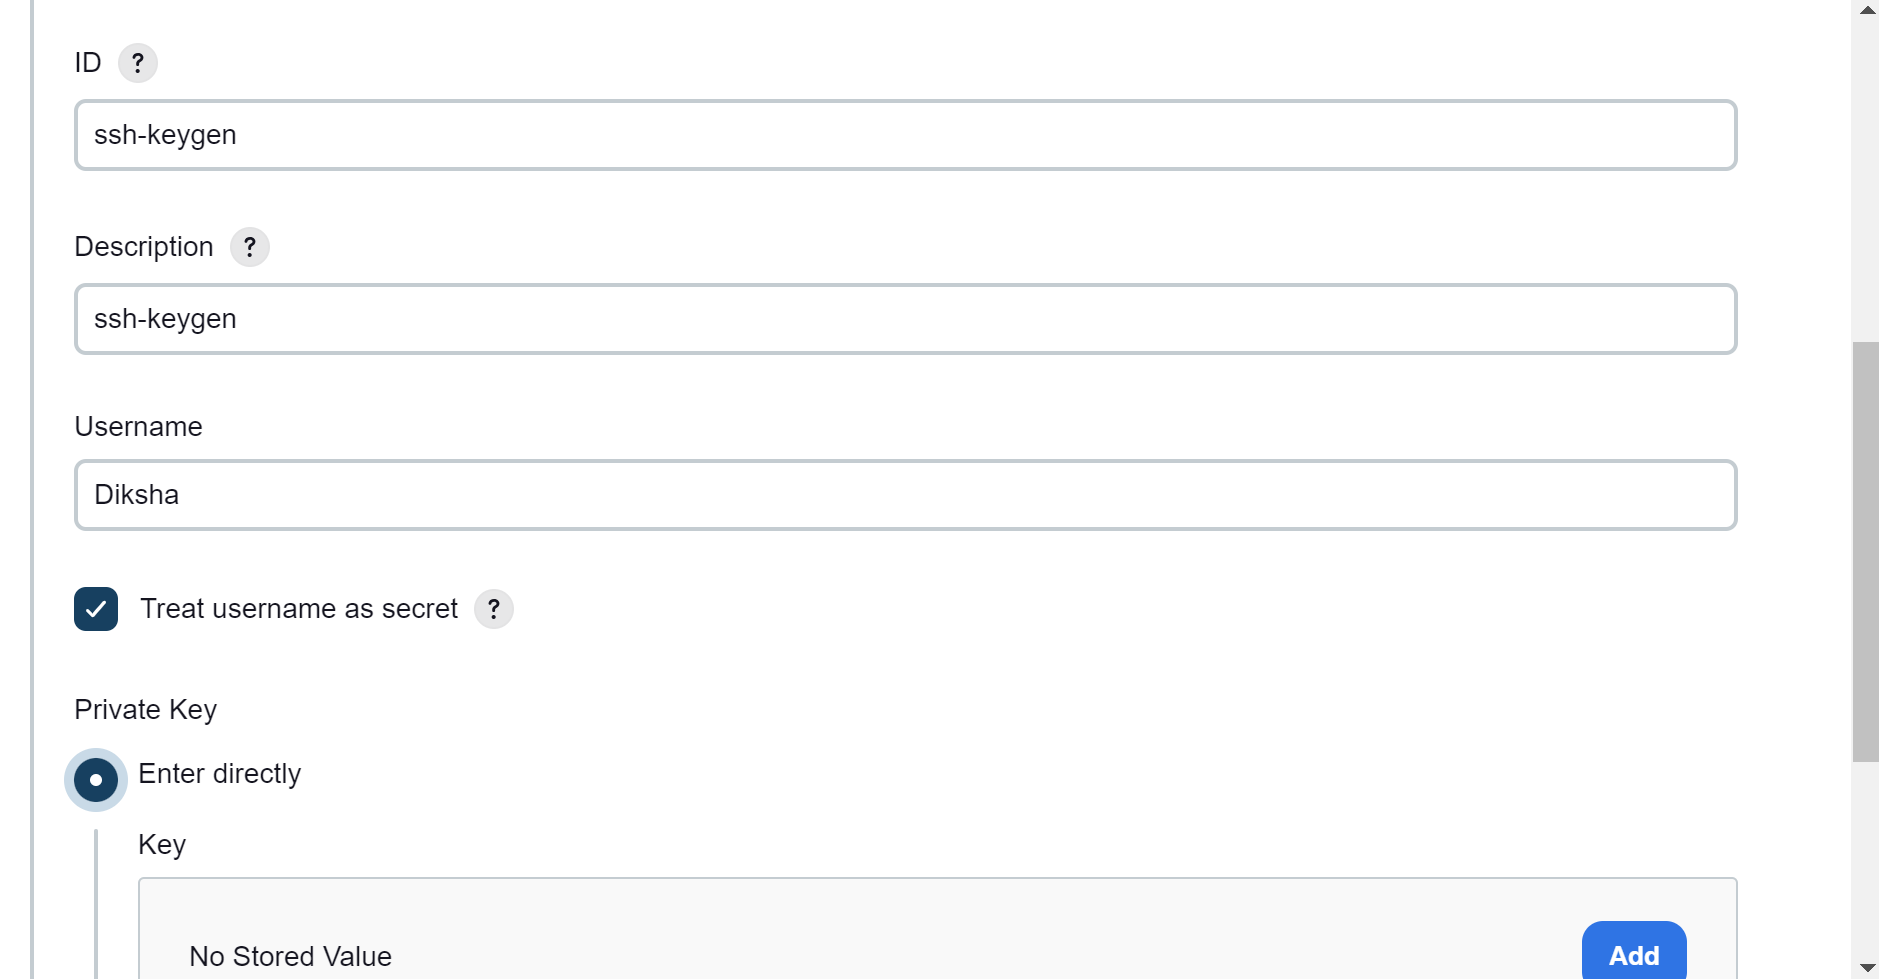
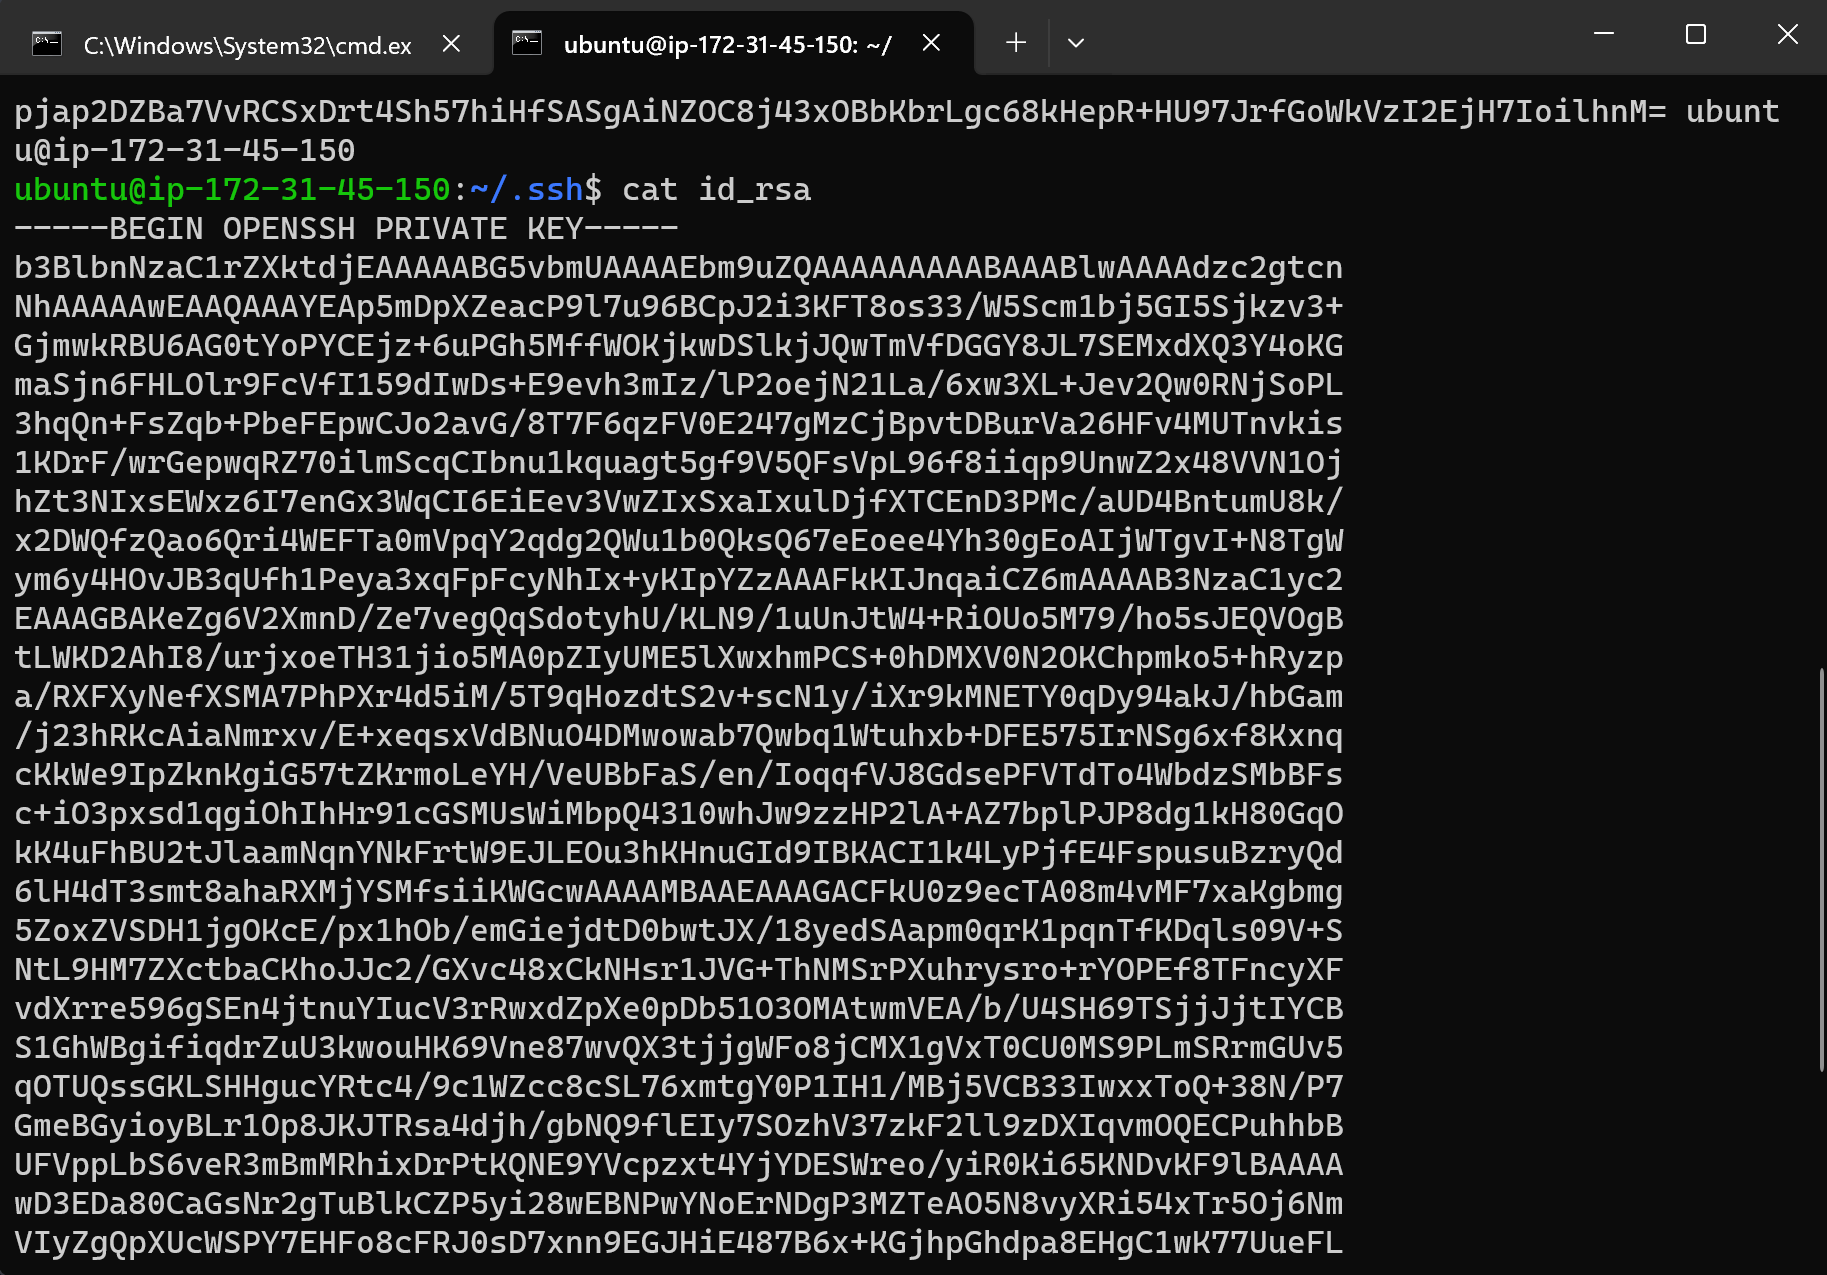
remember the ssh key we created copy the private key and paste it here
leave the passphrase empty if you did that while creating the key like we did above
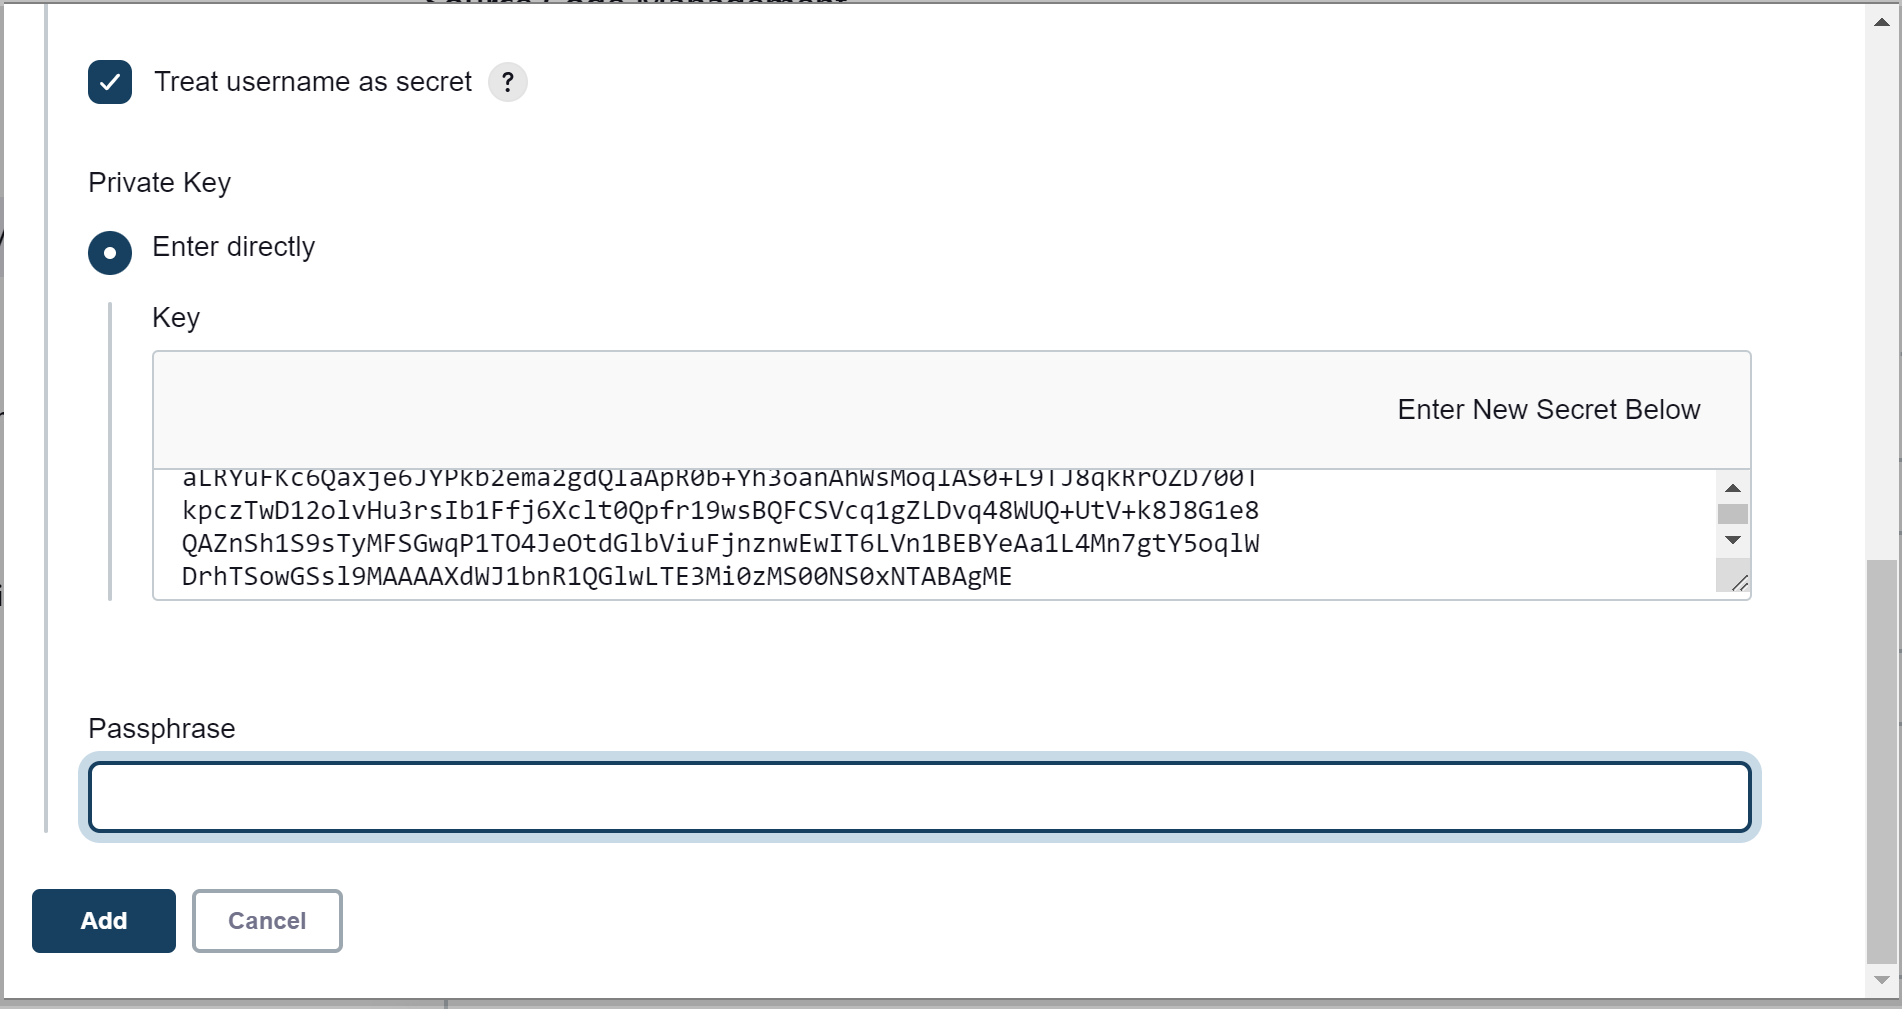
do add
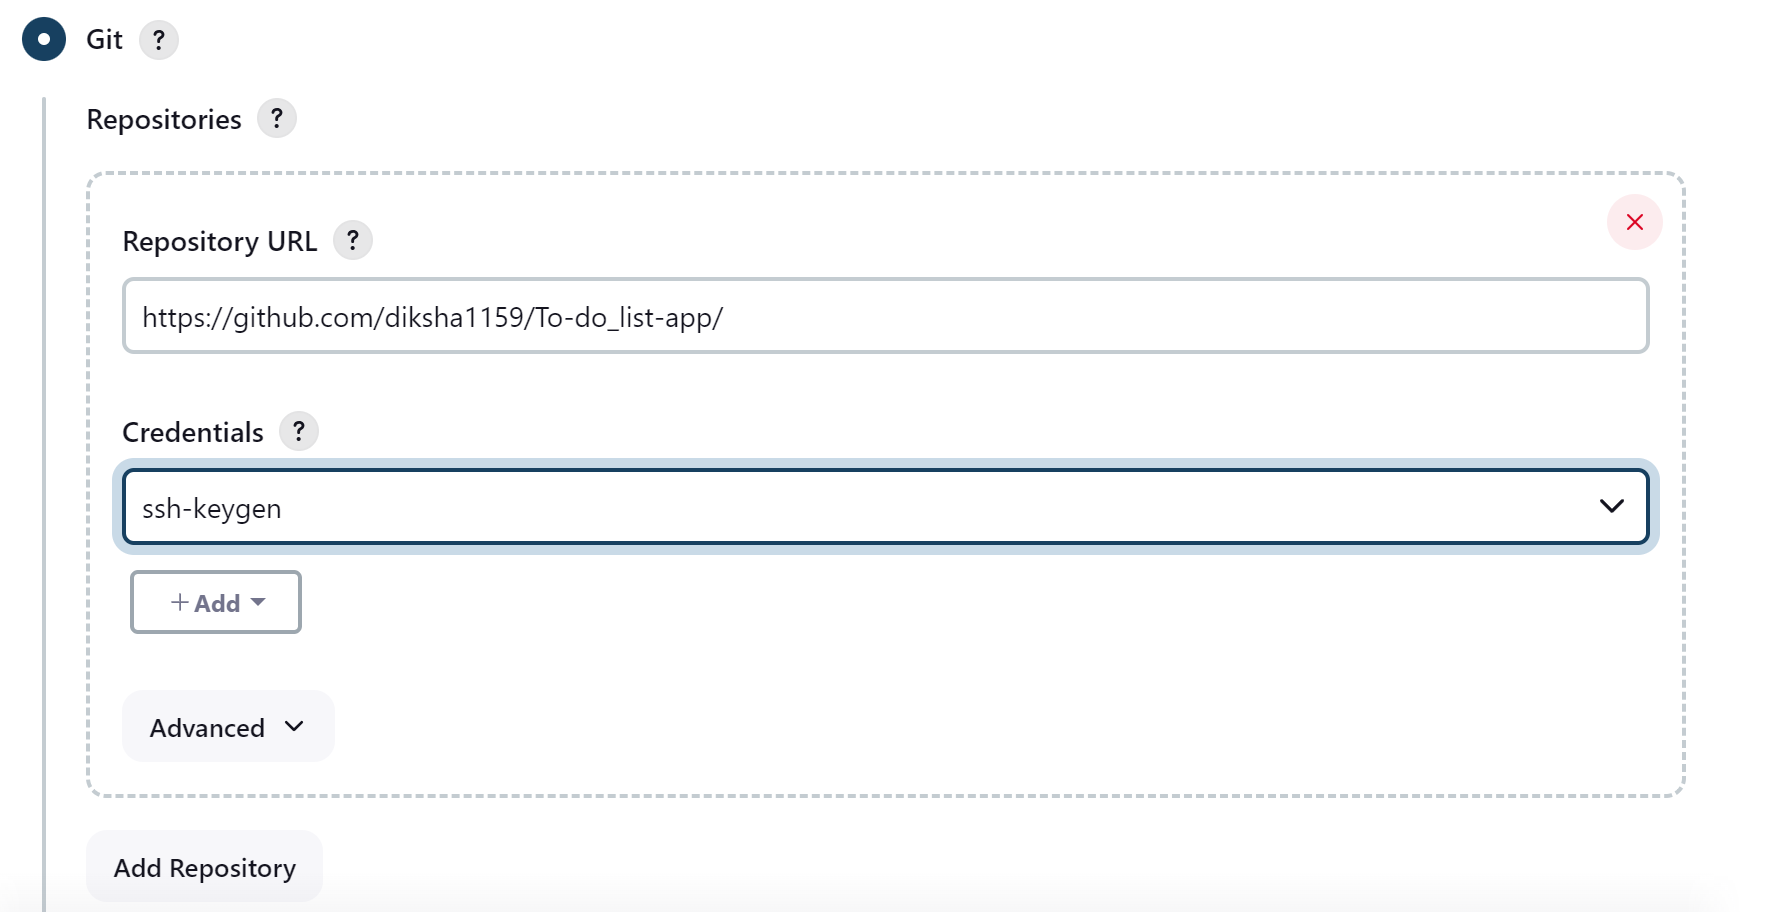
It should look something like this
Step 9: Click on the ‘Build Triggers’ tab and then on the ‘GitHub hook trigger for GITScm polling’. Or, choose the trigger of your choice.
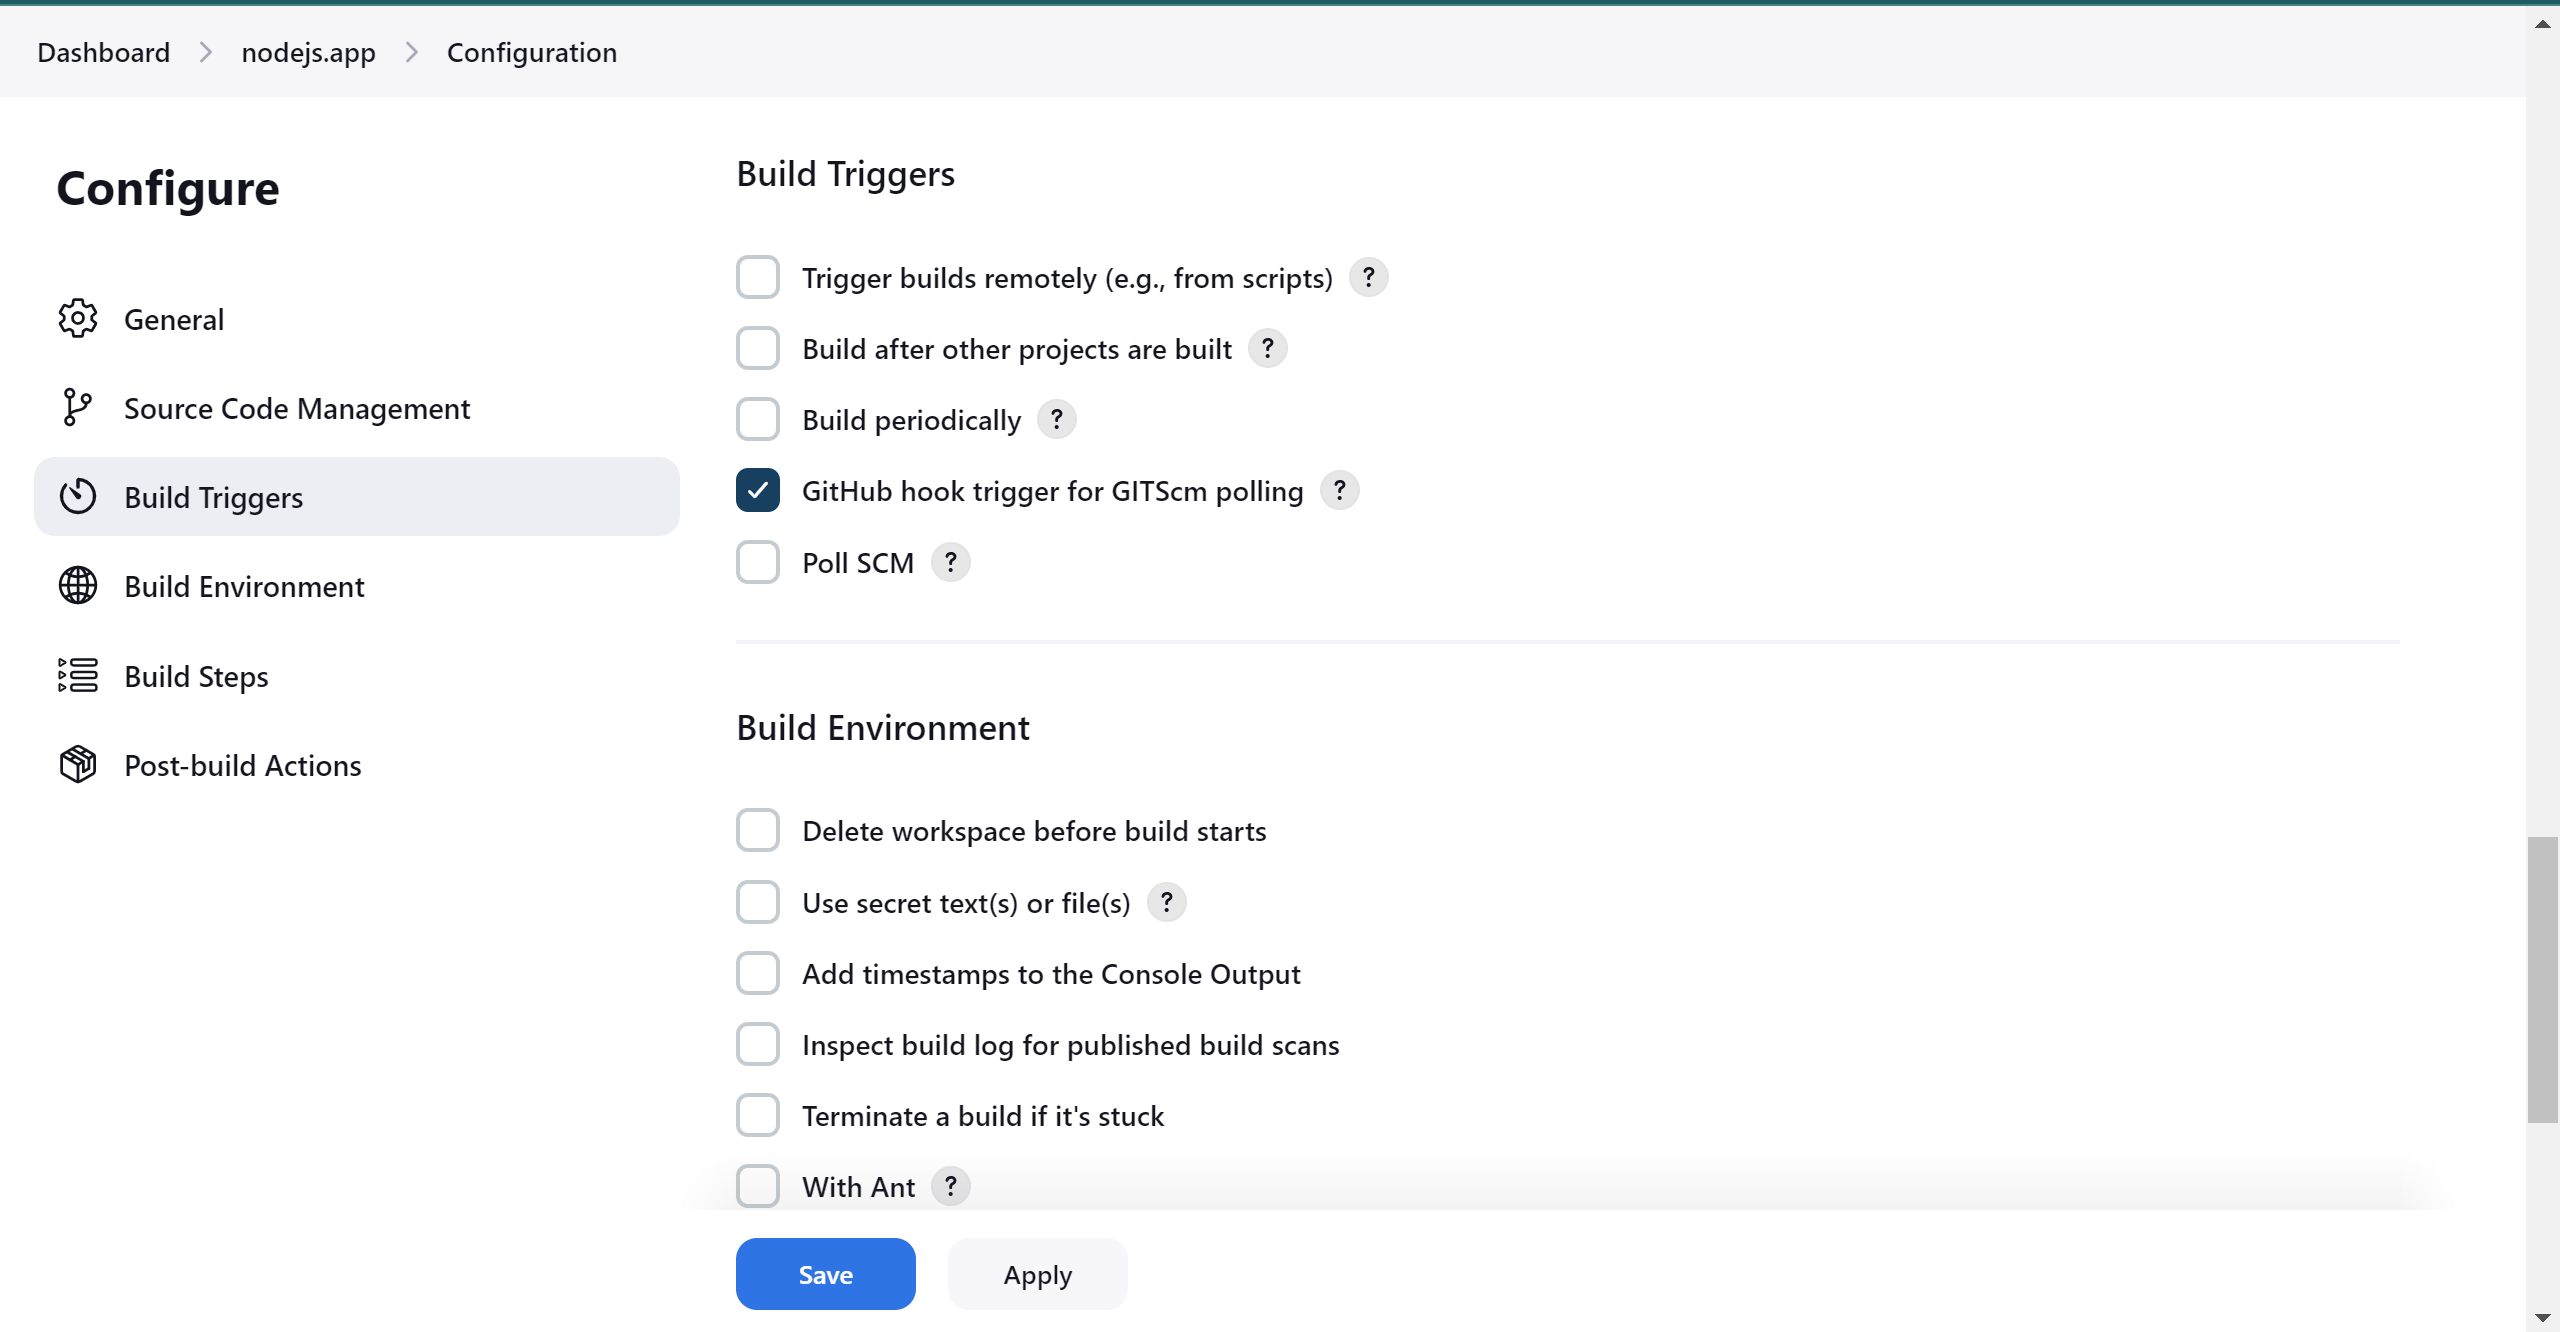
That's it! Your GitHub repository is integrated with your Jenkins project. With this Jenkins GitHub integration, you can now use any file found in the GitHub repository and trigger the Jenkins job to run with every code commit.
now just do save and apply
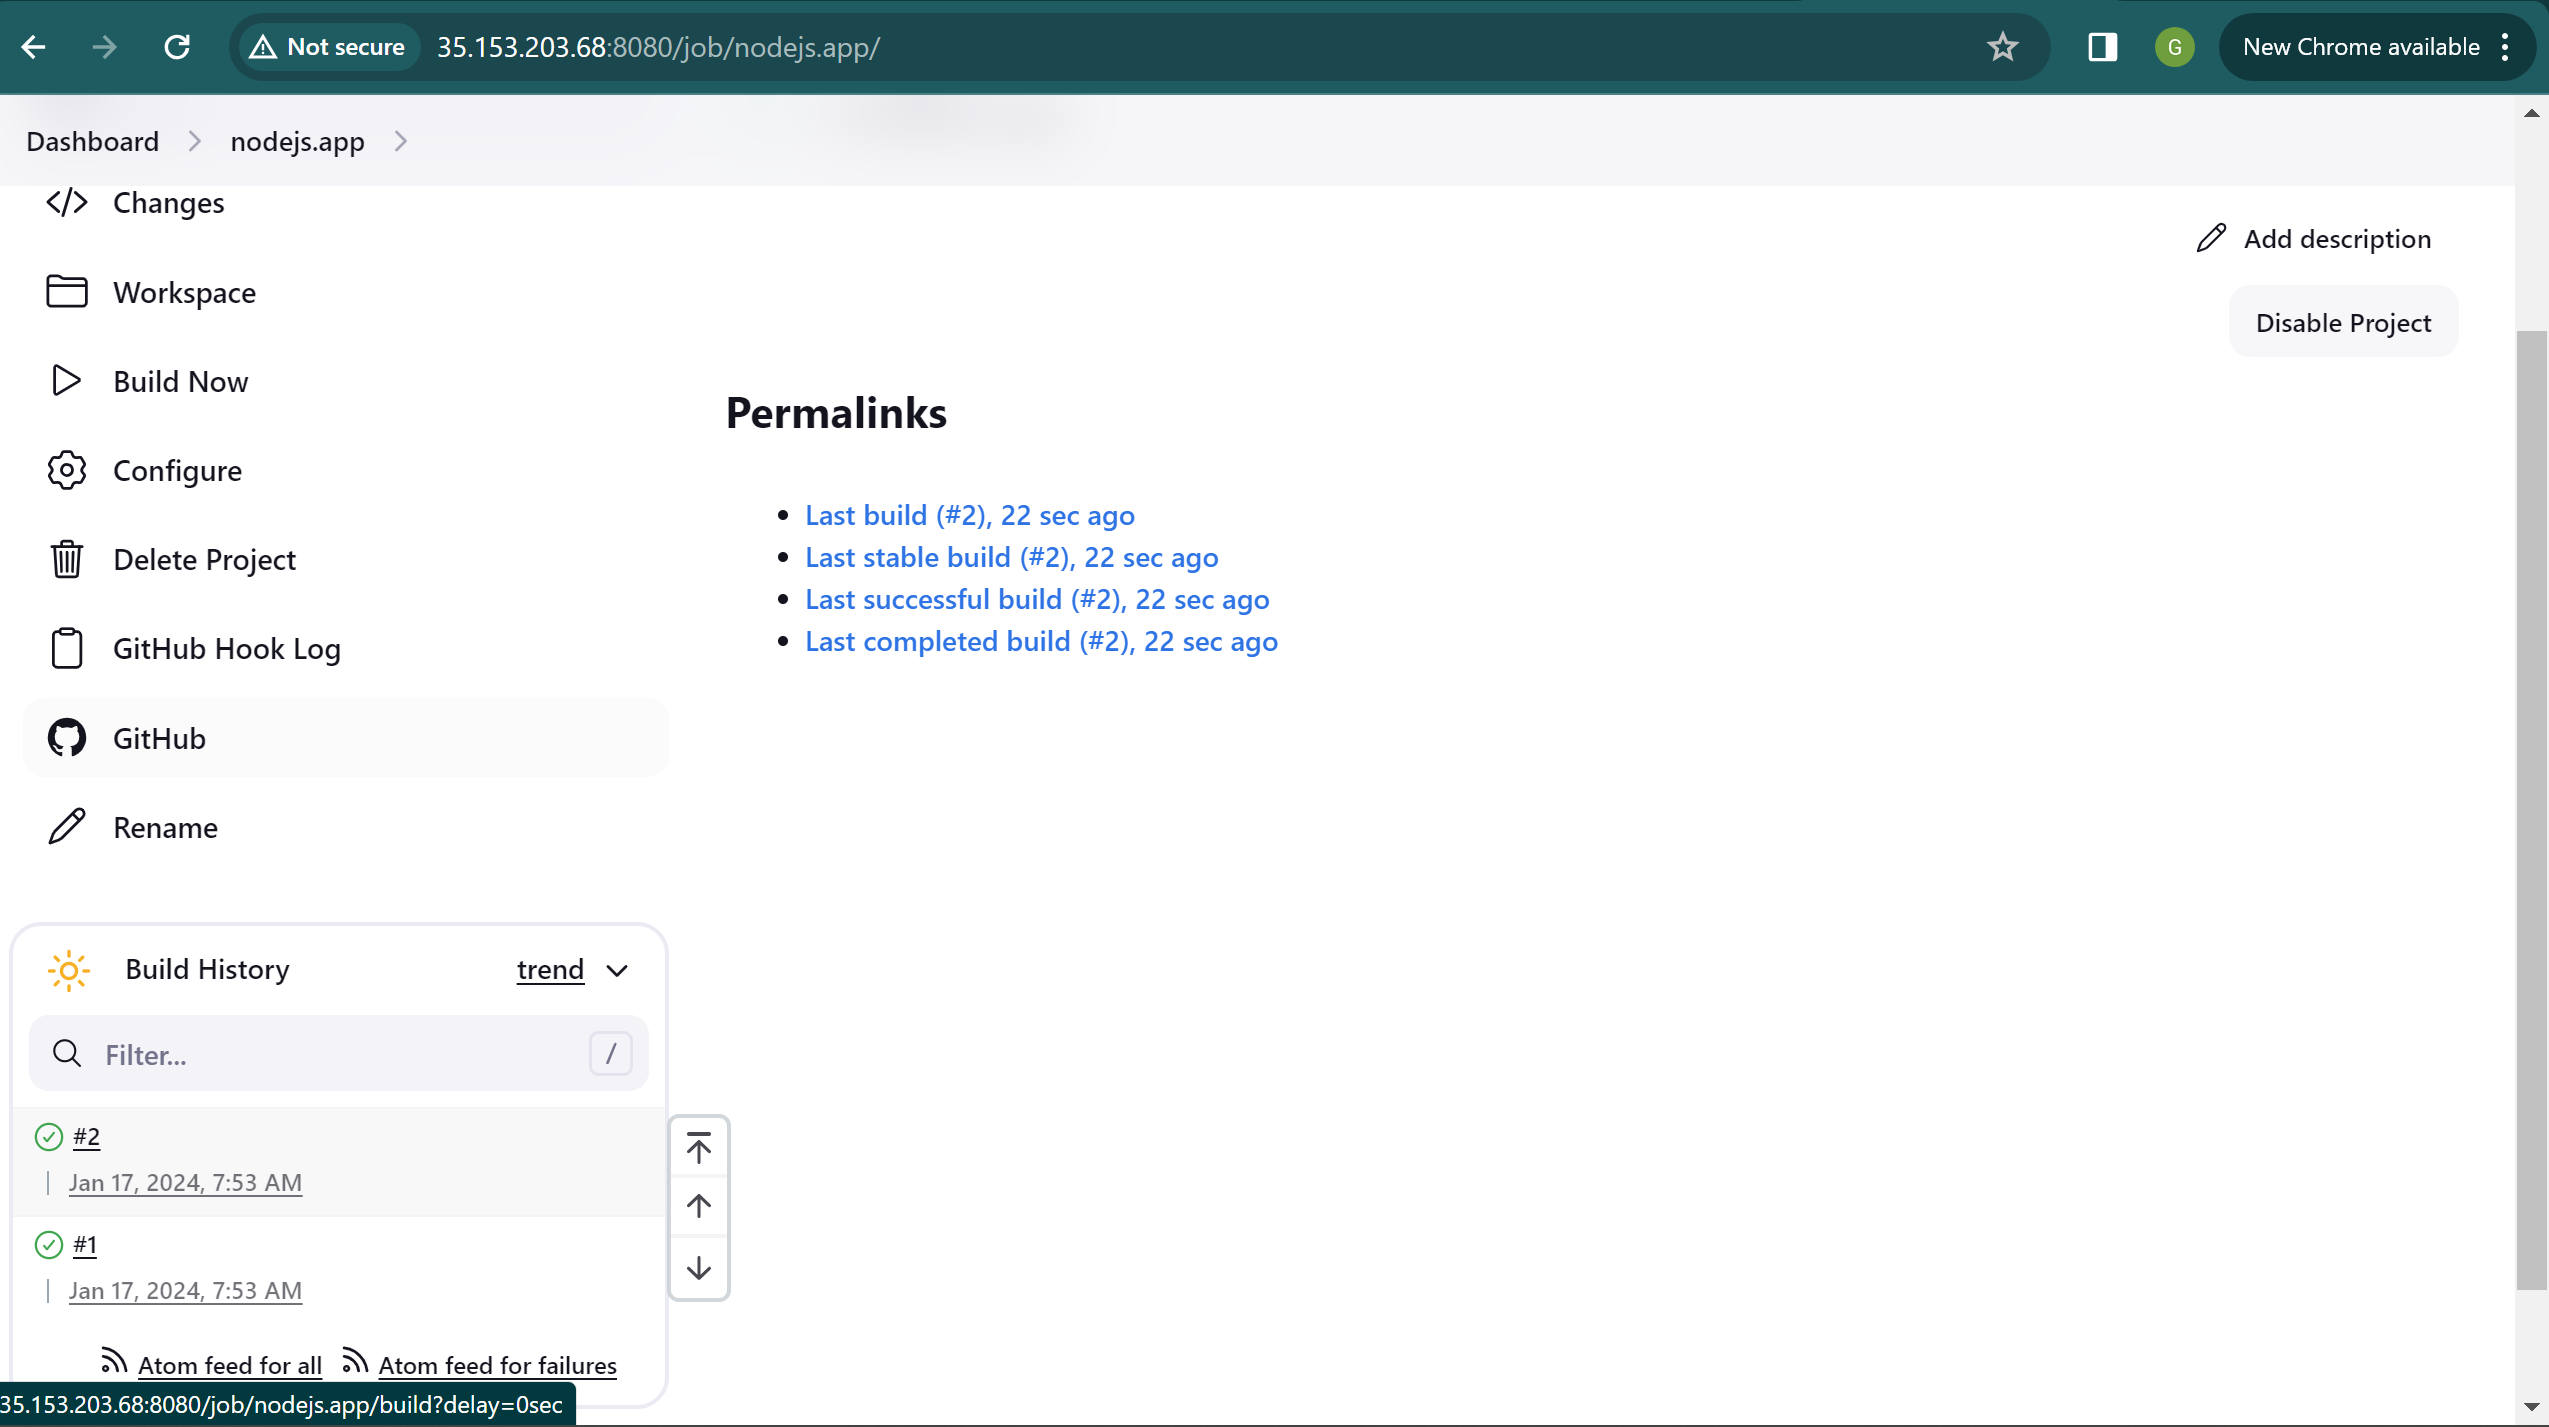
Now, you’re all set to build the job. Click “Build Now” to initiate the build process.
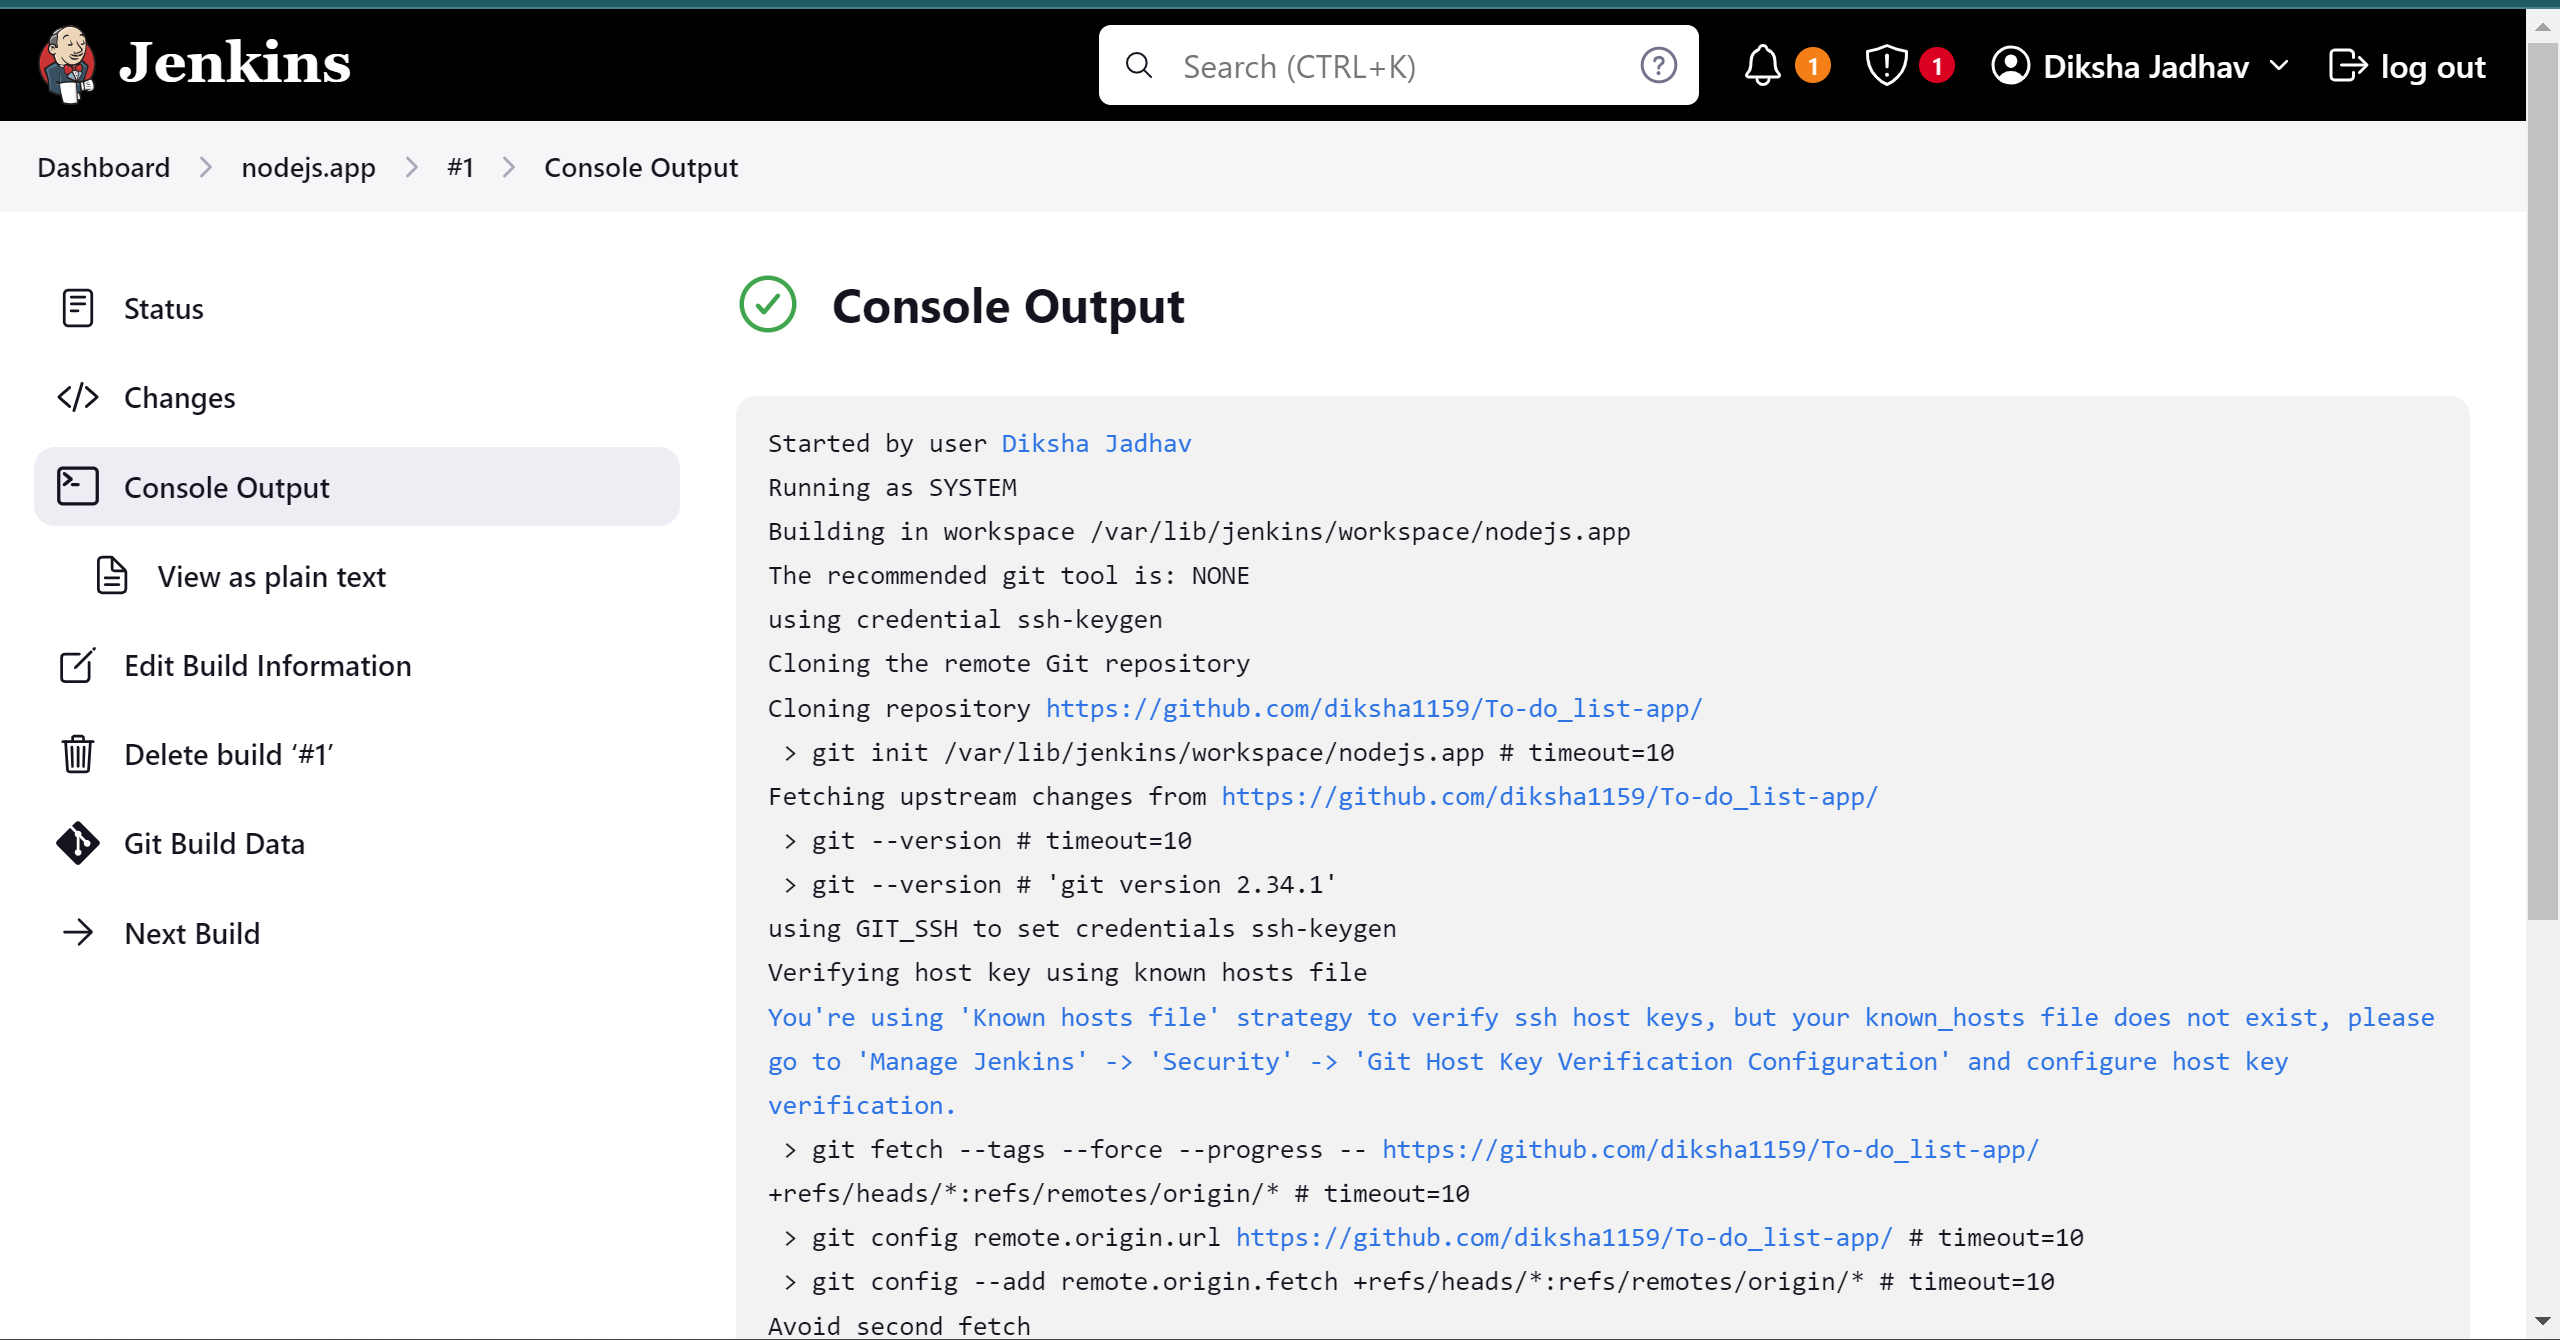
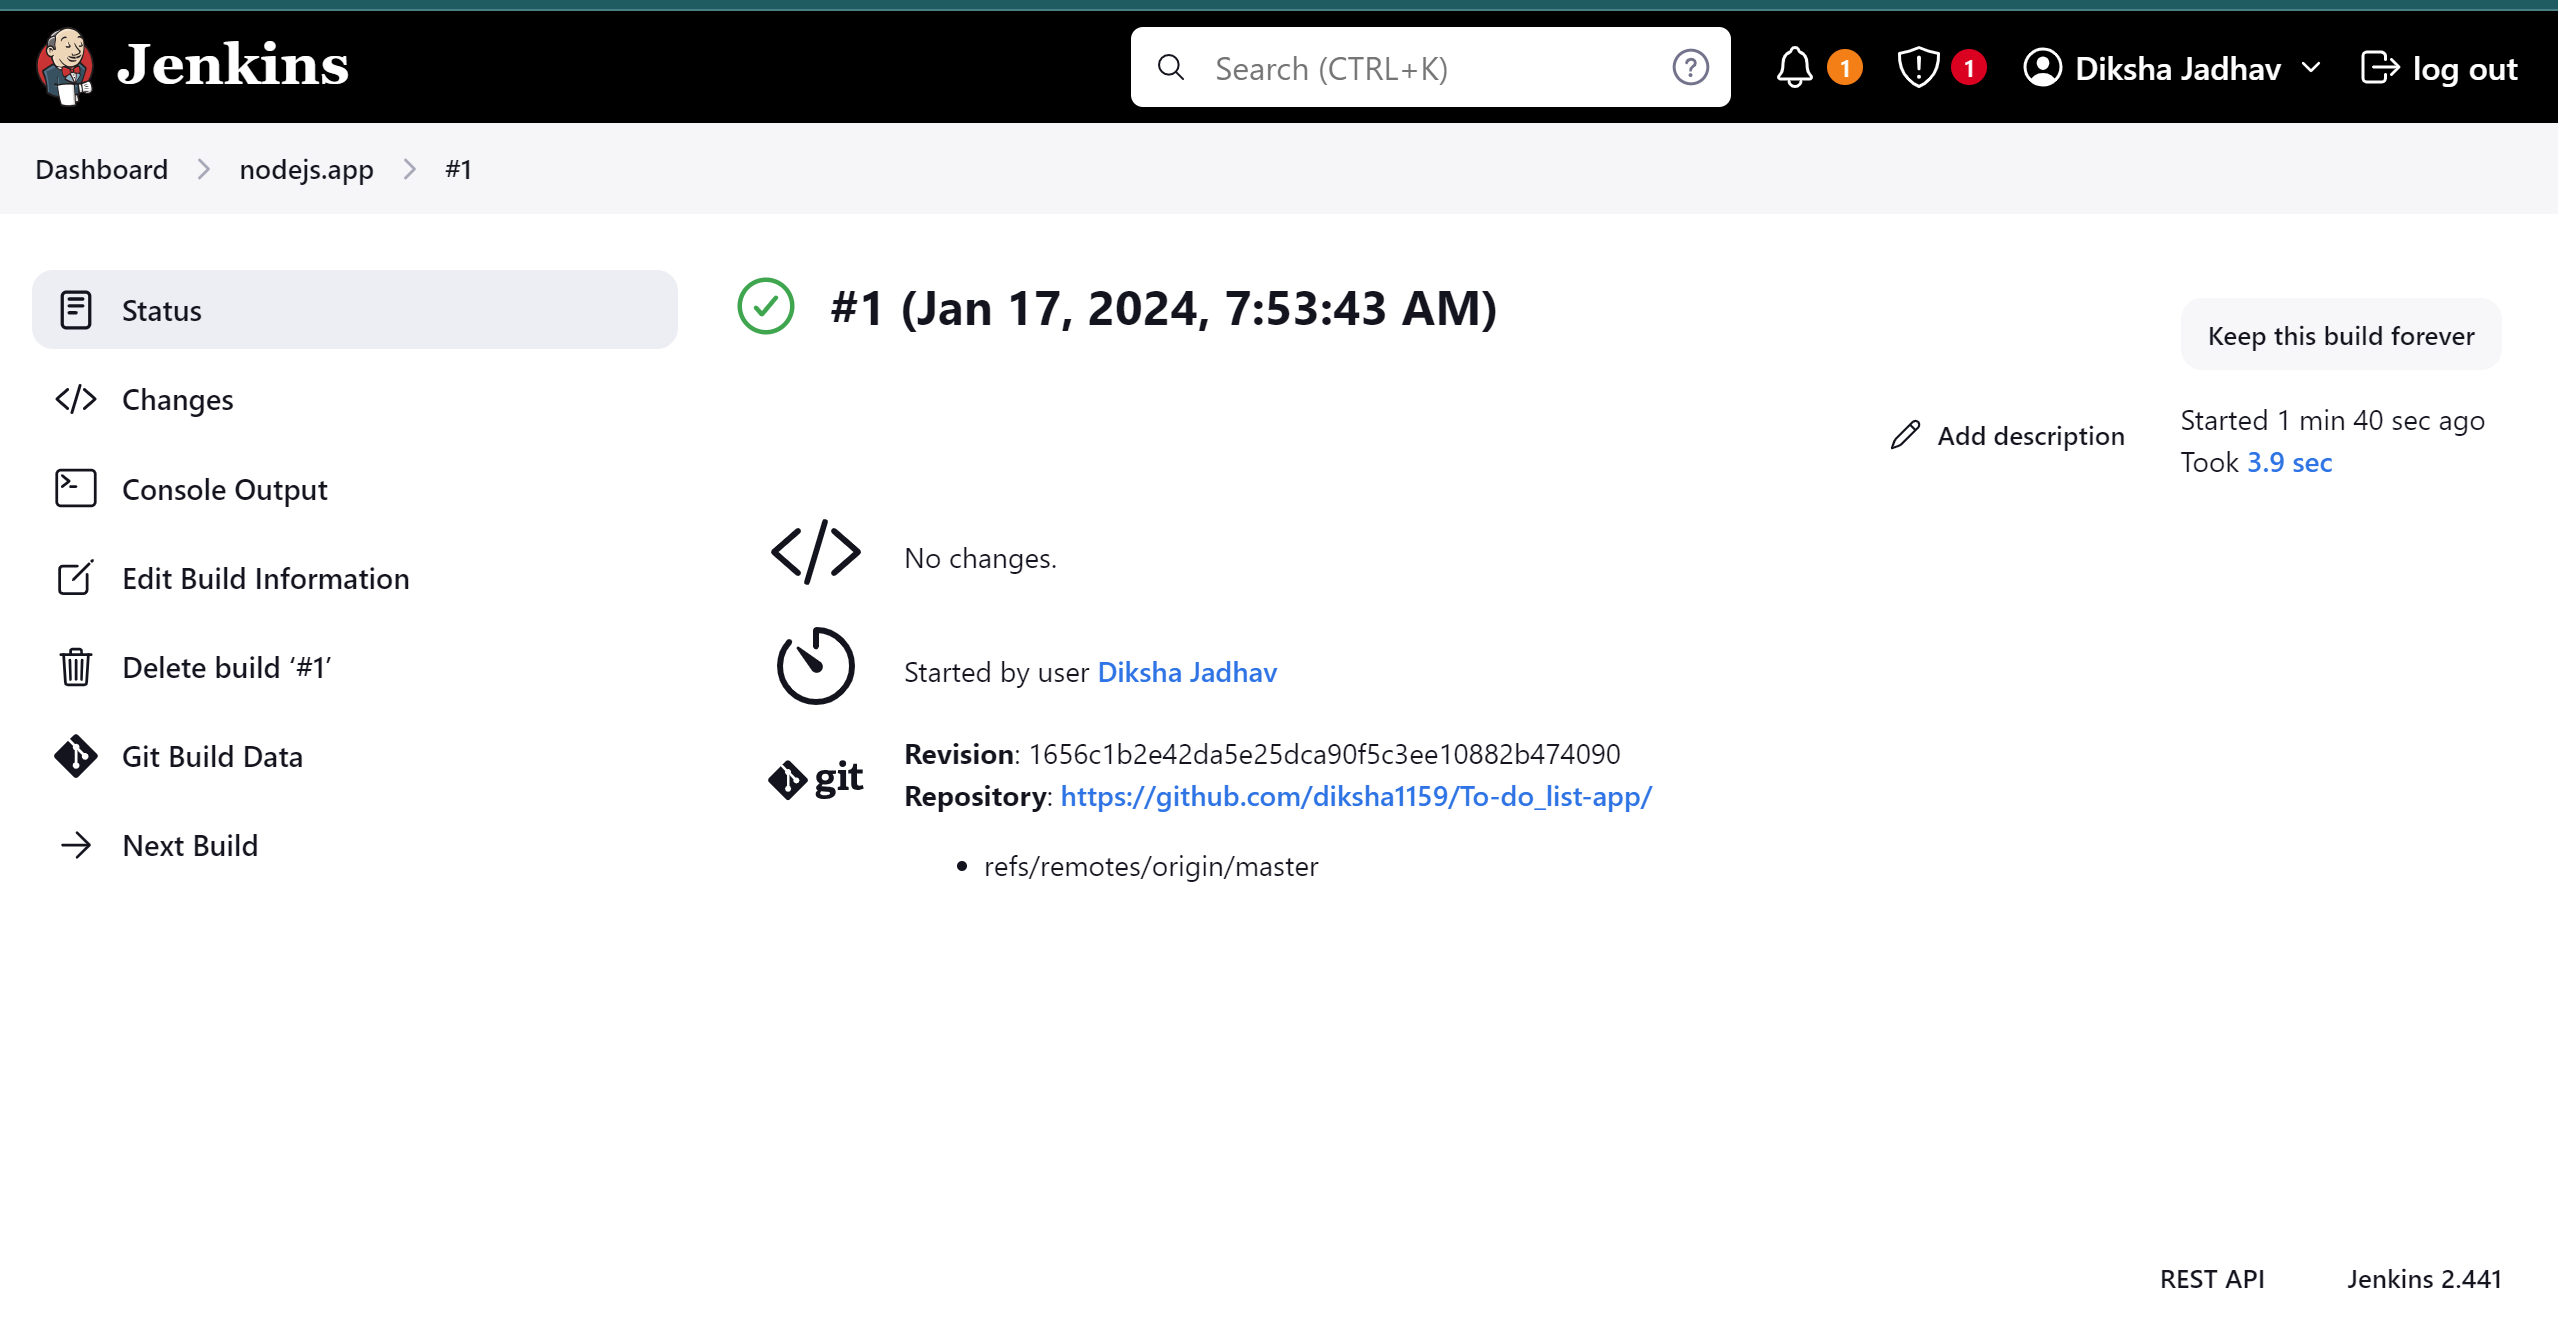
Check the instance to ensure the repository is successfully cloned.
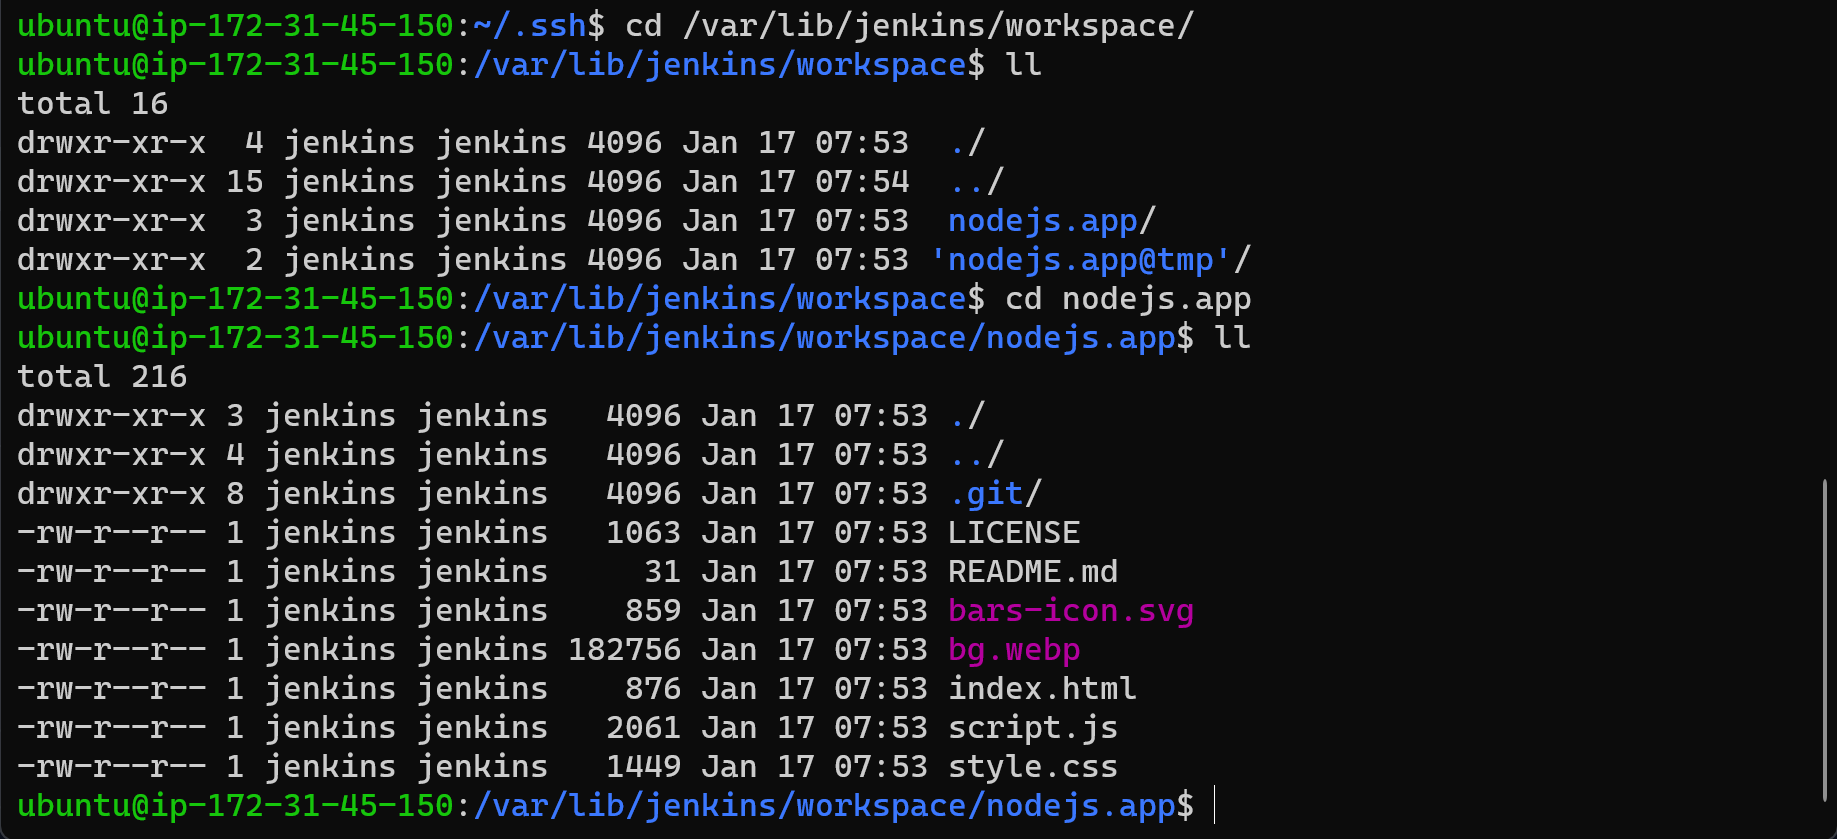
By following these steps, Jenkins will be configured to build your Node.js application and clone the repository onto the instance.
serve your files. Run the following command:
python -m http.server
You should see output indicating that the server is running. By default, it will listen on port 8000. If you want to use a different port, you can specify it, for example:
python -m http.server 8080Replace "8080" with your desired port number.
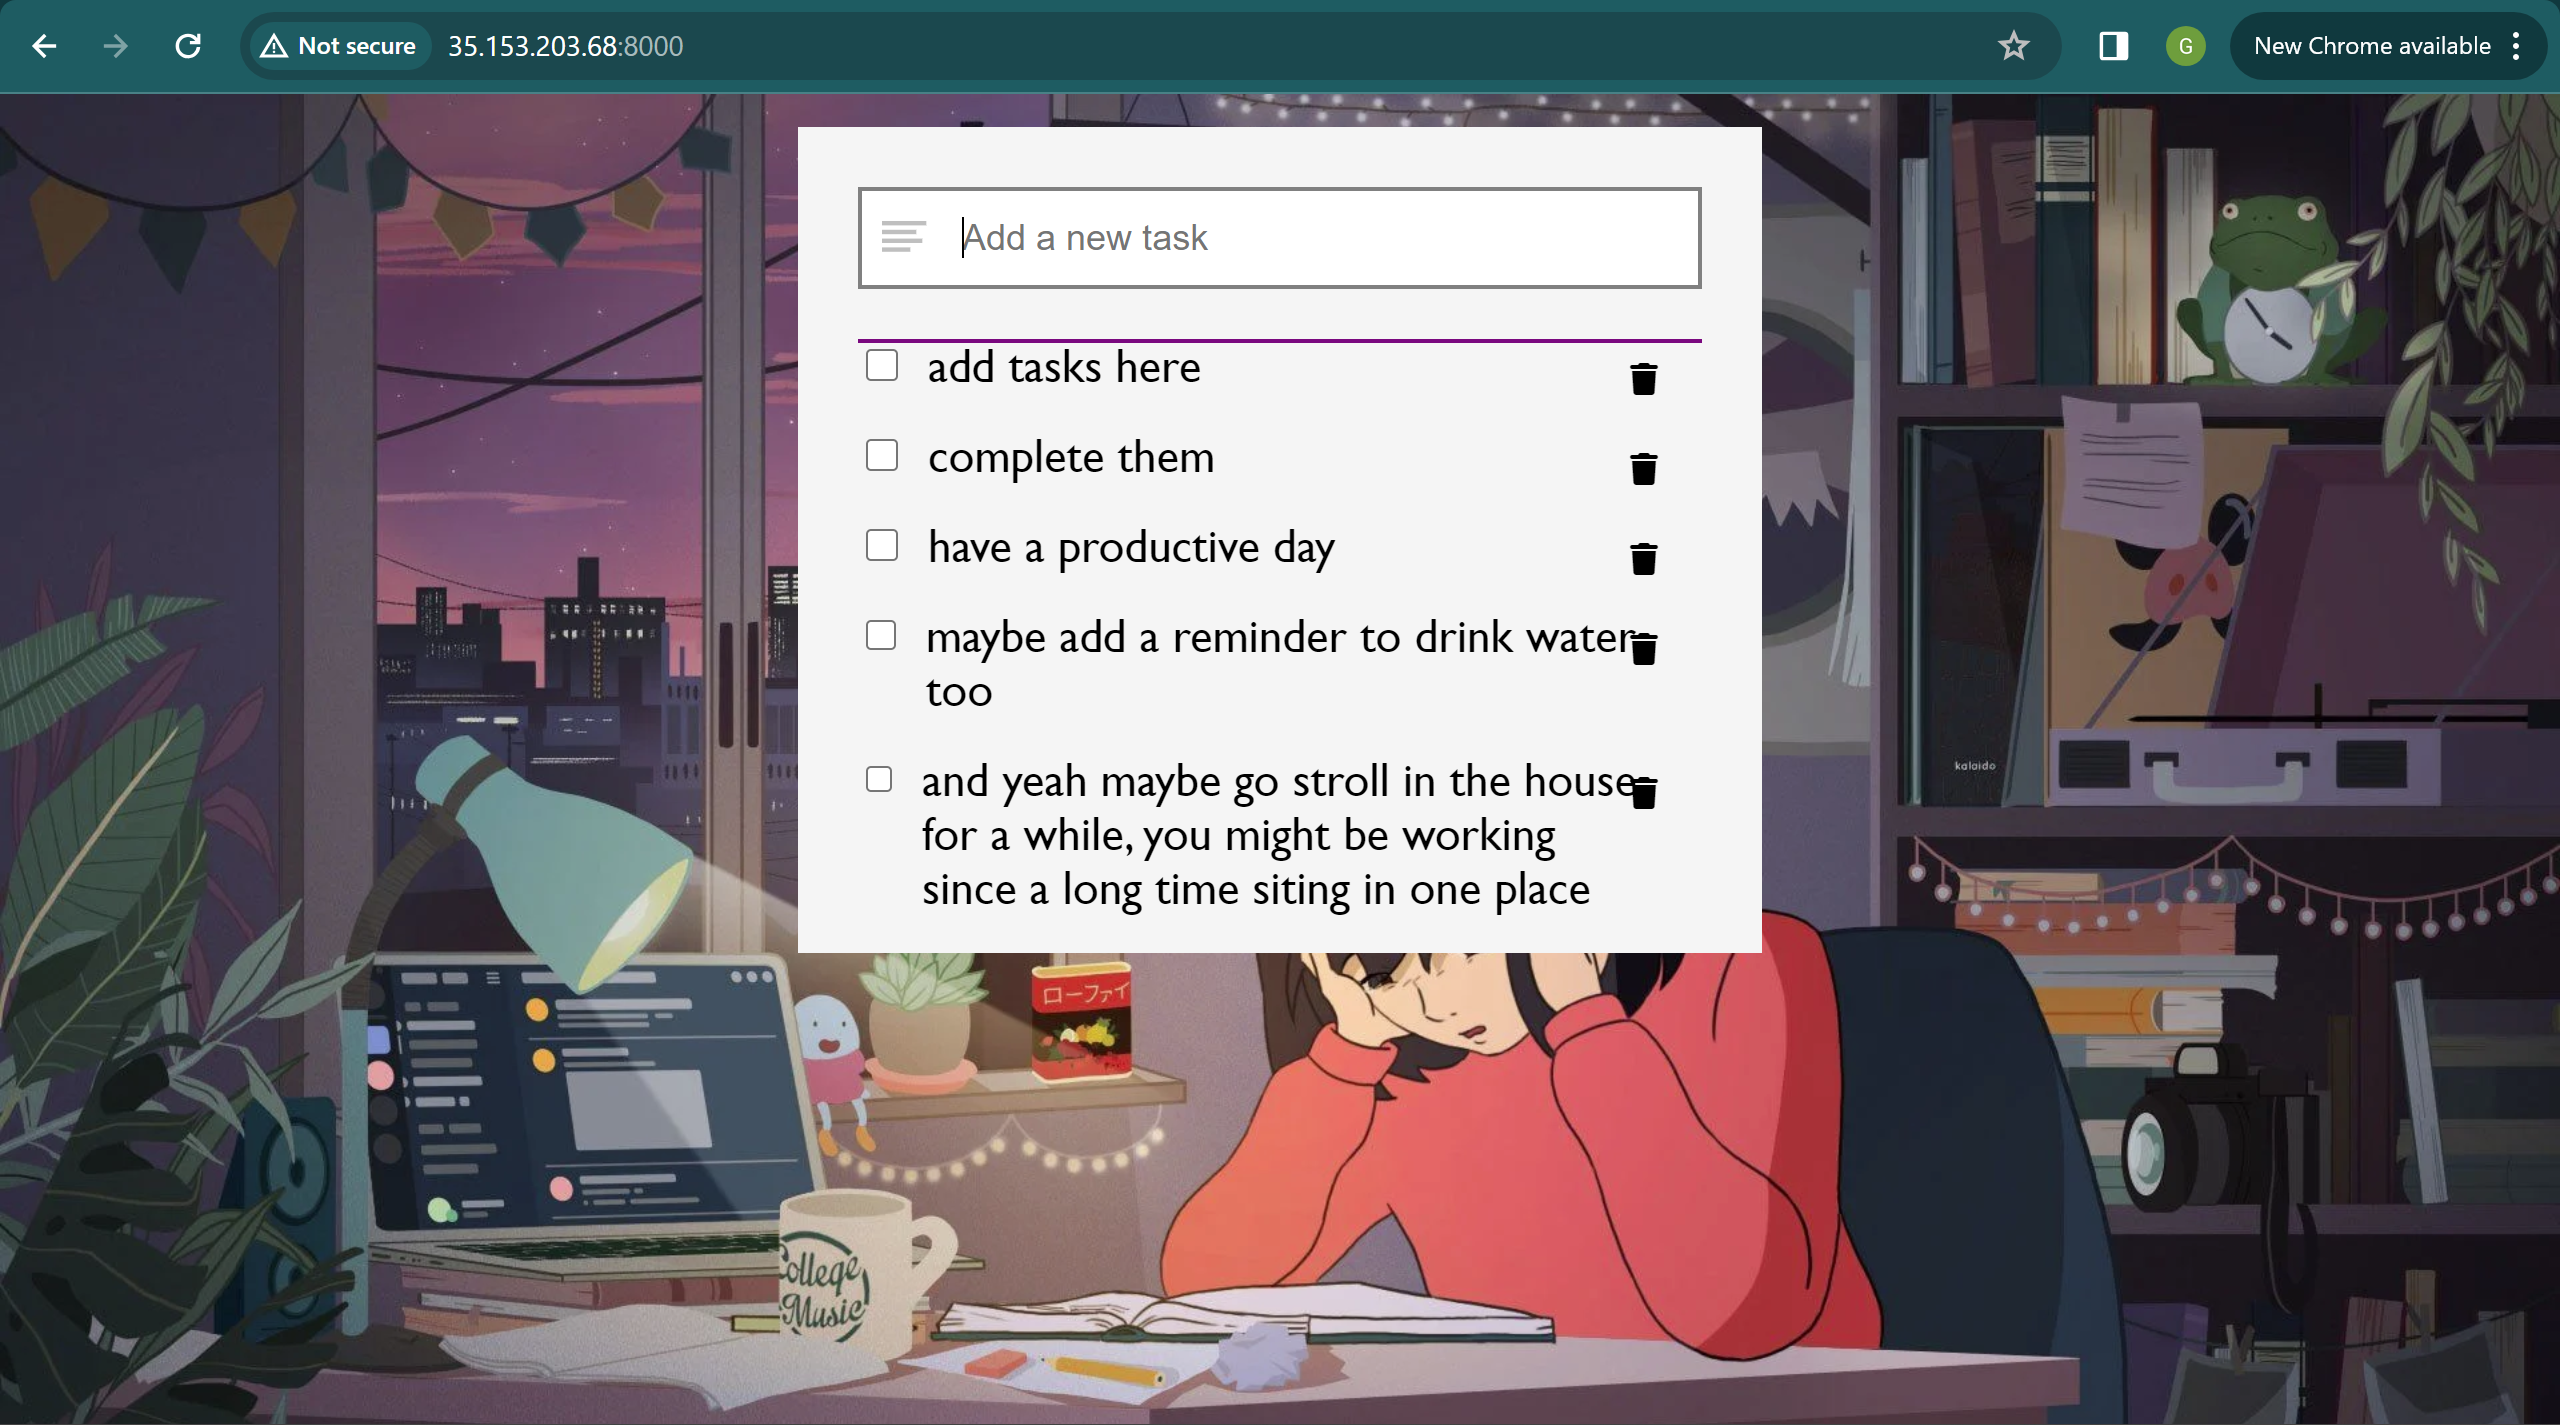
Open your web browser and go to http://localhost:8000 (or the port you specified). You should see your To-Do List App.
make sure to open the port before doing this or you will get this error
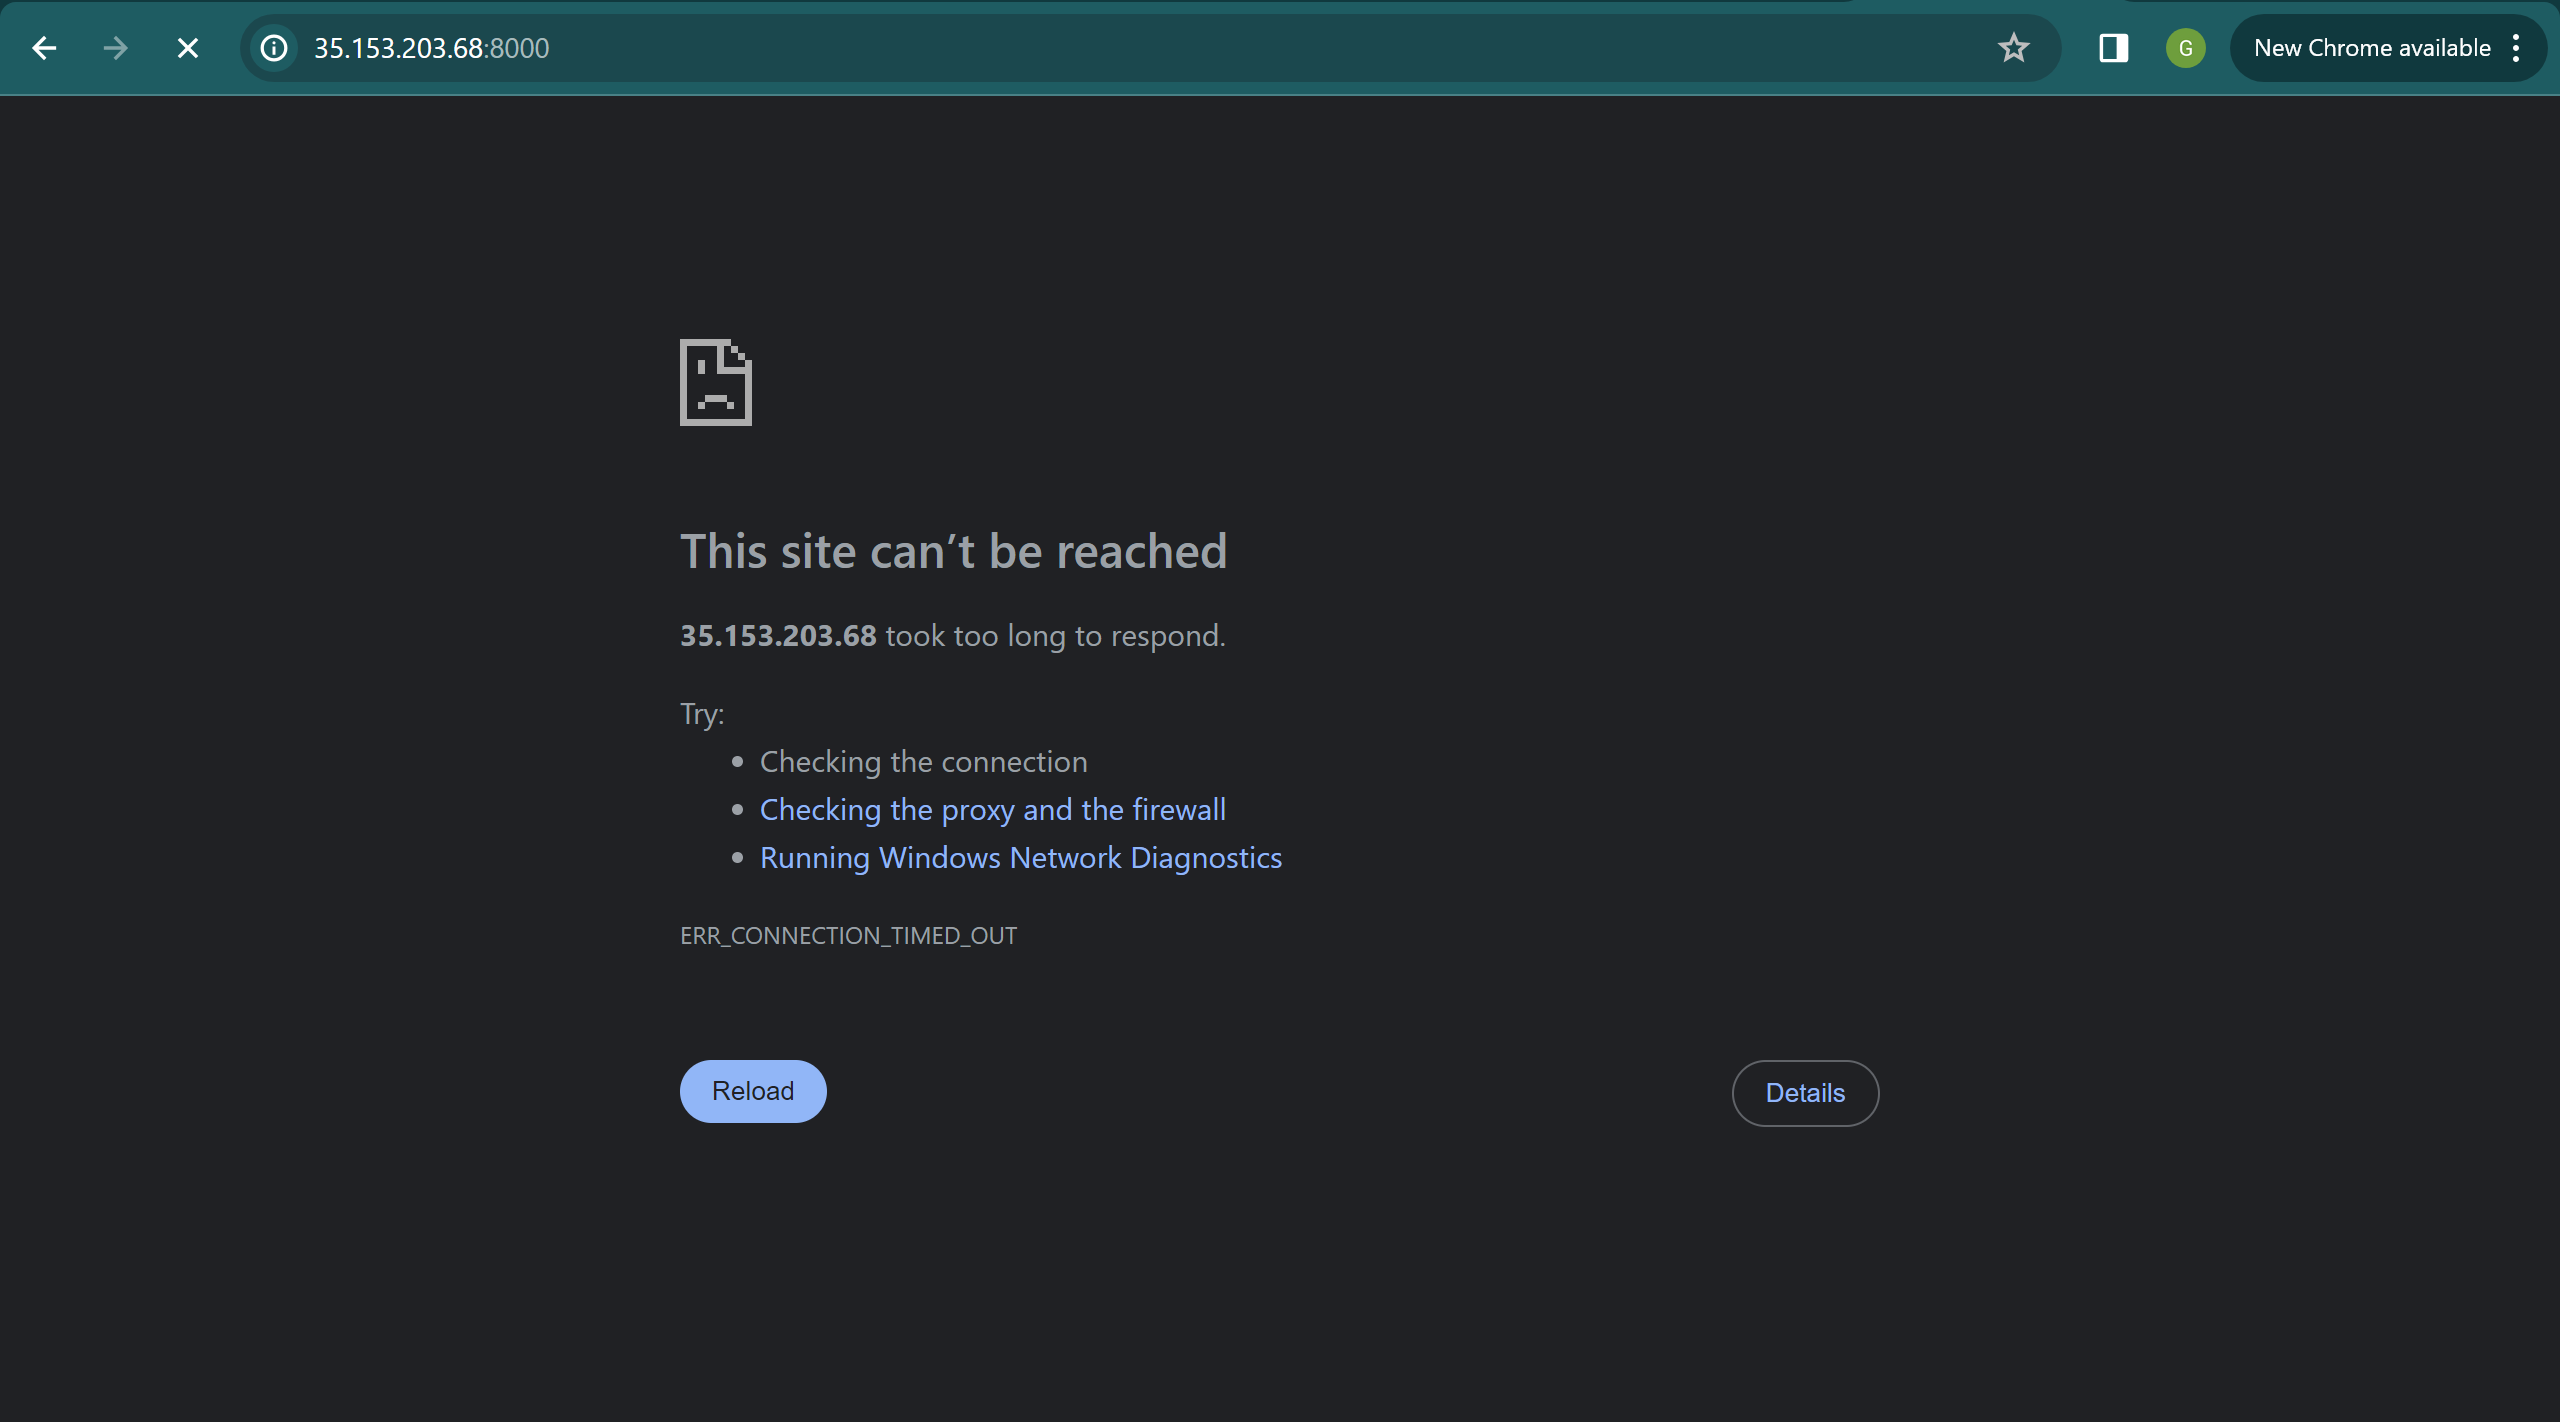
if you got this error, let's solve that...


now let us dockerize this thing
sudo apt-get update
sudo apt-get upgrade
sudo apt install docker.io
systemctl start docker
systemctl enable docker
docker --version
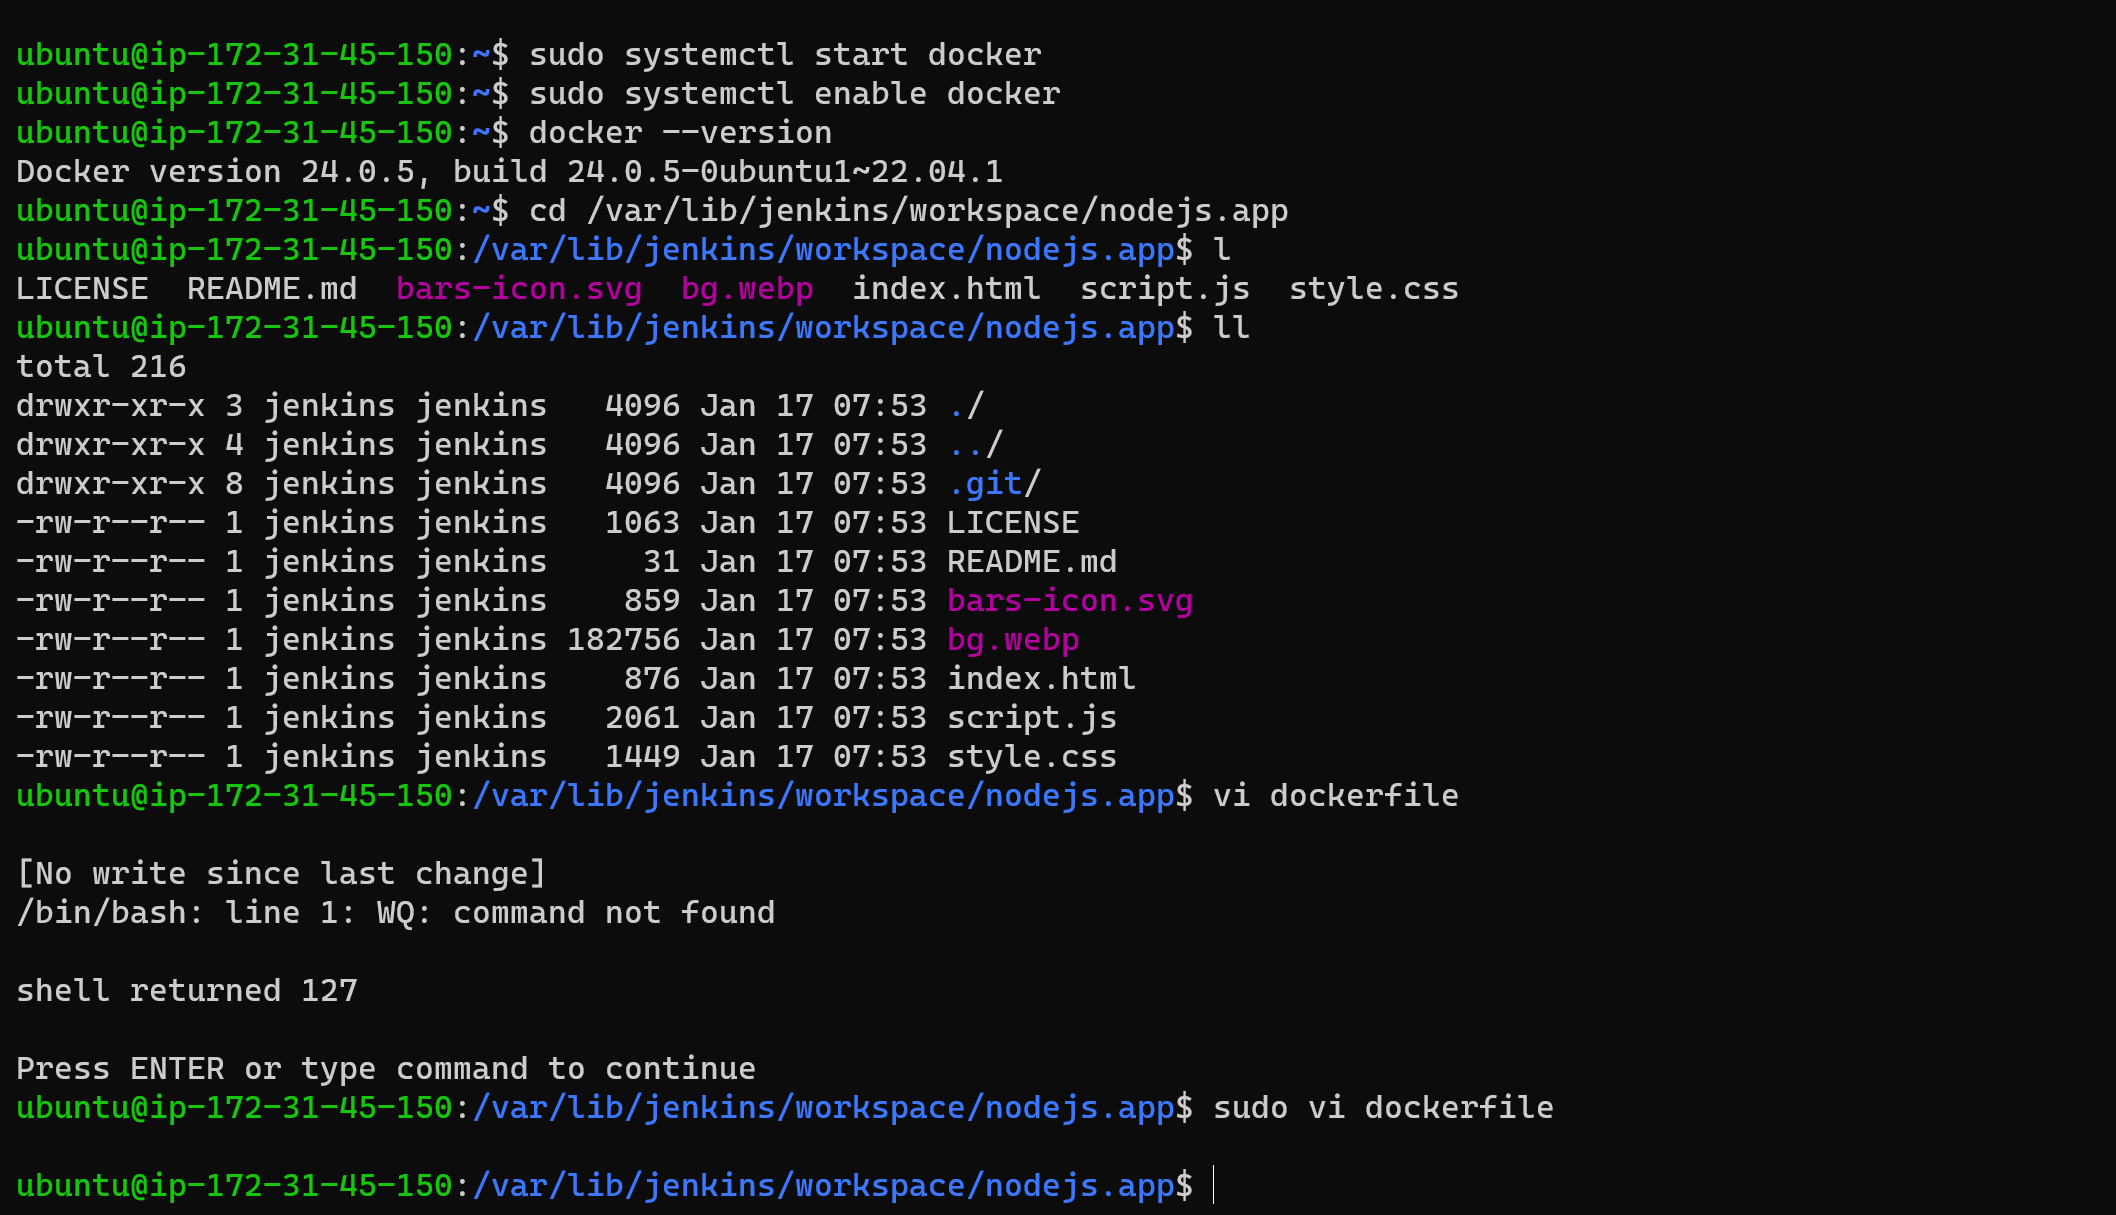
vi Dockerfile
if you are getting a permissions error try using "sudo vi dockerfile"
# Use a lightweight base image
FROM node:14-alpine

# Set the working directory to /app
WORKDIR /app

# Copy all local files to the working directory
COPY . .

# Install http-server globally
RUN npm install -g http-server

# Expose the port to access the application
EXPOSE 8888

# CMD to run http-server on port 8888, binding to all available interfaces
CMD ["http-server", "-p", "8888", "-a", "0.0.0.0"]
if you have trouble exiting vi editor, here is a mini guide
:q to quit (short for :quit)
:q! to quit without saving (short for :quit!)
:wq to write and quit
:wq! to write and quit even if file has only read permission (if file does not have write permission: force write)
:x to write and quit (similar to :wq, but only write if there are changes)
:exit to write and exit (same as :x)
:qa to quit all (short for :quitall)
:cq to quit without saving and make Vim return non-zero error (i.e. exit with error)
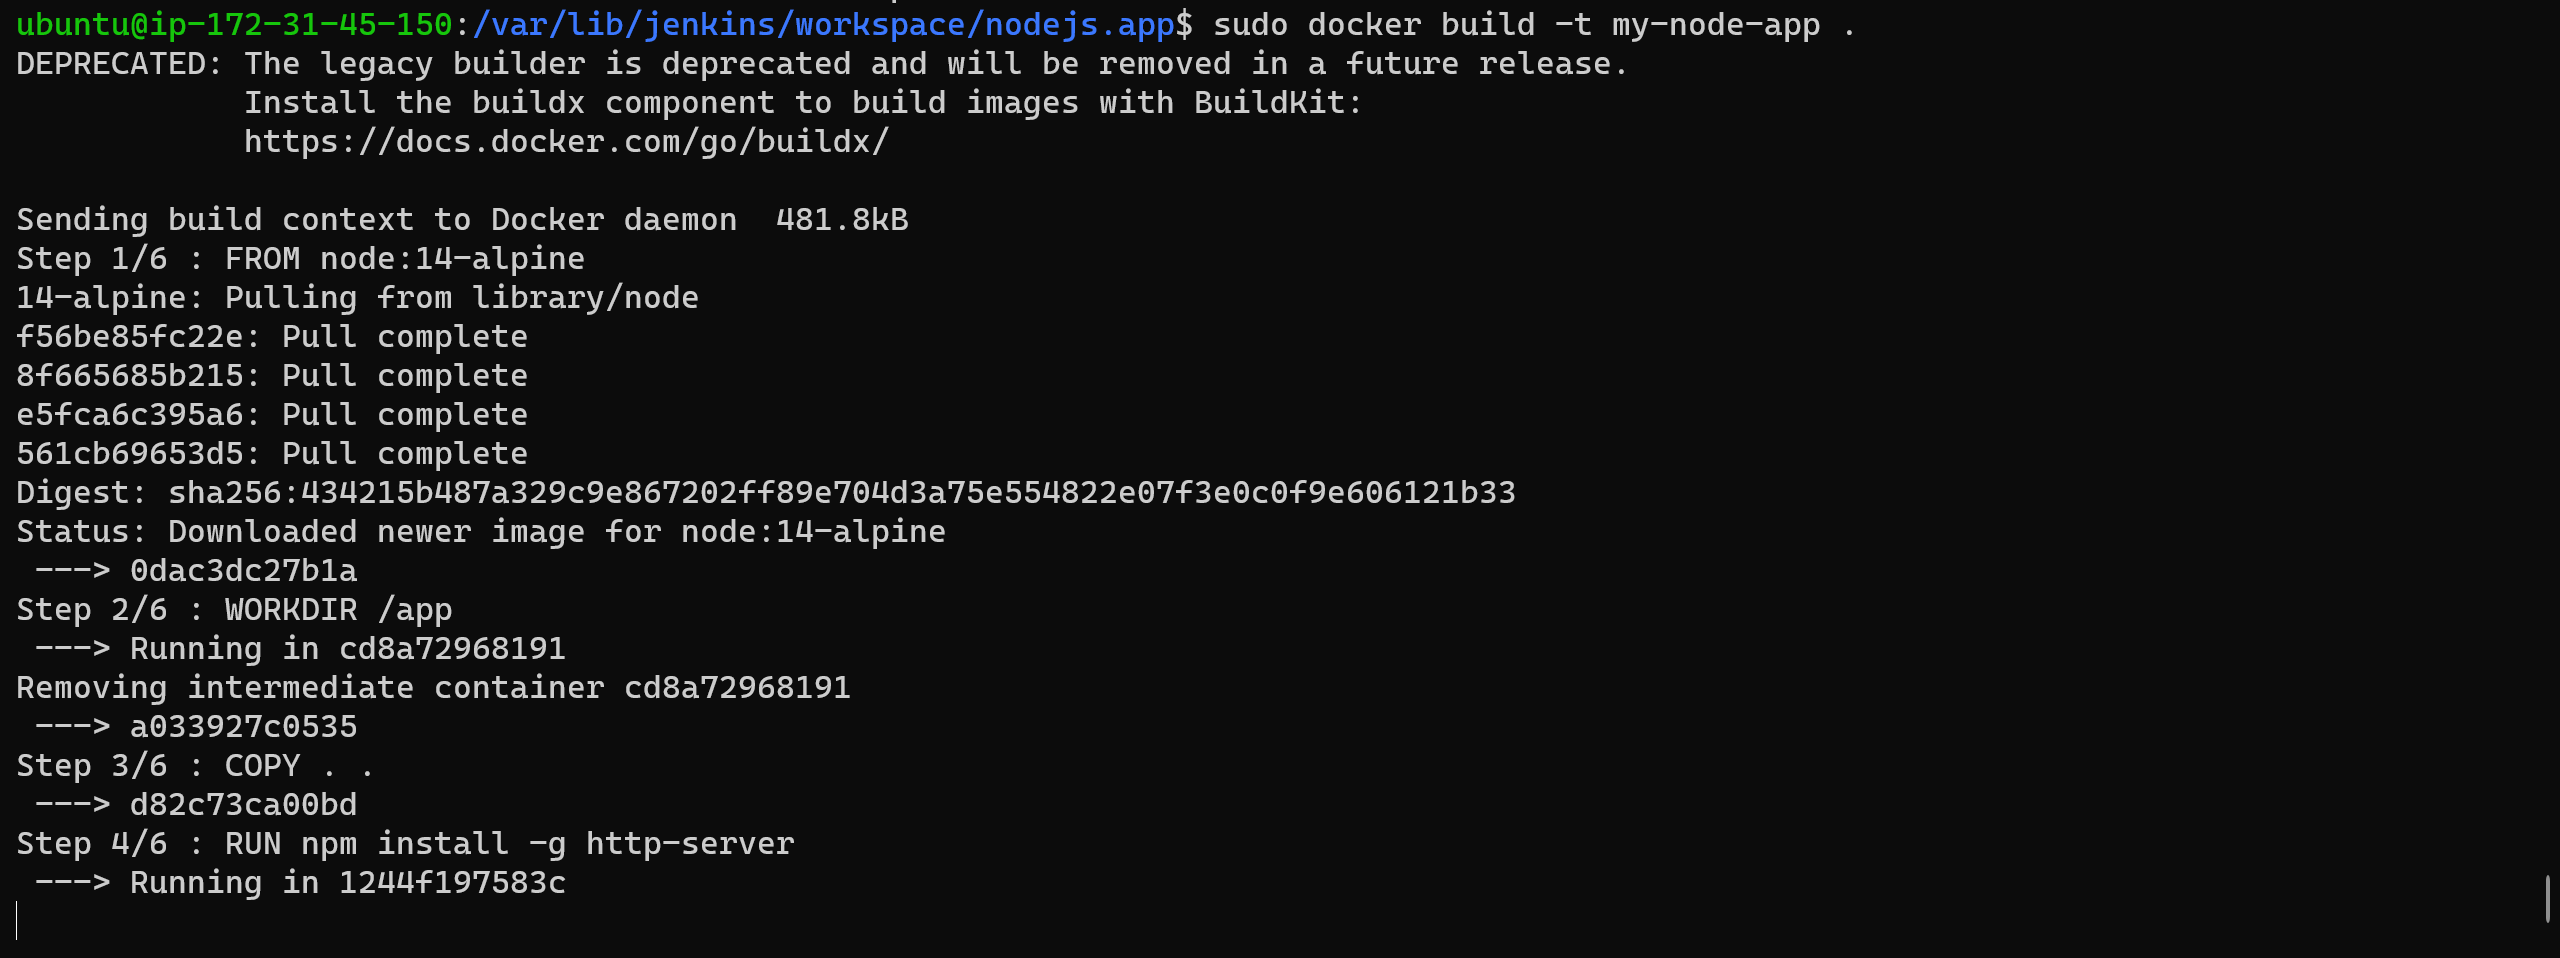
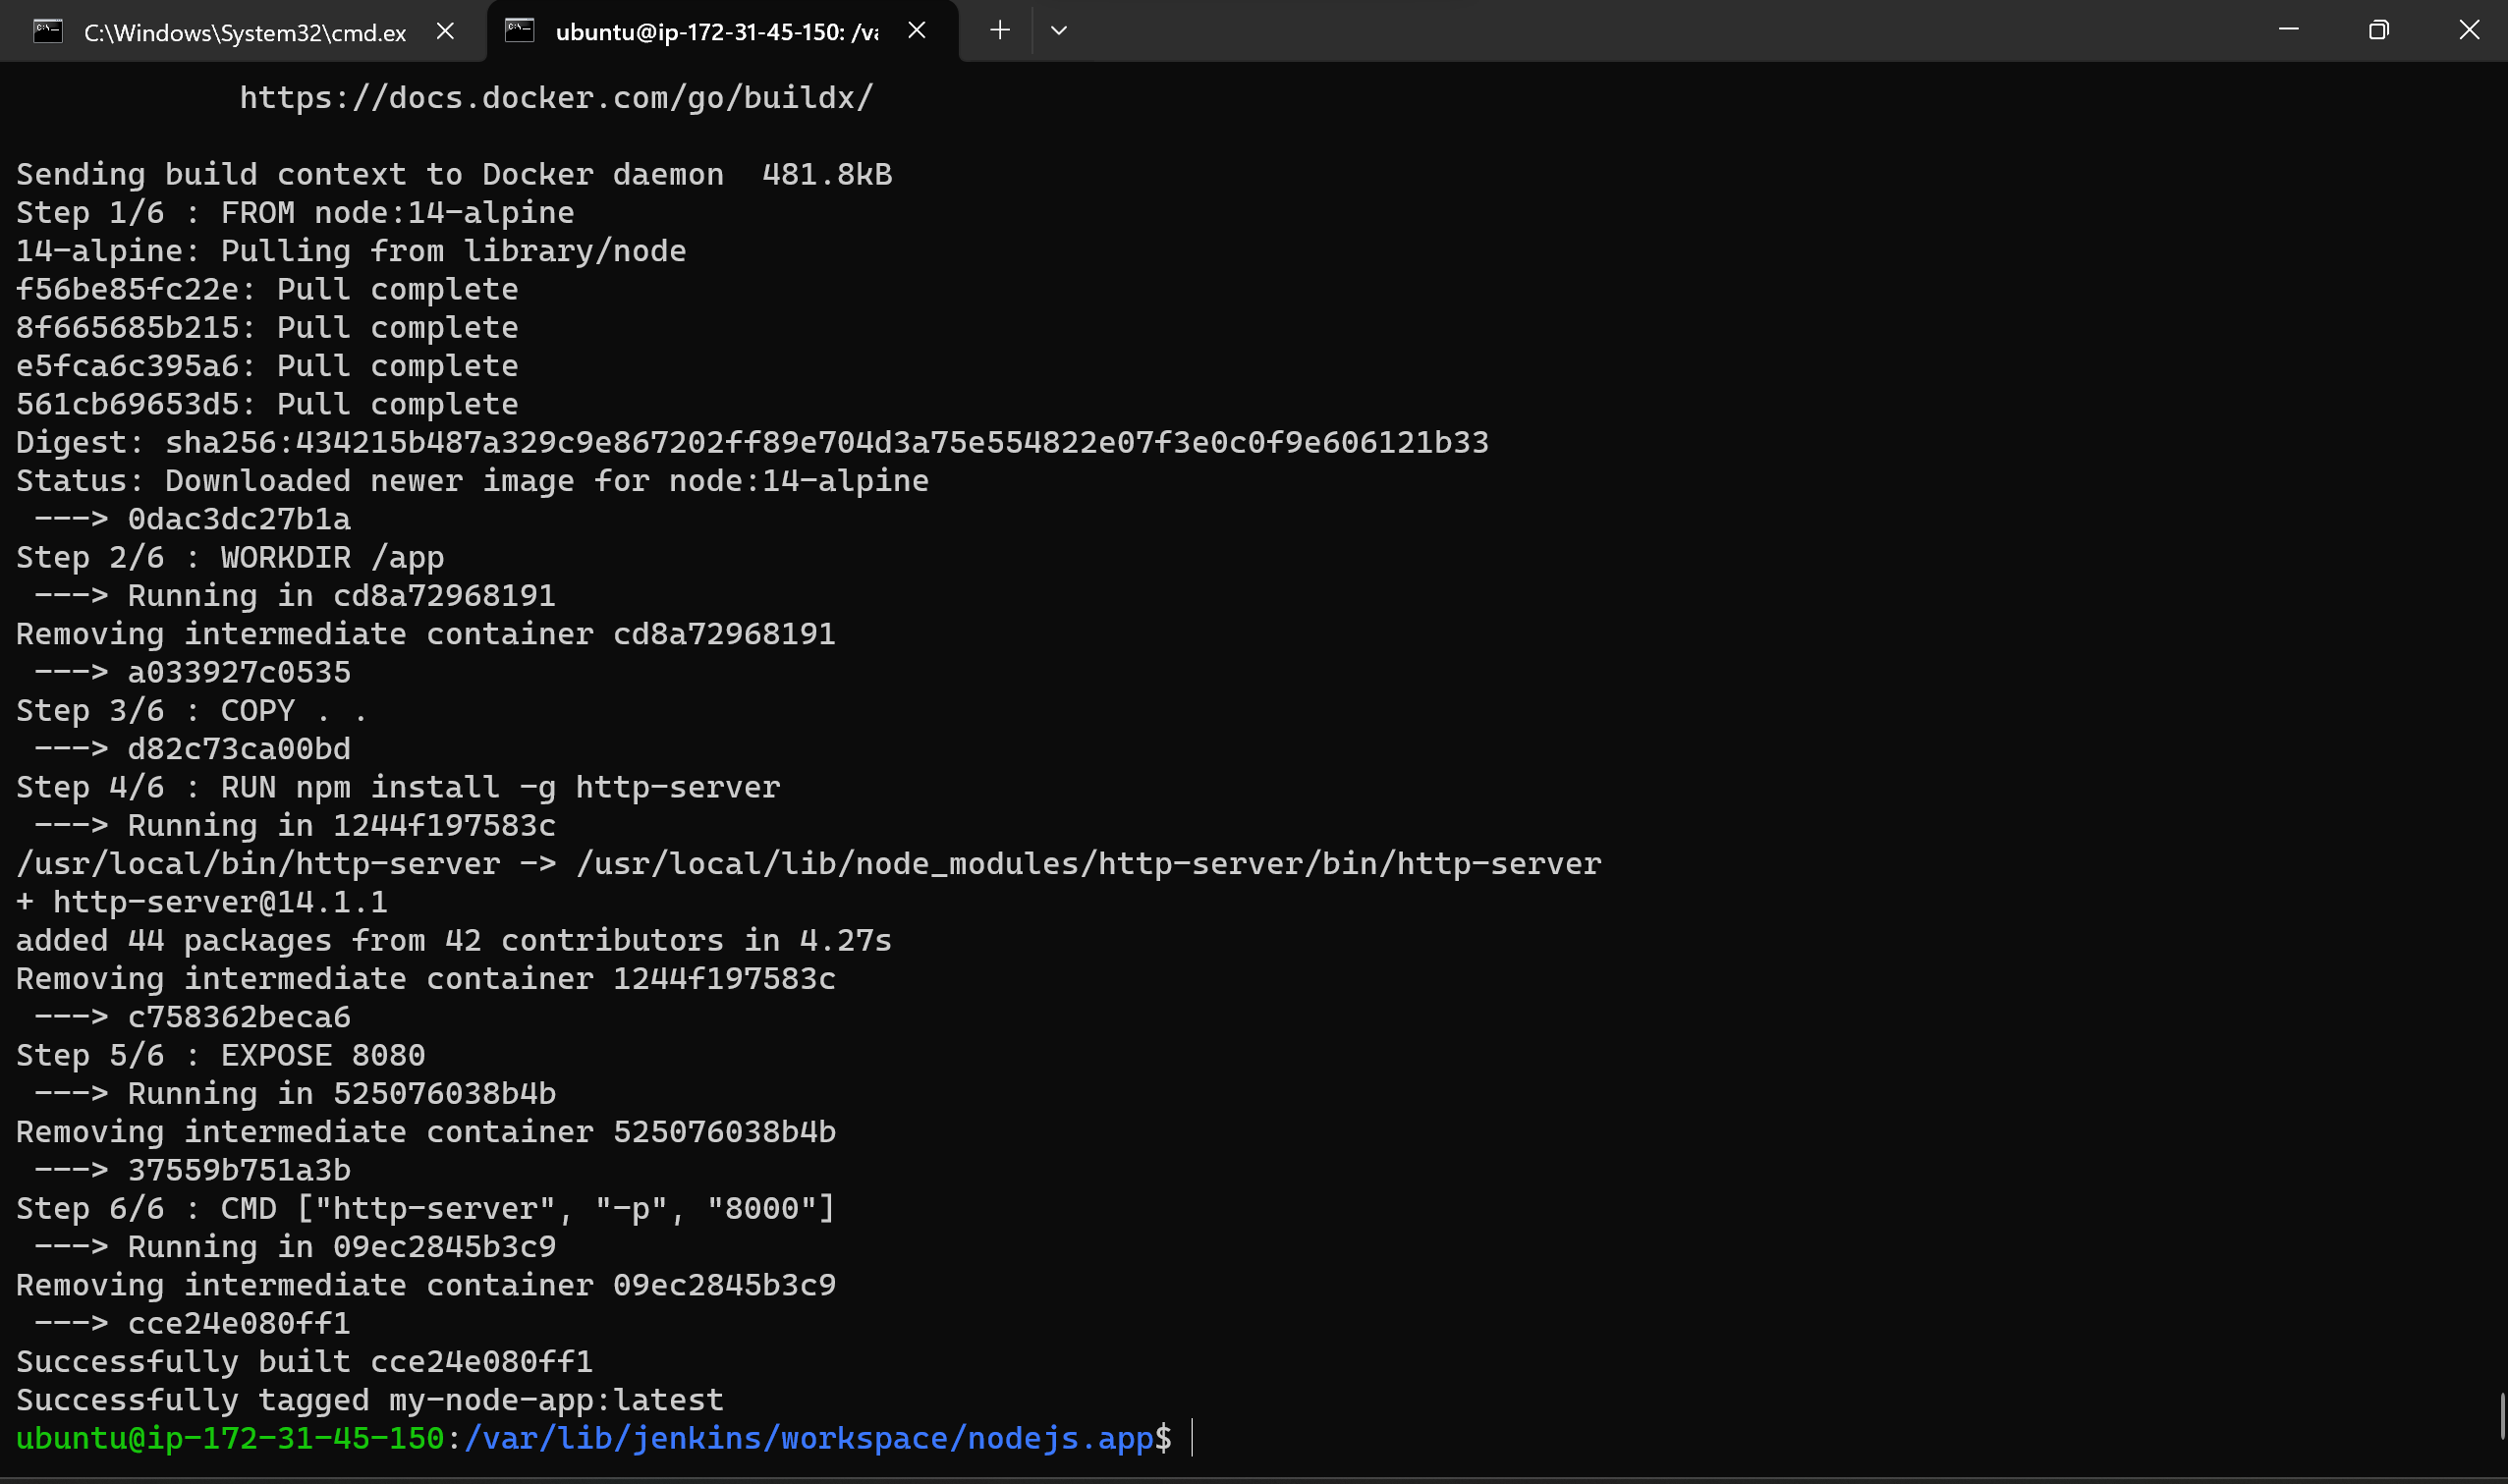
docker build -t my-node-app .
Build the Docker Image
run the docker container:
docker run -p 8888:8888 my-node-app
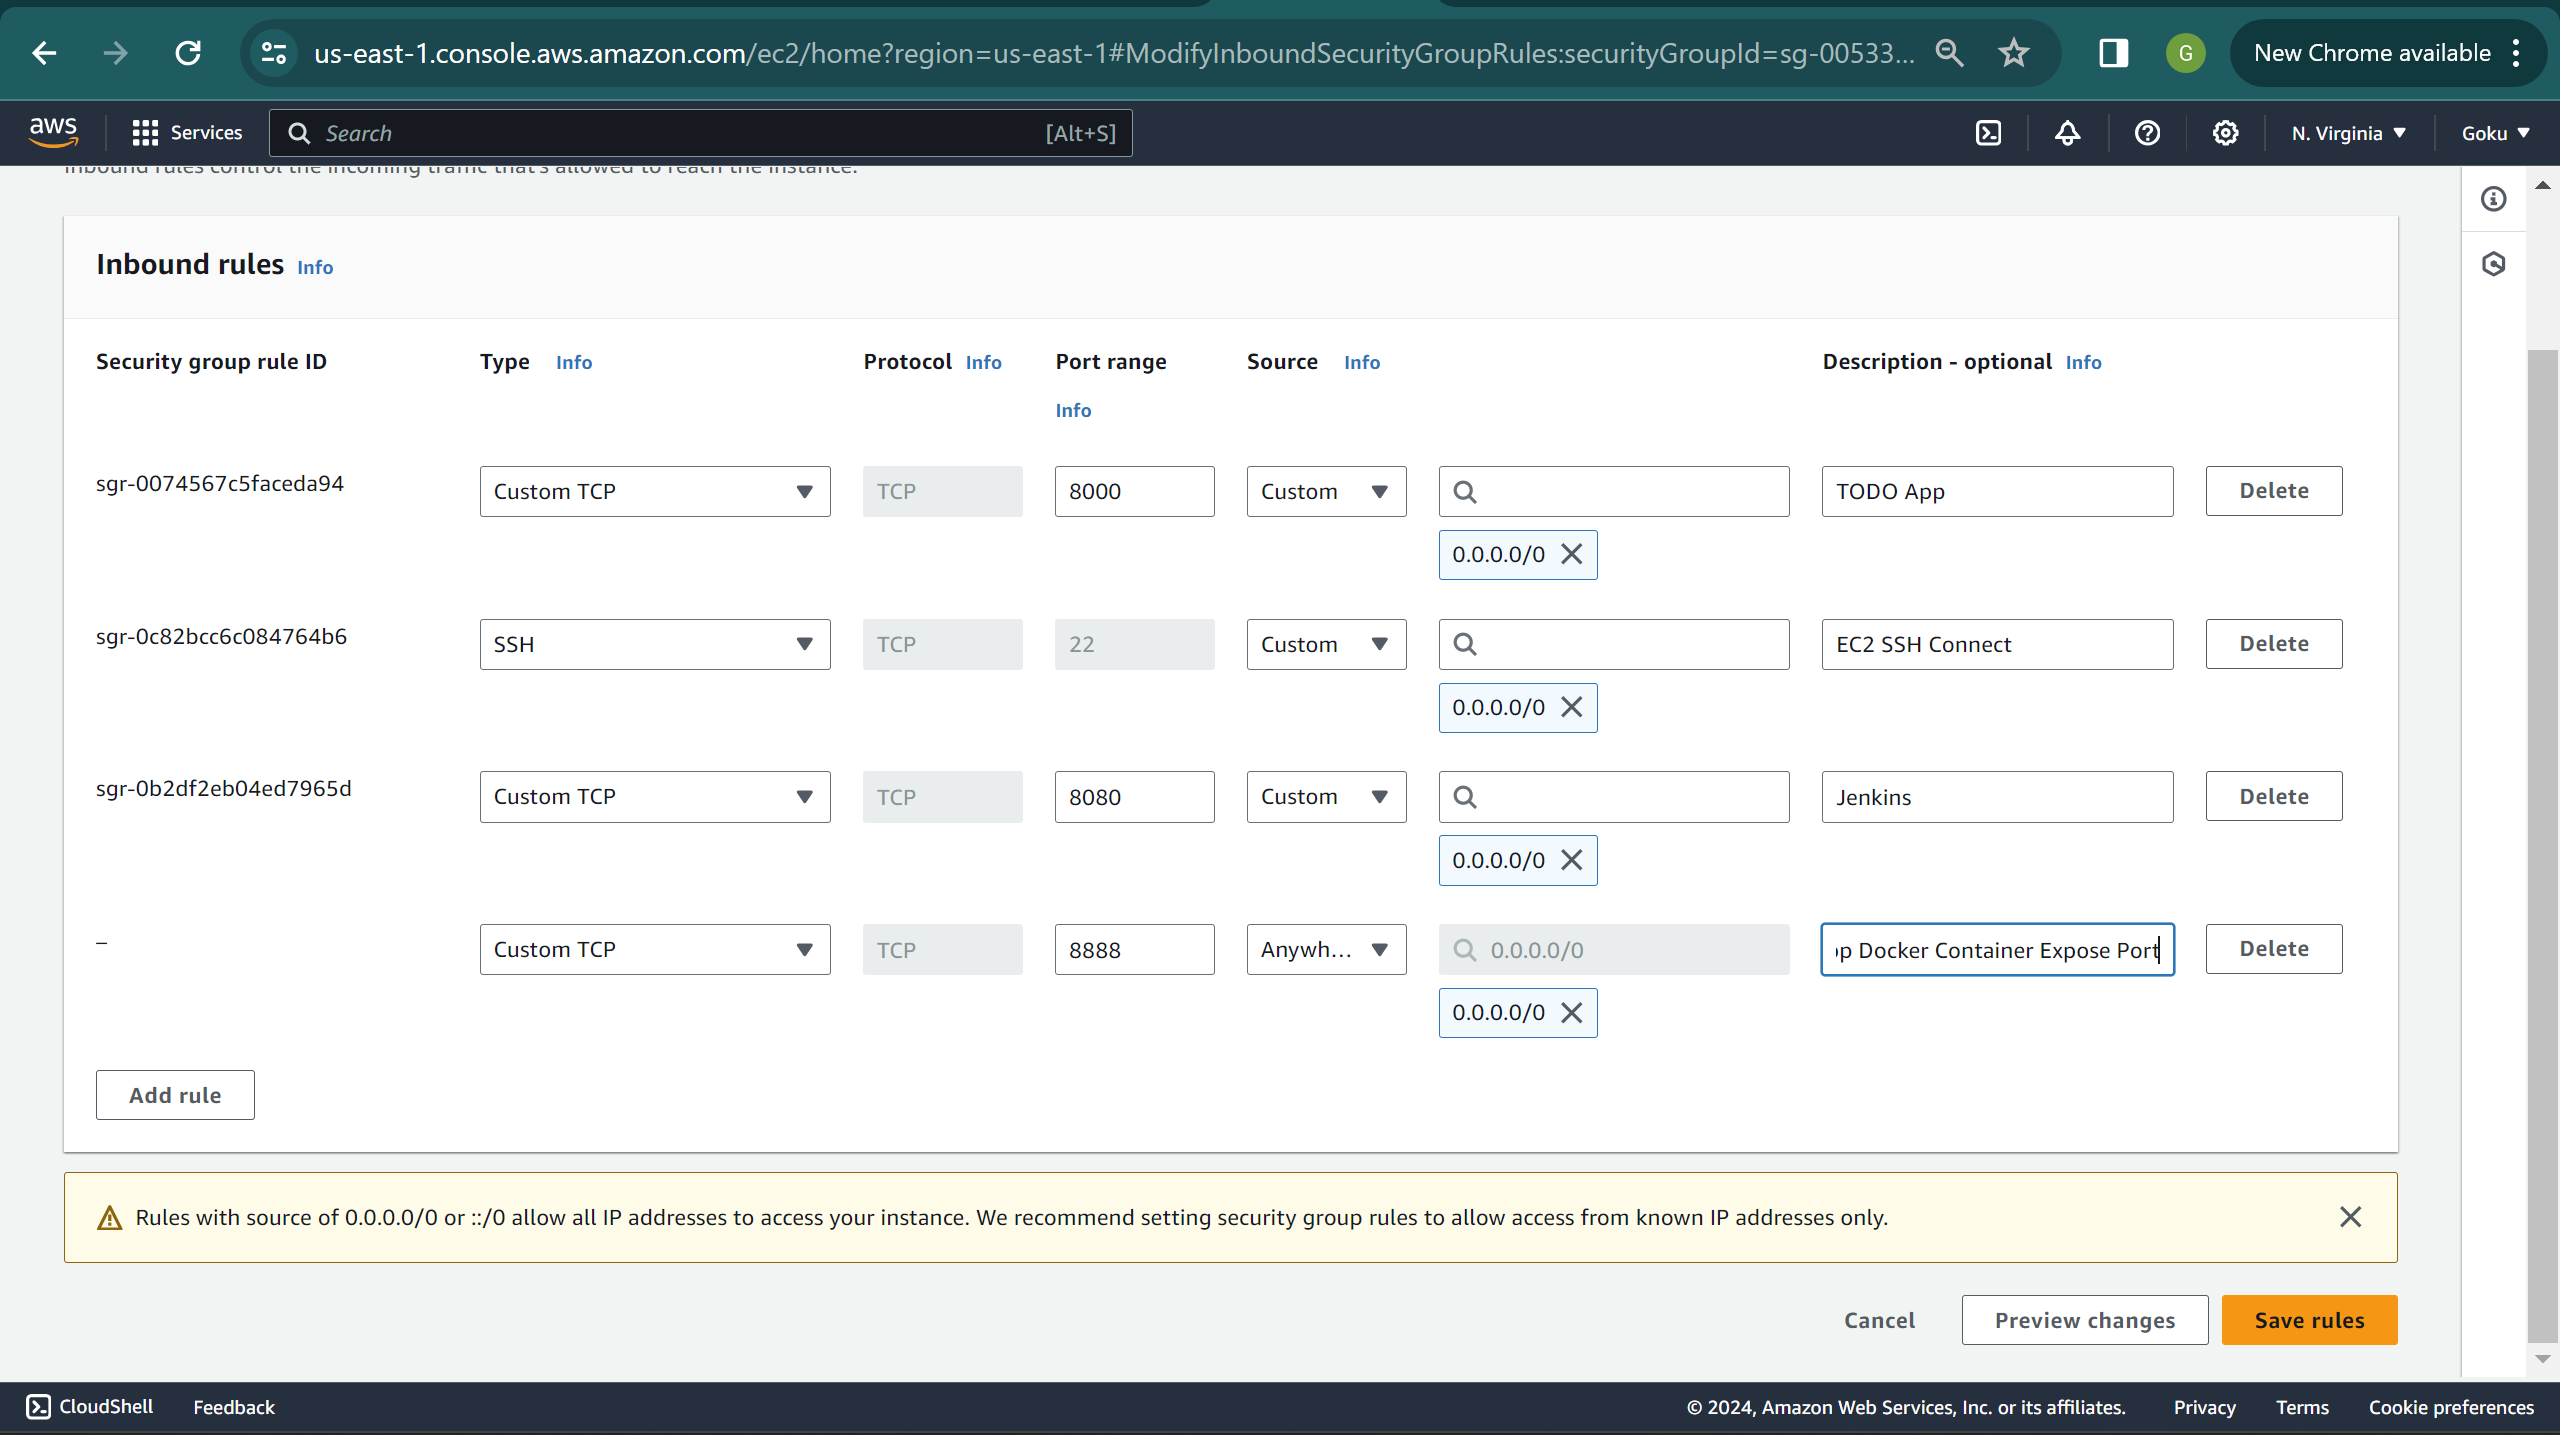
edit inbound rules
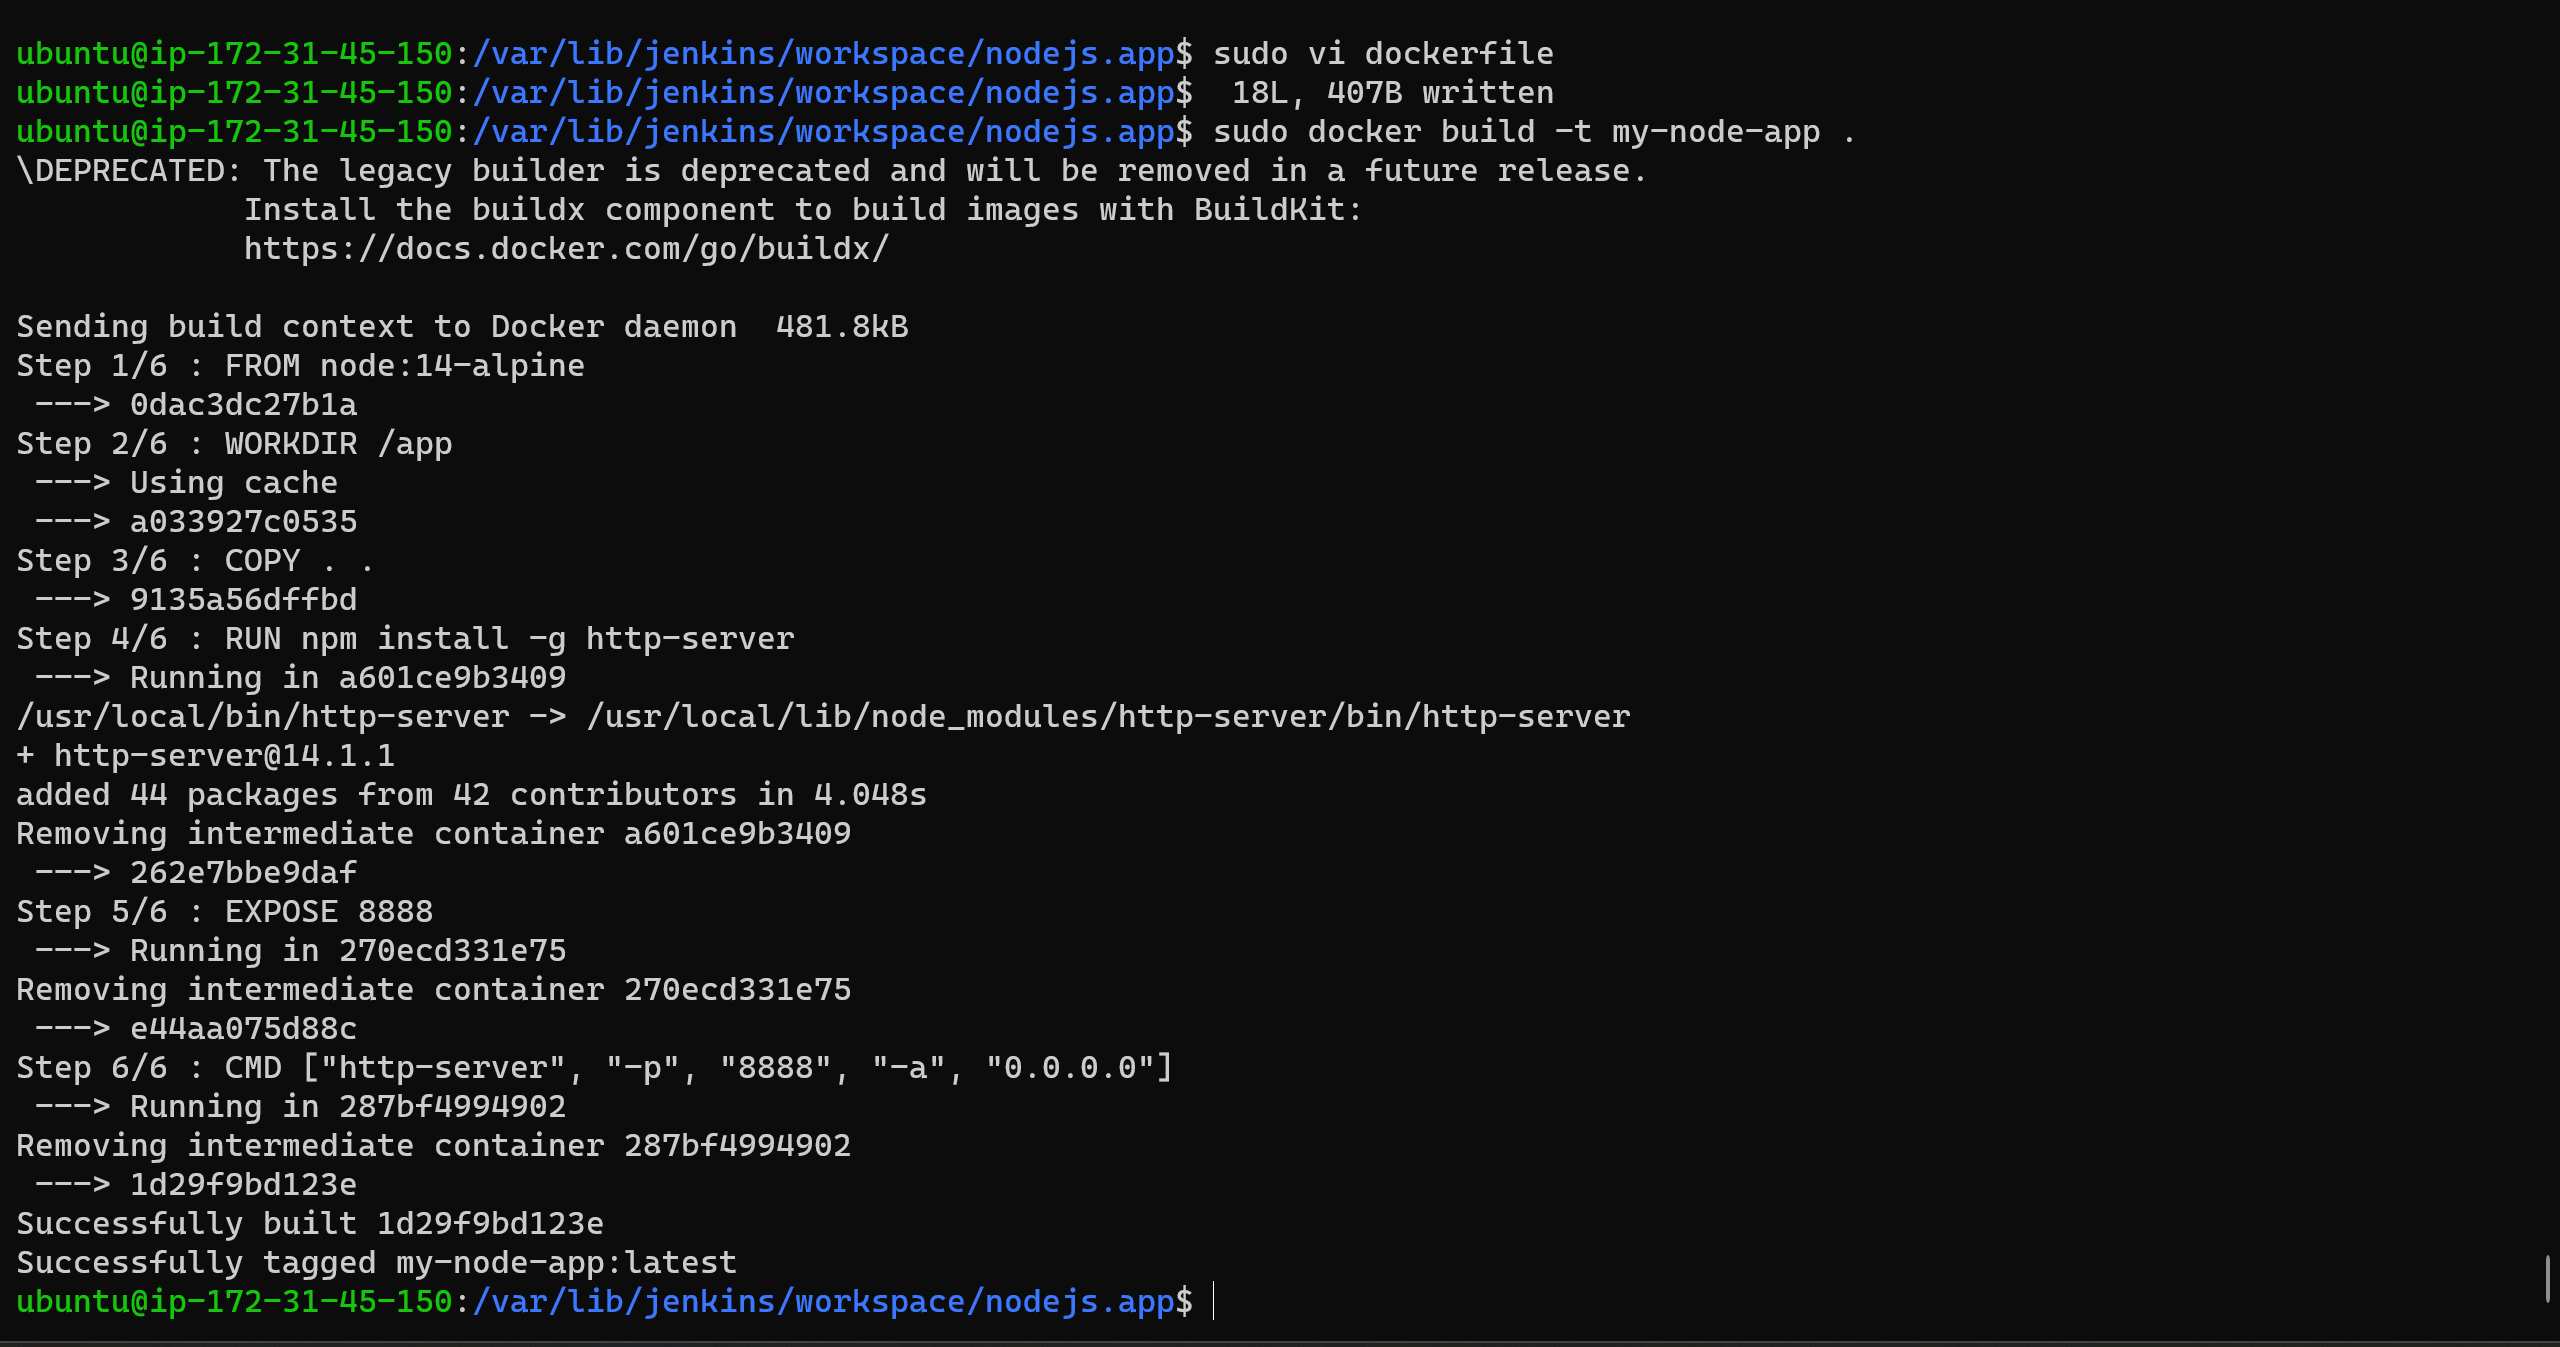
apparently I was getting a error
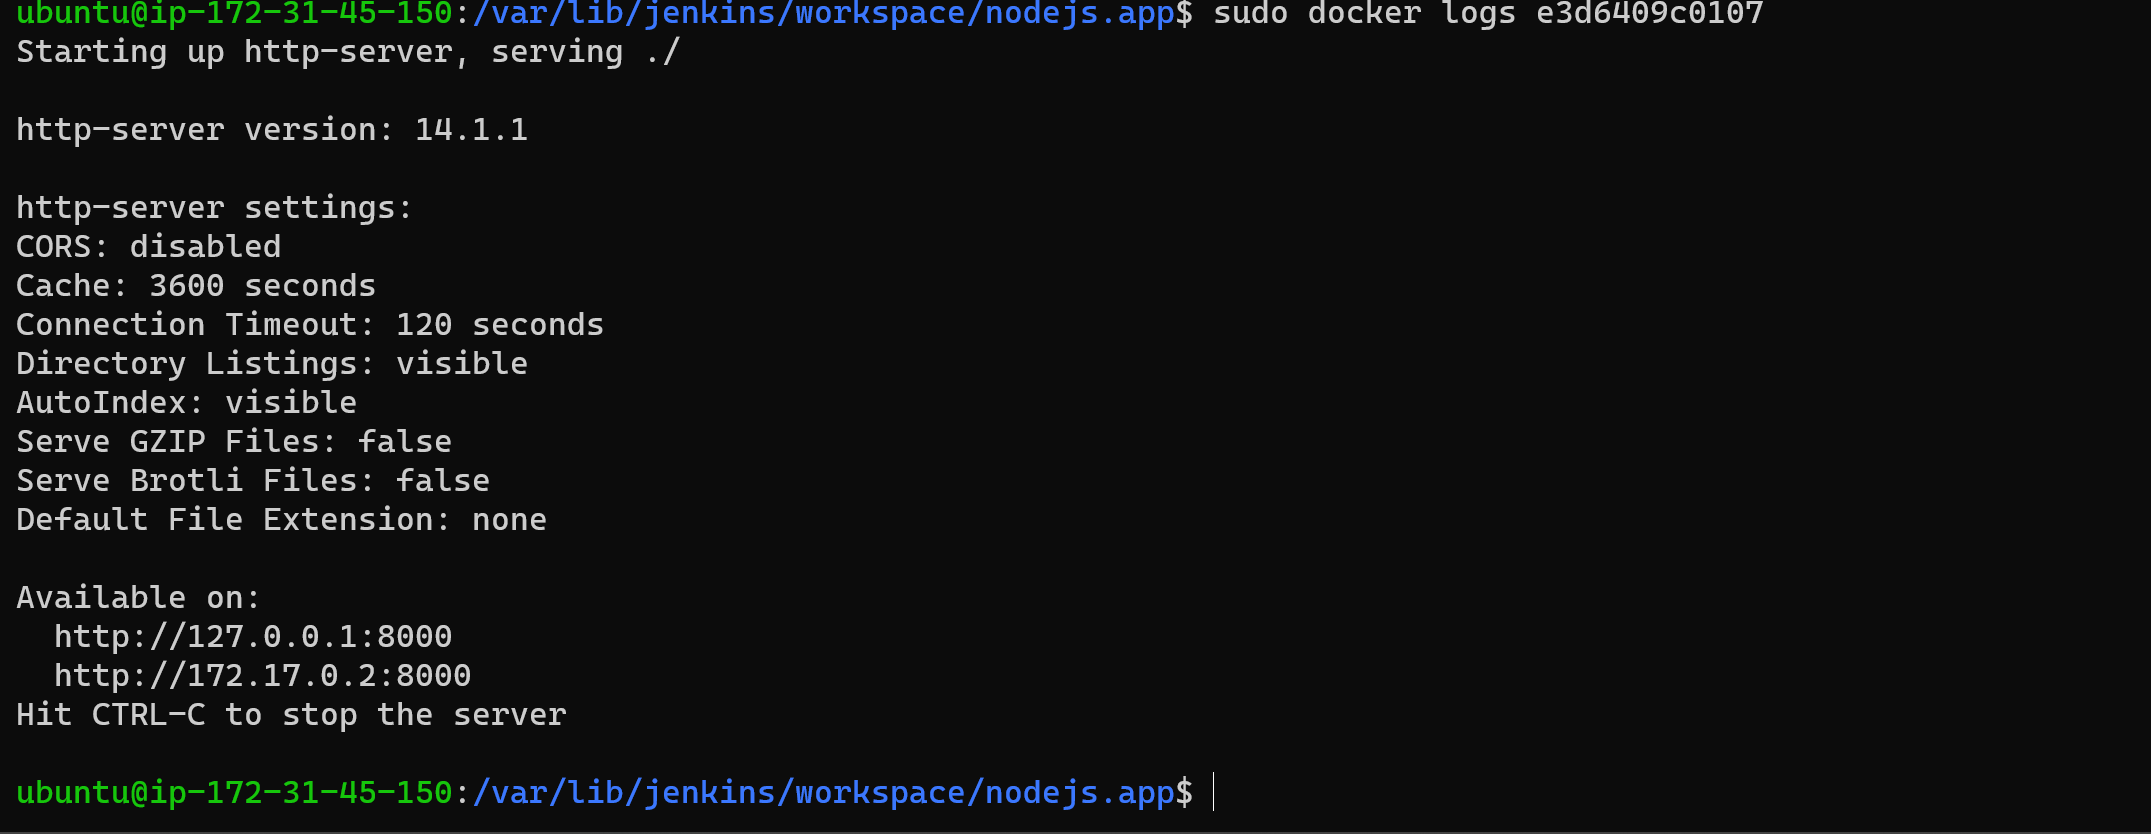
fixed it!!
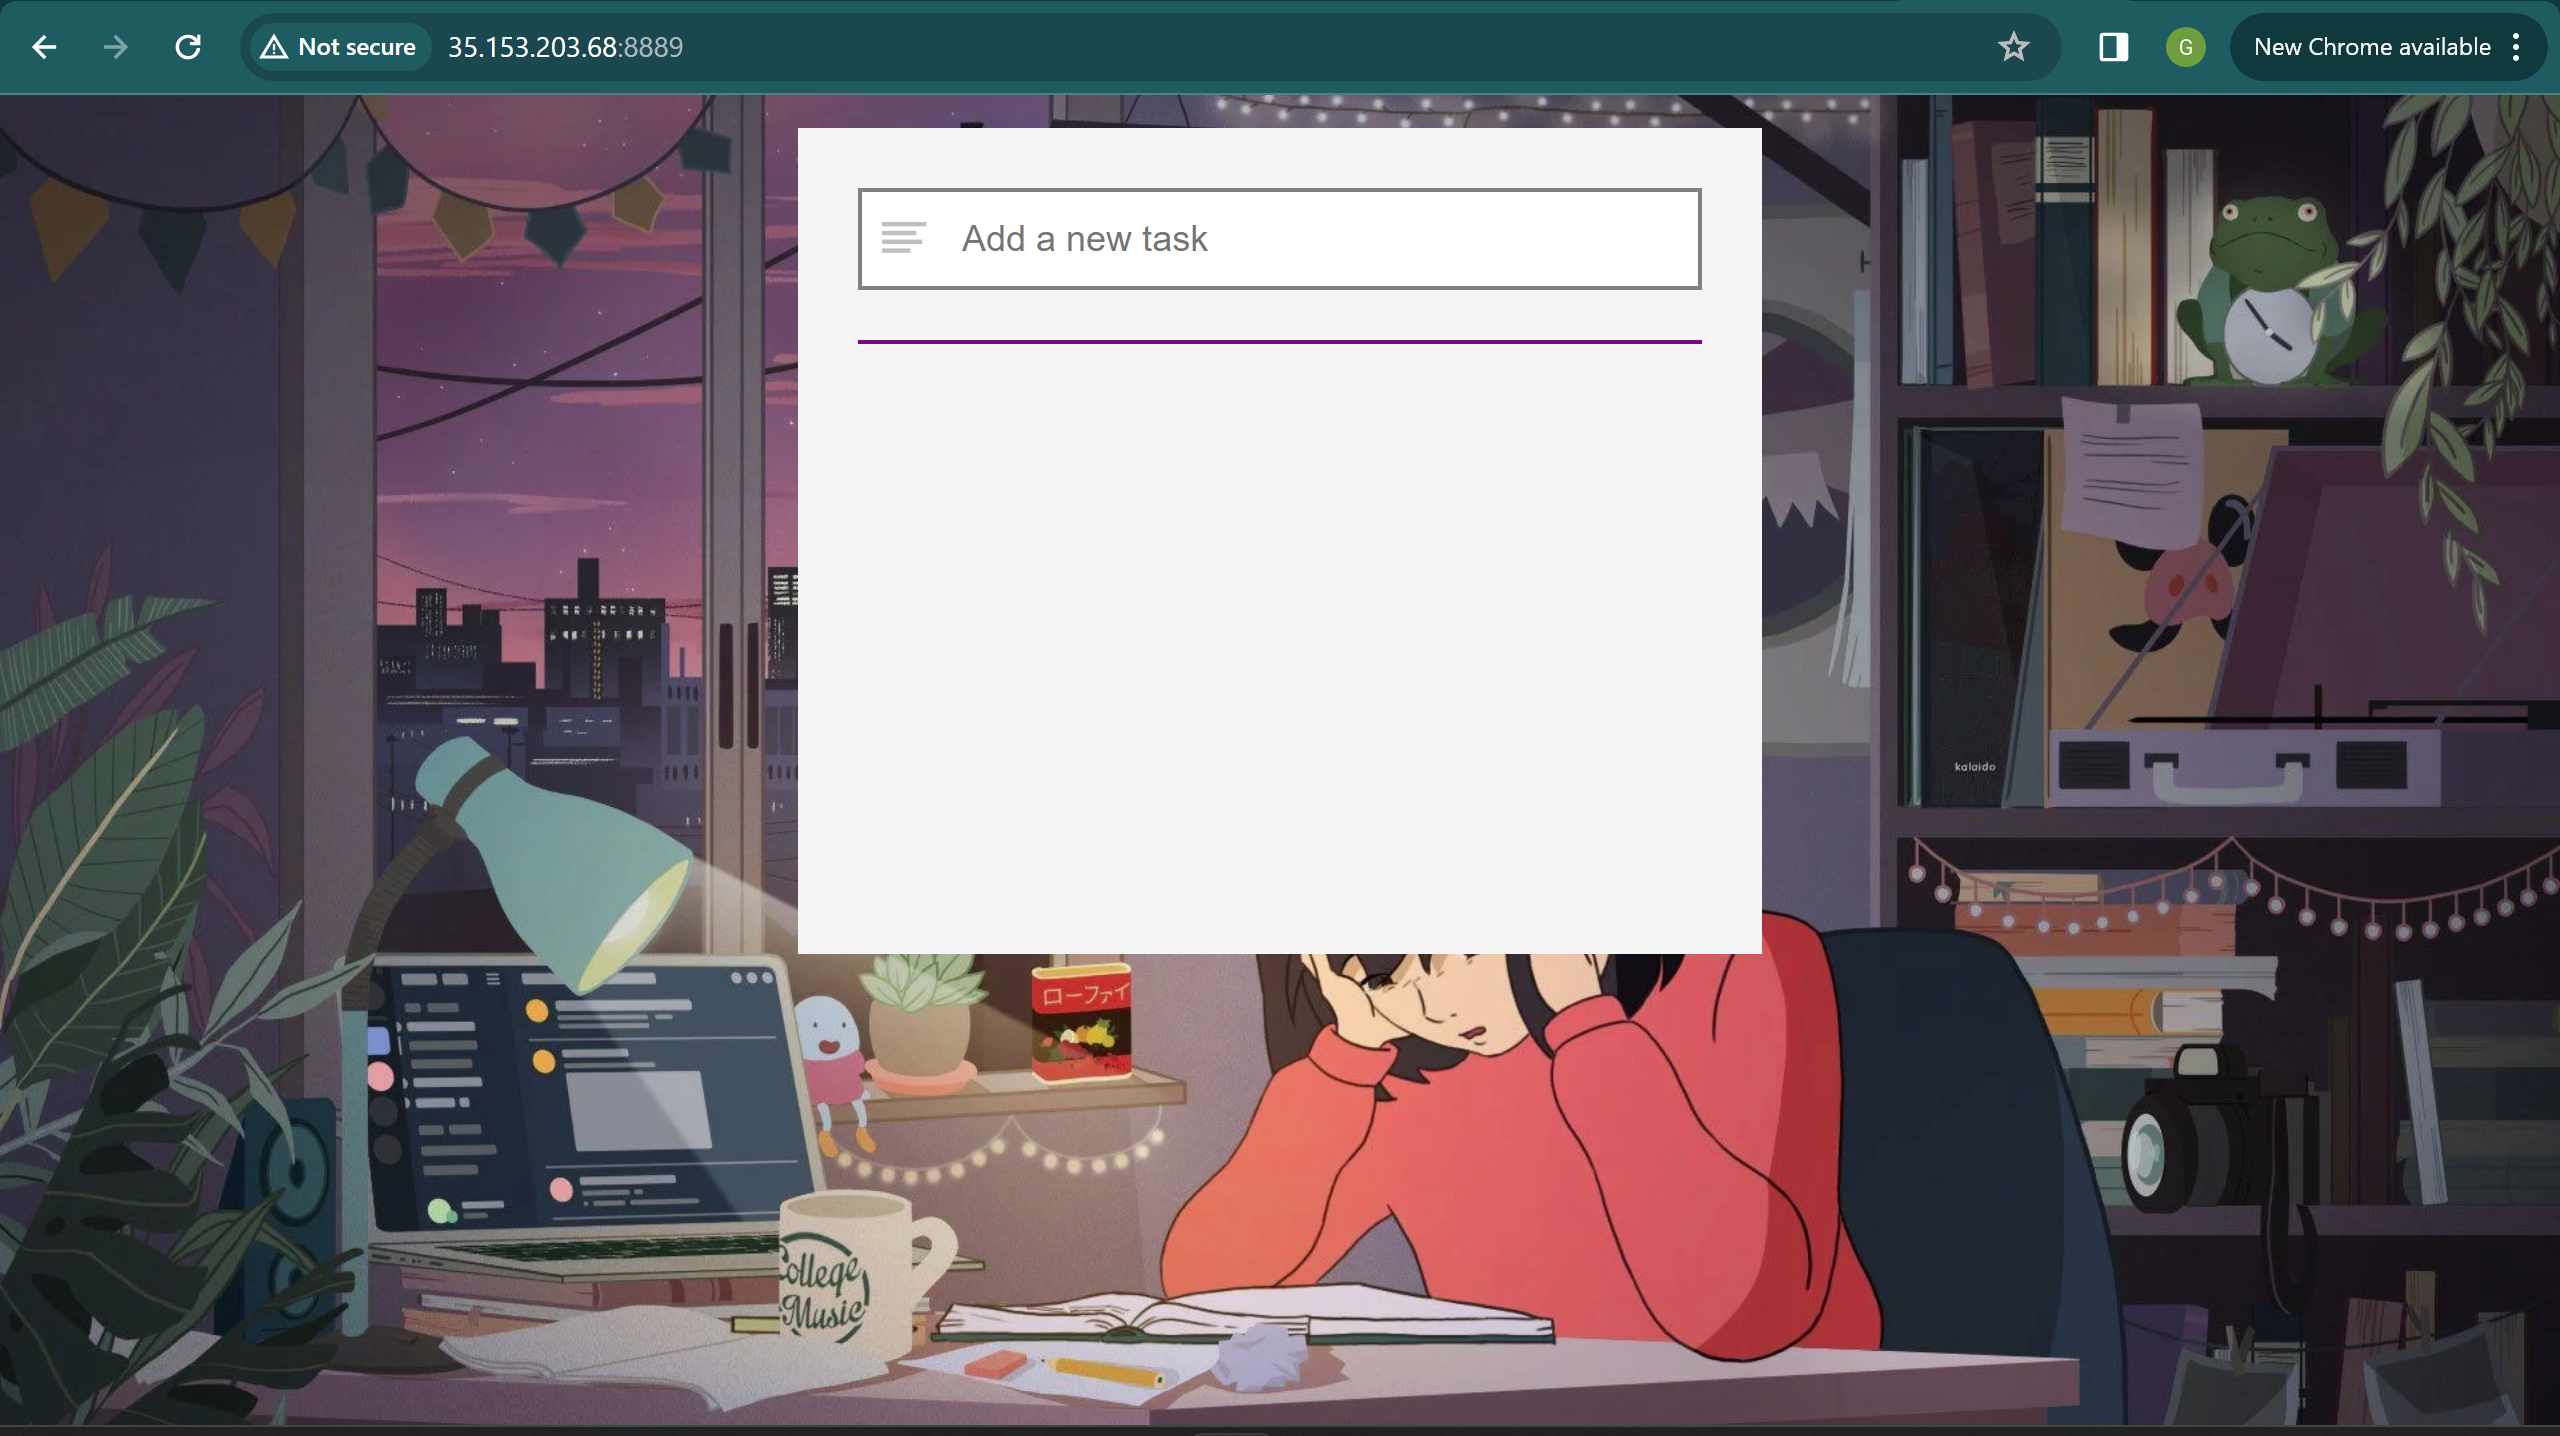
It is accessible.
Now we will automate this process by adding the commands in the shell.
Configure web-hook in the GitHub repository to trigger the Jenkins job automatically on updates or deletions.
Kill the existing container first.
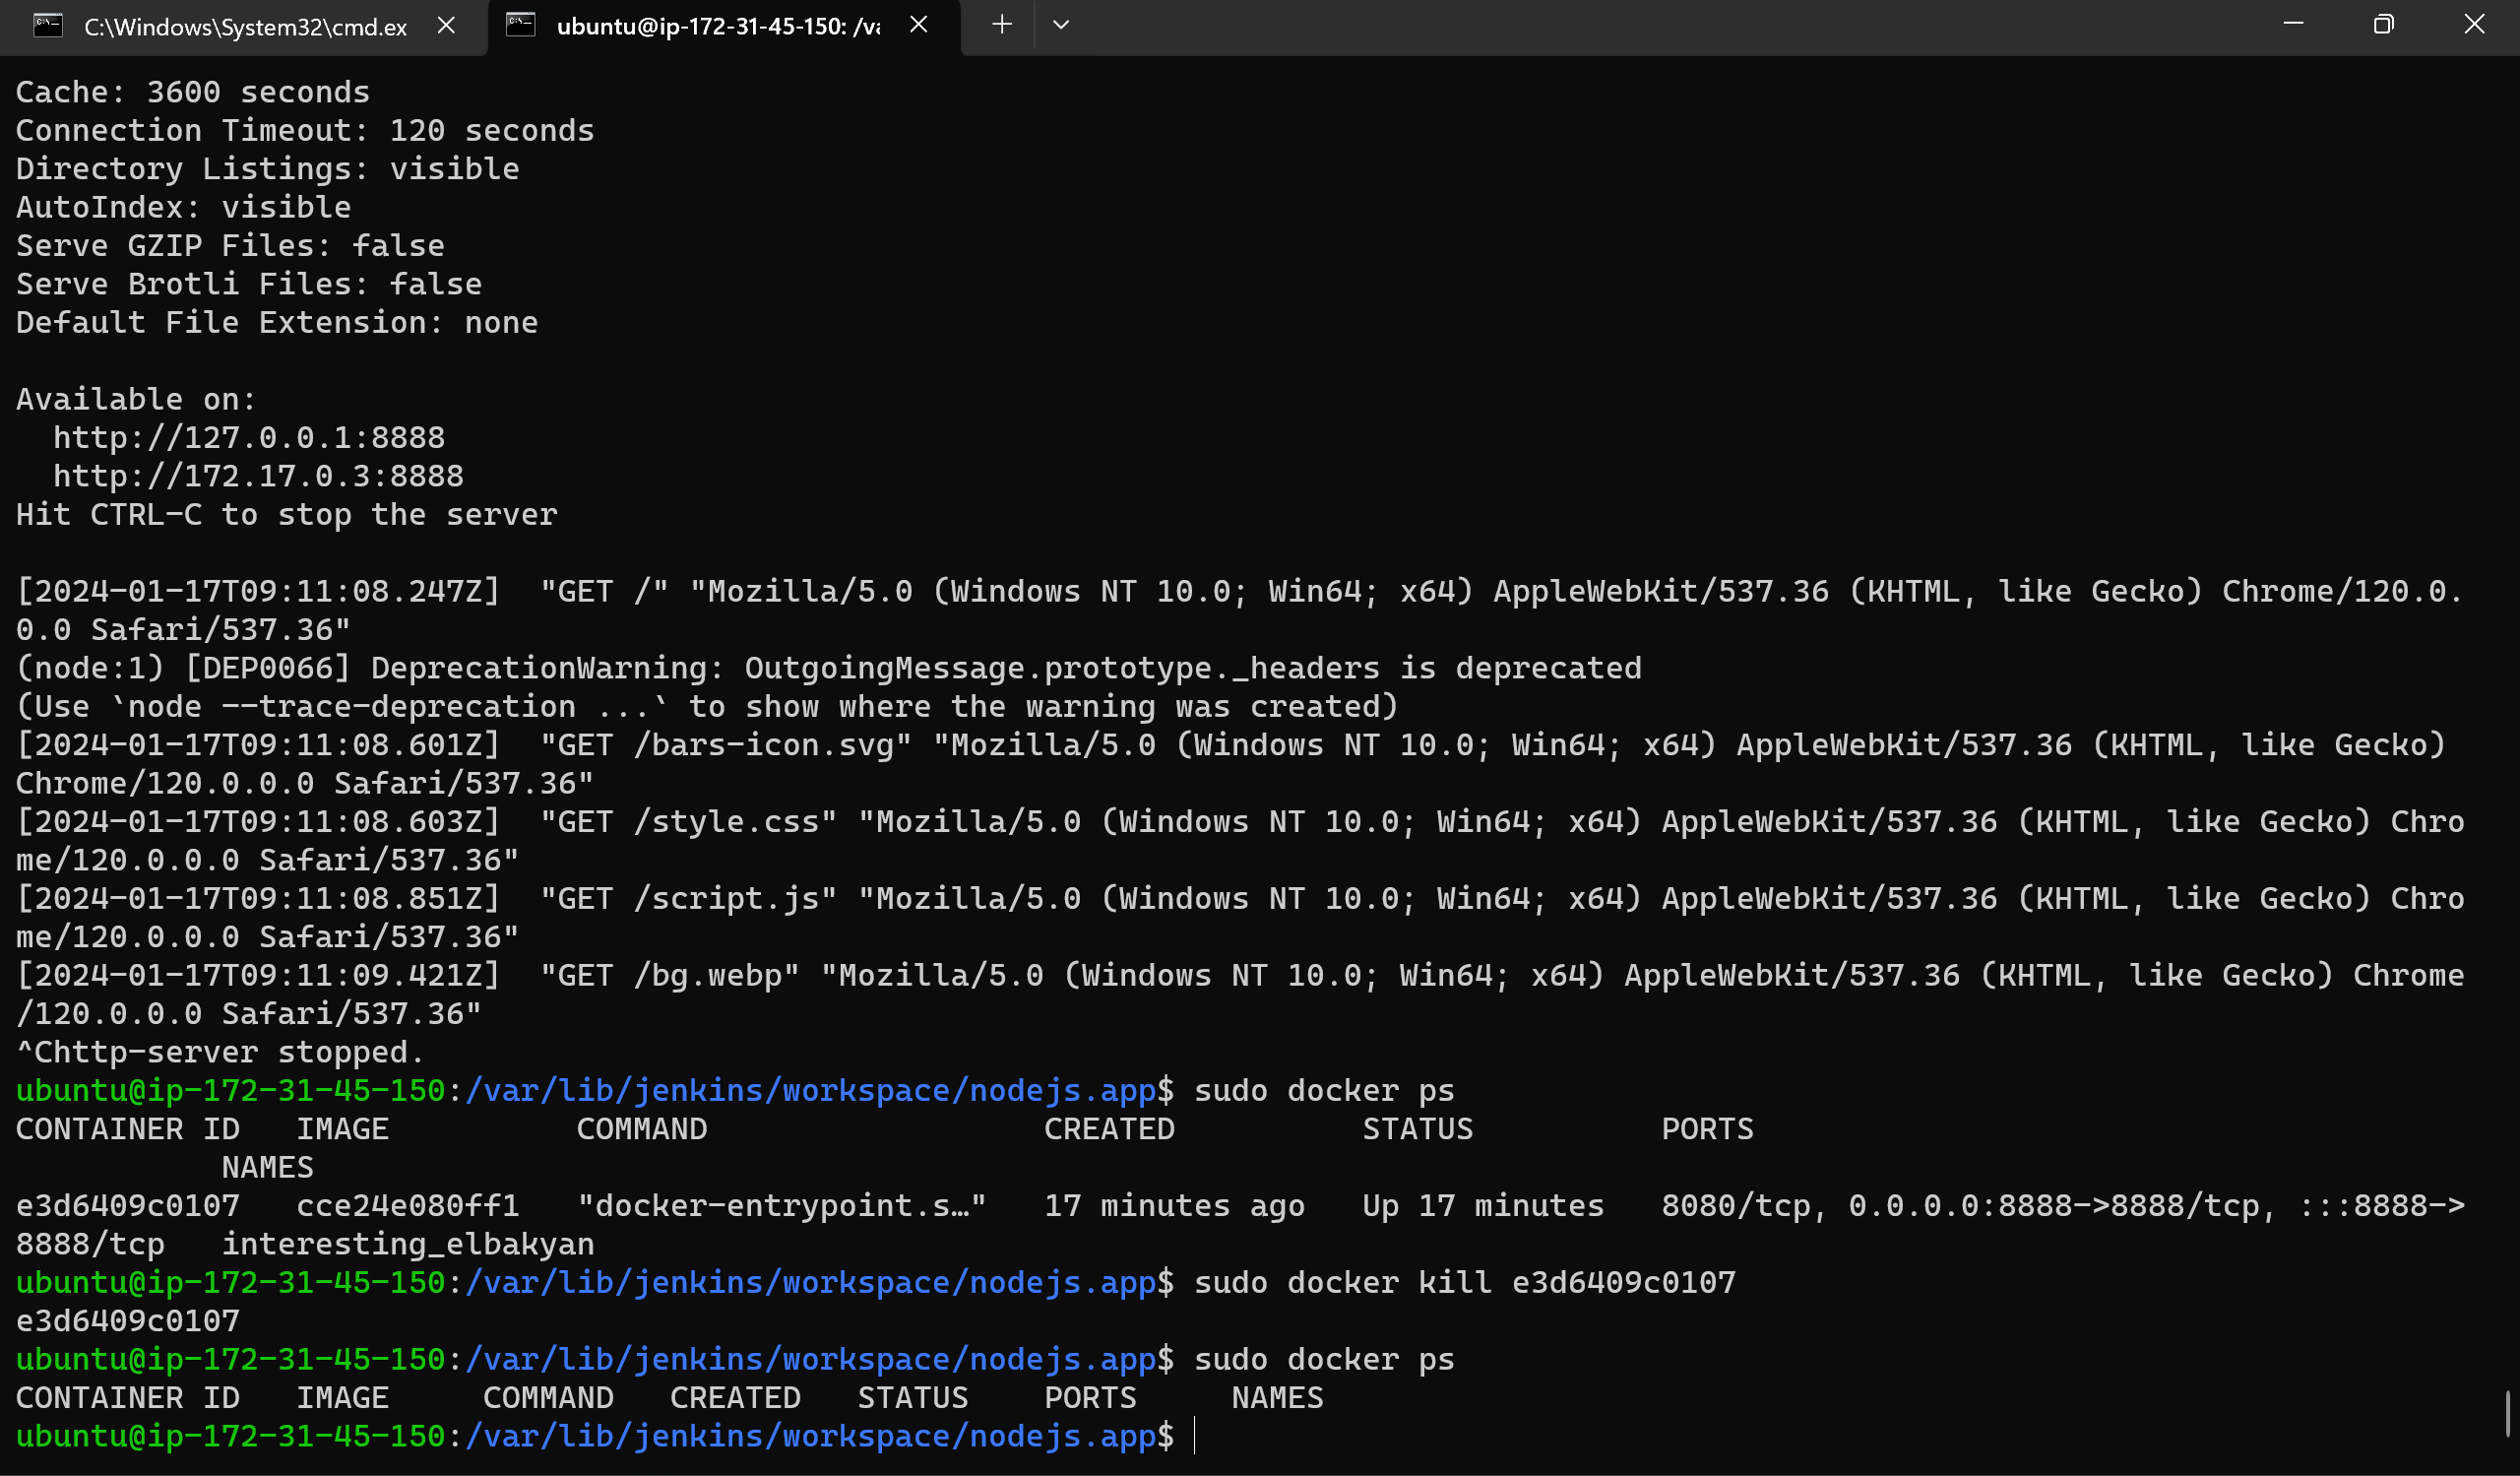
so now if i push some changes to github it will also get updated on jenkins and build automatically without human interaction
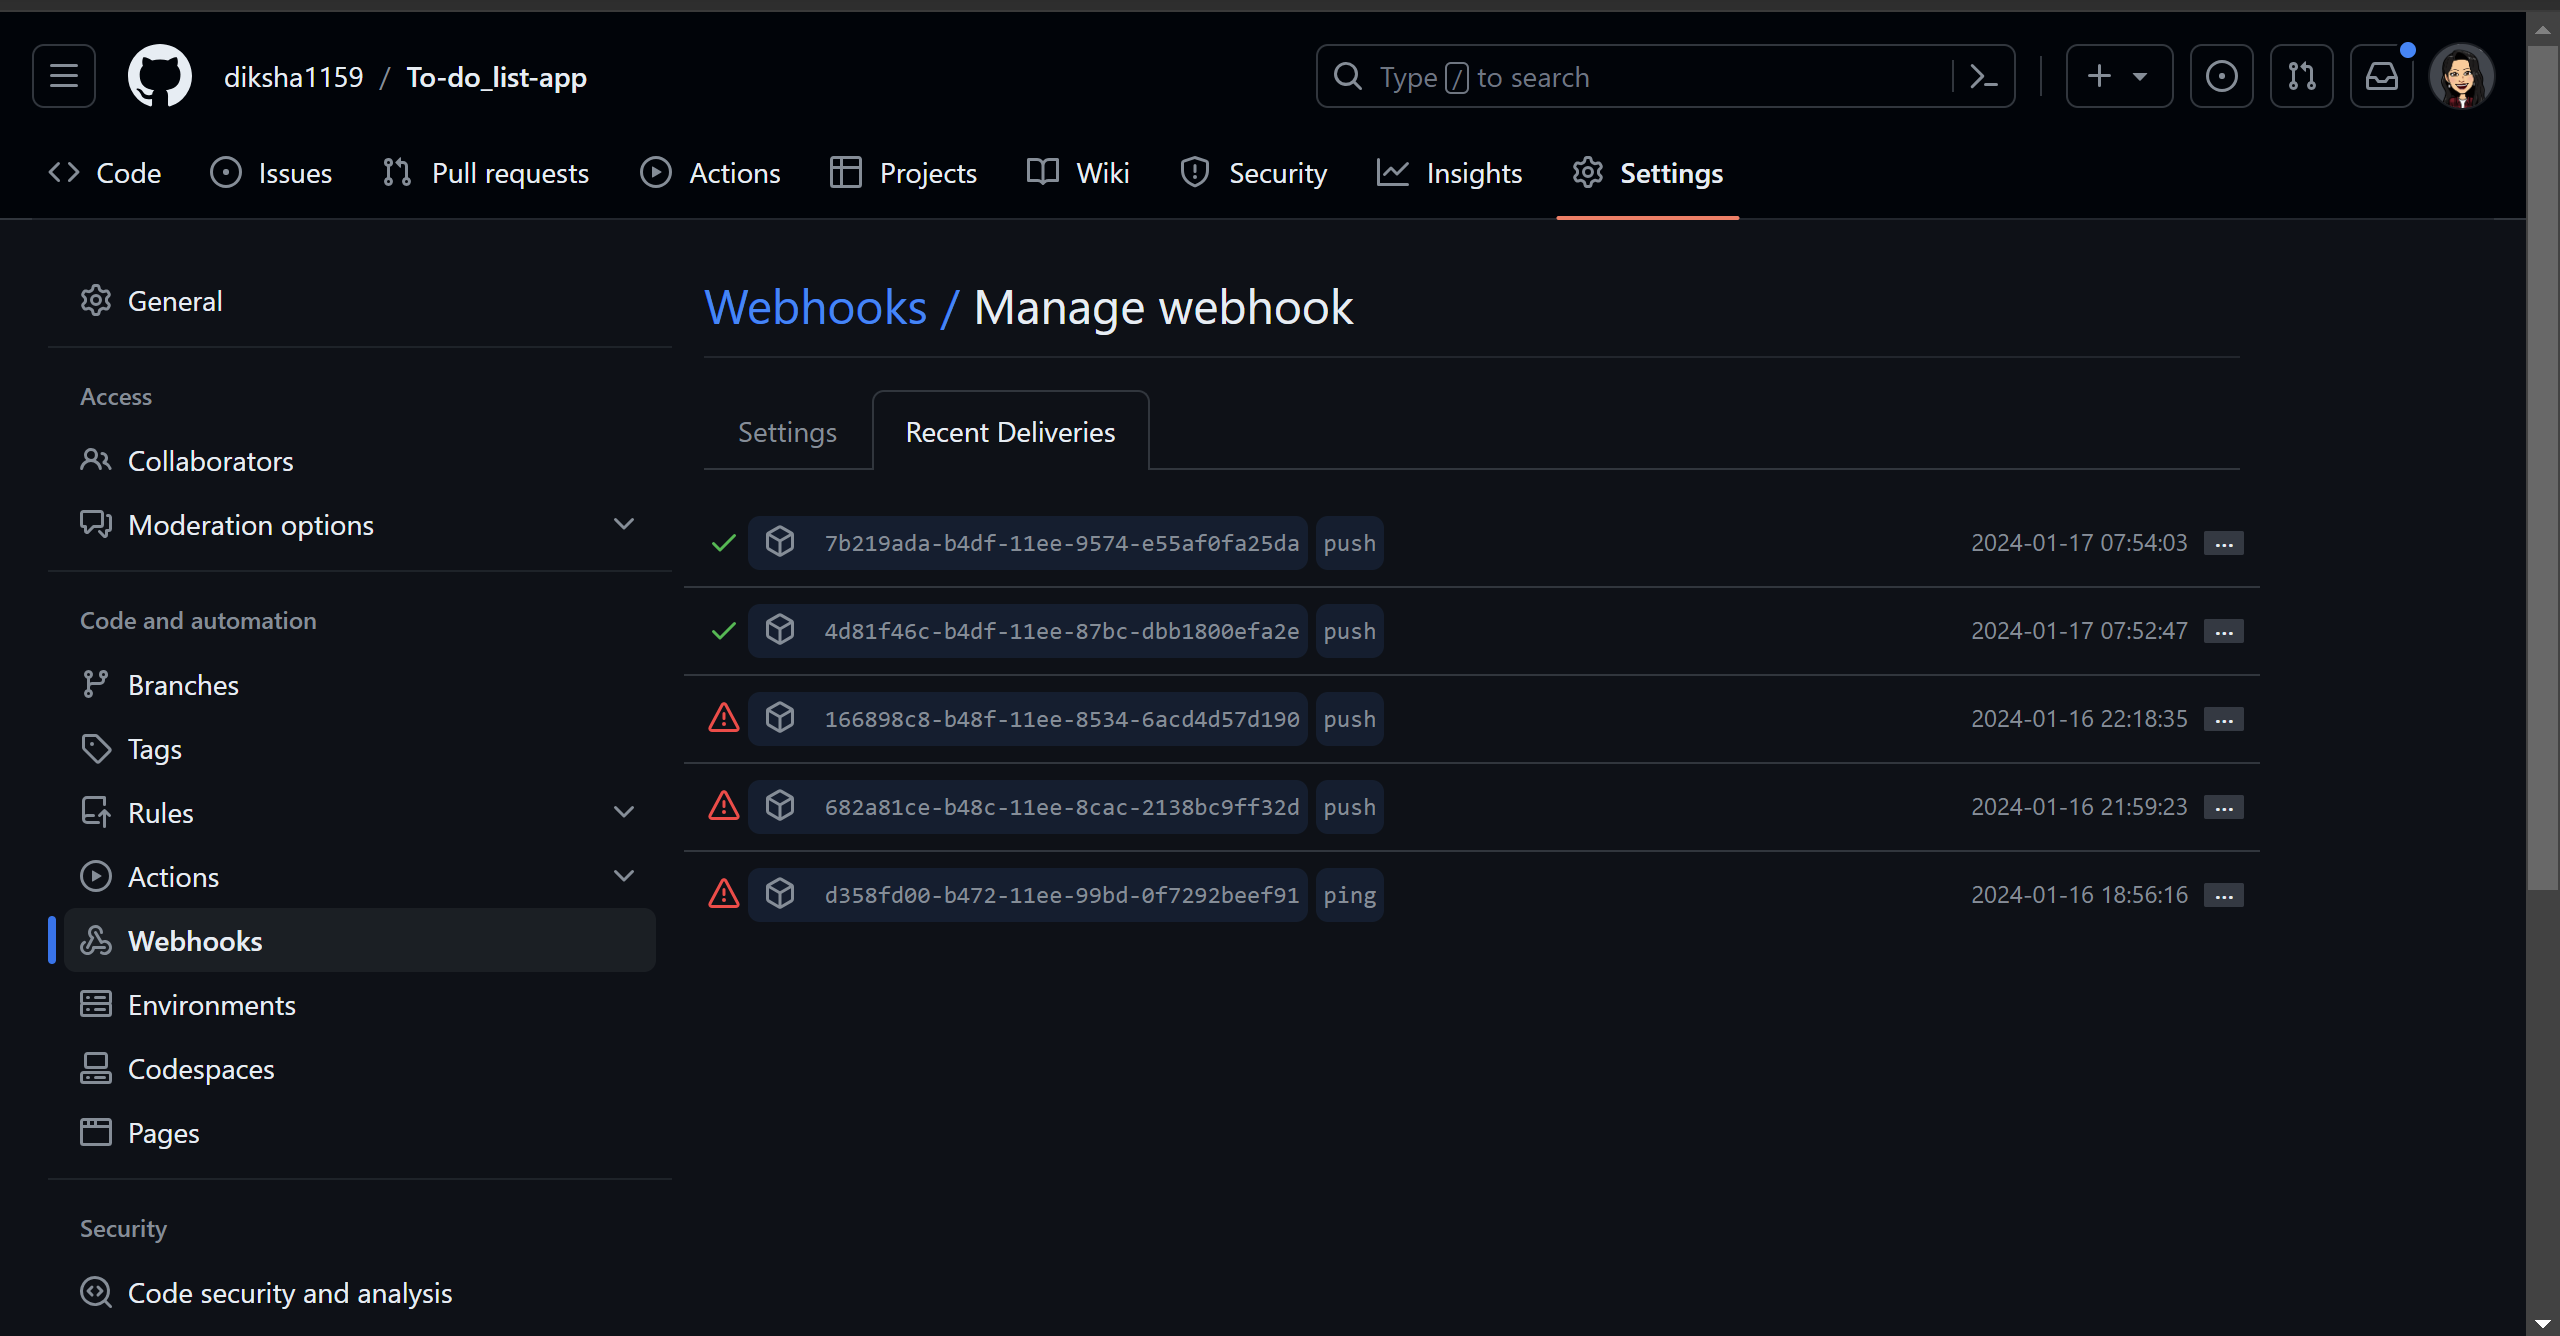
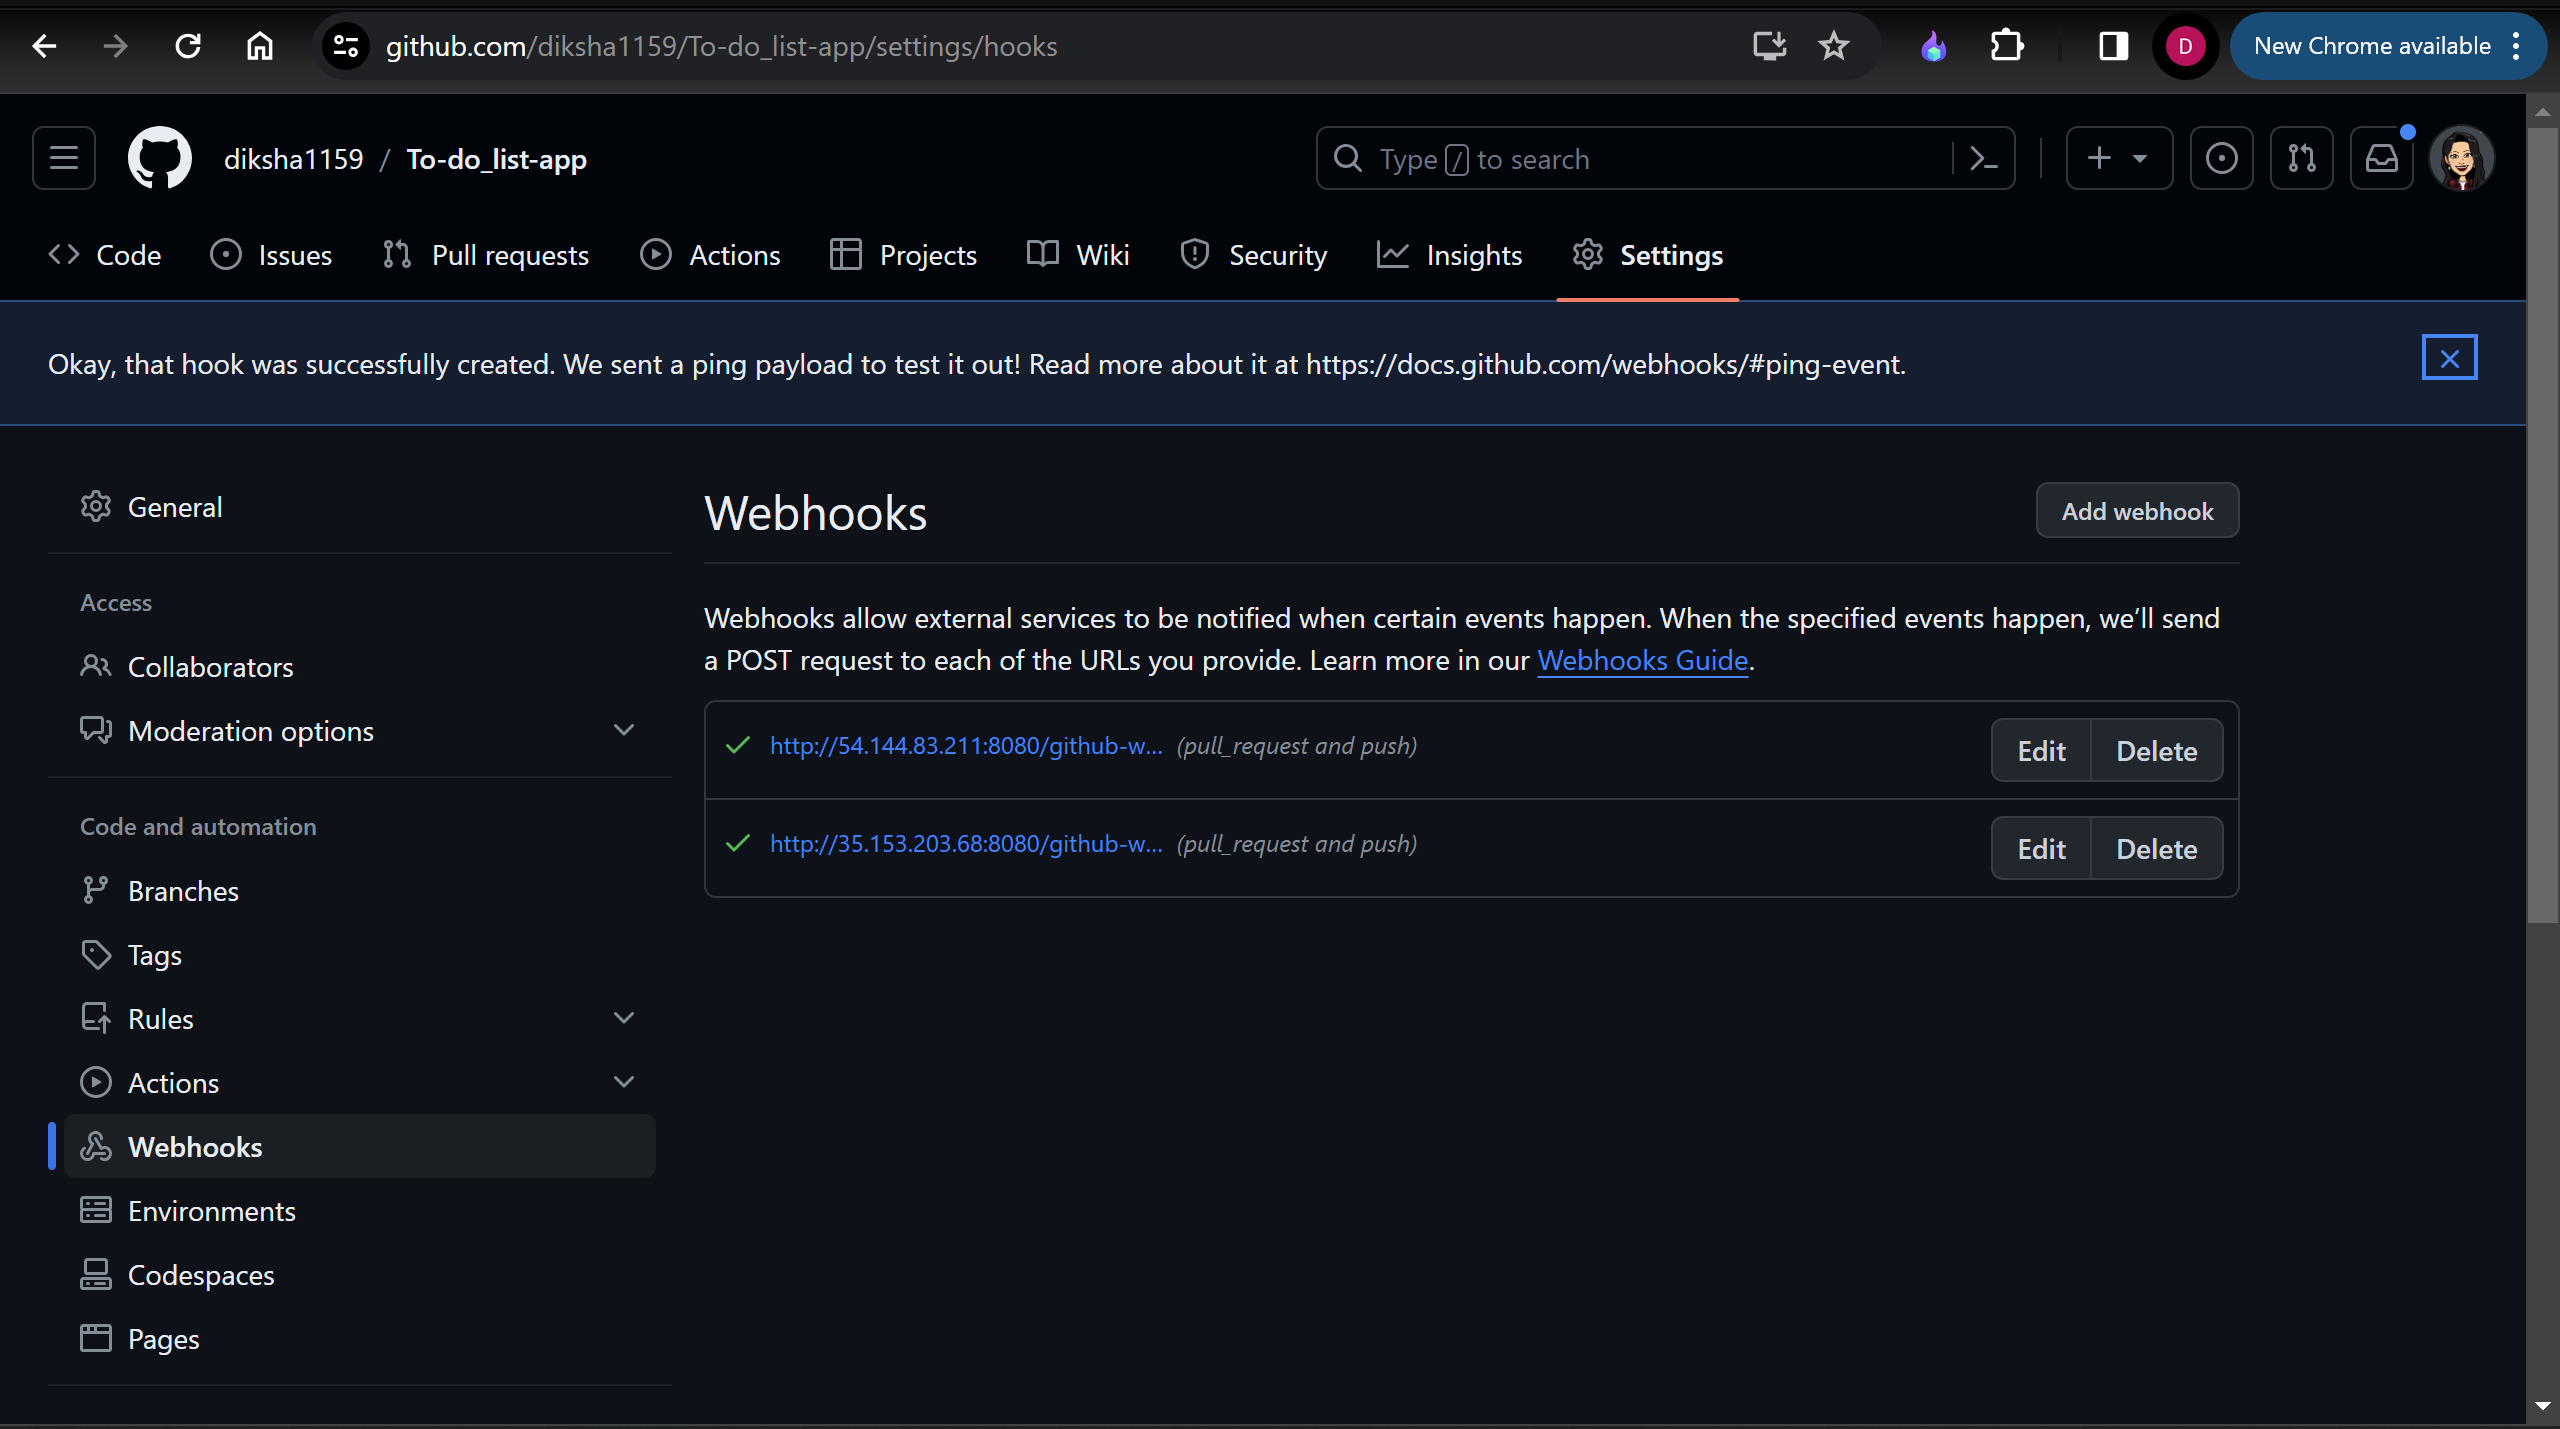
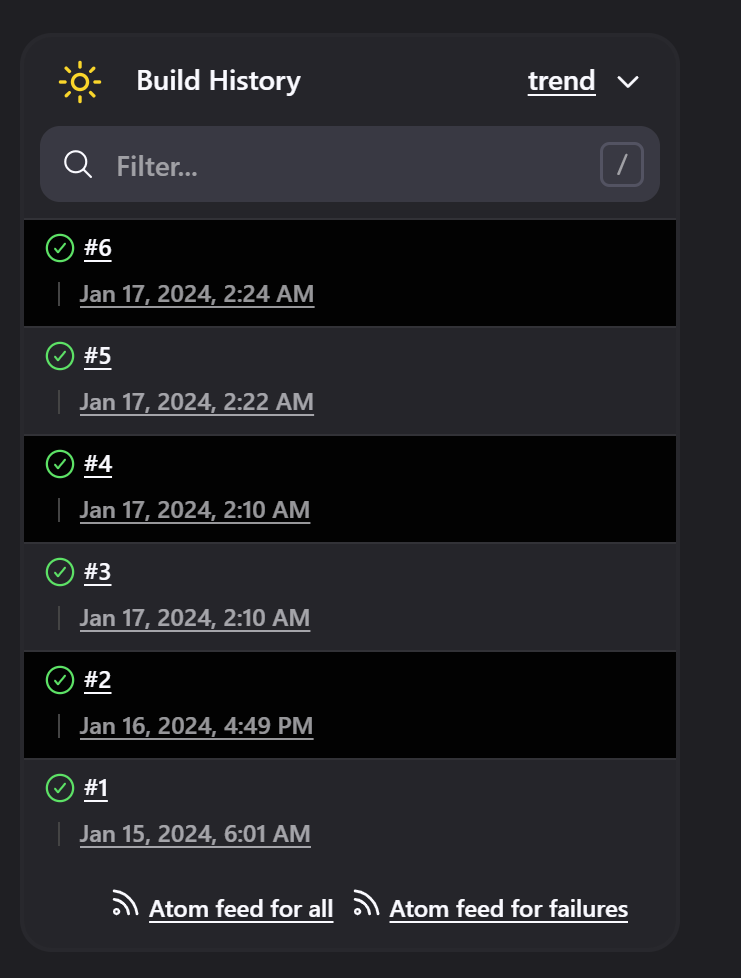
When things are going great and there's much success us rn:
ALSO, REMINDER TO DELETE ALL THE RESOURCES WE CREATED, ALL THE SSH KEYS, AWS EC2 INSTANCE, ETC...
Conclusion:
In conclusion, this project exemplifies the power of CI/CD in revolutionizing software development and deployment. The integration of Jenkins, AWS, GitHub, and Docker created a robust ecosystem that not only saved time and effort but also significantly improved the overall reliability of our Node.js application. By showcasing the successful implementation of these technologies, we hope to inspire others to embrace CI/CD methodologies for a more efficient and streamlined development process.

References:
https://skfaizan.hashnode.dev/seamless-devops-deploying-a-django-todo-app-with-docker
https://www.theserverside.com/blog/Coffee-Talk-Java-News-Stories-and-Opinions/Jenkins-GitHub-Webhook-example-no-403-crumb-error
https://plugins.jenkins.io/github/
Subscribe to my newsletter
Read articles from Diksha Jadhav directly inside your inbox. Subscribe to the newsletter, and don't miss out.
Written by

Diksha Jadhav
Diksha Jadhav
Just starting my journey in the tech world! As a beginner programmer, I'm eager to learn and grow in the field. I'm excited to connect with others in the tech community and see where this journey takes me.