Web Scraping 101 – Introduction to Data Scraping using Cheerio with Node JS
 Oluwatobi
Data, they say is Oxygen. Data plays a key role in the everyday living of an individual. A decision to go out based on the weather forecast is based on data collected over the years. More so, it's essential for small firms, large corporations, industries, national sectors, financial markets and also in multinational relations as it forms a strong basis for assessment and decision-making. Based on this, efficient sourcing of relevant data is very important. In this tutorial, we hope to walk the beginner through how to collect data which is popularly termed scraping from websites and other web applications. Although Web scraping is not out rightly illegal, it could however be flagged if used to collect much sensitive information. We would be scraping and storing data mainly for educational purposes. Right now, we would then proceed to the tutorial. This tutorial intends to guide beginners and intermediates on how to perform web scraping actions using Cheerio but before that, I would shortly highlight the necessary prerequisites needed to fully harness all that would be discussed in this tutorial.
Before we begin, here are some important prerequisites for this tutorial.
Basic Knowledge of Node JS
Basic knowledge of JQuery
What Is Cheerio?
Cheerio is a web tool used for obtaining data from websites and other web applications. It works as an implementation of the JQuery library by creating a virtual document object model of the website to access specific query selectors within the HTML code. This data obtained can then be accessed as desired to generate some texts. A good example of tools that perform similar action is Puppeteer.
Cheerio is a very robust but also minimalist package as it offers quite a range of advanced features with a small disk space size. It also harnesses the ability to collect data across paginated sites. The combination of this package with web backend tools such as Node Express can be used in the creation of data bots. Right now, we would like to dive deeper into its usage in the Node JS application but before then, let us set it all up.
Setting up Node JS
Setting up a Node JS application is quite straightforward. First of all, ensure that you have the current version of Node JS installed on your computer. If you haven’t installed it yet, you can download it here. Thereafter, create an empty folder for your file. You can name it whatever you want. Open to command prompt and navigate to that folder. Then type npm init in order to initialize the info you need for the application. To install relevant libraries that would help you run the application seamlessly, type npm install This command will install the necessary packages to run the application. Then we would create an index.js file and type the following to initialize the node application.
const express = require("express");
const app = express();


const cors = require("cors")


app.use(express.json());
app.use(cors());


app.get("/" , (req, res) => {
res.status(200).send("hello, you are welcome  ")
});

app.listen(process.env.PORT  || 5000, ()=> {
    console.log("tobi is king");
})
Setting up Cheerio
To install Cheerio, type npm I cheerio in your command prompt in the folder directory. This would install the Cheerio package and other necessary packages to ensure its optimal function.
We would initialize Cheerio in our web application by typingconst cheerio = require(“cheerio”) With that, we have successfully set up Cheerio in our web application. Up next, we demonstrate our knowledge of web scraping by using Cheerio to extract some relevant data from an e-commerce website.
Demo Project

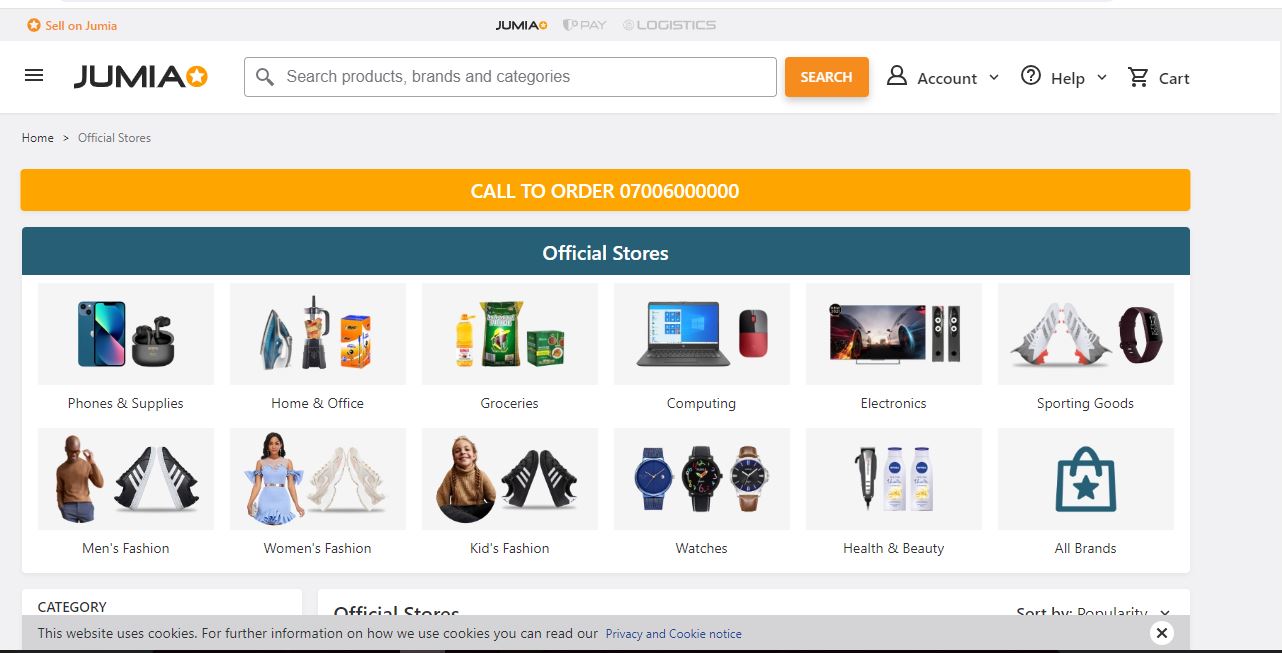
We intend on utilizing our newly found knowledge by performing a web scrape on an e-commerce web platform. Our platform of choice is Jumia. We intend to obtain the prices for some items on their site. The information would be obtained and then stored. We can then utilize the data obtained and compare it with the prices of its competitors. Here is the link to the Jumia page. Now let us begin.
Accessing the website to be scraped would be done using Axios package. It can be installed by running npm i axios within the same project folder on command prompt. A success statement would be displayed on the command prompt after the command is run. Then, we would be defining a function which encapsulates all that we need to do to obtain the data. The name of the function in this tutorial would be JumiaScrape. The entire code for the project is displayed below.
import express from "express"
import axios from 'axios'
import cheerio from "cheerio"
import cors from "cors"

const app = express();
app.use(cors())
app.use(express.json())

const url = 'https://www.jumia.com.ng/mlp-official-stores/'

const JumiaScrape= async() => {


    try {
        const htmlData = await Axios.get(url);

const $ = cheerio.load(htmlData.data);

const items = $("article > .core").find(".info").map(function () {
  return {
    nameItem: $(this).find(".name").text(),
    price: $(this).find(".prc").text()
  }
}).toArray();
console.log(items)

    }
    catch(err) {
        console.error(err)
    }

}

JumiaScrape();

app.listen(process.env.PORT|| 4000, () => {
    console.log("Hello Weby Scrapy")
  } )
We start by defining the web URL we intend to scrape. Thereafter, we set up the asynchronous JumiaScrape function which contains the required operations to locate the data.
It contains a try & catch block which catches any error that occurs while the function is running and displays it. Axios is used to fetch the web URL content and this content is then parsed into Cheerio. Cheerio.load(“”) which then converts the web page to its original html format in order to easily scrape it’s content.
const items = $("article > .core").find(".info").map(function () {
  return {
    nameItem: $(this).find(".name").text(),
    price: $(this).find(".prc").text()
  }
}).toArray();
console.log(items)
As we said earlier, Cheerio’s implementation is similar to JQuery, hence the use of a dollar sign to represent it.

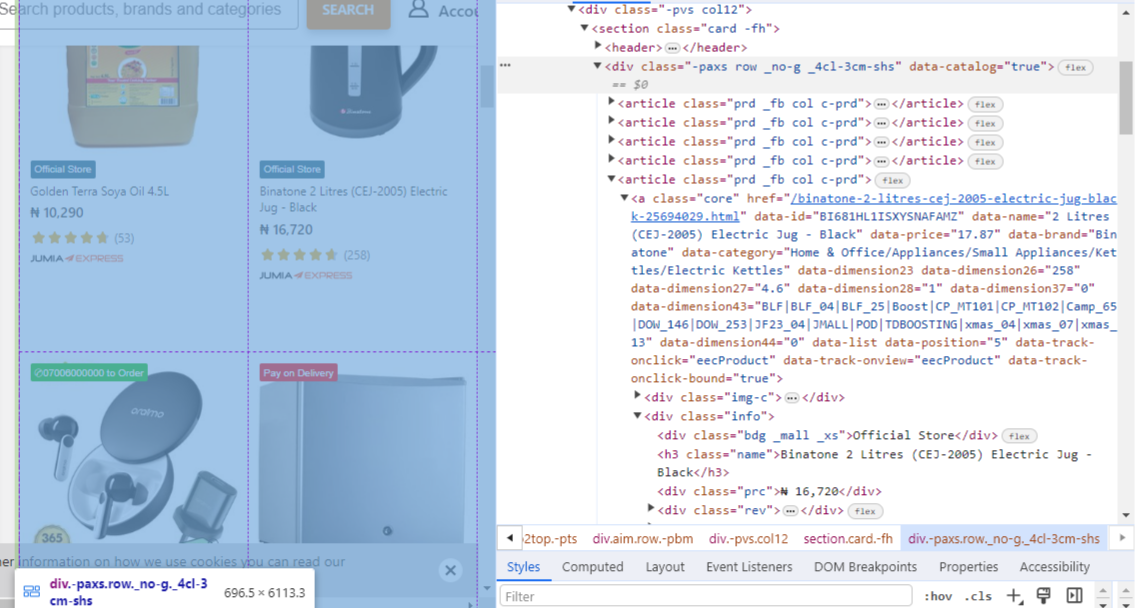
In order to retrieve the desired data, we had to inspect the elements in our browser to locate the selectors and attributes containing our desired data. As you can see from the image below, the div class “name” and div class “prc” contained the item information and price respectively.
Our function tries to locate the texts of choice using these selectors and generates all the available items and prices using the Javascript Map function.
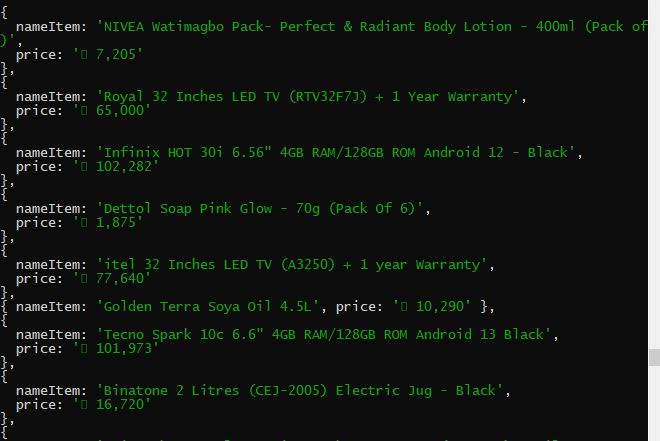
Displayed below are some of the data obtained.

Other Additional features
After getting our data, there are a lot of things that can be done with it. You can then parse this data and output it in a csv file for storage, or you can store the raw data in your database application (Mongo DB, MySQL etc.). Also, to get automated regular periodic data from the site, a simple Cron job can be done and a defined interval can be implemented. Here is an article link to learning Cron.
Conclusion
With this, we have come to the end of the tutorial. We hope you’ve learnt essentially about MongoDB Cheerio and how to harness it to obtain data from websites.
Feel free to drop comments and questions and also check out my other articles here. Till next time, keep on coding!
Subscribe to my newsletter
Read articles from Oluwatobi directly inside your inbox. Subscribe to the newsletter, and don't miss out.
Written by

Oluwatobi
Oluwatobi
I am a fullstack web developer with great knowledge of Javascript and Python programming languages. I also possess great skill in React JS , Node JS , Typescript, Firebase libraries and MongoDb database. This skillset has been pivotal in my knowledge of technical terminologies and has also been helpful in selecting topics that educate my target audiences.