Setting Up Your AWS Database Server and Connecting it with Your App
 Siddhant Bhattarai
This lab helps you learn how to use a database managed by Amazon Web Services (AWS) to meet your relational database needs. With Amazon Relational Database Service (Amazon RDS), setting up, running, and expanding a relational database in the cloud is made easier. It provides cost-effective and scalable storage space, while also taking care of the time-consuming tasks of managing the database. This frees you up to focus on your applications and business. Amazon RDS gives you a choice of six popular database engines: Amazon Aurora, Oracle, Microsoft SQL Server, PostgreSQL, MySQL, and MariaDB.
Objectives:
After completing this lab, you will be able to:
Launch an Amazon RDS DB instance with high availability.
Configure the DB instance to allow connections from your web server.
Access a web application and interact seamlessly with your database.
Scenario
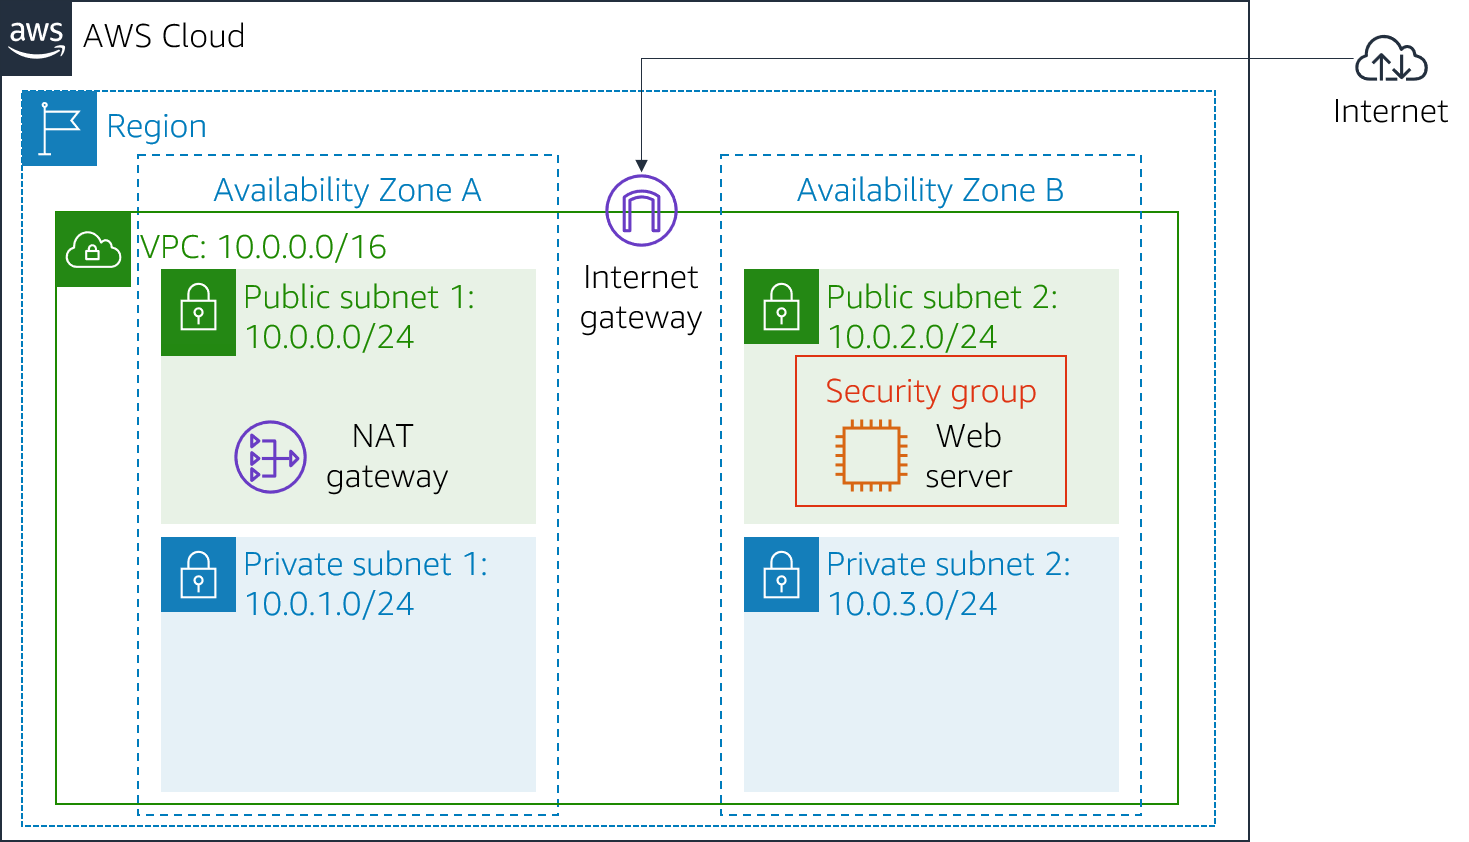
You start with the following infrastructure:

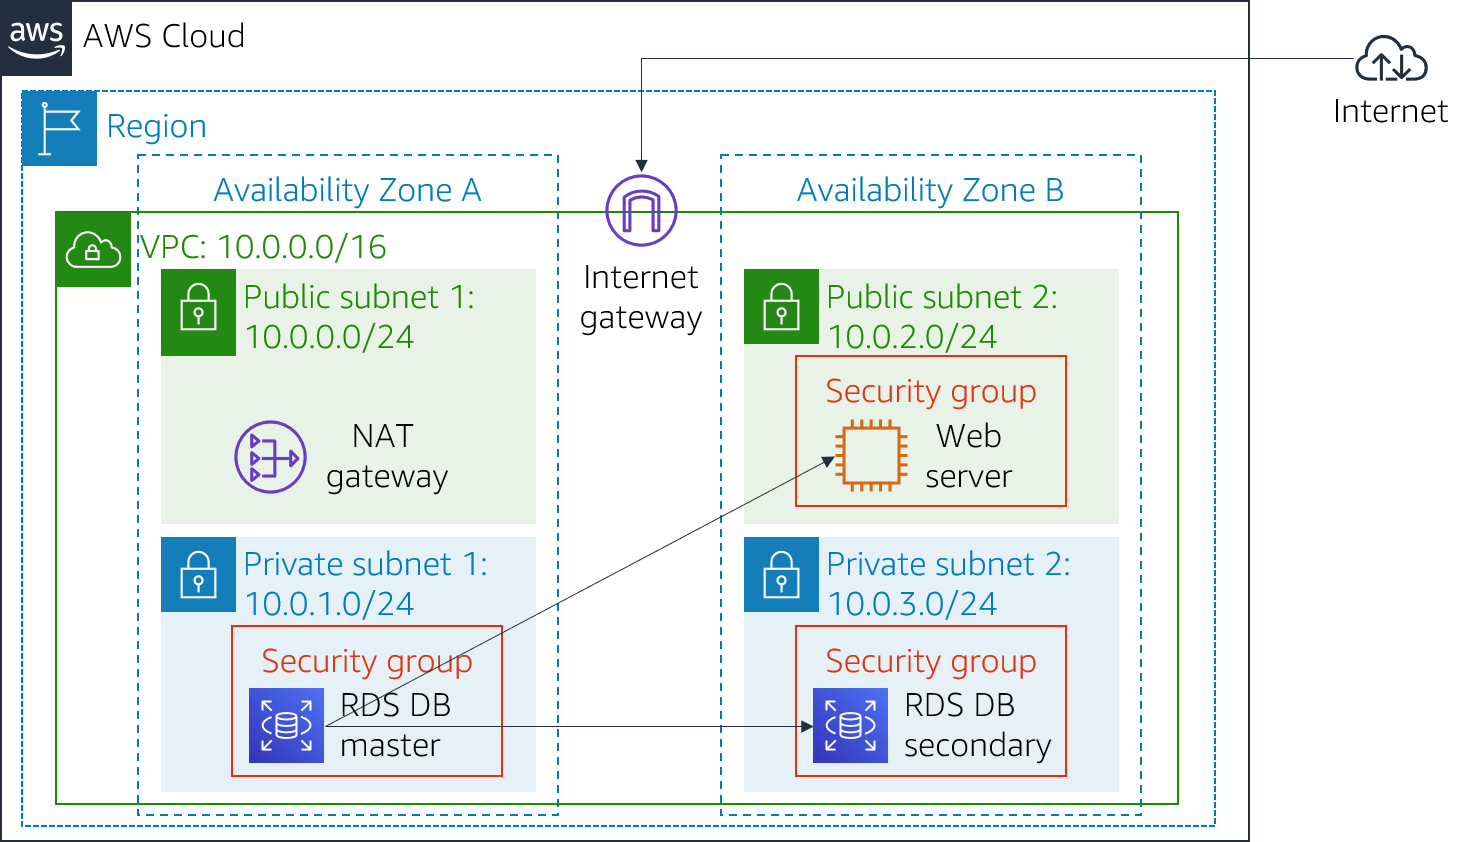
At the end of the lab, this is the infrastructure:

Task 1: Create a Security Group for the RDS DB Instance
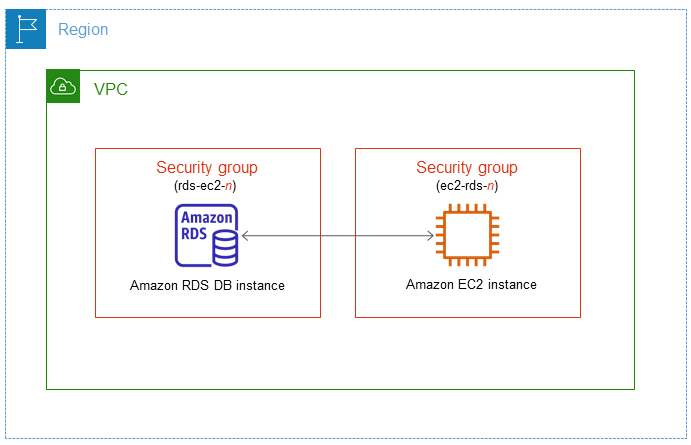
During this task, you'll create a security group to enable your web server's connection to your RDS DB instance. This security group will be applied when initiating the database instance.
Navigate to the AWS Management Console and select "VPC" from the Services menu.
In the left navigation pane, click on "Security Groups."
Choose "Create security group" and configure the following:
Security group name:
DB Security GroupDescription:
Permit access from Web Security GroupVPC:
Lab VPC
Now, let's add a rule to the security group to allow incoming database requests.
In the Inbound rules pane, click on "Add rule."
Since the security group currently has no rules, add a rule to permit access from the Web Security Group.
Configure the following settings:
Type: MySQL/Aurora (3306)
CIDR, IP, Security Group, or Prefix List: Type "
sg" and select Web Security Group.
This setup configures the Database security group to allow inbound traffic on port 3306 from any EC2 instance associated with the Web Security Group.
- Click on "Create security group."
This security group will be utilized when launching the Amazon RDS database.
Task 2: Create a DB Subnet Group
In this task, your objective is to create a DB subnet group, specifying which subnets RDS can utilize for the database. It's essential to have subnets in at least two Availability Zones for each DB subnet group.
Navigate to the RDS section by selecting it from the Services menu.
In the left navigation pane, click on "Subnet Groups."
- If the navigation pane is not visible, select the menu icon in the top-left corner.
Choose "Create DB Subnet Group" and configure the following:
Name:
DB-Subnet-GroupDescription:
DB Subnet GroupVPC:
Lab VPC
Scroll down to the "Add Subnets" section.
Expand the list of values under Availability Zones and choose the first two zones:
us-east-1aandus-east-1b.Expand the list of values under Subnets and select the subnets associated with the CIDR ranges 10.0.1.0/24 and 10.0.3.0/24.
These selected subnets should now be displayed in the "Subnets selected" table.
- Click on "Create."
This DB subnet group will be utilized when creating the database in the next task.
Task 3: Create an Amazon RDS DB Instance
In this task, your goal is to configure and launch a Multi-AZ Amazon RDS for MySQL database instance, enhancing availability and durability for production database workloads.
Navigate to "Databases" in the left navigation pane.
Click on "Create database."
- If you see "Switch to the new database creation flow" at the top, select it.
Choose "MySQL" as the database engine.
Under "Settings," configure the following:
DB instance identifier:
lab-dbMaster username:
mainMaster password:
lab-passwordConfirm password:
lab-password
Under "DB instance class," configure:
Select "Burstable classes (includes t classes)."
Choose
db.t3.micro.
Under "Storage," configure:
Storage type:
General Purpose (SSD)Allocated storage:
20
Under "Connectivity," configure:
- Virtual Private Cloud (VPC):
Lab VPC
- Virtual Private Cloud (VPC):
Under "Existing VPC security groups," from the dropdown list:
Choose DB Security Group.
Deselect default.
Expand "Additional configuration" and configure:
Initial database name:
labUncheck "Enable automatic backups."
Uncheck "Enable encryption."
Uncheck "Enable Enhanced monitoring." (Note: Turning off backups is not a standard practice but expedites the database deployment for this lab.)
Click on "Create database."
Your database will now undergo the launching process. If you encounter an error related to "not authorized to perform: iam:CreateRole," ensure that you unchecked "Enable Enhanced monitoring" in the previous step.
Choose "
lab-db" (select the link).Wait for approximately 4 minutes for the database to become available, as it is being deployed in two different Availability Zones.
While waiting, you may review the Amazon RDS FAQs or take a short break.
Wait until "Info" changes to "Modifying" or "Available."
Scroll down to the "Connectivity & security" section and copy the "Endpoint" field.
It will resemble something like: lab-db.cggq8lhnxvnv.us-west-2.rds.amazonaws.com
Paste the Endpoint value into a text editor; you will use it later in the lab.
Task 4: Interact with Your Database
In this task, you'll access a web application on your web server and configure it to utilize the database.
To copy the WebServer IP address, select the "Details" dropdown menu above these instructions, and then choose "Show."
Open a new web browser tab, paste the WebServer IP address, and press Enter.
The web application will appear, displaying information about the EC2 instance.
- Click on the "RDS" link at the top of the page.
Now, proceed to configure the application to connect to your database.
Configure the following settings:
Endpoint: Paste the Endpoint copied earlier into a text editor.
Database:
labUsername:
mainPassword:
lab-passwordClick on "
Submit"
A message will appear, explaining that the application is executing a command to copy information to the database. After a few seconds, the application will display an Address Book.
The Address Book application is utilizing the RDS database to store information.
- Test the web application by adding, editing, and removing contacts.
The data is persisting in the database and automatically replicating to the second Availability Zone.
Congratulations! You have completed the lab.
Subscribe to my newsletter
Read articles from Siddhant Bhattarai directly inside your inbox. Subscribe to the newsletter, and don't miss out.
Written by

Siddhant Bhattarai
Siddhant Bhattarai
I am a versatile professional with expertise in multiple domains, including DevSecOps, AWS Cloud Solutions, AI/ML, and Cyber Security. With over 5 years of experience in the field, I have honed my skills and dedicated myself to various roles and responsibilities. If you're looking for opportunities for collaboration, insights, or exciting ventures in these domains, I'm open to connecting. Please don't hesitate to reach out – I'm excited to engage with professionals, learners, and enthusiasts who share my passion for these fields!