Terraform: Remote Backends and State Locking in Action
 Subash Neupane
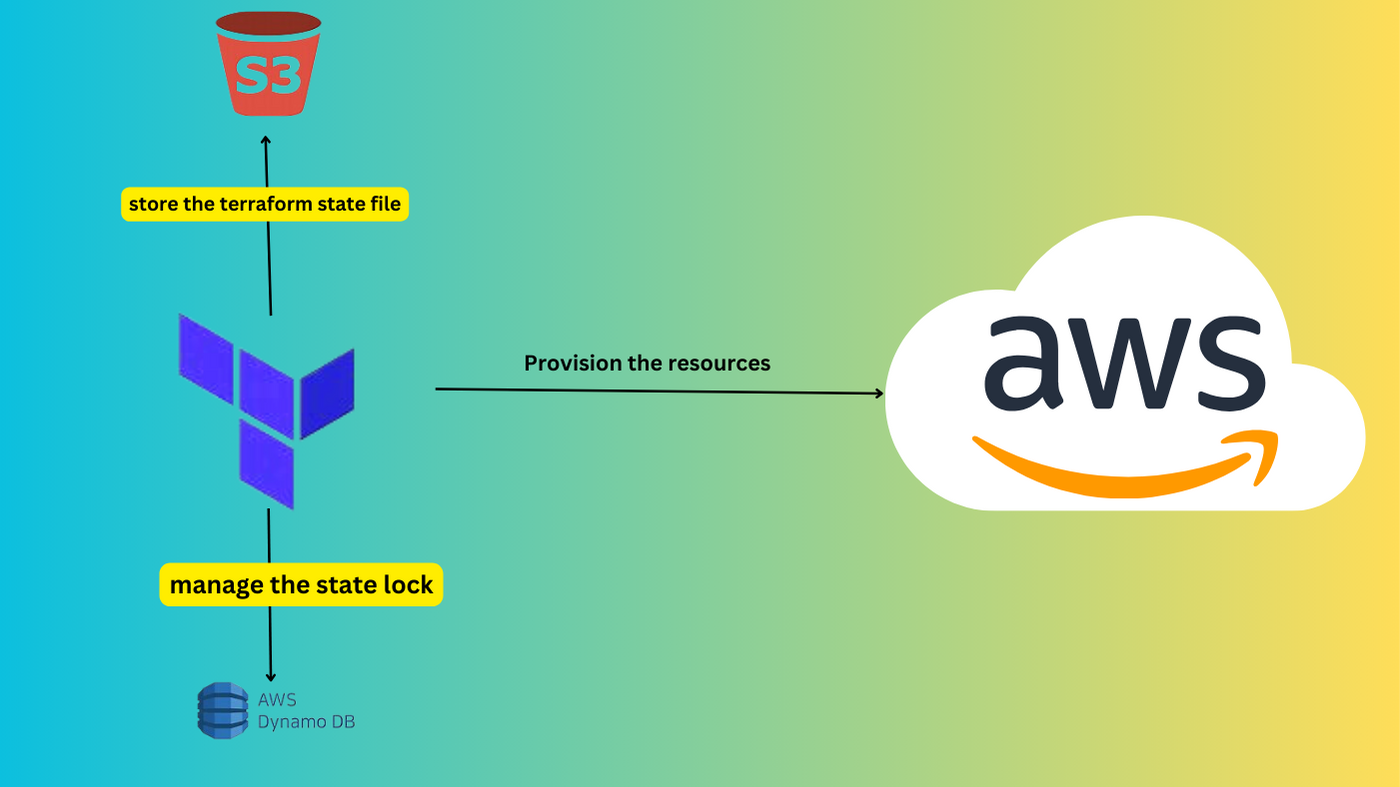
In this blog, we will learn about the different files used in Terraform while creating the resources. As the Terraform files especially state files, and lock files are sensitive we will look at how we can store these sensitive files remotely and access them securely. Let's know about the Terraform state files, and lock files, and get knowledge practically.
Terraform State files
Terraform state files commonly named "terraform.tfstate" maintain the current state of deployed infrastructures. These files store configurations, dependencies, and other essential information for Terraform to make informed decisions during subsequent runs. These files are updated upon each resource created.
Advantages of Terraform State File:
Resource Tracking
Concurrency Control
Stores metadata of each resource
Disadvantage:
Security Risk - If the state files are exposed then much sensitive information will be leaked.
To overcome the disadvantages, a remote backend will be used to store the Terraform state file outside of our local file system and version control. Using S3 as a remote backend is a popular choice due to its reliability and scalability.
Terraform State Locking
The lock file, typically ".terraform.lock.hcl", prevents concurrent modifications to the Terraform state. This helps avoid conflicts when multiple users or processes attempt to apply changes simultaneously. Suppose if two users are concurrently trying to create the resources in the cloud provider then the terraform will be confused whom to allow and whom not to allow. It cannot allow multiple users to create resources simultaneously. So, state locking is introduced which will allow only a user at a time to deploy the resourcesYour explanation is generally correct, but there seems to be a small confusion in the file name and some clarifications could be made. Here's a refined version:
Terraform State Locking
The lock file in Terraform, typically named ".terraform.lock.hcl", serves an important role in preventing concurrent modifications to the Terraform state. When multiple users or processes attempt to apply changes simultaneously, conflicts can arise. For instance, consider a scenario where two users are concurrently trying to create resources in a cloud provider(like AWS) using Terraform. Without state locking, Terraform might become confused about which changes to accept and which to reject.
The purpose of state locking is to ensure that only one user at a time can deploy changes to the infrastructure. This process prevents conflicts and maintains the integrity of the Terraform state. By using the lock file, Terraform serializes the execution of operations, allowing for a controlled and orderly deployment process. This is especially important in collaborative environments(like in organizations, or companies) where multiple users may be managing the same infrastructure concurrently.
Therefore, state locking is a protective measure that helps manage the coordination of Terraform operations, avoiding the potential pitfalls of conflicting changes when working on shared infrastructure.
DynamoDB is used for state locking when a remote backend is configured. It ensures that only one user or process can modify the Terraform state at a time.
Let's do it practically.
Create main.tf, variables.tf and terraform.tfvars
provider "aws" {
    region = "us-east-1"

}
resource "aws_instance" "subash_instance" {
  ami = var.ami_value
  instance_type = var.instance_type_value
}
variable "ami_value" {
    description = "ami value of the instance"

}
variable "instance_type_value" {
    description = "value for the instance type"

}
ami_value = "ami-0c7217cdde317cfec"
instance_type_value = "t2.micro"
Let's deploy the resource
terraform init
terraform plan
terraform apply
Before this we need to configure the aws credentials
aws configure

We have configured the AWS credentials and now we are ready to deploy the resources using Terraform
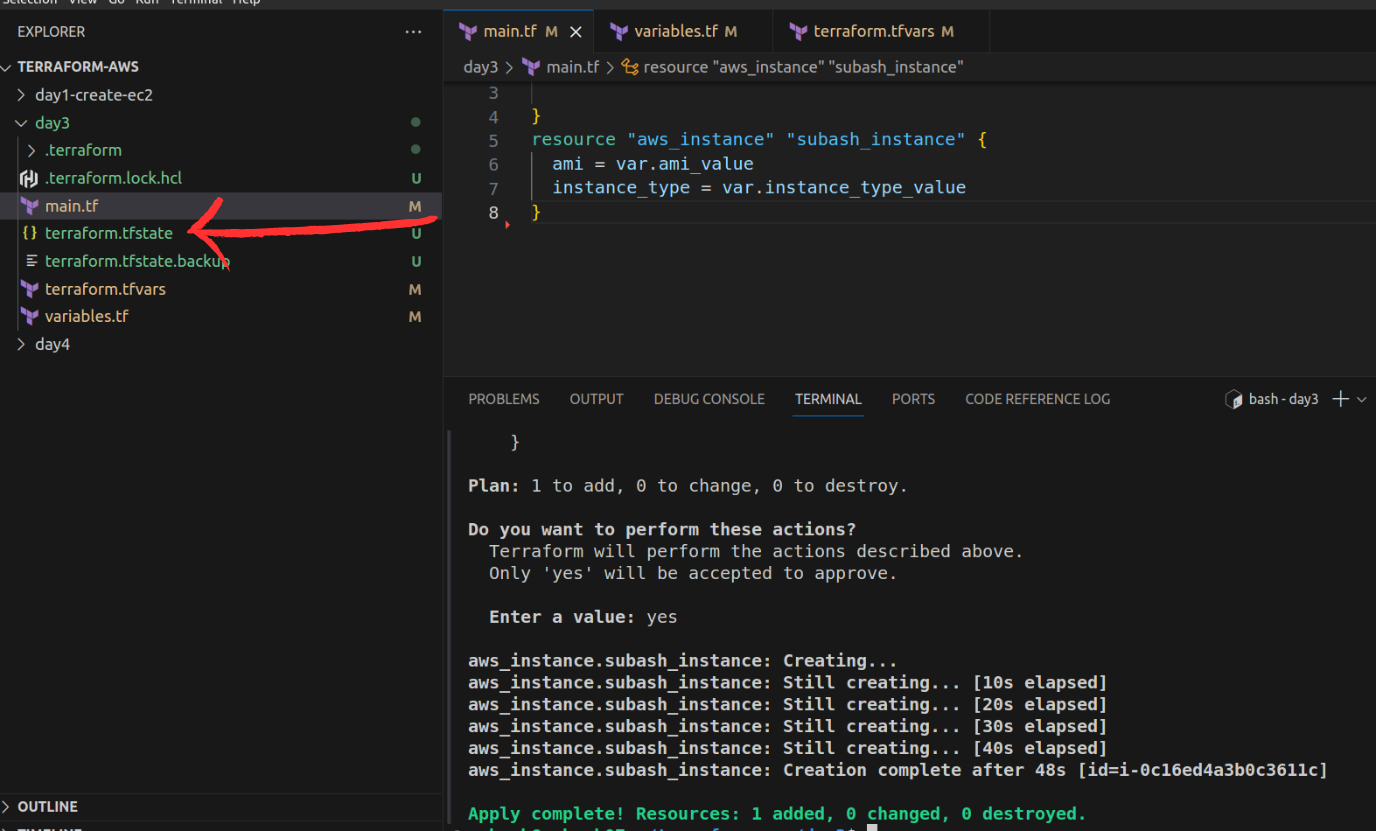
Resource is created and the state file is present.
To keep the statefile secure we will implement the remote backend. We will store the state file in the S3 bucket in AWS. For that, we will create the S3 bucket using Terraform.
In the main.tf file add the following resource
resource "aws_s3_bucket" "s3_bucket" {
    bucket = "subash1816-demo-bucket"
}
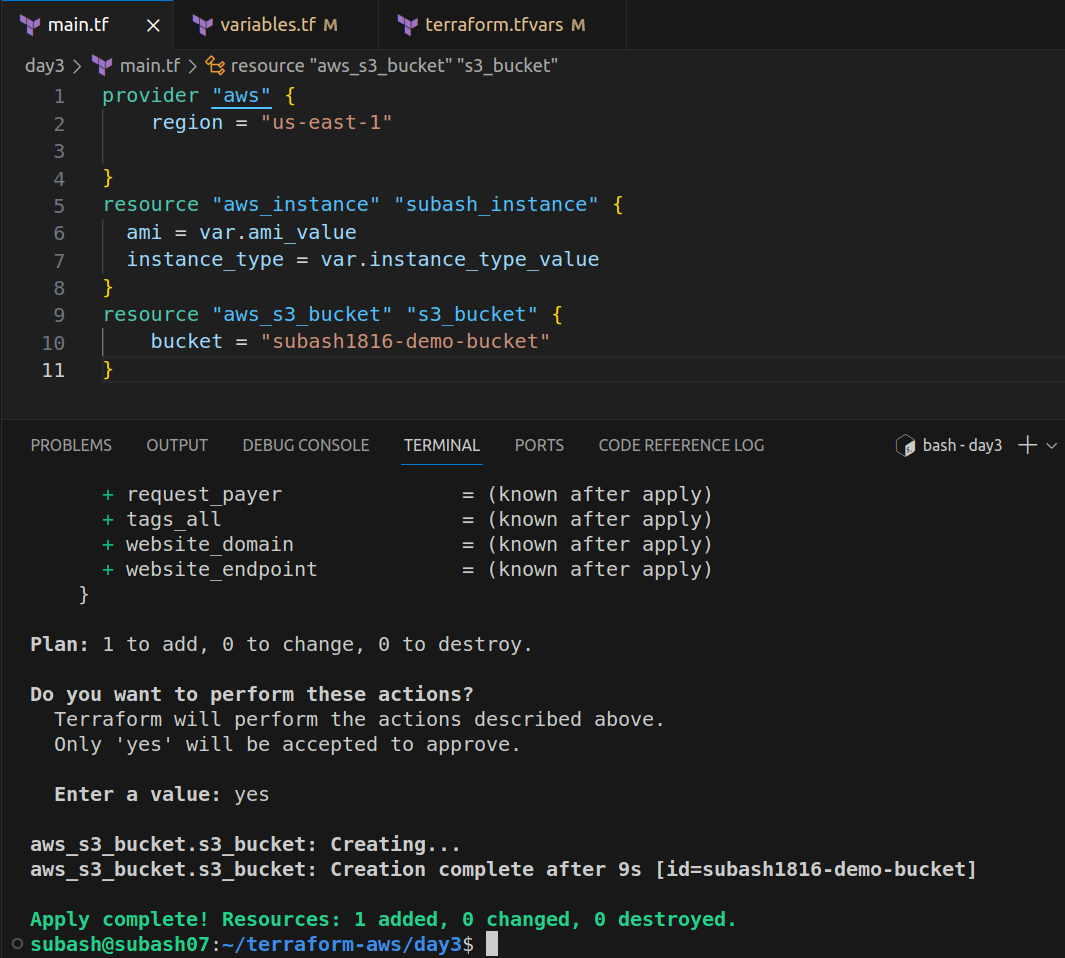
Let's verify if the bucket is created or not.

Our bucket is created and now in this bucket, we will store the state file. For that we we create the backend.tf file.
terraform {
  backend "s3" {
    bucket = "subash1816-demo-bucket"
    key    = "subash/terraform.state"
    region = "us-east-1"
  }
}
In key attribute, we set the path for the state file to be stored. A Subash directory will be created and inside it we will have the state file.
terraform init
terraform apply

Once we hit the terraform apply, a folder named "subash" will be created and inside it the state file will be attached.

We can see inside the bucket, subash is the folder and terraform.state file is attached.
Now we will delete the terraform.state locally and we will hit the terraform apply command and check whether the new resources will be created or not.
As per the Terraform, when the state file is deleted, terraform will have no any data on whether the resource is created or not and it cannot compare the resources to be created with the provisioned resources since there is no state file. Without the state file, Terraform won't be able to track the current state of the infrastructure it manages.
In our case, the local state file will be deleted but the remote state file is present. So let's check it out.
Apply:
terraform init
terraform apply
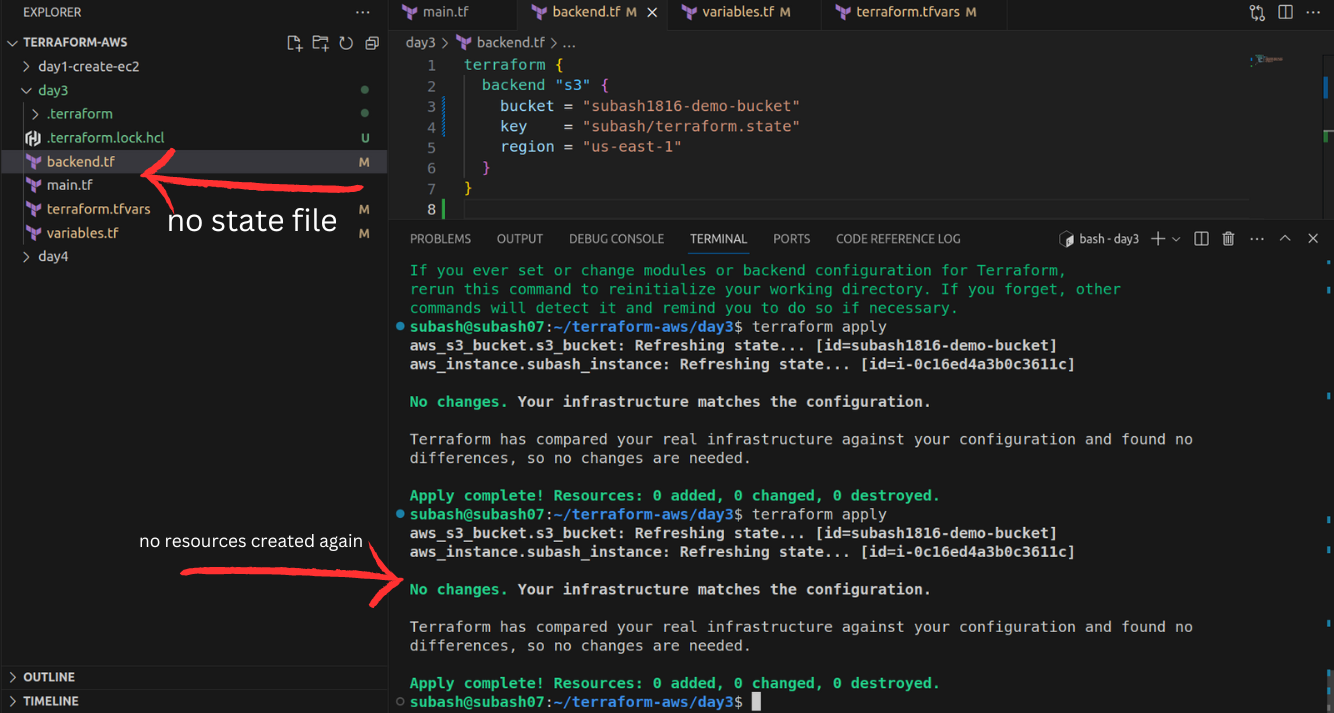
To Implement the state-locking mechanism
To create the dynamodb, add the dynamodb resource in the main.tf file.
resource "aws_dynamodb_table" "terraform_lock" {
  name           = "terraform-lock"
  billing_mode   = "PAY_PER_REQUEST"
  hash_key       = "LockID"

  attribute {
    name = "LockID"
    type = "S"
  }
}
In the backend, add the following attribute.
encrypt        = true
dynamodb_table = "terraform-lock"
Here once init the terraform, we will face the problem.

So we need to create the s3, dynamodb before creating the remote backend.
So we deleted the backend.tf and applied the following command.
terraform init
terraform apply
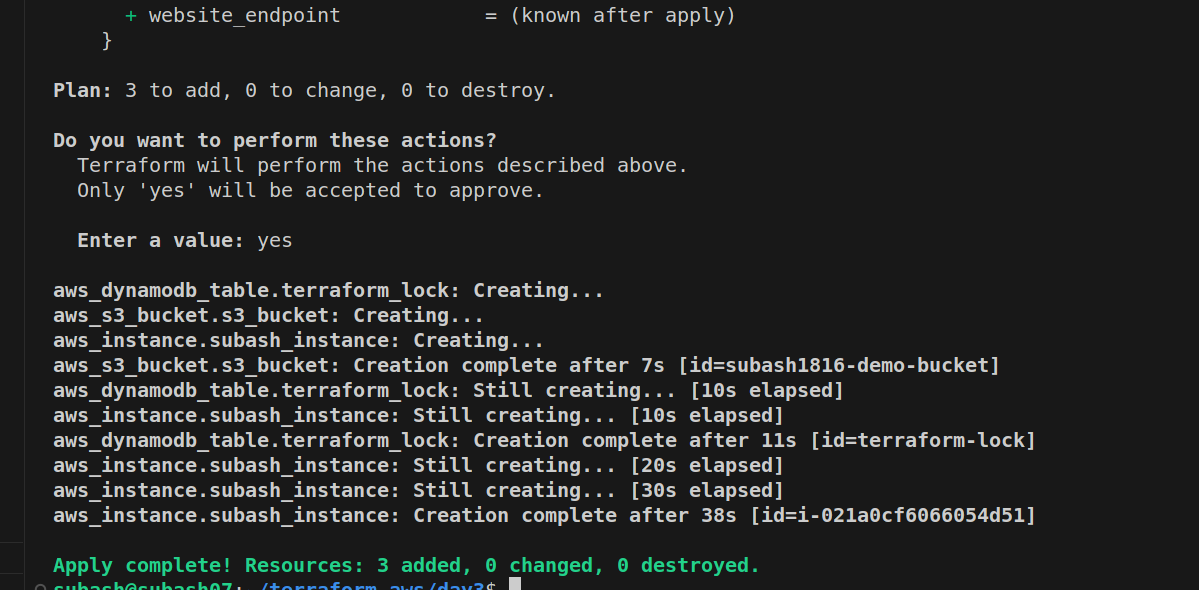
Our resources are created again. Now we will create the backend.tf
Previously we were not able to create the table since there was error. But now we are able to get the dynamodb table.

terraform {
  backend "s3" {
    bucket = "subash1816-demo-bucket"
    key    = "subash/terraform.state"
    region = "us-east-1"
    encrypt = true
    dynamodb_table = "terraform-lock"
  }
}
Once the backend.tf is ready. Apply the command.
terraform init
terraform apply
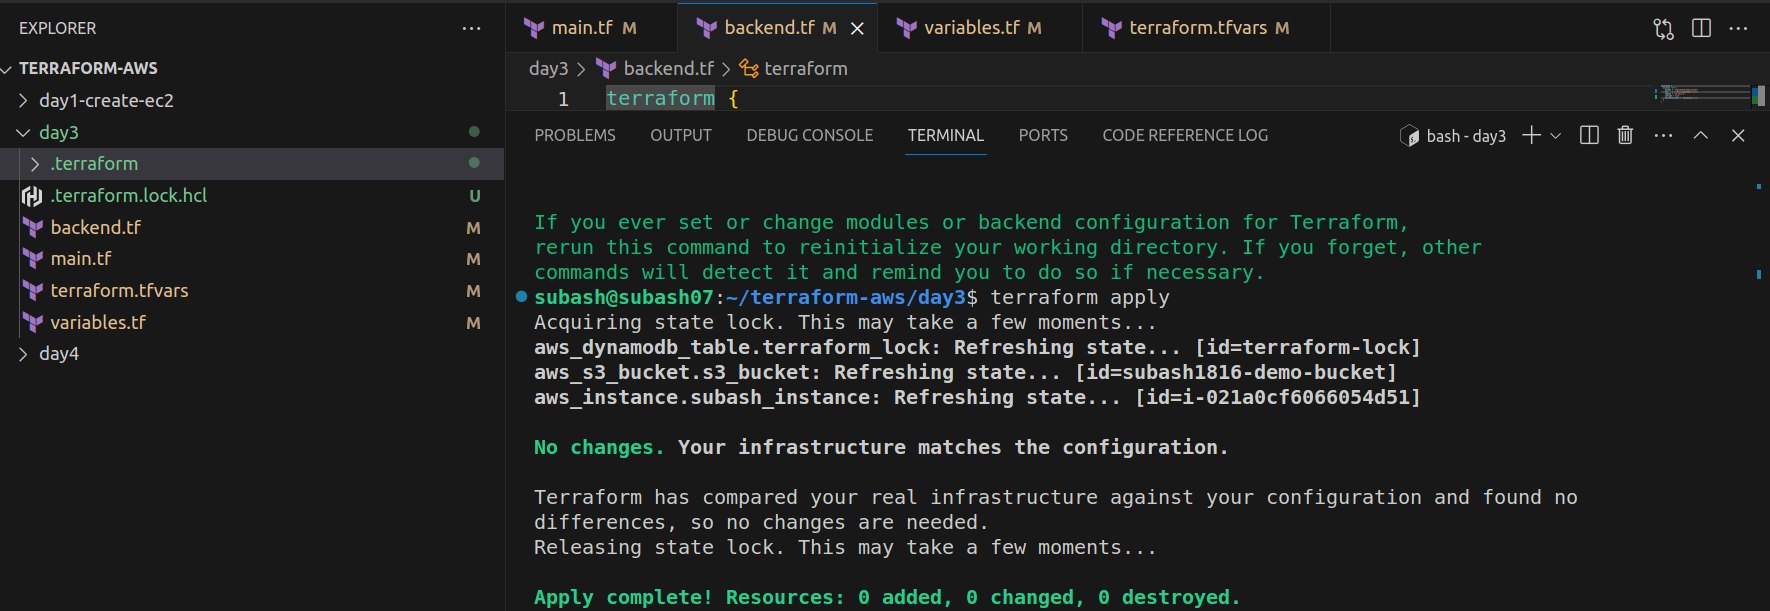
Therefore, we have enabled the state locking by using the Dynamodb. DynamoDB is used by Terraform as a backend to store the state file and manage the state lock.
Terraform Destroy
Once the provision is completed, delete the resources.
terraform destroy
Great!! Using the blog, we explored the critical aspects of Terraform state files and state locking for secure infrastructure deployment in the cloud. This approach ensures that sensitive information is stored securely, conflicts are avoided, and infrastructure changes are managed in a controlled manner.
Happy Learning!!
Subscribe to my newsletter
Read articles from Subash Neupane directly inside your inbox. Subscribe to the newsletter, and don't miss out.
Written by

Subash Neupane
Subash Neupane
Computer Science graduate