Day 43: Relational Database Service in AWS
 Pradeep chitroliya
Table of contents

Amazon Web Services (AWS) provides a managed relational database service called Amazon RDS (Relational Database Service). Amazon RDS makes it easier to set up, operate, and scale a relational database in the cloud. It supports various database engines such as MySQL, PostgreSQL, MariaDB, Oracle, and Microsoft SQL Server.
Here are the general steps to set up a Relational Database Service (RDS) instance in AWS:
Sign in to AWS Console:
- Log in to the AWS Management Console with your AWS account credentials.
Navigate to Amazon RDS:
- In the AWS Management Console, go to the "Services" menu and select "RDS" under the "Database" section.
Create a New DB Instance:
- Click on the "Create database" button.
Choose an Engine:
- Select the database engine you want to use (MySQL, PostgreSQL, Oracle, etc.).
Specify DB Details:
- Configure the database instance details such as DB instance identifier, master username, password, and other settings. You'll also need to choose the instance class, storage capacity, and other parameters.
Configure Advanced Settings:
- Optionally, you can configure advanced settings such as VPC, subnet group, security group, backup settings, maintenance preferences, and more.
Review and Launch:
- Review the configuration settings and click "Create database" to launch the RDS instance.
Monitor the Status:
- Once the database instance is created, you can monitor its status on the RDS dashboard. It may take a few minutes for the instance to be available.
Access the Database:
- Once the database is running, you can connect to it using the endpoint provided in the RDS dashboard. Use the master username and password you specified during the setup.
Configure Security Groups:
- Ensure that the security groups associated with your RDS instance allow inbound traffic on the necessary ports (e.g., 3306 for MySQL, 5432 for PostgreSQL).
Configure Backups and Maintenance:
- Set up automated backups and configure maintenance windows according to your requirements.
Task-01
- Create a Free tier RDS instance of MySQL
Go to aws account then search on top in RDS and then selected in RDS database and selected to Mysql and created.

here we can see that how to create a RDS
- Create an EC2 instance
go to aws account then search in search bar and create a EC2 as per project required
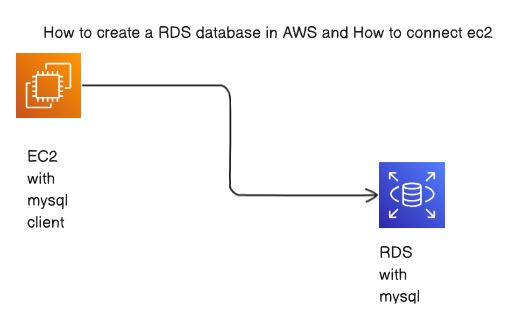
You should install mysql client on EC2, and connect the Host and Port of RDS with this client.

Here we can see that how to install in mysql client on EC2
3. Create an IAM role with RDS access
Go to IAM option and create role as per project required like to give the role EC2 of RDS acess.

- Assign the role to EC2 so that your EC2 Instance can connect with RDS
Go to running on EC2 click on action and select on modify IAM role and IAM role update and selected role that created will be new role assin in ec2.

5. Once the RDS instance is up and running, get the credentials and connect your EC2 instance using a MySQL client
I have go to EC2 CLI console and will login to rds using the mysql client which install in my ec2.we will be go to RDS then setup to RDS and EC2.
here we can see that what command used for login RDS


here we can see that we have sucessful login RDS using the mysql client.
Thanks for read my blog if you liked it this blog please like and commend.
Contact me on linkedin
check out my GitHub for more resource GitHub
Subscribe to my newsletter
Read articles from Pradeep chitroliya directly inside your inbox. Subscribe to the newsletter, and don't miss out.
Written by

Pradeep chitroliya
Pradeep chitroliya
Hey there! I am Pradeep Chitroliya I am a Devops engineer, started writing articles on my DevOps and cloud journey. My purpose is to share the concepts that I learn, the projects that I build, and the tasks that I perform regarding DevOps. Hope you all find it useful.