Automate Jira Creation on Github using Python Flask
 manogna
Table of contents
- Step 1: Install Jira and Generate API Token
- Step 2: Explore Jira API and Obtain Project Details
- Step 3: Create Jira Ticket Using Python
- Step 4: Transforming into Flask API
- Step 5: Understanding the Role of APIs in Automation
- Step 6: Leveraging Flask to Craft the API
- Step 7: Deploying the Flask Application to an EC2 Server
- Step 8: Integrating Flask API with GitHub Webhooks
- Step 9: Implementing Conditional Handling
- Conclusion :

Developers often face the challenge of efficiently transitioning issues from GitHub to Jira without the manual hassle of navigating through portals and backlogs. The vision is to automate this process, allowing developers to focus on genuine bugs reported by QE without the need for extensive manual intervention
The proposed solution involves a streamlined approach – a developer, upon identifying a valid bug on GitHub, can now utilize a command like /jira in the comments section. As soon as they hit 'comment', a Jira ticket is created instantly, providing an efficient way to track and manage their workload. This integration is made possible by bridging GitHub and Jira with the help of Python, leveraging its dynamic nature and extensive APIs.
In the event that an individual inputs /jira on GitHub. Through webhooks, GitHub transmits all relevant information about the specified issue to my Python app hosted on an EC2 instance in JSON format. Subsequently, the Python application extracts the necessary fields from the JSON data and initiates an API call to Jira for further processing.
Step 1: Install Jira and Generate API Token
Install Jira, provide project details, choose the Scrum option, and proceed by clicking on 'Next' , Jira dashboard is created.
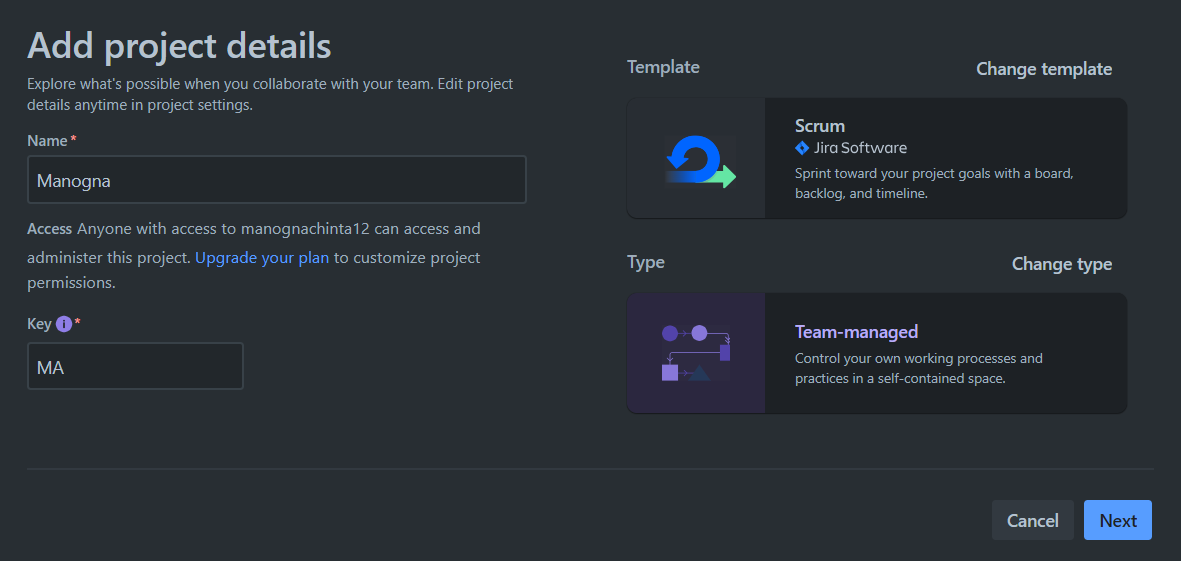
For enhanced security when communicating with the API, it is recommended to generate an API token. To do so, navigate to your dashboard, access your profile, click on 'Manage Your Account,' proceed to the 'Security' section, and create your API tokens.
Step 2: Explore Jira API and Obtain Project Details
- Now, let's begin exploring the Jira API documentation. Navigate to the Projects ->Get all projects and copy the python code
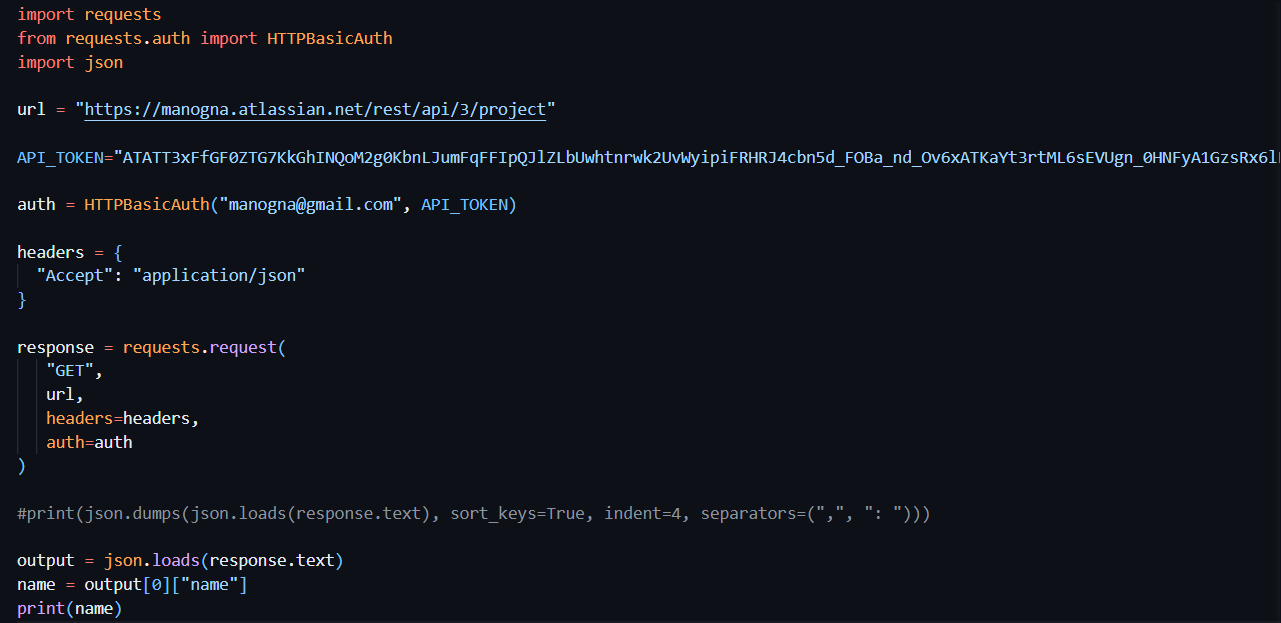
We have implemented modifications to the code itself. Let's review the changes. Please include the URL with your Atlassian domain name, and utilize the API_TOKEN that has been generated for you. In Python, we use
json.loadsto parse JSON information, converting it into a dictionary format. This allows us to perform operations on the dictionary. Additionally,httpbasicauthis employed for authentication with Jira.Execute the script by running
python list-projects.py( list-projects.py is file name). Copy the output and paste it into a JSON formatter tool. Click 'Beautify' to format the JSON, We are interested in extracting only the project name from the output. By utilizing indexing with the expressionname = output[0]["name"], we retrieve and print the project name.
Step 3: Create Jira Ticket Using Python
- Let's proceed by creating another file named
create-jira.py, Refer to the REST API documentation, and search for the section on creating a ticket or issue. Select 'Create Issue' in the documentation. The provided code includes both mandatory and non-mandatory fields. Specifically, there are four mandatory fields.
The code, after eliminating non-mandatory fields:
import requests
from requests.auth import HTTPBasicAuth
import json

url = "https://manogna.atlassian.net/rest/api/3/issue"
API_TOKEN="ATATT3xFfGF0ZTG7KkGhINQoM2g0KbnLJumFqFFIpQJlZLbUwhtnrwk2UvWyipiFRHRJ4cbn5d_FOBa_nd_Ov6xATKaYt3rtML6sEVUgn_0HNFyA1GzsRx6lLVPZLC02EStx_l05Lme18hdzOKvBiqFjzD6w-0C2NRI2he-iEQeFINbS0IDgFW8=204460EE"

auth = HTTPBasicAuth("manogna@gmail.com", API_TOKEN)

headers = {
  "Accept": "application/json",
  "Content-Type": "application/json"
}

payload = json.dumps( {
  "fields": {
    "description": {
      "content": [
        {
          "content": [
            {
              "text": "My first jira ticket",
              "type": "text"
            }
          ],
          "type": "paragraph"
        }
      ],
      "type": "doc",
      "version": 1
    },
    "project": {
      "key": "AB"
    },
    "issuetype": {
      "id": "10006"
    },
    "summary": "First JIRA Ticket",
  },
  "update": {}
} )

response = requests.request(
   "POST",
   url,
   data=payload,
   headers=headers,
   auth=auth
)

print(json.dumps(json.loads(response.text), sort_keys=True, indent=4, separators=(",", ": ")))
To obtain the issue type ID, navigate to 'Configure Board,' click on 'Issue Types,' and select 'Story.' In the URL, locate the ID as shown in the below image. Replace the issue ID in the code, and execute the script.

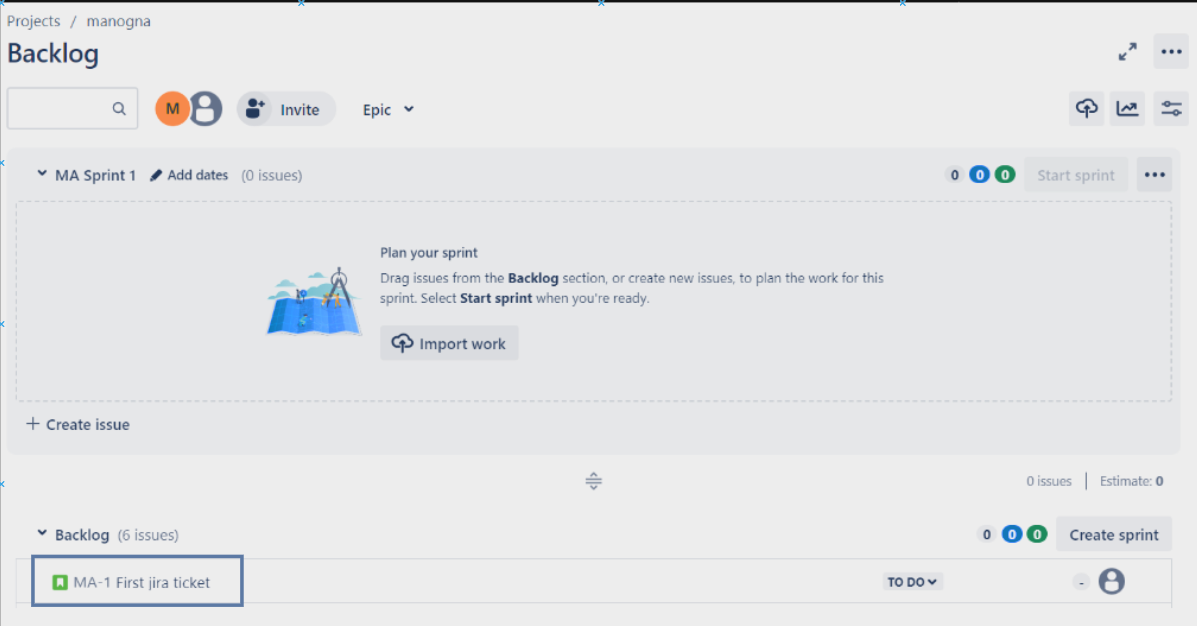
Now, proceed to check the backlog field, where you can find the generated ticket.
Step 4: Transforming into Flask API
In this guide, we'll explore the process of transforming this application into the Flask framework and seamlessly integrating it with GitHub webhooks. The objective is to convert the existing Python application into the Flask framework, enabling the exposure of the API.
Now, we have four tasks to accomplish:
Convert the
create-jira.pyPython script into an API.Deploy the Python application to the EC2 server.
Integrate it with GitHub webhook.
Implement conditional handling so that creating a Jira ticket only occurs when the command is
/jiraand not for any other command like/xyz.
Step 5: Understanding the Role of APIs in Automation
Let's start by gaining a clear understanding of what an API is. In essence, it serves as an application interface. In the context of automation, where the user interface may not be user-friendly, APIs play a crucial role. From a programming perspective, whenever you need to interact with an application, APIs are immensely valuable.
Any action performed through an API typically corresponds to one of four types of requests:
GET
POST
PUT
DELETE
In this scenario, GitHub sends information to the EC2 instance where the Flask application is deployed, and the Flask application subsequently posts information to the Jira application. Therefore, the use of the POST method is appropriate for both interactions – from GitHub to the Flask application and from the Flask application to Jira.
Step 6: Leveraging Flask to Craft the API
Installing Flask and Creating a Basic Application
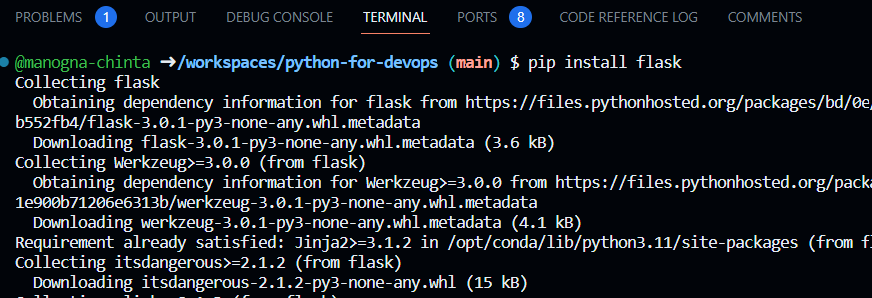
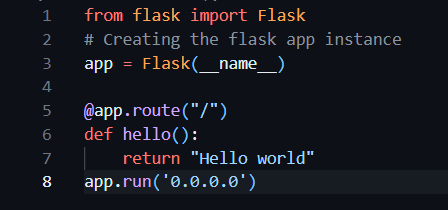
Now, let's explore the process of crafting a Flask API. Navigate to the API terminal and install Flask using the command pip install flask. Following that, create a helloworld.py file and develop a basic Flask application.
Understanding Flask Routes and Decorators
We're importing the Flask module from the package. The @app.route("/") is a decorator, which means that before executing the function, it performs an action. In this case, when someone tries to access the specified path ("/") mentioned in the decorator, Flask will send the request to the hello function.
If you want to build and deploy this API, you need a server. Flask provides an inbuilt server, eliminating the need for deployment on a separate server like Tomcat. The app.run('0.0.0.0') line is used to run the application on the EC2 instance's IP address.
In Codespaces, there might be delays in creating tunnels, so executing this program on an EC2 instance is preferred:
python3 helloworld.py

By defualt the flask uses port 5000, When you access the URL publicipaddress:5000/abc and receive a "Not Found" message, this response is typically sent by Flask itself. The route defined by the @app.route("/") decorator is specifically set up to handle requests to the root URL ("/"). If you access a URL that doesn't match any defined routes, Flask responds with a "Not Found" message. In this case, the decorator @app.route("/") is responsible for handling requests to the root URL.

Why use decorators? They verify authorization before executing the function
Step 7: Deploying the Flask Application to an EC2 Server
Now, let's rename the function to better suit its integration with GitHub.
import requests
from requests.auth import HTTPBasicAuth
import json
from flask import Flask

app = Flask(__name__)

# Define a route that handles GET requests
@app.route('/createJira', methods=['POST'])
def createJira():

    url = "https://manogna.atlassian.net/rest/api/3/issue"

    API_TOKEN="ATATT3xFfGF0ZTG7KkGhINQoM2g0KbnLJumFqFFIpQJlZLbUwhtnrwk2UvWyipiFRHRJ4cbn5d_FOBa_nd_Ov6xATKaYt3rtML6sEVUgn_0HNFyA1GzsRx6lLVPZLC02EStx_l05Lme18hdzOKvBiqFjzD6w-0C2NRI2he-iEQeFINbS0IDgFW8=204460EE"
    auth = HTTPBasicAuth("manogna@gmail.com", API_TOKEN)

    headers = {
        "Accept": "application/json",
        "Content-Type": "application/json"
    }

    payload = json.dumps( {
        "fields": {
        "description": {
            "content": [
                {
                    "content": [
                        {
                            "text": "Order entry fails when selecting supplier.",
                            "type": "text"
                        }
                    ],
                    "type": "paragraph"
                    }
                ],
            "type": "doc",
             "version": 1
        },
        "project": {
           "key": "MA"
        },
        "issuetype": {
            "id": "10004"
        },
        "summary": "Main order flow broken",
    },
    "update": {}
    } )


    response = requests.request(
        "POST",
        url,
        data=payload,
        headers=headers,
        auth=auth
    )

    return json.dumps(json.loads(response.text), sort_keys=True, indent=4, separators=(",", ": "))

if __name__ == '__main__':
    app.run(host='0.0.0.0', port=5000)
Place the code from create-jira.py within the createJIRA function, move the import statements to the beginning, and replace the print statement with a return statement suitable for an API:
return json.dumps(json.loads(response.text), sort_keys=True, indent=4, separators=(",", ": "))
As the API we're developing is not a GET type, we must switch the method to POST. Now, copy the code and navigate to the EC2 Instance.

we copy pasted the code on to the Ec2 Instance and after executed it and it's working fine.
Step 8: Integrating Flask API with GitHub Webhooks
Now lets create the github webhook:
Navigate to the repository, select 'Settings,' and then click on 'Webhooks.

We can utilize either the public IP or the public IPv4 DNS. In this case, we opted for the public IPv4 DNS.
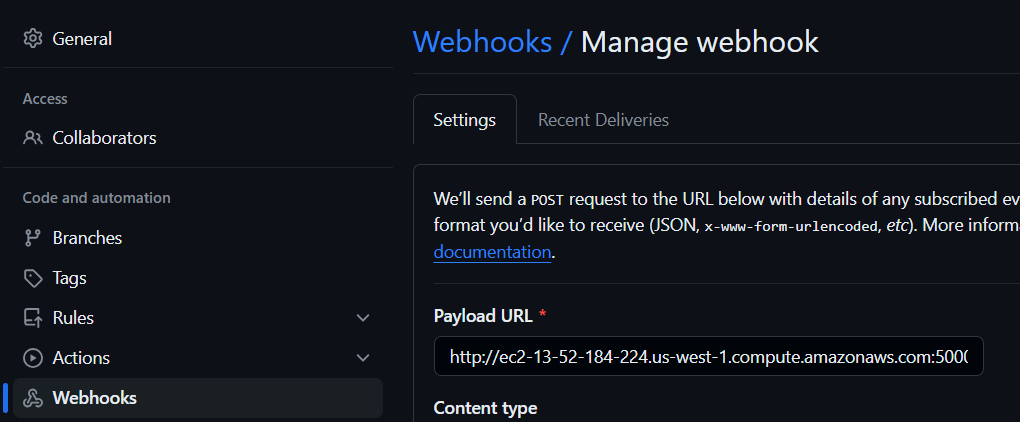
mention the url in this format : http://ipv4-dns:5000/createJira
Content type: select application/JSON
Events to trigger: select Issue comments (unselect remaining) and click on add webhooks.
Now, the GitHub action is successful

Step 9: Implementing Conditional Handling
Now, comment on the issue with '/jira', and you should be able to see the corresponding issue created on Jira. MA-8 is the ticket created , Now I commented /abc and it also created a ticket MA-9

However, currently, even if we type /abc, it creates a ticket. Let's address this issue by implementing ticket creation only for specific commands.
import requests
from requests.auth import HTTPBasicAuth
import json
from flask import Flask , request

app = Flask(__name__)

# Define a route that handles GET requests
@app.route('/createJira', methods=['POST'])
def createJira():
    webhook = request.json
    comment = webhook['comment']['body']

    if "/jira" in comment:
        url = "https://manogna.atlassian.net/rest/api/3/issue"

        API_TOKEN=""

        auth = HTTPBasicAuth("manogna@gmail.com", API_TOKEN)

        headers = {
            "Accept": "application/json",
            "Content-Type": "application/json"
        }

        payload = json.dumps( {
            "fields": {
            "description": {
                "content": [
                    {
                        "content": [
                            {
                                "text": "Order entry fails when selecting supplier.",
                                "type": "text"
                            }
                        ],
                        "type": "paragraph"
                        }
                    ],
                "type": "doc",
                "version": 1
            },
            "project": {
            "key": "MA"
            },
            "issuetype": {
                "id": "10004"
            },
            "summary": "Main order flow broken",
        },
        "update": {}
        } )


        response = requests.request(
            "POST",
            url,
            data=payload,
            headers=headers,
            auth=auth
        )

        return json.dumps(json.loads(response.text), sort_keys=True, indent=4, separators=(",", ": "))
    else:
        return "Jira issue will be created if the comment includes /jira"

if __name__ == '__main__':
    app.run(host='0.0.0.0', port=5000)
Incorporated a conditional statement using if and else ,Now let's see how it works
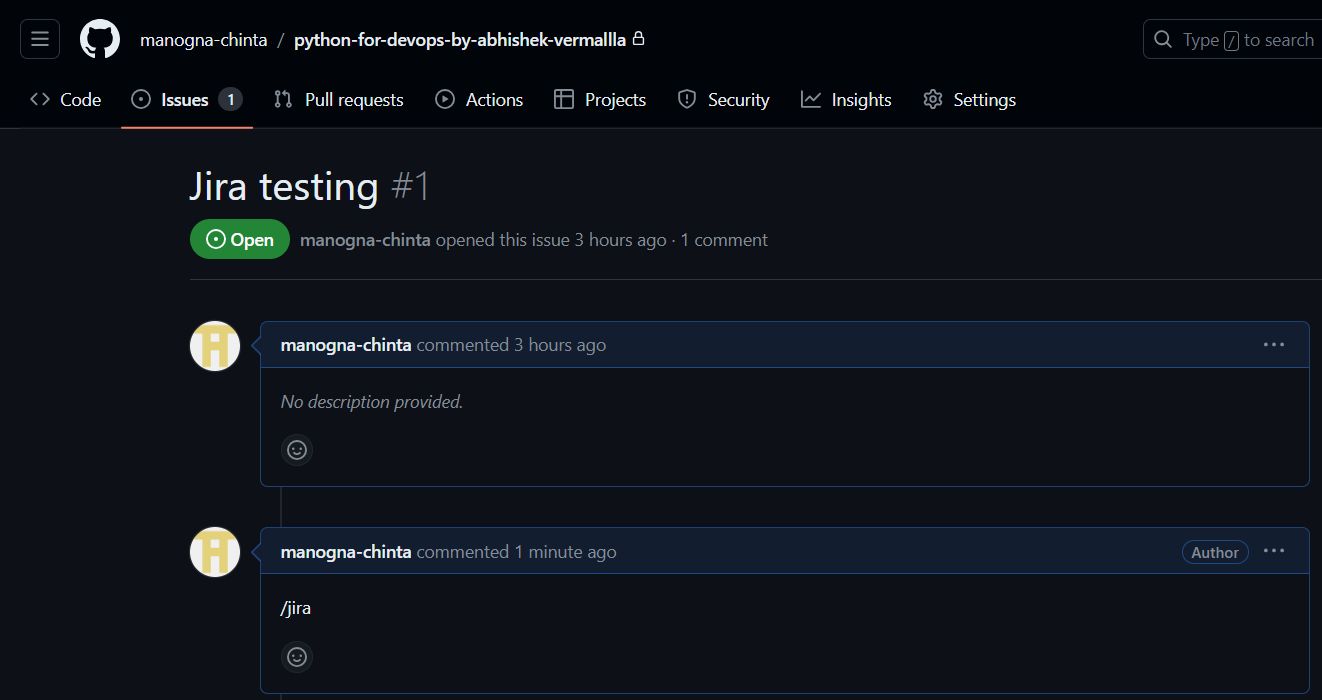
I have commented with /jira; let's observe if the ticket is generated

Great! The ticket has been created. Now, let's try typing /xyz and see the outcome
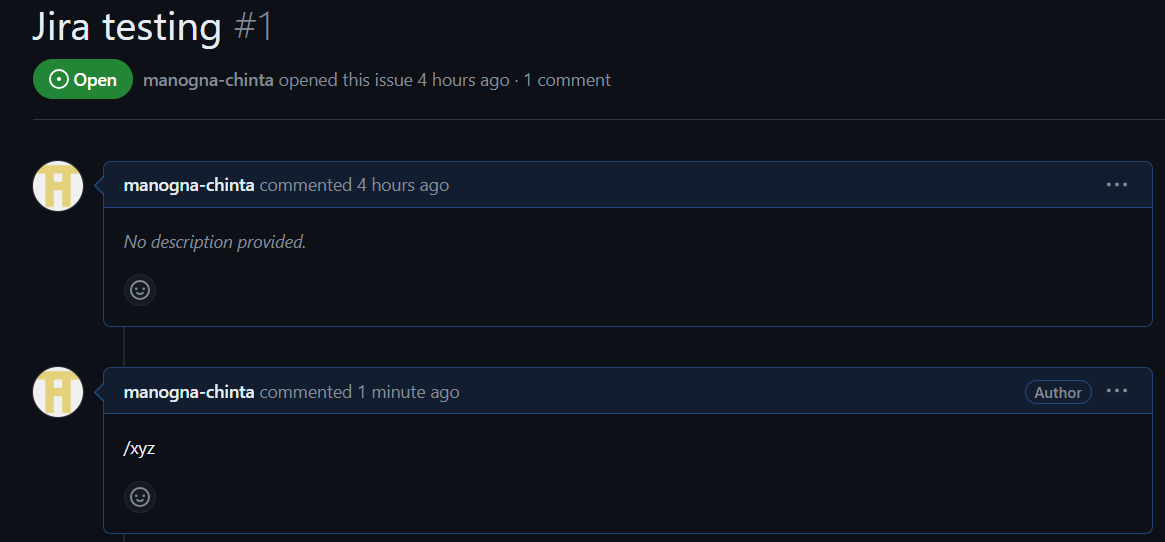
As evident, no issue has been created. Now, let's inspect the GitHub webhook to verify the absence of the issue
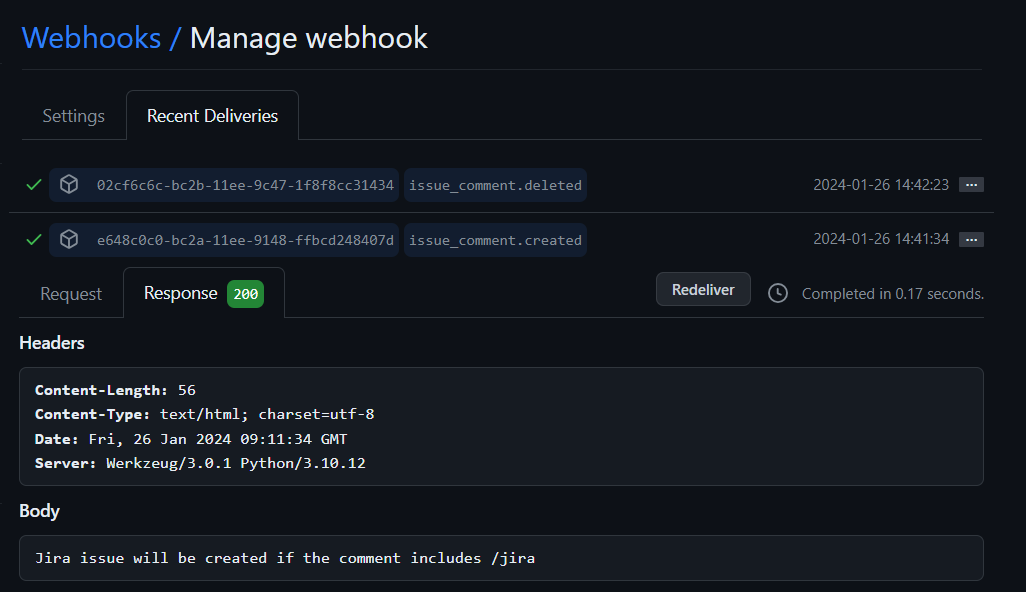
It provides the message: "Jira issue will be created if the comment includes /jira. Hurray , Finally we got the desired results .
Conclusion :
In this process, we delved into the significance of APIs, established a Flask API on an EC2 instance, and integrated it with GitHub. The Flask app, designed for Jira interaction, employs POST requests. We further optimized the code, deployed the application, and set up a GitHub webhook, ensuring Jira tickets are created selectively based on specified commands, such as /jira. This comprehensive workflow streamlines issue tracking and management within a unified development environment.
Source code :
https://github.com/manogna-chinta/Github-Jira-Integration-using-python-flask
Subscribe to my newsletter
Read articles from manogna directly inside your inbox. Subscribe to the newsletter, and don't miss out.
Written by
