Run an Avail Validator Node Using Spheron within minutes
 Spheron Network
Table of contents
- To deploy an Avail Validator Node using Spheron, follow these steps:
- Step 1: Create a Free Spheron Network Account
- Step 2: Creating an Organization
- Step 3: Deploying an Avail Validator Node With Spheron Platform UI
- Step 5: Check your running node
- Step 6: Create a stash and a controller account
- Create Stash Account
- Create Controller Account
- Step 7: Bond your funds
- Step 8: Adding Session Key
- Conclusion
- References
Spheron Network offers a marketplace for deploying and managing nodes, including Avail Validator Nodes. This guide will walk you through the process of deploying an Avail Validator Node using Spheron.
To deploy an Avail Validator Node using Spheron, follow these steps:
Deploying an Avail Validator Node on Spheron is a simple, streamlined process that does not require any DevOps knowledge!
Step 1: Create a Free Spheron Network Account
Visit Spheron Network: https://spheron.network/
On the Spheron homepage, locate and click the "Free Trial" button.
You'll be directed to a signup page. Choose your preferred authentication method: Web2 (GitHub account, GitLab account, or Bitbucket account) or Web3 (Ethereum).
Follow the provided prompts to authenticate your chosen account securely. This step ensures safe access to the Spheron Network platform. After successful authentication, you'll be guided to a confirmation page confirming the completion of your account setup.
Step 2: Creating an Organization
1. Upon logging in, you'll be directed to the Create Organization page, where you can give your organization name and choose Avatar. Ensure the "compute" option is selected from the drop-down menu of the "Start With" option. Click “Continue”.
2. Next, you'll be taken to a new page. Click the "Create New Projects" button.
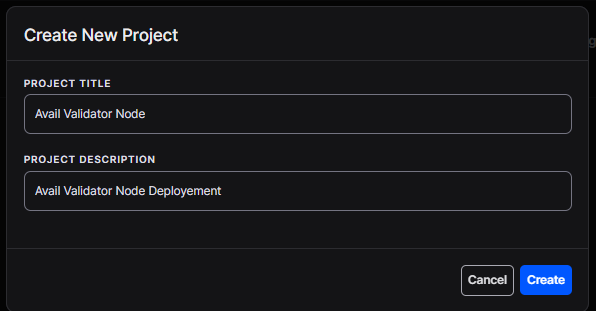
3. Add 'Project Title' And 'Project Description' and Click Create.
Step 3: Deploying an Avail Validator Node With Spheron Platform UI
Follow these steps to deploy an Avail Validator Node:
1. Choose "Compute" to use CPU-based instances for running containers.
2. Choose your desired Compute Type option under Compute Type.
NOTE: Please schedule a team call to gain early access to the "Spot" Type.
3. Click "Start from Marketplace App" and Select "Avail Validator Node" from the marketplace.
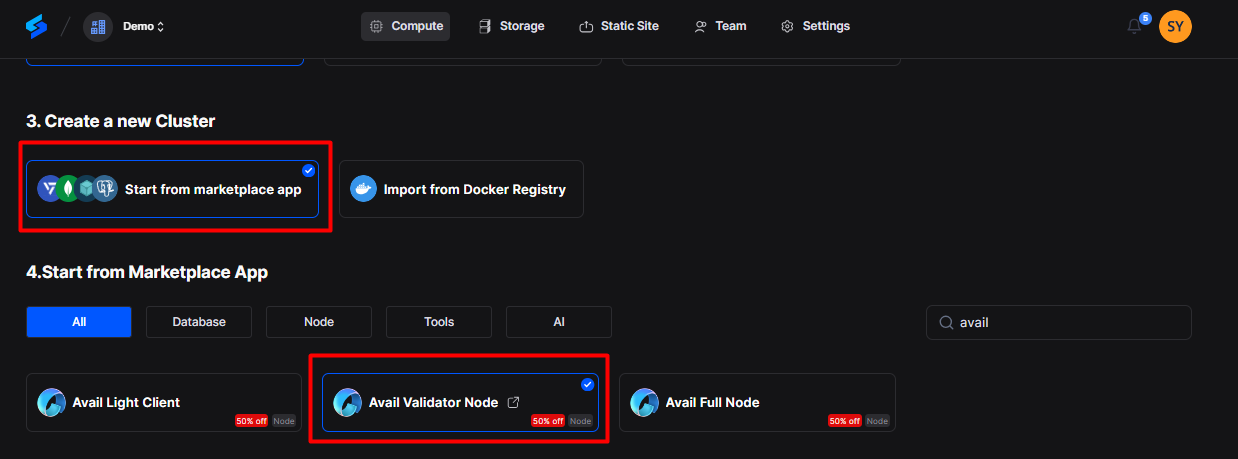
4. Select Region: Select your preferred region for deployment. Choosing a region closer to your users can improve performance and reduce latency.
5. Next, Choose an instance plan that aligns with your requirements. Spheron will recommend a suitable plan according to the Avail Validator Client template, but you can customize it from available plans or choose to 'Create Custom Plans.'
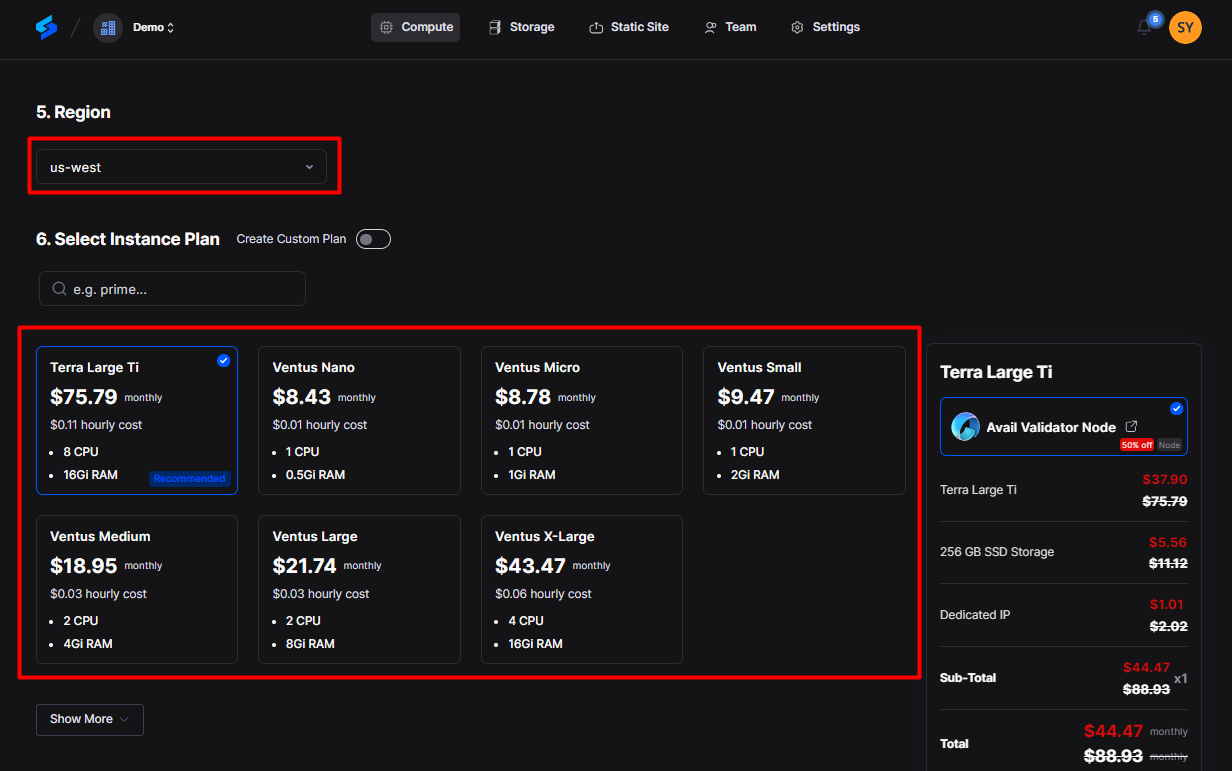
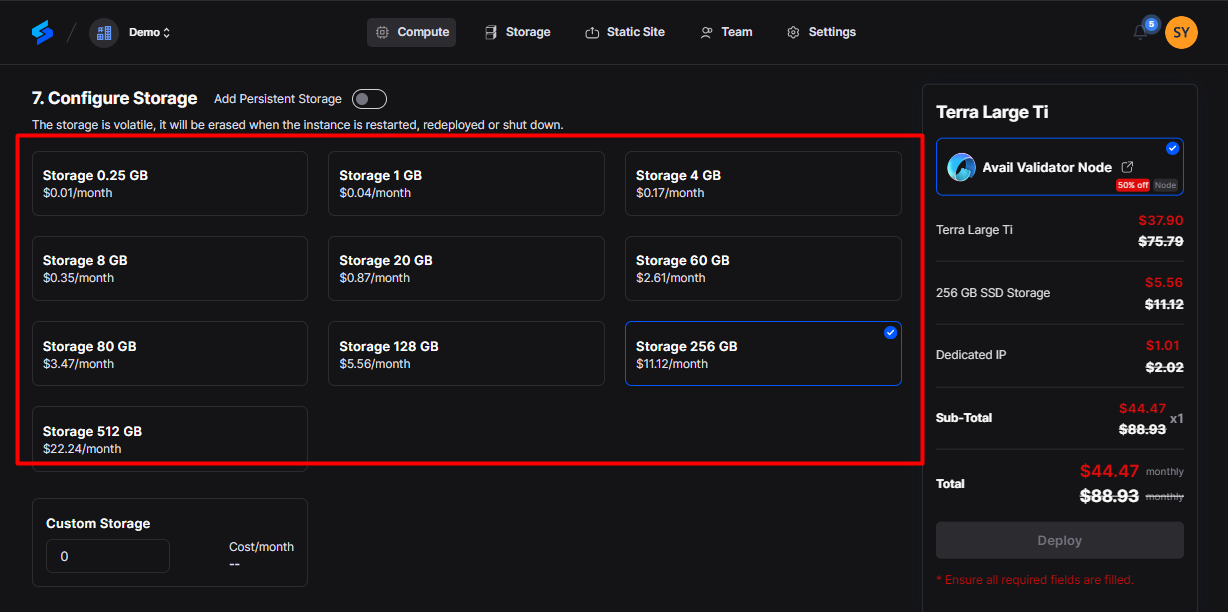
6. Next, Configure storage:
You have to choose storage from the available options or the custom storage option that fits your needs. This storage will be volatile and is erased when the instance is restarted, redeployed, or shut down. Additionally, you get the option to choose Persistent Storage.
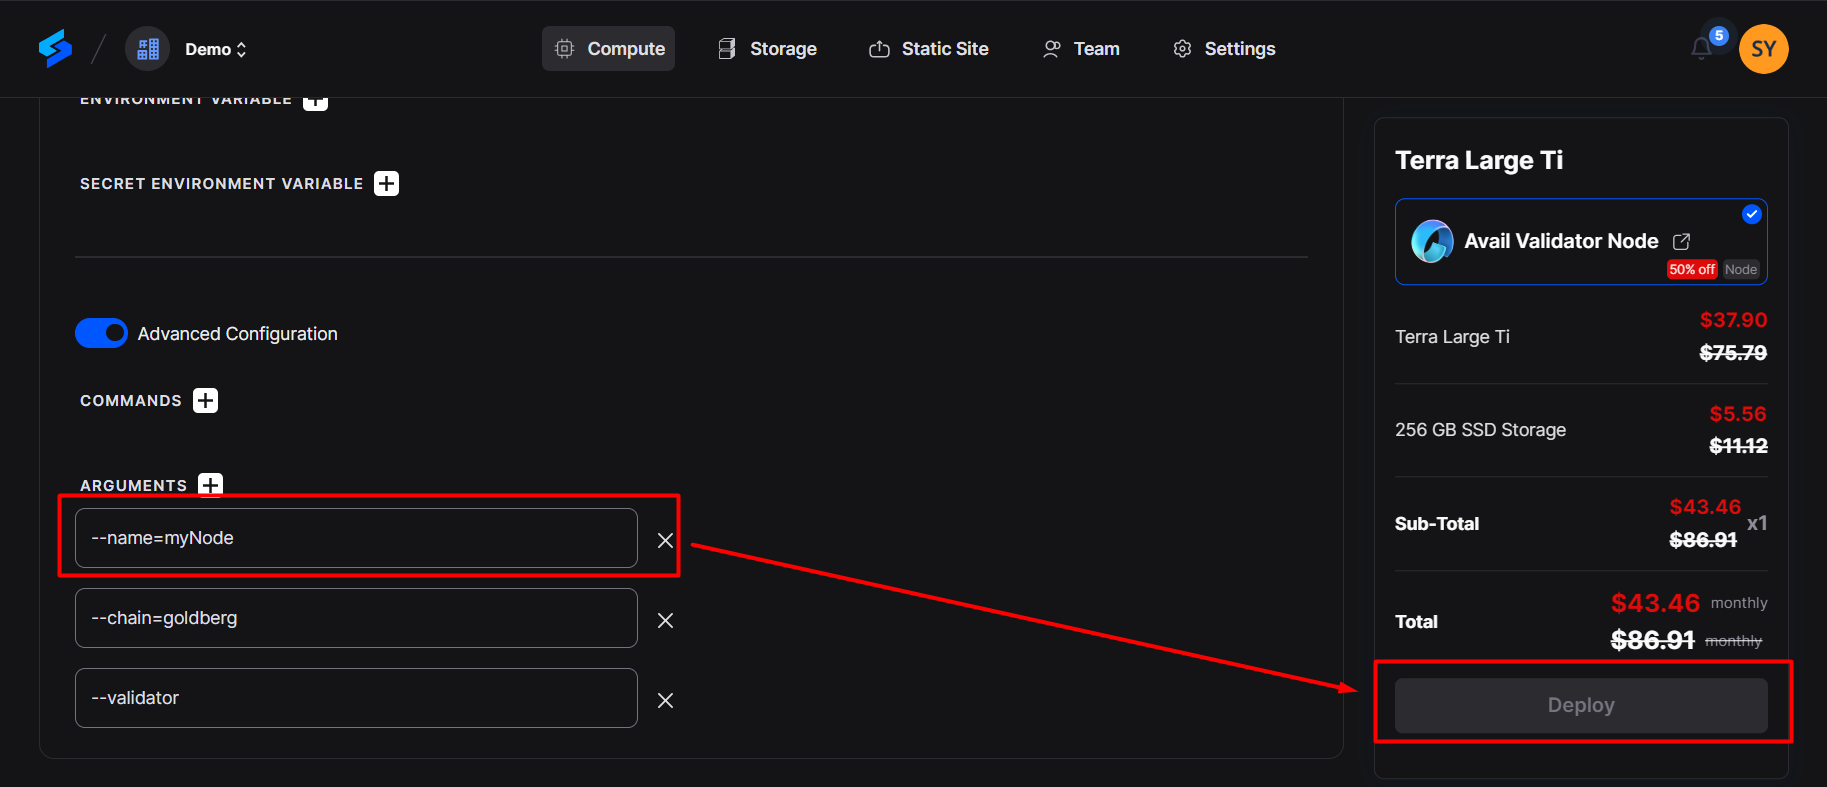
7. Next, you will see the configuration section. Go to the 'Advanced Configuration' section. Add your node name to the argument.
Next, Click the "Deploy" button to deploy the node successfully.
--name=”add your identifier”
Ex. –-name=potato-depl
Wait for your node to be fully set up. After it's provisioned, you'll see an option called ‘Overview’ in the dashboard; click on it to see all the details of the deployed node on Avail Network.
Step 5: Check your running node
Go to Avail Telemetry https//telemetry.avail.tools/, and check the synchronization status of the node. The block needs to attain a specific hash to become part of the validation network.
The synchronization will take time as per the network ~15hrs
Step 6: Create a stash and a controller account
Before becoming an active validator, you need to bond your funds to your node. This involves creating two separate Avail accounts: a stash account for holding your funds and a controller account for managing staking actions. [Please refer to https://docs.availproject.org/operate/validator/staking/ for elaborate details]
Create Stash Account
Go to https://goldberg.avail.tools/ and Create a stash account by clicking on the +Account button.
Copy the Mnemonic key and keep it safe, and then click on next.
Input the name and password to the stash account, then click next.
Click on Save, and you have successfully created a Stash account.
Create Controller Account
Create a controller account similarly by clicking on +Account.
Copy the Mnemonic key and keep it safely and then click on next.
Input the name and password to the stash account, then click next.
Click on Save, and you have successfully created a Stash account.
Step 7: Bond your funds
- Navigate to the Staking tab in the Explorer.
- Navigate to Account and then click on Stash to initiate the bonding process.
- Add the AVL bonded value and then click on the bond button.
Step 8: Adding Session Key
After your node is fully synced, you'll need to rotate and submit your session keys.
Paste the following command in the shell
curl -H "Content-Type: application/json" -d '{"id":1, "jsonrpc":"2.0", "method": "author_rotateKeys", "params":[]}' http://localhost:9944
Submit Session Keys
Navigate back to the Staking tab.
Click on Set Session Key and enter the hex-encoded result.
Click Set Session Key and enter your password when prompted.
Register as a Validator
- Click Validate on the Staking tab.
Set your validator commission percentage.
Enter your password and click on the Validate button.
Start Validation
Your validator is now prepared to begin the validation process. If you wish to discontinue, you can click the stop icon.
Please note that the Avail interface doesn't automatically verify if your node is synchronized; you'll need to confirm this manually. If your node has sufficient stake, the Avail blockchain will likely select it in the next epoch or two.
Conclusion
Running an Avail Validator Node using Spheron is a hassle-free and flexible process. With no long-term commitments, you can easily manage your node and focus on your validator duties. Spheron's marketplace provides a user-centric experience and one-click node deployment, making running nodes seamless.
References
Spheron Avail Node Guide: https://docs.spheron.network/marketplace-guide/avail/
Avail Node Documentation: https://docs.availproject.org/operate/node/docker/
Subscribe to my newsletter
Read articles from Spheron Network directly inside your inbox. Subscribe to the newsletter, and don't miss out.
Written by

Spheron Network
Spheron Network
On-demand DePIN for GPU Compute