Day 42: IAM Programmatic access and AWS CLI ☁☁
 Siri Chandana
IAM Programmatic access:
IAM (Identity and Access Management) in AWS provides programmatic access to AWS services through the use of access keys. Programmatic access allows you to interact with AWS resources and services using AWS CLI, SDKs, and other automation tools.
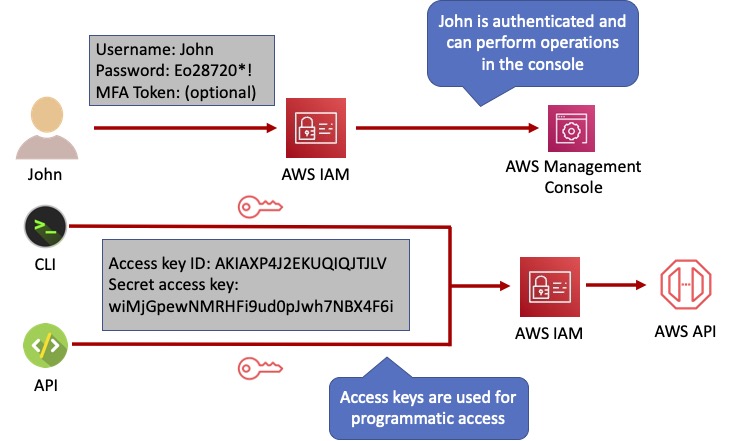
To enable programmatic access for an IAM user, you need to perform the following steps:
Create an IAM user: Start by creating an IAM user in the AWS Management Console. You can assign a user name and configure various settings like access permissions, security credentials, and password policies.
Generate access keys: Once the IAM user is created, you can generate access keys. Access keys consist of an access key ID and a secret access key. The access key ID is used to identify the IAM user, and the secret access key is used to authenticate the user when making API calls.
Provide access permissions: Assign appropriate permissions to the IAM user based on the actions and resources that it needs to access. You can create IAM policies that define the necessary permissions and attach them to the user or a group to which the user belongs.
Use access keys in programmatic tools: With the access key ID and secret access key, you can configure programmatic tools such as AWS CLI, SDKs, or custom scripts to authenticate and interact with AWS services. These tools will use the access keys to sign API requests and authenticate with AWS.
It is important to keep the access keys secure. Treat them like passwords and do not share them openly. Rotate access keys periodically to maintain good security practices.
By leveraging IAM's programmatic access capabilities, you can automate and manage your AWS resources securely and efficiently. It allows you to integrate AWS services into your applications, scripts, and workflows, enabling you to automate various tasks and interact with AWS programmatically.
AWS CLI:
The AWS Command Line Interface (CLI) is a unified tool provided by AWS that allows you to interact with various AWS services from the command line. It provides a command-line interface for managing and automating your AWS resources and services.
Here are some key features and benefits of the AWS CLI:
Unified Interface: The AWS CLI provides a consistent and unified interface for interacting with different AWS services. It allows you to manage resources across multiple AWS accounts and regions using a single set of commands.
Wide Service Coverage: The AWS CLI supports a wide range of AWS services, including EC2, S3, IAM, Lambda, CloudFormation, RDS, and many more. You can perform various operations such as creating, configuring, and deleting resources, as well as retrieving and modifying their properties.
Scripting and Automation: The AWS CLI is designed for scripting and automation purposes. It enables you to write scripts or incorporate AWS CLI commands into your automation workflows. This allows you to automate repetitive tasks, manage resources at scale, and integrate AWS services into your custom scripts or third-party tools.
Integration with Other Tools: The AWS CLI can be easily integrated with other tools and frameworks. It can be used in conjunction with scripting languages like Python or Bash, and it supports integration with popular DevOps tools like Jenkins, Terraform, and Ansible.
To start using the AWS CLI, you need to install it on your local machine. It supports Windows, macOS, and Linux operating systems. Once installed, you can configure it by providing your AWS access key ID, secret access key, default region, and other optional settings.
After configuration, you can use the AWS CLI by running commands in the terminal or command prompt. The commands follow a consistent syntax, typically starting with the service name, followed by the operation and required parameters.
For example, to list all the EC2 instances in your account, you would run the following command:
aws ec2 describe-instances
Task-1:
Create AWS_ACCESS_KEY_ID and AWS_SECRET_ACCESS_KEY from AWS Console
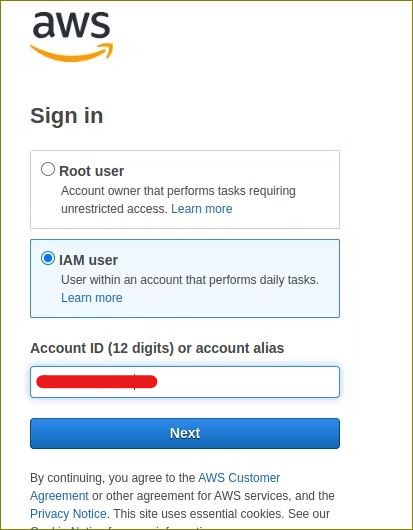
Step 1: Log in to AWS using the root or IAM users. (if you have permission to create EC2-instance as an IAM user)
Step2: Click on your username in the top right corner of the console and select "Security Credentials"
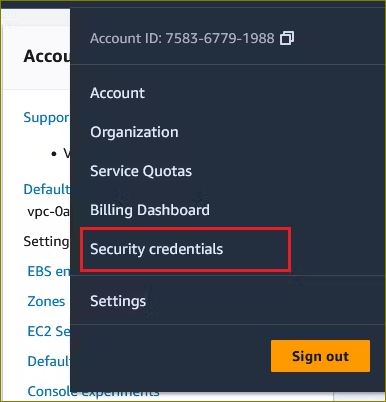
step3: Click on the "Access keys (access key ID and secret access key)" section to create access key.
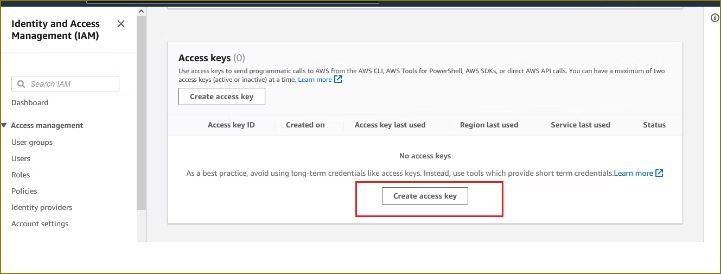
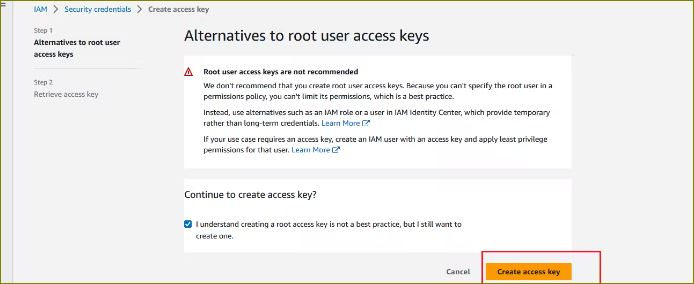
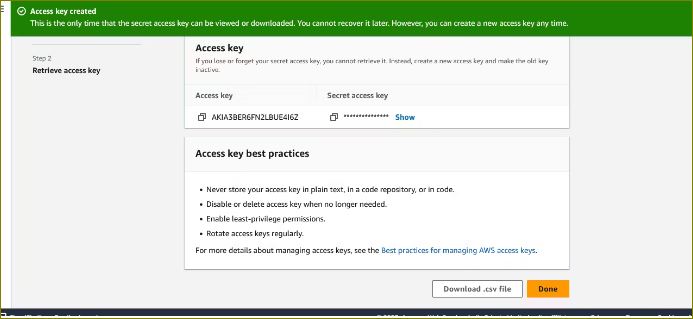
step4: Your access key ID and secret access key will be displayed. Make sure to download the CSV file with your access key information and store it in a secure location.
Task-2
Setup and install AWS CLI and configure your account credentials
step1: Install the AWS CLI by following the instructions for your operating system: docs.aws.amazon.com/cli/latest/userguide/in
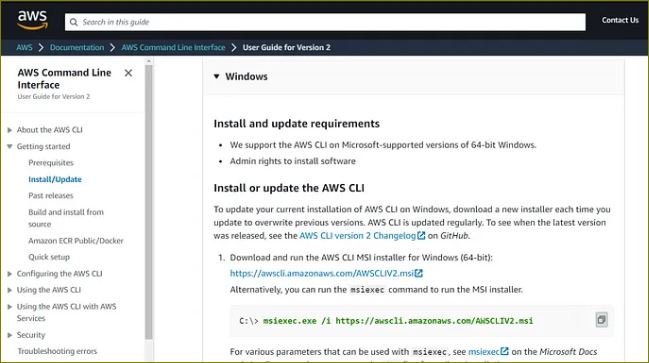
step2: To confirm whether aws cli is installed or not, open terminal and run below command.
aws --version

step3: In your terminal, run the following command to configure AWS CLI:
aws configure
You will be prompted to enter the following information:
AWS Access Key ID: Enter the Access Key ID from the CSV file you downloaded during Task-01.
AWS Secret Access Key: Enter the Secret Access Key from the CSV file.
Default region name: Enter the AWS region you want to use as the default (e.g., "us-east-1").
Default output format: You can leave this as "json" or choose another format.

- After entering this information, the AWS CLI will be configured with your IAM user's credentials.
You have now successfully created an IAM user and configured AWS CLI on your local machine. You can use the CLI to interact with AWS services using the credentials of the IAM user you created.
Thank you for reading my blog/article.
Happy Learning!!!!
Subscribe to my newsletter
Read articles from Siri Chandana directly inside your inbox. Subscribe to the newsletter, and don't miss out.
Written by
