How to Insert Update Delete View in PHP
 OnlineITtuts
Learn How to Insert Update Delete in PHP, Guys if you face problems performing the operations such as Insert Update Delete in PHP. You need to follow the tutorial, guys, there are a lot of Web Developers or PHP Developers sharing personal ideas or knowledge.
So, Guys, I’m also a Web Developer, so I will teach you How You can use PHP & MySQLi databases to Perform Operations. This tutorial is All about Newbies or Beginners, they don’t have any ideas or knowledge.
Basically, this knowledge is Very Important for newbies or beginners, basically, It will help you to develop a web-based application.

Guys, Any type of web application has those features such as Insert Update Delete and View Record. Once you have learned those features, then you can use those features with any type of application without facing any problems.
How to Insert Update Delete Record Using Php and MySQL
Guys, I have been using the 5.6 PHP Version, If you have the same or previous version. You can use my methods to perform the operations. This time PHP’s latest version 7.2 is available, if you have PHP’s latest version you can also use functions or codes.
In this tutorial, I used the Bootstrap CSS file to design the complete application. If you want to use this file, you can easily download the Bootstrap CSS file and use that with your own project. If you have knowledge of CSS3 and you want to use HTML5 and CSS3 to Design your application you can do that.
You May Also Like: Student Registration System in Php
Php Insert Update Delete
First of All, you need to create a Database and a table, you can use them to store the records in the Database. So, Below, I have mentioned the query, you can use that to create a table. Before executing the below query, you have made a database.
CREATE TABLE records
(
User_ID int AUTO_INCREMENT,
User_Name varchar(50),
User_Email varchar(50),
User_Age varchar(20),
)
Once you have executed the above-mentioned query, then you will use it to store the records. I mentioned the below code, you need to design the registration form.
You May Also Like: School Management System in PHP
Before designing the registration form and storing the data in the database, you need to create a connection. below I mentioned the connection.php code, you need to follow it. So, you need to how to make a connection, I’m going to share your connection code.
mysqli_connect(host, username, password, dbname)
mysqli_connect is a Php built-in function that helps you to communicate Php with the MySQLi database. Once you use the call mysqli_connect function, then you need to pass four parameters.
The first one is your MySQLi database host such as “localhost”, the second one is MySQLi username such as “root”, and the third one is MySQLi connection the default password is null or empty. You need to enter “” which means empty. The last one is your database name which you created like “crud“. I’ve mentioned my connection code, you need to use that.
<?php
$con=mysqli_connect("localhost","root","","crud");
if(!$con) { die(" Connection Error "); }
?>
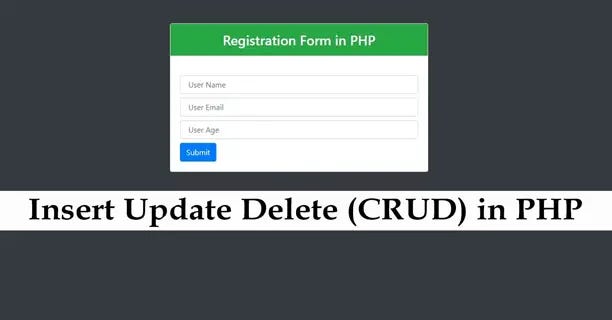
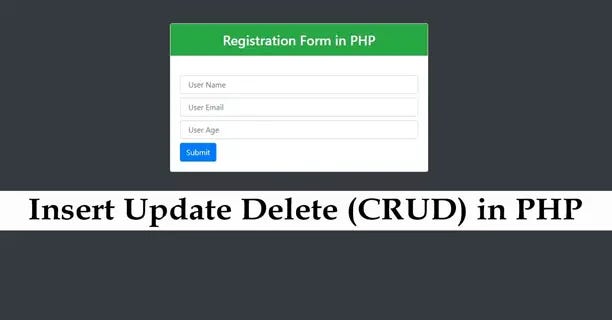
Below mentioned code All about Design Registration Form, you can use Bootstrap CSS File to follow the code. Otherwise, you can use HTML and CSS3 to Design it.
<!DOCTYPE html>
<html lang="en">
<head>
    <meta charset="UTF-8">
    <meta name="viewport" content="width=device-width, initial-scale=1.0">
    <meta http-equiv="X-UA-Compatible" content="ie=edge">
    <link rel="stylesheet" a href="CSS/bootstrap.css"/>
    <title>Registration Form</title>
</head>
<body class="bg-dark">

<div class="container">
            <div class="row">
                <div class="col-lg-6 m-auto">
                    <div class="card mt-5">
                        <div class="card-title">
                            <h3 class="bg-success text-white text-center py-3"> Registration Form in PHP</h3>
                        </div>
                        <div class="card-body">
                            <form action="insert.php" method="post">
                                <input type="text" class="form-control mb-2" placeholder=" User Name " name="name">
                                <input type="email" class="form-control mb-2" placeholder=" User Email " name="email">
                                <input type="text" class="form-control mb-2" placeholder=" User Age " name="age">
                                <button class="btn btn-primary" name="submit">Submit</button>
                            </form>
                        </div>
                    </div>
                </div>
            </div>
        </div>

</body>
</html>
Once you have designed the registration form, then you need to create an insert.php file to get from the data and store it in the variables. Once you do that, then you need to write the validation and also query to store the data. I’m going to share with you the insert query.
Insert Query
INSERT INTO table_name (column1, column2, column3,...)
VALUES (value1, value2, value3,...)
The insert query helps you to store the record in the database. I’ve mentioned below code that helps to store the record in the database.
<?php

require_once("connection.php");
    if(isset($_POST['submit']))
    {
        if(empty($_POST['name']) || empty($_POST['email']) || empty($_POST['age']))
        {
            echo ' Please Fill in the Blanks ';
        }
        else
        {
            $UserName = $_POST['name'];
            $UserEmail = $_POST['email'];
            $UserAge = $_POST['age'];
            $query = " insert into records (User_Name, User_Email,User_Age) values('$UserName','$UserEmail','$UserAge')";
            $result = mysqli_query($con,$query);
            if($result)
            {
                header("location:view.php");
            }
            else
            {
                echo '  Please Check Your Query ';
            }
        }
    }
    else
    {
        header("location:index.php");
    }

?>
Once you have followed the above process, then your data has been stored in the database. once you do that, then you are able to display each database data in the HTML tables. Follow on below code, Basically, the Below File Name is View.php, you can write any name.
Select Query
SELECT * FROM table_name
I’ve mentioned the above code called Select statement which is used to get the data from the database. Then you can store the database data in the PHP local variables, then you can assign the PHP local variable where you want to display the data. you can check out the below-mentioned code.
You May Also Like: How to Upload Php Website on CPanel.
<?php

require_once("connection.php");
    $query = " select * from records ";
    $result = mysqli_query($con,$query);
?>
<!DOCTYPE html>
<html lang="en">
<head>
    <meta charset="UTF-8">
    <meta name="viewport" content="width=device-width, initial-scale=1.0">
    <meta http-equiv="X-UA-Compatible" content="ie=edge">
    <link rel="stylesheet" a href="CSS/bootstrap.css"/>
    <title>View Records</title>
</head>
<body class="bg-dark">
        <div class="container">
            <div class="row">
                <div class="col m-auto">
                    <div class="card mt-5">
                        <table class="table table-bordered">
                            <tr>
                                <td> User ID </td>
                                <td> User Name </td>
                                <td> User Email </td>
                                <td> User Age </td>
                                <td> Edit  </td>
                                <td> Delete </td>
                            </tr>
                            <?php

                                    while($row=mysqli_fetch_assoc($result))
                                    {
                                        $UserID = $row['User_ID'];
                                        $UserName = $row['User_Name'];
                                        $UserEmail = $row['User_Email'];
                                        $UserAge = $row['User_Age'];
                            ?>
                                    <tr>
                                        <td><?php echo $UserID ?></td>
                                        <td><?php echo $UserName ?></td>
                                        <td><?php echo $UserEmail ?></td>
                                        <td><?php echo $UserAge ?></td>
                                        <td><a href="edit.php?GetID=<?php echo $UserID ?>">Edit</a></td>
                                        <td><a href="delete.php?Del=<?php echo $UserID ?>">Delete</a></td>
                                    </tr>
                            <?php
                                    }
                            ?>

                        </table>
                    </div>
                </div>
            </div>
        </div>

</body>
</html>
Once you have displayed each student’s data in the HTML tables. Then you are able to perform the operation such as Update and Delete Record. So, you need to use select statements and also where keywords help you to get the particular data.
Select Query With Where Keyword
SELECT * FROM table_name where table_Id=1
You May Also Like: Login And Registration System in PHP
First, We need to Update the Record, So, You need to Follow the below-mentioned code to display student data in the input text fields.
<?php
require_once("connection.php");
    $UserID = $_GET['GetID'];
    $query = " select * from records where User_ID='".$UserID."'";
    $result = mysqli_query($con,$query);
    while($row=mysqli_fetch_assoc($result))
    {
        $UserID = $row['User_ID'];
        $UserName = $row['User_Name'];
        $UserEmail = $row['User_Email'];
        $UserAge = $row['User_Age'];
    }
?>
<!DOCTYPE html>
<html lang="en">
<head>
    <meta charset="UTF-8">
    <meta name="viewport" content="width=device-width, initial-scale=1.0">
    <meta http-equiv="X-UA-Compatible" content="ie=edge">
    <link rel="stylesheet" a href="CSS/bootstrap.css"/>
    <title>Document</title>
</head>
<body class="bg-dark">
        <div class="container">
            <div class="row">
                <div class="col-lg-6 m-auto">
                    <div class="card mt-5">
                        <div class="card-title">
                            <h3 class="bg-success text-white text-center py-3"> Update Form in PHP</h3>
                        </div>
                        <div class="card-body">
                            <form action="update.php?ID=<?php echo $UserID ?>" method="post">
                                <input type="text" class="form-control mb-2" placeholder=" User Name " name="name" value="<?php echo $UserName ?>">
                                <input type="email" class="form-control mb-2" placeholder=" User Email " name="email" value="<?php echo $UserEmail ?>">
                                <input type="text" class="form-control mb-2" placeholder=" User Age " name="age" value="<?php echo $UserAge ?>">
                                <button class="btn btn-primary" name="update">Update</button>
                            </form>
                        </div>
                    </div>
                </div>
            </div>
        </div>

</body>
</html>
Here is the update query, inside the update operation, you need to use that. I’m going to share with you the update query that helps you to understand how to update a record using with the help of query.
Update Query

UPDATE table_name
SET column1=value, column2=value2,...
WHERE some_column=some_value
Once you do that, then you are able to perform the operation such as update the record. below, I mentioned below code, you can use that to update the record.
<?php
require_once("connection.php");
    if(isset($_POST['update']))
    {
        $UserID = $_GET['ID'];
        $UserName = $_POST['name'];
        $UserEmail = $_POST['email'];
        $UserAge = $_POST['age'];
        $query = " update records set User_Name = '".$UserName."', User_Email='".$UserEmail."',User_Age='".$UserAge."' where User_ID='".$UserID."'";
        $result = mysqli_query($con,$query);
        if($result)
        {
            header("location:view.php");
        }
        else
        {
            echo ' Please Check Your Query ';
        }
    }
    else
    {
        header("location:view.php");
    }

?>
Once you do that, then you are able to perform another operation such as Delete the record. I mentioned below a very simple code, you can follow that to delete the record.
DELETE FROM table_name
WHERE some_column = some_value
Above I’ve mentioned the delete query that helps you to delete the record. I’ve mentioned below the delete code, you can find out the usage of the delete query. I hope you can do that.
if(isset($_GET['Del']))
         {
             $UserID = $_GET['Del'];
             $query = " delete from records where User_ID = '".$UserID."'";
             $result = mysqli_query($con,$query);
             if($result)
             {
                 header("location:view.php");
             }
             else
             {
                 echo ' Please Check Your Query ';
             }
        }
         else
         {
             header("location:view.php");
         }
Insert Update Delete in PHP With Source Code
Above, All About How to Insert Update Delete in PHP with MySQLi Database. You can use the above-mentioned instructions to perform those operations as well, I also made a tutorial that helps you to understand everything from scratch practically.
If you face any problem with the codes mentioned, you need to watch the complete video, then hope you will understand.
Guys, I hope you have learned something new about this tutorial. I have mentioned a simple way to learn to insert update delete in PHP. If you like it, kindly share the content and Share it with Social Networks.
If you have any questions/suggestions, comment to me or email, me after receiving your email. I will help you to solve your problems. Thanks For Watching and Reading the Complete Article.
Subscribe to my newsletter
Read articles from OnlineITtuts directly inside your inbox. Subscribe to the newsletter, and don't miss out.
Written by

OnlineITtuts
OnlineITtuts
As a dedicated front-end developer, I am passionate about crafting immersive and user-friendly digital experiences. With a keen eye for design and proficiency in HTML, CSS, and JavaScript, I specialize in translating creative concepts into responsive and visually appealing websites. My commitment to staying abreast of industry trends and technologies allows me to create dynamic and engaging user interfaces. Whether optimizing for mobile responsiveness or ensuring cross-browser compatibility, I bring a meticulous approach to every project. With a strong foundation in front-end frameworks like React and Angular, I thrive on transforming ideas into seamless, interactive, and aesthetically pleasing web applications that leave a lasting impression on users."