Unlocking the Power of AWS CLI: An In-Depth Guide (Day-7)
 Rohit Deore
In today's fast-paced digital era, cloud computing has become the backbone of the tech industry, with Amazon Web Services (AWS) standing tall among its peers. Among the various tools offered by AWS, the Command Line Interface (CLI) is particularly noteworthy for its power and versatility. This blog aims to demystify the AWS CLI, presenting it in a way that's accessible to those who may not be fluent in complex technical jargon. Our goal is to make this powerful tool understandable and approachable for everyone interested in leveraging AWS to its full potential.
What is AWS CLI?
The AWS CLI is a unified tool that allows you to manage and automate AWS services directly from your terminal or command prompt. It serves as a bridge between you and the AWS platform, enabling you to execute commands and control various AWS services without navigating through the web interface.
Why AWS CLI?
The appeal of the AWS CLI lies in its simplicity and efficiency. It facilitates batch operations and scripting, enabling you to perform tasks more quickly and with fewer steps than would be required using a graphical user interface. This efficiency is crucial in the cloud-driven world where speed and operational efficiency are key to staying competitive.
How it Works
The AWS CLI works by sending requests to the AWS services' APIs. When you type a command, the CLI converts it into a request that the AWS service can understand. It then sends this request over the internet to the service. Once the service processes the request, it sends back a response, which the CLI displays to you.
Deep Dive into the Working Mechanism
Installation and Configuration: Before you can start using the AWS CLI, you need to install it on your machine and configure it with your AWS credentials. This involves specifying your Access Key ID, Secret Access Key, and the AWS Region and output format you prefer.
Command Structure: AWS CLI commands follow a simple structure:
aws [options] <command> <subcommand> [parameters]. Each component instructs the CLI on what you want to do, with which service, and how.Interacting with AWS Services: Whether you're launching an EC2 instance, listing S3 buckets, or querying DynamoDB tables, the CLI translates your commands into API requests. It leverages the robustness of AWS's APIs to perform a vast range of tasks across different services.
Automation and Scripting: Beyond individual commands, the AWS CLI shines when it comes to automation. You can write scripts that combine multiple commands to orchestrate complex workflows. This capability is especially beneficial for repetitive tasks, backups, and bulk operations.
Features
The AWS CLI boasts an extensive feature set, including:
Support for All AWS Services: From EC2 and S3 to Lambda and DynamoDB, the CLI covers every AWS service.
Scripting Capabilities: Automate tasks and workflows by writing scripts.
Flexibility: Execute commands on any operating system.
Batch Operations: Perform actions on multiple resources in one go.
Similar Tools
While the AWS CLI is powerful, there are other tools in the ecosystem, such as:
AWS SDKs: For developers preferring to use programming languages like Python, Java, or Node.js to interact with AWS services.
Terraform: A tool for building, changing, and versioning infrastructure safely and efficiently.
Ansible: An open-source tool for software provisioning, configuration management, and application deployment.
Advantages
Efficiency: Streamline operations and save time.
Cost-Effective: Automate tasks to reduce operational costs.
Flexibility: Use across various operating systems and integrate into existing workflows.
Disadvantages
Learning Curve: Requires time to learn command syntax and options.
Complexity for Large Infrastructures: Managing extensive infrastructures solely via CLI can be challenging.
Demo
Install the AWS CLI:
For instructions on how to install the AWS CLI, please follow the link and select the guide for your operating system: https://docs.aws.amazon.com/cli/latest/userguide/getting-started-install.html.
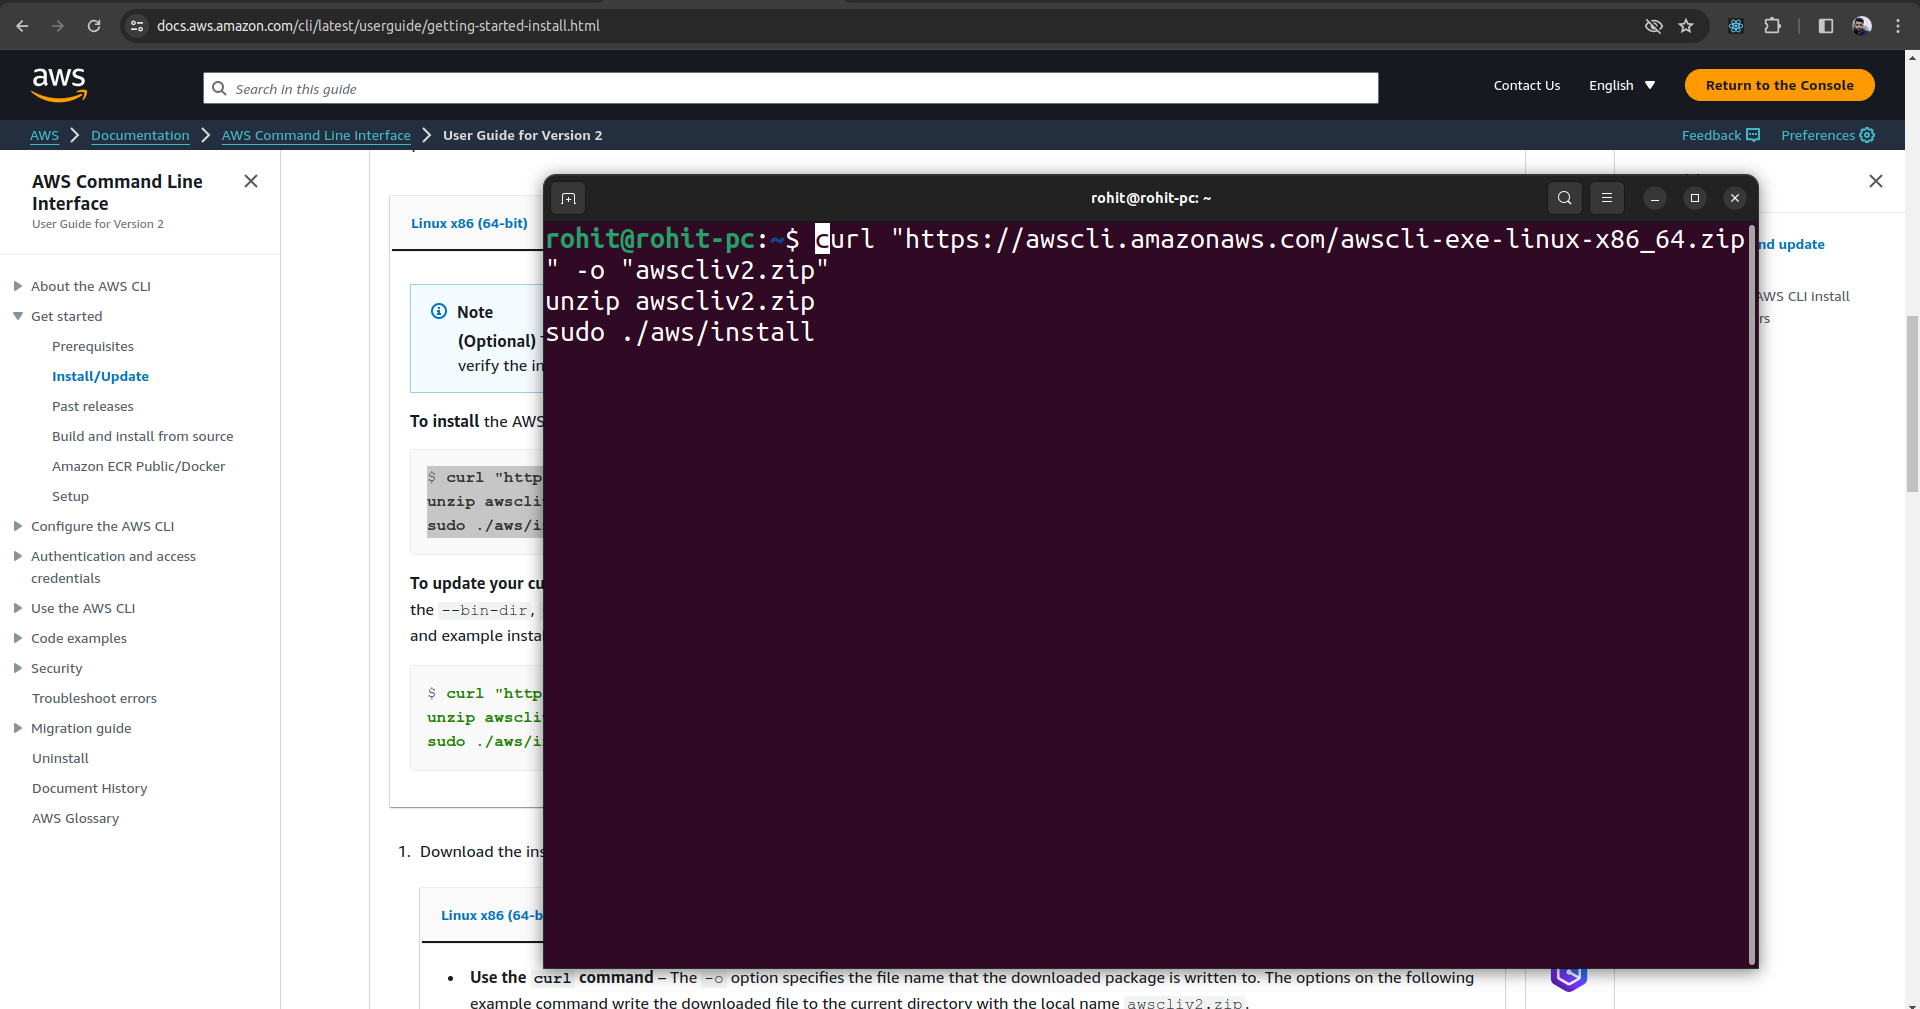
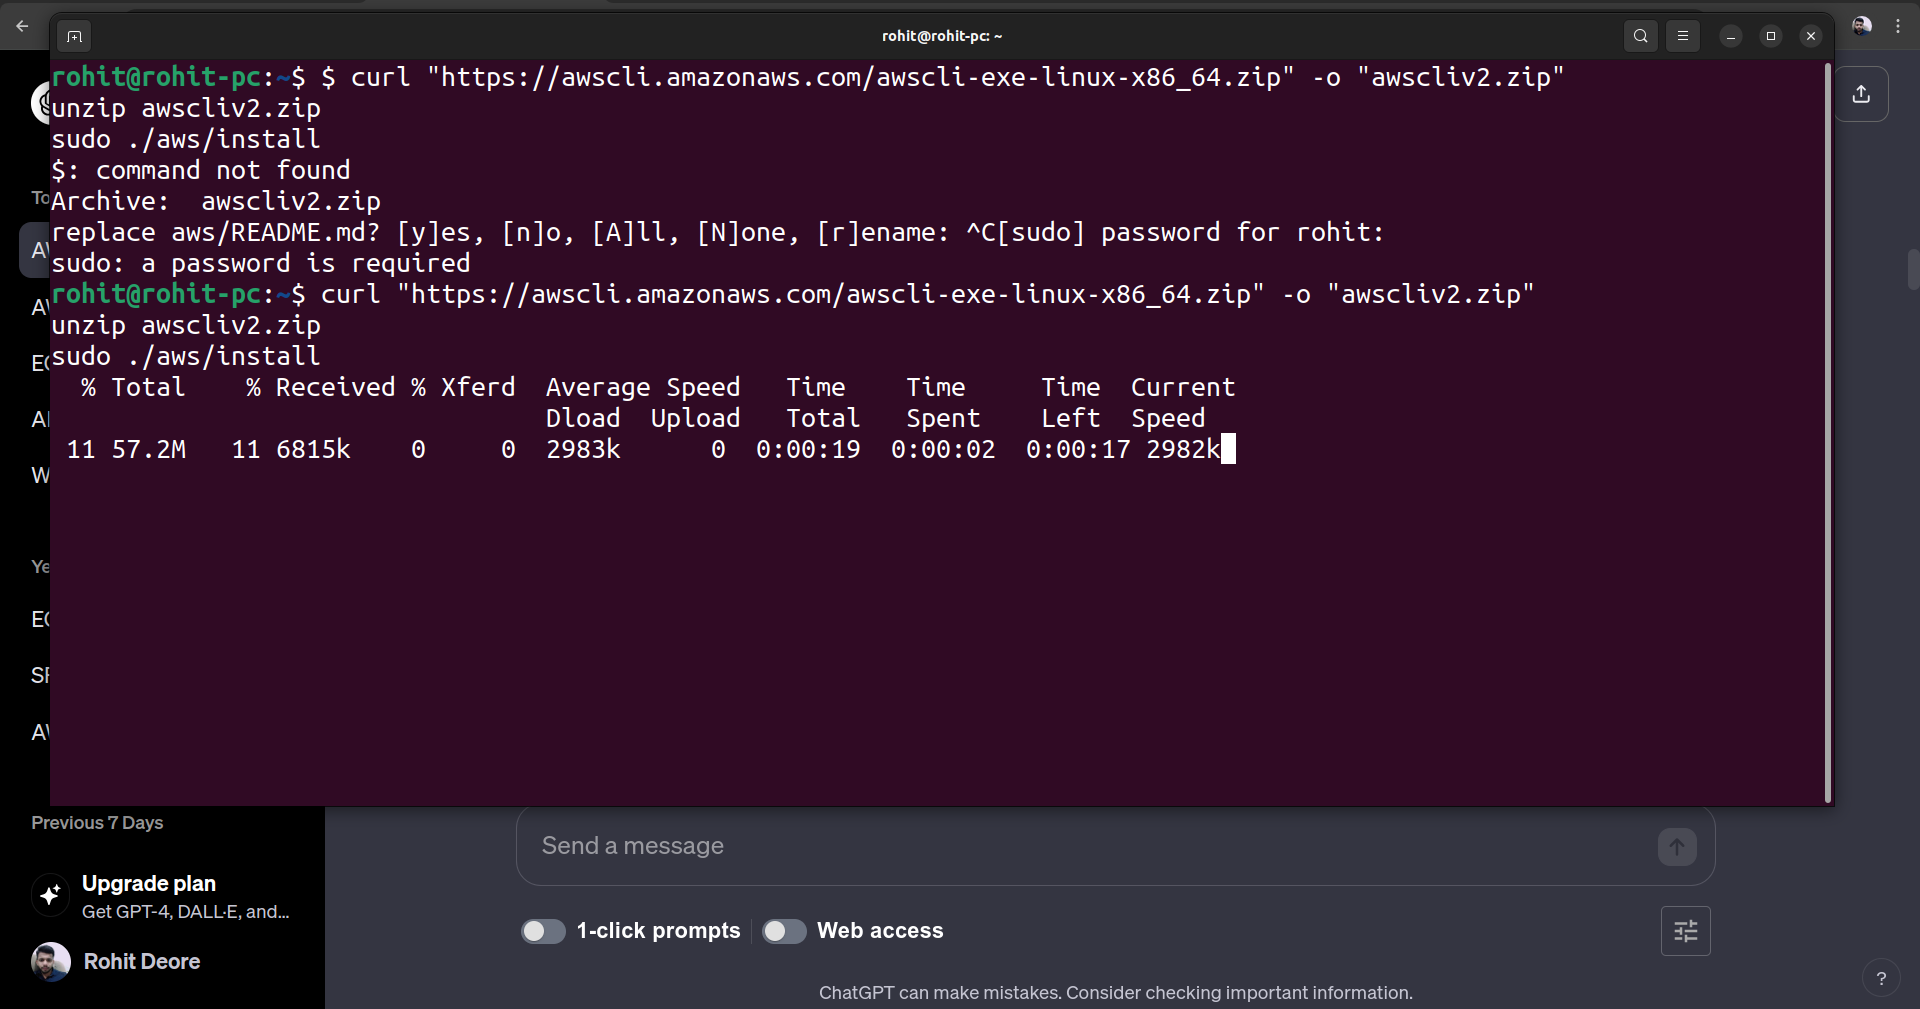
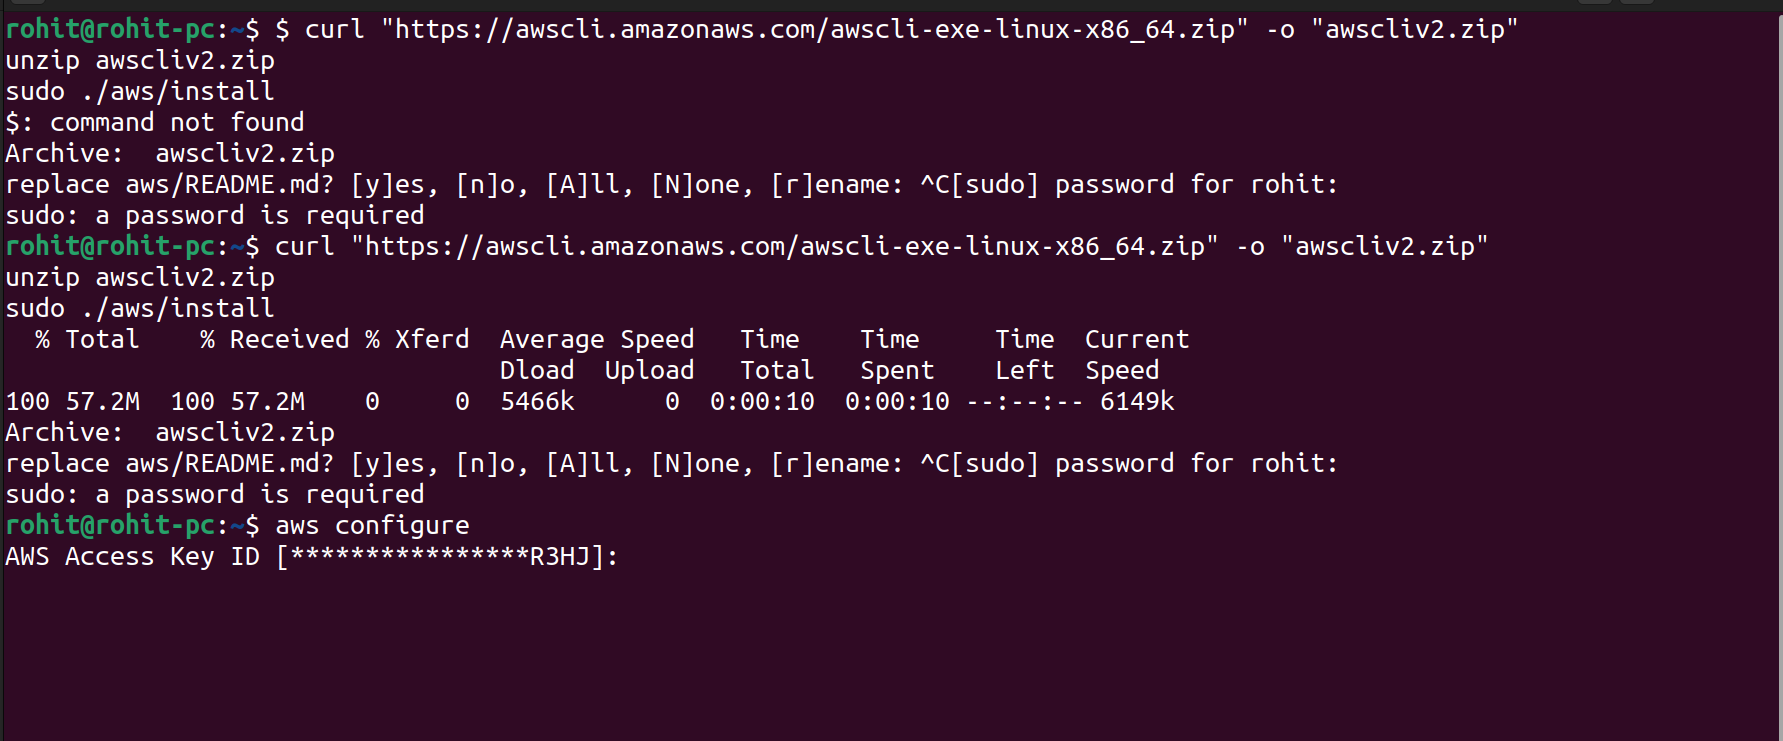
Once the installation is complete, use the "aws configure" command to configure the CLI with your AWS account.
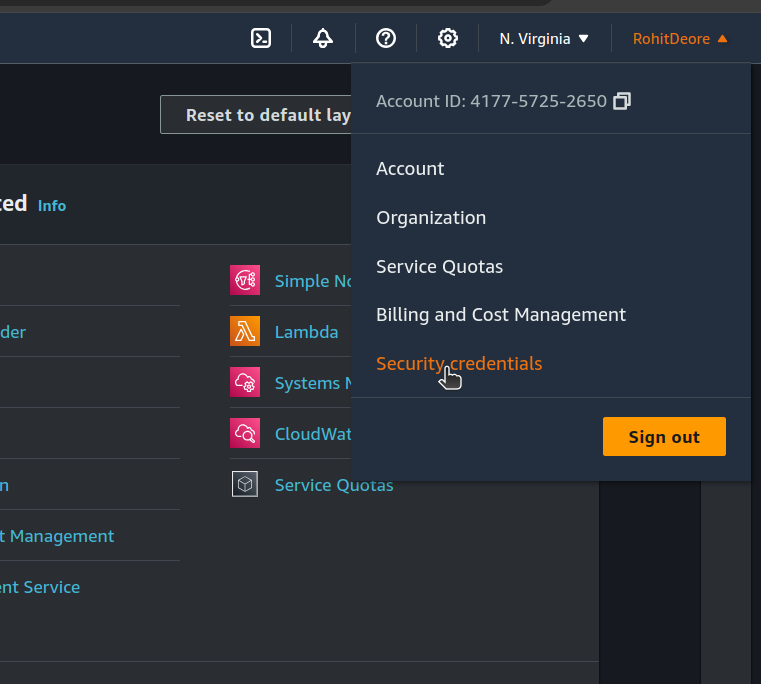
Create an access key.
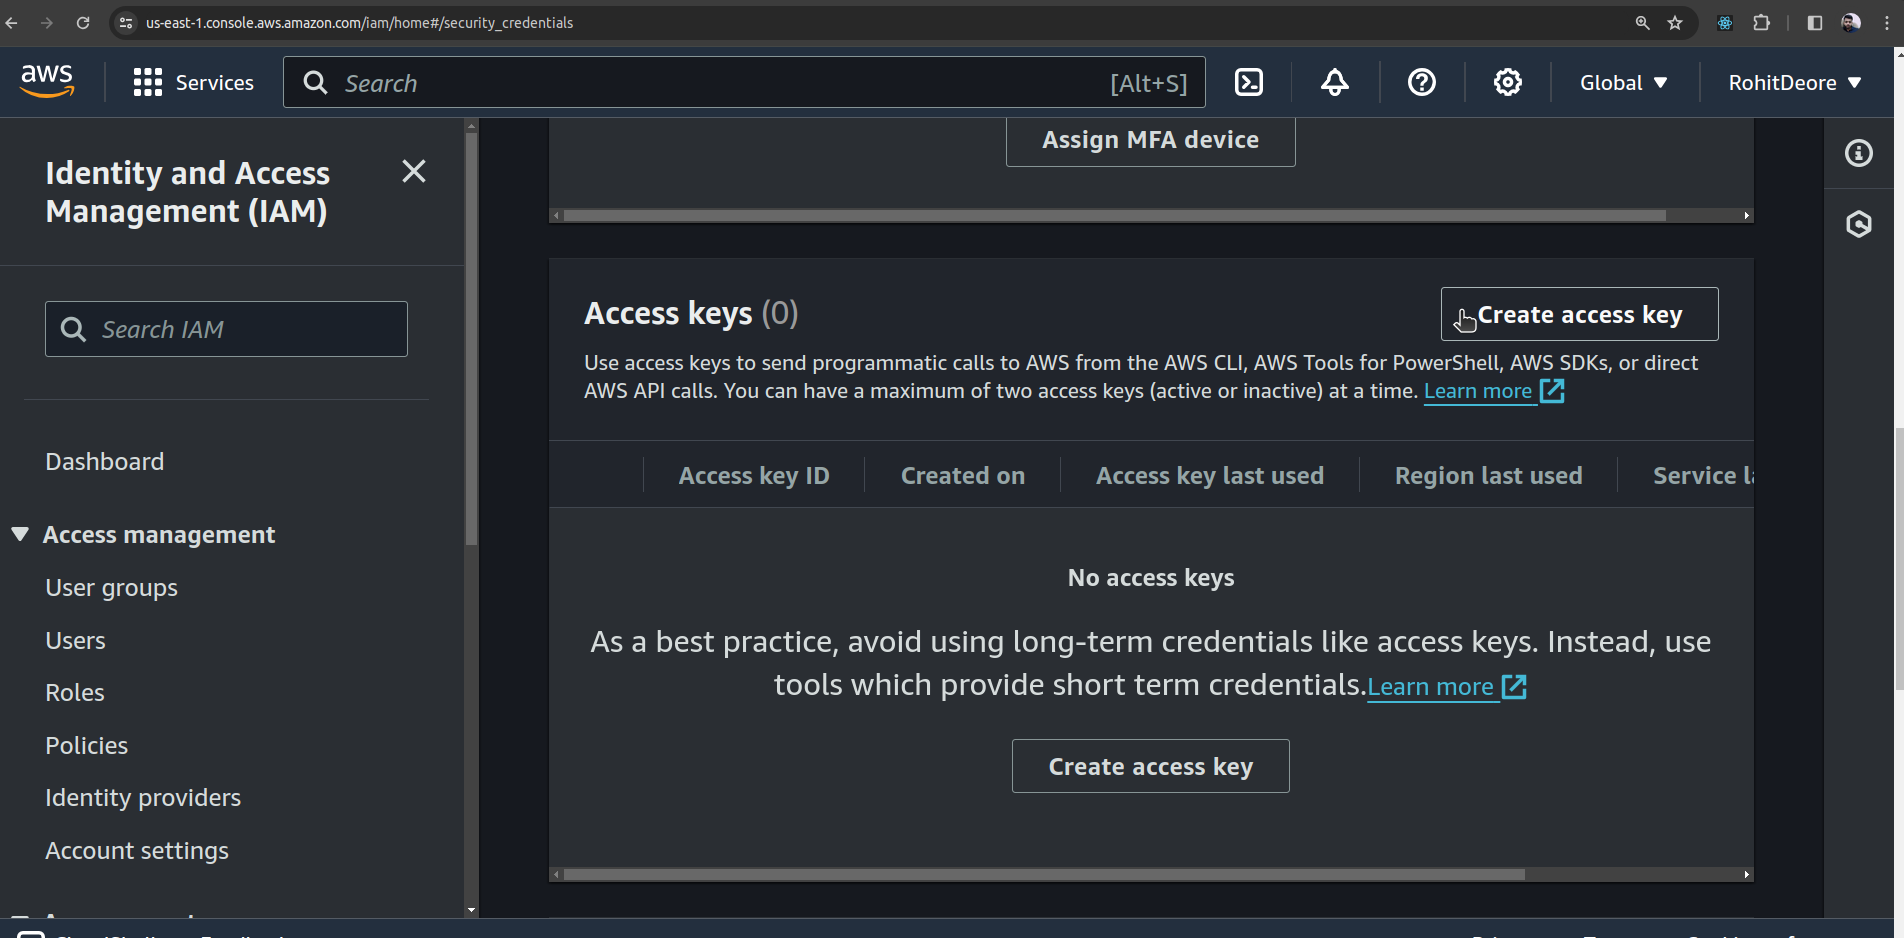
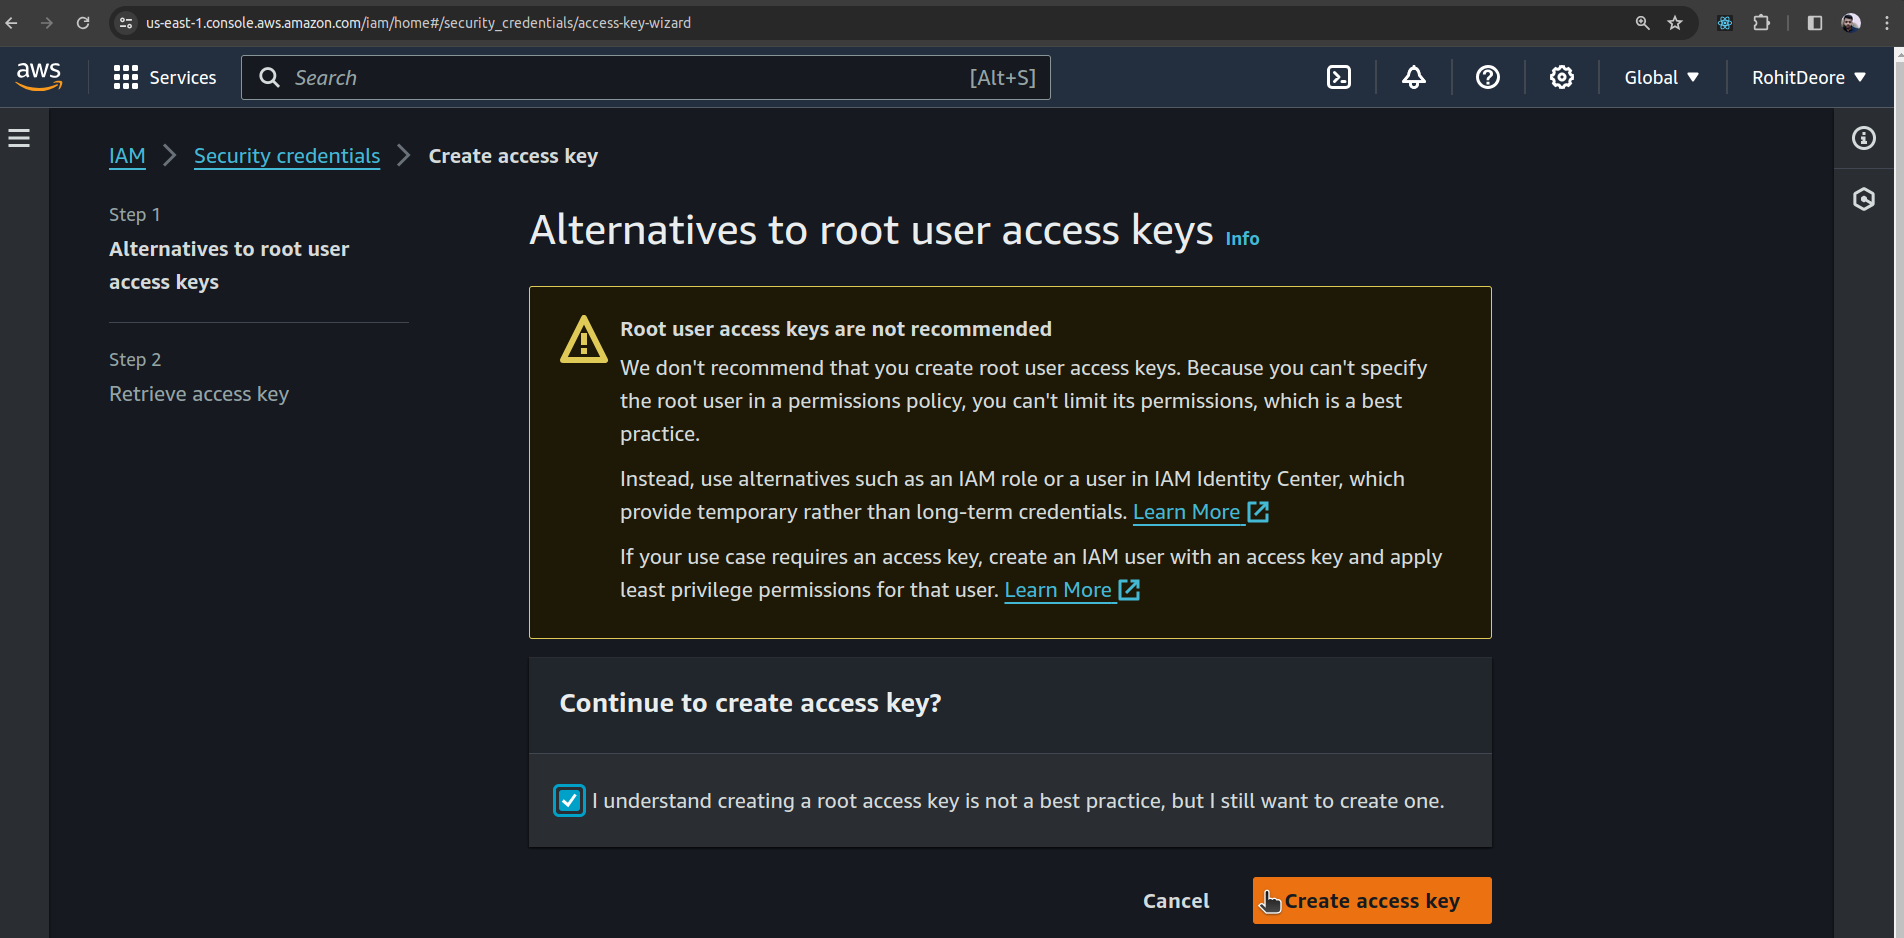
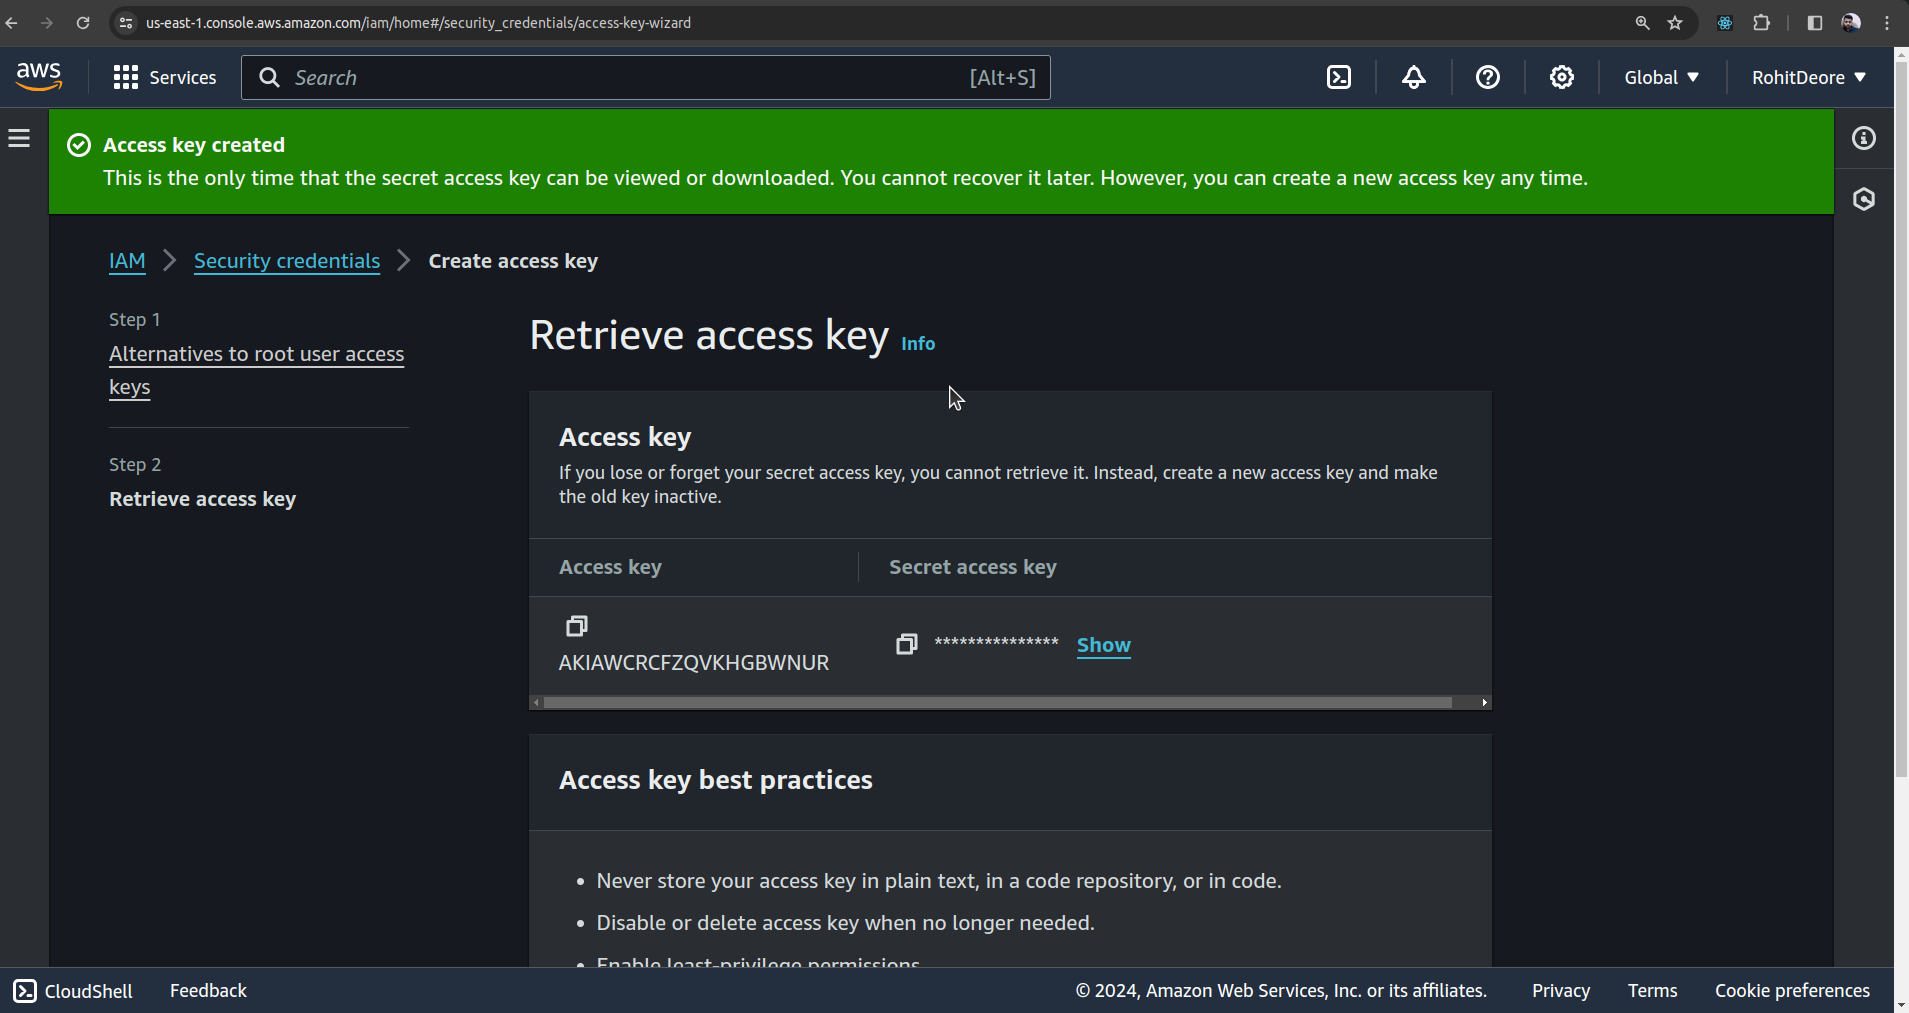
Now, using the access key and secret access key, configure the AWS CLI.

Let's verify whether the AWS CLI is configured or not using a simple command: "aws s3 ls" This command will display a list of S3 buckets if the AWS CLI is successfully configured.

Seeing two buckets indicates that our CLI is configured correctly.
Now, let's try to create an S3 bucket using the CLI.


Hence, you can see that the bucket is created using the command aws s3 mb s3://s3-bucket-name.
Using the command aws s3 rb s3://s3-bucket-name --force, you can delete the bucket.

Hence, the bucket "creating-s3-from-cli" gets removed or deleted.
This was a simple demo demonstrating how to access or create resources in an AWS account through the interaction between the AWS CLI and AWS API.
On Closing
The AWS CLI is a powerful, versatile tool that can significantly enhance your productivity and operational efficiency. By understanding its workings, features, and how to leverage it alongside other tools, you're well-equipped to harness the full potential of AWS services. While it may require some effort to master, the benefits it brings to the table make it a worthwhile investment for anyone working in the cloud computing space.
Remember, the journey to mastering AWS CLI is a marathon, not a sprint. Start with small, manageable tasks and gradually build your expertise.
To Explore More Visit https://docs.aws.amazon.com/cli/
Keep Exploring...
Subscribe to my newsletter
Read articles from Rohit Deore directly inside your inbox. Subscribe to the newsletter, and don't miss out.
Written by

Rohit Deore
Rohit Deore
Student and Developer