Mount and Unmount an EBS volume to an EC2 Instance
 Ankit Singh
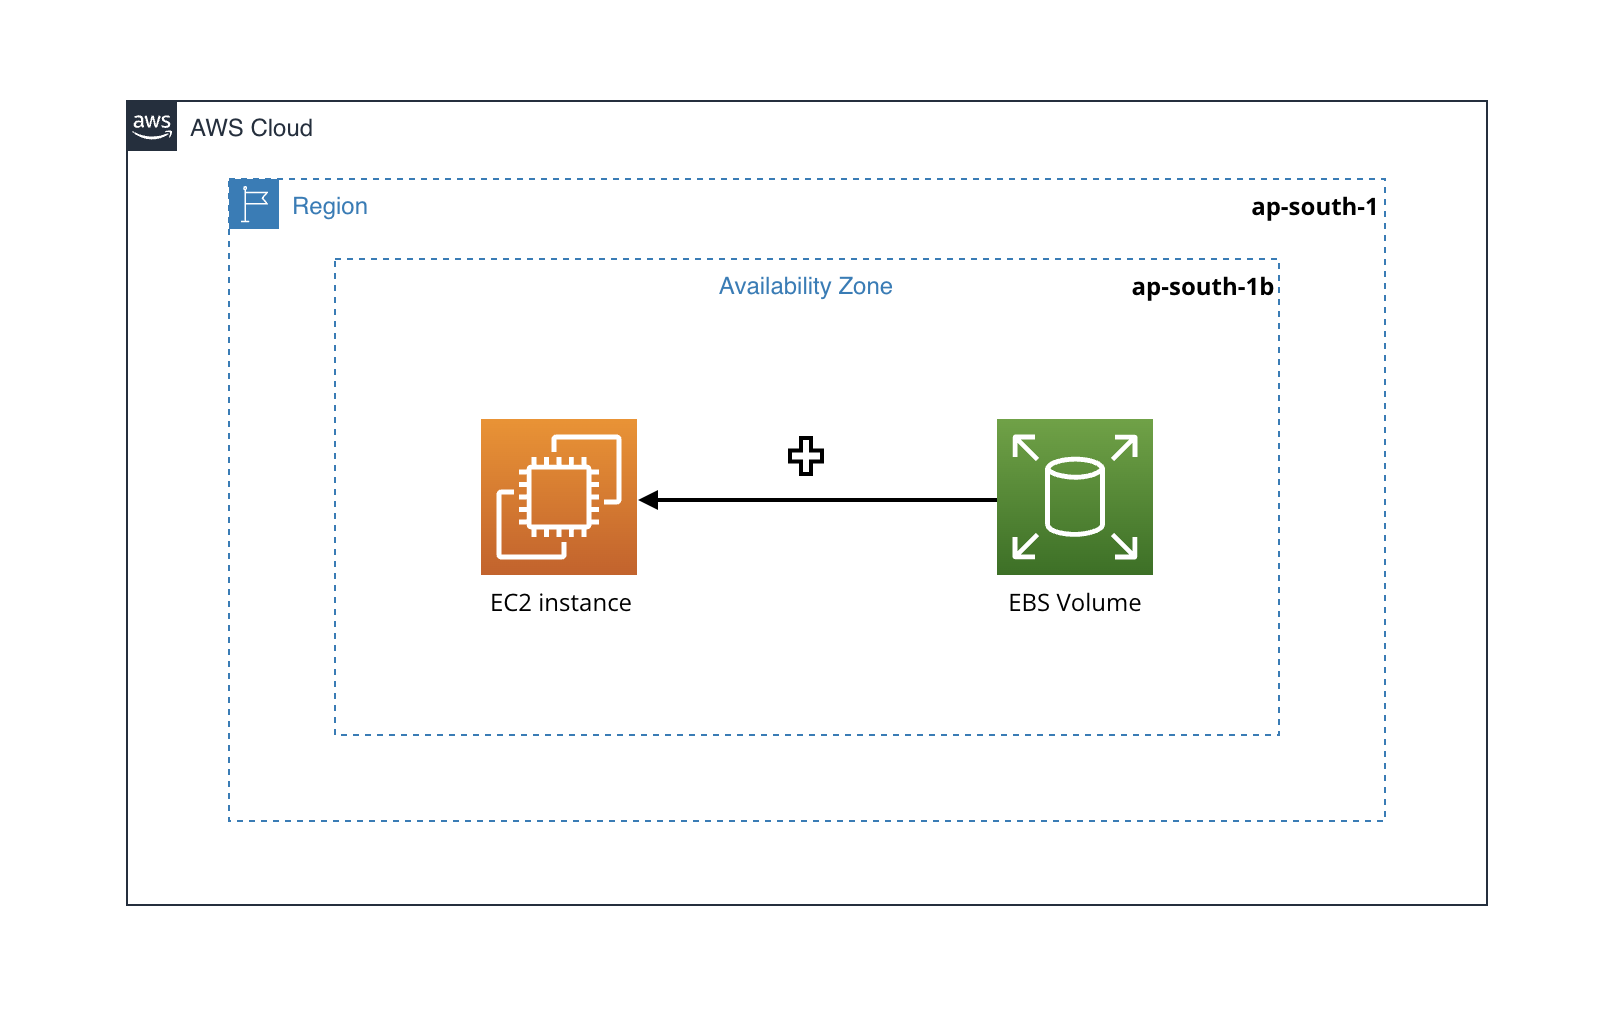
Scenario:-
In real-time scenarios, working with EC2 instance, where the disk space utilisation, gets high. In that case we can use an EBS volume that can be attached to our EC2 to instance. The number of EBS volume that can be attached to an EC2 instance, will depend on the size of EC2 instance. You can use type gp2 or gp3 EBS volume depending upon the requirement here I will be using the default gp3 EBS volume type for our EC2 machine.
Steps For Mounting:-
Here i have created one EBS volume named as Demo Volume which is type gp3 having size 8gb and the other one is my Roots Volume which is attached to my EC2 instance.
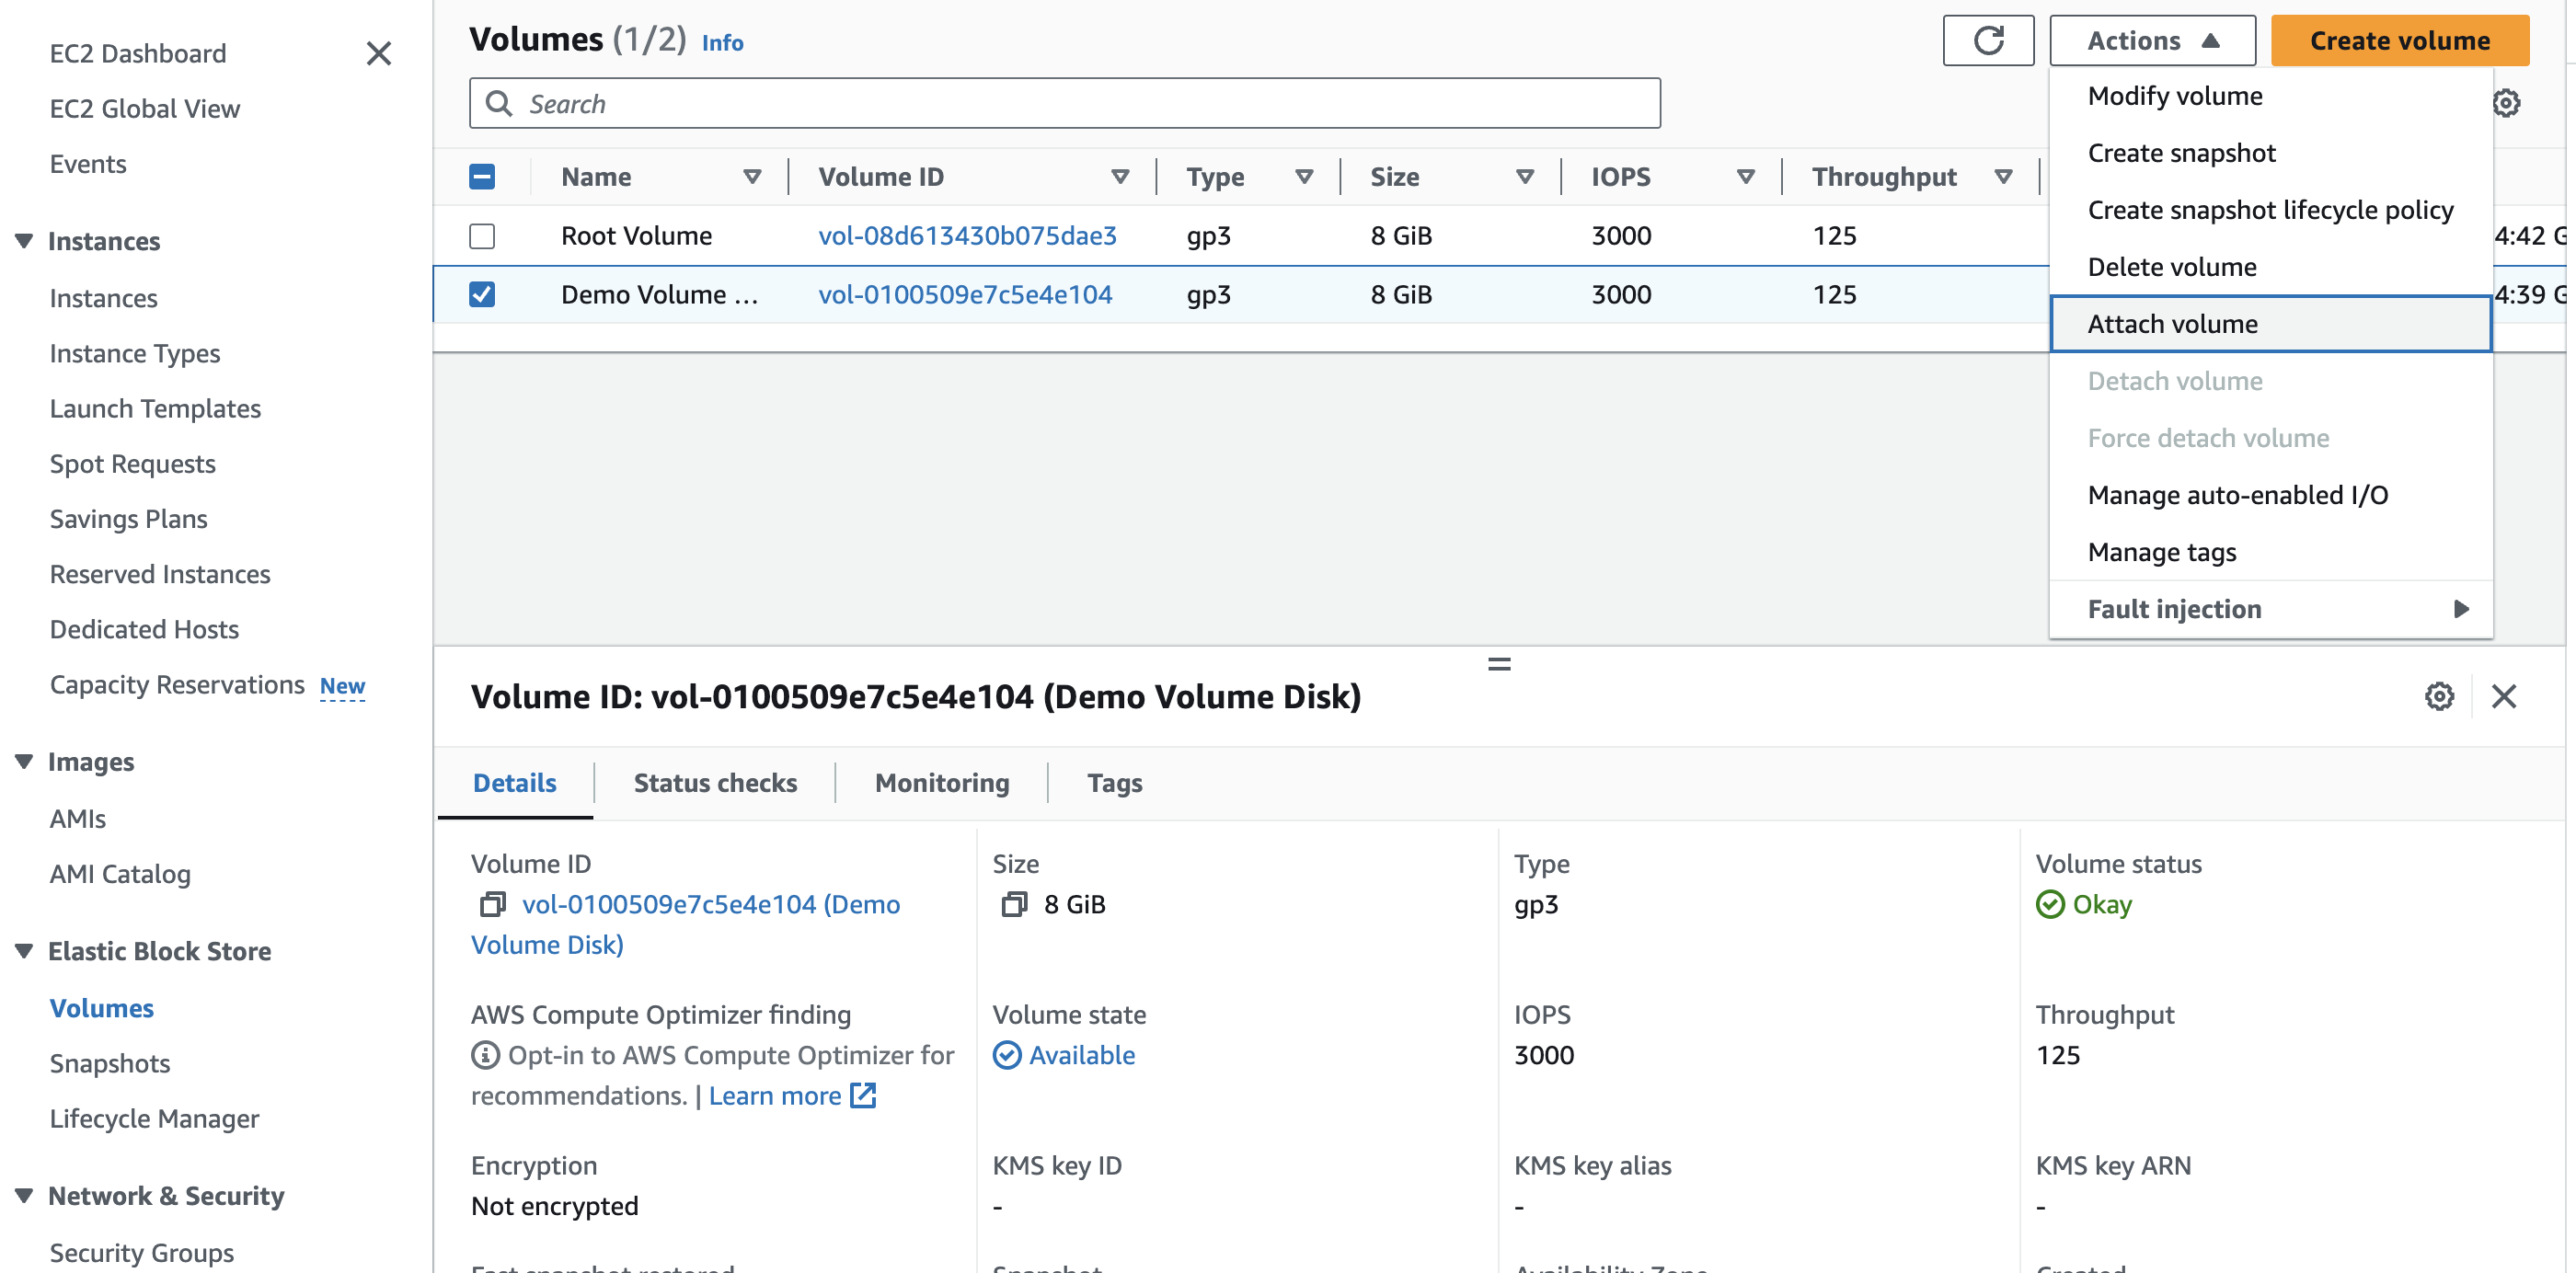
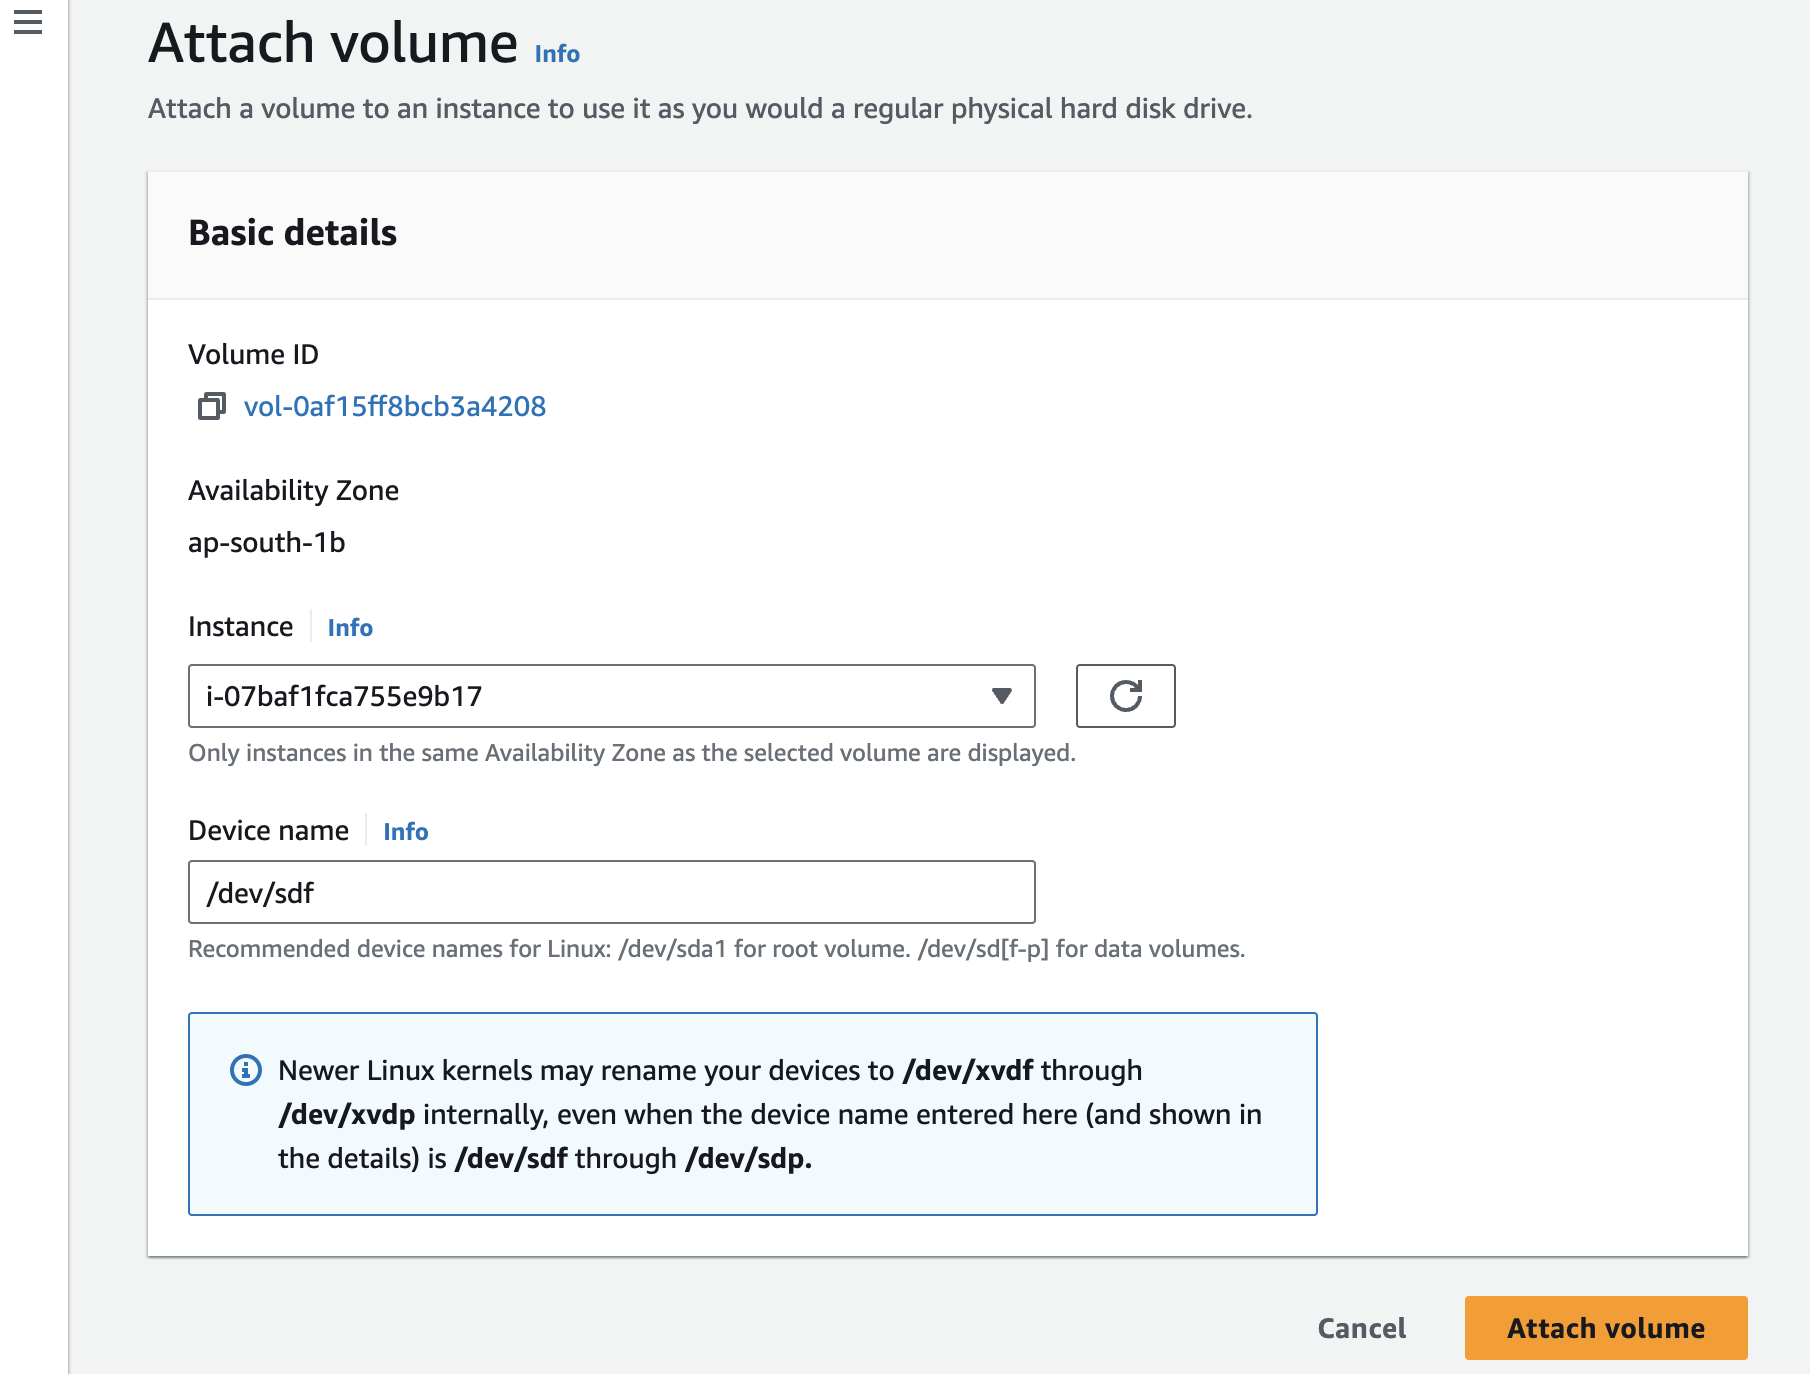
Select the EC2 instance ID to which you want to attach your EBS volume
Note that the EBS volume and the EC2 instance should be in the same availability zone.
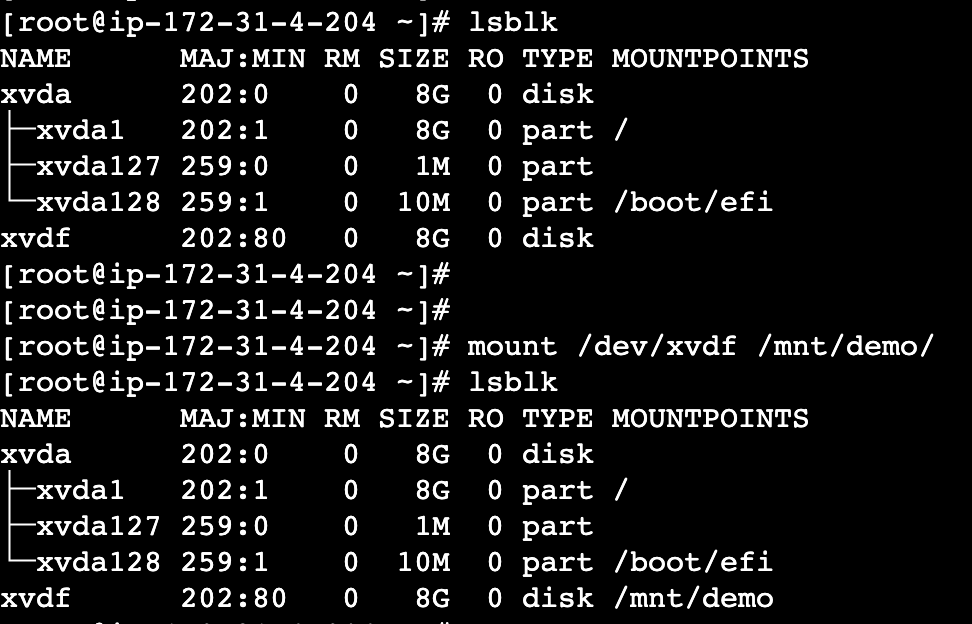
Now you will be able to see the named xvdf type disk using lsblk command.
But as of now you cannot utilise this filesystem for that you need to create and directory and mount that directory.

There are two types of mounting one is temporary mount other one is permanent mount. The difference between both is the permanent mount stay even after the instance reboot as during reboot it check the fstab file configuration .
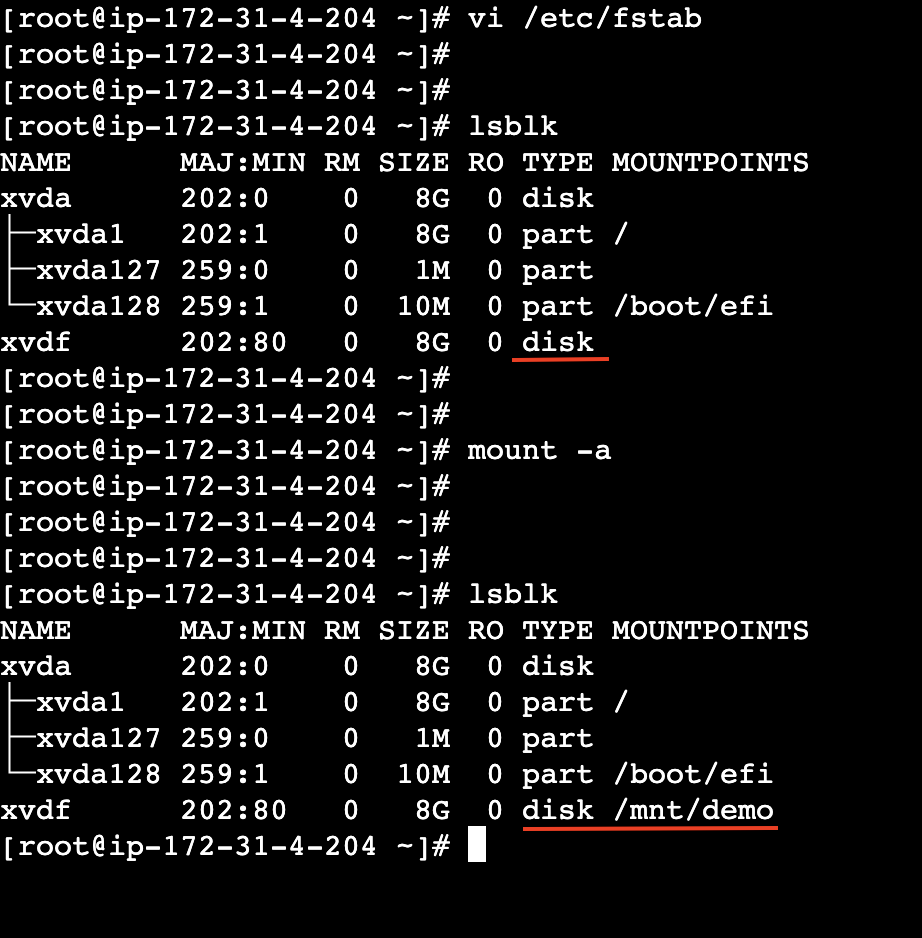
Temporary Mount:- I have created a directory at path /mnt/demo. In the below snapshot i have done the temporary mount.
Permanent mount:- To achieve permanent mounting in Linux, you need to use the /etc/fstab file, which stands for "File System Table."
The /etc/fstab file is a configuration file that specifies how disk drives and partitions are mounted at boot time.
Use the blkid command to copy the UUID of xvdf disk.
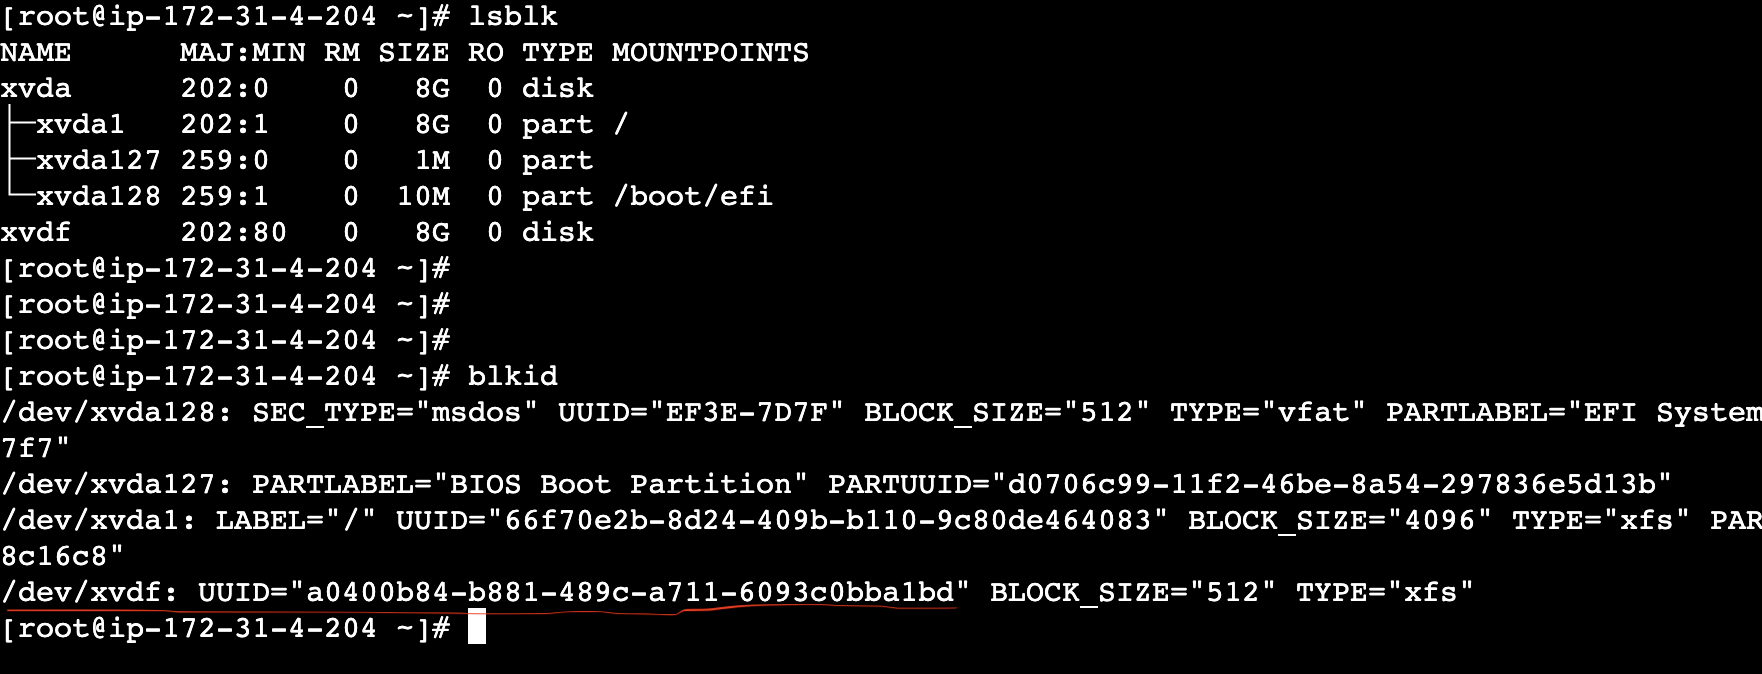
Also you can use the mkfs.xfs command to change the file system, here both the Root Volume & Demo Volume having xfs filesystem by default.
Now, edit the /etc/fstab file with the configuration given below.

In the above command that we have added UUID specify the device ID, then we have given the directory /mnt/demo as mount point, the xfs is the filesystem, defaults can be replaced by rw, ro.
The 0 here is specifying that we are not using the dump utility. 2 is being used for file filesystem check utility it's should be 1 in case of root volume only.
Note that any wrong entry in the /etc/fstab can cause major issue for your instance, so the changes should be done carefully.
Now save the file & use the mount -a command for mounting or you can do system reboot to apply the changes.
Steps For Unmounting:-
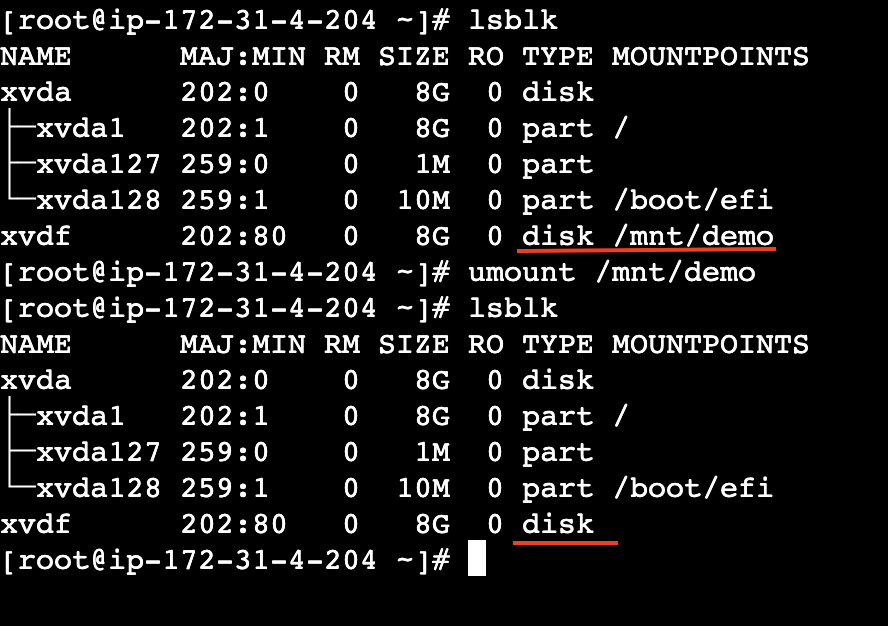
For unmounting a file system, you can use umount command.
Here i will be unmounting the filesystem /mnt/demo.
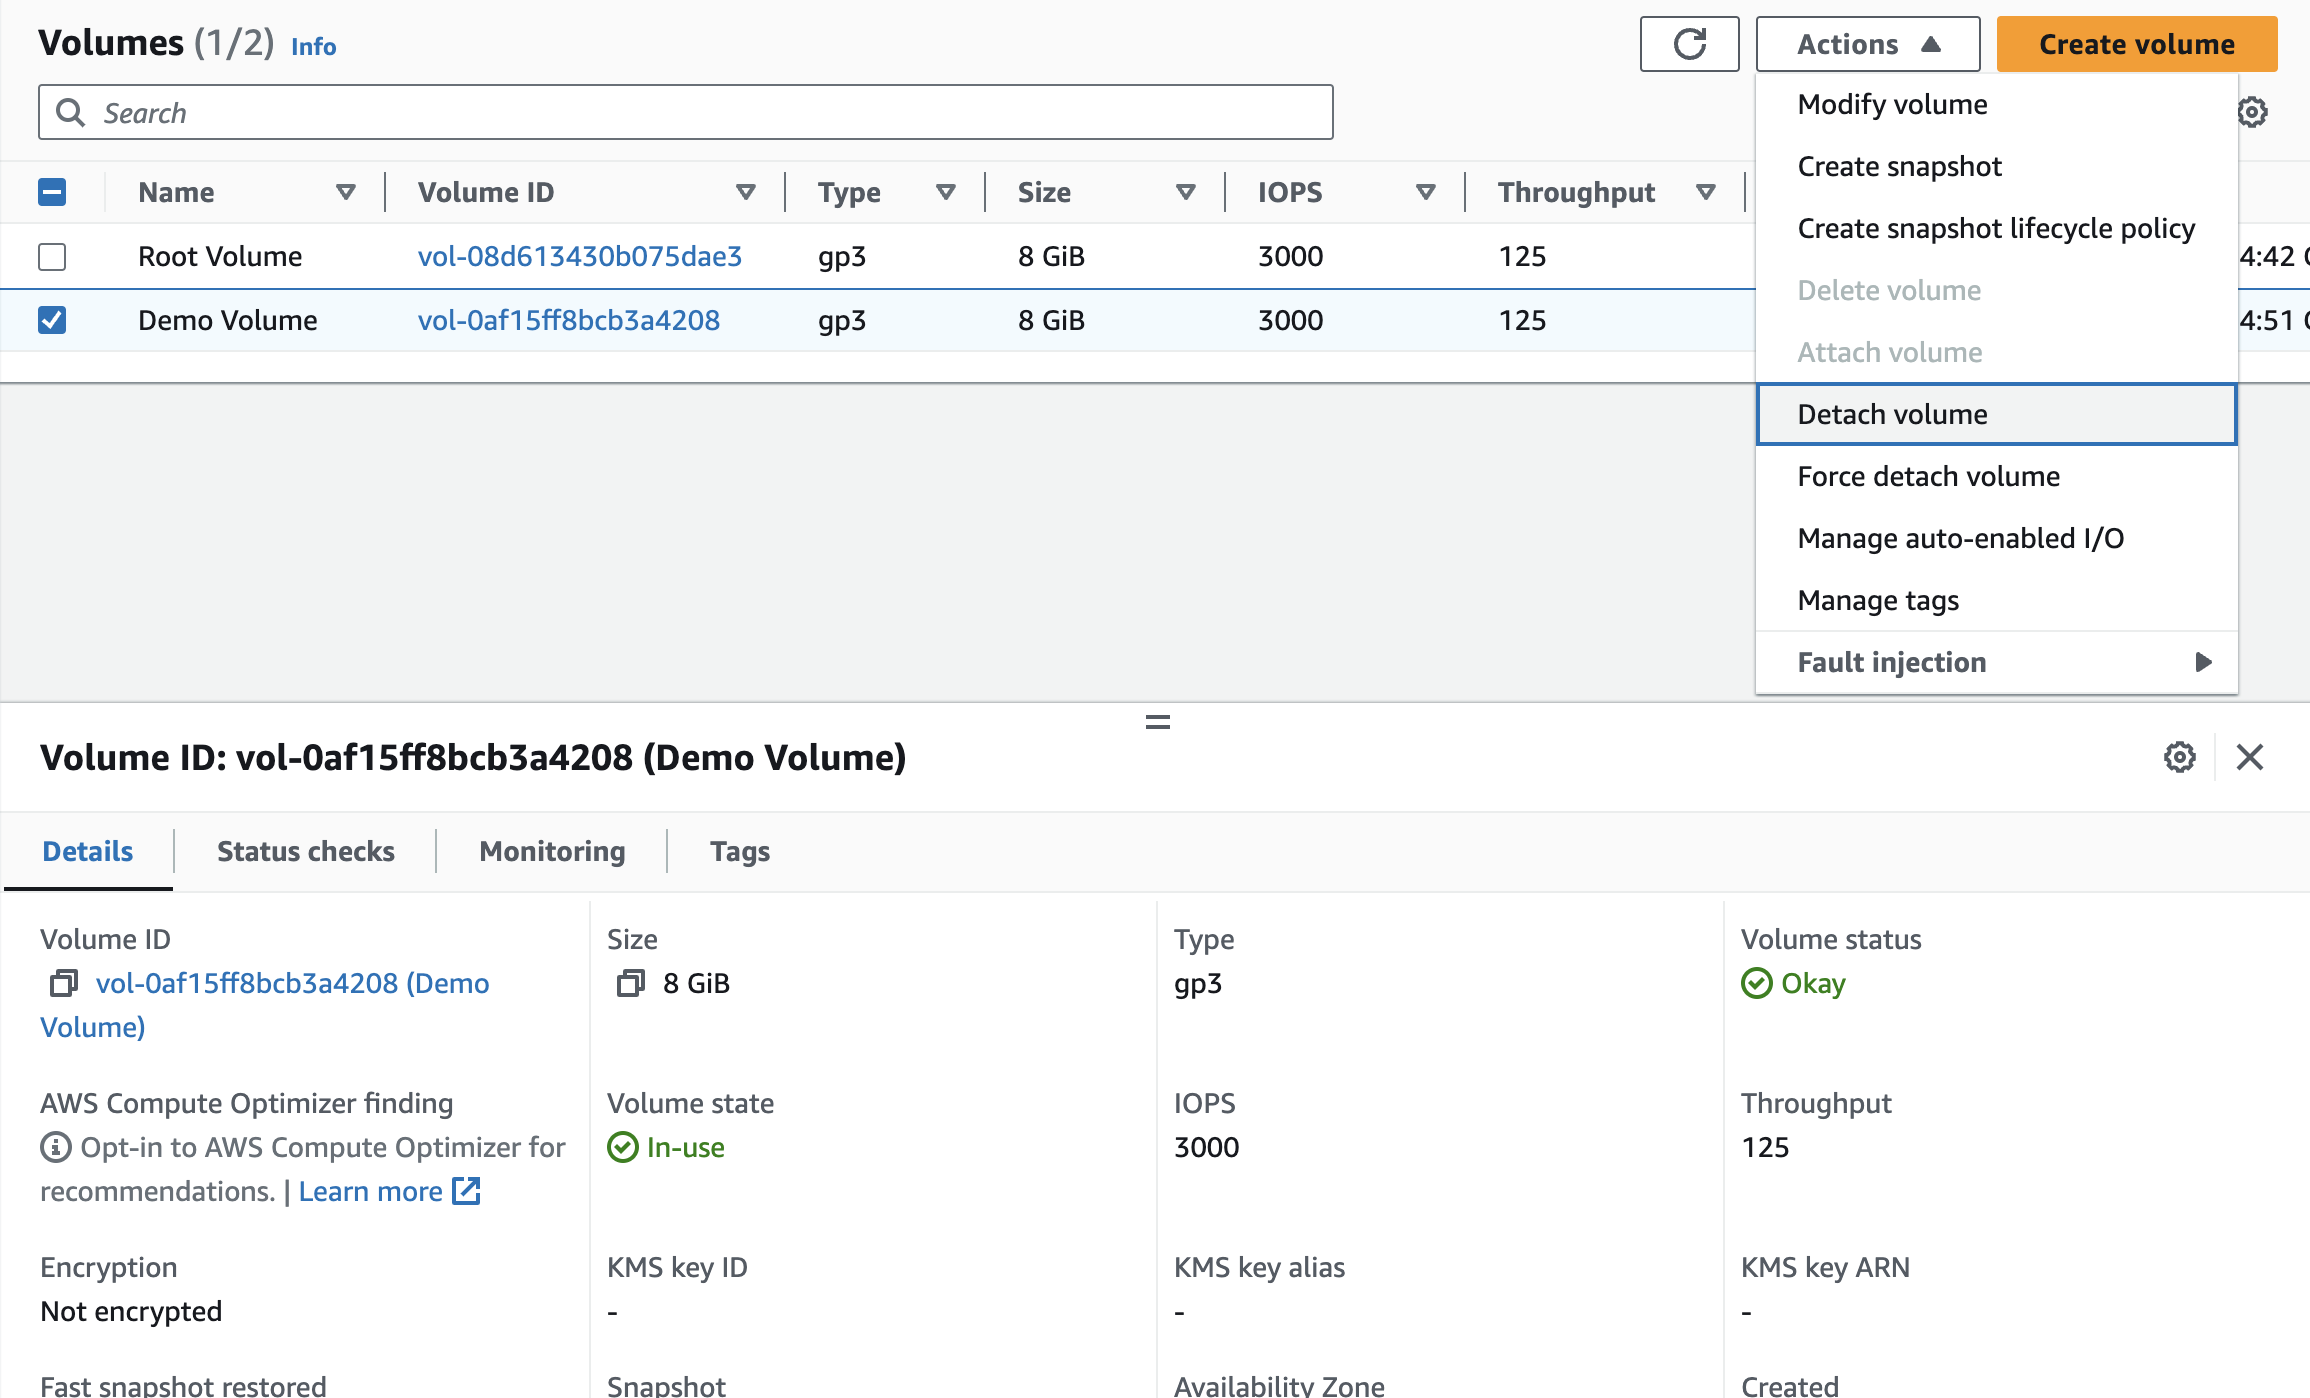
Now go to the volume that you have attached previously, from the console, use the option detach volume to detach the EBS volume from the EC2 instance.
Summary:-
So in summary we need to ensure the EBS volume and EC2 instance are in the same availability zone. Temporary mounting involves creating a directory (e.g., /mnt/demo) and using the 'mount' command. For permanent mounting, edit the /etc/fstab file, specifying device ID, mount point, filesystem, and other configurations. Use caution, as incorrect entries can cause issues. Unmount with 'umount' command & detach the volume from console.
Subscribe to my newsletter
Read articles from Ankit Singh directly inside your inbox. Subscribe to the newsletter, and don't miss out.
Written by

Ankit Singh
Ankit Singh
I am a DevOps engineer looking to exchange knowledge and gain insights from fellow professionals.