How to Add Custom Fonts in React Native CLI
 <Usman />
Fonts are the building blocks of a great user experience. Using custom fonts can provide your apps with a unique identity to your project, helping your project stand out in a competitive marketplace.
In this guide, we will explore ways to add custom fonts in a React Native app using Google Fonts. To follow along, you should be familiar with the basics of React Native or the Expo SDK, including JSX, components and styling.
Adding custom fonts to a React Native CLI project
Google Fonts is a library for free, open source fonts that can be used while designing web and mobile applications.
create new React Native CLI project, run the following command in your terminal:
npx react-native@latest init yourAppName
Open your project in your preferred IDE to get started. In this tutorial, we will use VS Code.
Once the project has been bootstrapped, we will move on to getting the fonts we want to use. We’ll go over how to import them and use them in our project.
Before doing this first start your React native CLI server by running npm run android or npm run ios according to your plateform.
Downloading and integrating Google Fonts into our project
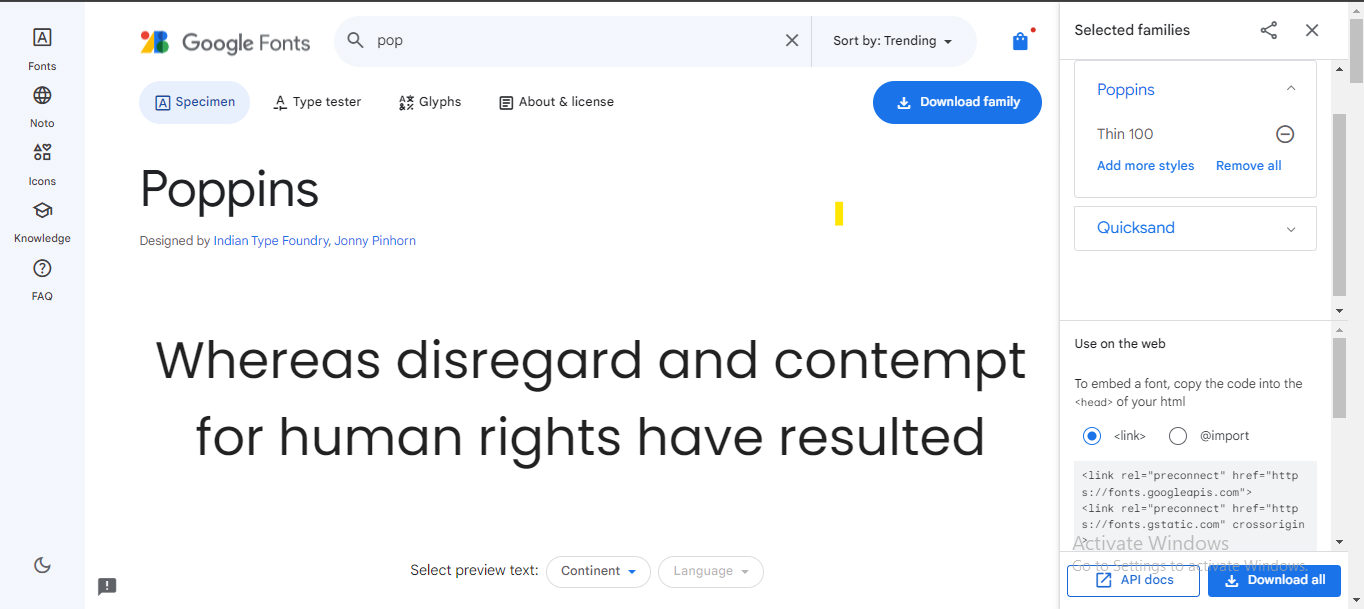
In this project, we will demonstrate custom font integration using two fonts: QuickSand and Raleway, which you can find on Google Fonts.
Find your desired fonts in Google Fonts, select the styles you want (e.g., Light 300, Regular 400, etc.), and download the entire font folder using the Download all button

Integrating the Google Fonts into the project
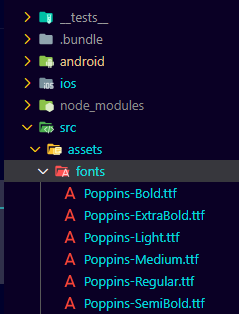
Create an asset folder in the root directory of your project, with a subfolder called fonts . Then, paste all the TTF files into the font folder of your project:

Next, create a react-native.config.js file in the root directory and paste the code below inside it:
module.exports = {
  project: {
    ios: {},
    android: {},
  },
  assets: ['./src/assets/fonts'],//just paste your font family directory
};
// in my case the directory is ./src/assets/fonts/
Linking the fonts to be used in project files
Link all these files my running command into your current project
npx react-native-asset
Now you can use fontFamily into your project:
import {StyleSheet, Text, View} from 'react-native';
import React from 'react';
const App = () => {
  return (
    <View style={styles.container}>
      <Text style={styles.poppinsRegular}>
        This text uses a quick sand font
      </Text>
      <Text style={styles.poppinsLight}>
        This text uses a quick sand light font
      </Text>
    </View>
  );
};
export default App;
const styles = StyleSheet.create({
  container: {
    backgroundColor: 'white',
    flex: 1,
    justifyContent: 'center',
    alignItems: 'center',
  },
  poppinsRegular: {
    fontFamily: 'Poppins-Regular',
    fontSize: 20,
  },
  poppinsLight: {
    fontFamily: 'Poppins-Light',
    fontSize: 20,
  },
});
Thanks
Subscribe to my newsletter
Read articles from <Usman /> directly inside your inbox. Subscribe to the newsletter, and don't miss out.
Written by

<Usman />
<Usman />
Hi, I'm Usman, a Web and Mobile developer with a passion for creating beautiful, functional, and user-centered digital experiences. With 2 years of experience in the field. I am always looking for new and innovative ways to bring my clients' visions to life. I believe that design is about more than just making things look pretty – it's about solving problems and creating intuitive, enjoyable experiences for users. Whether I'm working on a website, mobile app, or other digital product, I bring my commitment to design excellence and user-centered thinking to every project I work on. I look forward to the opportunity to bring my skills and passion to your next project.