Mastering AWS CloudFormation Templates: An In-Depth Guide (Day-8)
 Rohit Deore
Introduction
Welcome to the world of AWS CloudFormation Templates (CFT), a powerful tool designed to help you manage and provision your AWS resources efficiently. Whether you're a seasoned AWS user or new to cloud computing, this guide aims to simplify the concept of AWS CFT, making it accessible even to those who find technical jargon challenging. Let's embark on this journey together, unraveling the what, why, and how of AWS CloudFormation Templates.
What is AWS CloudFormation?
AWS CloudFormation is a service that gives developers and businesses an easy way to create a collection of related AWS and third-party resources, and manage them in an orderly and predictable fashion. In simpler terms, it allows you to use a simple text file, written in YAML or JSON format, to model and provision, in an automated and secure manner, all the resources needed for your applications across all regions and accounts. This file is known as a CloudFormation Template.
Why Use AWS CloudFormation?
The core advantage of AWS CloudFormation lies in its ability to automate the provisioning of your AWS infrastructure, thereby eliminating the manual and time-consuming process of setting up AWS resources. With AWS CloudFormation, you can:
Ensure consistency in resource creation, avoiding the pitfalls of manual configurations that can lead to discrepancies and errors.
Save time by deploying complex environments quickly and repeatably.
Manage infrastructure as code (IaC), allowing you to version control and review your AWS infrastructure in the same way as you do with your software.
Automate deployments, enabling you to focus on building applications rather than managing infrastructure.
Working of AWS CloudFormation (Deep Dive)
Let's take a detailed look at how AWS CloudFormation works:
Template Creation: The process begins with the creation of a CloudFormation template. This template describes all the AWS resources you need (like Amazon EC2 instances, Amazon RDS database instances, and Amazon S3 buckets) and their configurations. You can write these templates in either JSON or YAML format.
Stack Creation: Once the template is ready, you upload it to CloudFormation and create a stack. A stack is essentially a collection of AWS resources that you can manage as a single unit. CloudFormation takes care of provisioning and configuring the resources as described in the template.
Operations and Management: After the stack is created, you can perform various operations like updating the stack with a new template if you need to change resources, deleting the stack to remove all the resources, or checking the stack's event history to troubleshoot issues.
Resource Dependencies: CloudFormation automatically handles the dependencies between resources. For example, if your application requires an Amazon RDS instance and an EC2 instance, CloudFormation ensures that the RDS instance is created before the EC2 instance.
Rollback: If stack creation or update fails, CloudFormation automatically rolls back changes and brings your stack to its previous state, minimizing risks and reducing manual troubleshooting efforts.
Advantages of AWS CloudFormation
Infrastructure as Code: Manage and provision your infrastructure through code, improving automation and reducing errors.
Declarative Syntax: Define what AWS resources you need without having to figure out how to create them.
Reusable Templates: Use templates to create identical copies of the same environment in different regions or AWS accounts.
Integrated with AWS Services: Seamlessly integrates with other AWS services for monitoring, logging, and security.
Disadvantages of AWS CloudFormation
Learning Curve: Writing and understanding CloudFormation templates requires learning their syntax and structure, which can be challenging for beginners.
Limited by Template Capabilities: Sometimes, the capabilities of CloudFormation templates may not cover all specific use cases or the latest AWS service features.
Features
Change Sets: Preview changes before applying them, ensuring you understand the impact on your environment.
Nested Stacks: Organize complex setups by creating templates for different parts of your infrastructure and nesting them.
Drift Detection: Automatically detect and report any deviations from the expected configuration of your stack resources.
Example
Here's a simple example of a CloudFormation template that provisions an Amazon S3 bucket:
AWSTemplateFormatVersion: '2010-09-09'
Resources:
  MyS3Bucket:
    Type: 'AWS::S3::Bucket'
    Properties:
      BucketName: rohit-aws-s3-bucket
This template defines a single resource, an S3 bucket, with a specified name.
Demo
Creating a demo for provisioning an Amazon S3 bucket using AWS CloudFormation is a straightforward process that demonstrates the power of infrastructure as code. This guide will walk you through creating a CloudFormation template to deploy an S3 bucket, deploying the stack, and then verifying the deployment.
Step 1: Prepare Your AWS Account
Ensure you have an AWS account set up and have installed the AWS Command Line Interface (CLI) on your machine. The AWS CLI will be instrumental in deploying our CloudFormation stack.
For instructions on installing and configuring the AWS CLI, please refer to the AWS Day 7 blog post.
Here is the link:" https://rohitexplainstech.hashnode.dev/unlocking-the-power-of-aws-cli-a-comprehensive-guide-day-7 "

Step 2: Create Your CloudFormation Template
For this demo, we will create a CloudFormation template that provisions a simple Amazon S3 bucket. Follow these steps to create your template:
Open a text editor and create a new file named
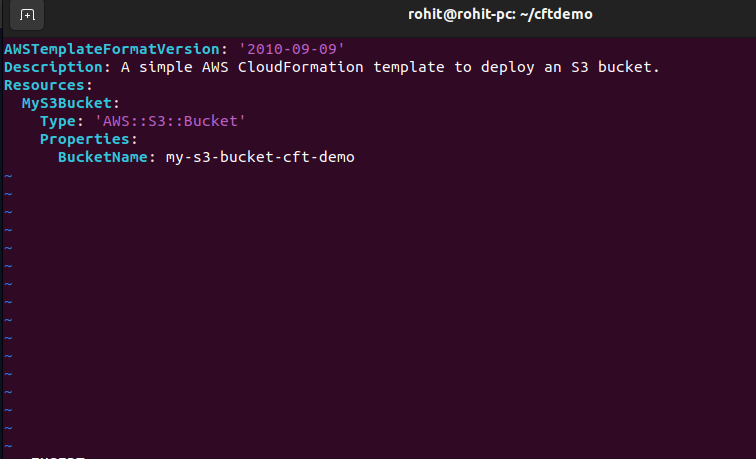
s3-bucket.yml.Copy and paste the following YAML code into your file. This code defines a CloudFormation template that creates an S3 bucket.
AWSTemplateFormatVersion: '2010-09-09'
Description: A simple AWS CloudFormation template to deploy an S3 bucket.
Resources:
  MyS3Bucket:
    Type: 'AWS::S3::Bucket'
    Properties:
      BucketName: my-s3-bucket-cft-demo

- Save the file. Ensure you replace
my-s3-bucket-cft-demowith a globally unique name for your S3 bucket. Bucket names must be unique across all existing bucket names in Amazon S3.
Step 3: Deploy Your Stack
Now that your CloudFormation template is ready, you will deploy your stack using the AWS CLI.
Open a terminal and navigate to the directory containing your
s3-bucket.ymlfile.Run the following command to create a CloudFormation stack named
MyS3BucketStack. ReplaceMyS3BucketStackwith a unique name for your stack.
aws cloudformation create-stack --stack-name MyS3BucketStack --template-body file://s3-bucket.yml

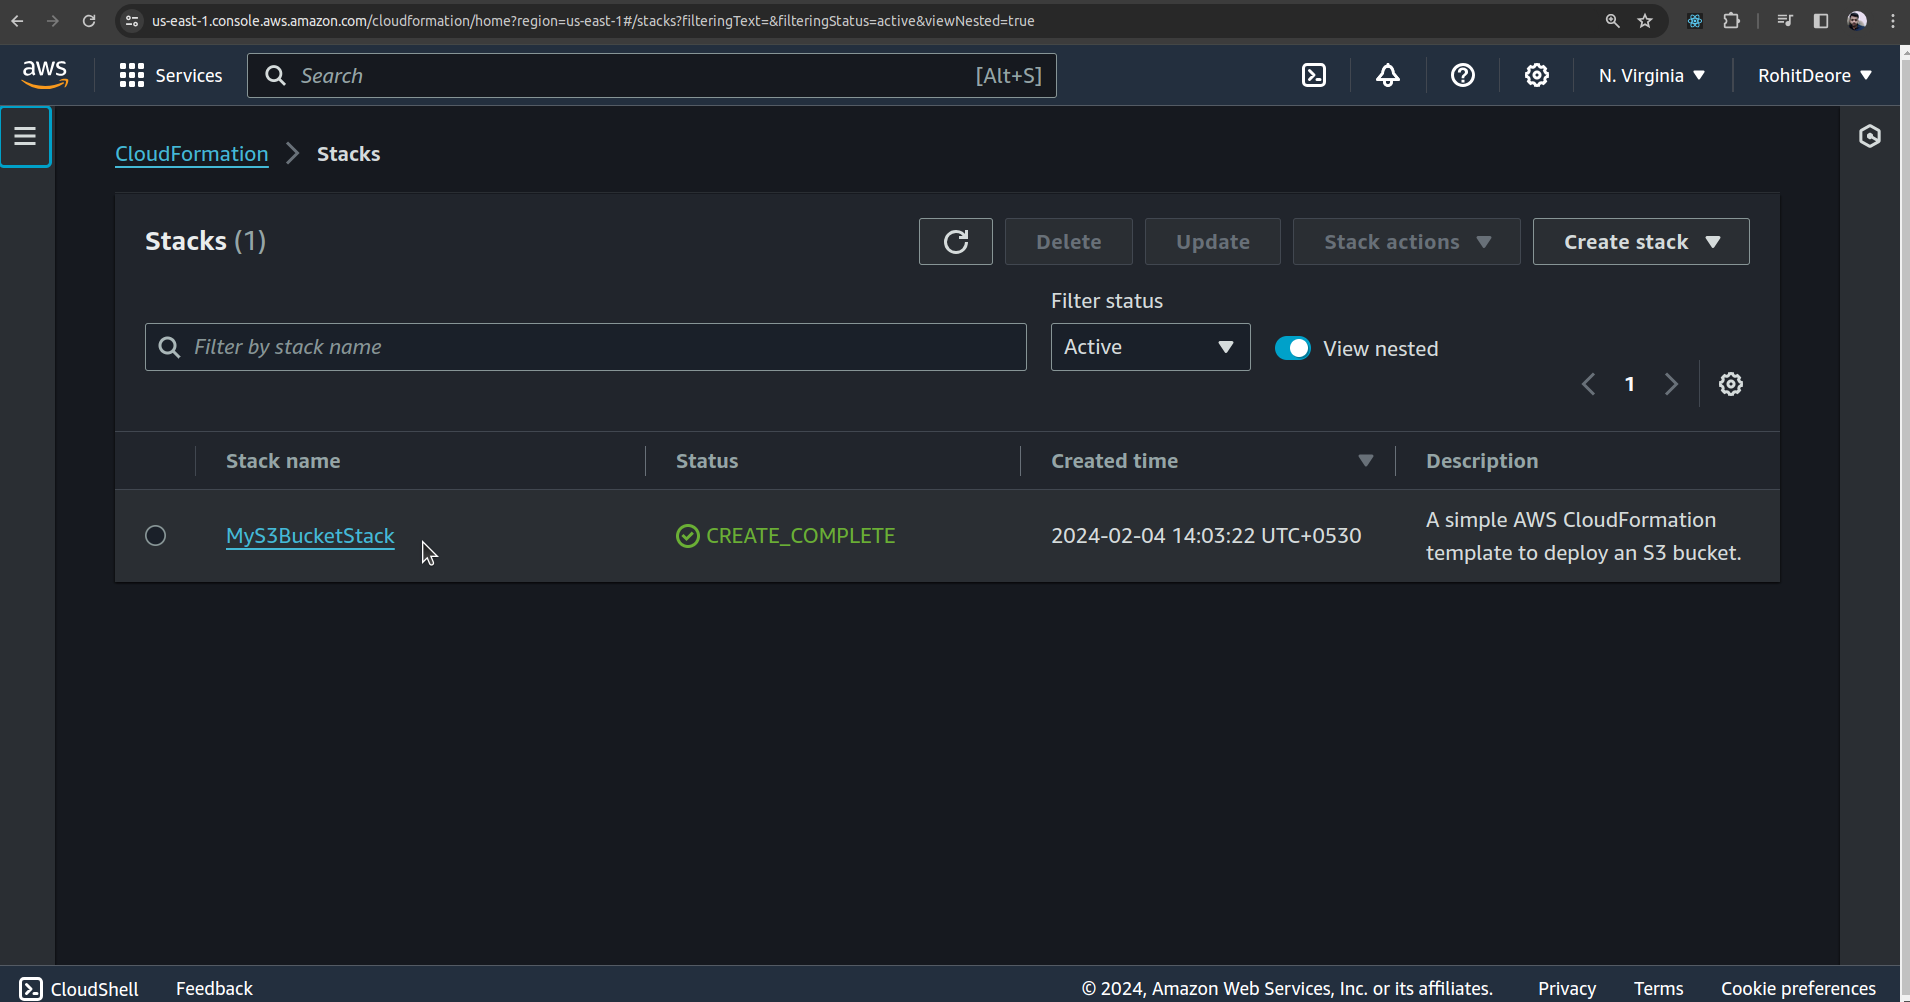
Wait for the stack to be created. You can check the progress in the AWS Management Console under CloudFormation by looking for the stack name you specified.

Step 4: Verify the Deployment
After the stack's status changes to CREATE_COMPLETE, you can verify that the S3 bucket was successfully created.
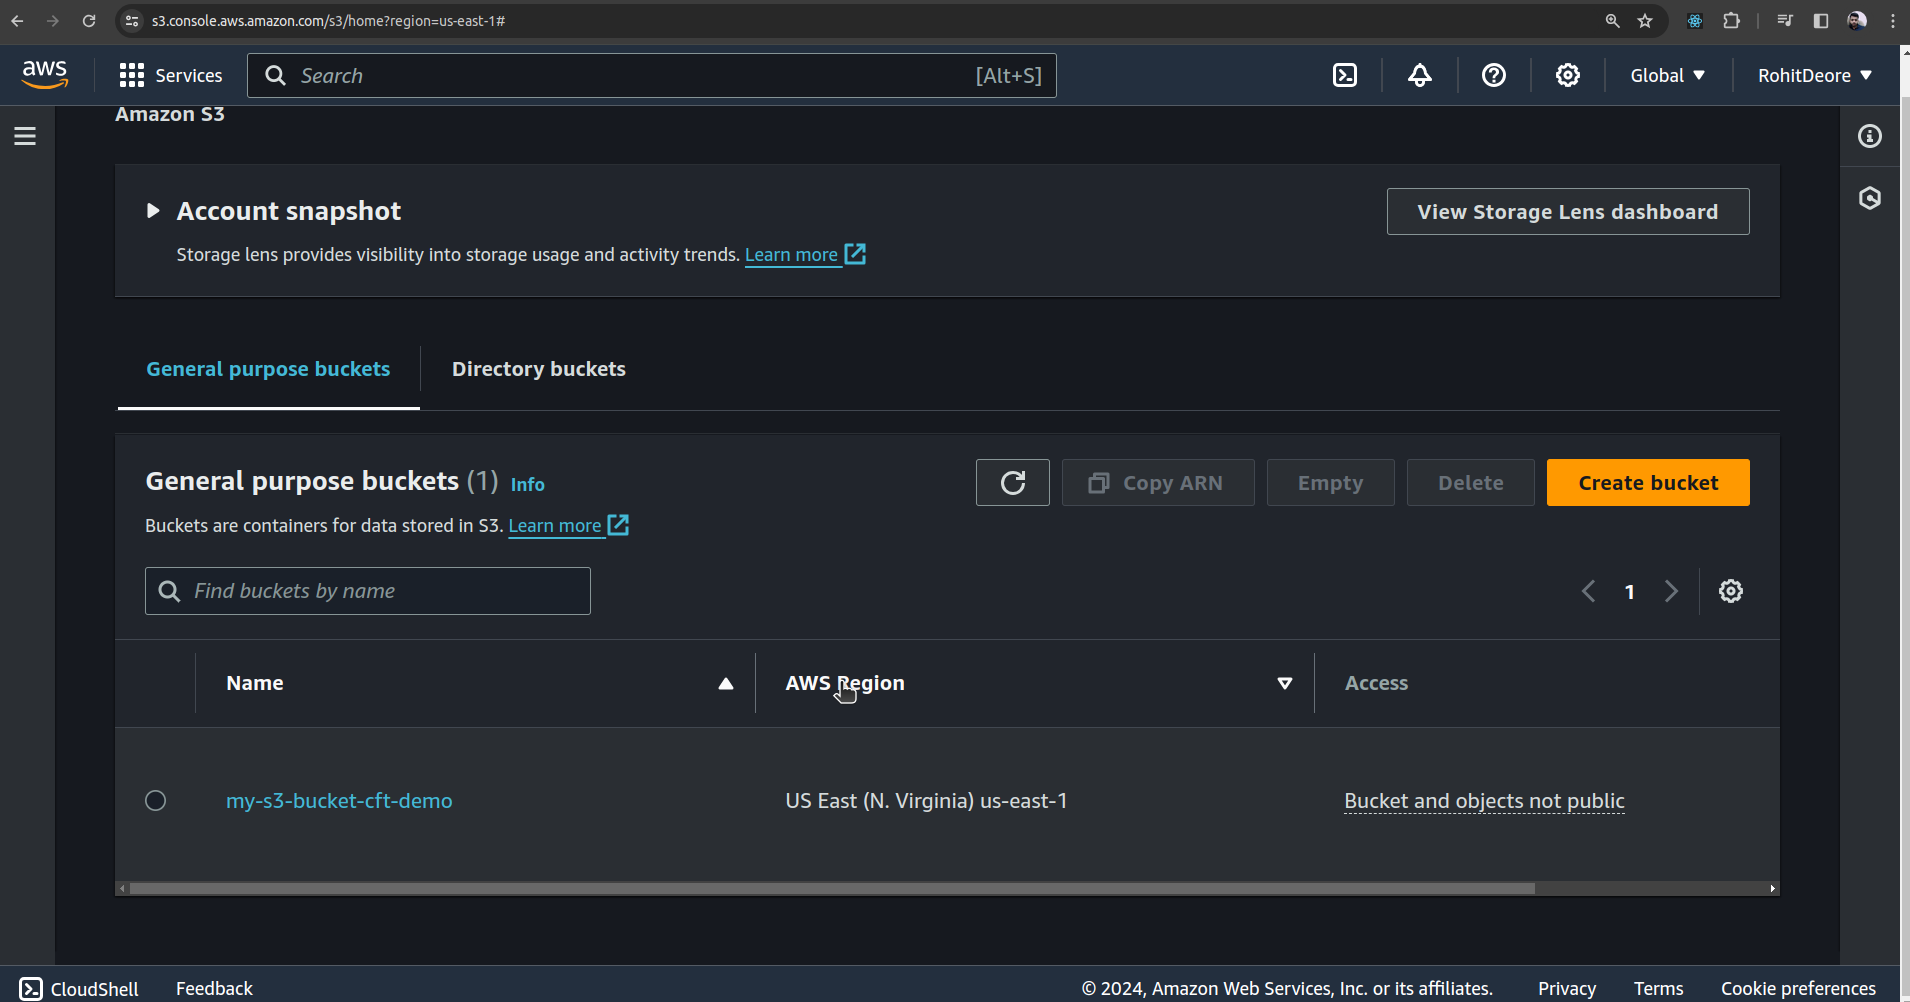
Go to the S3 Dashboard in the AWS Management Console.
Check for a new S3 bucket. It should have the name you specified in your CloudFormation template.

Step 5: Clean Up
To avoid incurring any unnecessary charges, remember to delete the resources after completing your demo.
Go to the CloudFormation Dashboard in the AWS Management Console.
Select your stack named
YourStackName.Click on "Delete" to remove all resources associated with the stack, including the S3 bucket.
This demo illustrates how you can use AWS CloudFormation to provision AWS resources, such as an S3 bucket, with minimal effort. By defining your infrastructure as code, you gain the ability to easily deploy, update, and delete resources in a consistent and repeatable manner. Experiment with adding more resources or properties to your CloudFormation template to explore the full capabilities of AWS CloudFormation.
In Closing
AWS CloudFormation is an invaluable tool for automating the deployment and management of AWS resources, offering a mix of flexibility, efficiency, and control. By embracing the power of infrastructure as code, teams can ensure consistent, error-free deployments that are easily repeatable
Keep Exploring...
Subscribe to my newsletter
Read articles from Rohit Deore directly inside your inbox. Subscribe to the newsletter, and don't miss out.
Written by

Rohit Deore
Rohit Deore
Student and Developer