Understanding basic Git commands and how they work
 Rutuja Deodhar
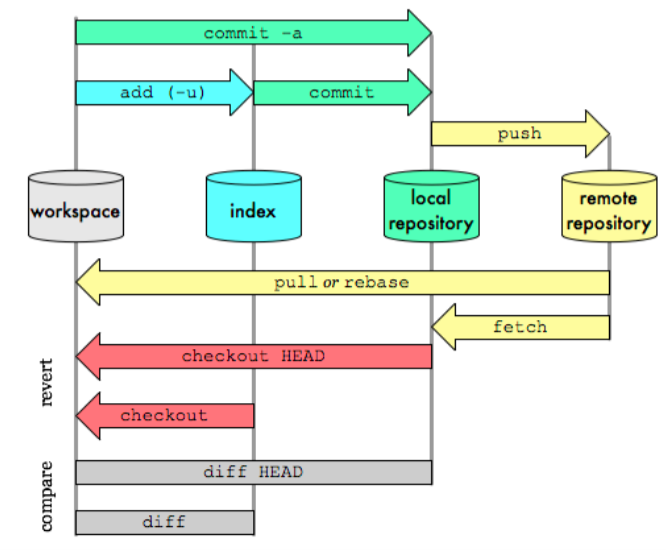
Git commands workflow:

Now let's explore each command in detail.
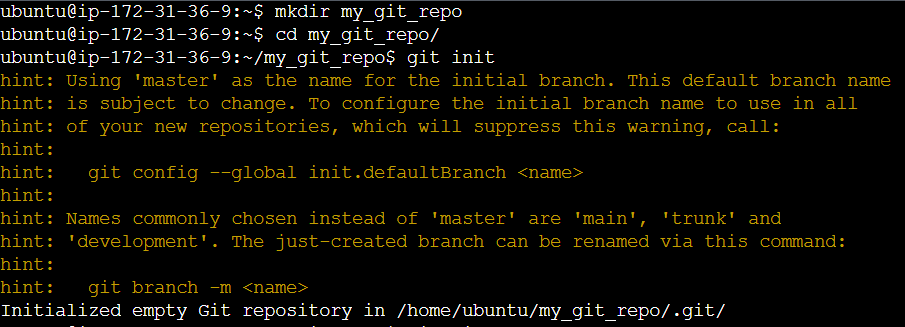
Create new directory for Git initiation
- Create a directory with "mkdir my_git_repo" and navigate into it using "cd my_git_repo" for Git initiation.
Initialize a new Git repository
- Run the git init command to start a new Git repository in the selected directory.

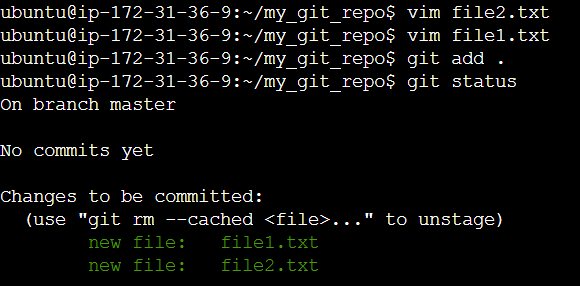
Create two files, add them to staging:
Utilize the vim command to create two files named file1.txt and file2.txt
Use the git add command to add the newly created files to the staging area, preparing them for the next commit.
This command stages the changes made to the specified files, marking them for inclusion in the next commit.
Command used to add all files: git add .
You can check file status using git status command

Commit the changes:
Execute the git commit command to permanently save the changes made to the files along with a descriptive commit message.
syntax: git commit -m "commit message"
Command used to commit files: git commit -m "First commit"
Here, the -m flag allows you to include a commit message directly in the command. This message should succinctly describe the changes made in this commit.

To check git history
- git log displays a chronological history of commits in a Git repository, showing commit messages, authors, dates, and unique identifiers.

git log -oneline condenses commit history to a single line per commit, displaying abbreviated commit hashes and commit messages for brevity.

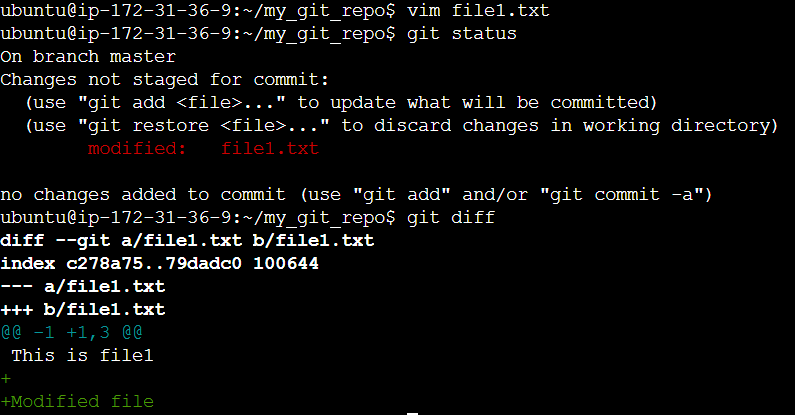
To check changes between working file and last commit
git diff shows changes between the working directory and the last commit, highlighting modifications, additions, and deletions in a Git repository.

To remove file from staging
- git restore --staged unstages changes in the working directory that were previously added to the staging area, preventing them from being included in the next commit.

To set username and user email
git config --global user.name "rutuja" sets the global Git username
git config --global user.email "rutuja@gmail.com" sets the associated email address.


To clone a remote Git repository to a local machine
First, let's understand what is remote and local repository
Local: On your machine, accessible offline.
Remote: Hosted on platforms like GitHub, facilitating collaboration.
In Github, manually create new repository "my_repo"
In Github homepage click on "New", it will redirect to repository creation page where it will ask for basic requirements to create repo for eg, repository name, its description (if any), it will be public or private etc. Fill this details and click on "Create Repository"

Then, create new file "demo.txt" under it using "Create new file" option.


In terminal, create new directory "remote_git_repo" for cloning our remote repository "my_repo"
Navigate to remote_git_repo using cd
Clone the remote repository using the git clone command. Replace <repository_url> with the URL of the remote Git repository:
syntax: git clone <repository_url>
// You can find this url in github under code tab
Optionally, if the repository requires authentication, Git might prompt you to enter your username and password.

Now, you have successfully cloned a remote Git repository to your local machine. The cloned repository will be in a subdirectory with the same name as the remote repository.
git push: Uploads local changes to a remote repository.
git pull: Fetches changes from a remote repository and merges them into the local branch.
We will see these commands in details in next blog. Stay tuned!
Subscribe to my newsletter
Read articles from Rutuja Deodhar directly inside your inbox. Subscribe to the newsletter, and don't miss out.
Written by
