Setting Up Local Kubernetes Cluster with Kops
 AutOps
Author: Ujwal Pachghare
In this tutorial, we will walk through the process of setting up a Kubernetes (k8s) cluster on AWS using Kops. We will then deploy a Mario game on the nodes of our cluster in Next tutorial.
Prerequisites
Before we begin, Install following tools:
AWS CLI 2
sudo apt install unzip -y
curl "https://awscli.amazonaws.com/awscli-exe-linux-x86_64.zip" -o "awscliv2.zip"
unzip awscliv2.zip
sudo ./aws/install --bin-dir /usr/local/bin --install-dir /usr/local/aws-cli --update
echo "awscli version:-" && aws --version
Kops
curl -Lo kops https://github.com/kubernetes/kops/releases/download/$(curl -s https://api.github.com/repos/kubernetes/kops/releases/latest | grep tag_name | cut -d '"' -f 4)/kops-linux-amd64
chmod +x kops
sudo mv kops /usr/local/bin/kops
echo "kops version:-" && kops version
A Short Introduction to Kops
Kops is a production-grade command-line tool for managing Kubernetes clusters. It is not only helps you create, destroy, upgrade, and maintain production-grade, highly available Kubernetes clusters, but it also provisions the necessary cloud infrastructure.

Setting Up Kops IAM User
First, create an EC2 instance with the Ubuntu AMI of type t2.micro rest of options could be defult for Kops configuration.
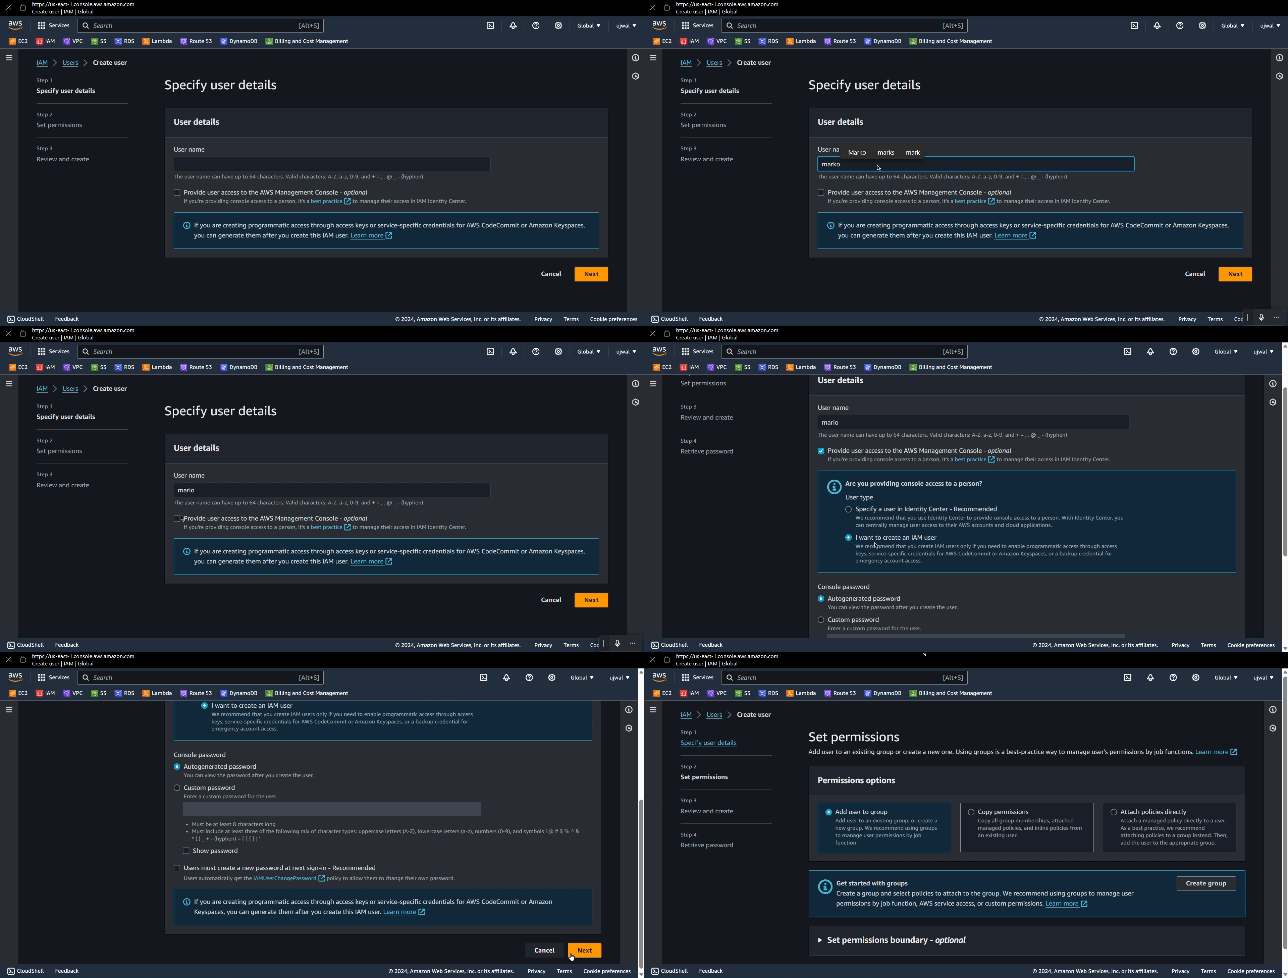
Next, create an IAM user with the following permissions:
AmazonEC2FullAccess
AmazonRoute53FullAccess
AmazonS3FullAccess
IAMFullAccess
AmazonVPCFullAccess
AmazonSQSFullAccess
AmazonEventBridgeFullAccess
After creating the IAM user, generate an access key with CLI permissions.
If you are not familiar with AWS then you can follow this tutorial “Kops IAM User Configuration with AWS Console and CLI” here.

Configuring AWS CLI
Open your terminal and export your keys (make sure not to leave a space after the equal sign):
export KOPS_ACCESS_KEY=<aws_access_key_id>
export KOPS_SECRET_ACCESS_KEY=<aws_secret_access_key>
Run the aws configure command and provide your access key, secret access key, region (in this case, “ap-south-1”), and output format (in this case, “json”):
AWS Access Key ID [None]: $KOPS_ACCESS_KEY
AWS Secret Access Key [None]: $AWS_SECRET_ACCESS_KEY
Default region name [None]: ap-south-1
Default output format [None]: json
You can verify your configuration by running aws s3 ls && aws iam list-users.
Creating a State Store for Kops
Kops use Terraform in backend for storing file that`s why we have to create state store.
Create a state store for Kops using the following command:
aws s3api create-bucket --bucket kops-state-store-bucket-1 --region ap-south-1
If you encounter an IllegalLocationConstraintException error, try creating the bucket with a location constraint:
aws s3api create-bucket \
    --bucket kops-state-storage-bucket-1 \
    --region ap-south-1 \
    --create-bucket-configuration LocationConstraint=ap-south-1

Creating a Kops Local Cluster
Export your cluster name and state store:
export KOPS_CLUSTER_NAME=mycluster.k8s.local
export KOPS_STATE_STORE=s3://kops-state-storage-bucket-1
Then, Create your cluster. Below process may take 5–10 minutes:
kops create cluster --name $KOPS_CLUSTER_NAME \
--state $KOPS_STATE_STORE \
--control-plane-count 3 \
--control-plane-zones ap-south-1a,ap-south-1b,ap-south-1c \
--control-plane-size t2.medium \
--node-count 3\
--zones ap-south-1a,ap-south-1b \
--node-size t2.micro \
--yes
kops validate cluster --wait 10m
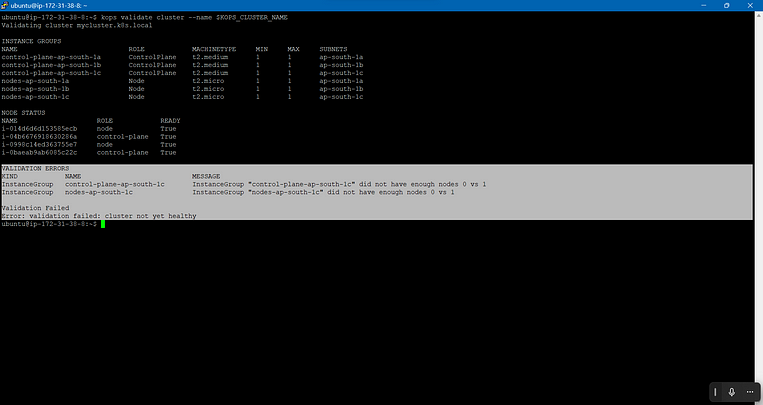
Now, You can view all your Kops resources with kops get all or kops validate cluster —-name $KOPS_CLUSTER_NAME command.
If above command throws an error so, first try to run without “— — yes” flag. then try again with “— — yes” flag.
In above command we are creating 3 master nodes and 3 slave nodes. It is recommended you always create master nodes in odd numbers only, because
ETCDhas requirement of odd numbers for distributed systems to avoid “split-brain” scenarios, where there is no clear majority and becauseETCDis typically run on the control plane nodes and it requires an odd number of members.
You might encounter the following error, but don`t worry it will not stop you from using cluster. still you can use two master and slave nodes. I couldn't solve this issue, if someone solve this please let me know in the comment section.

Explore Kops Commands
See what Kops do after running these commands:
kops get ig
kops get all
kops get cluster
kops completion bash
validate cluster --name $KOPS_CLUSTER_NAME
kops update cluster --name=$KOPS_CLUSTER_NAME --state=$KOPS_STATE_STORE --yes --admin
And that’s it! You now have a on-premises ready local Kubernetes cluster.
Delete the cluster
Finally, completion of exploring whole kops possibilities. delete the cluster to avoid any unnecessary cost.
kops delete cluster --name=$KOPS_CLUSTER_NAME --state=$KOPS_STATE_STORE --yes
Thank you for reading. 🙏🙏
Subscribe to my newsletter
Read articles from AutOps directly inside your inbox. Subscribe to the newsletter, and don't miss out.
Written by
