Sending Emails with Next.js and RESEND — The Cool Developer’s Guide
 Imam Dahir Dan-Azumi
Communication they said is key! Communication stands as a corner stone for any successful brand or business and in the digital world, email messaging has long been a pivotal means of outreach due to its ease and convenience.
Enter RESEND, an Email API for Developers that emerged from an open source project in 2022. In 2023, it evolved into a robust email sending platform that stands out not just cause of its easy to implement code, user-friendly interface but its seamless email template design capabilities using the usual component codes to implement email designs — a notable improvement from my previous experience with Sendgrid.
In this Article, we delve into RESEND and explore its features, uncovering the simplicity of integrating RESEND seamlessly with a Next.js project amongst other exciting insights! By the end of this article you should be armed with the skill to seamlessly build email integration into any React/Next.js project with RESEND.
Before we dive into this, I assume you have at least knowledge of either Next.js or React.js.
Table of Content:
- Getting Started with RESEND
Creating a RESEND Account
Adding your Domain
Creating an API Key
2. Integration with Next.js
Installing RESEND SDK and React-Email
Creating Server Function
3. Sample Contact Form Building
Building a Contact Component
Connecting Form to RESEND
Handling Sending functionality
4. Email Template Design
- Crafting a UI for our Email
5. Use cases and examples
6. Conclusion
Setting Up Resend
Before we use RESEND, we need to create an account, add domain & create an API key. With an easy to use UI and number of free templates and an amazing free tier, RESEND help makes all of that easy!
Creating an Account
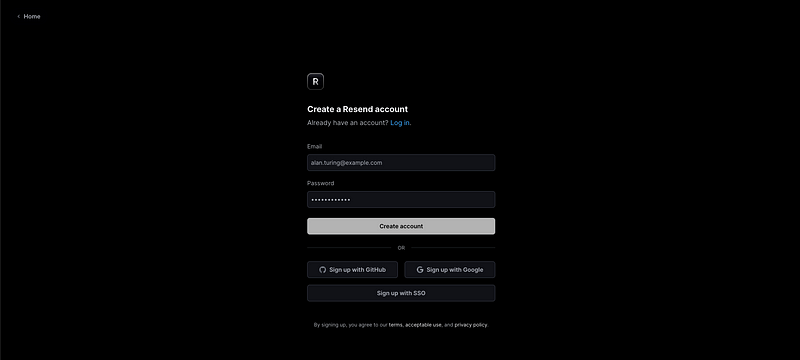
Click here or head to https://resend.com/signup to Sign up
Resend gives option of Github, Google, Password & Email for SIgn up in addition to SSO sign up.
Add your Domain
After successful signup, next thing on our list is to add a domain — proceed to the Domain page to add your Domain so we can have the ability to send emails from our custom emails. Using my Portfolio Domain for this walkthrough e.g contact@eimaam.dev
Verify your Domain
We are getting closer! To unleash the full power of RESEND and send emails with your custom domain, a crucial step involves DNS addition and verification. Follow these steps for a seamless integration:
Utilize the DNS record provided by RESEND.
Update your Domain DNS on your Domain Provider’s platform with the exact values provided.
Return to the RESEND Domain Page and hit the Verify button to complete the process.”
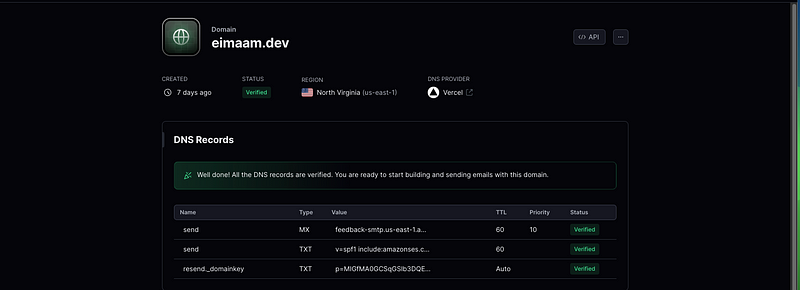
My Portfolio Domain Verified via Vercel (Provider)
Create API Key
After a successful DNS verification, a key step is getting an API key — proceed to the API Keys page to create an API by hitting on the Create API Key button to create one.
Note: You can only create 1 API Key on the Free-tier account, to create more, one needs to be on the premium tier. Check Pricing here
NB: Ensure you copy your API Key after creation as RESEND does not support viewing the keys again.
That’s enough setup for RESEND, lets proceed to setting up our Next.js!
Integration with Next.js
For this project, I will be using my Portfolio Project to show how RESEND works, if you do not have a Next.js project to integrate into lets take the below steps to create one just for this.
Create Next Project
Create a new Next.js App by running the below command in your terminal where test-resend is your project name
npx create-next-app@latest test-resend
The above command will trigger the creation of new Next.js project using the latest version.
Install Dependencies
Lets proceed to install the required depencies to our Next App
Run the below command to install to your new project or an old project you want to integrate RESEND
npm install resend @react-email/components react-email
The react-email and @react-email/components packages allows us to be able to build a template using React components.
Saving our API Key
Create .env.local file in the root directory and in it, save your API key in the below format
RESEND_API_KEY=your_api_key
Building a Contact Form
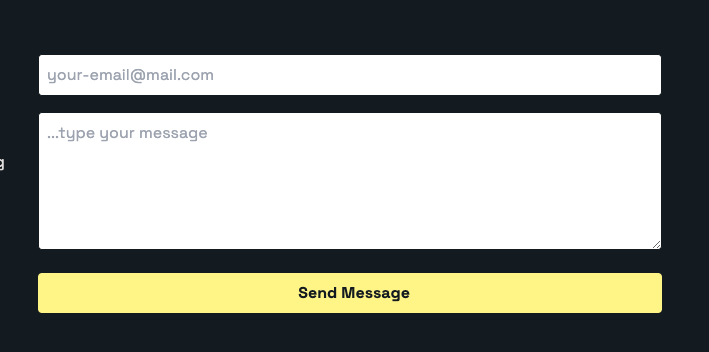
Now, lets proceed to build our Contact Form, I will be having the below for my Portfolio
<form
onSubmit={handleSubmit}
className="border-none p-0"
data-aos="fade-down"
>
<input
name="email"
type="email"
placeholder="your-email@mail.com"
value={formData.email}
onChange={handleChange}
className="text-background w-full p-2 mb-4 border border-gray-300 rounded"
required
/>
<textarea
name="message"
cols={30}
rows={5}
placeholder="...type your message"
value={formData.message}
onChange={handleChange}
className="text-background w-full p-2 mb-4 border border-gray-300 rounded"
required
/>
<button
type="submit"
className="w-full bg-primary hover:shadow-lg hover:opacity-90 text-background font-bold py-2 px-4 rounded"
>
{isSending && <ClipLoader color="#000" size={10} />} Send
Message
</button>
</form>
I’ll be keeping the form simple! Taking only Email (to enable me send a response to the sender) and of course Message.
Create Email Template
Now lets proceed to craft a beautiful Email Template using React. If you need to save time, you can check out some free templates here.
in your repo, create a file named EmailTemplate.tsx or EmailTemplate.jsx depending on the language you are scripting with. Open the component and either build your custom design or paste the below:
import * as React from "react";
import {
  Body,
  Container,
  Head,
  Hr,
  Html,
  Preview,
  Text,
} from "@react-email/components";
import { ContactEmailProps } from "../app/components/Contact";

export const EmailTemplate = ({ message, email }: ContactEmailProps) => {
  const containerStyle = {
    margin: "0 auto",
    padding: "0 1.25rem",
    marginTop: "1.25rem",
    marginBottom: "3rem",
  };

  const hrStyle = {
    marginTop: "0.625rem",
    marginBottom: "1.875rem",
    border: "1px solid #ccc",
  };

  const textStyle = {
    base: {
      fontSize: "1rem",
      marginTop: "0",
      marginBottom: "0.625rem",
    },
  };

  return (
    <Html>
      <Head />
      <Preview>Portfolio Message</Preview>
      <Body style={{ fontFamily: "sans-serif", background: "#fff" }}>
        <Container style={containerStyle}>
          <Hr style={hrStyle} />

          <Text style={textStyle.base}>
            From: <i>{email}</i>,
          </Text>
          <Text style={textStyle.base}>{message}</Text>
          <Text style={textStyle.base}>
            Sent via Contact Form @{" "}
            <a rel="noopener" href="https://eimaam.dev" target="_blank">
              eimaam.dev
            </a>
            <br />
          </Text>
          <Hr style={hrStyle} />
        </Container>
      </Body>
    </Html>
  );
};

export default EmailTemplate;
Using some predefined components from the react-emails components, we will build an email template which simply details the Sender’s name, message and a footer that tells where the message is from, here my Portfolio. If you notice, we are passing two props to the component — message and email , same data we have in our Form created above.
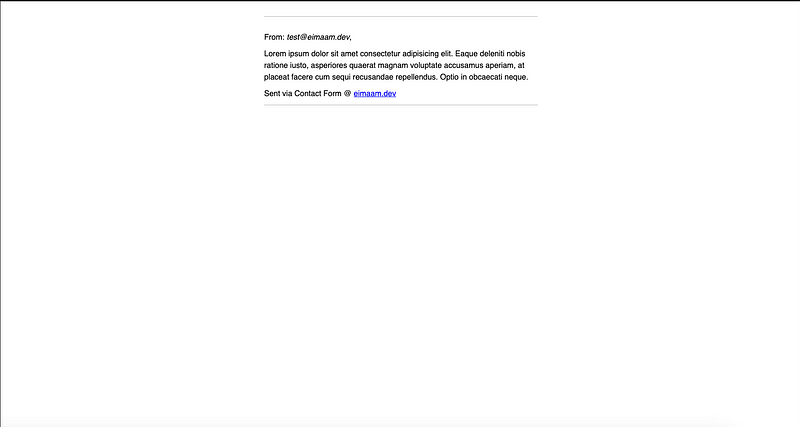
Custom Template View
Create Server Function or Email Controller
Now lets proceed to write in our Next.js api a function to handle our email sending
As earlier mentioned, I will be using my portfolio website for this guide, now lets create a folder named contact in our Next.js api folder and in it, create route.ts or route.js file, this is our route handler function
import { NextRequest, NextResponse } from "next/server";
import { Resend } from "resend";
import { EmailTemplate } from "@/emails";

export async function POST(req: NextRequest) {
  const body = await req.json();
  // body of our request - to be sent from the Client-side in our form above
  const { message, email } = body;

  // Check if the required fields are present
  if (!message || !email) {
    return NextResponse.json(
      { error: "Missing required fields" },
      { status: 400 }
    );
  }

  // resend declaration with API key as parameter
  const resend = new Resend(process.env.RESEND_API_KEY);

  try {
    // resend function handler for executing email sending
    // returning data and error state to indicate success and failure respecfully
    const { data, error } = await resend.emails.send({
      from: `Imam - Porfolio <info@eimaam.dev>`, //Title of our Email, here, our email will indicate Imam - Portfolio and the <info@eimaam.dev> will be the sending address. NB: `eimaam.dev` replace with your registered domain
      to: "myemail@gmail.com", // email receiver, // in case where you are sending onboarding emails, this field will be dynamic, it will be the email of the User
      subject: "Message from Portfolio,
      react: EmailTemplate({ email, message}), //using our custom react component to render email content/body
    });

    if (error) {
      return NextResponse.json(
        { message: "Email sending failed", error },
        { status: 400 }
      );
    }

    return NextResponse.json(
      { message: "Email sent successfully", data },
      { status: 200 }
    );
  } catch (error) {
    console.error("Error sending email:", error);
    return NextResponse.json(
      { message: "Failed to send email", error },
      { status: 500 }
    );
  }
}
In the above code, we will be importing our custom email template in the react field of the RESEND emails function:
const { data, error } = await resend.emails.send({
      from: `Imam - Porfolio <info@eimaam.dev>`, //Title of our Email, here, our email will indicate Imam - Portfolio and the <info@eimaam.dev> will be the sending address. NB: `eimaam.dev` replace with your registered domain
      to: process.env.RESEND_RECEIVER_EMAIL as string, //email receiver
      subject: "Message from Portfolio,
      react: EmailTemplate({ email, message}), //using our custom react component to render email content/body
    });
RESEND supports using HTML to send the emails and with that, by default, you can use html in place of react but that will mean passing HTML tags only, but in order to use custom template components, you need to declare as the above — react and pass your component file. Read more on the react-email and its ready-made components here.
With the above Server function, we can now proceed to integrate the endpoint to our form submit action via /api/contact
Integrate Server Function to Form
Now we can proceed to write a function to make a successful call to our API from the app route. Lets add the below function in our Contact Form file
const [formData, setFormData] = useState<ContactEmailProps>({
    fullName: "",
    email: "",
    subject: "",
    message: "",
  });
  const [isSending, setIsSending] = useState<boolean>(false);

  const handleChange = (
    e: ChangeEvent<HTMLInputElement | HTMLTextAreaElement>
  ) => {
    const { name, value } = e.target;
    setFormData((prev: ContactEmailProps) => ({ ...prev, [name]: value }));
  };

  const handleSubmit = async (e: FormEvent<HTMLFormElement>) => {
    e.preventDefault();

    //confirm email and message field are not empty
    if (!formData.email || !formData.message) {
      showToast.info("Email and message are required fields");
      return;
    }

    try {
      setIsSending(true);
      const response = await fetch("/api/contact", {
        method: "POST",
        headers: {
          "Content-Type": "application/json",
        },
        body: JSON.stringify({
          email: formData.email,
          message: formData.message,
        }),
      });

      // handle success
      if (response.ok) {
        showToast.success("Email Sent Successfully!");
        setFormData({
          email: "",
          message: "",
        })
      } else {
        showToast.error("There was a problem sending email. Pls try again!");
      }
    } catch (error) {
      console.log("Error sending email:", error);
      showToast.error("There was a problem sending email. Pls try again!");
    } finally {
      setIsSending(false);
    }
  };
With the above, we can now proceed to test our email.
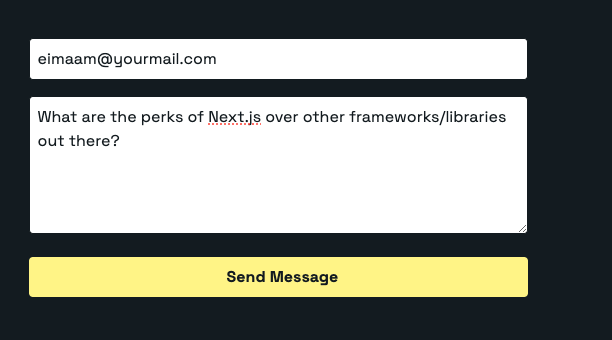
Test Email Message
RESULT
Voila! 🎉 Here goes our message in the mail:

Mail showing the Subject and to details as in our server function.
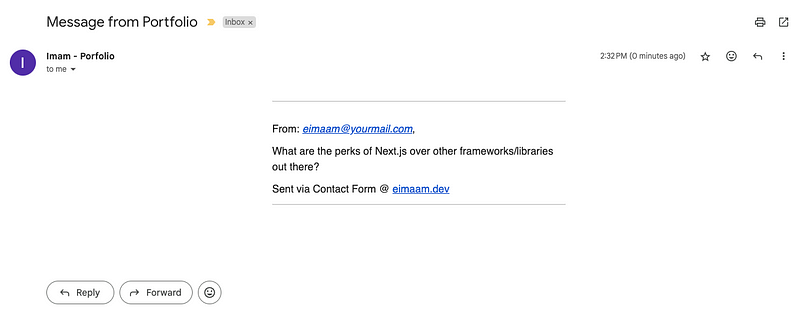
Email Content

“from” value from server function.
Use Cases & Examples
Some use cases of the RESEND emailing or email feature in general goes a long way, some include:
User Onboarding Message: Use RESEND email to send message after Users onboard on your platform
E-commerce Delight: Use RESEND to send personalized order confirmations, shipping updates, and exclusive promotions to customers.
Subscription expiry notification
Newsletter and lots more.
CONCLUSION
Yay! With that, you have successfully integrated EMAIL sending in your Next.js Project using RESEND. This seamless integration between thsese cool deps allows you to easily have this amazing email feature in your app. Feel free to checkout RESEND and REACT-EMAIL docs for more details on building amazing features with these tools!
Feel free to reach out to me should you need help!
LinkedIn: Imam Dahir Dan-Azumi
Github: @eimaam
Subscribe to my newsletter
Read articles from Imam Dahir Dan-Azumi directly inside your inbox. Subscribe to the newsletter, and don't miss out.
Written by

Imam Dahir Dan-Azumi
Imam Dahir Dan-Azumi
Software Engineer - Crafting the Web's marvels, One Line of Code at a Time