How to deploy a Nest app to Railway using Bitbucket pipelines
 FOBABS
Deploying a project from GitHub to Railway is as straightforward as knowing your name, but there's more when deploying from Bitbucket. Many of us love Railway because it offers features that we (developers) find beneficial, such as easy deployment workflows, scalability, good performance, cost-effectiveness, and robust support for various programming languages and frameworks. For me, it's just a "plug-and-play" app.
The aggravation I felt knowing that Railway did not natively support Bitbucket prompted me to devise a workaround.
After a futile search through the internet pages, expecting to locate an existing solution, an inspiration struck me: what if all I had to do was construct a deployment pipeline, like Railway had done behind the scenes for GitHub? That struck a chord in my mind.
If you have been trying to achieve this, sweat no more; you can now deploy from Bitbucket using CI/CD (bitbucket pipelines).
Without further ado, let’s begin.
Prerequisites:
A Bitbucket account.
A Railway account already setup. (If you do not already have an account, you can create one here)
In the root folder of your application, create a file called bitbucket-pipelines.yml and add the following code snippet:
image: node:18

clone:
  depth: full

pipelines:
  branches:
    main:
    - step:
        name: Deploy to railway
        caches:
          - node
        deployment: production # Only if you have more than one environment
        script:
          - npm i -g @railway/cli
          - RAILWAY_TOKEN=$RAILWAY_TOKEN railway up --service=$RAILWAY_SERVICE
NOTE: Please take note of the indention. Any incorrect indentation will render your pipeline invalid.
To avoid "story that touches," you can validate your pipeline before pushing to Bitbucket using this link: https://bitbucket-pipelines.prod.public.atl-paas.net/validator
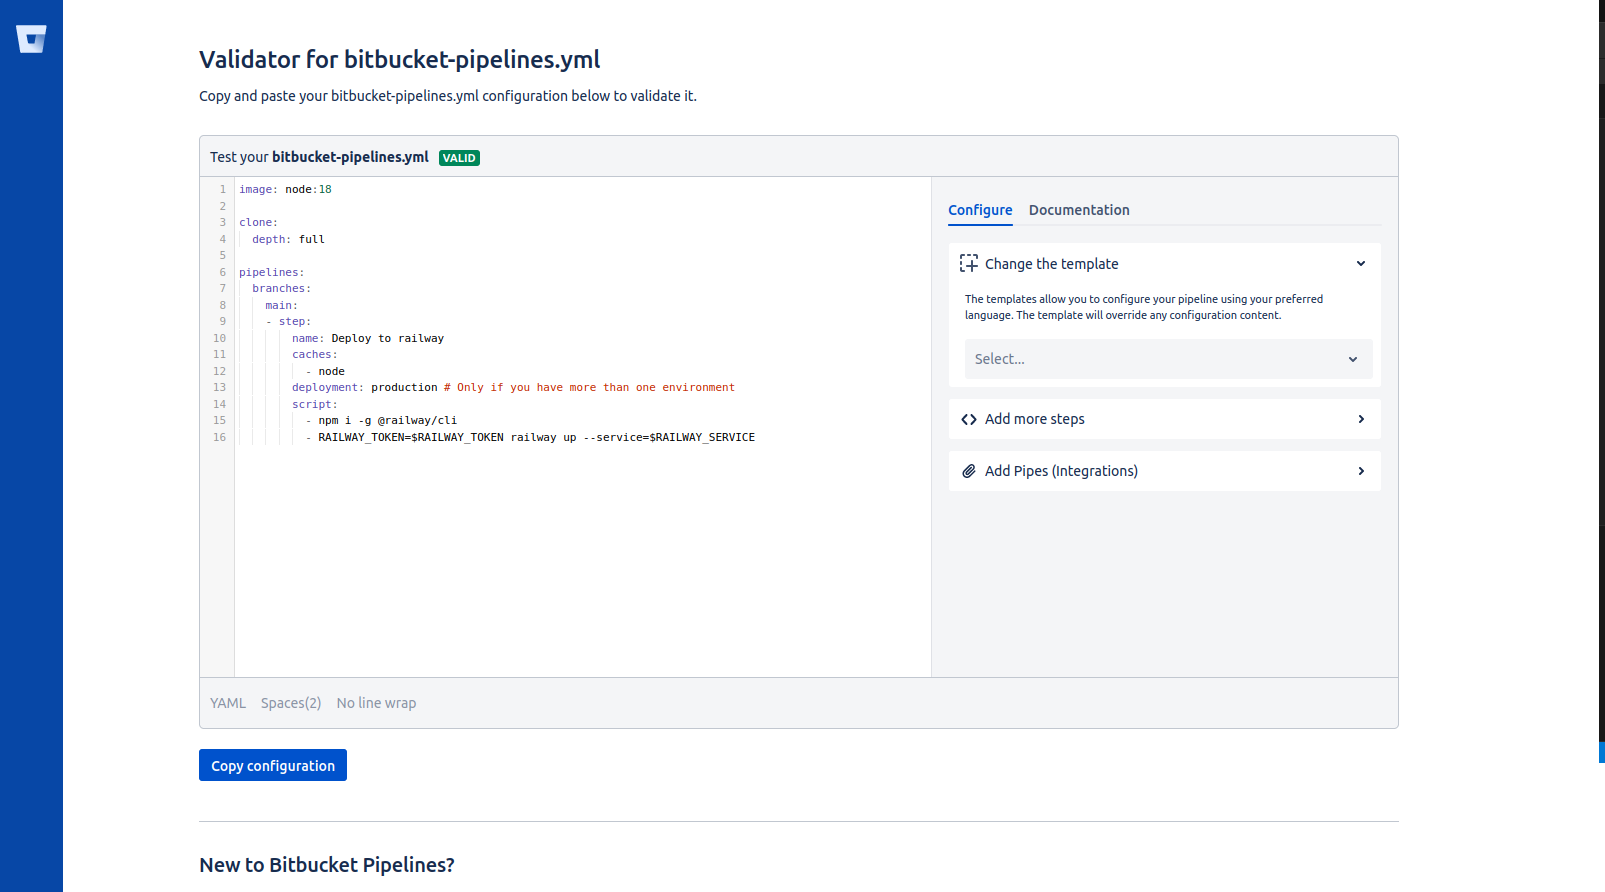
After you've validated your pipeline with VALID status, you can push your repo to Bitbucket.
Just a step back, if you're a DevOps engineer, this pipeline is simple math; but, if you're unfamiliar with CI/CD pipelines, this may appear to be a mirage to you.
Check out the official documentation to fully understand Bitbucket pipelines. To gain a basic grasp of CI/CD, check this article: https://itnext.io/ci-cd-an-introduction-using-bitbucket-pipelines-8701a400b97d
Now, let me walk you through the pipeline I just constructed.
I used node v18 as my image, but you can use any node version you wish. One thing I enjoy doing is caching node to minimize build time; you should do the same.
Take heed of this line.
deployment: production
This is unnecessary if you just have one deployment environment, but in practice, you will have several environments. This line instructs Bitbucket which environment variables to deploy. In our instance, it is the production environment, which implies that our pipeline will deploy utilizing variables from that environment. I'll go into how you can do this later.
Let us now go on to the last line, which completes the railway deployment.
- RAILWAY_TOKEN=$RAILWAY_TOKEN railway up --service=$RAILWAY_SERVICE
You'll notice $RAILWAY_TOKEN and $RAILWAY_SERVICE. These two variables will serve as your environment variables later on, and they are required to start our pipeline.
For you to connect to your railway project, you'll need a railway token and a service ID to identify the exact service for which your project is hosted, but to achieve that, you have to set up your railway project.
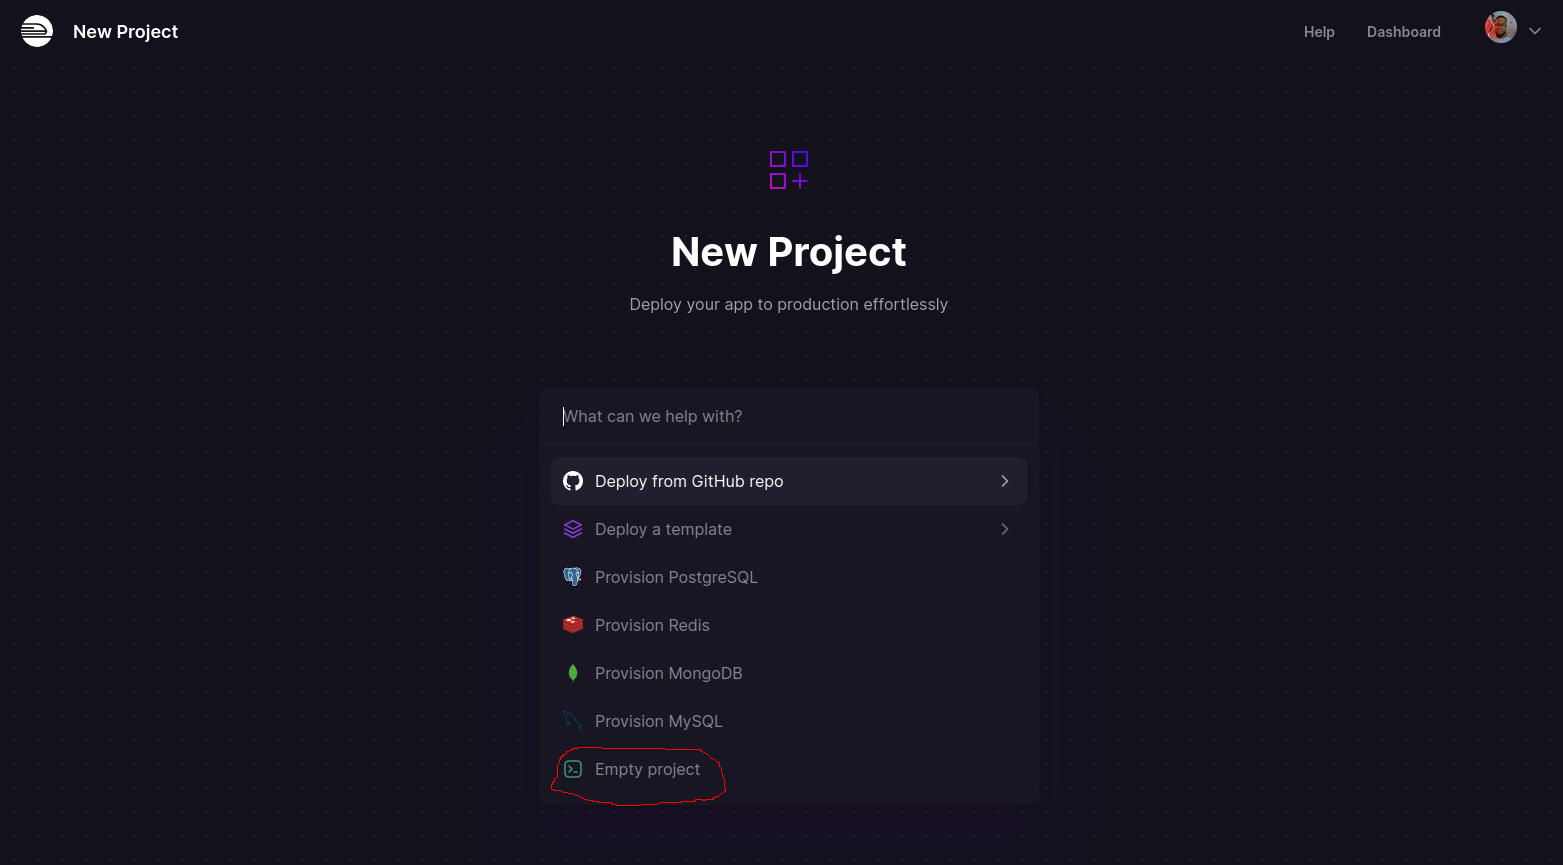
Step 1: First, start a new project and select Empty Project .
Step 2: After your project has been created, you’ll see the following image prompting you to add a service. Simply follow the process of adding a service.
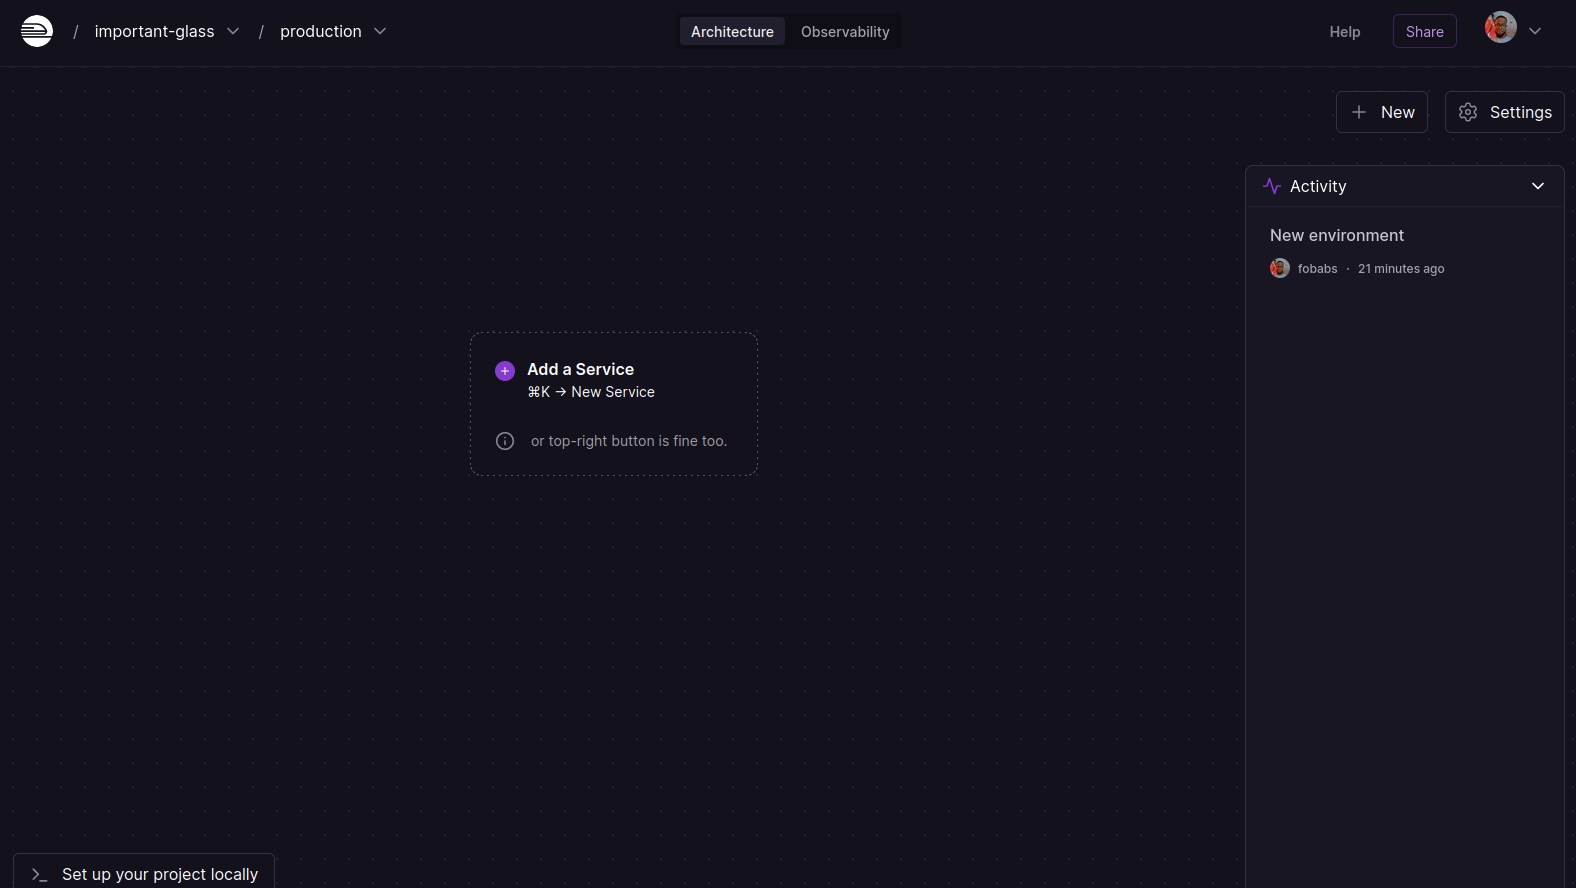
Step 3: Now it's time to acquire your token and service ID. Click on the service you created, as illustrated below:
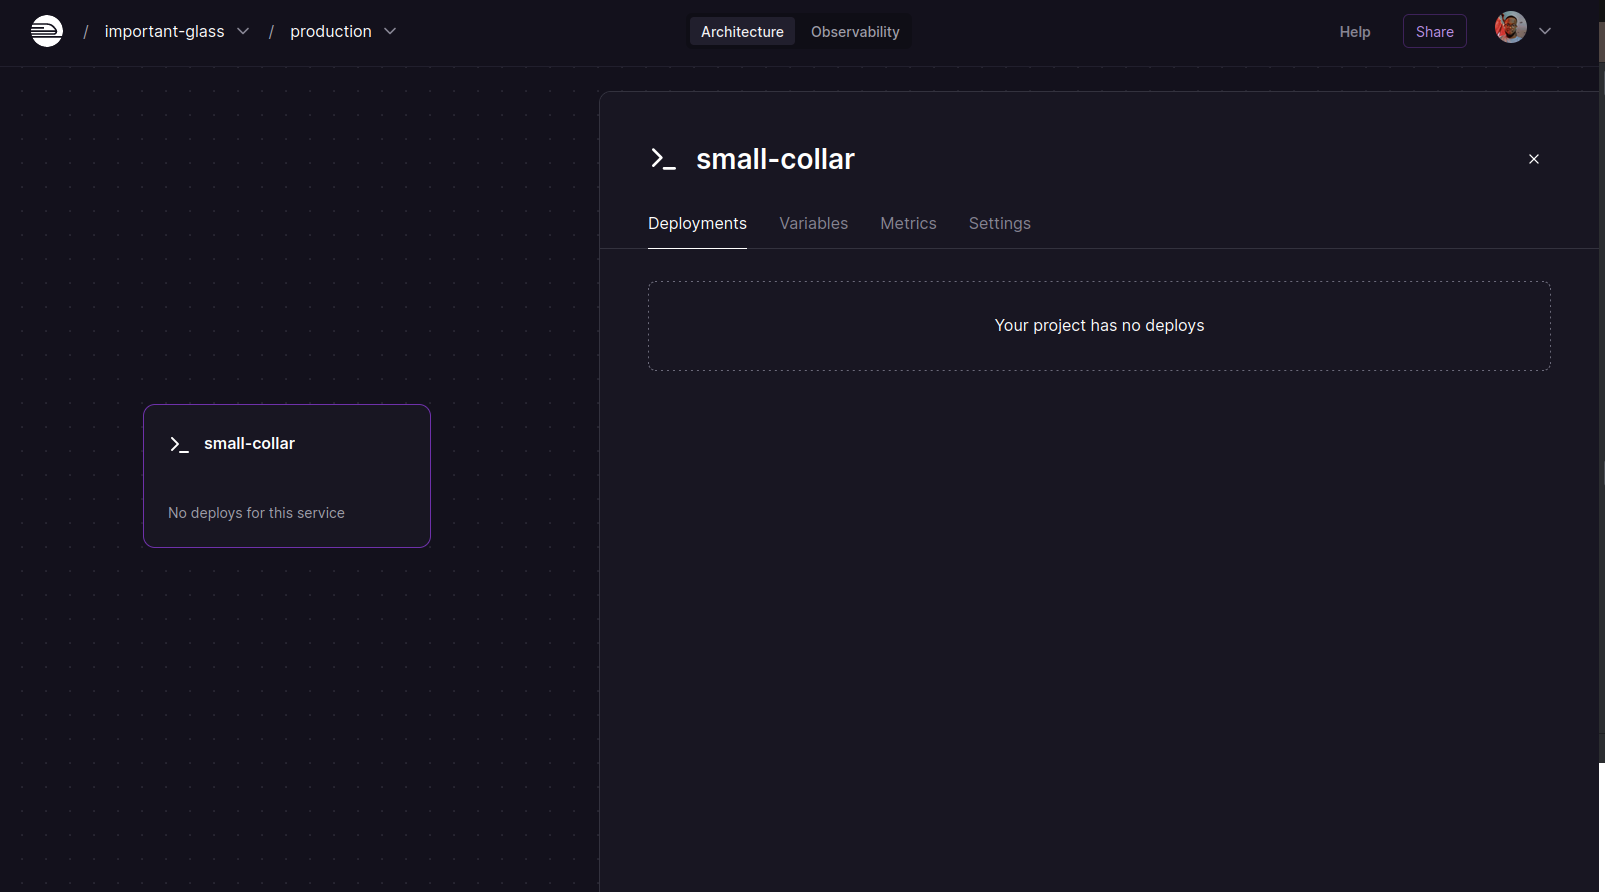
Navigate to the page address, and you'll notice a URL string in this format:
https://railway.app/project/<project-id>/service/<service-id> .

Copy <service-id> which is your service ID, and save it somewhere for later use, as this will serve as your $RAILWAY_SERVICE.
Now click on the Tokens tab. Create a new token with any name of your choice. I opted to use BITBUCKET_DEPLOY to signify that this token is intended for usage with Bitbucket.
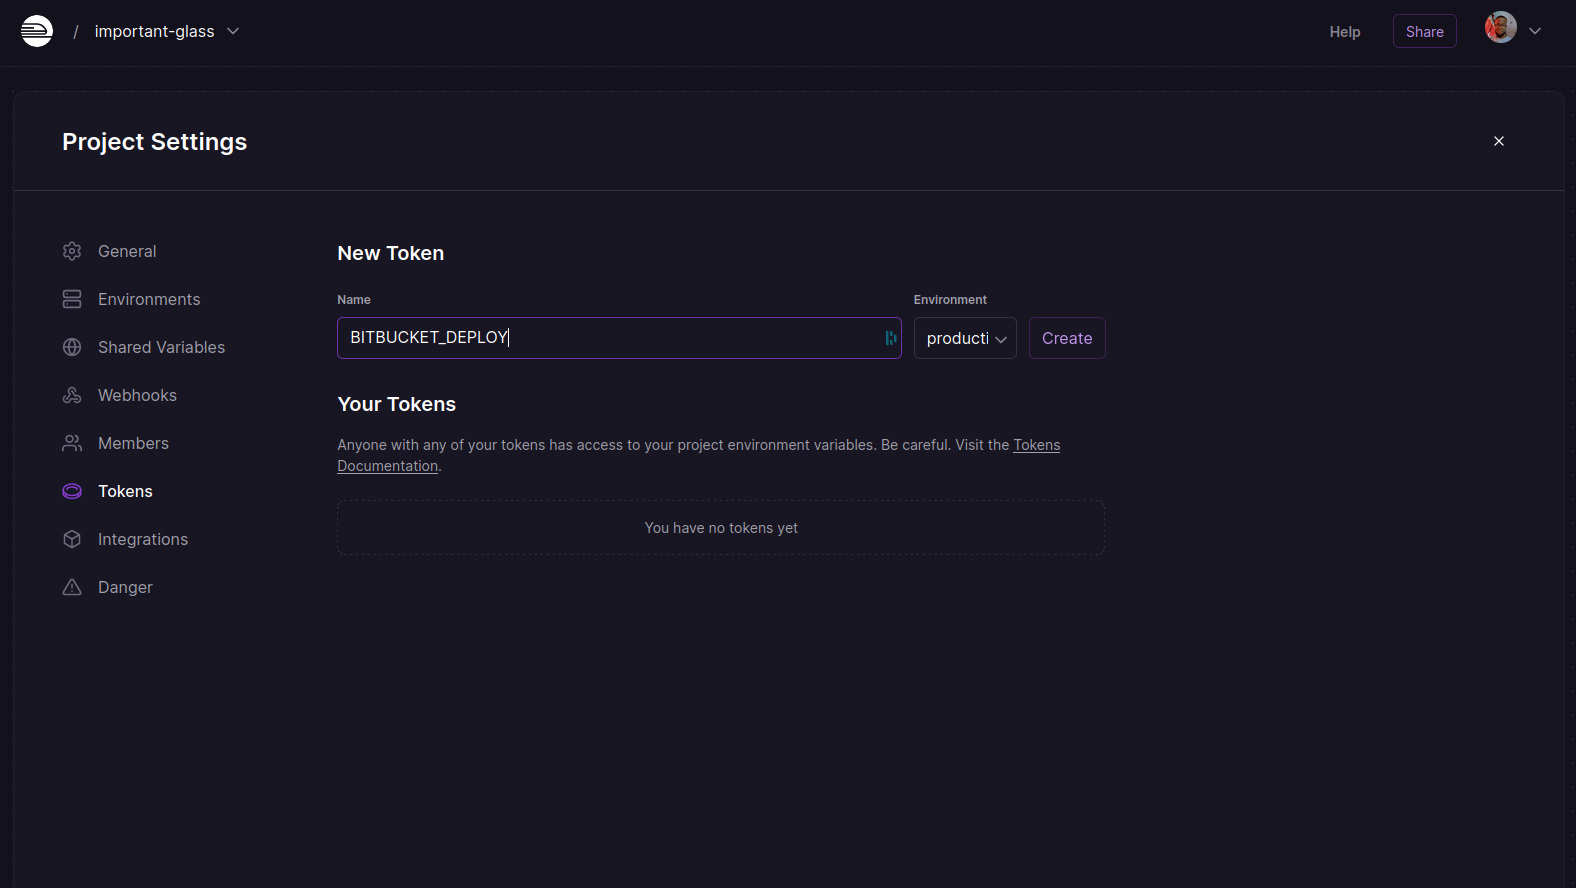
Copy the token immediately and securely store it as previously described, since this will function as your $RAILWAY_TOKEN.
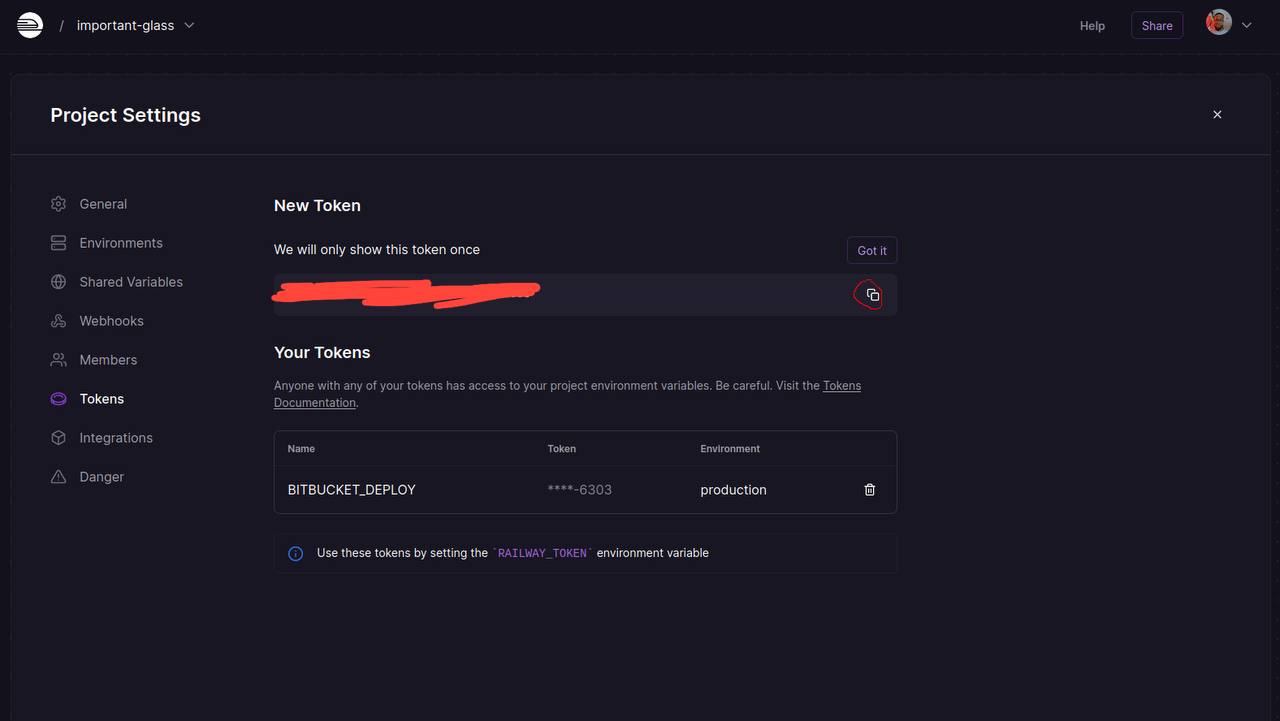
NOTE: You will only be shown the token once, after which you will be unable to copy it again.
Step 4: Check the build and start commands by accessing your service's settings page. NOTE: The default build and start commands are npm run build and npm run start respectively. If your project requires a different command, adjust it accordingly.
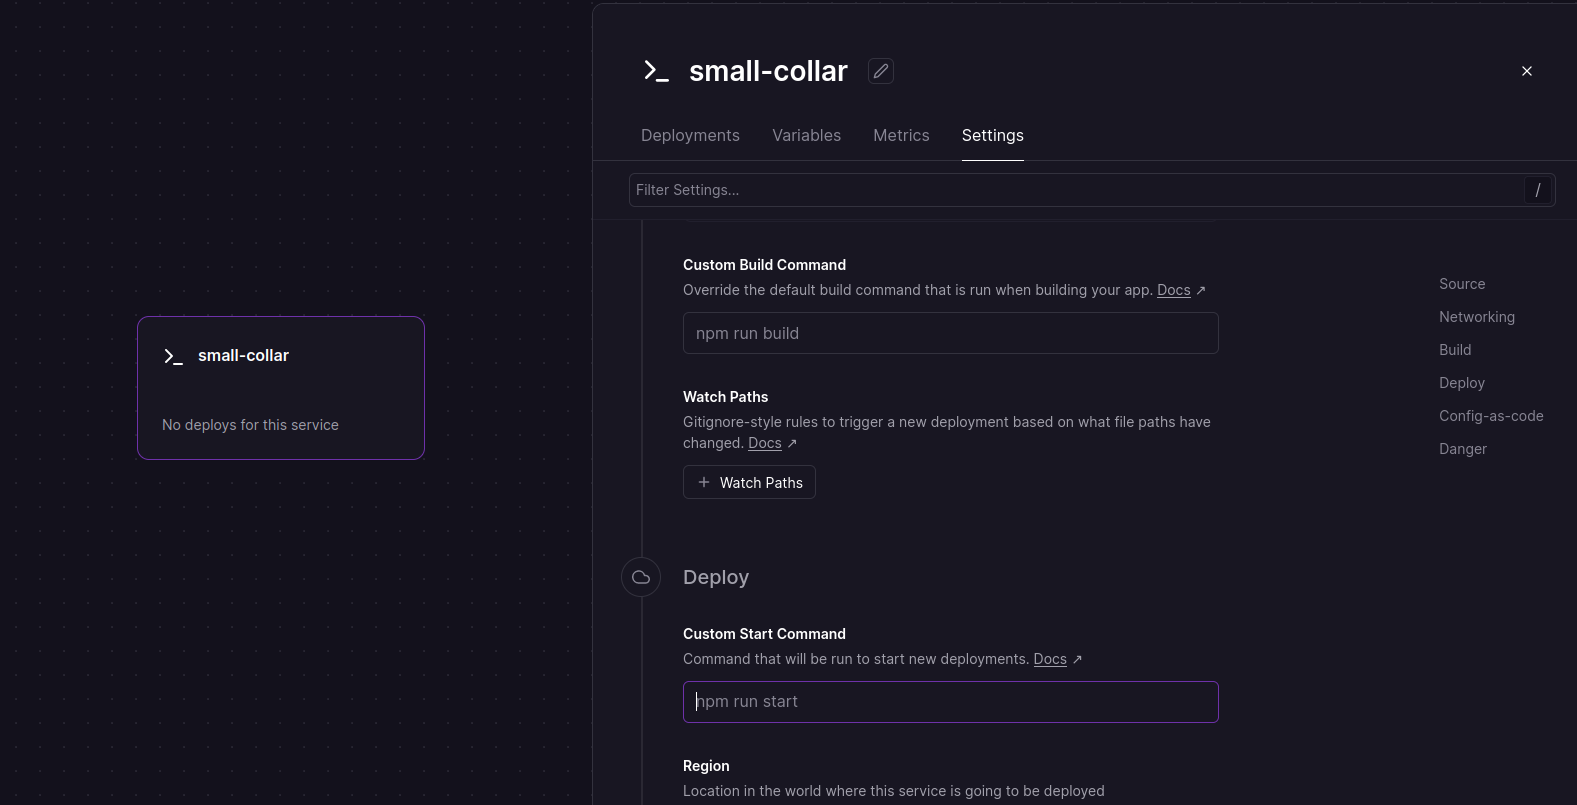
Step 5 (optional): If your project requires environment variables, which is the case in real life, proceed to the Variables tab.
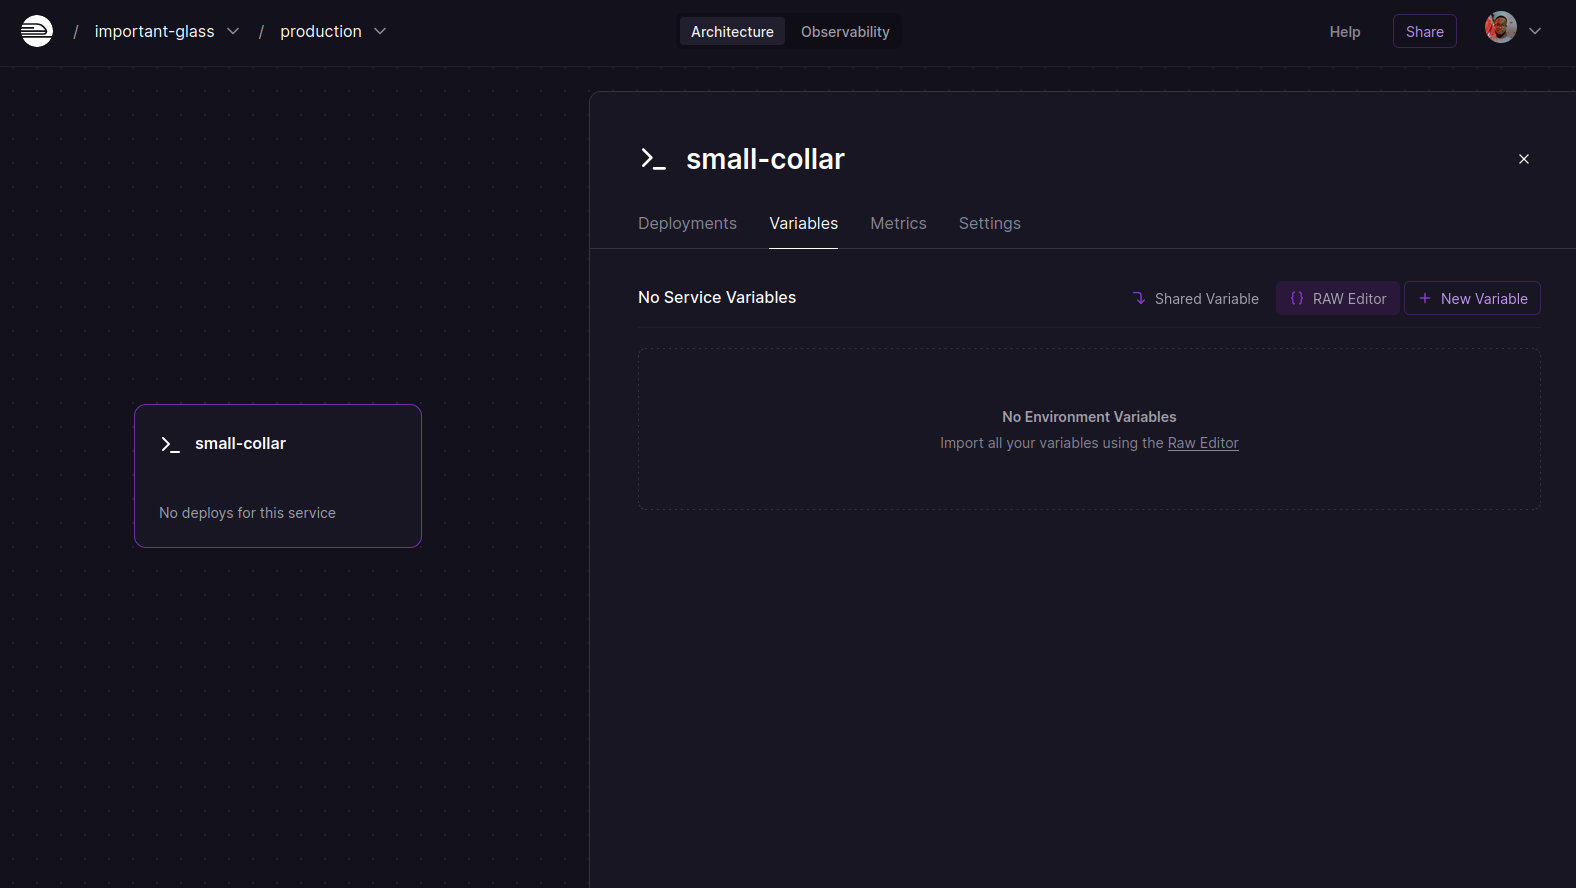
Click on RAW Editor .
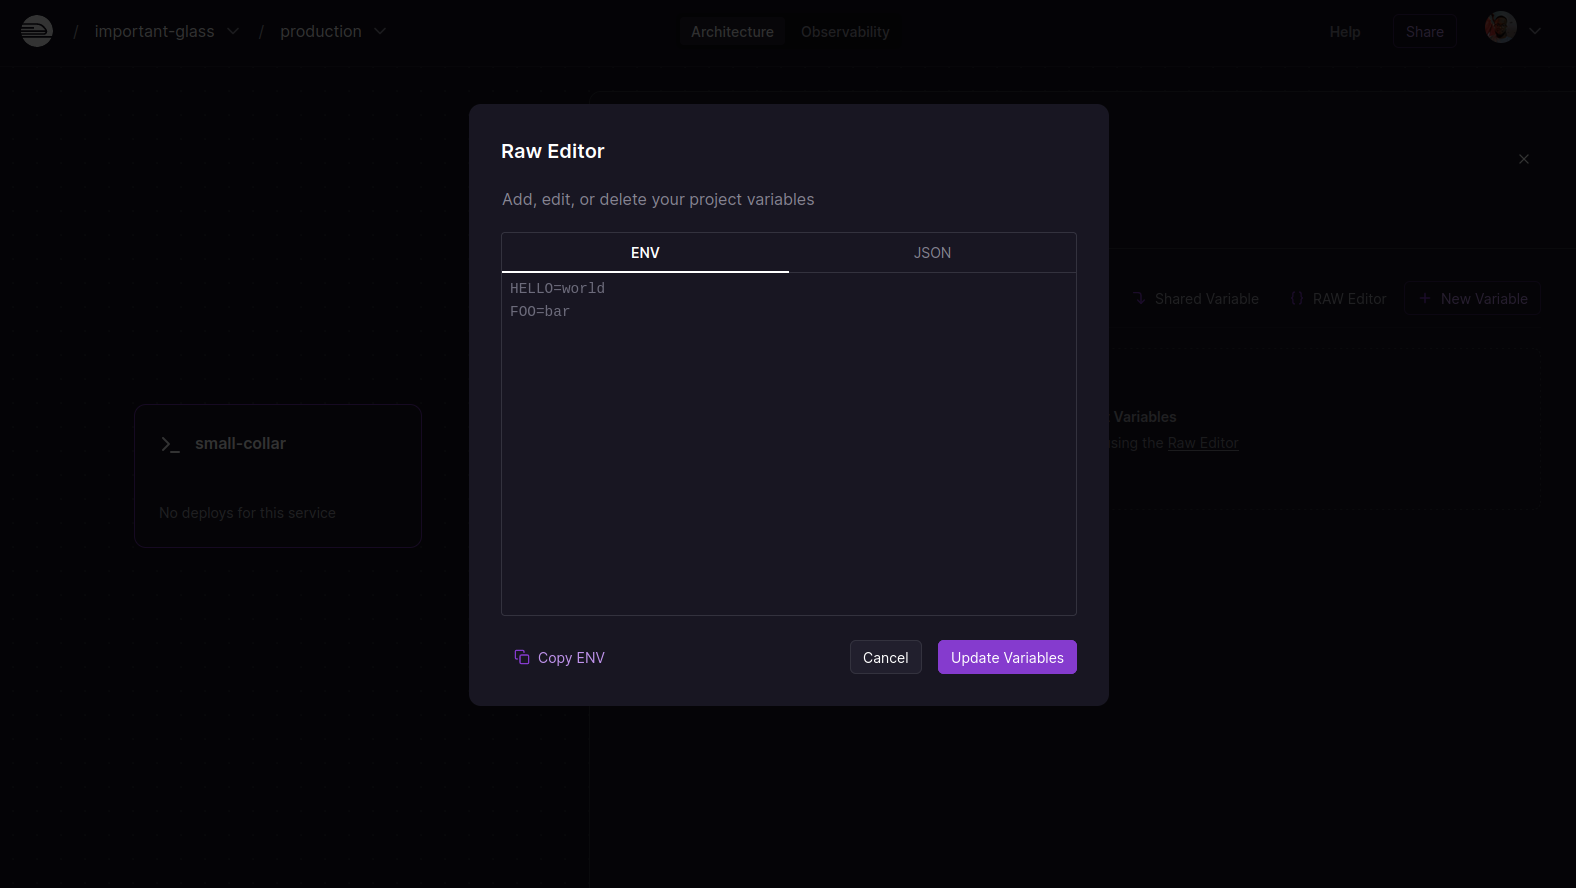
Under the ENV tab, paste your .env variables from your nest app and hit the Update Variables button, and you're done.
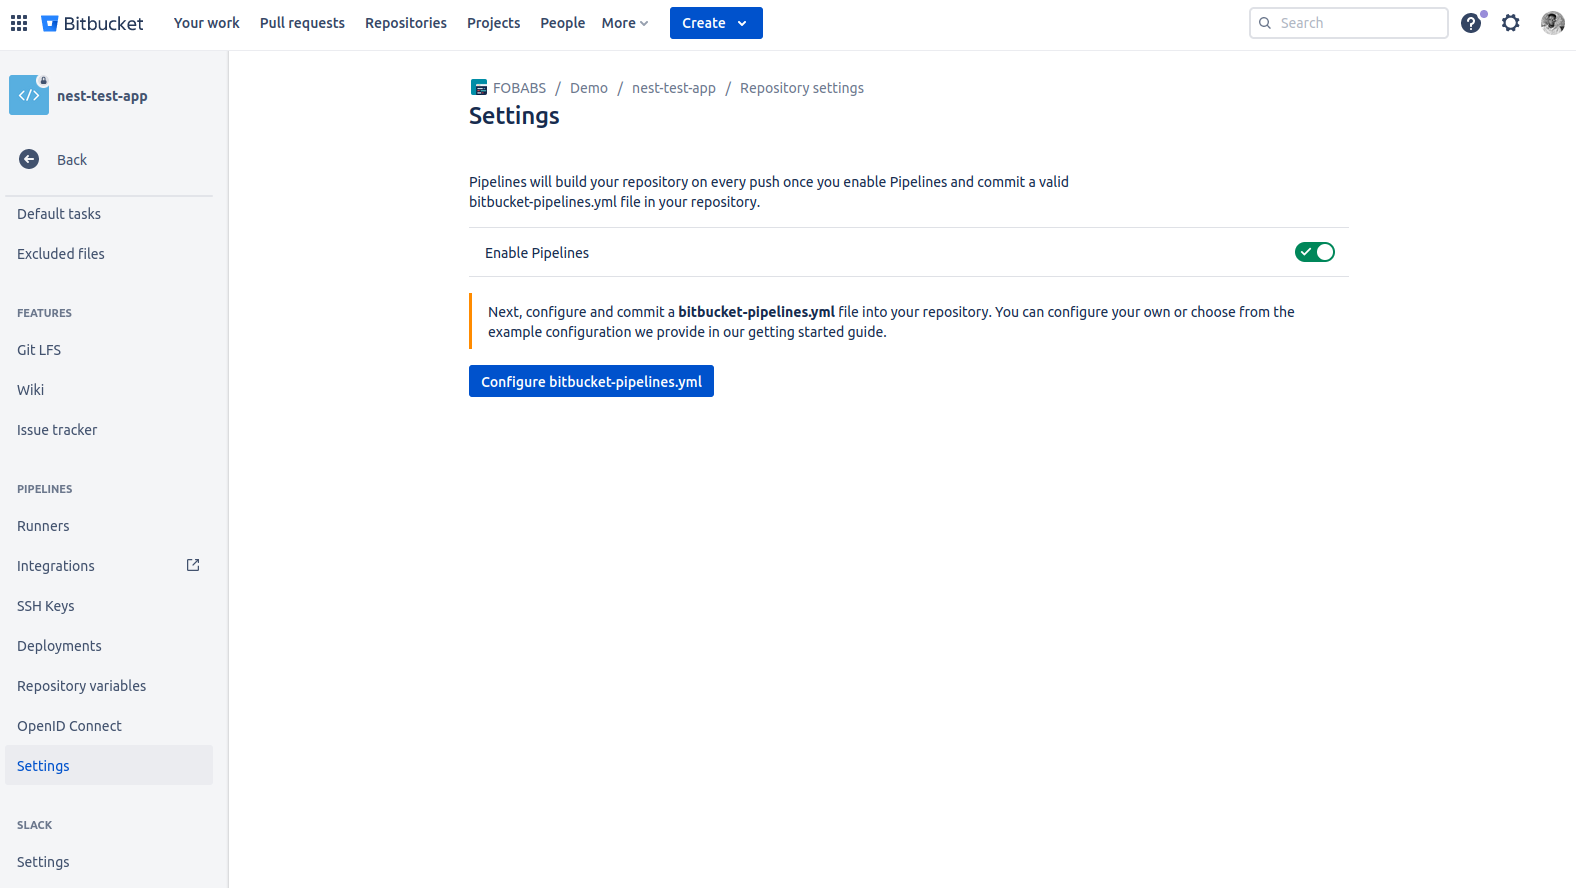
Now, let's return to your Bitbucket repository and configure your pipeline. Click on Repository settings, go down to Settings, and then change Enable Pipelines to true.
After that, click on Deployments and scroll down to choose the production environment, since you will be deploying to this environment. Create the variable RAILWAY_TOKEN and put the token you saved previously into it. Before adding it, ensure that the Secured option is set to true.
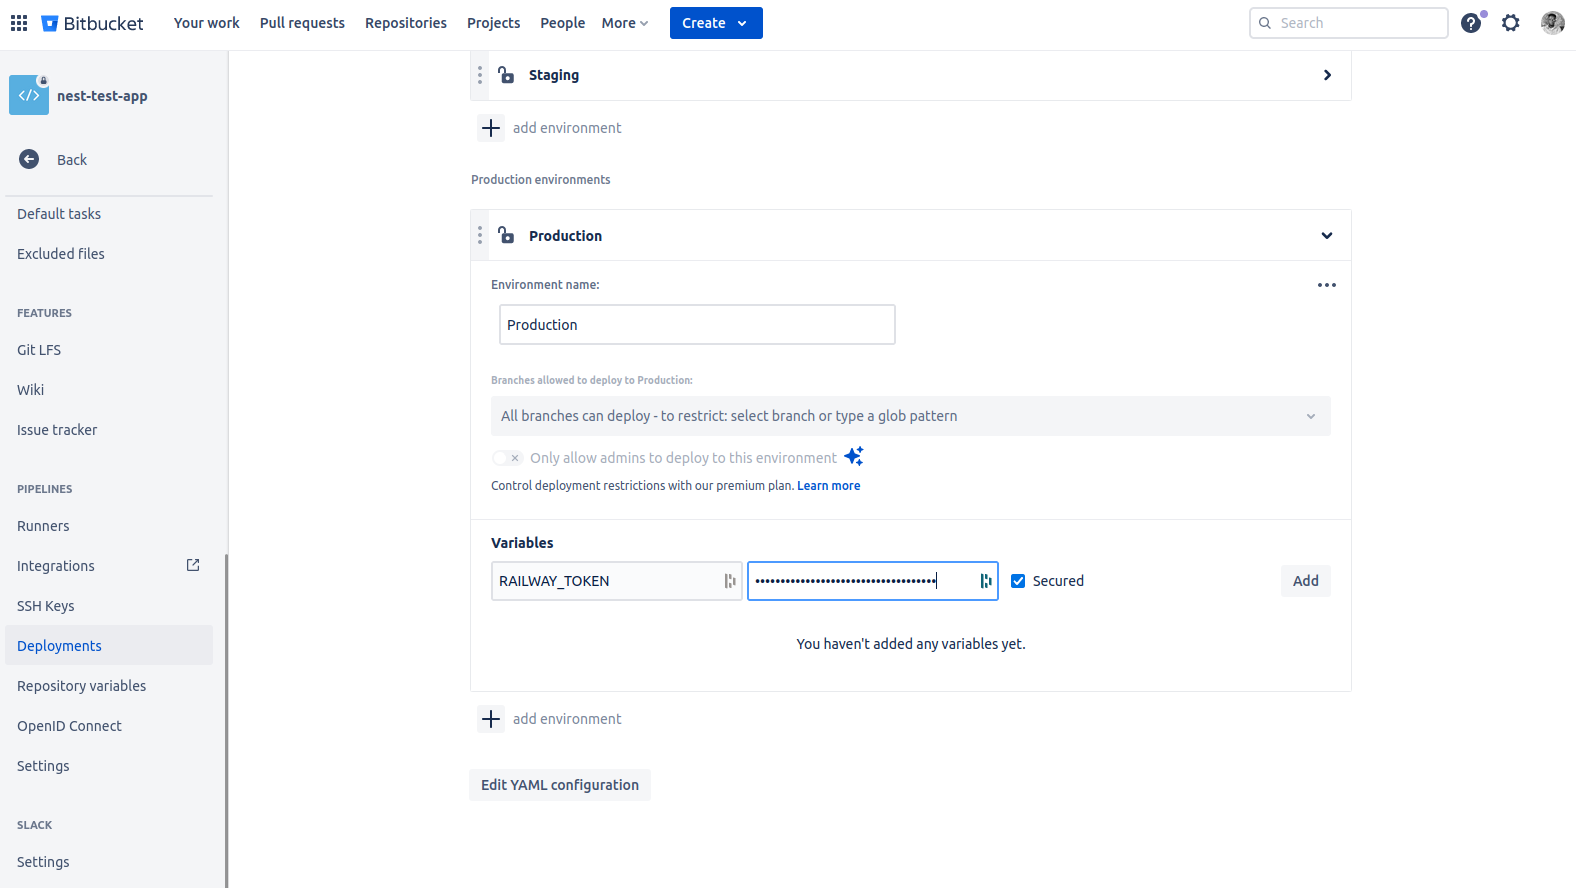
NOTE: This page allows you to manage variables for various deployment environments.
Next, navigate to Repository Variables. Create a RAILWAY_SERVICE variable and put the service ID you saved previously into it. Also, before adding, ensure that the Secured option is set to true.
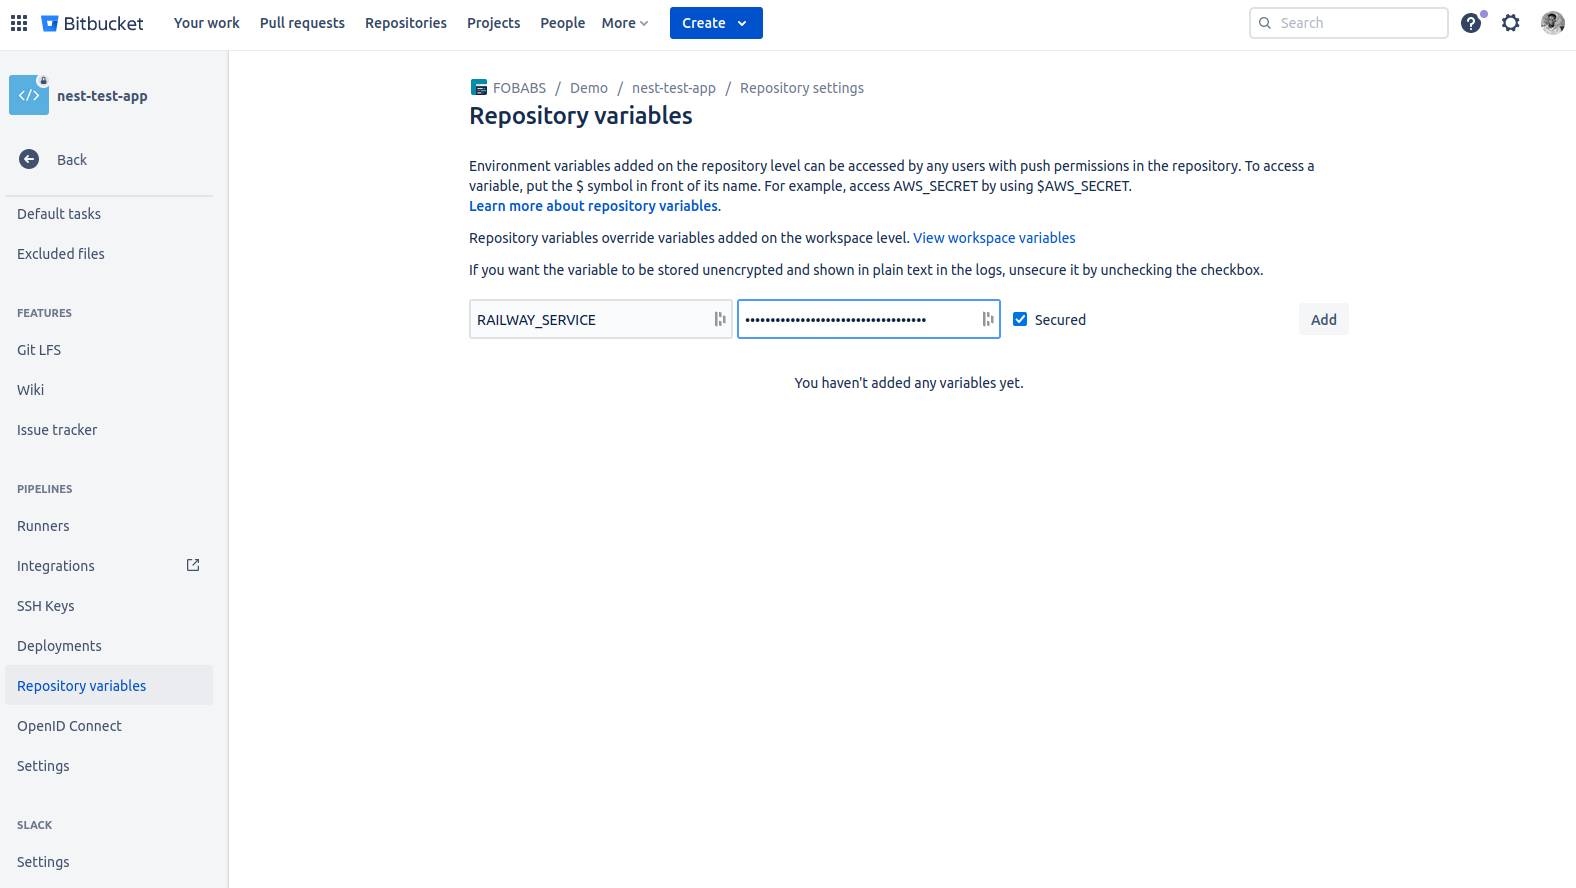
Hurray! 💃 Your pipeline is ready to receive oil.
Now, return to your repo, choose the Pipelines tab, run the pipeline by clicking the Run initial pipeline button, and follow through with the procedures.
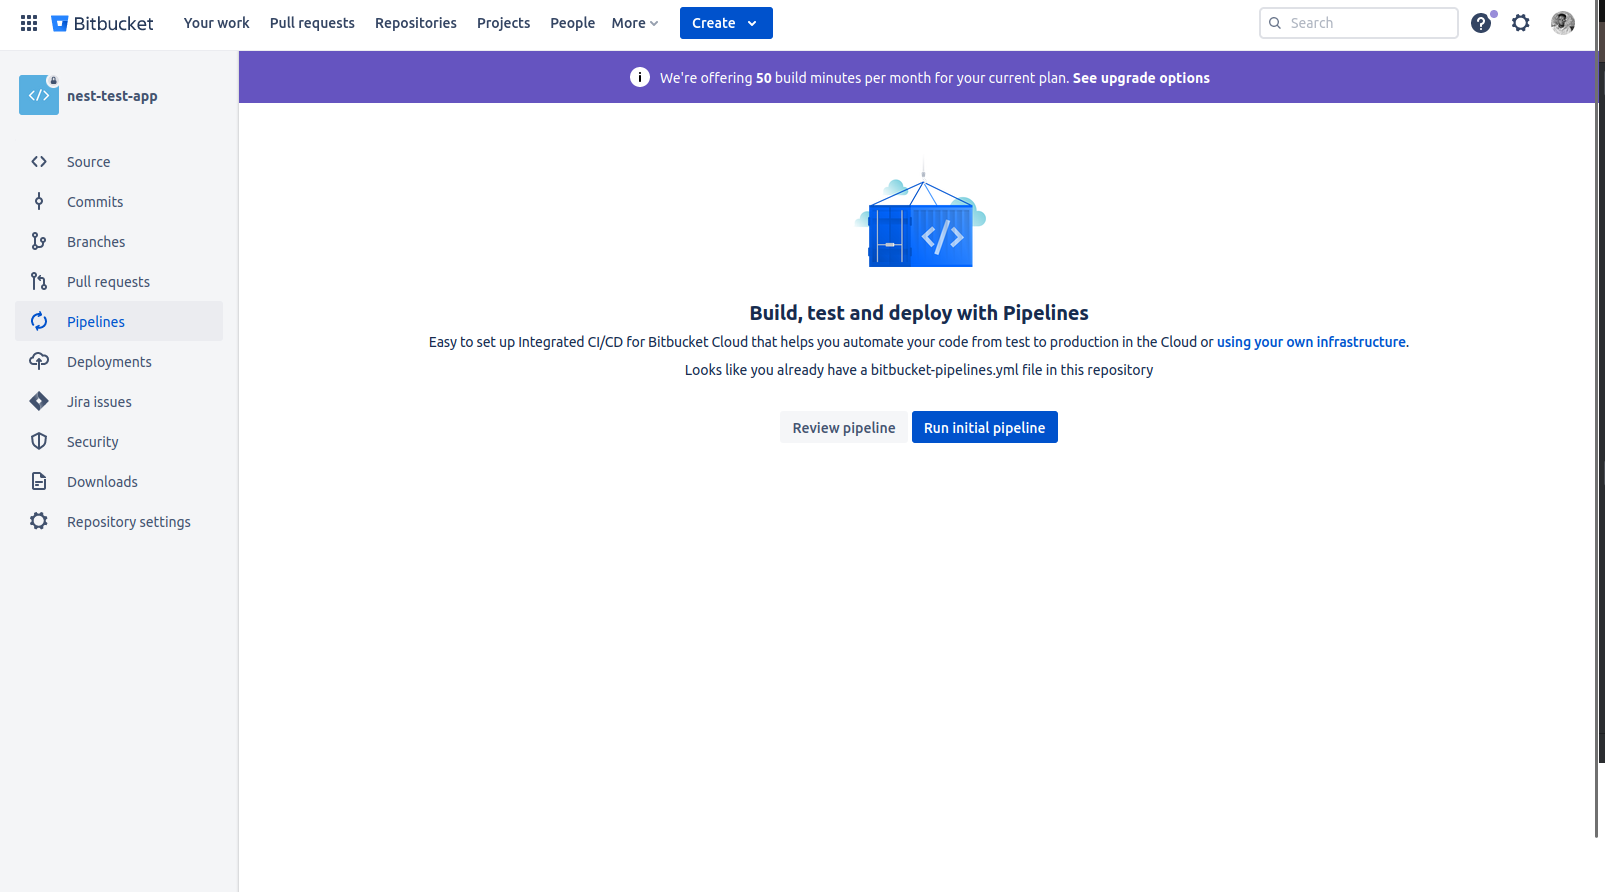
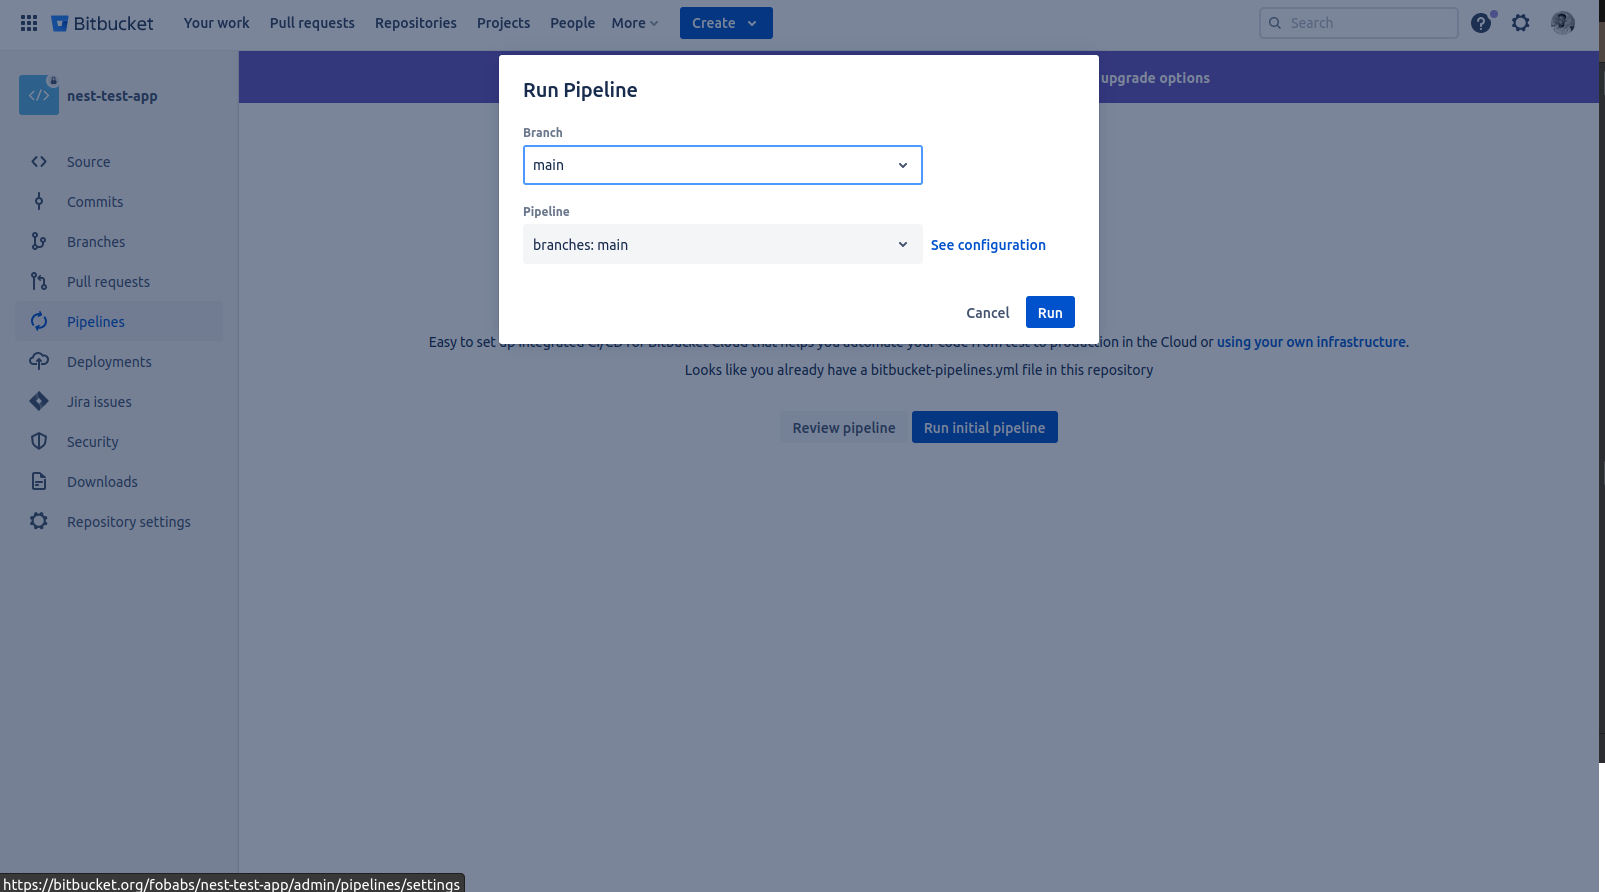
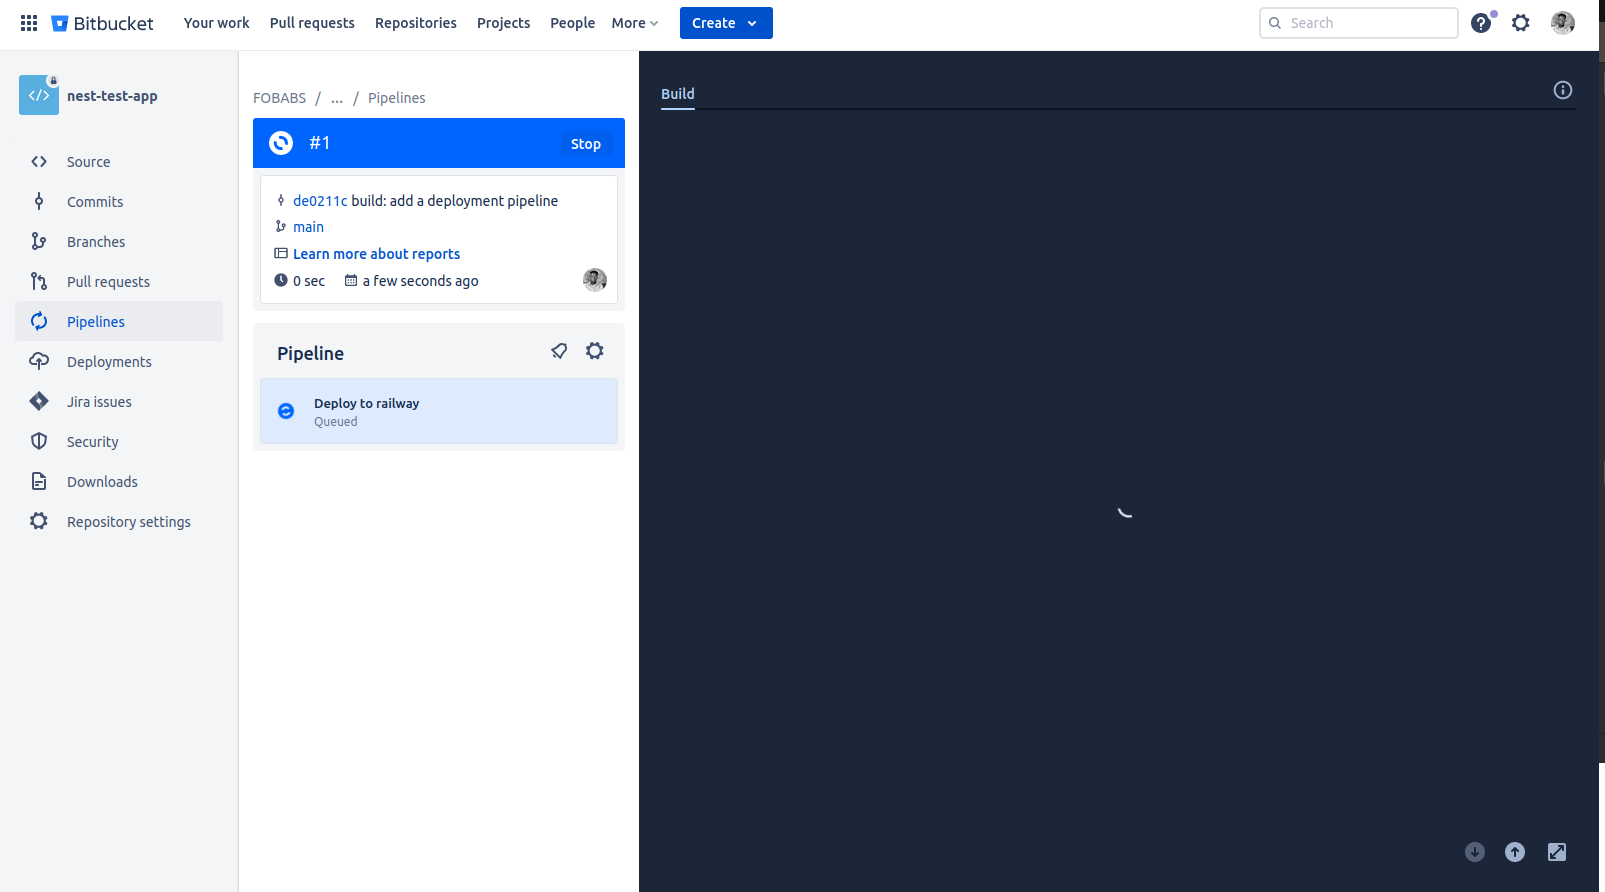
If the pipeline is successful, you should see the following:
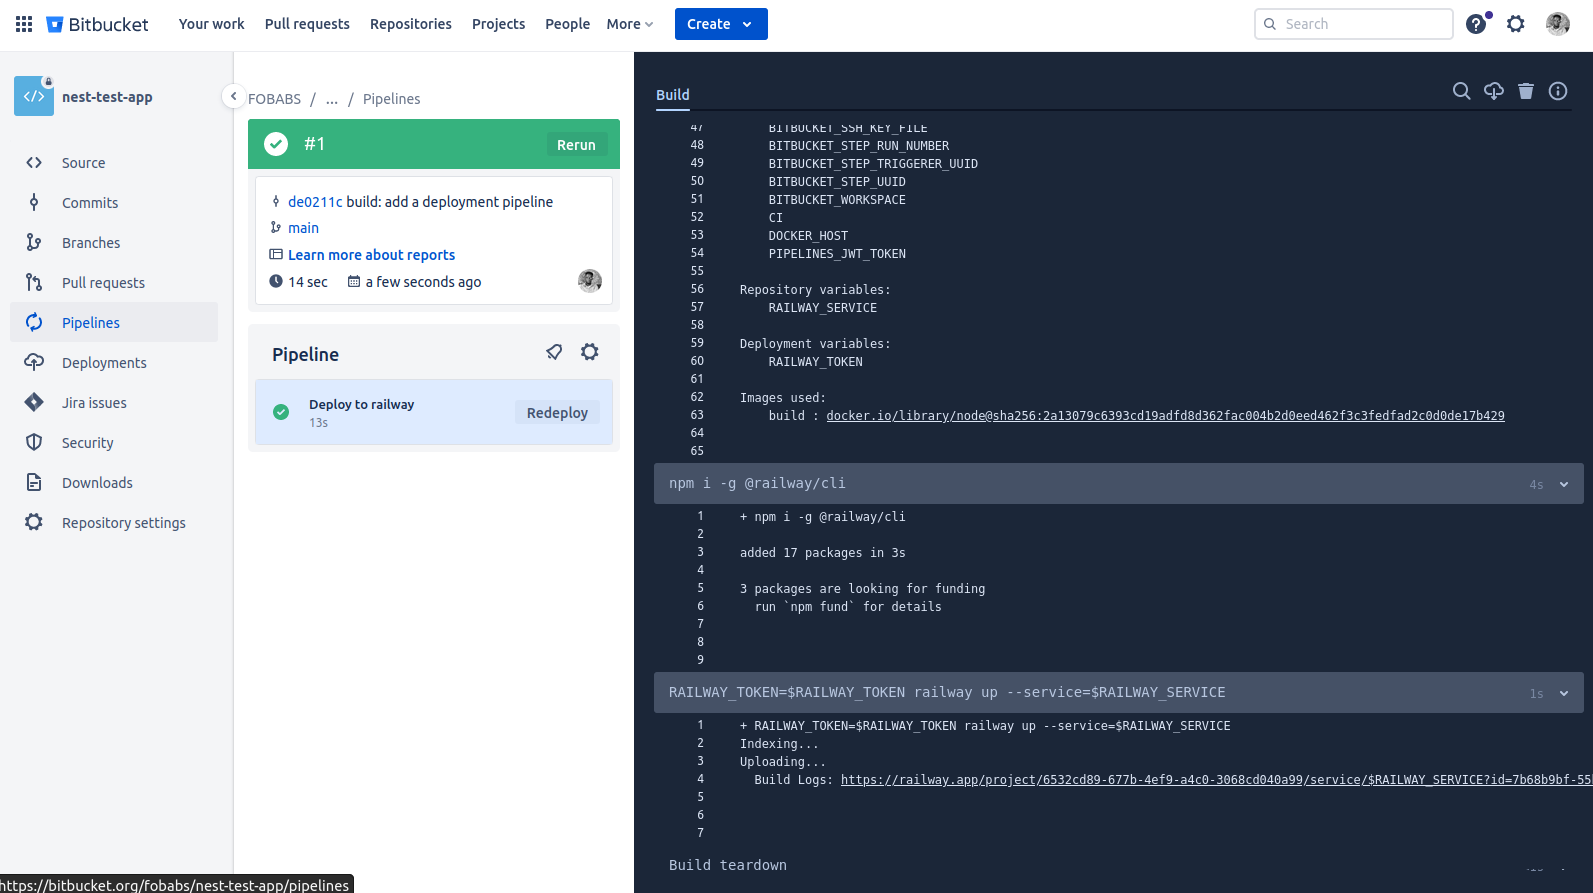
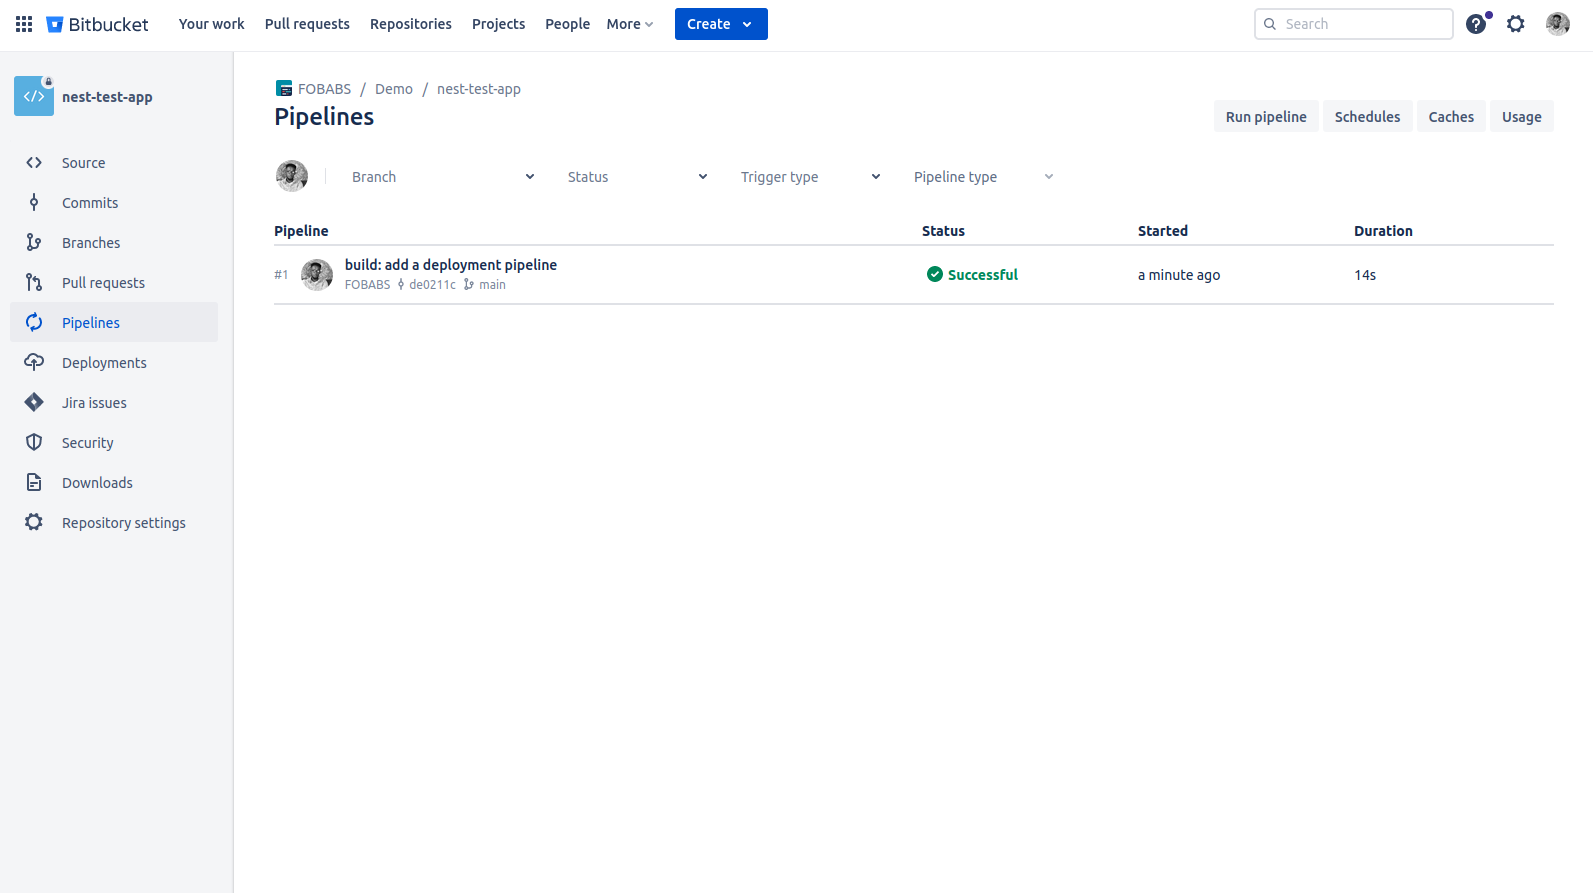
Bravo! Now let's return to Railway to observe your deployment.
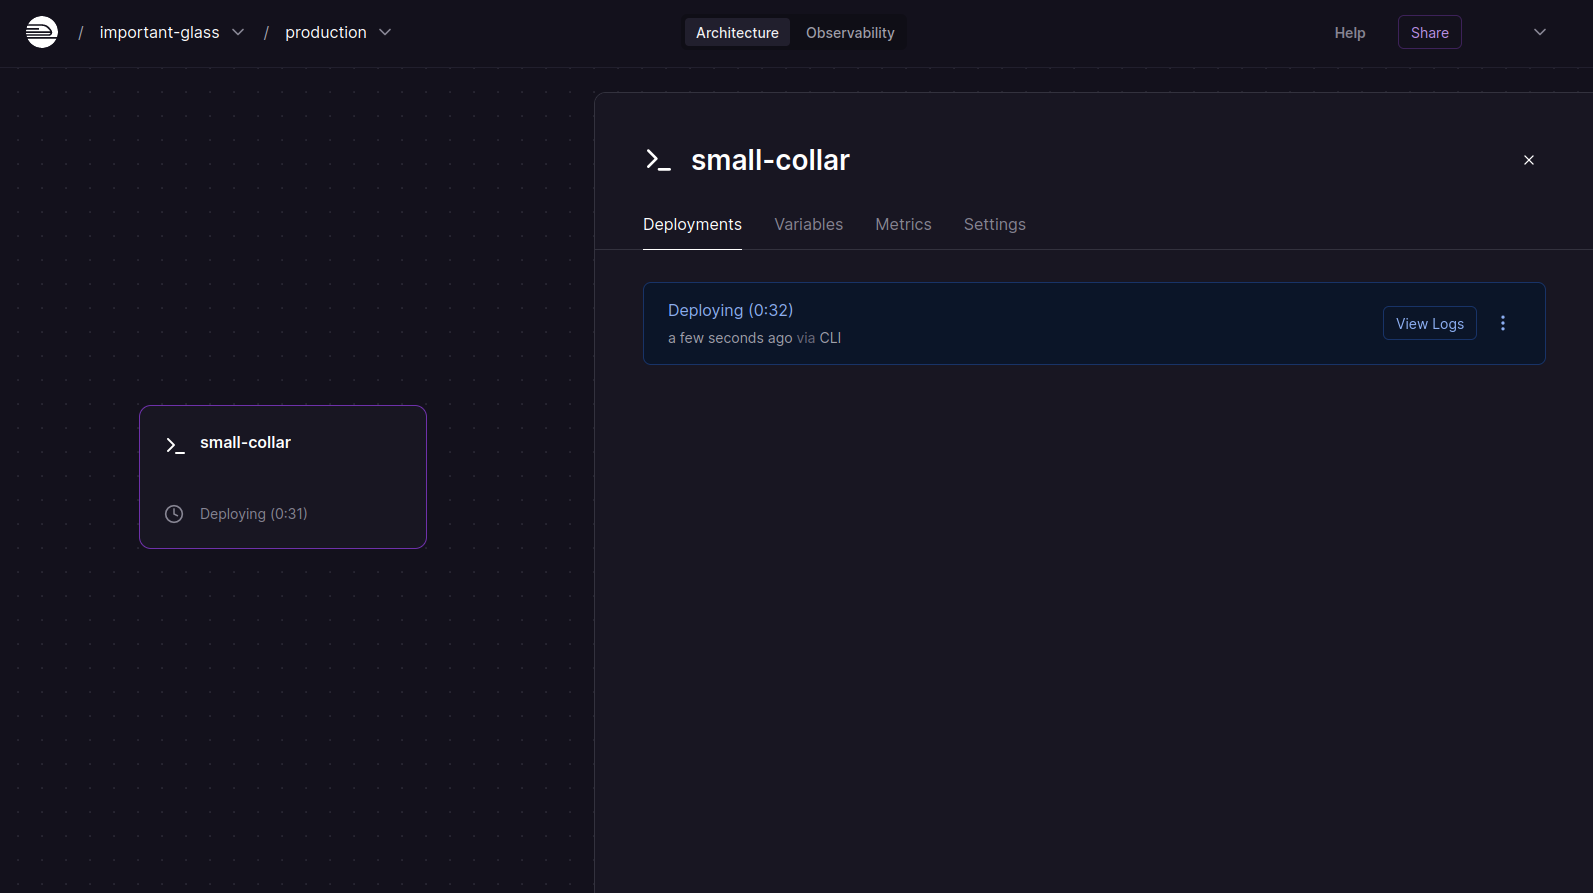
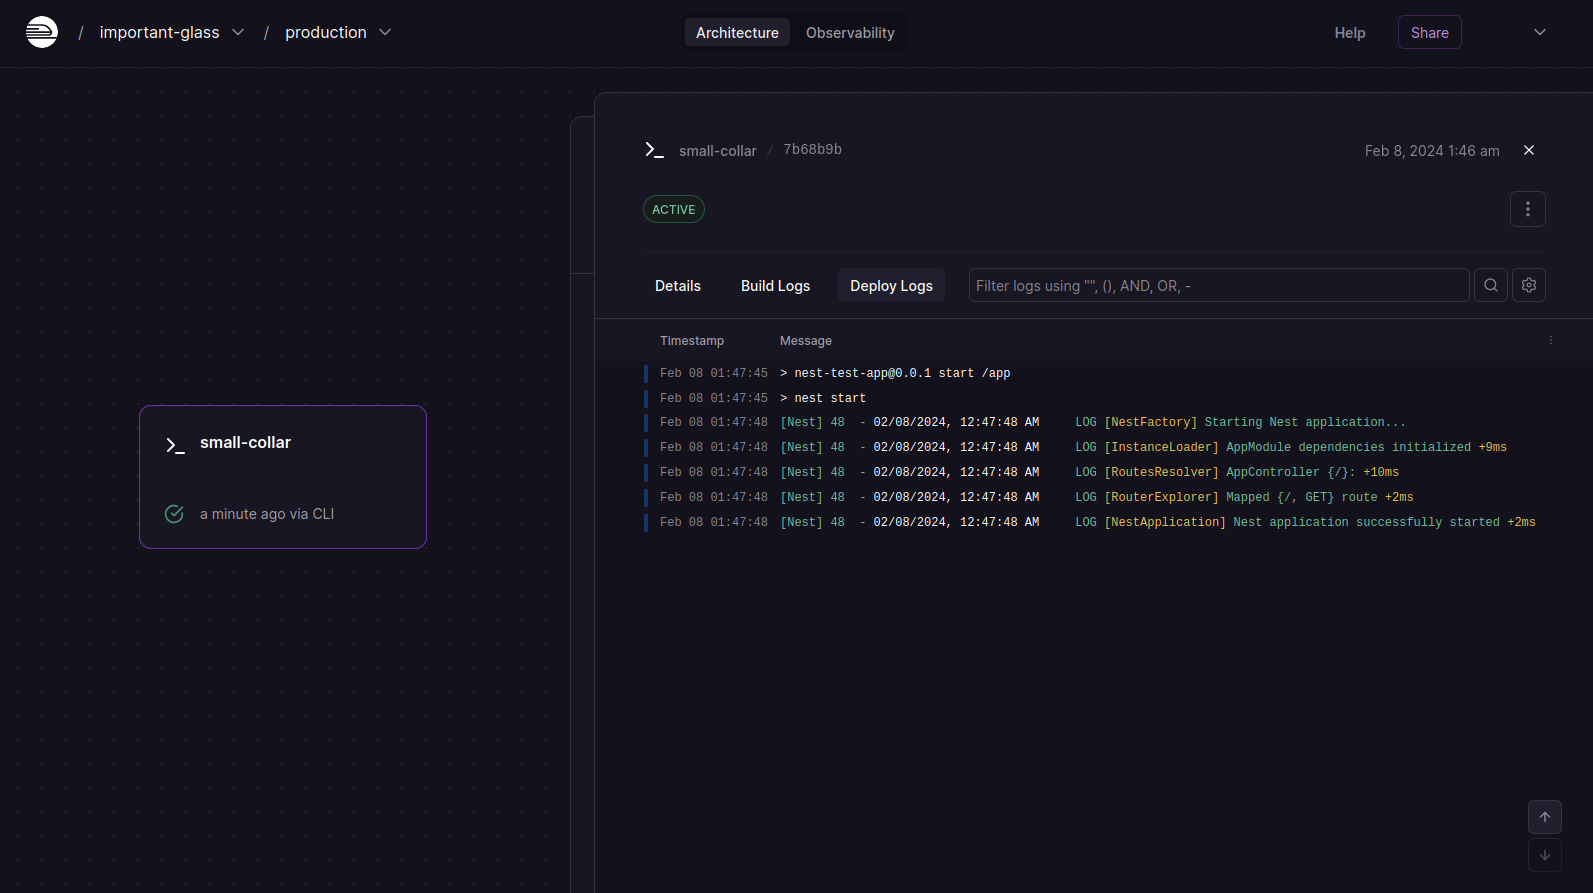
You can see that your project is now being deployed. After it is successful, you will see the following:
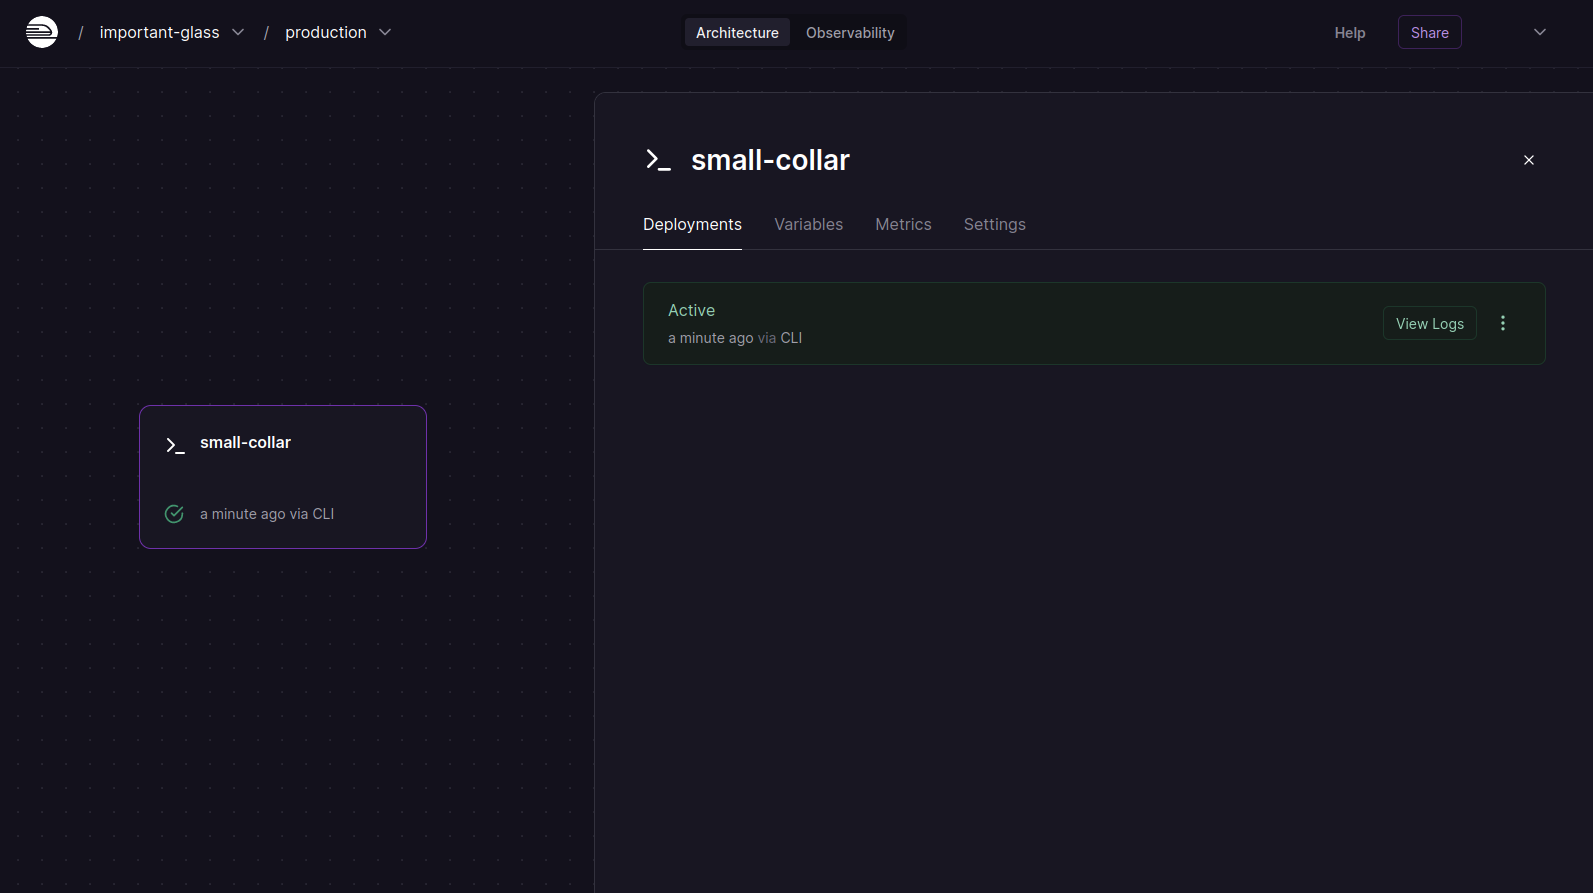
At this point, your project has been successfully deployed. You may view the logs and see them for yourself.
Now you can easily deploy from Bitbucket to Railway. My work here is done till we meet again.
P.S. You can also use this pipeline for other projects.
Subscribe to my newsletter
Read articles from FOBABS directly inside your inbox. Subscribe to the newsletter, and don't miss out.
Written by
