Safely Deleting a Virtual Machine Without Losing Its Resources: A Step-by-Step Guide
 AKEH EUNICE
Introduction
Users can run various operating systems and apps on a single physical computer thanks to virtual machines (VMs), which are crucial parts of today's computing infrastructure. Efficient management of virtual machines (VMs) requires not only the creation and operation of these machines but also the knowledge of how to properly remove them from the system without destroying any of the related resources. Go over any dependencies or linked resources that might be impacted carefully before eliminating the virtual machine. Verifying dependencies on storage volumes, network interfaces, security groups, and other components connected to the virtual machine (VM) is part of this process. As you take the necessary steps to minimize any possible disruptions, make sure you are aware of the consequences of removing these resources.
In this guide, we'll explore the process of deleting a VM while preserving its resources intact.
GUIDELINES
STEP 1. Firstly, Log into the Azure portal using this URL- https://portal.azure.com/
Log
STEP 2. Create a Virtual machine using the link as a guide
https://ladyintech.hashnode.dev/a-beginners-guide-to-creating-a-windows-11-pro-virtual-machine-in-azure
Then "Click" "Home" on the top left corner of your page
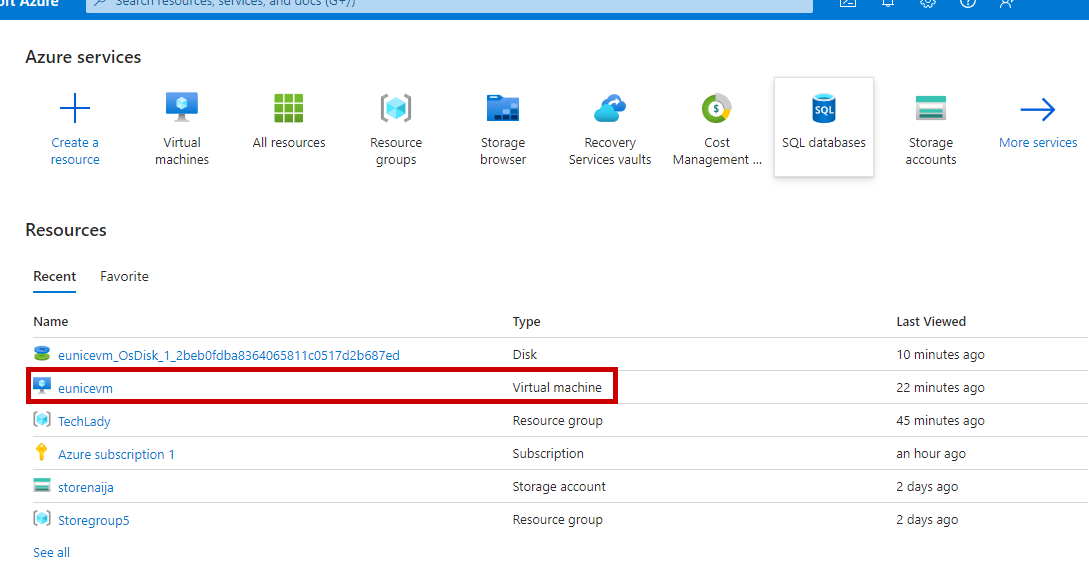
STEP 3a. "Click" on the VM you want to delete
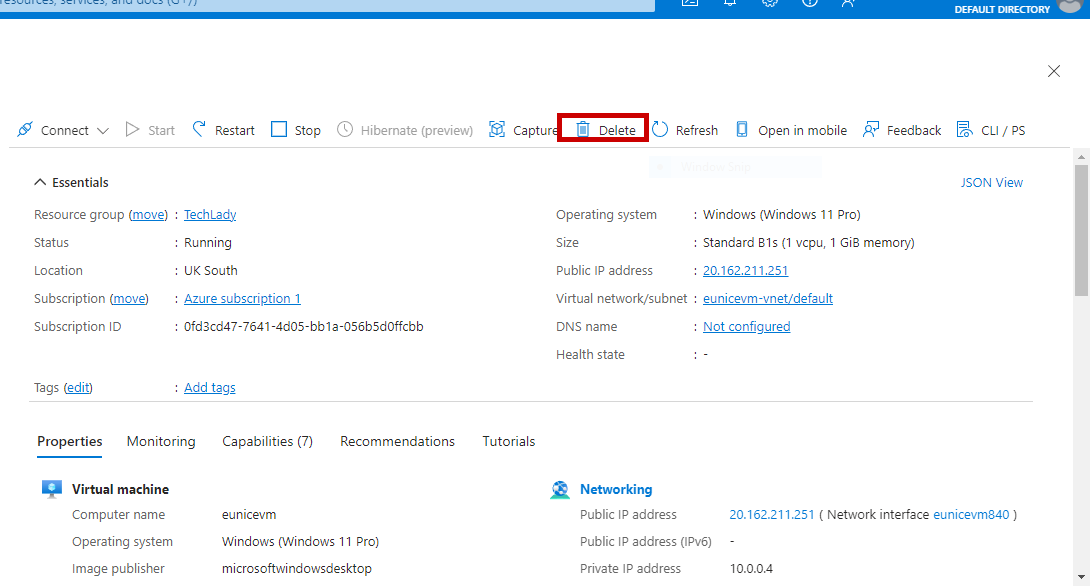
b. "Click" "Delete"
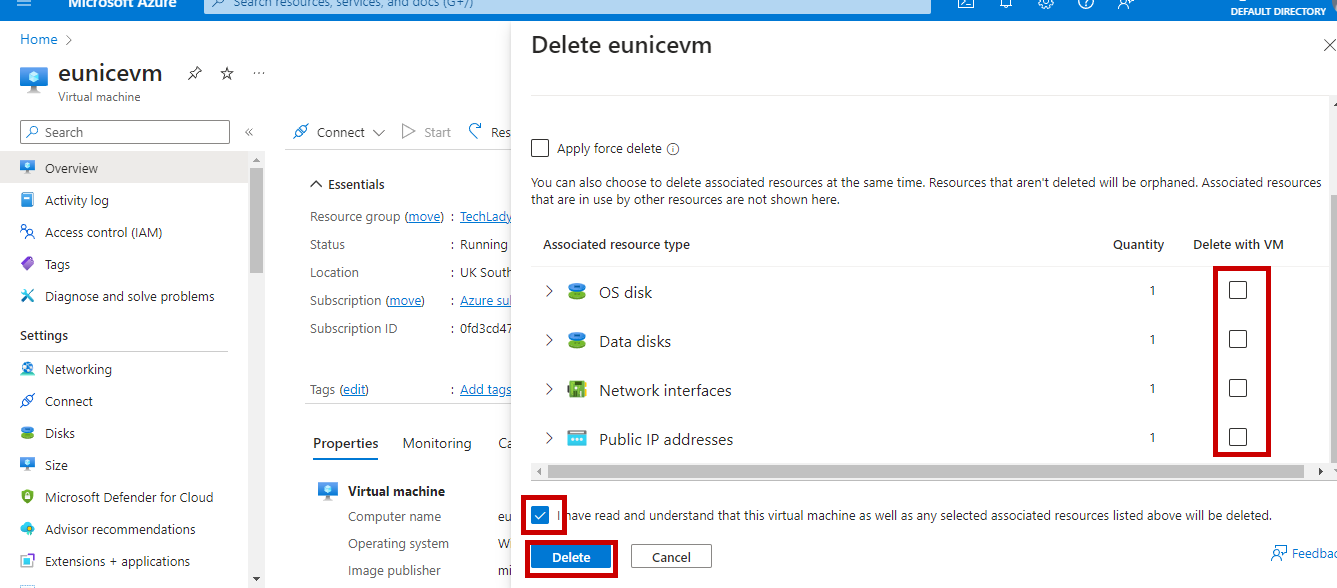
c. The right page will open just as the image below with the 3 associated resources ticked as a default setting in azure
NOTE: To be able to reinstall your VM do not delete the Associated resources type.
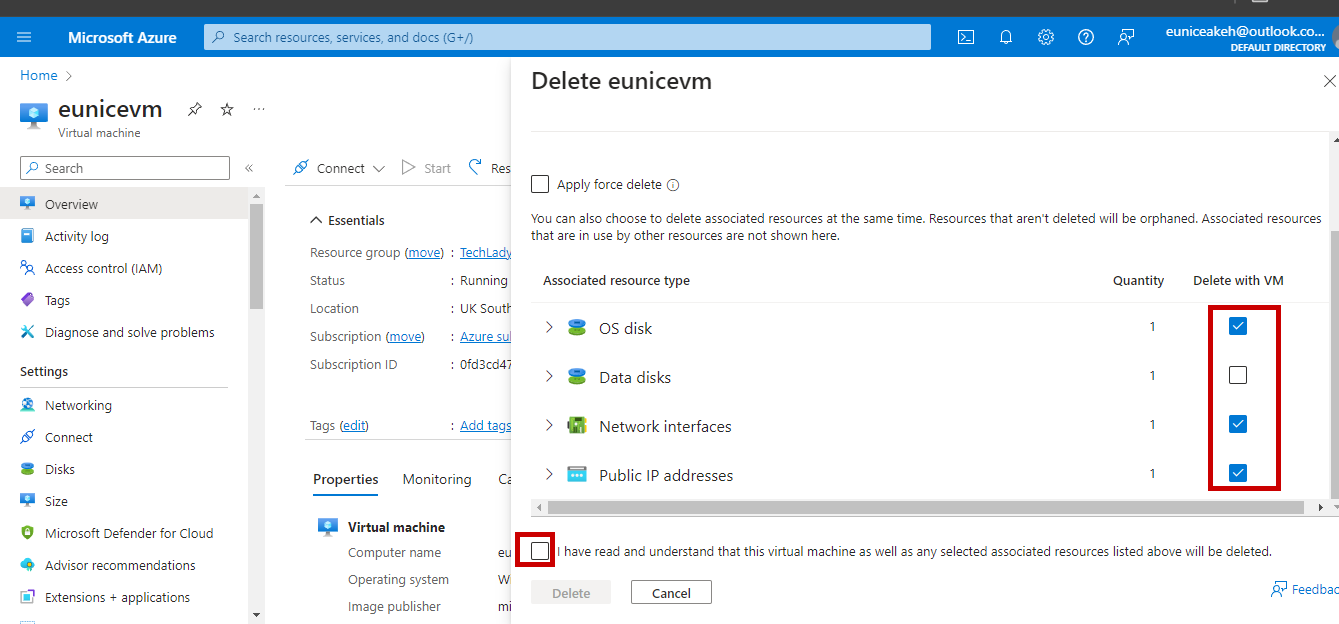
d. Preserve Associated Resources When deleting the VM, ensure that you select the option to preserve associated resources. This prevents the deletion of any linked assets such as disks, networking configurations, or security groups. By preserving these resources, you can safely remove the VM without losing its underlying components.
"Uncheck all the boxes" ,It is a must to keep the OS disk because that is what will be used to restore the VM
"Tick" the box on the left corner of the page
Then "Click" "Delete"
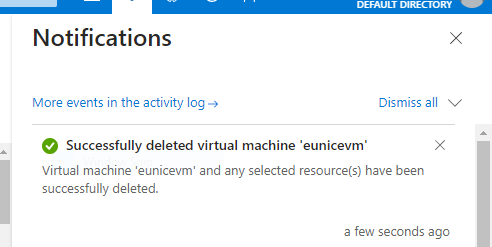
e. Our Virtual machine has been successfully deleted
Next Go to "Click" "Home"
f. This ids the OS disk you preserved

Step 4. Cleanup and Review After deleting the VM, take some time to review the remaining resources and configurations in your environment. Make sure that all associated resources are still intact and functioning as expected. If necessary, perform any cleanup tasks to remove any leftover artifacts or unused resources.
NOTE:
Consideration for Cost Optimization Deleting a VM doesn't necessarily mean eliminating all associated costs, especially in cloud environments where resources are billed separately. Keep an eye on any lingering costs associated with preserved resources and consider optimizing your resource allocation to minimize expenses.
Conclusion
It takes careful preparation and execution to remove a virtual machine without losing the resources that go along with it. You can safely remove a virtual machine (VM) from your environment without damaging its underlying components by following the instructions provided in this article. To prevent any unintentional disruptions, don't forget to analyze dependencies, document resources, and take measures. You can preserve a pristine and effective virtualized infrastructure without compromising priceless assets with the right management.
Watch out for my next blogpost, I will be using these preserved Associated resources to reinstall my deleted VM.
Subscribe to my newsletter
Read articles from AKEH EUNICE directly inside your inbox. Subscribe to the newsletter, and don't miss out.
Written by
