How to translate navigation menu on Experience Cloud
 Salla Tero-Anandamurthy
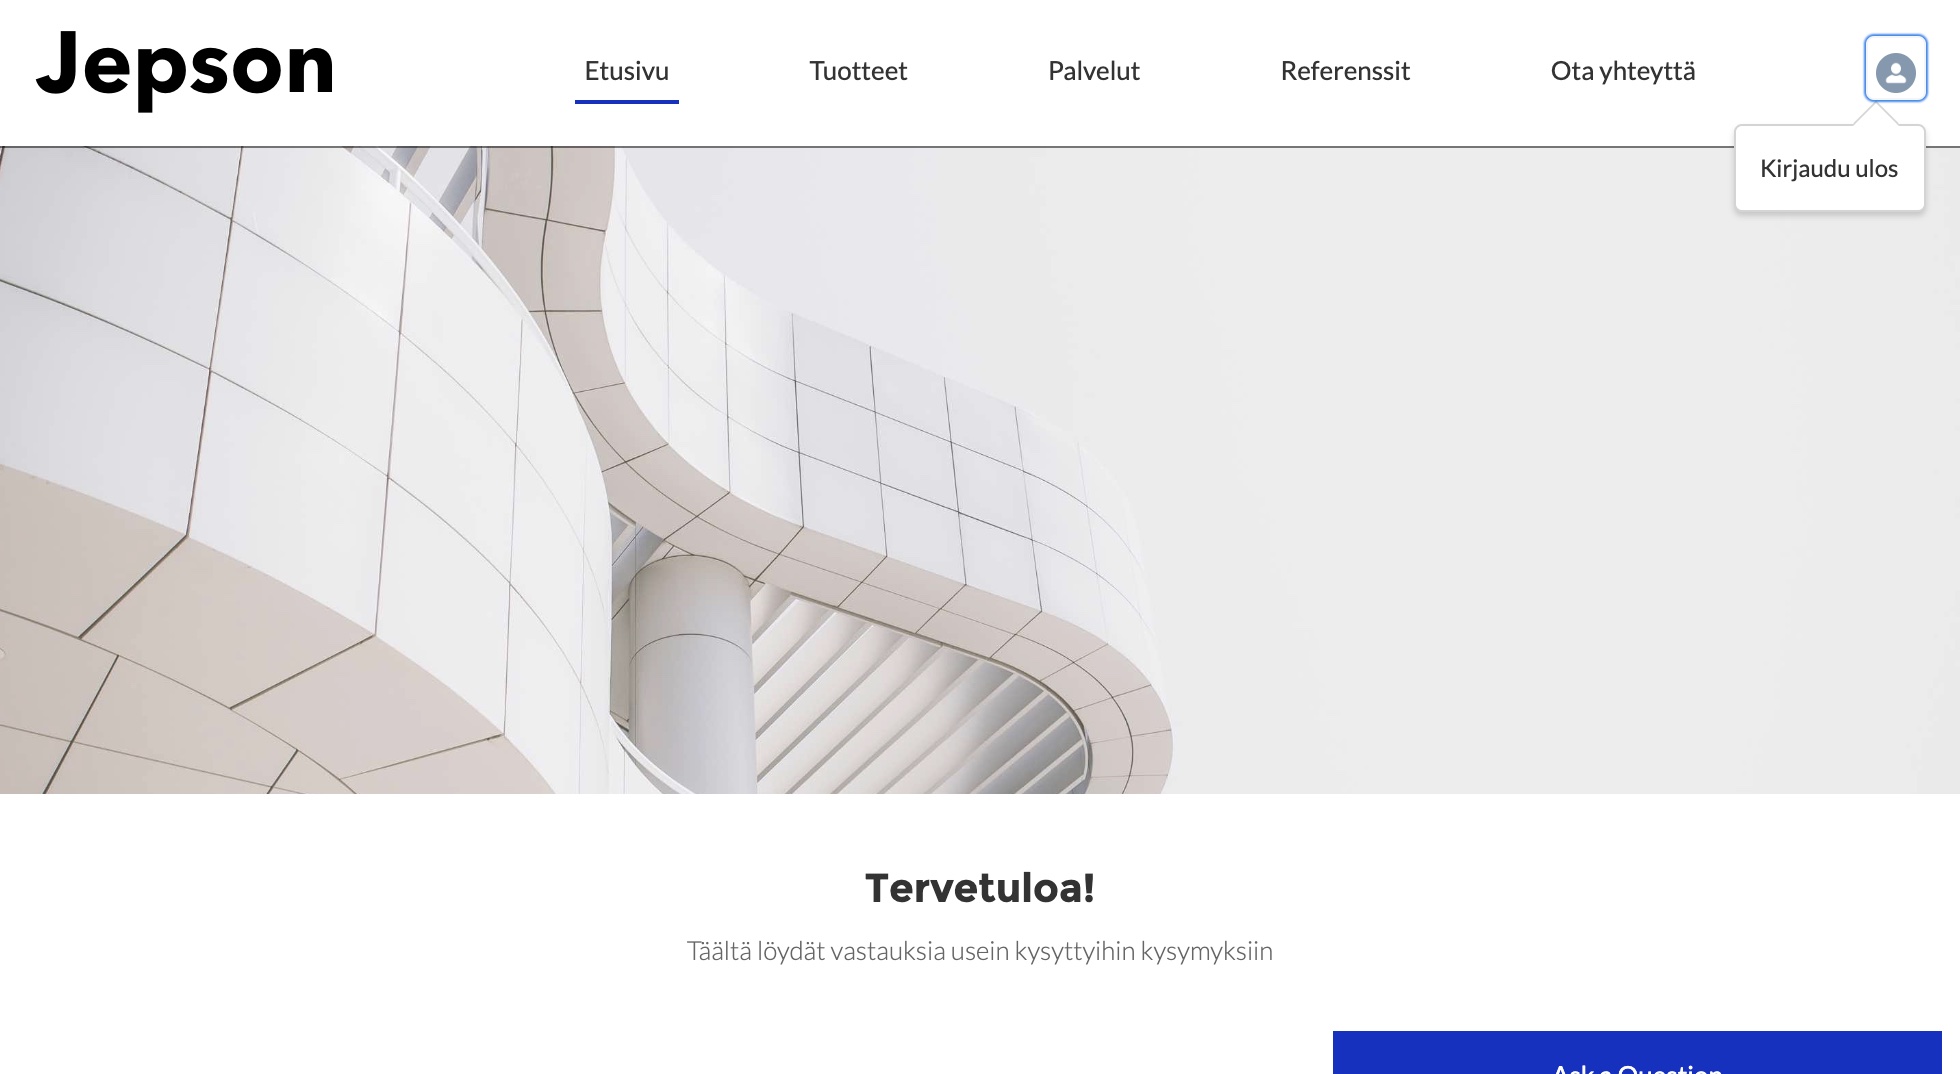
Translating navigation menu items for your Experience Cloud site is quite easy, with the exception of Home navigation item, which needs a bit more work. In this article I will walk you through the needed steps. Here we are using an Aura Experience Cloud template.
Before we can actually do the translations, make sure your org and site are both setup with the needed translation and language settings. More info here.
When using a ready-made theme
If you are using a ready-made theme, like Jepson, your site might look something like this.
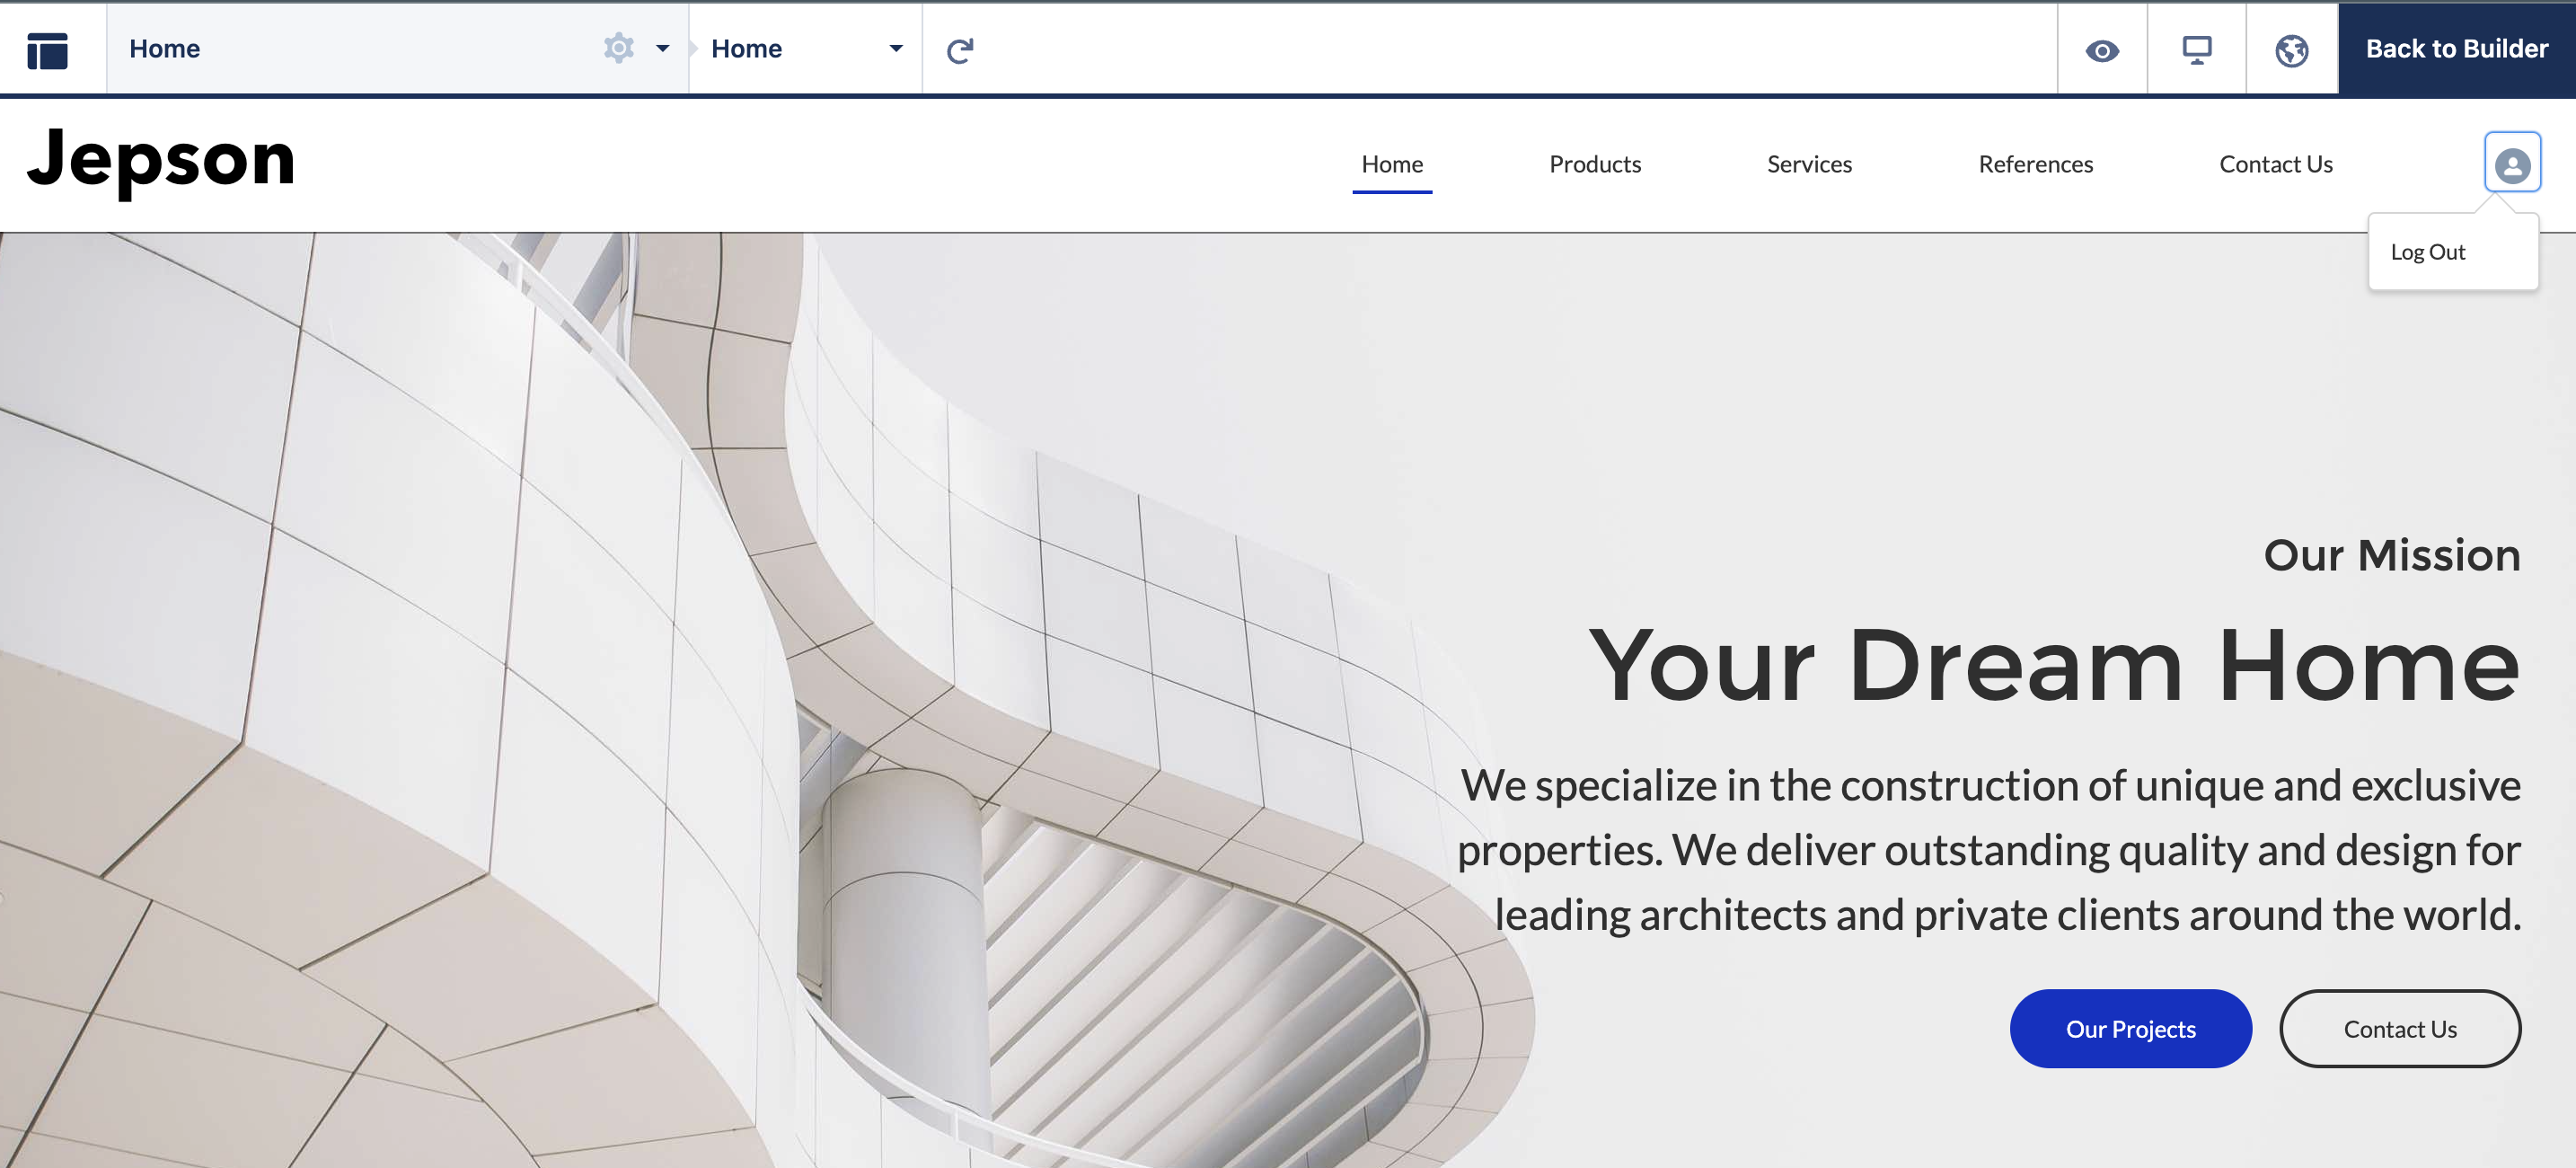
The look, layout, and functionality of the navigation menus come as part of the theme. This includes both the page navigation menu, as well as the user profile menu, which is what you see when you click your avatar logo.
You can define the actual navigation items in Settings > Navigation. Now, let's see how the navigation looks like in the Preview mode with a different language, before we have done any translations. In preview mode click the globe icon and select your language.

The first navigation item, Home, has been automatically translated by Salesforce. If you need to override this translation, read further, we will address this in a bit. In the meanwhile, let's translate the other ("normal") navigation items.
Translate navigation items in Translation Workbench
Go to Salesforce Setup > User Interface > Translation Workbench > Translate.
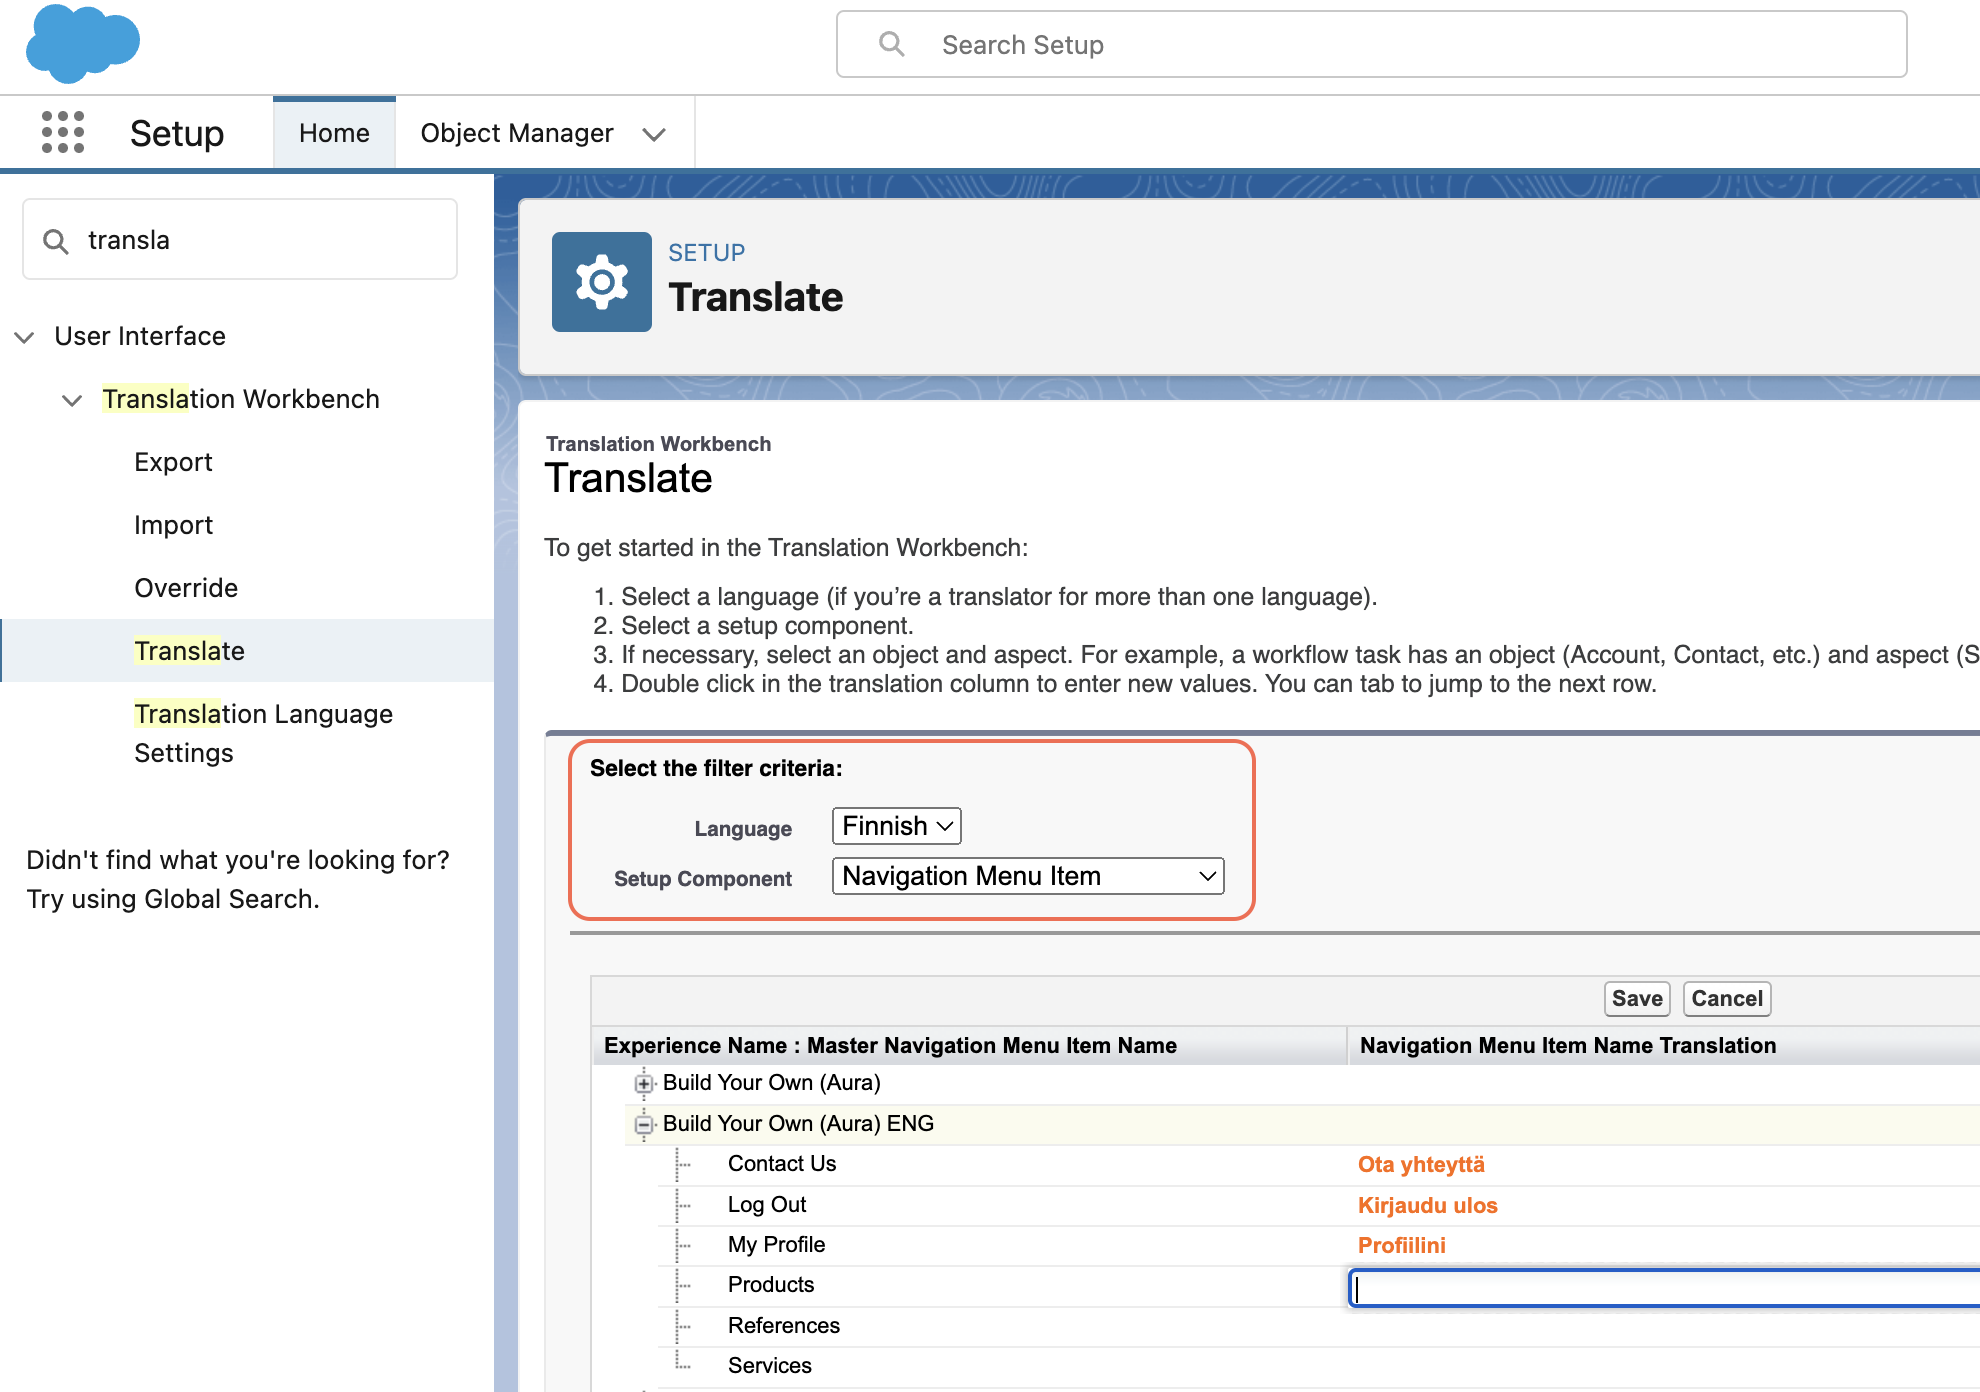
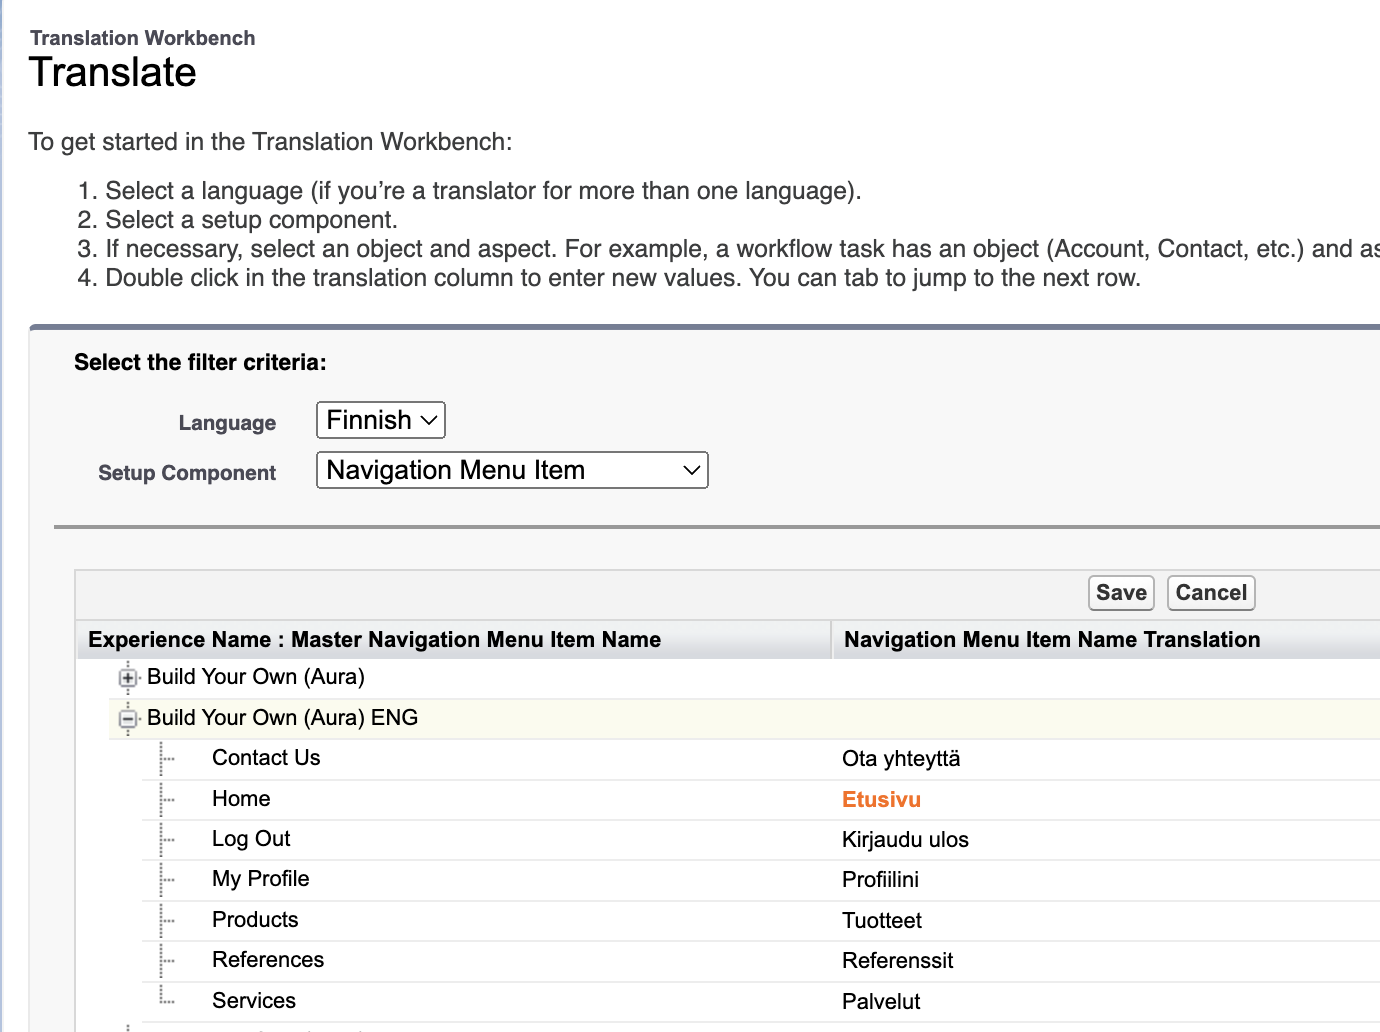
Select the language you want to translate to and as the setup component, select Navigation Menu Item. From the list of Experience Sites, open the one you are translating for. Here are all your navigation items you can translate. To translate, just double click the cell in the second column and write your translation. Click save.
Now go back to Experience Builder and see how your site looks like, when viewing in the language you just translated.

Overriding translation for Home navigation item
One thing to note. The labels you see are those you just defined in the Translation Workbench, except the first tab, Home, which is automatically translated by Salesforce.
For some languages this might be ok, but in Finnish it's a bit off. It seems there is no way to override this translation, at least no standard way. So if you need to get your hands on it, here's what you can do.
Add new Navigation item that points to Home page
Edit your navigation menu by adding a new menu item under the disabled (default) Home item. You can name it anyway you like. Make sure it points to the right place.
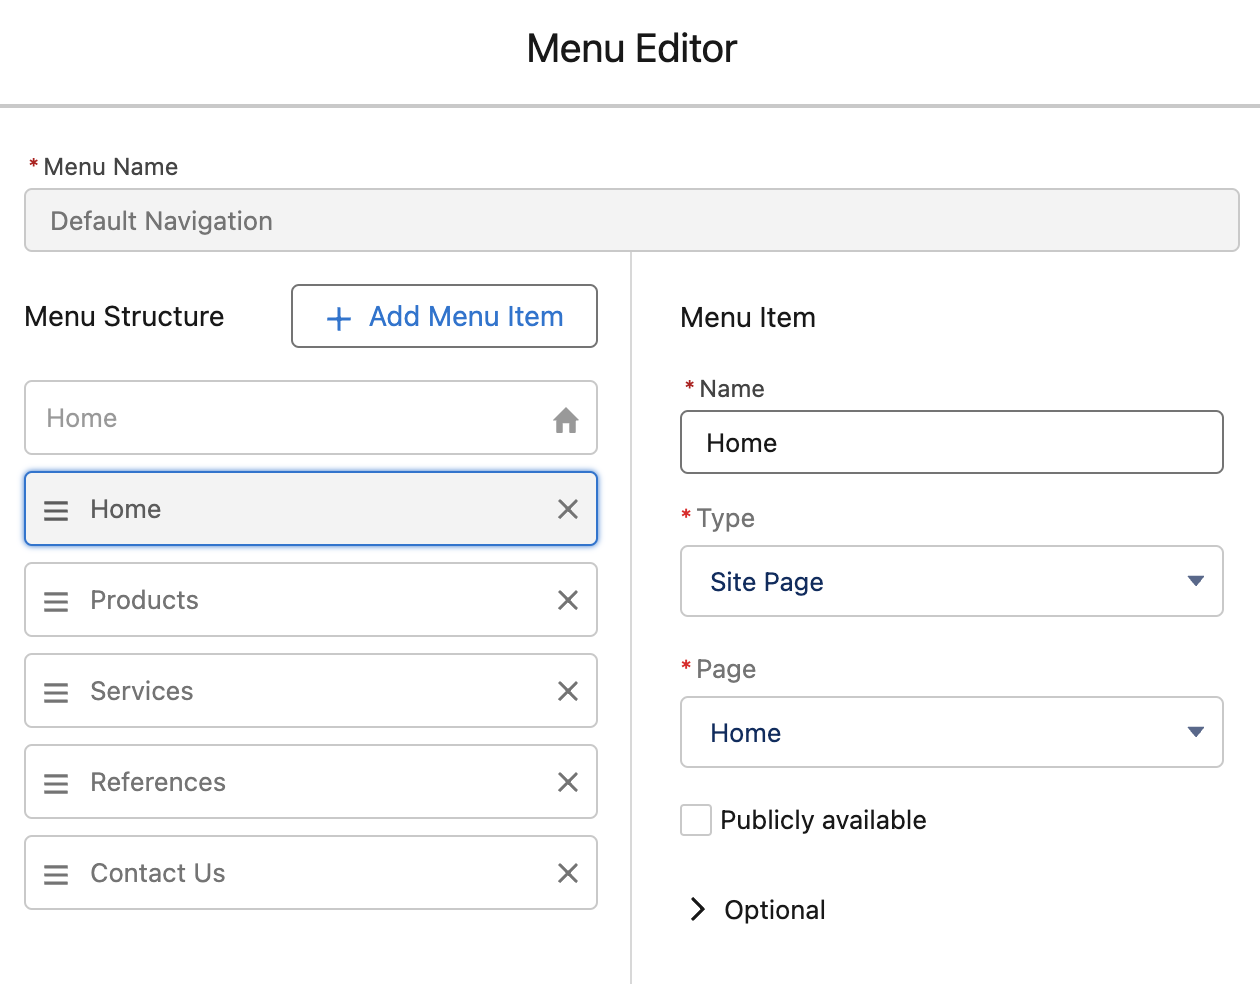
Now your navigation bar looks a bit funny, so let's fix it.

Override CSS to hide the default Home item
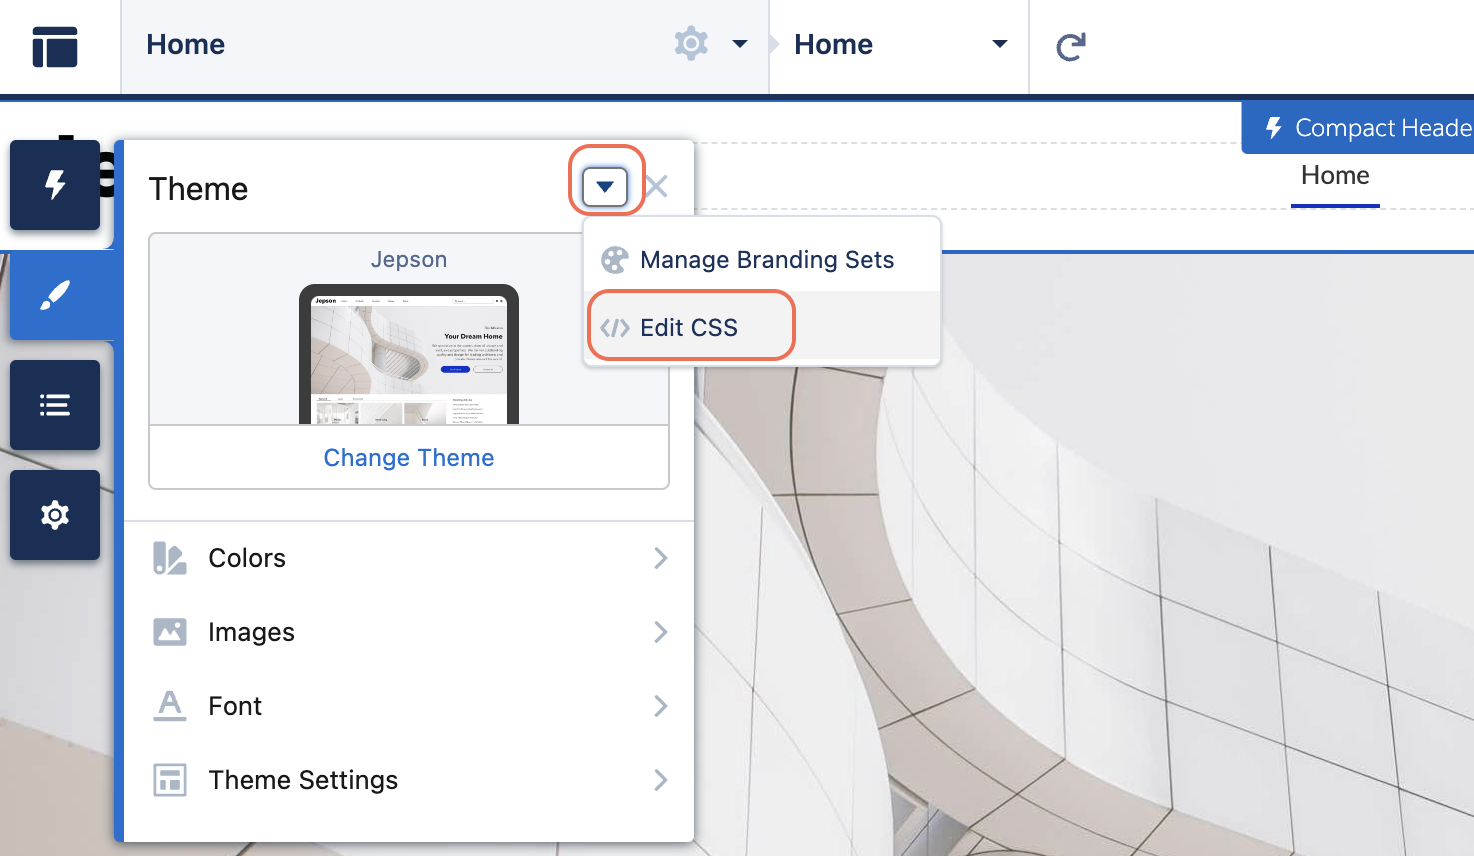
Go to Theme and click Edit CSS from behind the arrow menu. In the popup, confirm you want to use overrides. Add this piece of code in your CSS editor and click save.
.mainNavItem:first-of-type {
    display: none !important;
}
This will hide the first navigation item, that is the disabled (default) Home item, that we don't want to use anymore. And voilà! We can already see in the builder that the duplicate Home item has disappeared.

Now you can translate your Home navigation item in the Translation Workbench like you did previously with the other navigation items.
When using a custom theme layout
Everything we've covered so far in this article, holds true even if you are using a custom theme layout. To have Salesforce automatically translate the navigation items based on the translations you have defined in the Translation Workbench, you need to make sure your custom navigation component is Aura based. Even if you could write a custom LWC component as your navigation and use this in the custom theme layout, translations do not follow. So best to stick to Aura if you are using an Aura site.
Here is an example of how to build your custom theme and navigation in your Aura site.
Thanks for reading. I hope this article helped you with your translation activities!
Subscribe to my newsletter
Read articles from Salla Tero-Anandamurthy directly inside your inbox. Subscribe to the newsletter, and don't miss out.
Written by
