AWS Serverless with Lambda & API Gateway Hands-On
 AutOps
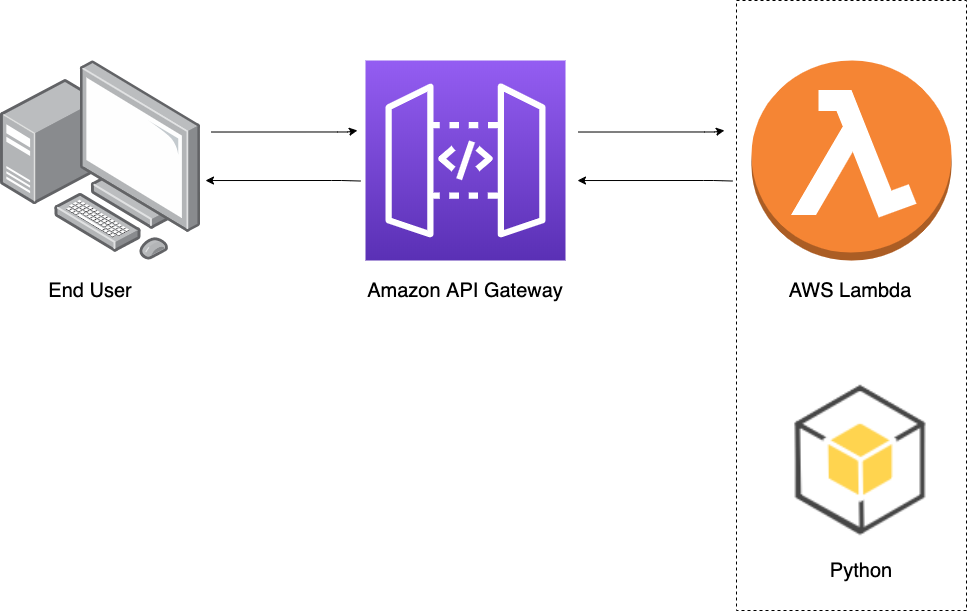
Step 1

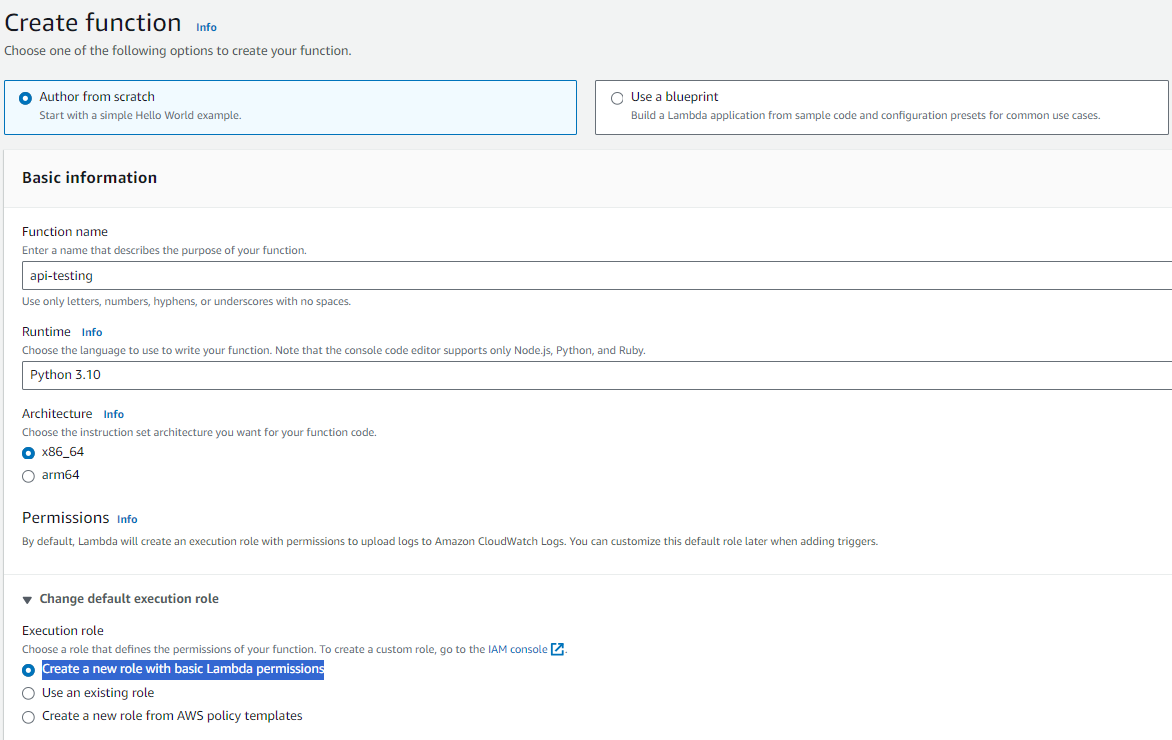
Create a Lambda function with the following configurations:
Function name: api-testing
Runtime: Python 3.10
Architecture: x86_64
Permissions -> Execution role: Create a new role with basic lambda permissions
Step 2
AWSGI
FlASK
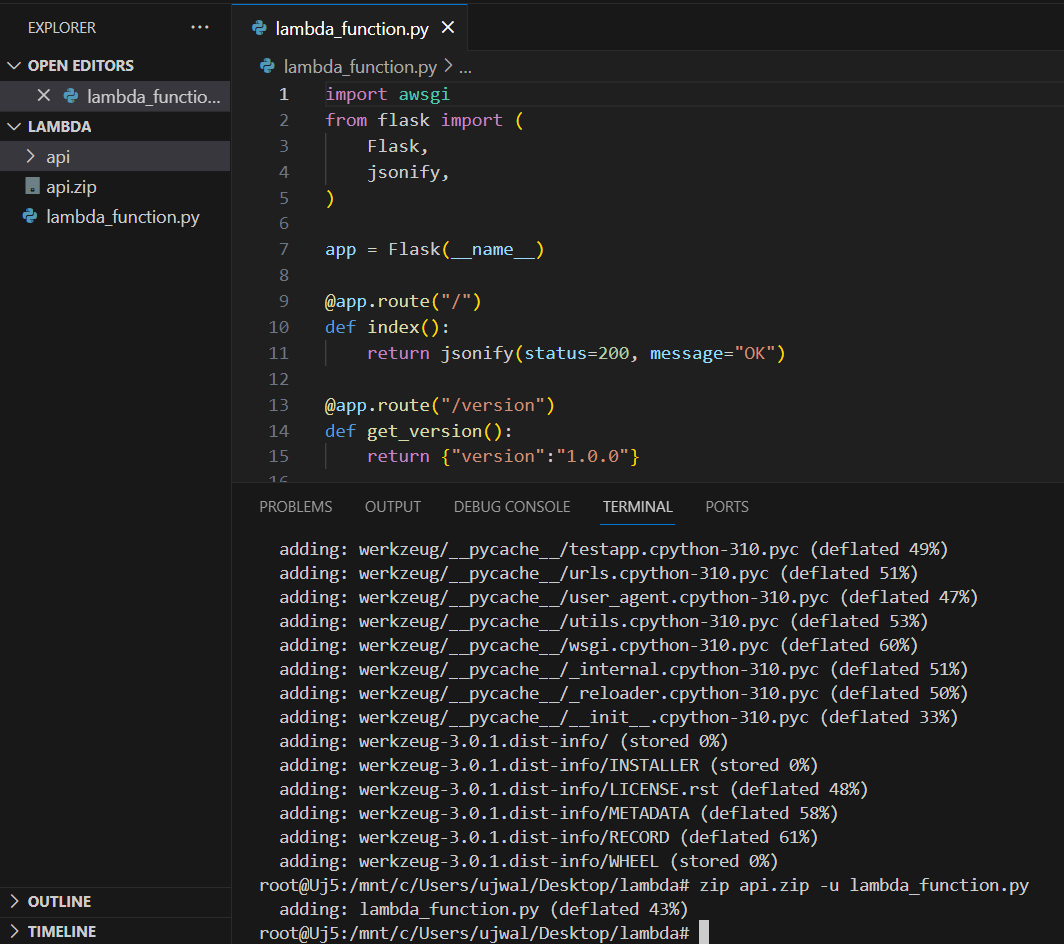
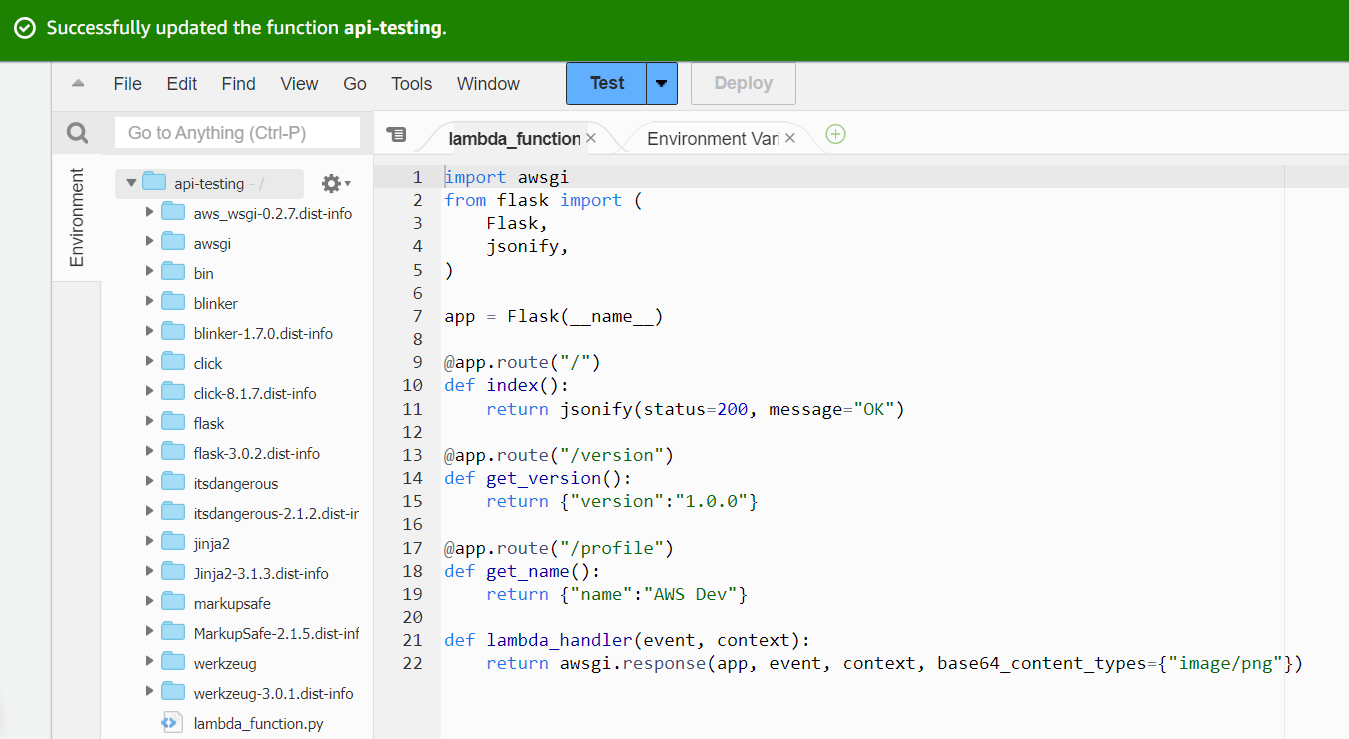
import awsgi
from flask import (
    Flask,
    jsonify,
)

app = Flask(__name__)

@app.route("/")
def index():
    return jsonify(status=200, message="OK")

@app.route("/version")
def get_version():
    return {"version":"1.0.0"}

@app.route("/profile")
def get_name():
    return {"name":"AWS Dev"}

def lambda_handler(event, context):
    return awsgi.response(app, event, context, base64_content_types={"image/png"})
# Install pip on ubuntu(if not):
sudo apt install python3-pip -y

# Install zip on ubuntu(if not):
sudo apt install zip -y

# Install awsgi and flask in api directory
pip install aws-wsgi flask -t api

# zip the code of api directory
(cd api; zip ../api.zip -r .)

# Add lambda_function.py file in zipped directory
zip api.zip -u lambda_function.py
Step 3

Step 4

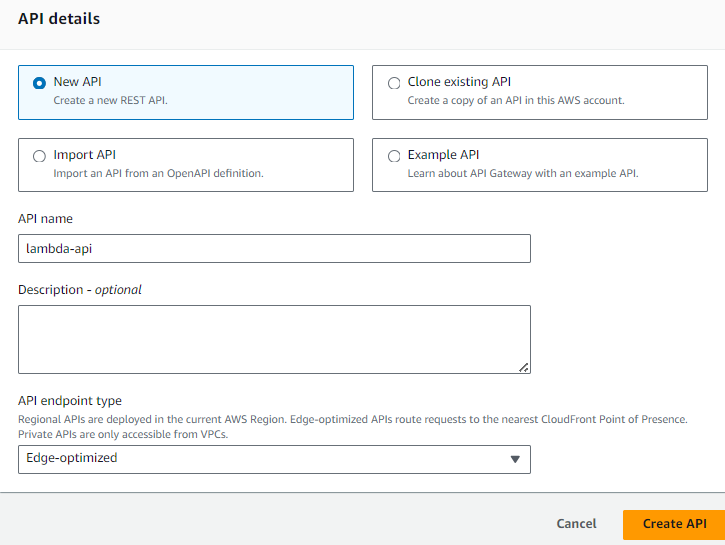
Select the following API Details:
Choose New API
API name: lambda-api
API endpoint type: Edge-optimized (it can be accesible from browser)

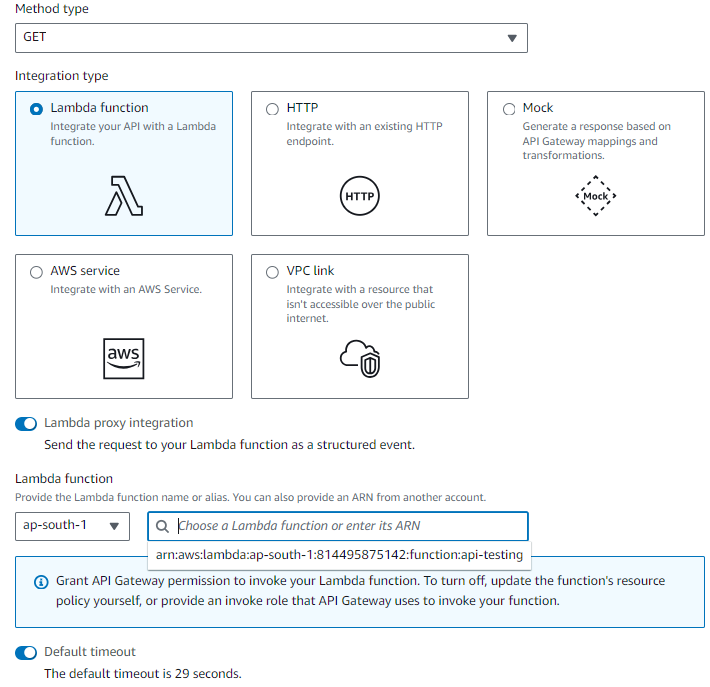
Fill in the following method details:
Method type:GET (To get the value)
Integration type:Lambda function (API integration with lambda)
Lambda proxy integration:ON (For sending request to lambda)
Lambda function: choose region and lambda function ARN
Default timeout:default (29 sec)

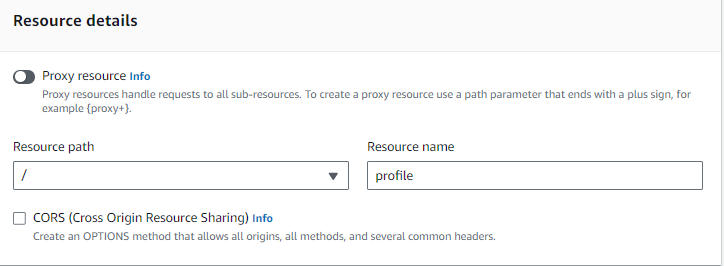

Step 5

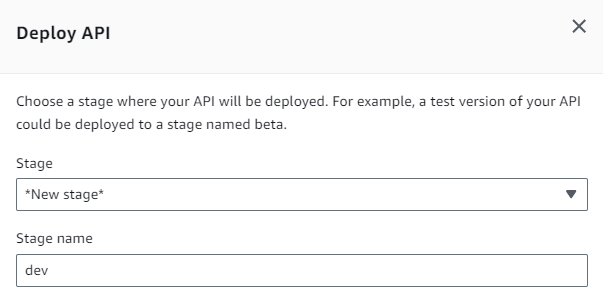
Fill in the following Deploy API configurations:
Stage: \New stage**
Stage name: dev
Description: optional
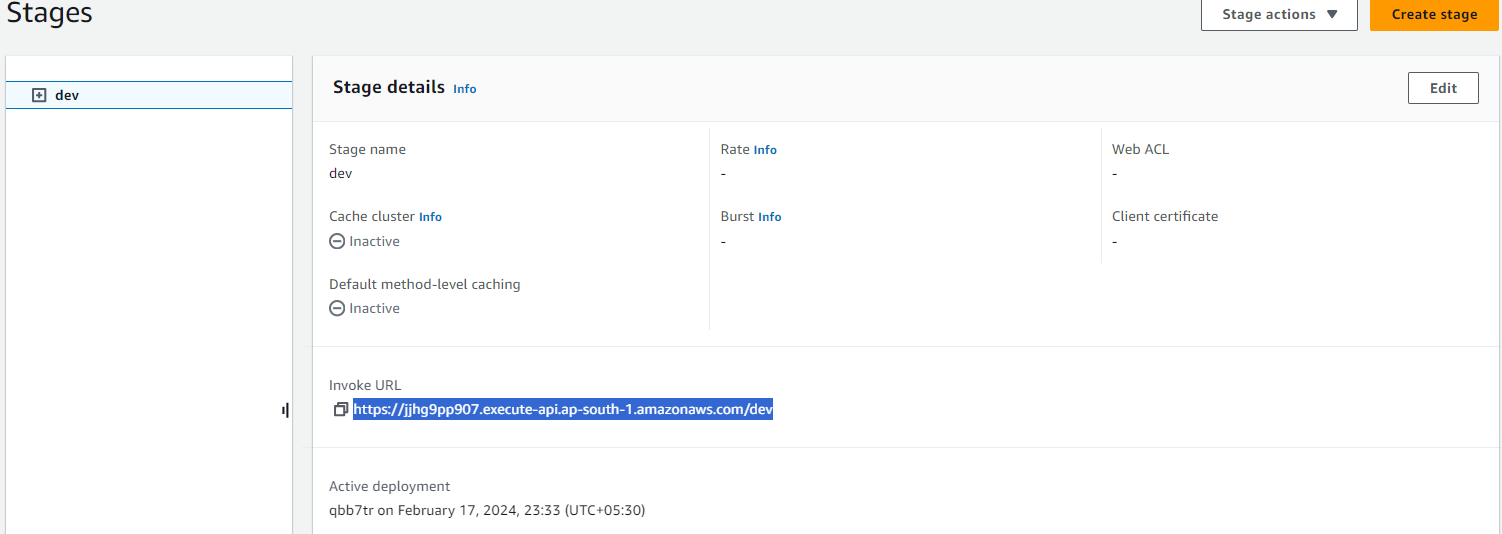
Copy that URL and paste it into the browser; you will get the following result for a GET API of the root.

Testing version API: you will get result as follows:

Testing profile API: you will get result as follows:

Conclusion:
We have successfully created an automation task with the help of AWS Lambda and the Amazon API Gateway, and it will perform the following actions:
-> Whenever any of the above APIs are called by any user, it will trigger the Lambda function.
Final Step
Cleaning Up
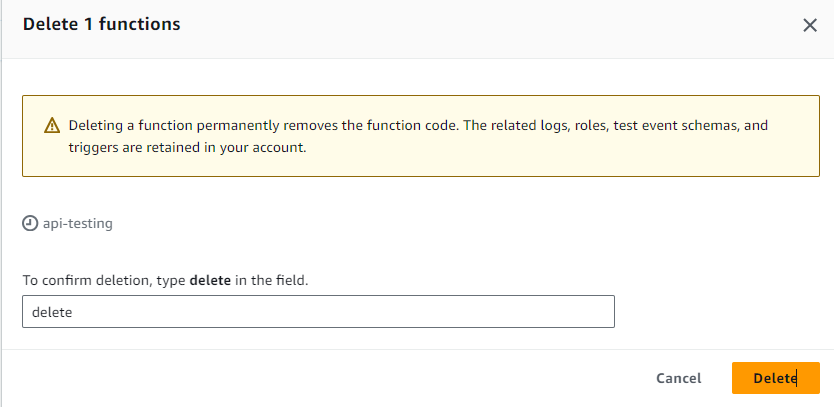
Delete Lambda function
❎Go to the Lambda console -> Select function to delete -> Click on Delete -> Type delete in pop-up -> Delete
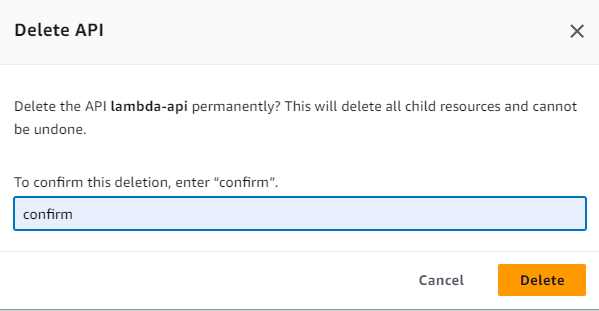
Delete API Gateway

- If you find this blog enjoyable, please show your appreciation with some claps and stay connected by subscribing to our newsletter. This way, you won’t miss any updates from AutOps.
Thank you for reading...🙏🙏🙏
Subscribe to my newsletter
Read articles from AutOps directly inside your inbox. Subscribe to the newsletter, and don't miss out.
Written by
