Download All Your Photos From Google Photos Using Google Takeout
 Michael Akinyemi
Introduction
Are you looking to download your entire Google Photos library? With thousands of photos and videos saved over the years, Google Takeout provides the perfect solution to export all your images for easy backup or to switch online services. In just few steps you can download a complete archive of every photo you have stored with Google. This guide will walk you through the full process start to finish.
Why?
Why Download Your Photos?
There are several great reasons you may want to download your full Google Photos library locally:
Backup your images - downloading serves as another form of protection if files were ever lost online.
Switch services - if you want to move to another cloud photo provider, having local copies makes transfer easier.
Store pictures long term - with an offline archive, you have full control no matter if an online service changes or closes down.
Access files anytime without Internet - having pictures on your own drive allows reliable access when offline.
Overall, downloading using Google Takeout gives peace of mind that you have full ownership copies of every precious photo.
Preparation for Download
The first step is making sure you have enough free storage locally to hold your entire Google Photos collection before you start the export process. High resolution photo libraries can easily occupy gigabytes (or even terabytes) of space depending on the number and sizes of all images. Check your available hard drive room across your personal devices or external portable drives where you intend to download the archive. Also confirm sufficient quota in your cloud storage if downloading there directly (such as OneDrive, Dropbox etc). Clearing up capacity beforehand avoids roadblocks later when the massive download kicks off.
Additionally, have stable broadband connection ready for this significant data transfer, especially if your photo collection numbers in the thousands. Even fast 500 Mbps network would take a couple hours for a 1 TB download. For even larger libraries you’re probably looking at closer to a full day.
Request Your Google Photos Archive
Once storage and network access are prepped, head over to takeout.google.com. This is the home of Google Takeout – a self-service tool to create comprehensive archives of your data stored in Google services. Upon first visiting, you’ll go through an account verification process to access the dashboard.
From within the main interface you can select the products to download data from. Photos will likely have the bulk of your imagery, but also consider Drive and Gmail as they may house more pictures. Enable the checkbox next to Photos (and any other desired services). Then scroll down and choose file type to export – there will likely be just a single “All photo albums” option. For file format, stick with the preset .zip format for wide device compatibility when transporting the archive.
Next choose delivery method – download directly to your local device or store in cloud storage. Lastly start the export! Depending on volume of images Google will prepare an archive .zip file behind the scenes, email a notification upon completion, then facilitate download. Very large libraries may be split over multiple zip files. Disk space and patience will be needed as this process runs – give it at least several hours up to multiple days for libraries with hundreds of gigabytes. Periodically check email (including spam folder) for completion notices.
Transfer and Organize Photos
Once Google Takeout has finished compiling and exporting your photo archive it becomes available for download for two weeks. You should receive email as soon as your files are ready to access. Sign back into takeout.google.com to locate the prepared photos archive(s) along with direct download links if you didn’t already push straight to cloud storage or local drive originally. Retrieve the .zip files then get them transferred onto your target long term storage location whether that’s an external hard disk on your home network or perhaps a rented cloud hosting account. If working with exceptionally huge libraries exceeding storage limits, you’ll likely need to selectively exclude certain eras of media until achieving a manageable size.
As last mile in the migration process from Google Photos into permanent personal custody, carefully organize your newly acquired image archive into appropriate folders by date or subject depending on preferences. Take your time here to avoid a convoluted mess of thousands pictures and videos. Finally affirm copies landed smoothly without any noticeable corruption – though Google engineered redundancy appropriate for sensitive memories.
Enjoy peace of mind going forward knowing you have full ownership of comprehensive collection of your most precious digital images safely secured independent of reliance on any cloud service! Revisit the straightforward Google Takeout process periodically, perhaps once a year, to refresh your local photo vault as you steadily accumulate more precious memories worth securing just in case.
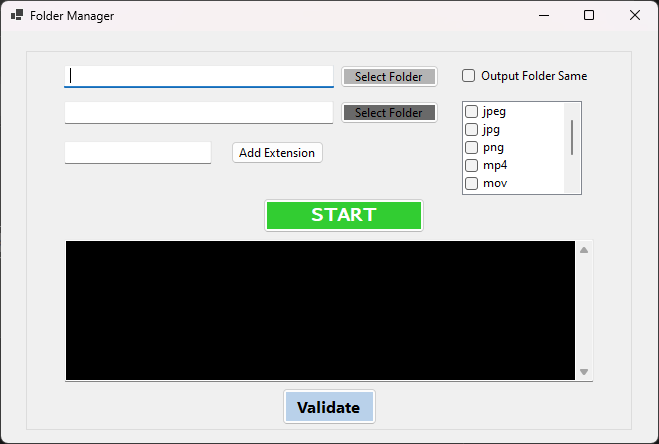
Tool For Organizing Photo
To simplify the process of organizing the photos, here is the link to a tool for that.
Enjoy!
Subscribe to my newsletter
Read articles from Michael Akinyemi directly inside your inbox. Subscribe to the newsletter, and don't miss out.
Written by

