Unleashing the Power of Google Gemini: Integrating Cutting-Edge AI into Your Node.js Applications
 Rajesh Shiyani
Introduction
Generative AI has continued to dominate discussions in the tech world over the past year. Many are diving into exciting projects harnessing its capabilities. Google stands out with its proprietary generative AI, dubbed Gemini.
Recently, Google unveiled its Gemini APIs tailored for developers. These APIs come packed with an array of libraries and frameworks, empowering developers to seamlessly integrate them into their applications.
In this article, we embark on the journey of creating a straightforward Node.js application and seamlessly integrating Google Gemini into it. Leveraging the Google Gemini SDK, we'll explore the potential of this cutting-edge technology.
What is Google Gemini?
Gemini, Google's latest artificial intelligence model, represents a significant leap in AI capabilities. It goes beyond mere text comprehension to interpret images, videos, and audio inputs. Classified as a multimodal model, Gemini boasts the ability to tackle intricate tasks in disciplines like mathematics, physics, and beyond. Moreover, it excels in comprehending and generating top-tier code across multiple programming languages.
Where can it be applied?
Content creation: Gemini AI proves invaluable in generating diverse content types, including articles, blogs, and scripts, with a touch of creativity. Data analytics: Leveraging Gemini AI enables efficient analysis of vast datasets, uncovering intricate patterns and trends for informed decision-making. Medical diagnostics: Gemini AI serves as a valuable tool for healthcare professionals, aiding in the accurate diagnosis of various diseases and conditions.
How to integrate into a Nodejs project?
To add Google Gemini to your project, you can follow these steps.
Note: We must use node version 18+ to integrate this.
Let's create a new Nodejs project.
npm initInstall Required Dependencies:
npm install express body-parser @google/generative-ai dotenvThis will install the following packages:
express: A Widely Used Web Framework for Node.js
body-parser: Middleware for Efficiently Parsing Request Bodies
@google/generative-ai: An Essential Package for Accessing the Gemini Model
dotenv: Simplifying Environment Variable Management with .env Files
3. Setup Environment Variables:
Next, we'll create a .env file to securely store our sensitive information such as API credentials.
//.env API_KEY=YOUR_API_KEY PORT=3000- Get API Key:
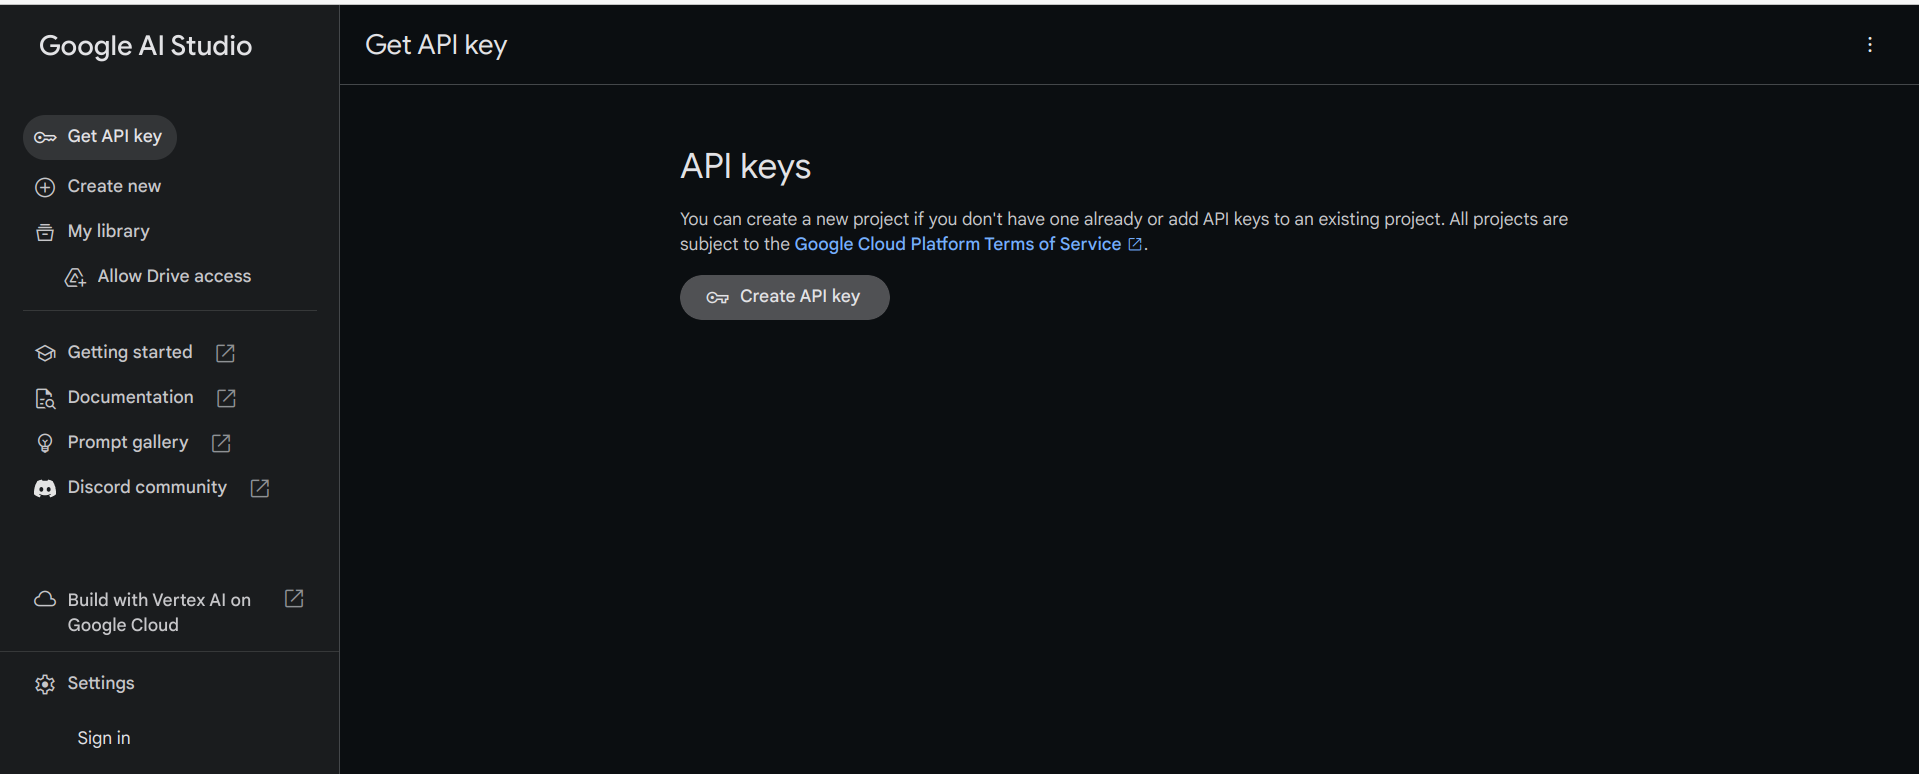
Before using Gemini, we need API credentials from Google Developers Console. For that, We need to sign up on our Google account and create an API key.
Once signed in, Go to https://makersuite.google.com/app/apikey. We'll get something like this:

Then click on the Create API key button. This will generate an API key that we'll use to authenticate requests to the Google Generative AI API.
To Test your API you can run the following Curl Command:
    curl
    -H 'Content-Type: application/json'
    -d '{"contents":[{"parts":[{"text":"Write a story about a magic backpack"}]}]}'
    -X POST https://generativelanguage.googleapis.com/v1beta/models/gemini-pro:generateContent?key=YOUR_API_KEY
Replace YOUR_API_KEY with the actual API key that we got before.
After getting the API key we'll update the .env file with our API key.
Create Express Server:
Now, we'll create an index.js file in the root directory and set up a basic express server. See the following code:
 const express = require("express");
 const dotenv = require("dotenv");

 dotenv.config();

 const app = express();
 const port = process.env.PORT;

 app.get("/", (req, res) => {
   res.send("Hello World");
 });

 app.listen(port, () => {
   console.log(`Server running on port ${port}`);
 });
Here, We're using the "dotenv" package to access the PORT number from the .env file.
At the top of the project, we're loading environment variables using dotenv.config() to make them accessible throughout the file.
Run Project:
In this step, we'll add a start script to the package.json file to easily run our project.
So, Add the following script to the package.json file.
 "scripts": {
   "start": "node index.js"
 }
To check whether everything is working or not, let's run the project using the following command:
npm run start
This will start the Express server. Now if we go to this URL http://localhost:3000/ we'll get this:

Fantastic! The Project setup is done and it's working perfectly. Next up, we'll add Gemini to our project in the next section
Adding Google Gemini:
- Set up Route and Middleware: To add the Gemini to our project, We'll create a /generate route where we'll communicate with the Gemini AI.
For that add the following code into the index.js file.
const bodyParser = require("body-parser");
const { generateResponse } = require("./controllers/index.js");

//middleware to parse the body content to JSON
app.use(bodyParser.json());

app.post("/generate", generateResponse);
Here, We're using a body-parser middleware to parse the content into a JSON format.
Configure Google Generative AI:
Now, We'll create a controller folder and inside that, we'll create a index.js file. Here, we will create a new controller function to handle the generated route declared in the above code.
const { GoogleGenerativeAI } = require("@google/generative-ai");
const dotenv = require("dotenv");

dotenv.config();

// GoogleGenerativeAI required config
const configuration = new GoogleGenerativeAI(process.env.API_KEY);

// Model initialization
const modelId = "gemini-pro";
const model = configuration.getGenerativeModel({ model: modelId });
Here, we are creating a configuration object for the Google Generative AI API by passing the API key from the environment variables.
Then, we initialize the model by providing the model ID ("gemini-pro") to the getGenerativeModel method of the configuration object.
You can add many other configuration options as well when initializing the model.
Implement Controller Function:
Now, we'll write a controller function generateResponse to handle the generation route (/generate) and generate a response to User requests.
/**
 * Generates a response based on the given prompt.
 * @param {Object} req - The request object.
 * @param {Object} res - The response object.
 * @returns {Promise} - A promise that resolves when the response is sent.
 */
export const generateResponse = async (req, res) => {
  try {
    const { prompt } = req.body;

    const result = await model.generateContent(prompt);
    const response = await result.response;
    const text = response.text();
    res.send({ response: text });
  } catch (err) {
    console.error(err);
    res.status(500).json({ message: "Internal server error" });
  }
};
Here we are taking the prompt from the request body and generating a response based on the prompt using the model.generateContent method.
And we are Done!
Run the project:
Now, we have to check if our app is working correctly or not!
Let's run our project using:
npm run start

No errors! It's working perfectly.
Check Functionality
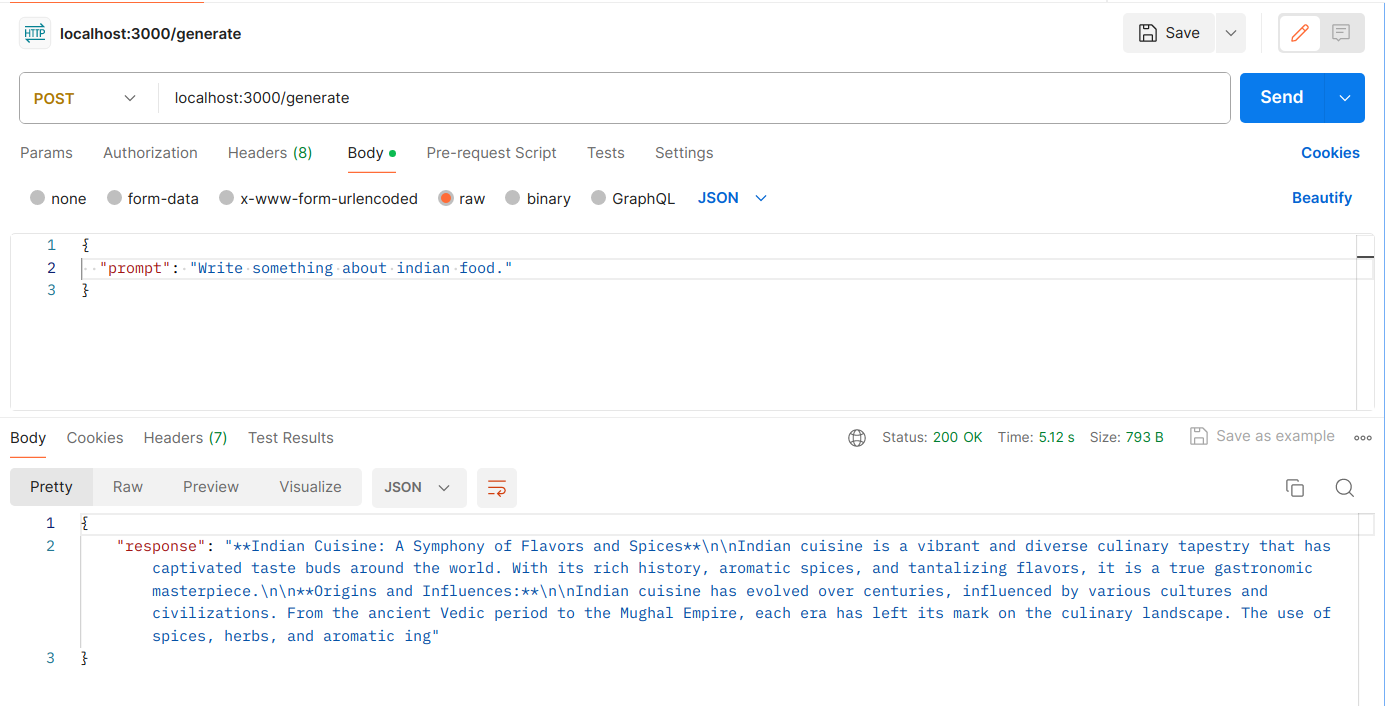
Next, we'll make a Post request with the help of Postman to check our controller function.
Let's send a POST request to http://localhost:3000/generate with the following JSON payload:
{
  "prompt": "Write something about indian food."
}
And We got our response:

Great! Our Gemini AI integration is Working as expected!
Conclusion
If you found this blog post helpful, please consider sharing it with others who might benefit.
Thank you for Reading :) Enjoy Coding!
Subscribe to my newsletter
Read articles from Rajesh Shiyani directly inside your inbox. Subscribe to the newsletter, and don't miss out.
Written by

Rajesh Shiyani
Rajesh Shiyani
I am a web developer with ambitious mind to learn different technologies.