Expose pods: Creating Nodeport service
 Jm Bargallo
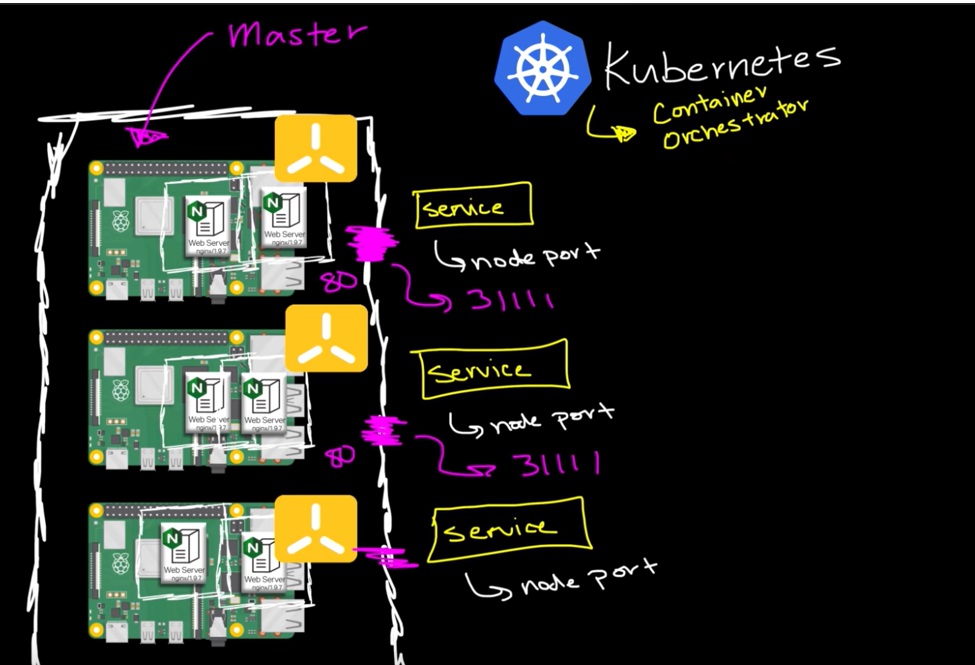
Networking in Kubernetes it´s not a simple matter but it is possible to advance a little beginning for a simple step: expose the pods, and make it accessible from a web browser.
Pods with nginx servers created in the last article are in a subnet different not the 192.168.0.X used in the previous examples ...Why??
So we have pods running nginx in a flat, cluster-wide, address space. In theory, you could talk to these pods directly, but what happens when a node dies? The pods die with it, and the ReplicaSet inside the Deployment will create new ones, with different IPs. This is the problem a Service solves.
A Kubernetes Service is an abstraction that defines a logical set of Pods running somewhere in your cluster, that all provide the same functionality. When created, each Service is assigned a unique IP address (also called clusterIP). This address is tied to the lifespan of the Service, and will not change while the Service is alive. Pods can be configured to talk to the Service, and know that communication to the Service will be automatically load-balanced out to some pod that is a member of the Service.
Steps to access the POD from outside the cluster using Nodeport
Create a Kubernetes pod
For instance, we create an Nginx pod and try to access it outside the world.
1. create a YAML file using vim <filename.yaml>
2. nginx sample yaml file.
apiVersion: v1
kind: Pod
metadata:
  name: nginx
  labels:
    name: nginx
spec:
  containers:
  - name: nginx
    image: nginx
Nginxpod.yaml
*We tied pods with services using Labels.
3. create a pod using below comment
kubectl create -f <filename.yaml>
4. To check pod is created or not.
kubectl get pod
Create a service yaml file for ngnix using nodeport
- To create a service.yaml file.
apiVersion: v1
kind: Service
metadata:
  name: nginx
  labels:
    name: nginx
spec:
  type: NodePort
  ports:
    - port: 80
      nodePort: 30080
      name: http
    - port: 443
      nodePort: 30443
      name: https
  selector:
    name: nginx
The service.yaml file we used Nodeport as a 30080.
*Nodeport range: 30,000 TO 32767
The selector work here is to choose a specific pod among many pods, so here we give the Nginx pod labels name so selector only chooses Nginx pod.
2. Create a service file.
kubectl create -f <filename.yaml>
3. To check service is created or not use below cmd.
kubectl get svc
4. To cross-check the Nodeport you must describe the svc using below cmd.
kubectl describe svc <servicename>
SVC describe output
VERIFICATION:
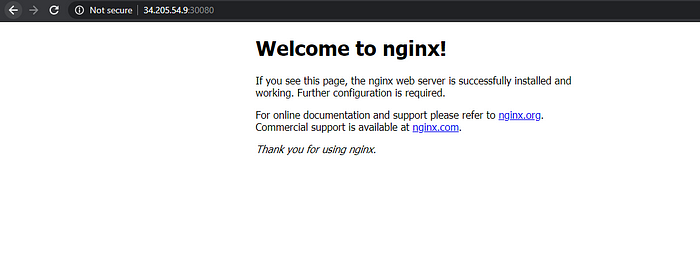
Open the web browser from the local machine and access type the Kubernetes node IP along with the Node port.

We are able to access the Nginx homepage successfully. It’s a containerized web server listening in the port 80 and we mapped it to 30080 in every node in the cluster.
Subscribe to my newsletter
Read articles from Jm Bargallo directly inside your inbox. Subscribe to the newsletter, and don't miss out.
Written by
