🚀 Supercharge Your Monitoring: Unleashing Grafana with Loki and Promtail on an EC2 Adventure! 🔍 Day - 74
 Vishal Shekokar
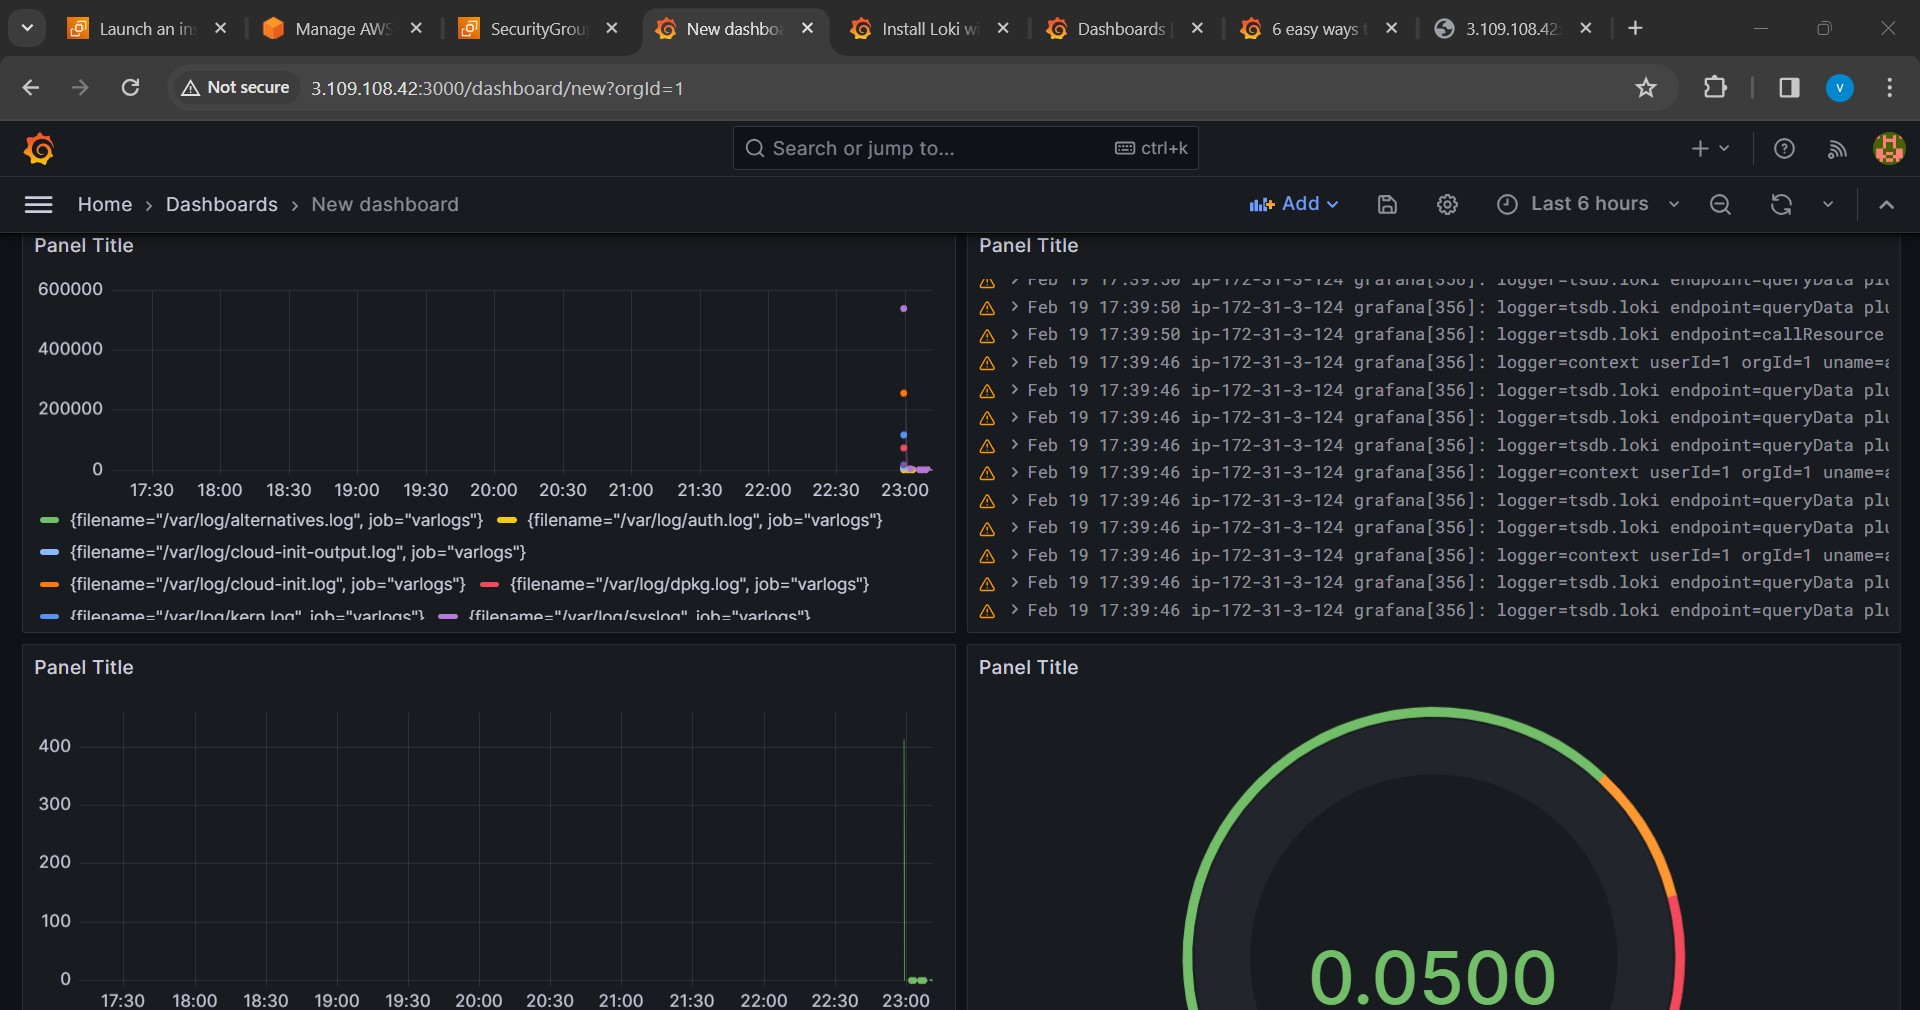
Introduction:
Hey Rockstar Techies! 🌟 Yesterday's Grafana setup on your local machine was pure fire! 🔥 Now, are you ready to crank it up a notch and take your monitoring game to the cloud? Today, we're embarking on an epic journey - connecting a Linux EC2 instance with Grafana and throwing Loki and Promtail into the mix. Buckle up for an exhilarating ride through the clouds! ☁️🚀
Step 1: Launching a Linux EC2 Instance
Begin your mission by soaring into the AWS console and launching a new Linux EC2 instance. Choose an instance type that matches your monitoring aspirations and configure security groups to let the Grafana, Loki, and Promtail magic flow.
Step 2: Connecting Grafana with the EC2 Instance
Time to establish the cosmic connection! Dive into your Grafana dashboard and navigate to the "Configuration" tab. Under "Data Sources," add a new source and select Loki as the type. Input the vital details - the public IP address of your EC2 instance, the port, and any authentication credentials that might be needed.
Step 3: Installing and Configuring Loki on EC2 Instance
Prepare for lift-off! SSH into your EC2 instance and install Loki. Execute the following commands to download and install the Loki spacecraft:
wget https://github.com/grafana/loki/releases/download/v2.3.0/loki-linux-amd64.zip
unzip loki-linux-amd64.zip
chmod +x loki-linux-amd64
sudo mv loki-linux-amd64 /usr/local/bin/loki
Create a Loki configuration file, let's call it loki-config.yaml. Customize it like a spacesuit and commence the Loki launch sequence
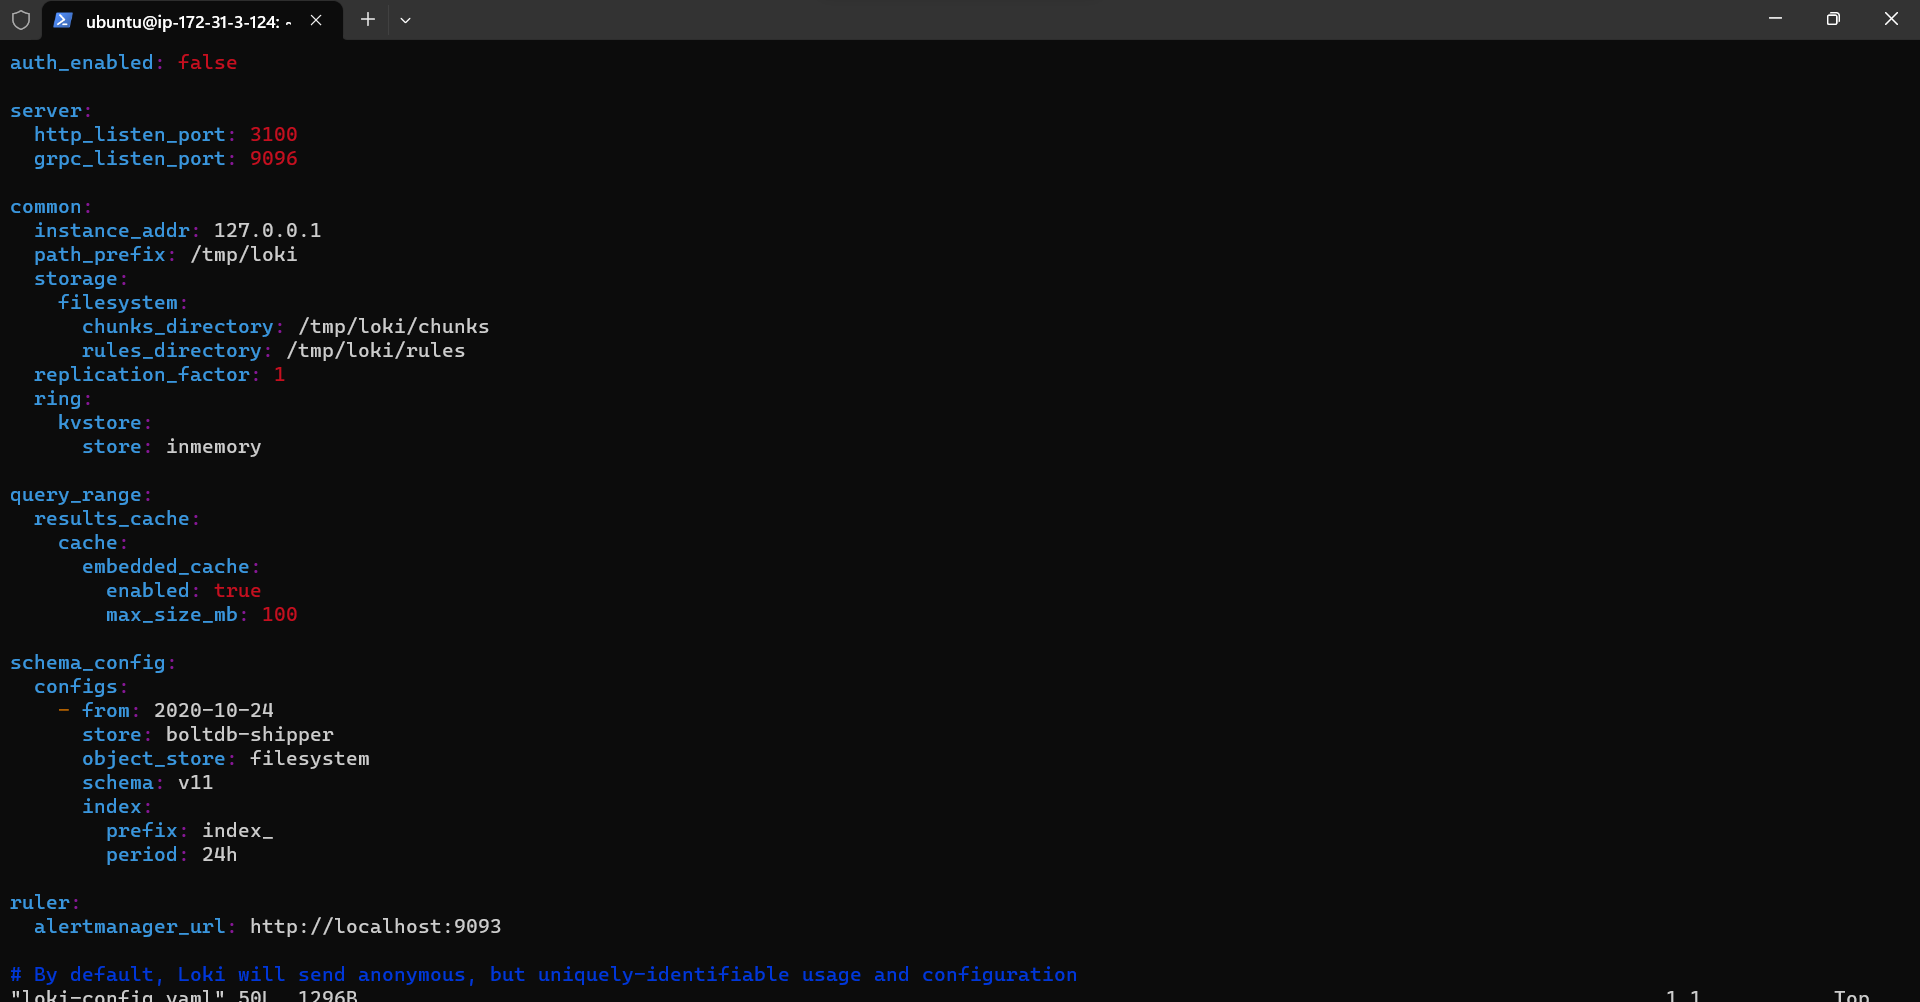
:
Blast off with Loki:
loki -config.file=loki-config.yaml
Step 4: Installing and Configuring Promtail
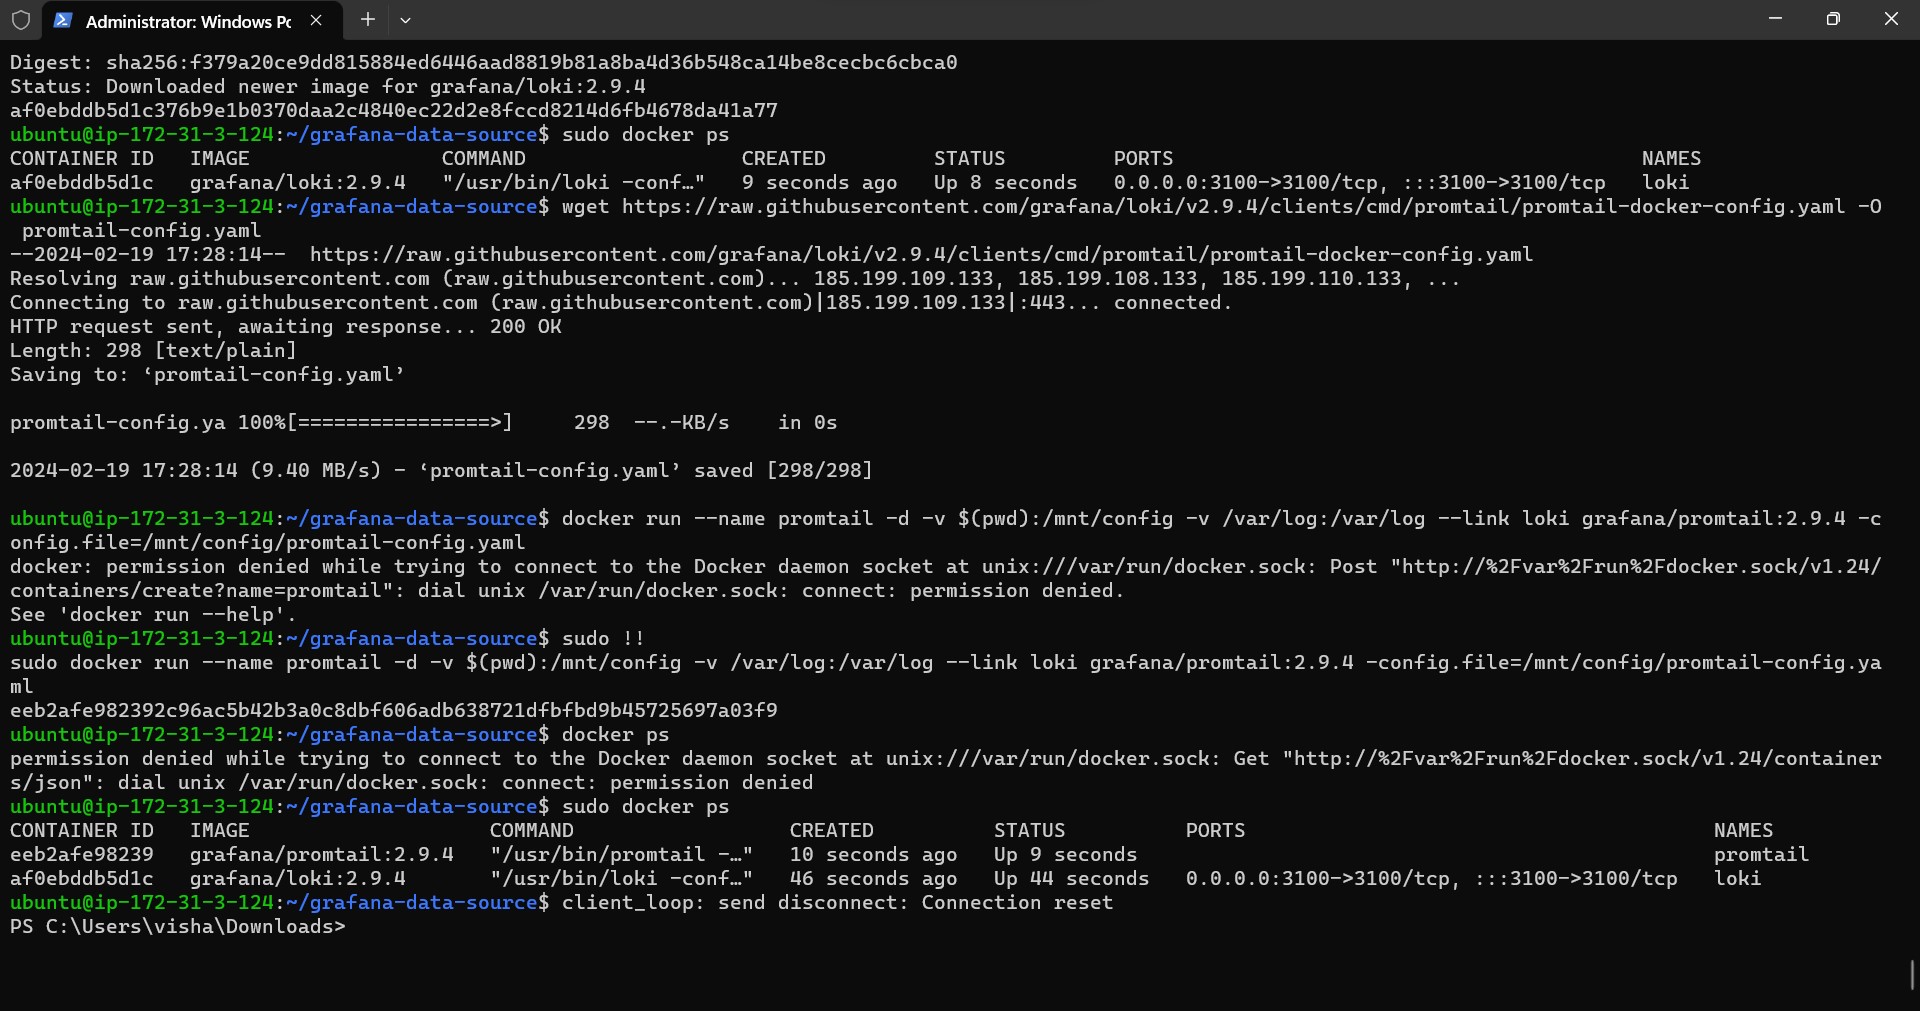
Now, install Promtail on the same EC2 instance, because why not add another rocket to the fleet?
wget https://github.com/grafana/loki/releases/download/v2.3.0/promtail-linux-amd64.zip
unzip promtail-linux-amd64.zip
chmod +x promtail-linux-amd64
sudo mv promtail-linux-amd64 /usr/local/bin/promtail
Create a Promtail configuration file, let's call it promtail-config.yaml. Customize it with the finesse of an astronaut suiting up
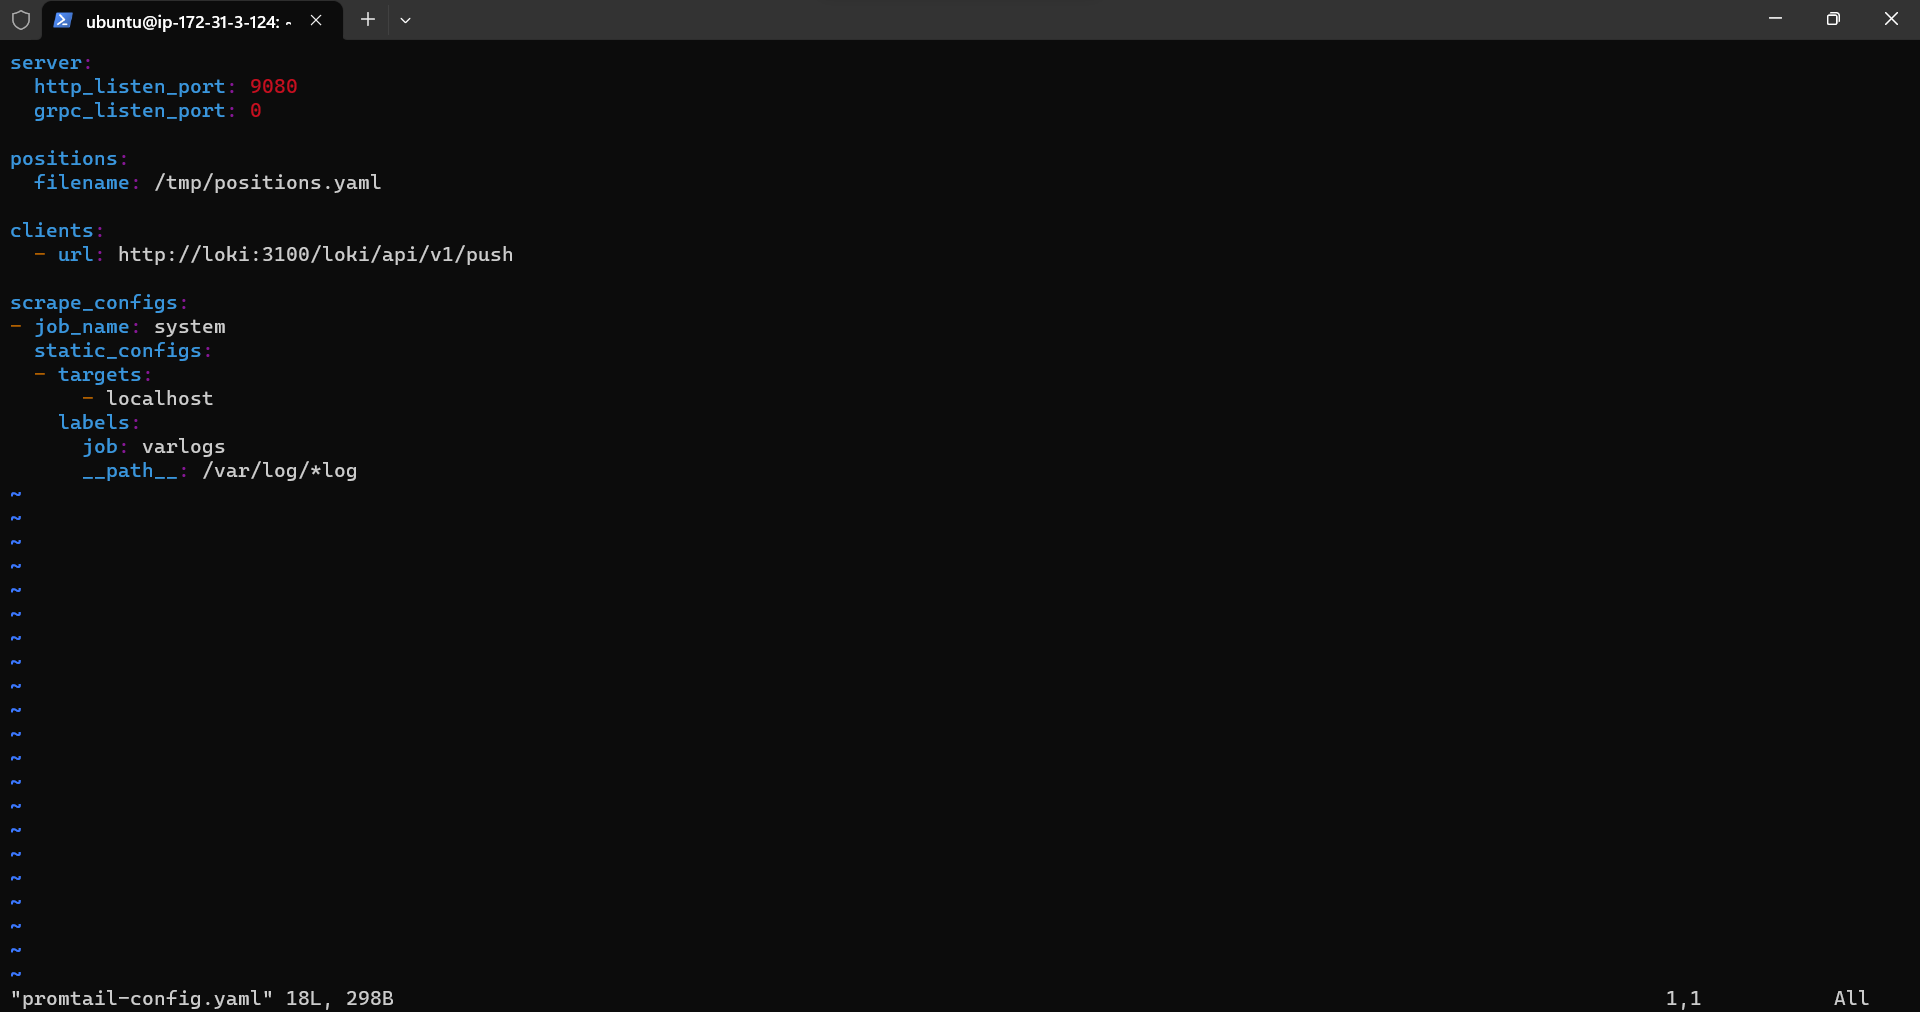
:
Initiate Promtail's countdown:
promtail -config.file=promtail-config.yaml
Step 5: Verifying Loki and Promtail Integration
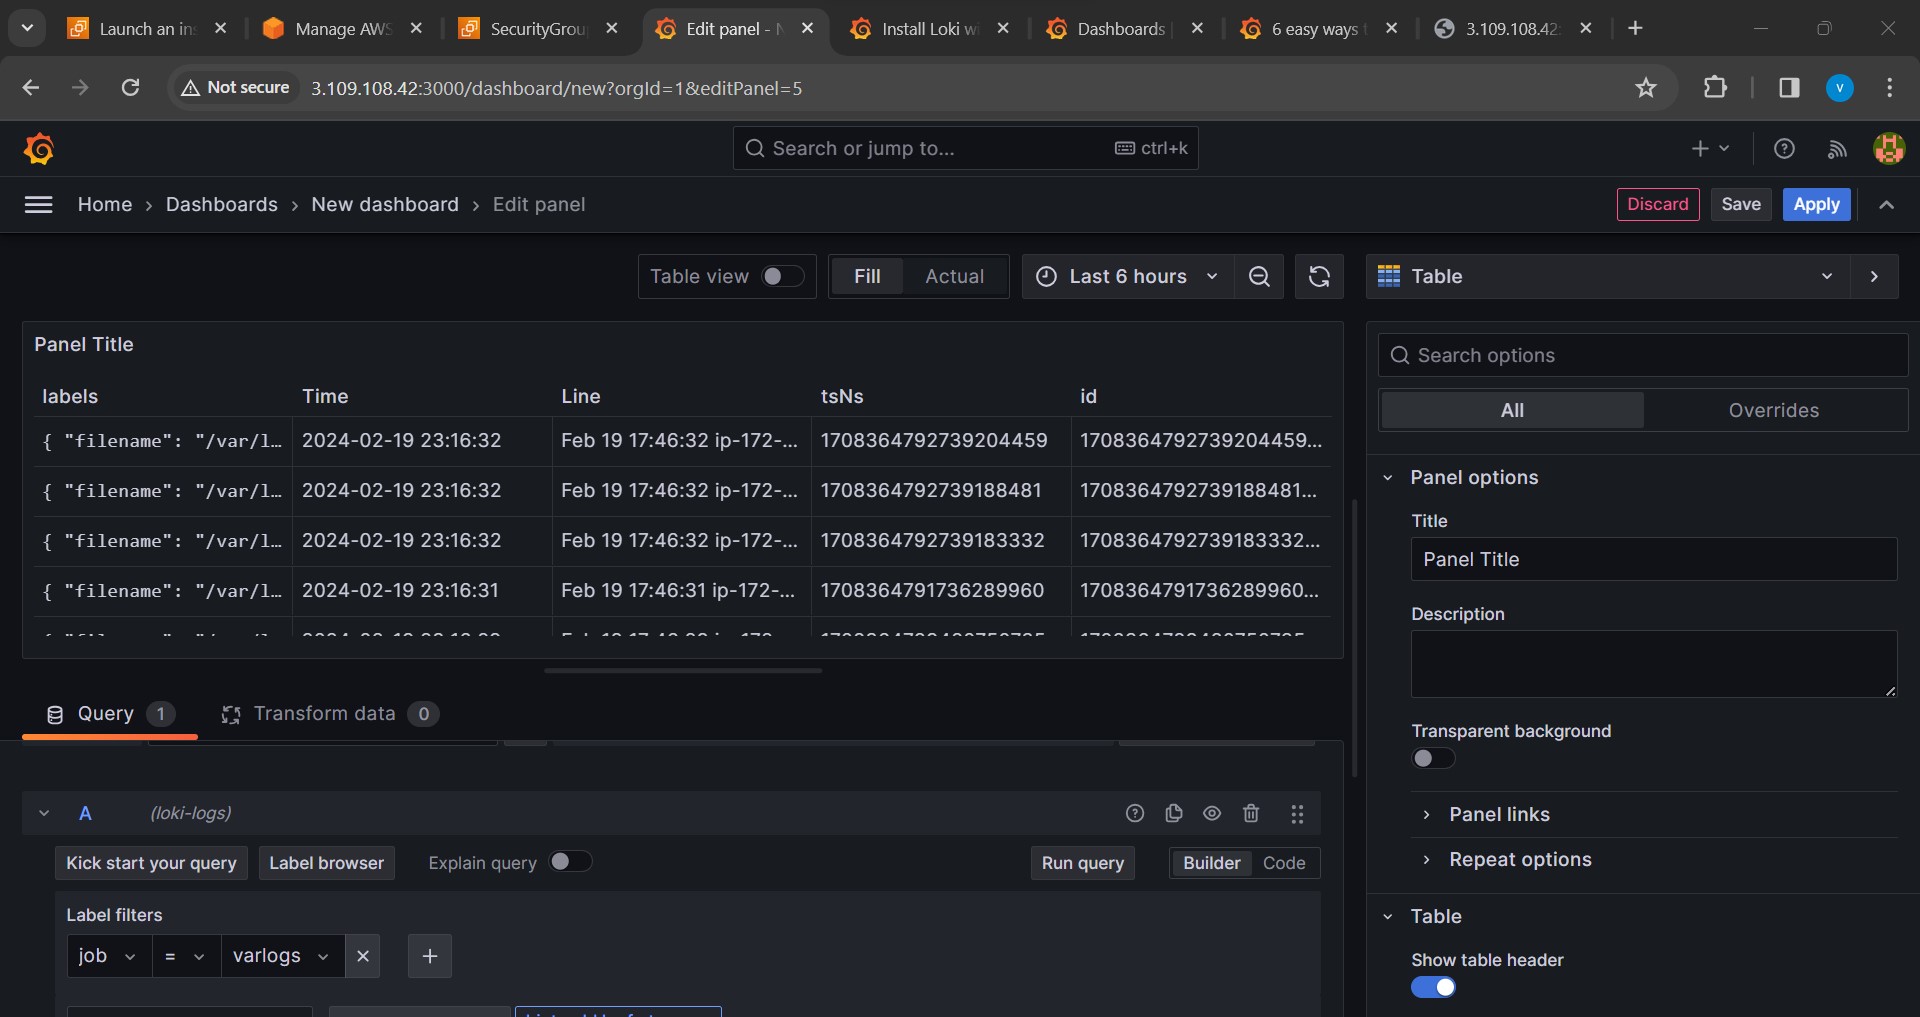
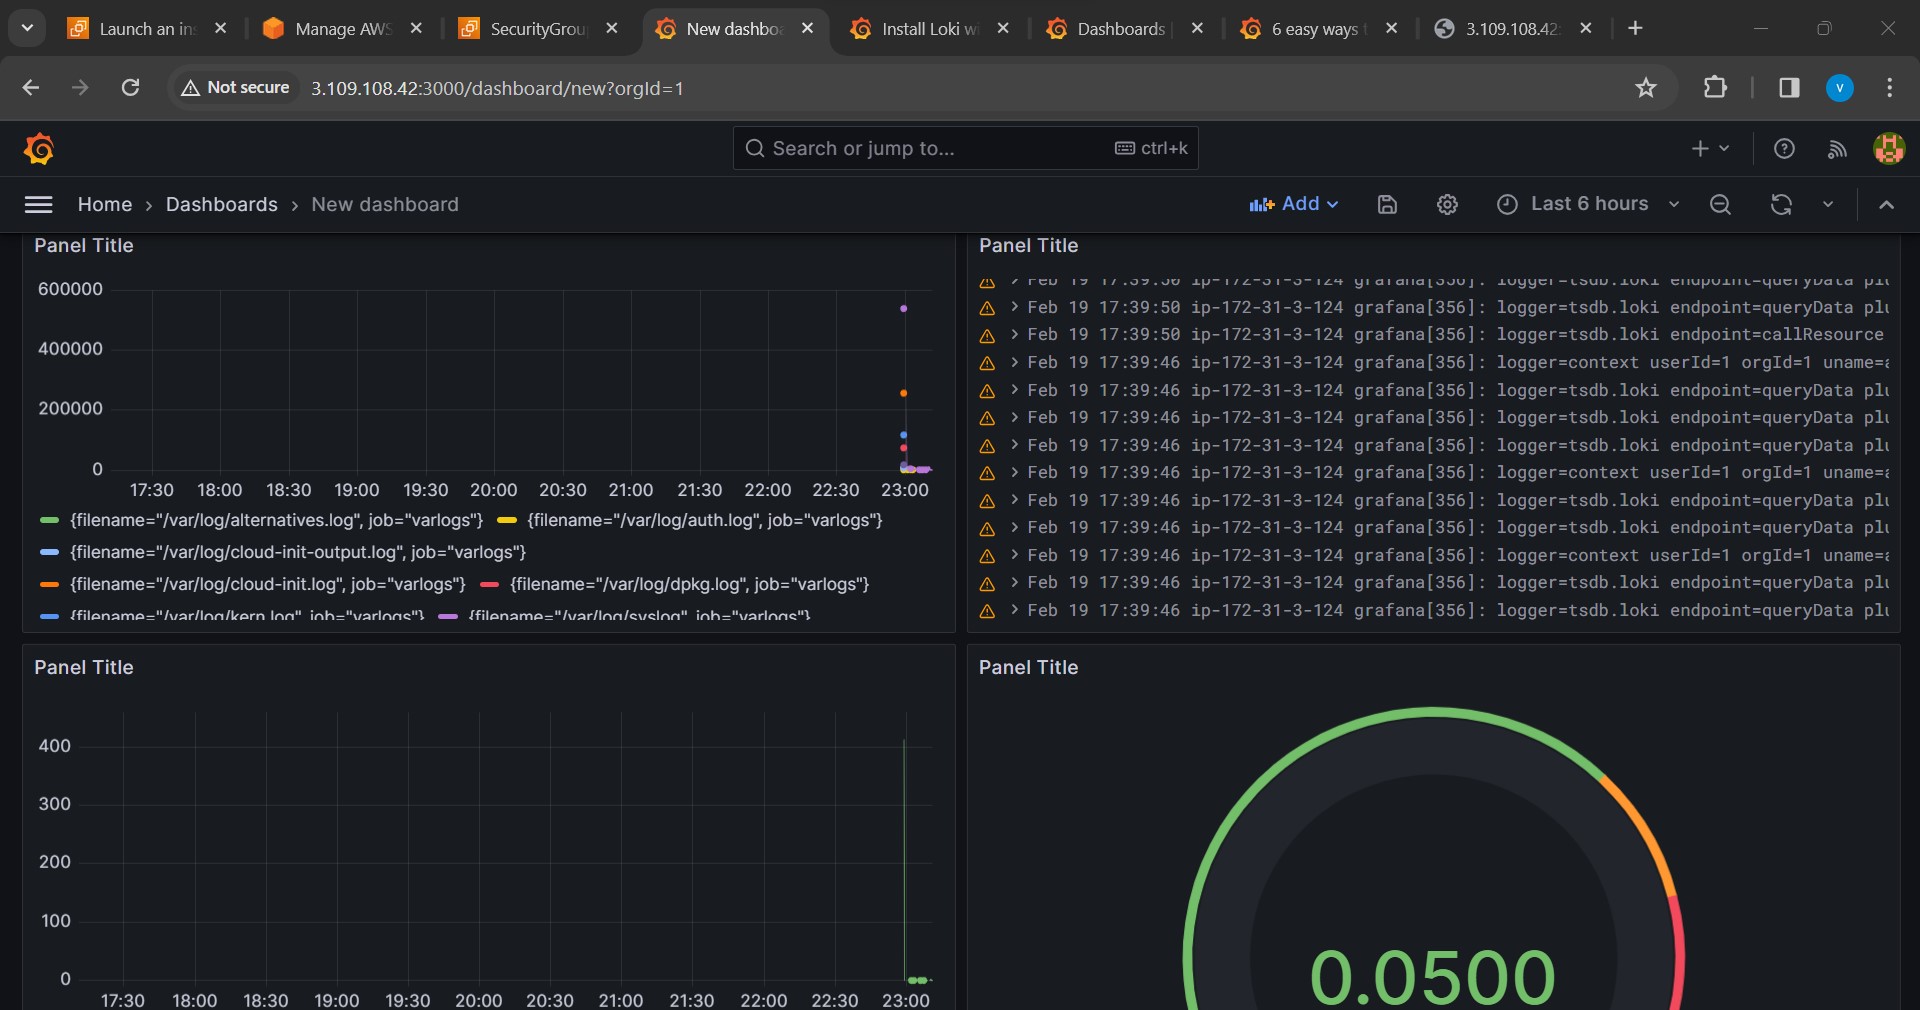
Zoom back into your Grafana dashboard, create a new dashboard, and add Loki as a data source. Construct panels to display logs from your EC2 instance, with Promtail swooping in to scrape and send logs to Loki in real-time.
Conclusion:
You've just navigated a galactic journey, connecting Grafana with Loki and Promtail on a Linux EC2 instance! 🌌🛰️ Keep exploring the features, customize those dashboards like a true cosmic artist, and stay on top of your cloud-based infrastructure. Happy monitoring, space pioneers! 🚀✨
Subscribe to my newsletter
Read articles from Vishal Shekokar directly inside your inbox. Subscribe to the newsletter, and don't miss out.
Written by

Vishal Shekokar
Vishal Shekokar
👋 Hello, I'm Vishal, an aspiring Information Technology enthusiast currently embarking on a journey towards a Bachelor's degree in Engineering. My passion lies in exploring the dynamic realms of cloud computing and DevOps technologies, where I constantly strive to bridge the gap between innovation and practical implementation. 💡 As a student of Information Technology, I'm on a mission to absorb knowledge, solve real-world problems, and contribute to the tech community. My academic pursuits fuel my curiosity, and my hands-on experience with cloud and DevOps tools empowers me to navigate the evolving landscape of modern technology. 🚀 Join me as I share insights, discoveries, and challenges encountered on this exciting educational and professional adventure. Let's connect, collaborate, and grow together in the ever-expanding world of IT. 🔗 Connect with me on social media and let's build a network that fosters learning, sharing, and innovation. Happy coding! 🌟