Step-by-Step Guide: Creating a File Share in Azure Storage Account and Connecting it to a Windows Virtual Machine
 AKEH EUNICE
Table of contents
Prerequisites
An active Azure subscription
Create a Storage Account
Create a Virtual Machine
Guidelines
Step 1: Create a Storage Account
Step 2: Create a File Share in the Storage Account
Step 3: Create A Windows Virtual Machine
Step 4: Connect the File Share to the Windows Virtual Machine
Step 5: Verify the Connection
Introduction
Users may easily connect storage solutions with their computing resources thanks to Azure's stable cloud storage and virtual machine architecture. Creating a file share in Azure Storage and connecting it to a Windows Virtual Machine (VM) is one such situation. With this configuration, sharing and storing files across several virtual machines is simple. We'll walk through the steps of setting up a file share in an Azure Storage account and connecting it to a Windows virtual machine in this step-by-step tutorial.
Step 1: Create a Storage Account - Follow the step by step guideline and create a storage account through the link below:
-
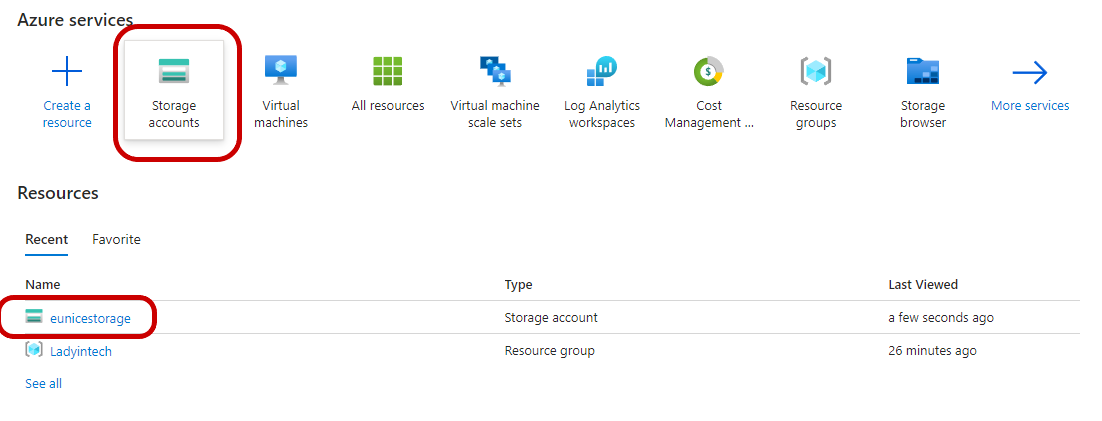
- Step 2: Create a File Share in the Storage Account- Once the storage account is deployed, navigate to it in the Azure Portal "Click on" "Storage Account"
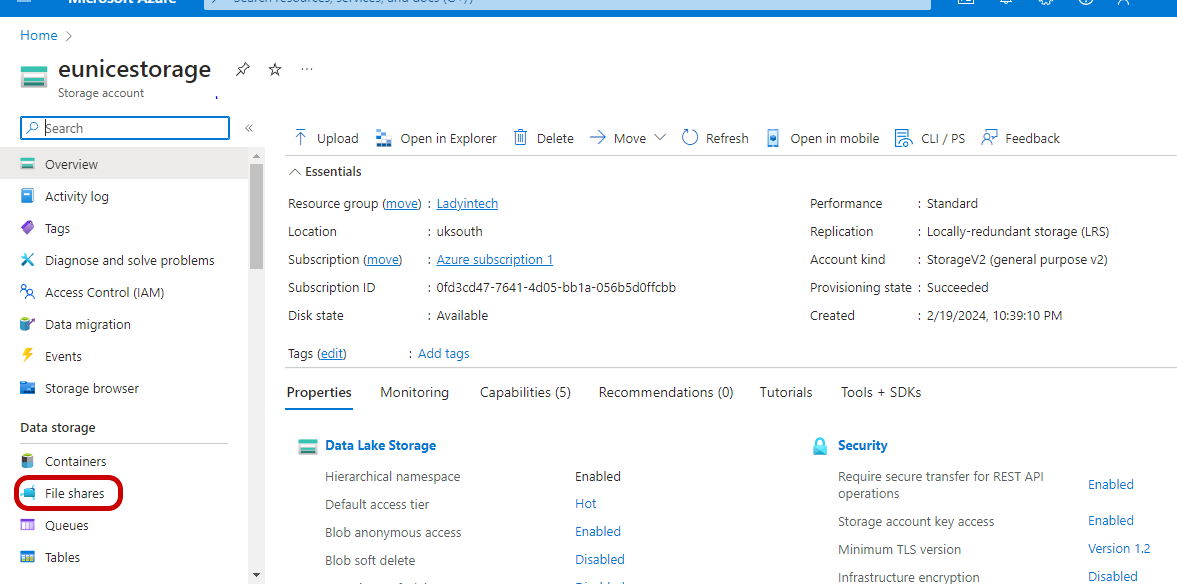
a. In the left-hand menu, under the "Settings" section, "Select" "File shares"
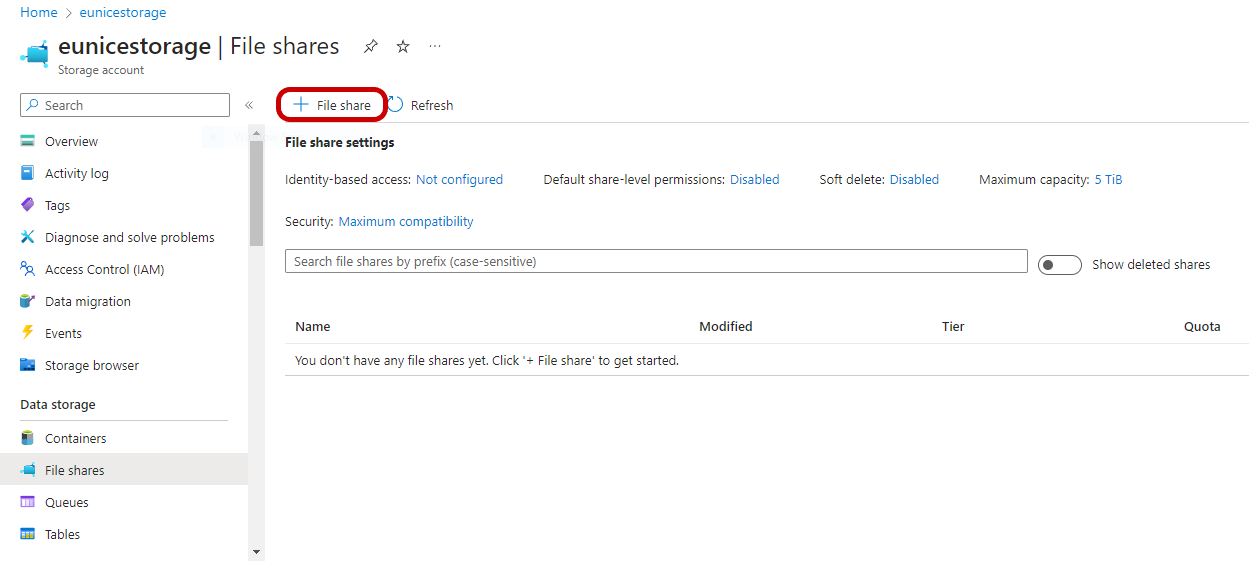
b." Click on" the "+ "File share" button
c. Fill up the settings as highlighted in the image below: Basics Settings Provide a name for the file share and leave the rest as a default setting
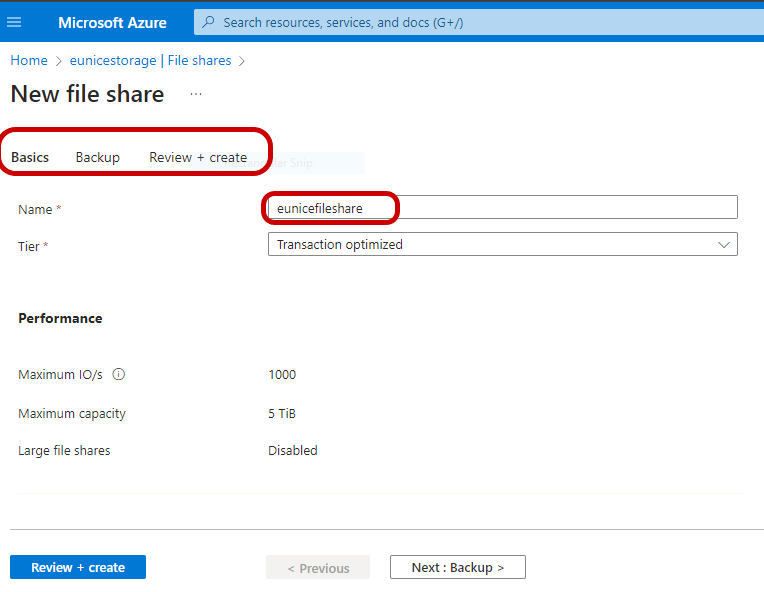
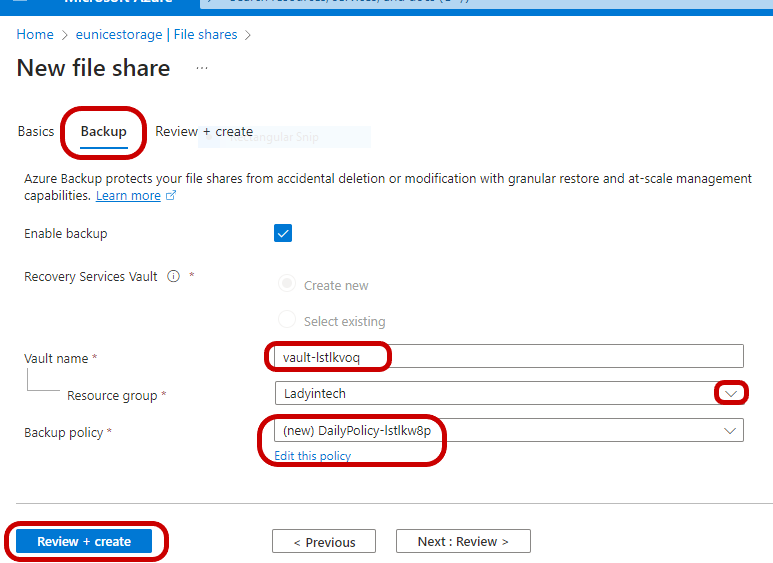
d. Backup Setting: Enable backup "Tick box" , "Provide a Vault name" "Choose Resource group", "Select" a "Backup policy, "Click on" "Review+Create"
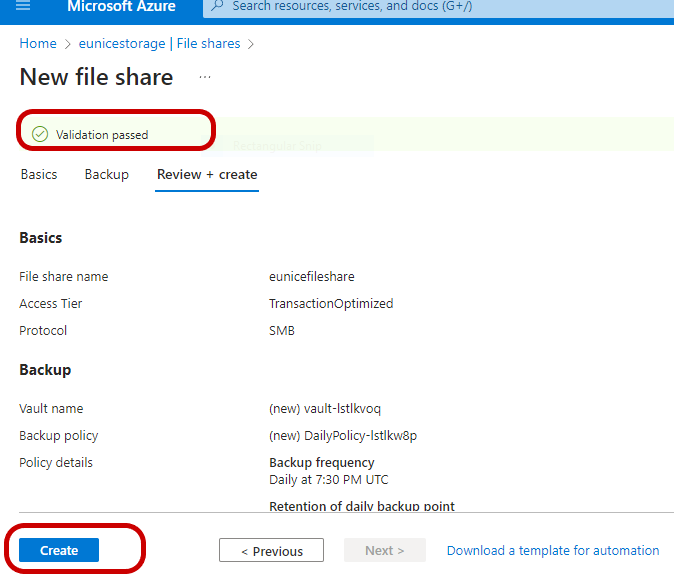
e. Validation Passed : "Click on" "Create"
Step 3: Follow the link below and create a windows virtual machine
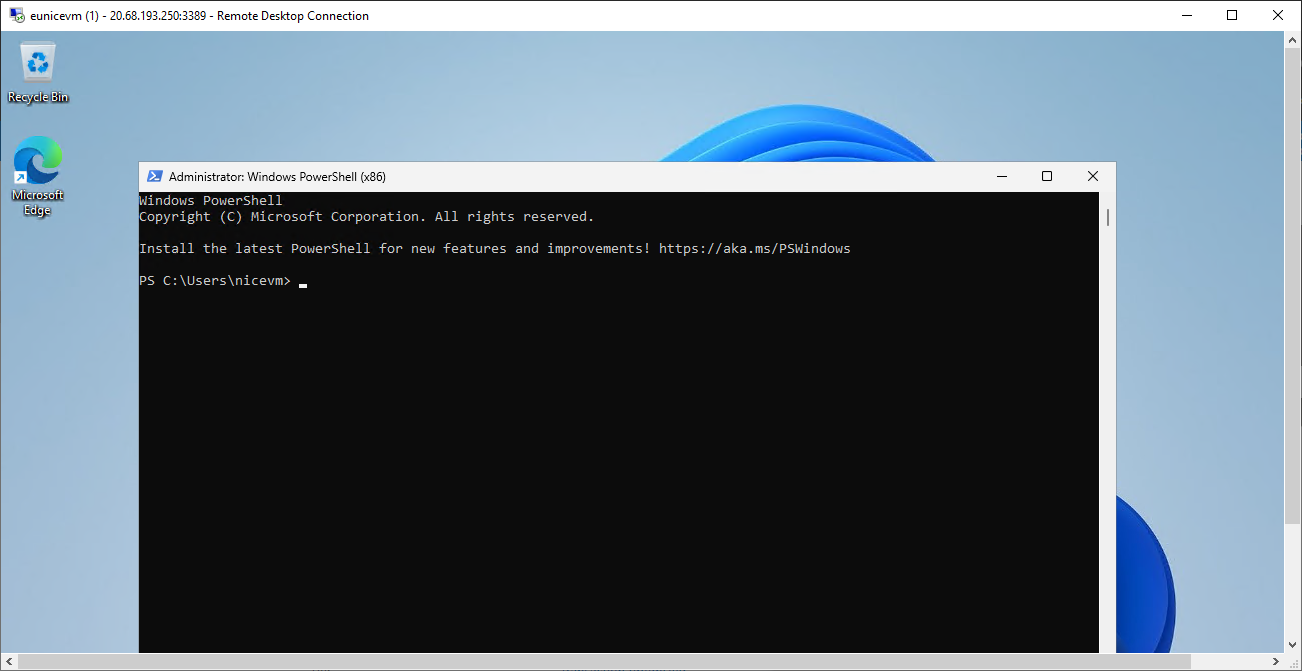
a. Connect to your VM: RDP into your Windows VM using Remote Desktop Connection. In the "Search bar" search "Windows powershell" and "Click on" "Run as administrator"
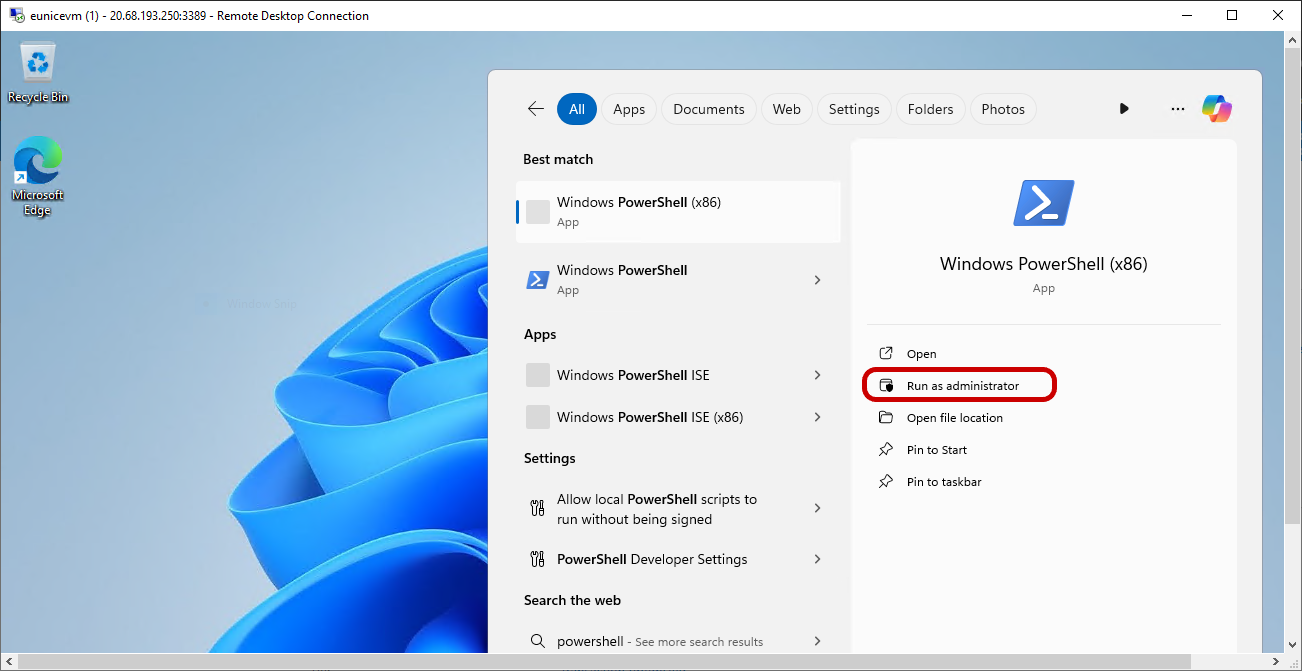
b. Powershell is ready
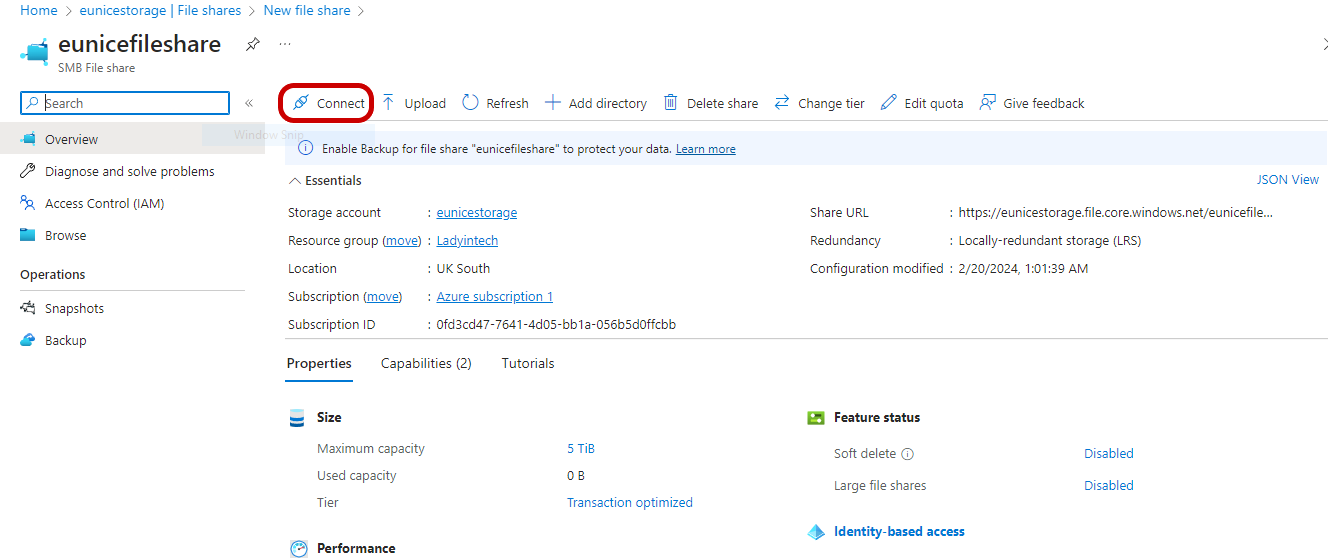
Step 4: Connect Fileshare to your VM: Navigate to the fileshare created and "Click on" "Connect"
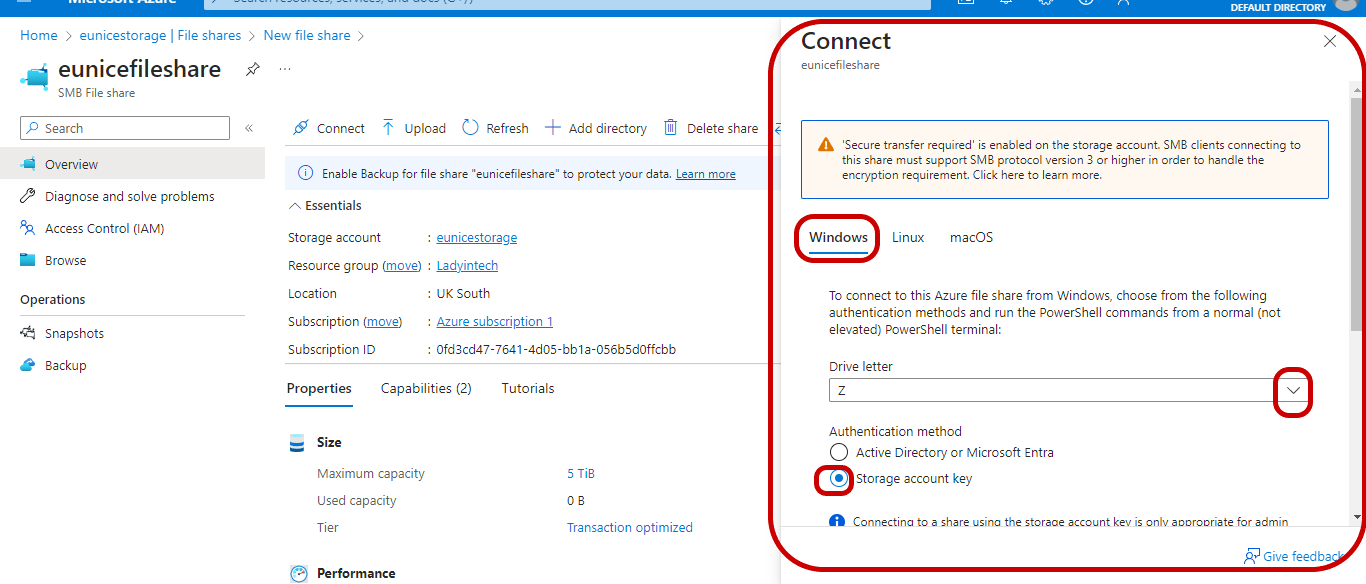
a. Connect Fileshare: The right highlighted box will open "Select" "Windows" then "Select" "Drive letter" and for the authentication method "Check box" to select "Storage account key"
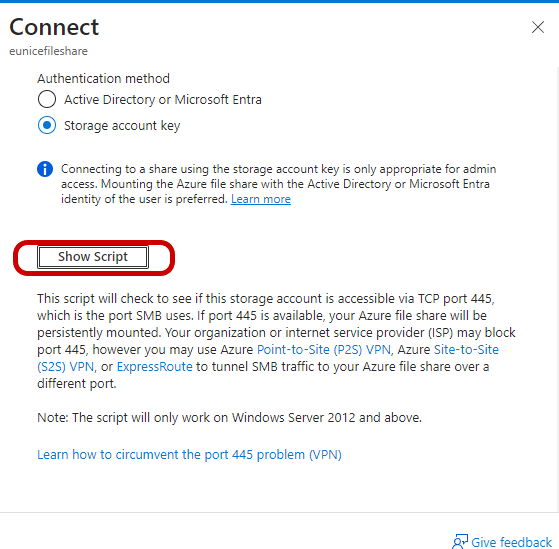
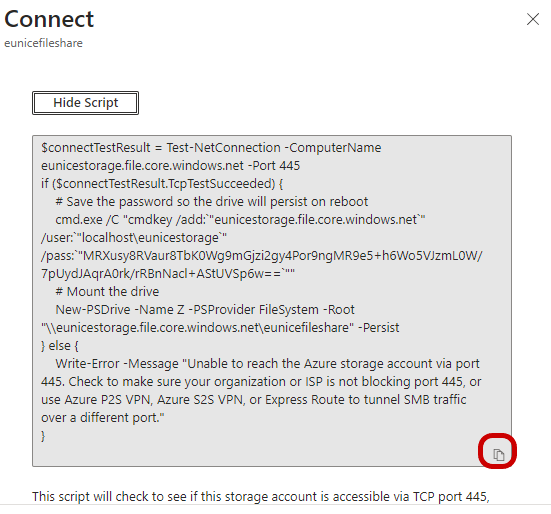
b. "Click on" "Show Script"
c. "Click on" the "highlighted box " to copy script
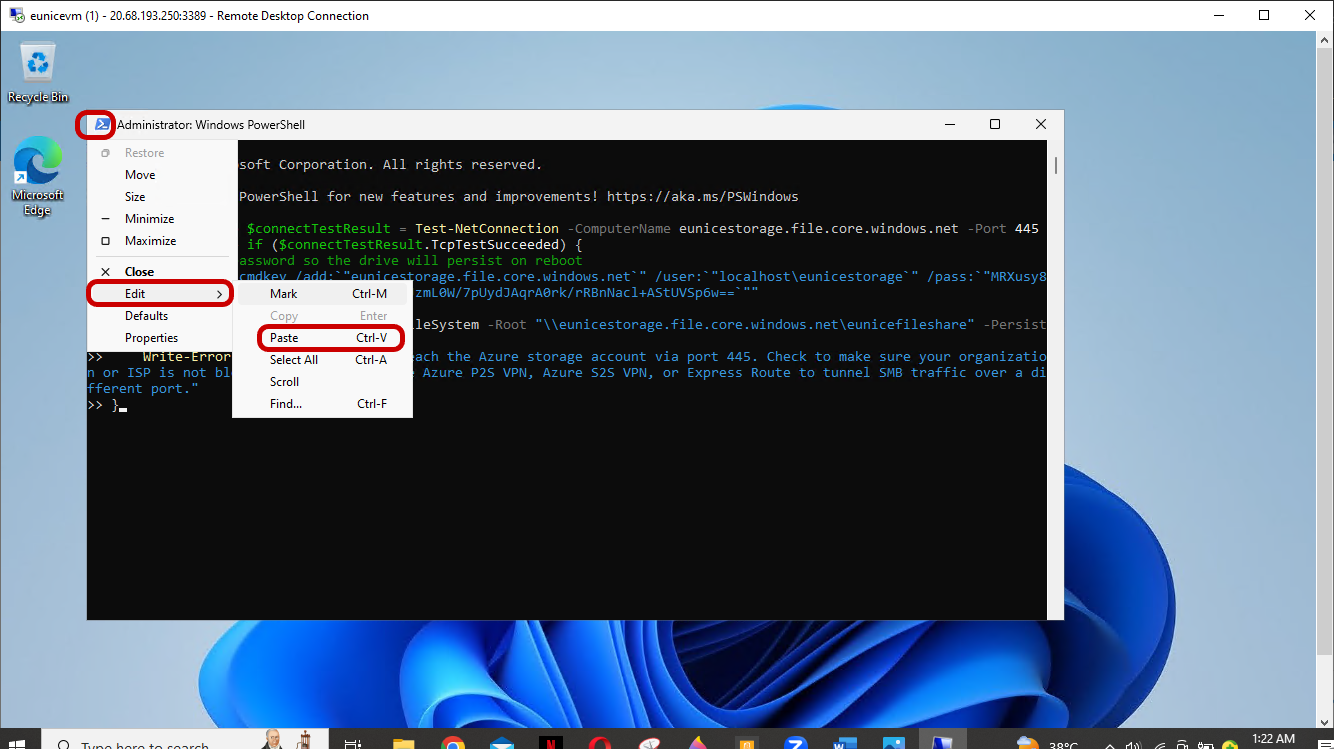
d. Navigate to your Windows VM and paste script: "Click on" the "Icon Administrator windows powershell", "Click on" "Edit" "Click on" "Paste" and hit "Enter"
e. Fileshare added successfully
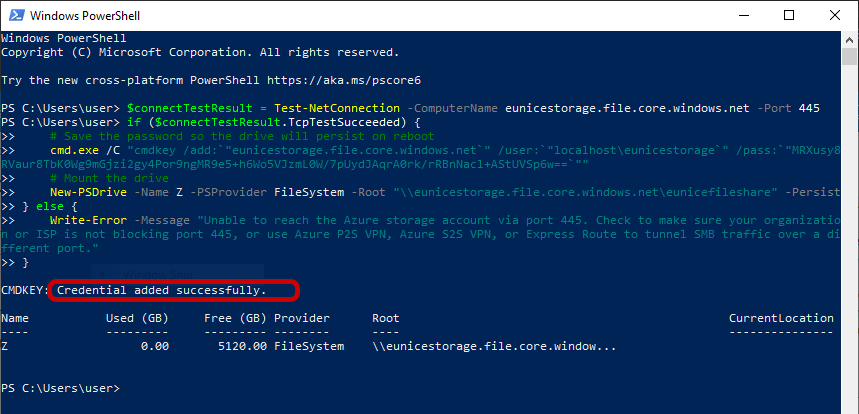
Step 5: Verify the Connection: Once the drive is mapped, you should see it listed in File Explorer under "This PC."
Double-click on the mapped drive to open it and verify that you can access the files stored in the file share.
You can now copy, move, and manage files in the file share directly from your Windows VM.
In conclusion, setting up a file share in an Azure Storage account and linking it to a Windows virtual machine is a simple procedure that facilitates easy cloud file sharing and storing. You can rapidly set up a file share and integrate it with your Windows virtual machine (VM) by following the instructions provided in this article. This will enable effective data management and collaboration inside your Azure environment.
Subscribe to my newsletter
Read articles from AKEH EUNICE directly inside your inbox. Subscribe to the newsletter, and don't miss out.
Written by
