Setting Up a Scalable Two-Tier Architecture in Azure
 Siddhant Bhattarai
Introduction
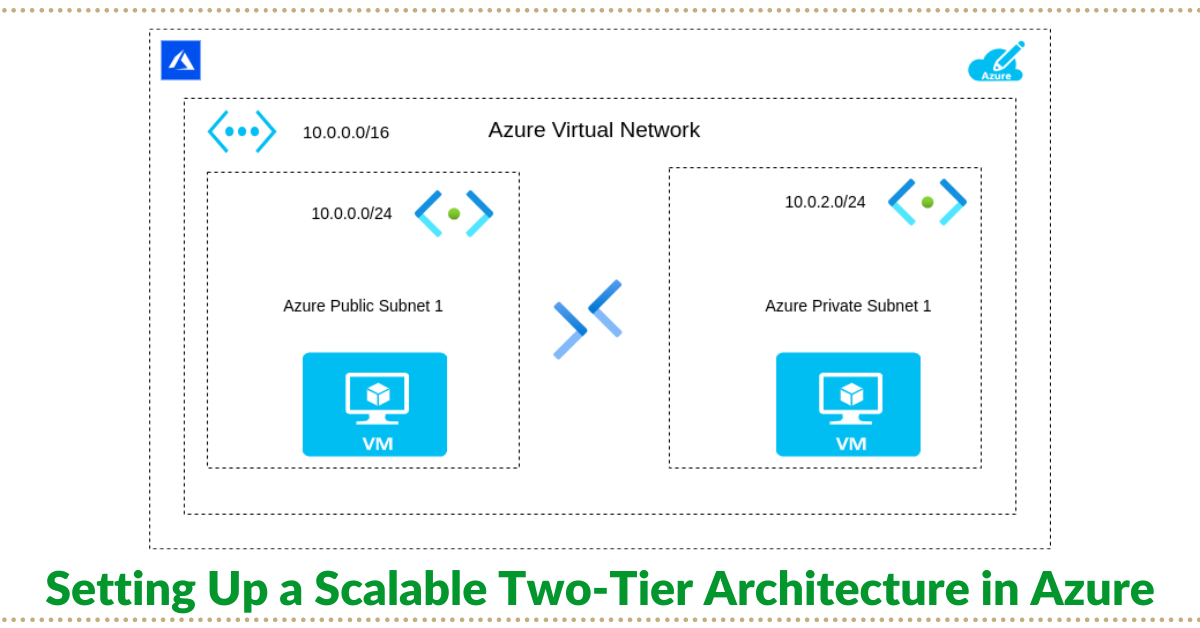
In today's cloud-centric world, building a scalable and secure infrastructure is paramount for any application. Microsoft Azure, with its comprehensive suite of services, provides a robust platform for deploying a wide range of architectures. In this blog post, we'll explore how to set up a scalable two-tier architecture in Azure. This setup includes a virtual network (VNet) with a public and a private subnet, hosting virtual machines (VMs) for a web application and its database, respectively. We'll also implement a bastion host for secure access. Such an architecture is ideal for applications requiring a separation of concerns between the user-facing front end and the backend database, enhancing both security and scalability.
Scenario
Consider a scenario where you're deploying a web application that requires a front-end accessible to the internet and a back-end database that should be isolated from direct internet access. The front-end needs to communicate with the back-end securely without exposing the database to potential threats. This setup is common for e-commerce websites, online platforms, and internal business applications requiring enhanced security and data integrity.
Step 1: Planning and Creating Virtual Network
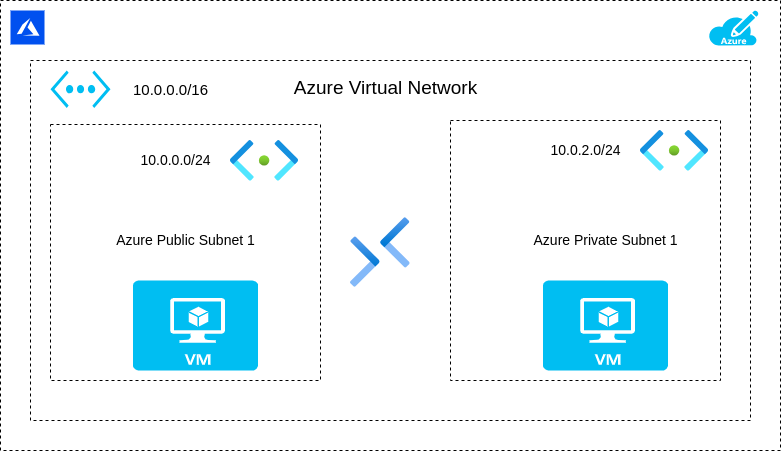
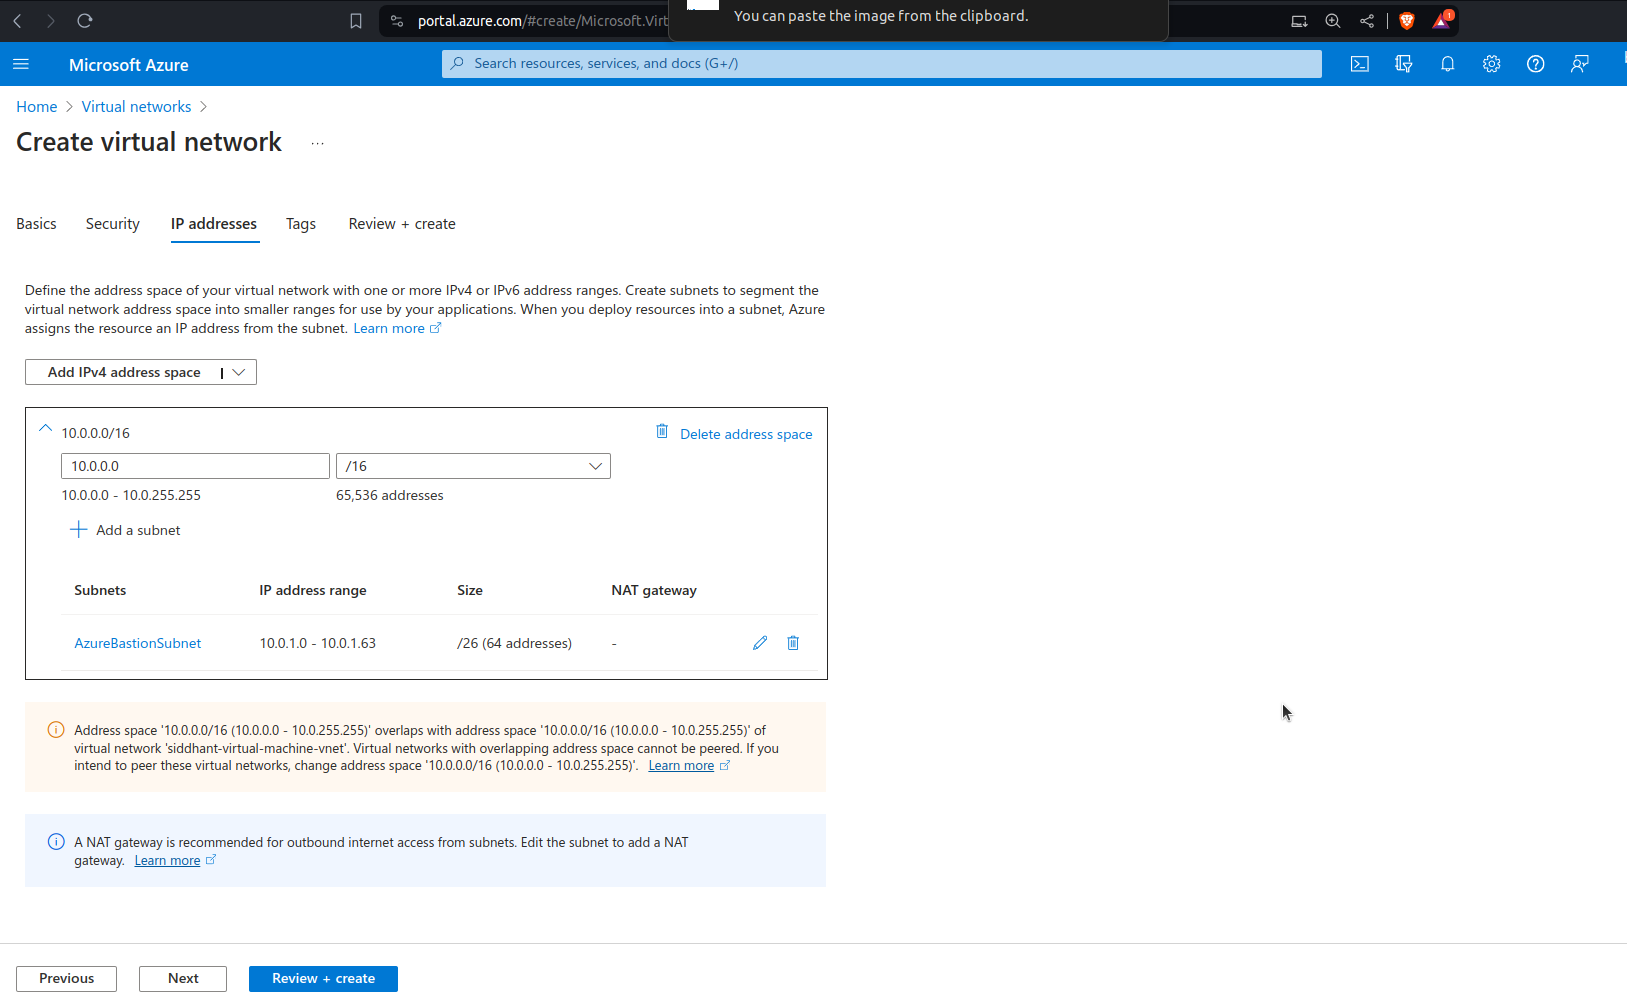
Before diving into Azure, plan your network. Our architecture will use a VNet with CIDR block 10.0.0.0/16, ensuring ample IP addresses for scalability. Within this VNet, we'll create two subnets:
Public Subnet: 10.0.0.0/24, for our front-end VM, accessible from the internet.
Private Subnet: 10.0.2.0/24, for our back-end VM, isolated from direct internet access.
1.1 Understand Your Architecture Requirements
First, understand the requirements and how your application's components interact. This will determine how you segment your network. For our two-tier architecture:
Front-End VM (Public Subnet): Requires internet access to serve content to users.
Back-End VM (Private Subnet): Holds sensitive data or processes and should not be directly accessible from the internet.
1.2 Planning the CIDR Blocks
Virtual Network (VNet): Choose a CIDR block that is large enough to accommodate future growth. The
10.0.0.0/16CIDR block provides up to 65,536 IP addresses, offering ample space for subnetting and scalability.Public Subnet:
10.0.0.0/24offers 256 IP addresses (though a few are reserved by Azure), suitable for front-end services that might scale horizontally.Private Subnet:
10.0.2.0/24also provides 256 IP addresses, catering to back-end services that require isolation from the public internet.
1.3 Creating the Virtual Network in Azure
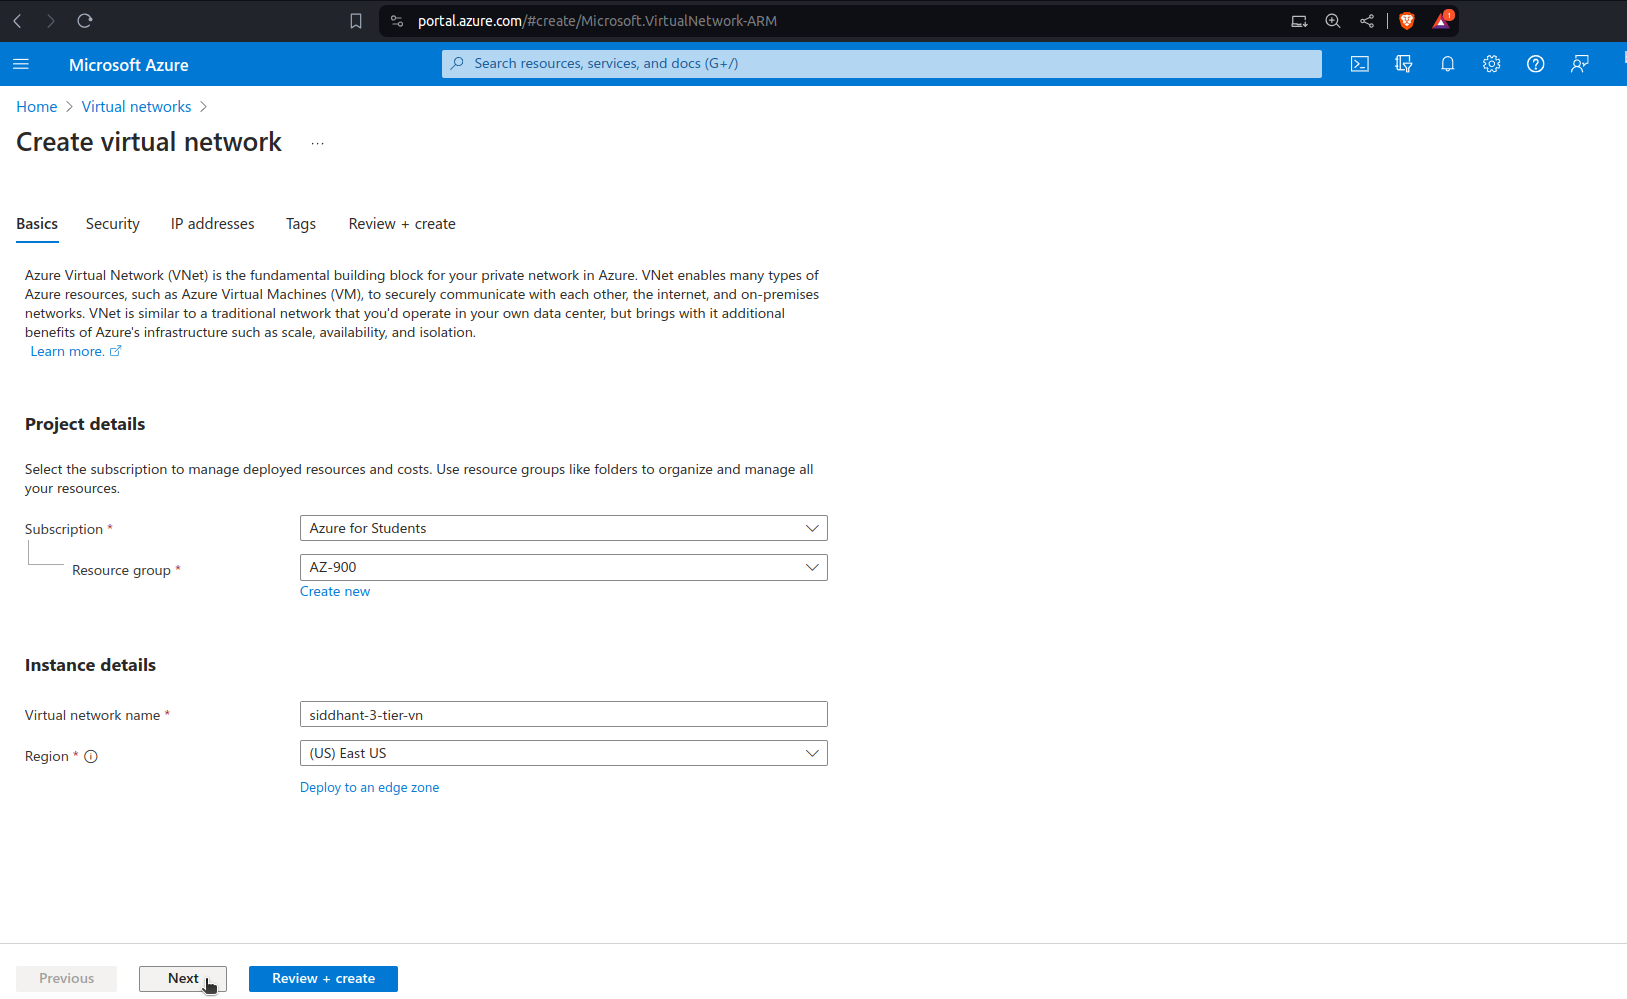
Navigate to the Azure Portal and sign in.
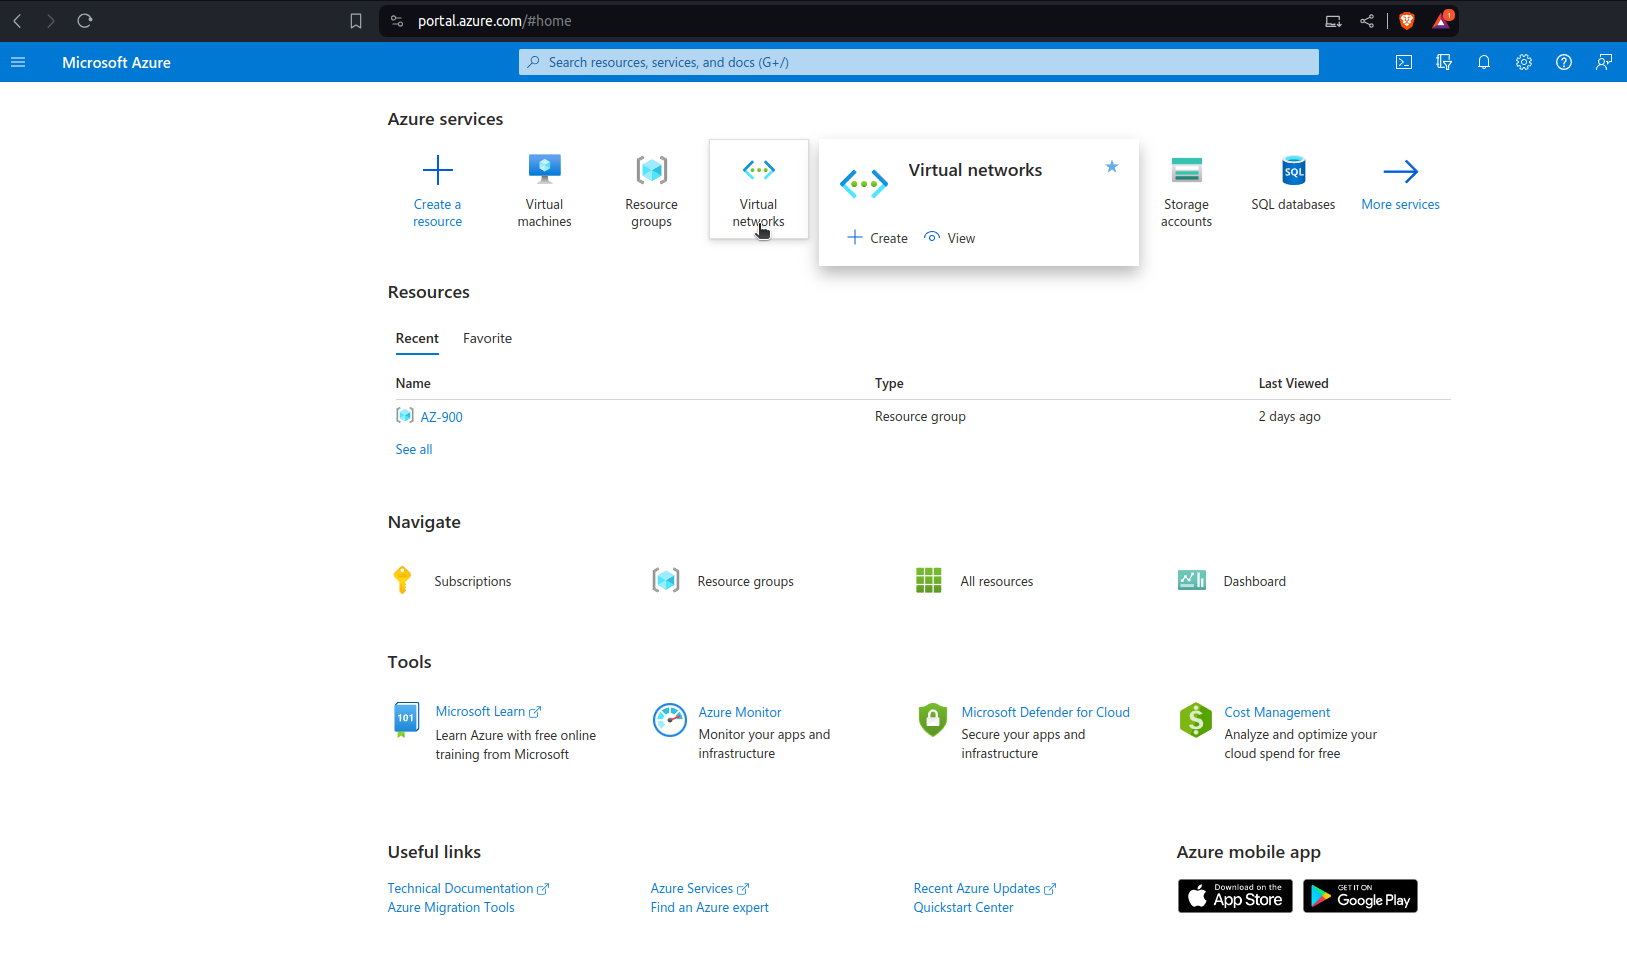
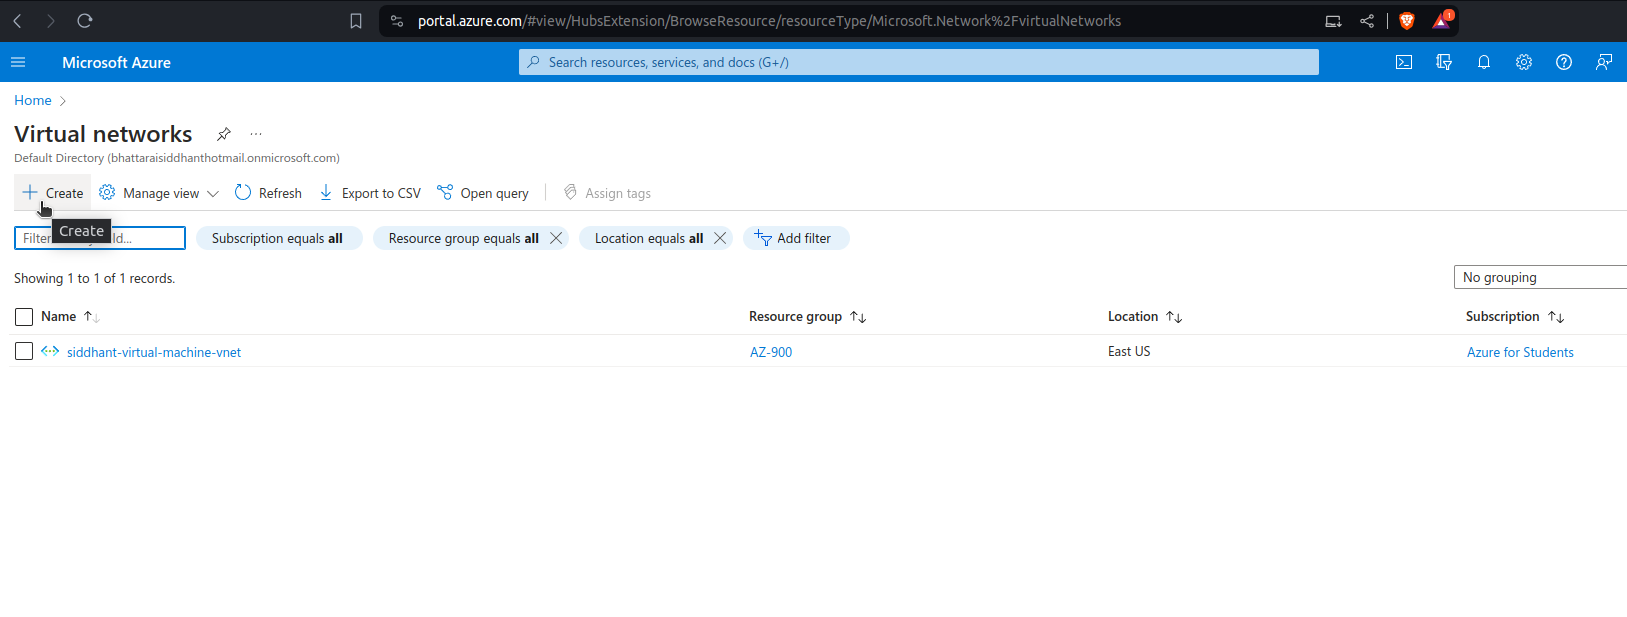
Go to the "Create a resource" section and select "
Networking" > "Virtual network" Or simply click on "Virtual Networks"Setup the VNet:
Name: Choose a meaningful name, e.g.,
VNet-AZ900.Address space: Enter
10.0.0.0/16.Subscription: Select the appropriate subscription.
Resource group: Create a new one (e.g.,
AZ-900) or select an existing group.Location: Choose the Azure region closest to your users or requirements.
Click "Create" to provision your VNet.

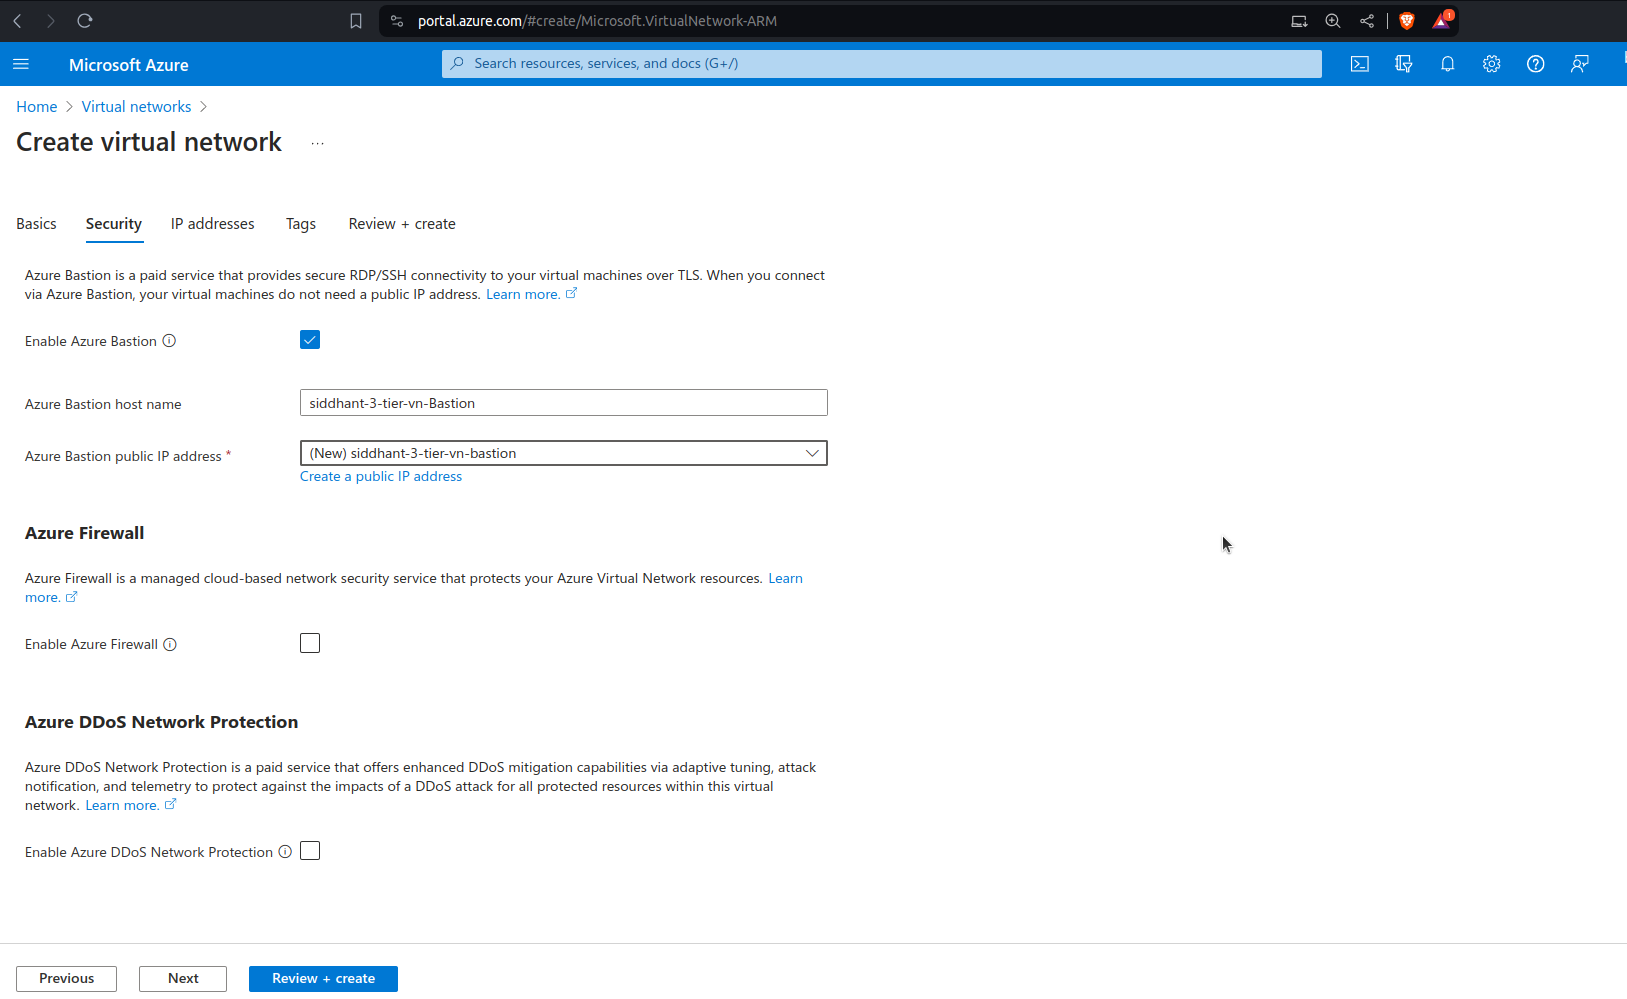
Creating an Azure Bastion host is a vital step in securing your virtual network (VNet) infrastructure, as it allows you to securely access your virtual machines (VMs) without exposing them to the public internet. Azure Bastion provides RDP and SSH access directly from the Azure portal over SSL.
- Check the box
Enable Azure Bastion, it will automatically chooseip-addressor you can create one.
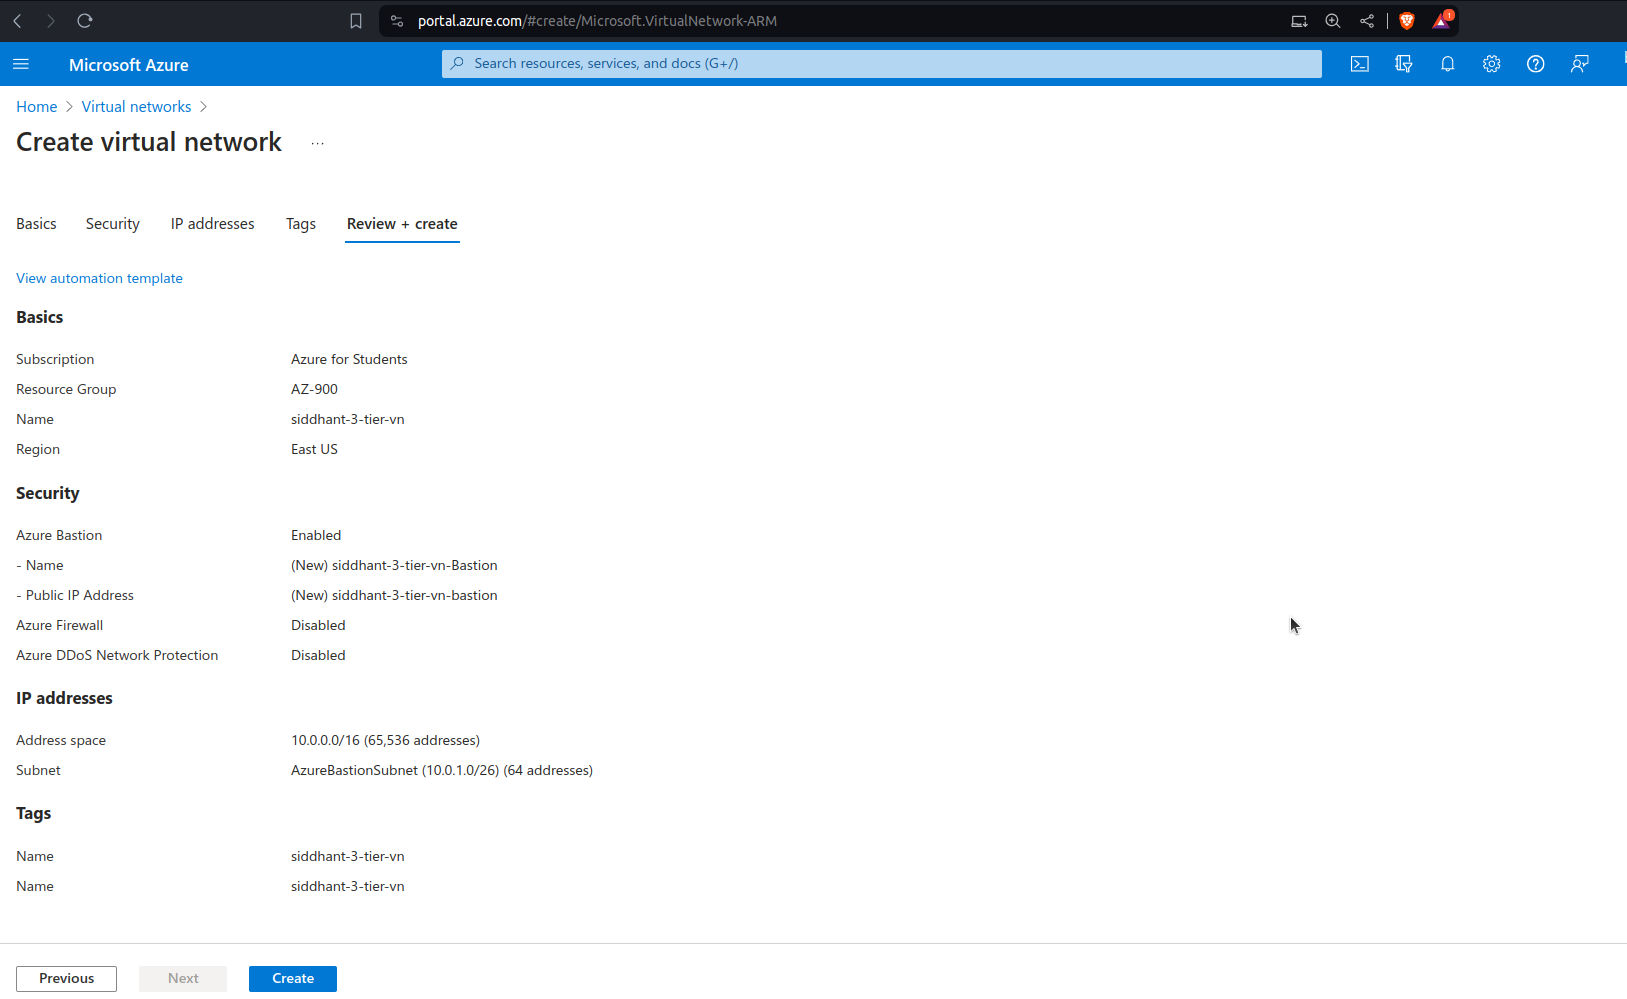
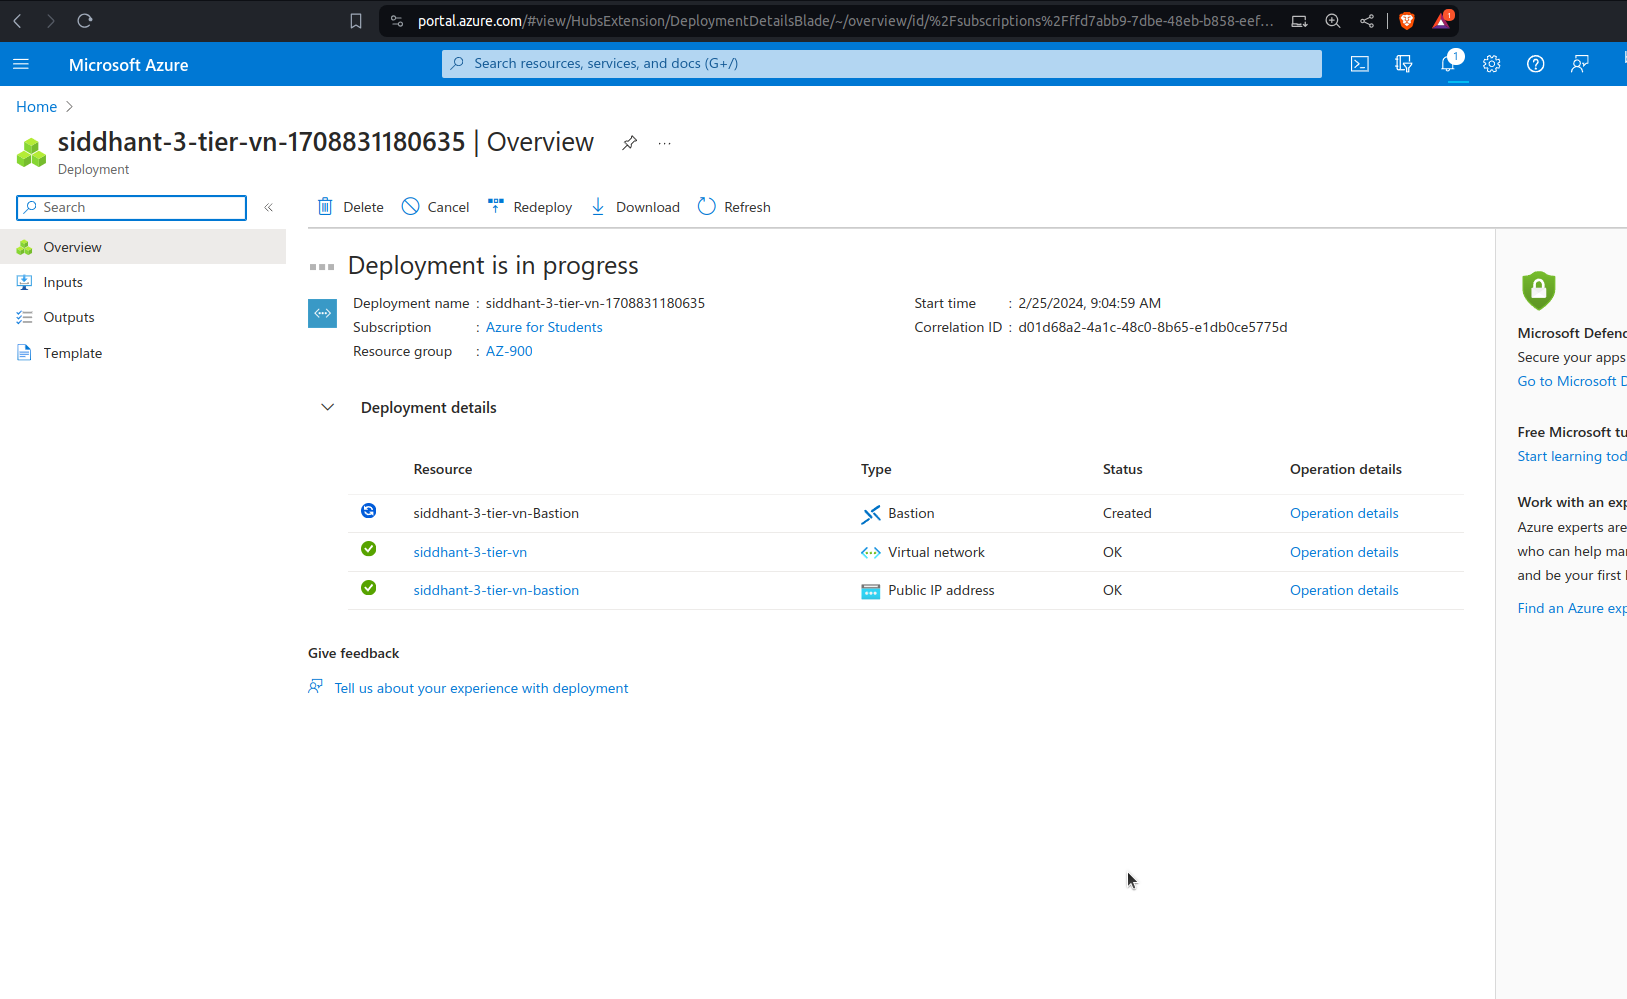
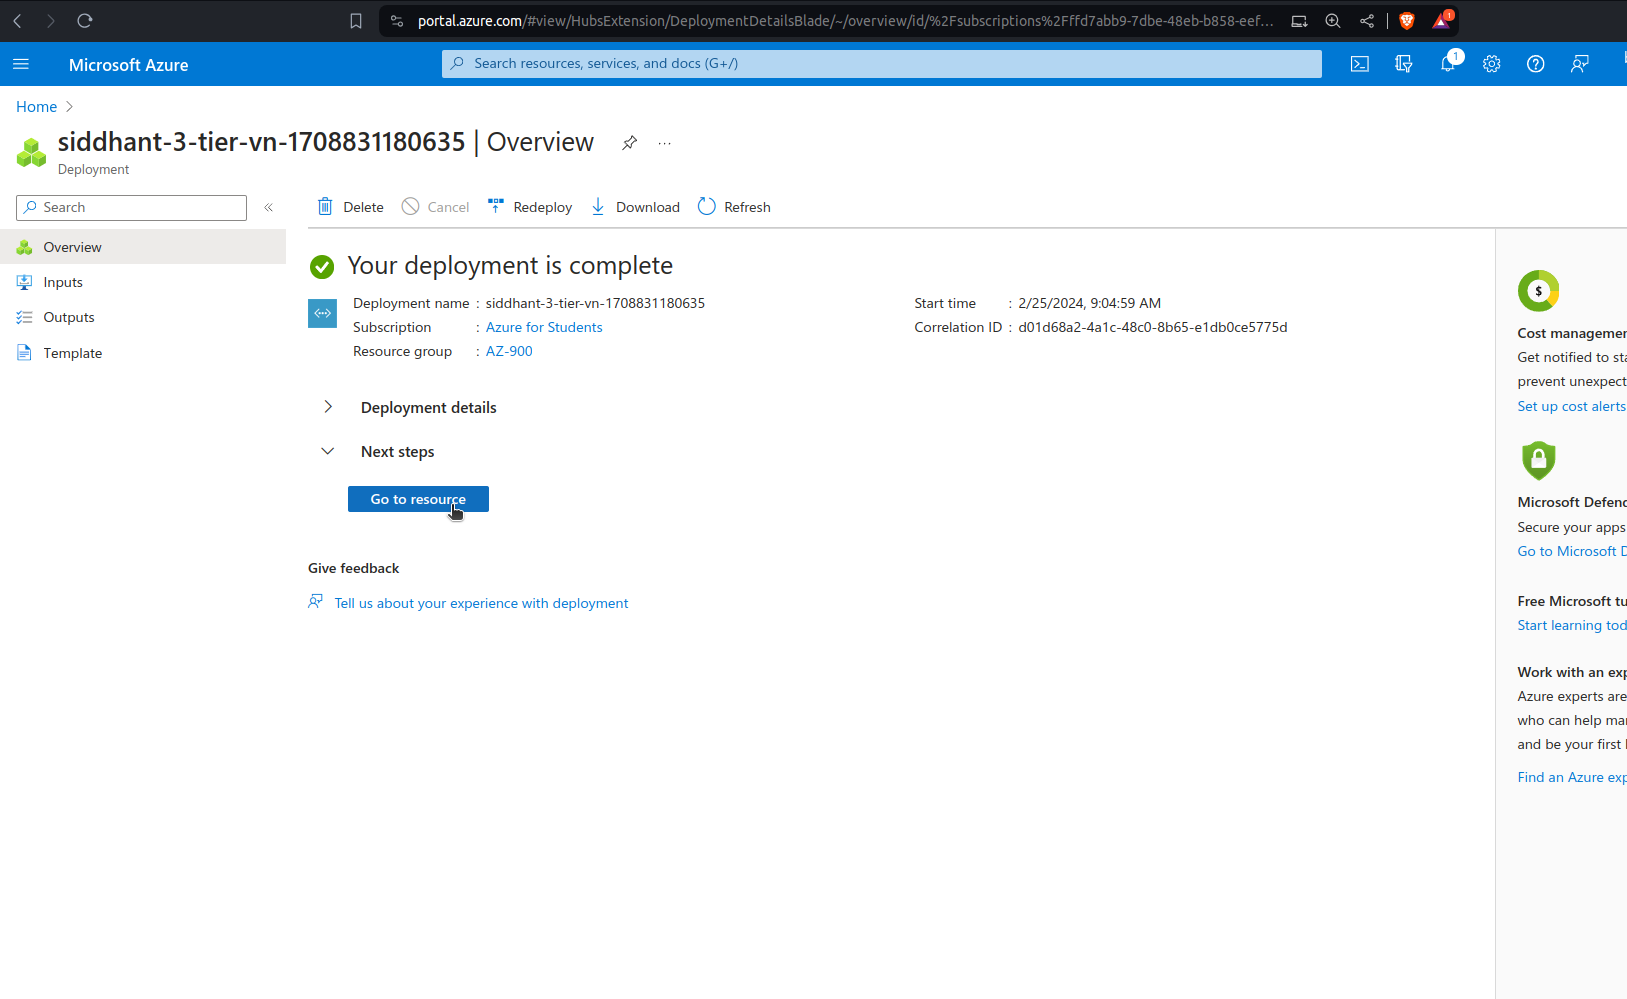
1.4 Adding Subnets to the Virtual Network
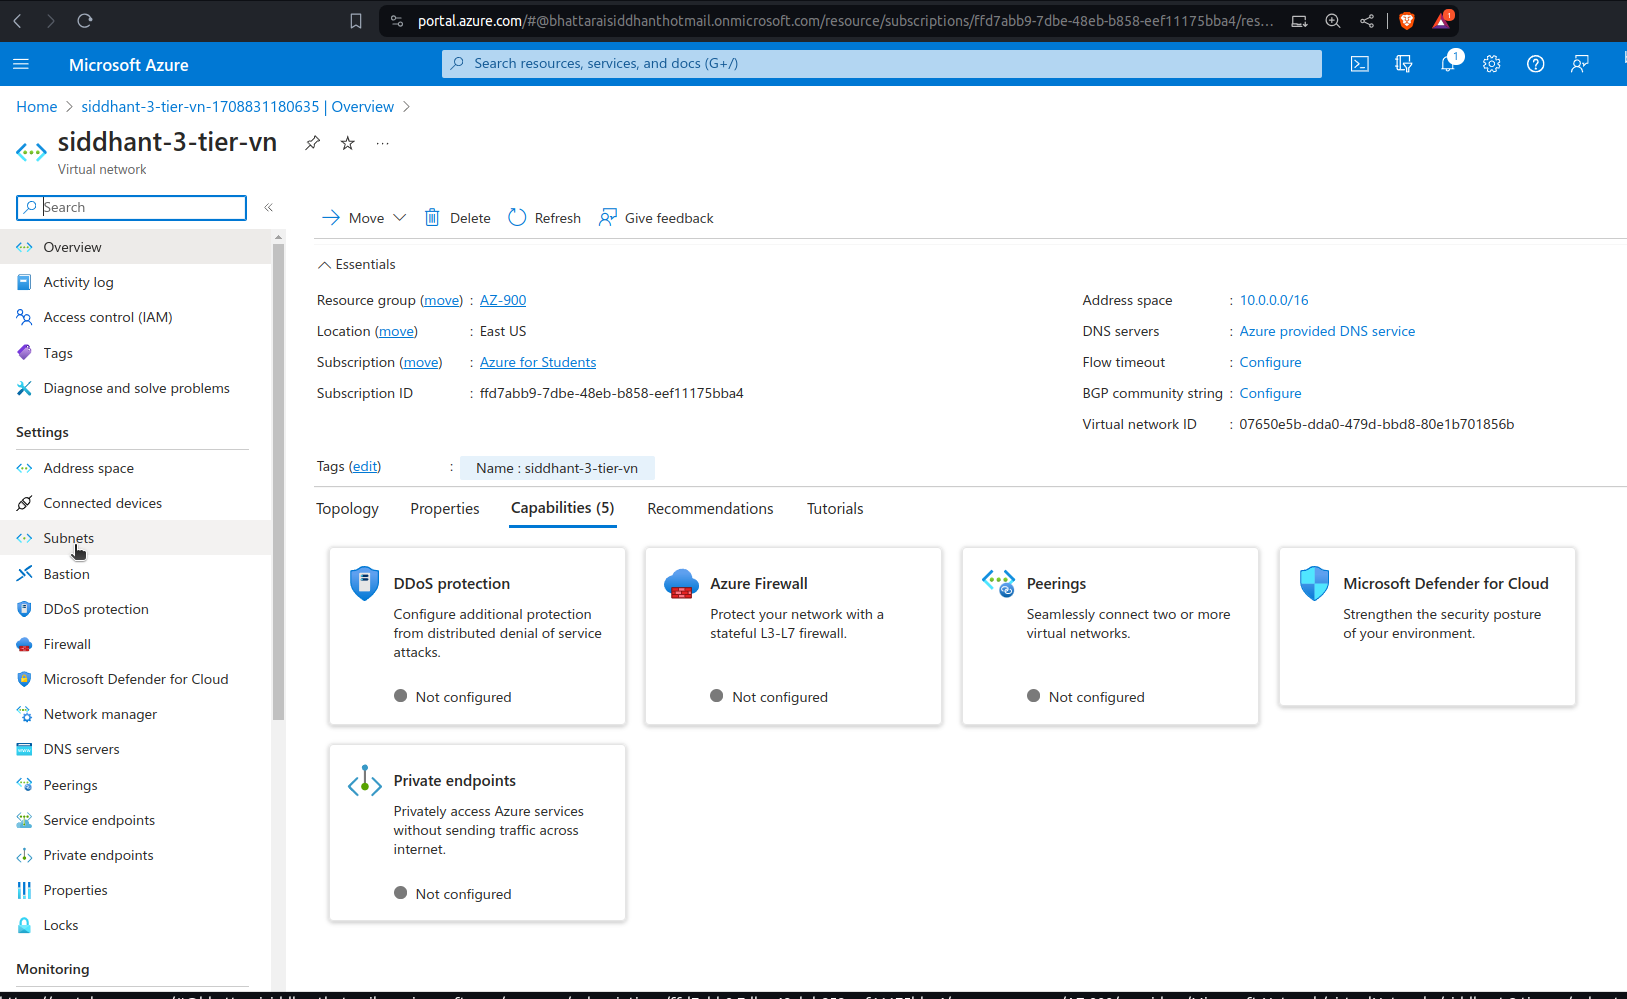
After creating your VNet, add your planned subnets to it:
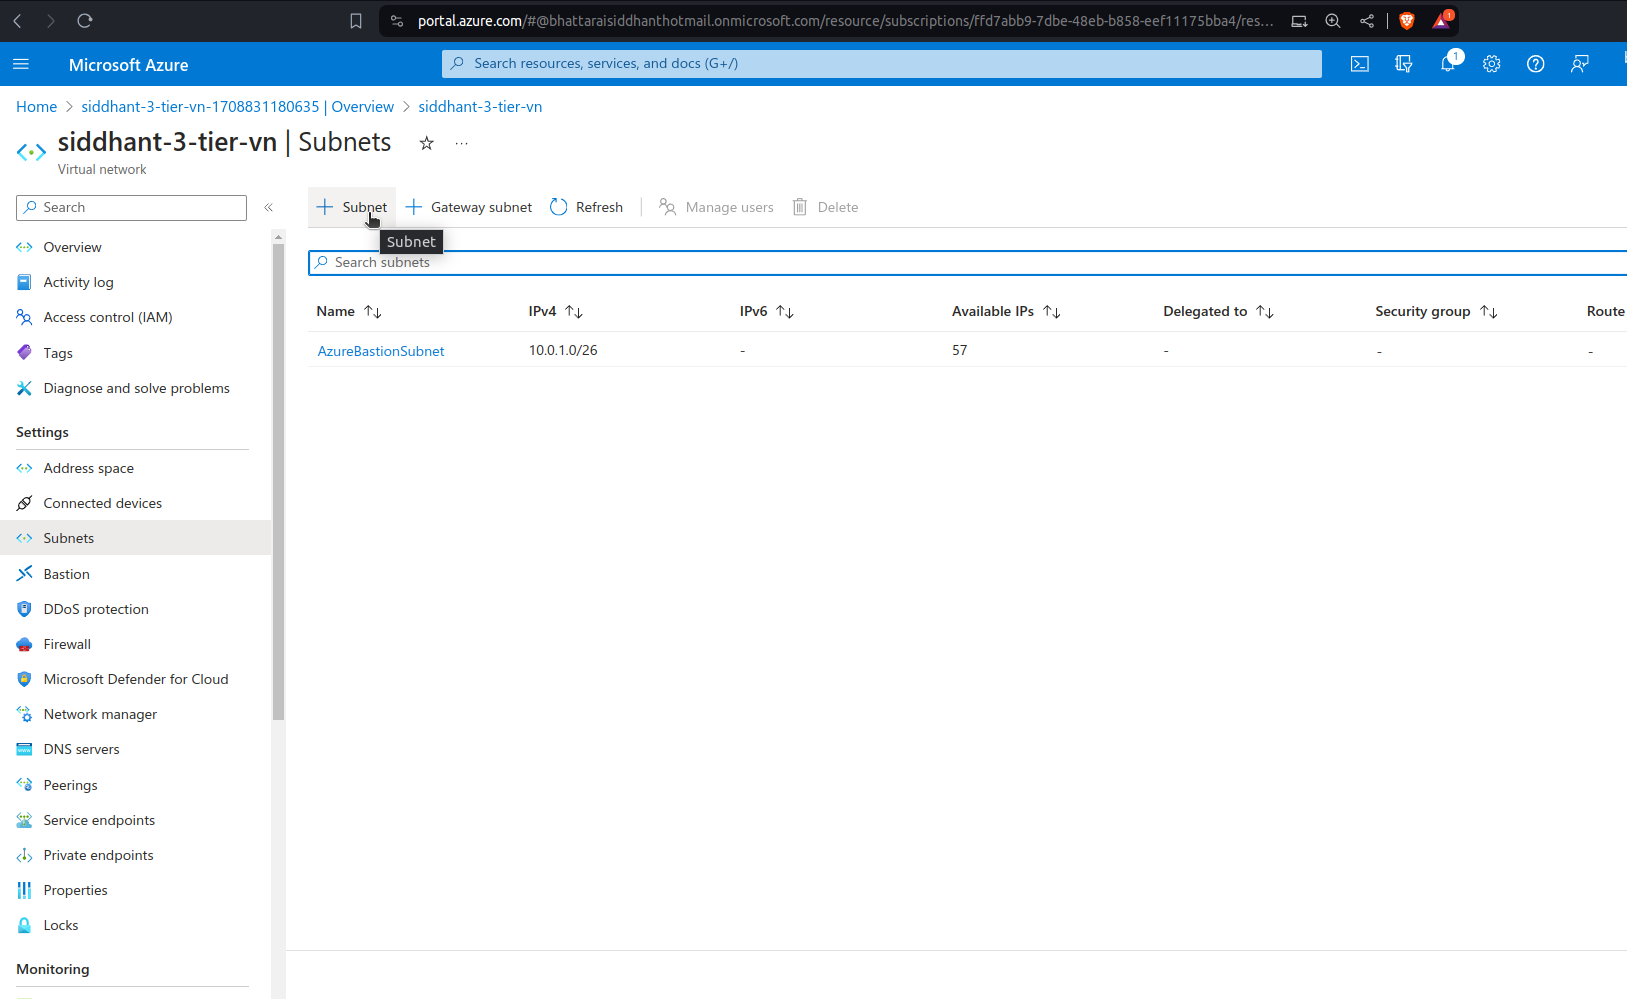
Navigate to your VNet: Go to the Azure Portal > Networking > Virtual networks, then select your VNet (
VNet-AZ900).Add the Public Subnet:
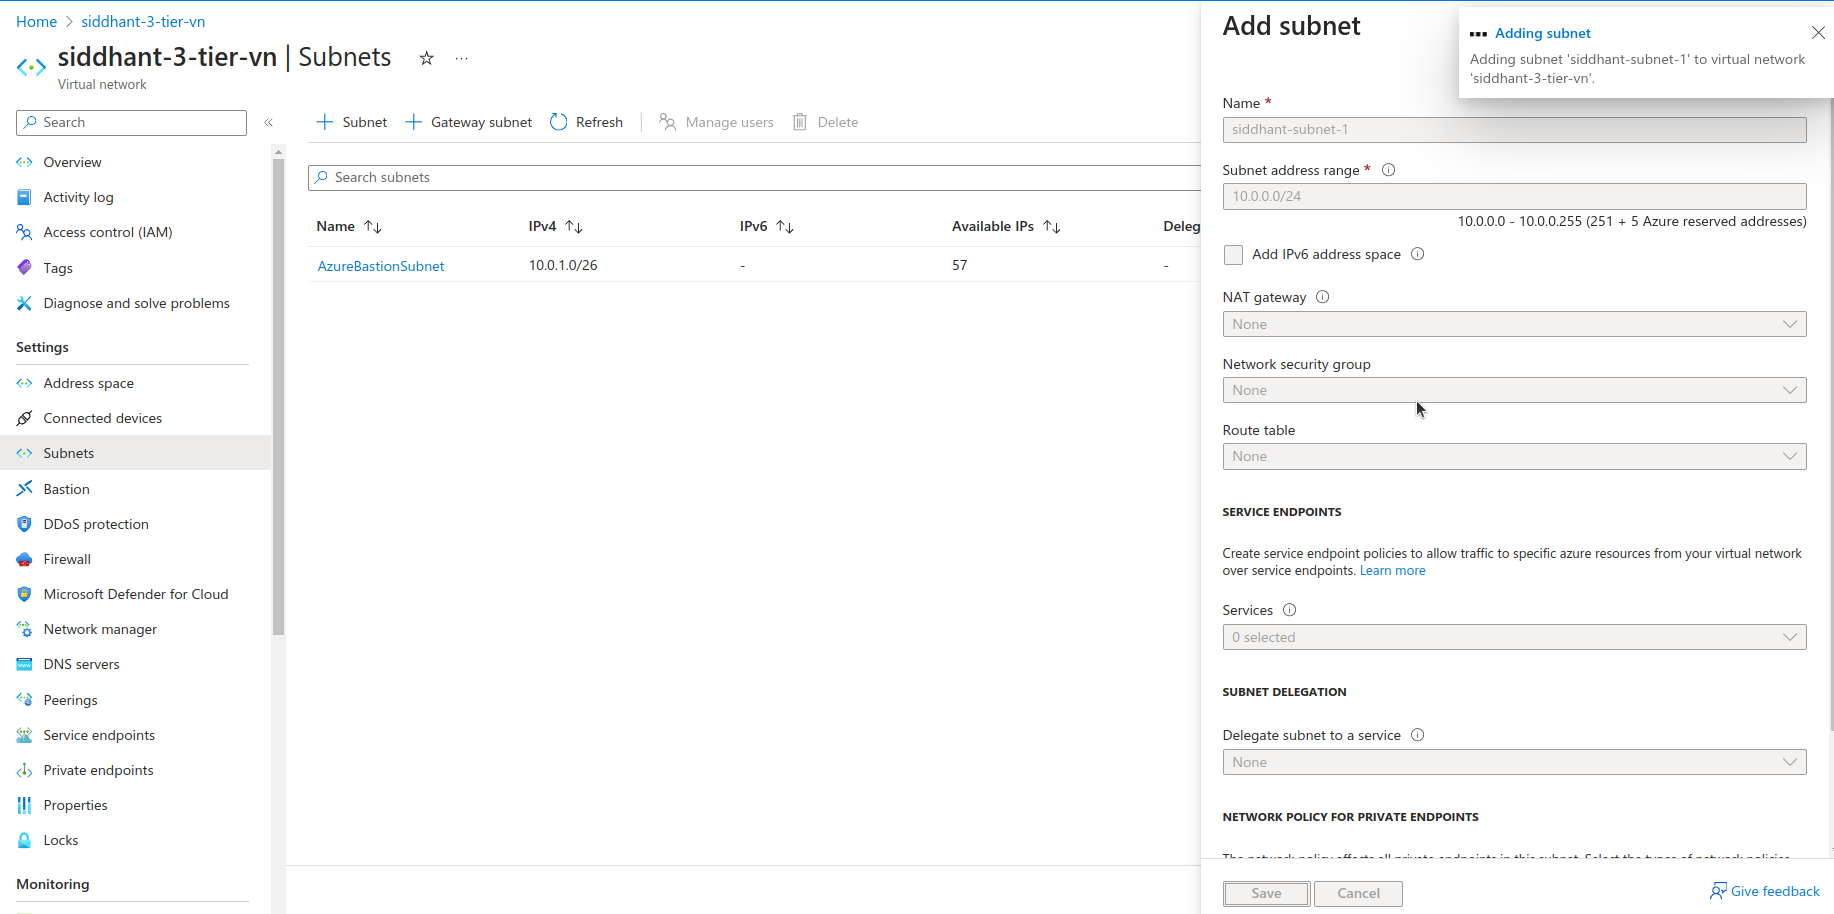
Click on "Subnets" > "+ Subnet".
Name:
public-subnet.Address range (CIDR block): Enter
10.0.0.0/24.Configure any additional settings as needed, such as routing or security.
Click "Save" to create the subnet.
Add the Private Subnet:
Repeat the steps to add another subnet.
Name:
private-subnet.Address range (CIDR block): Enter
10.0.2.0/24.Ensure this subnet's settings align with your security requirements for backend access.
Click "Save" to create the subnet.
Step 2: Deploying Virtual Machines
Deploying a VM in the Public Subnet
2.1 Selecting a VM Size and Image
Go to the Azure Portal: Sign in to your account.
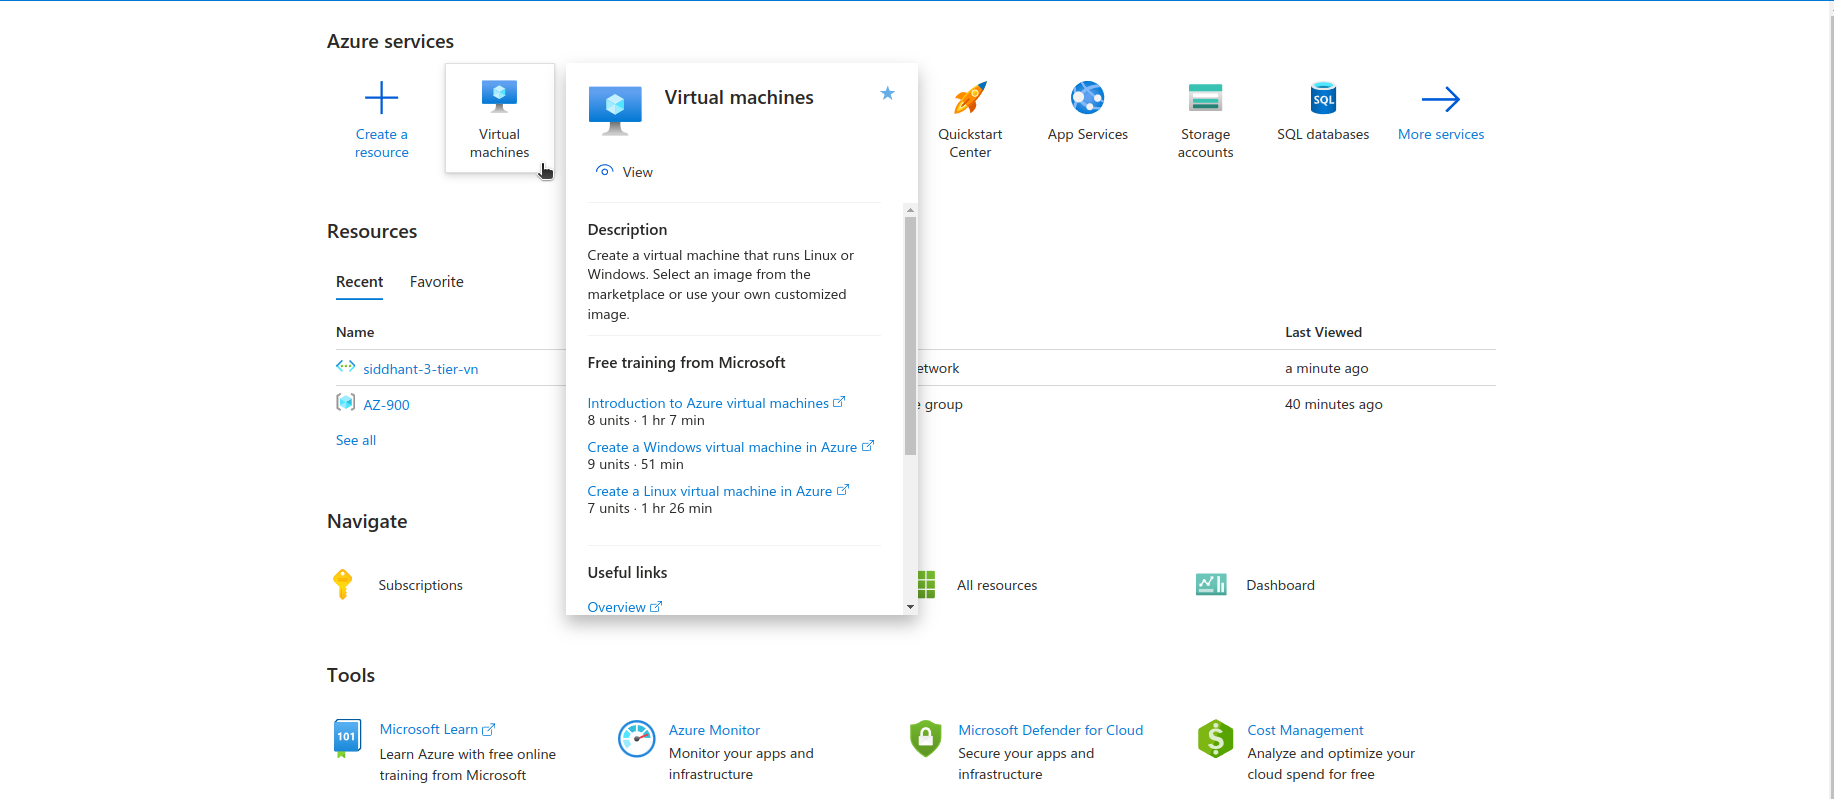
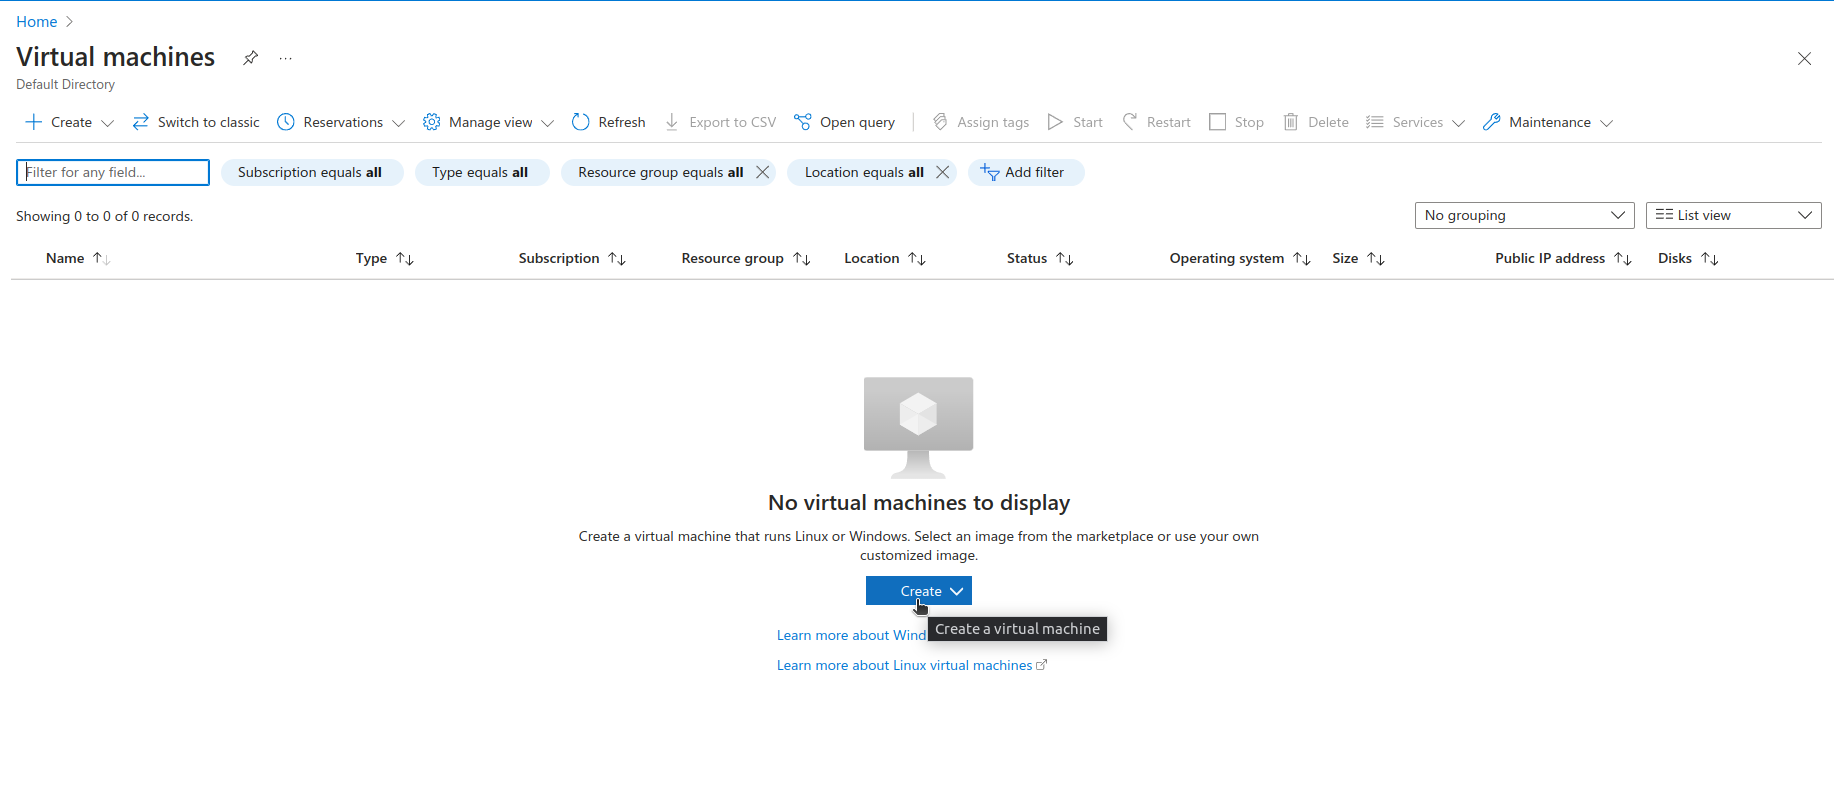
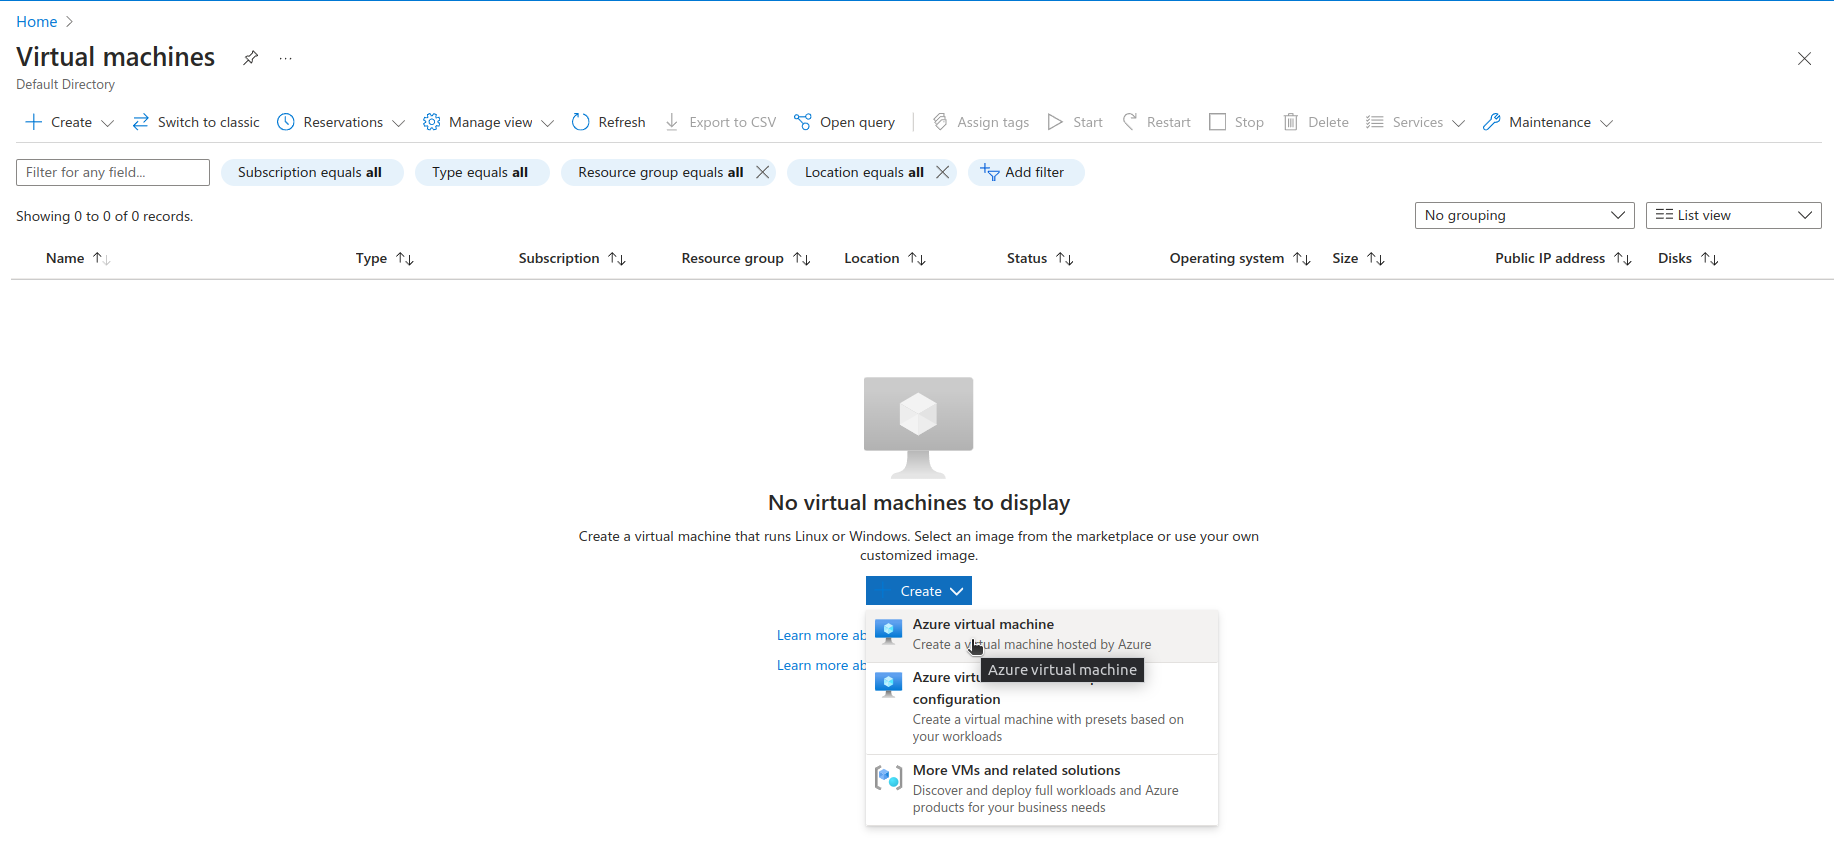
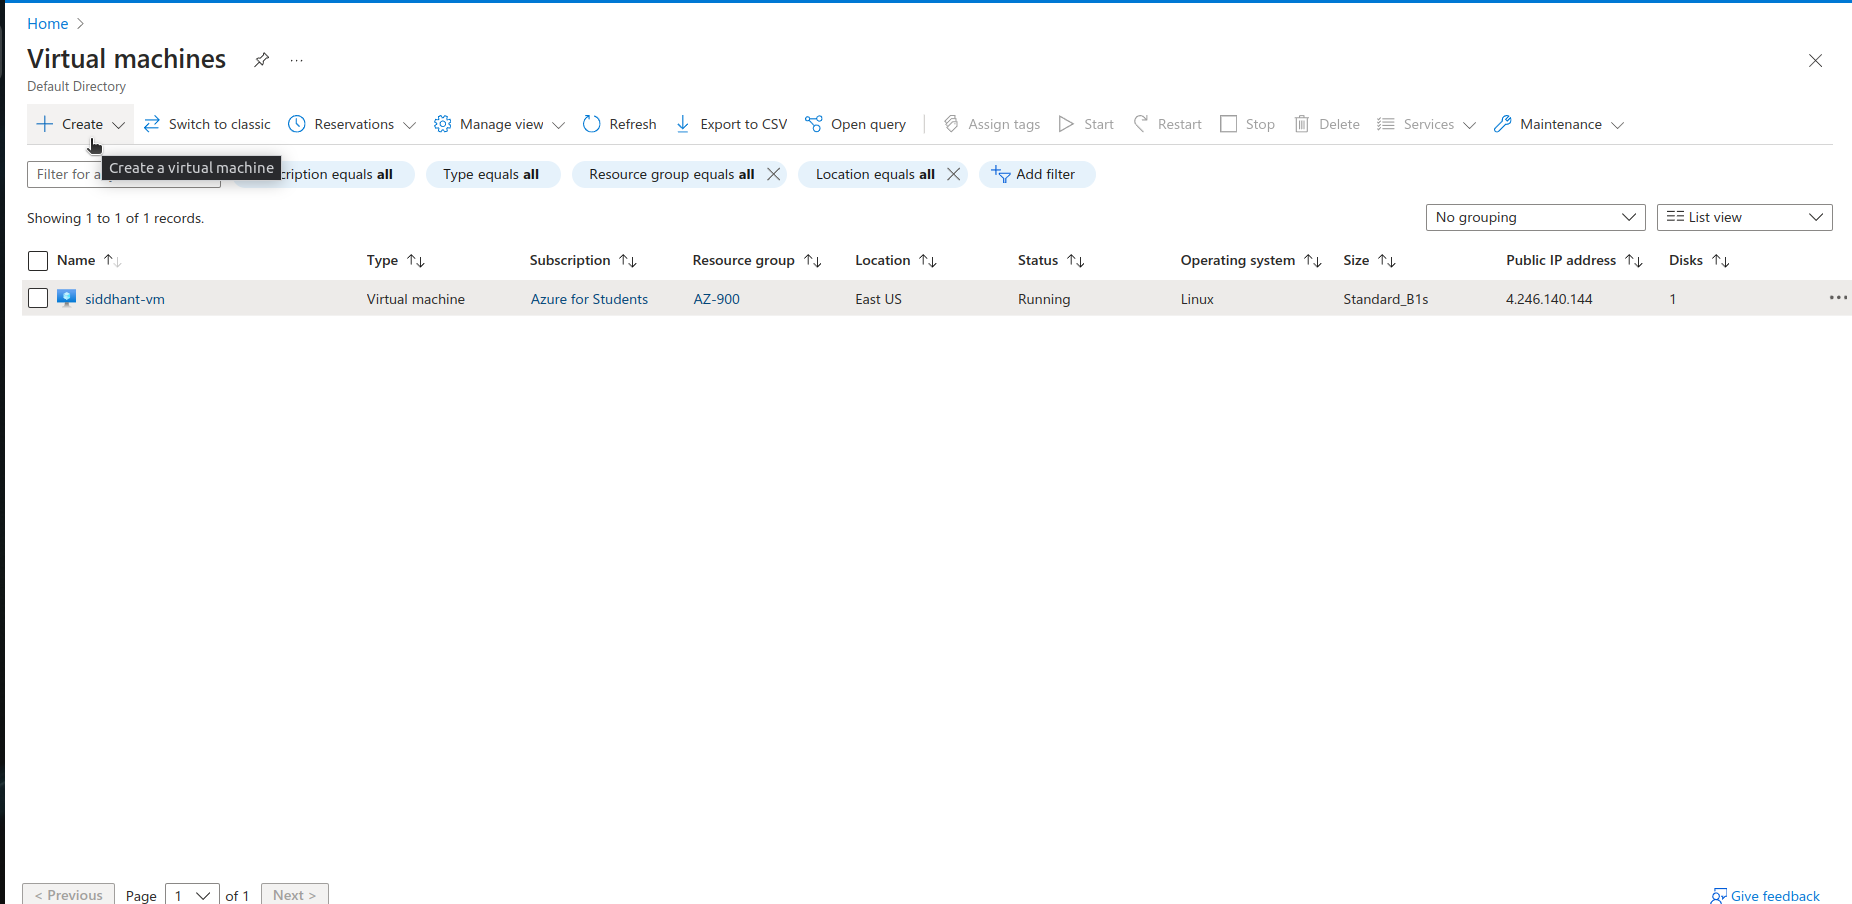
Create a new VM: Navigate to "Virtual machines" and click on "+ Create" or "+ Add".
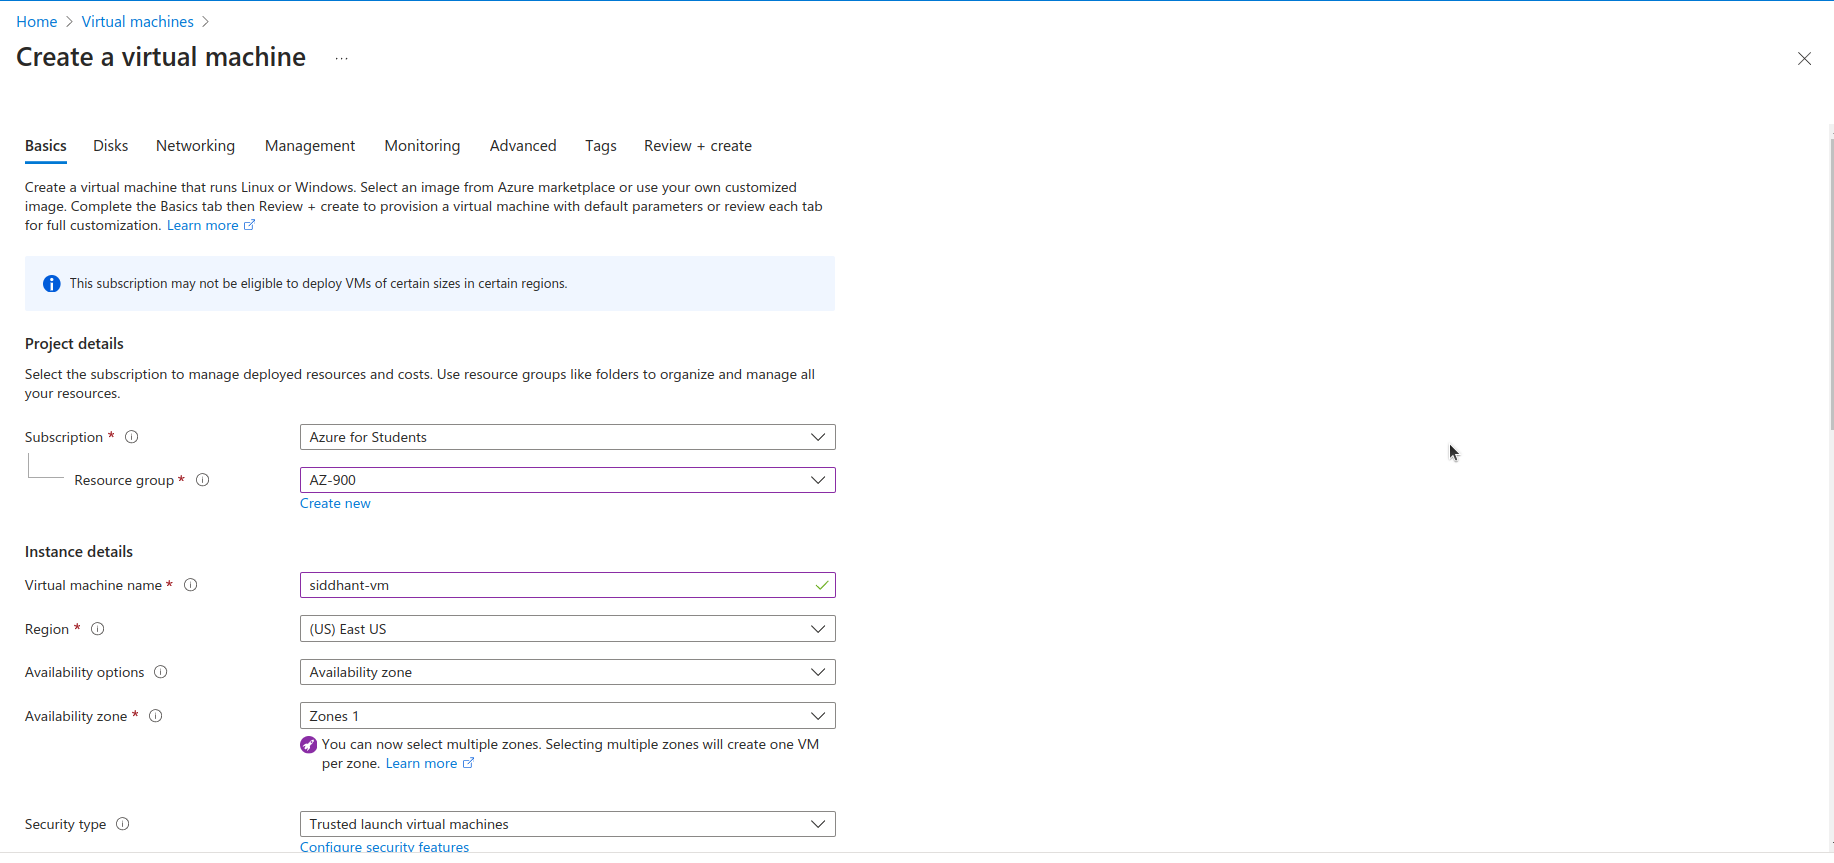
Basics:
Subscription: Choose the appropriate subscription.
Resource group: Select the
AZ-900resource group you previously created.Virtual machine name: Give your VM a descriptive name, like
frontend-vm.Region: Choose the same region as your VNet.
Availability options: Select an option based on your availability needs (e.g., no infrastructure redundancy required).
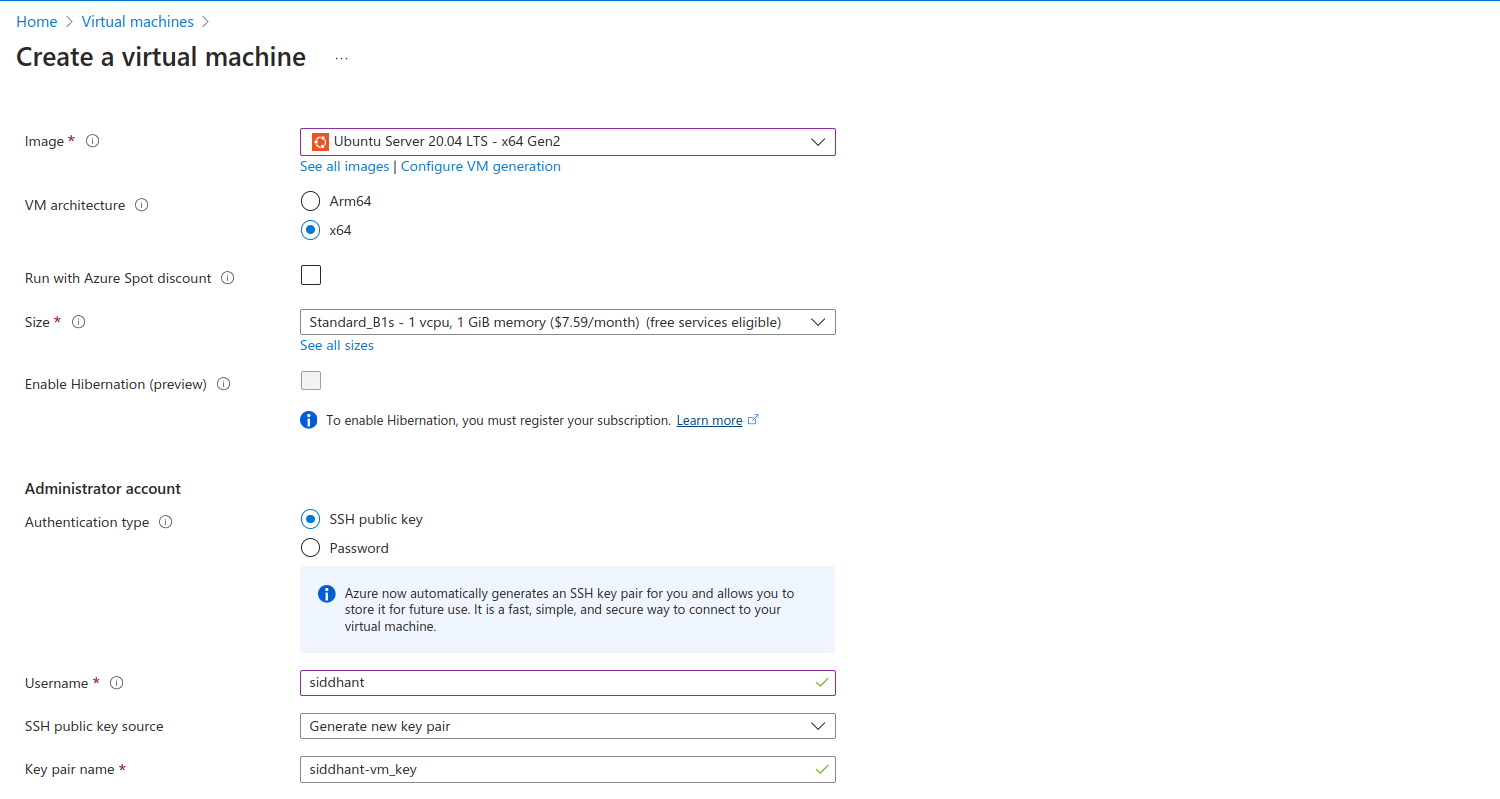
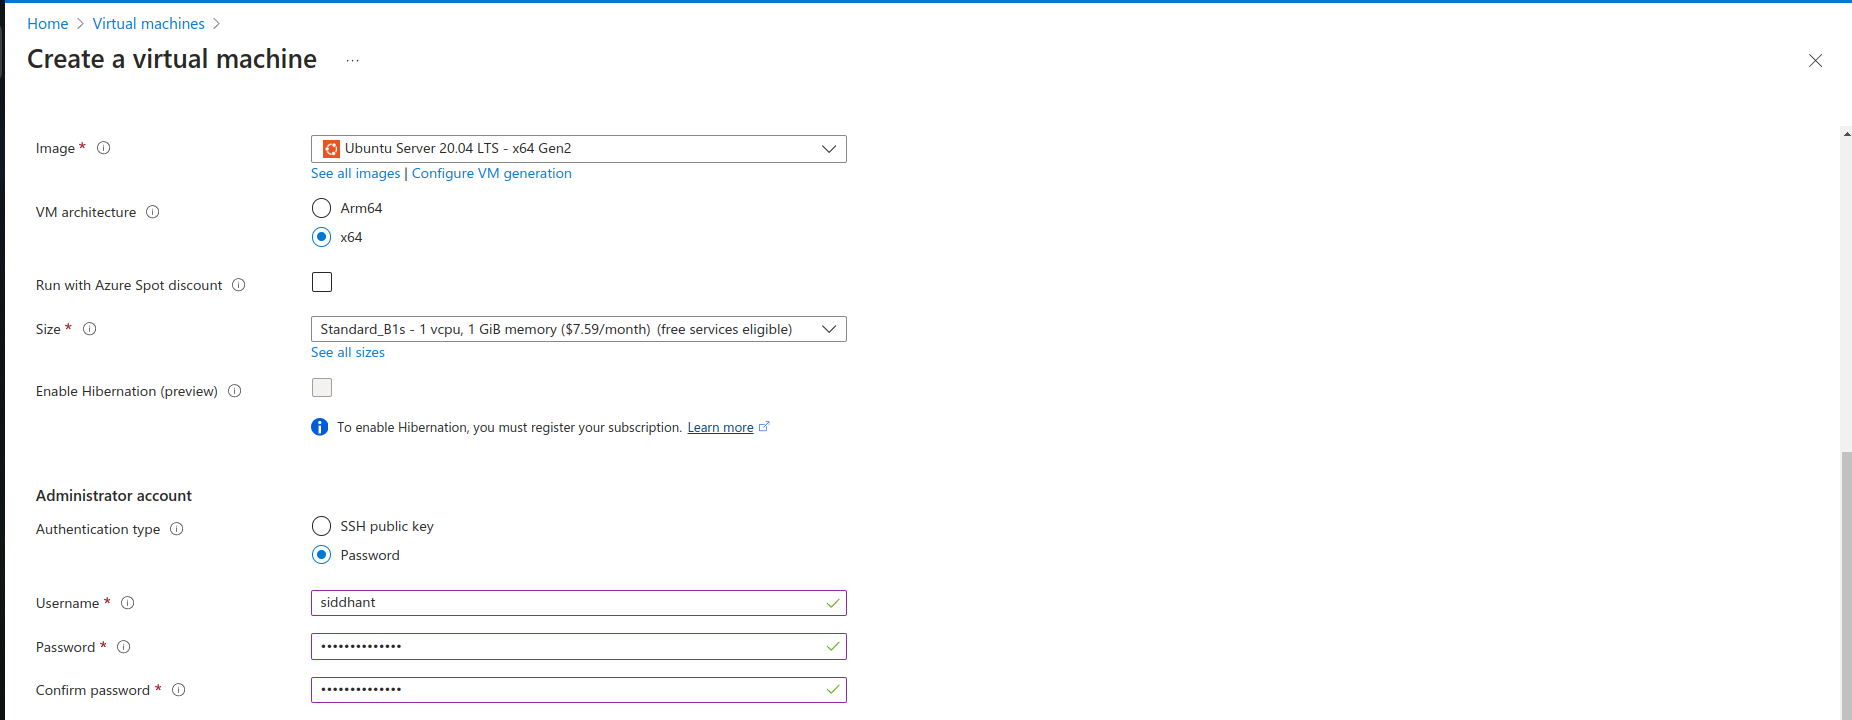
Image: Select an OS image, such as Ubuntu 18.04 LTS, suitable for your front-end application.
Size: Choose a VM size that matches your front-end's performance requirements. Azure offers a variety of sizes, so select one that provides the necessary CPU, memory, and storage for your application.
2.2 Configure Administrator Account
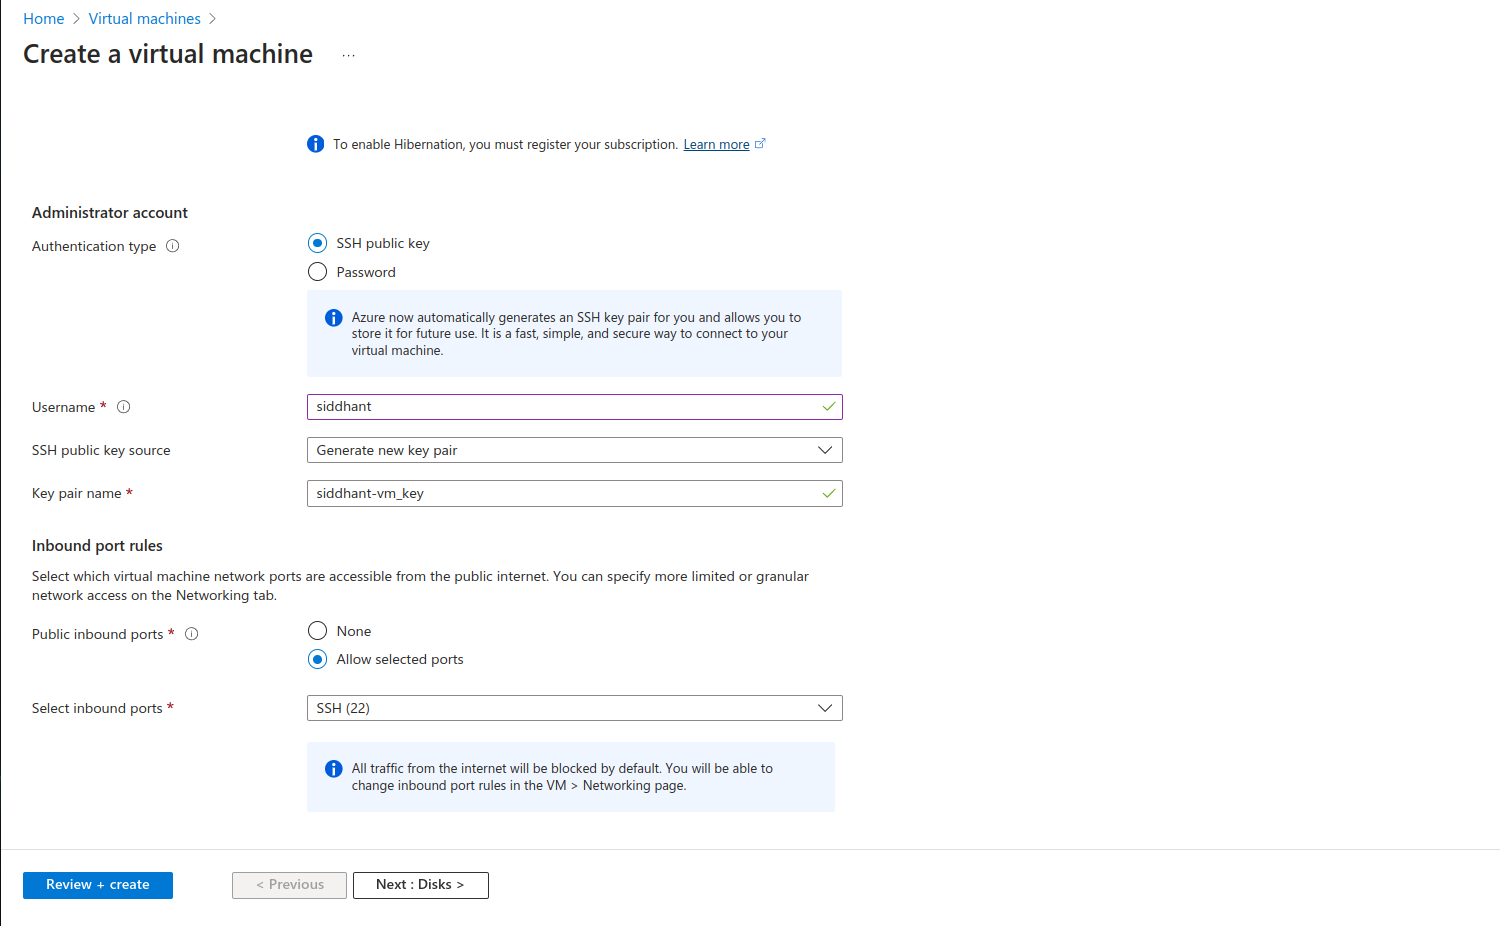
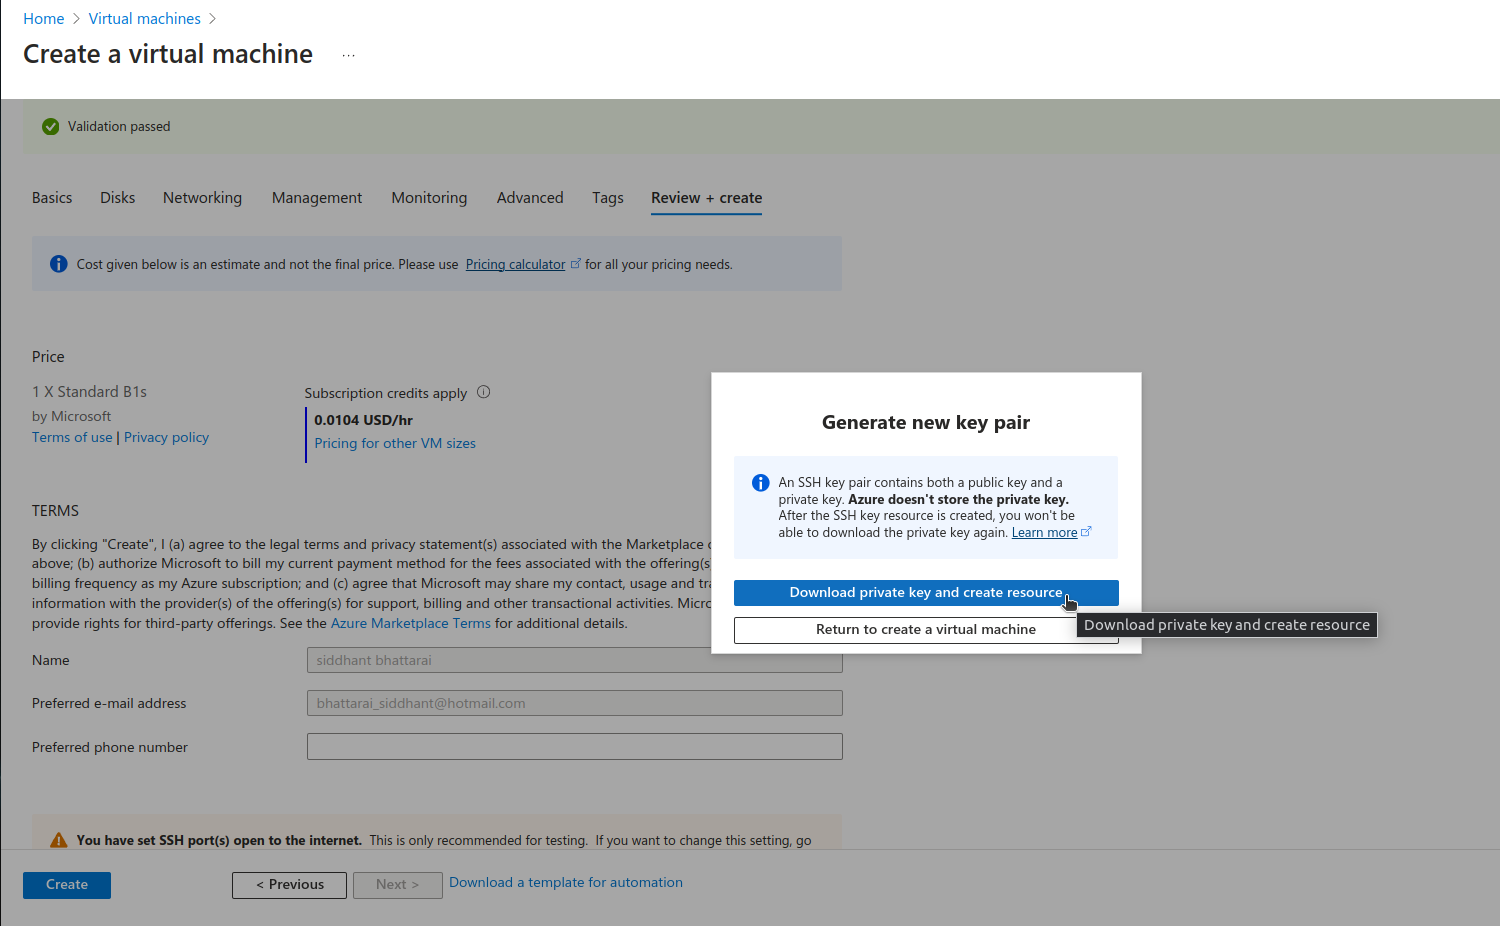
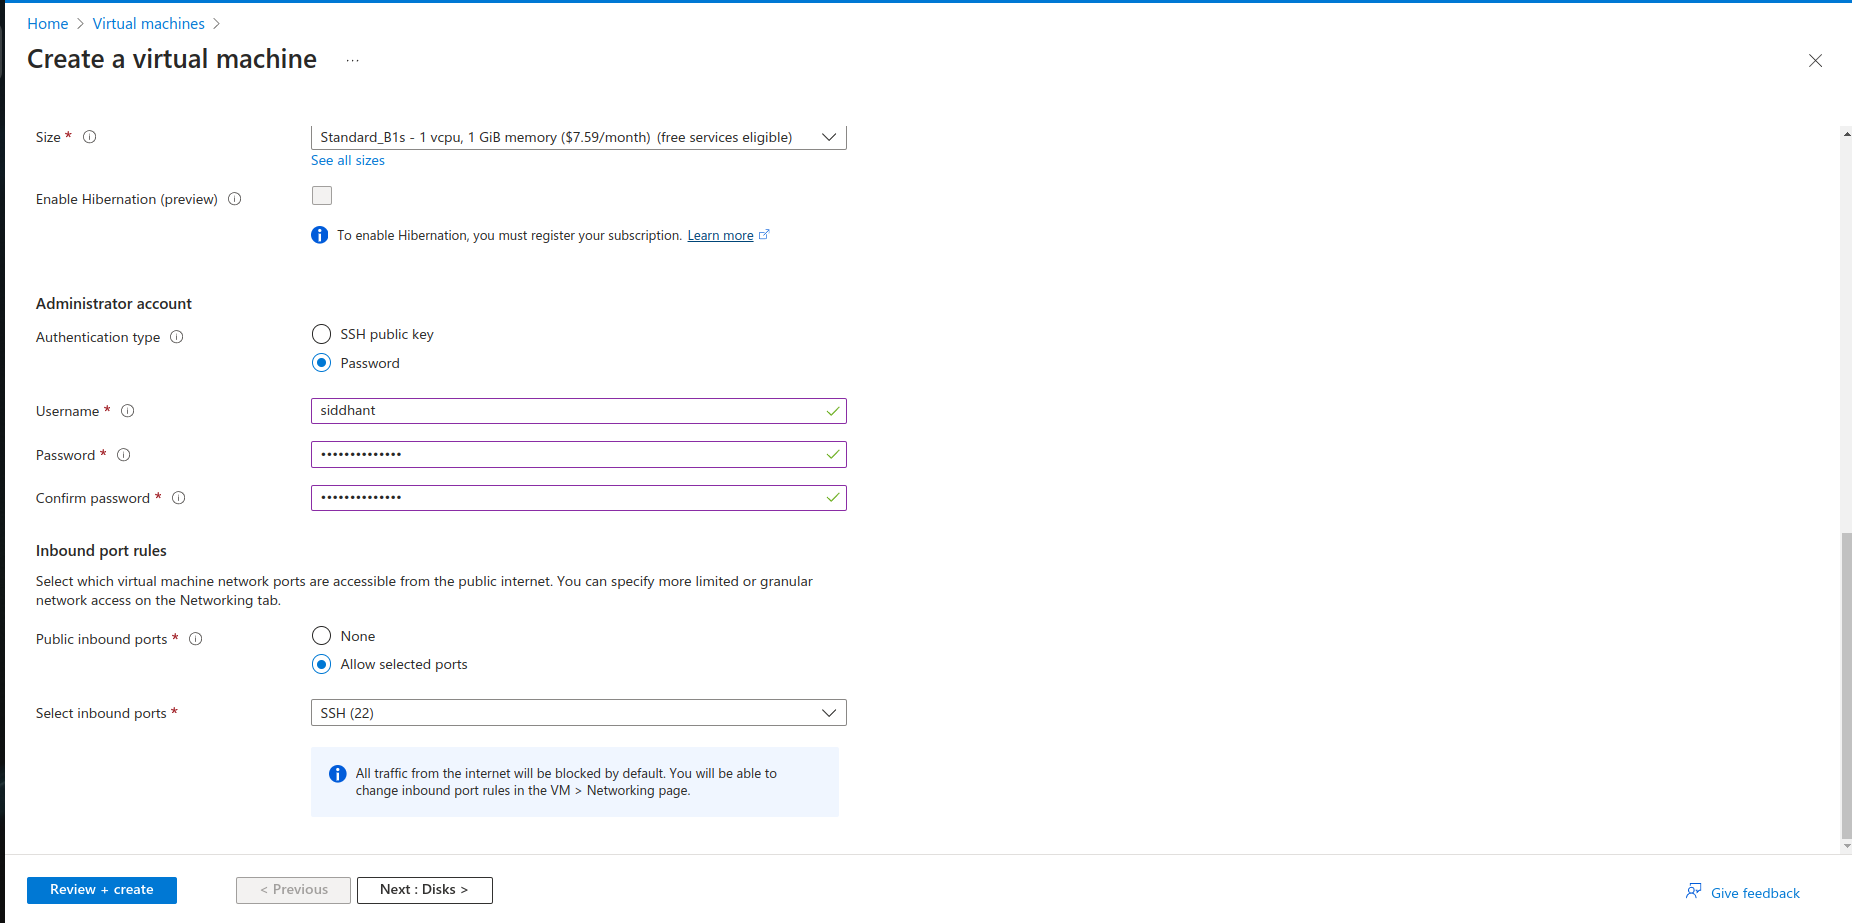
Authentication type: Choose between SSH public key and password. SSH is recommended for Linux VMs for security.
Username: Enter a username.
SSH public key or password: Provide your SSH public key or create a strong password.
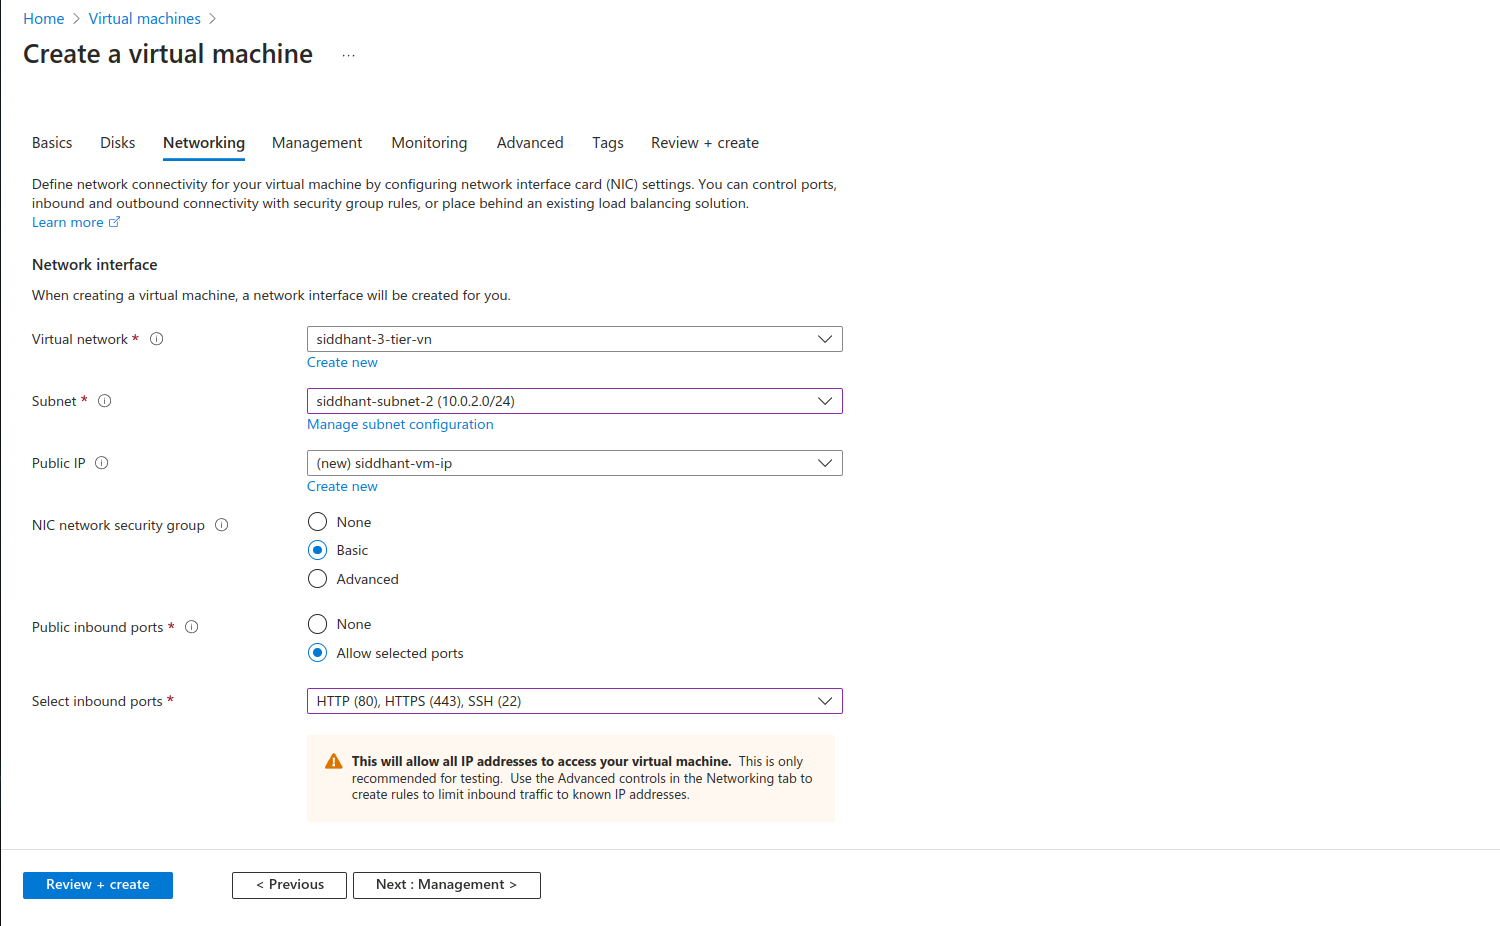
2.3 Configure Networking Settings
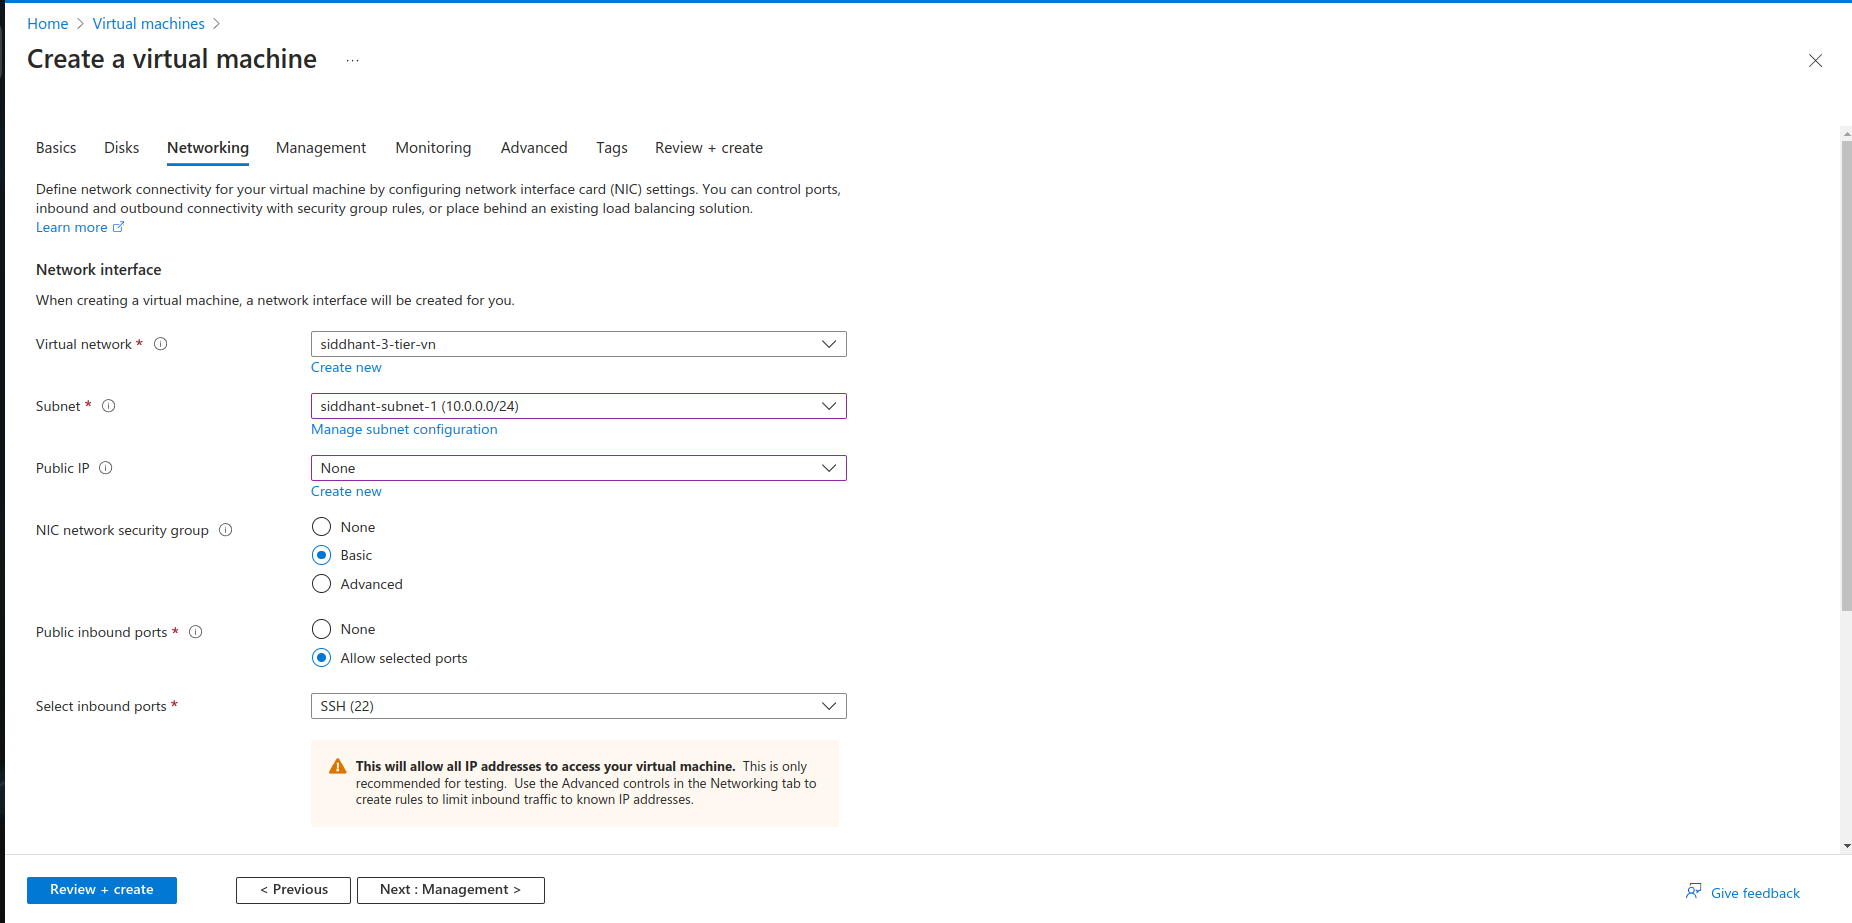
Virtual network: Select the VNet (
VNet-AZ900) you created earlier.Subnet: Choose the
public-subnet(10.0.0.0/24).Public IP: Enable a public IP address. This allows your VM to be accessible from the internet.
NIC network security group (NSG): Either create a new NSG or select an existing one that defines the security rules for your VM. Ensure the NSG allows inbound traffic on ports required by your application (e.g., HTTP/HTTPS).
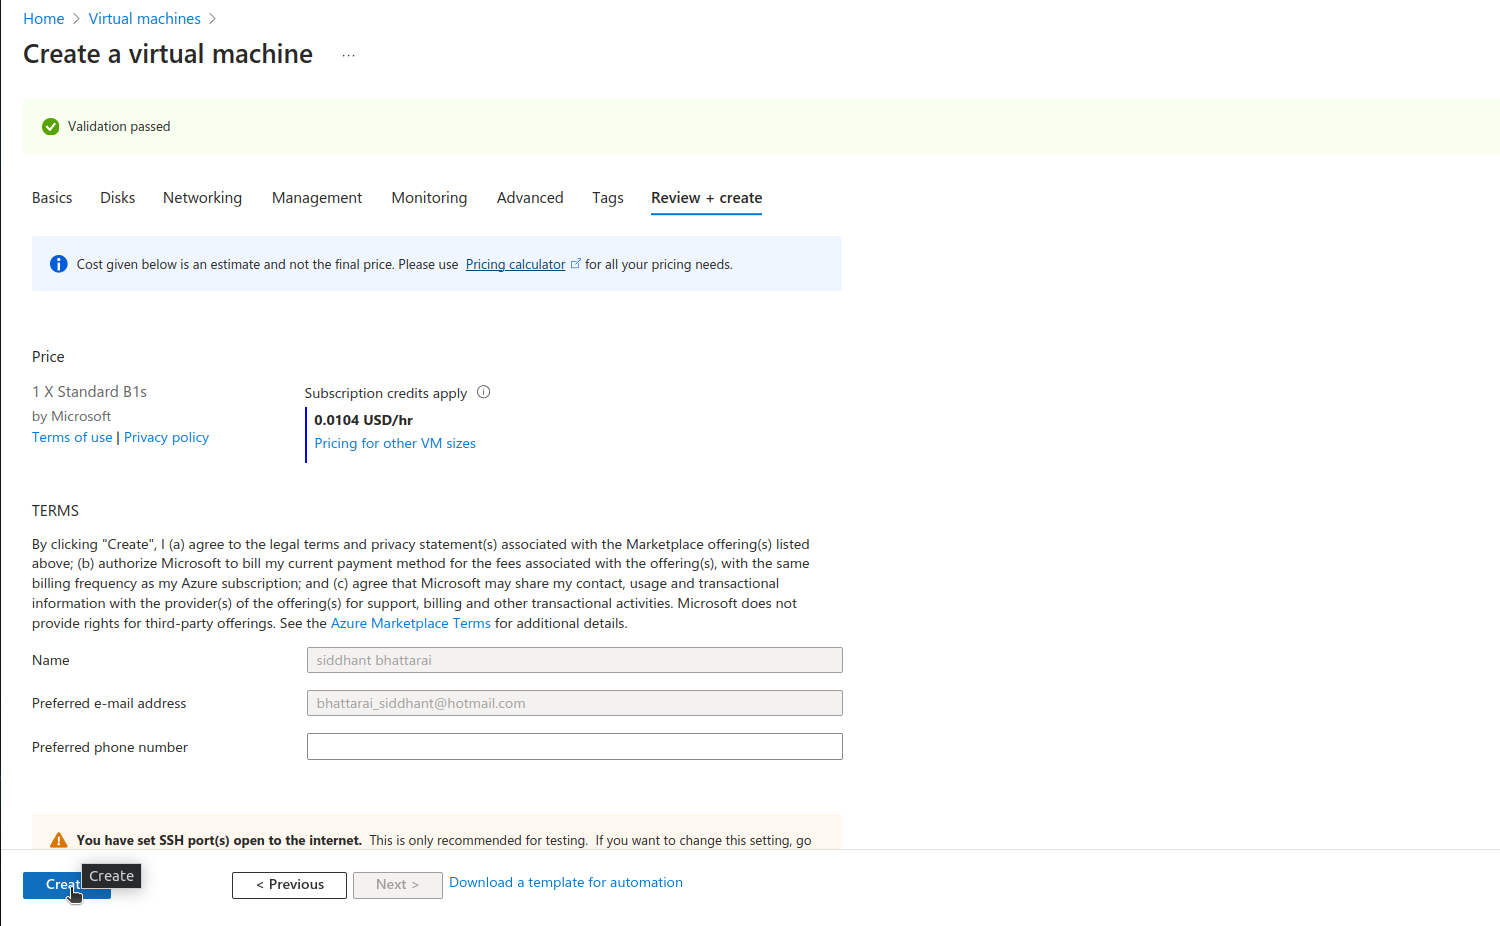
2.4 Review and Create
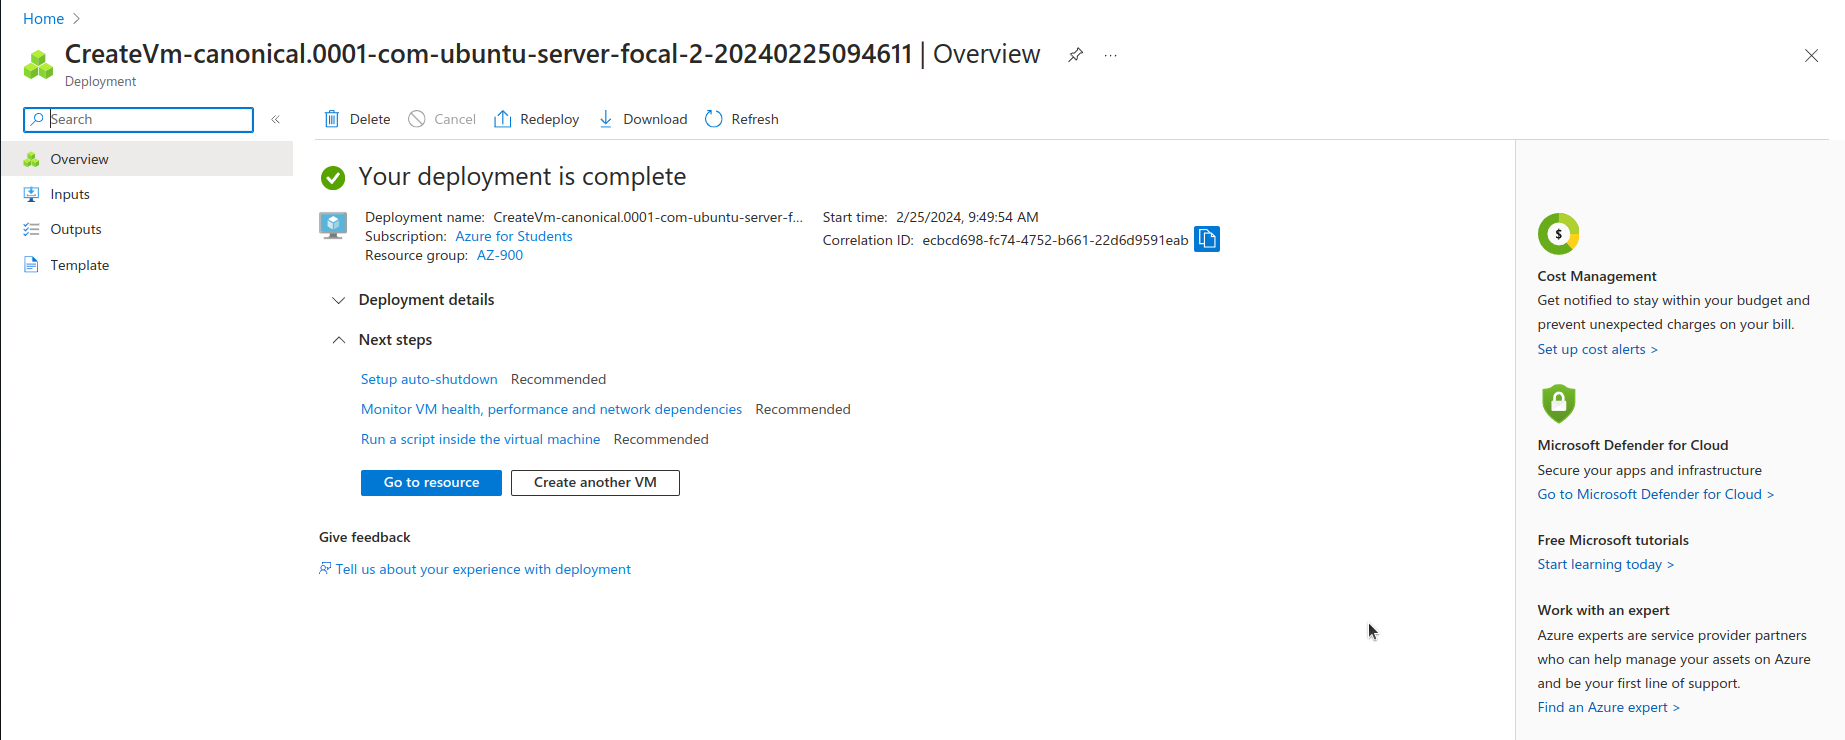
- Review all settings, then click "Create" to deploy your VM.
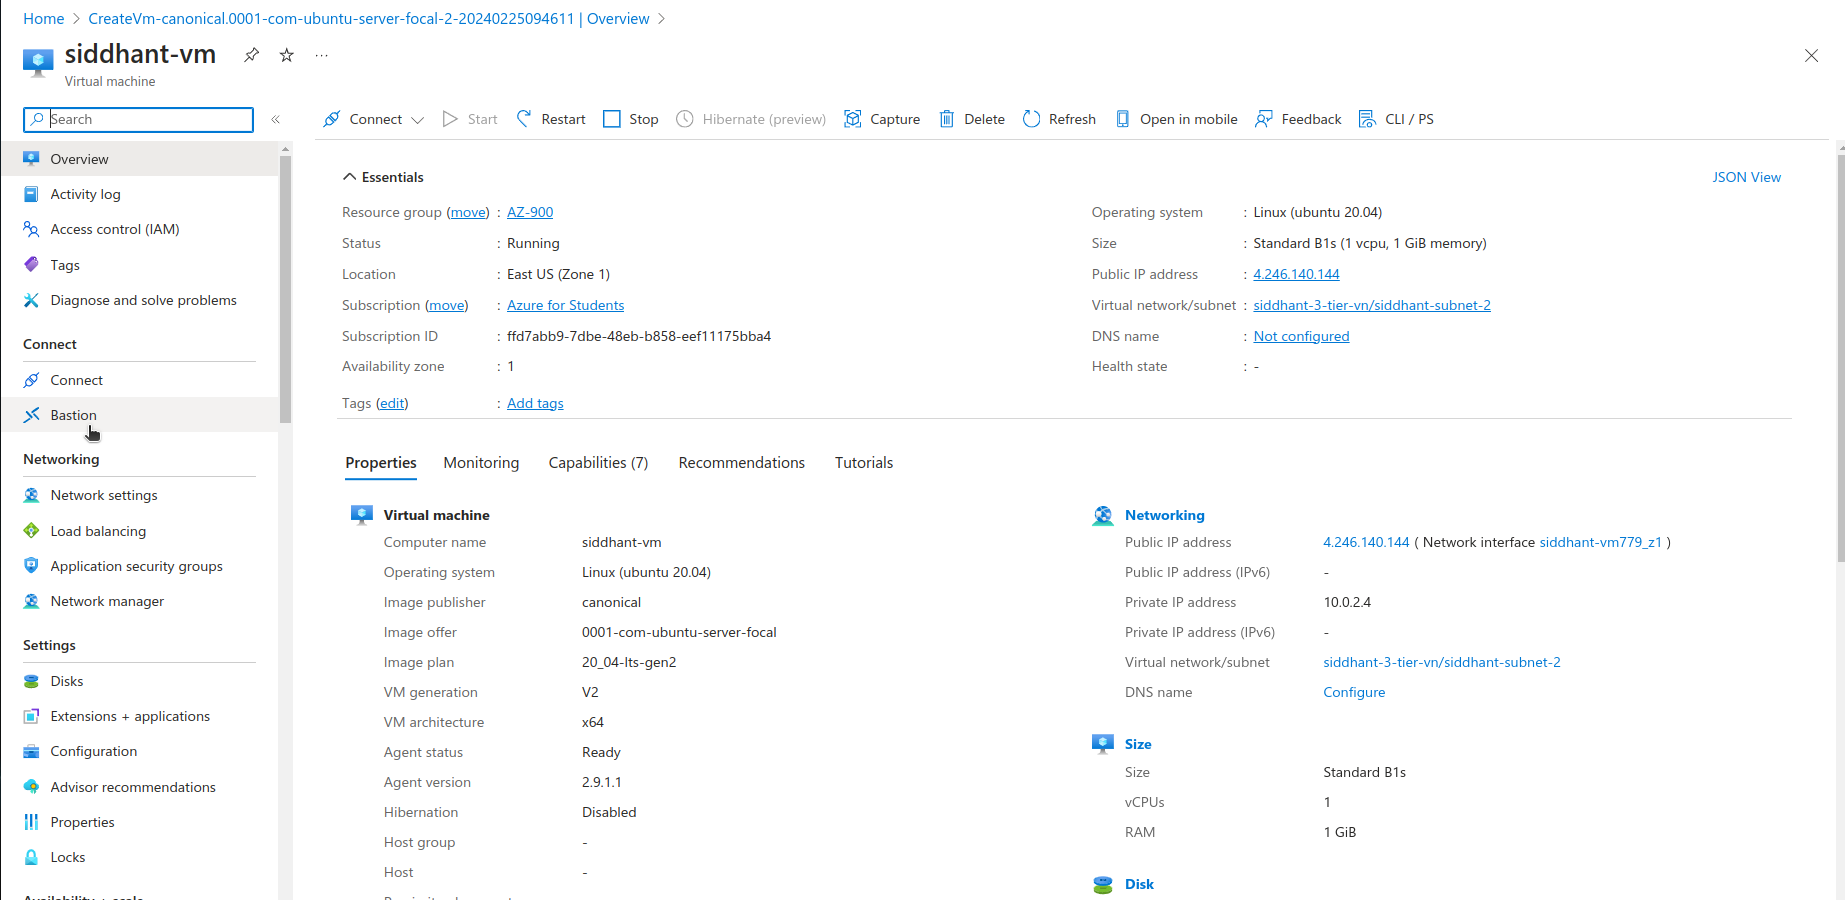
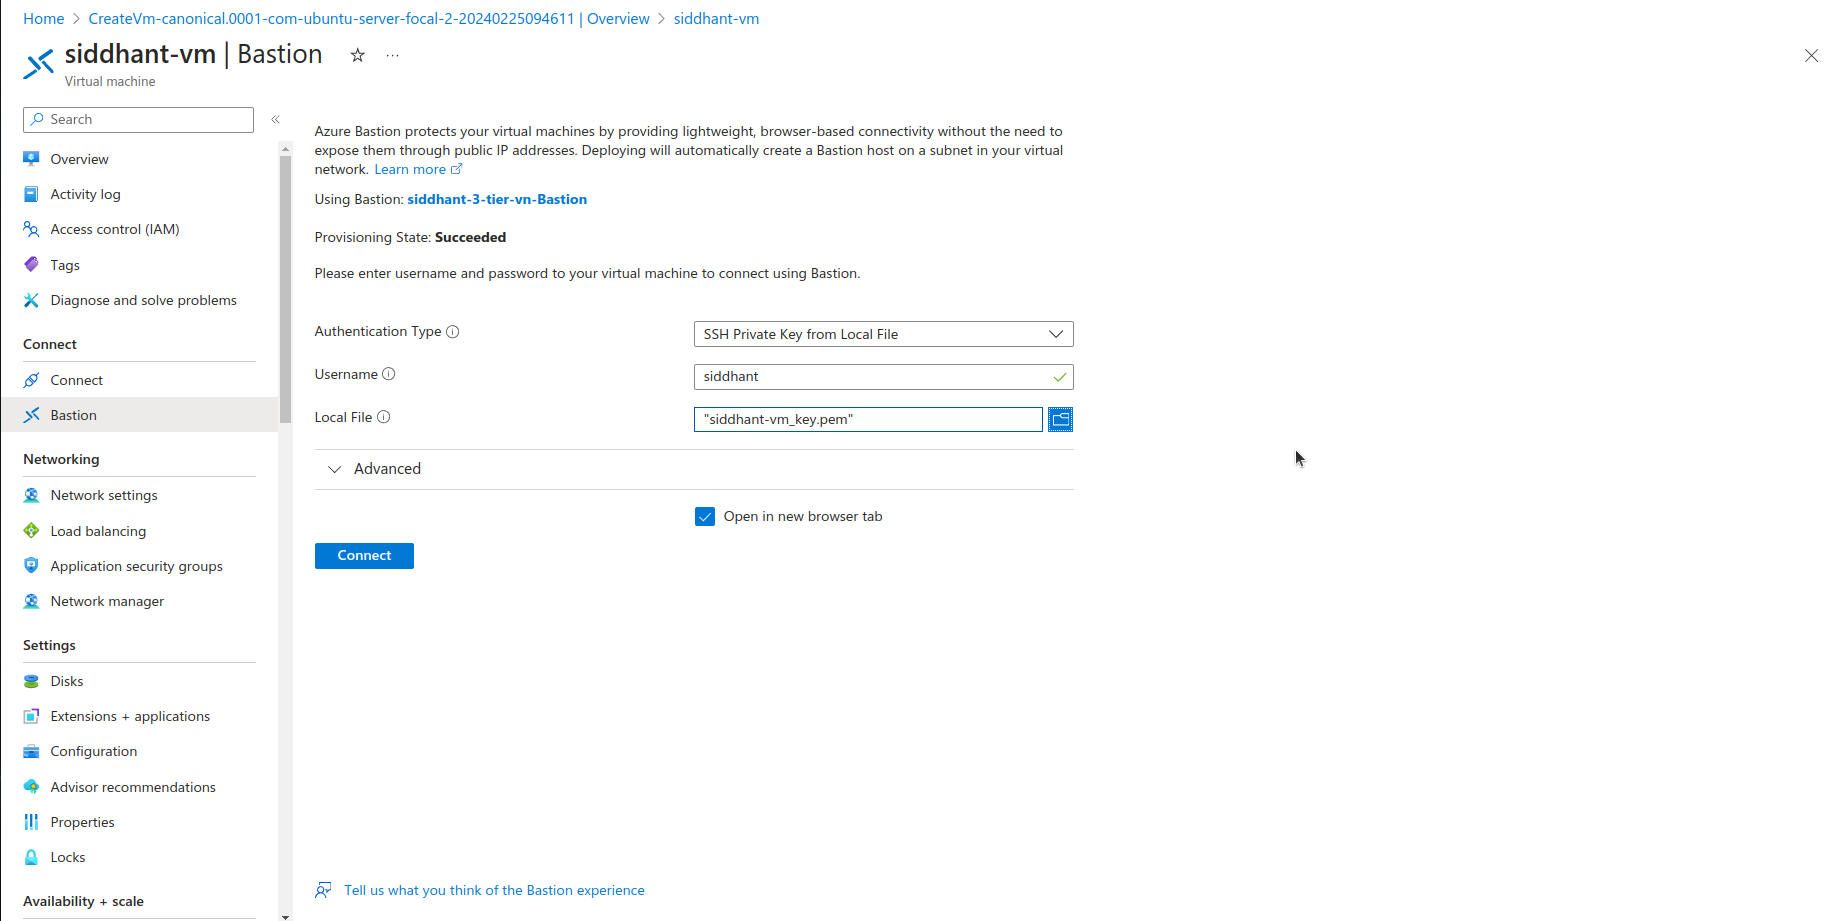
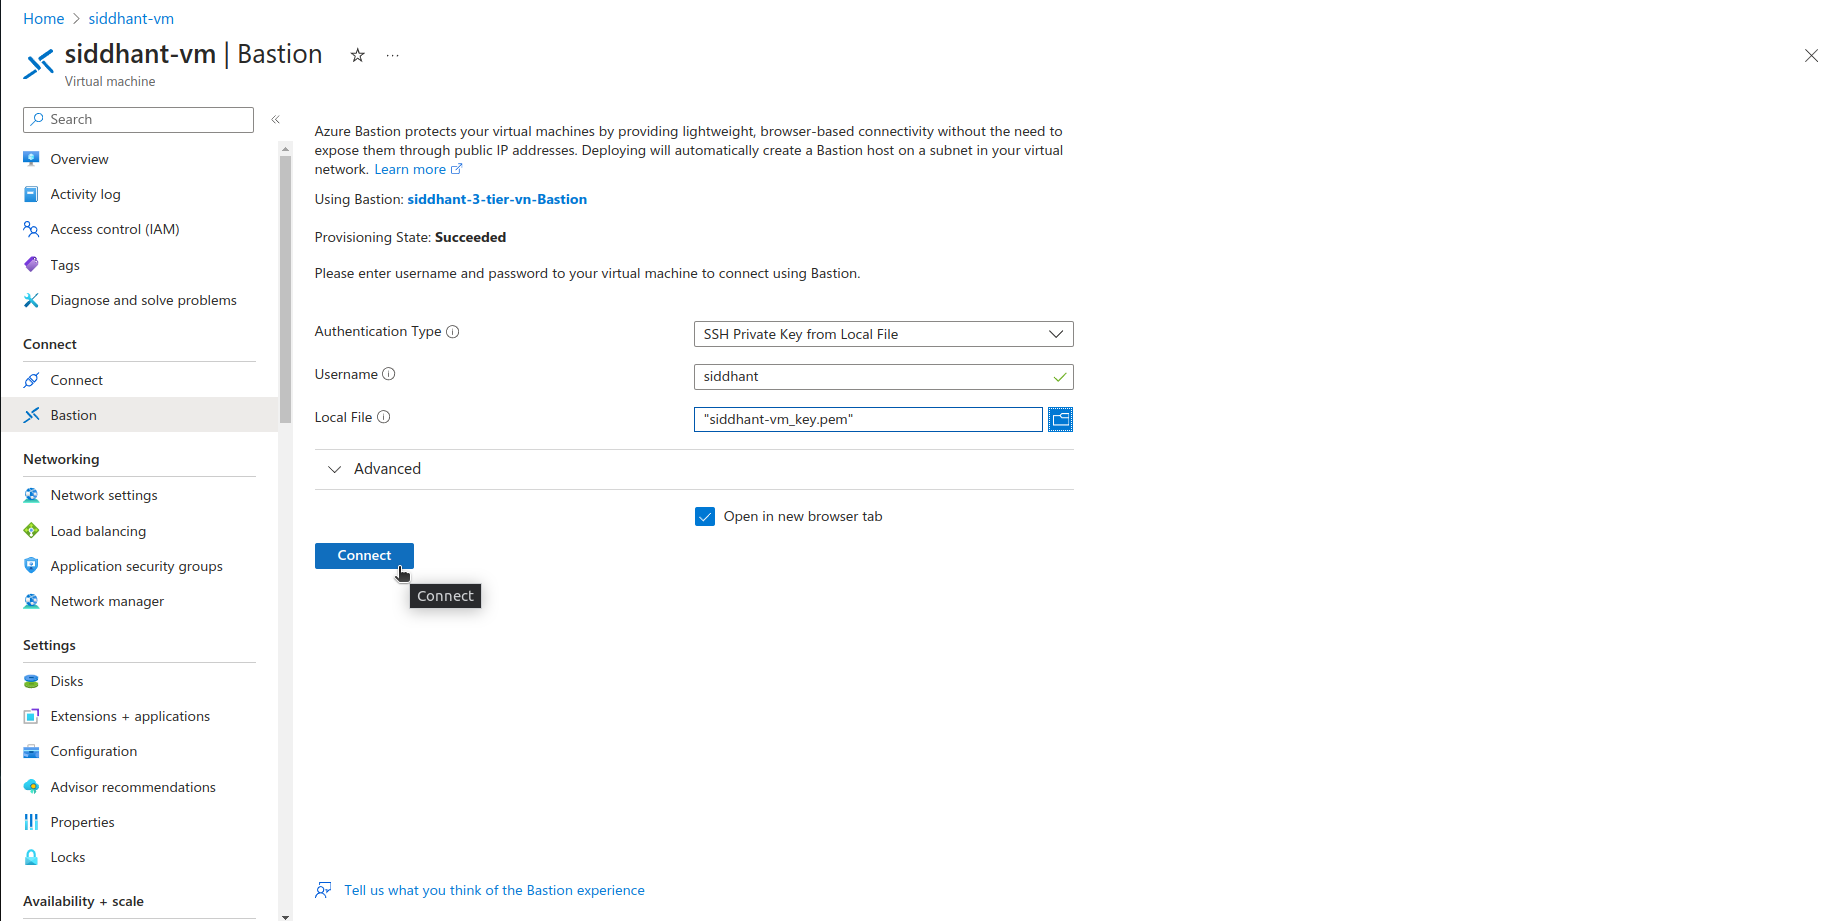
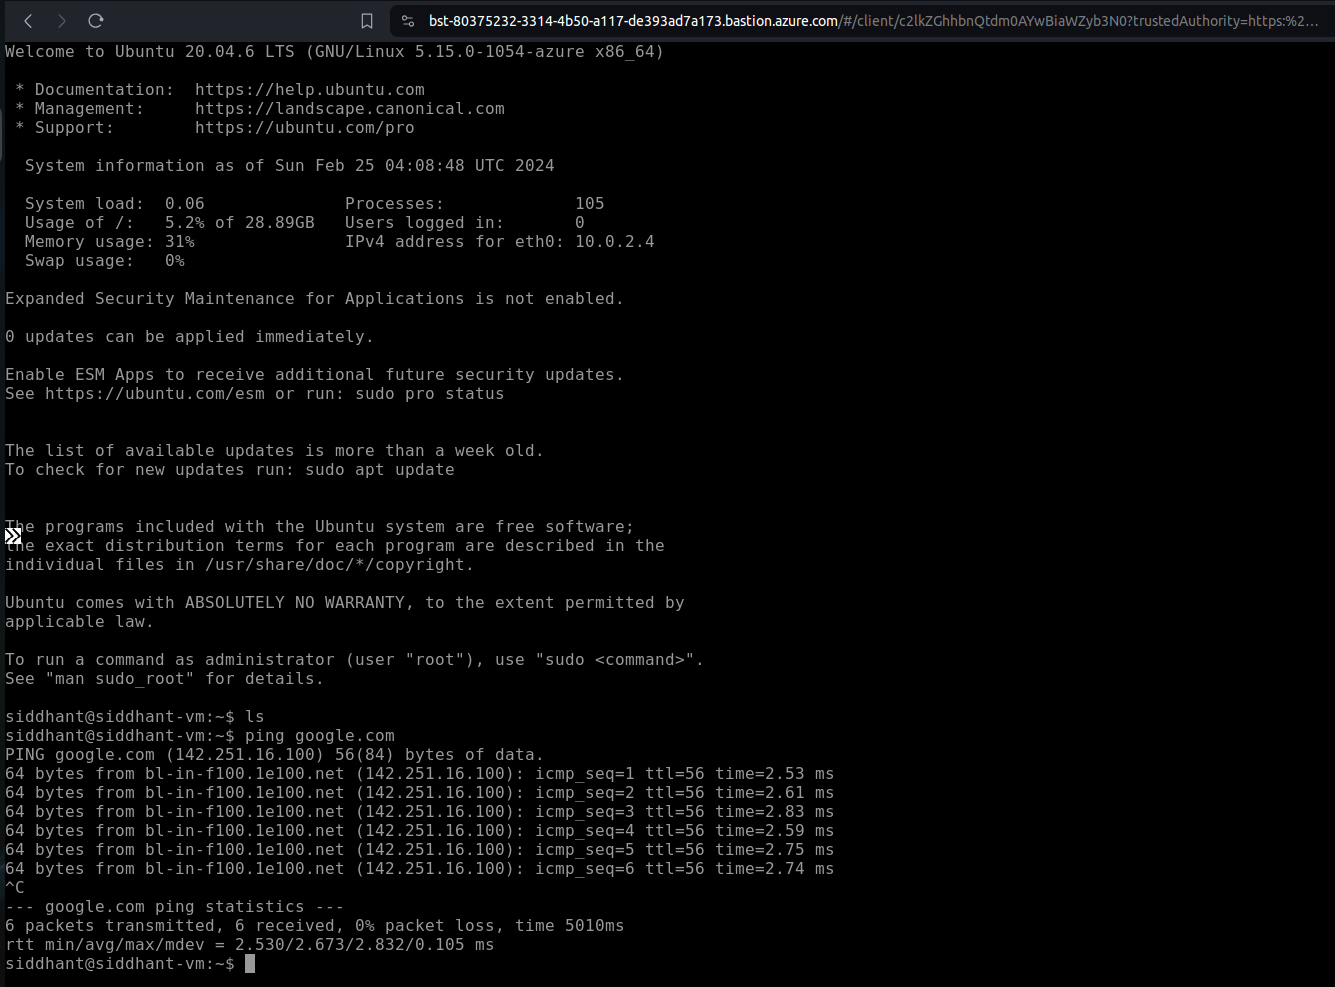
Deploying a VM in the Private Subnet
2.5 Repeating the Process with Modifications
Follow the same steps as above, but make the following adjustments for the back-end VM:
Virtual machine name: Use a different name, like
backend-vm.Subnet: Select the
private-subnet(10.0.2.0/24). This ensures the VM is isolated from direct internet access.Public IP: Do not enable a public IP address for this VM. This is a critical step to ensure the VM's isolation from the internet.
2.6 Network Security Group (NSG) Considerations
For the VM in the private subnet, the NSG should be configured to allow only necessary internal traffic. Typically, this would include:
Inbound traffic from the public subnet (where your front-end VM resides).
Necessary outbound access to the internet for updates or to access Azure services, which can be achieved via Azure NAT Gateway or a similar service.
2.7 Final Steps
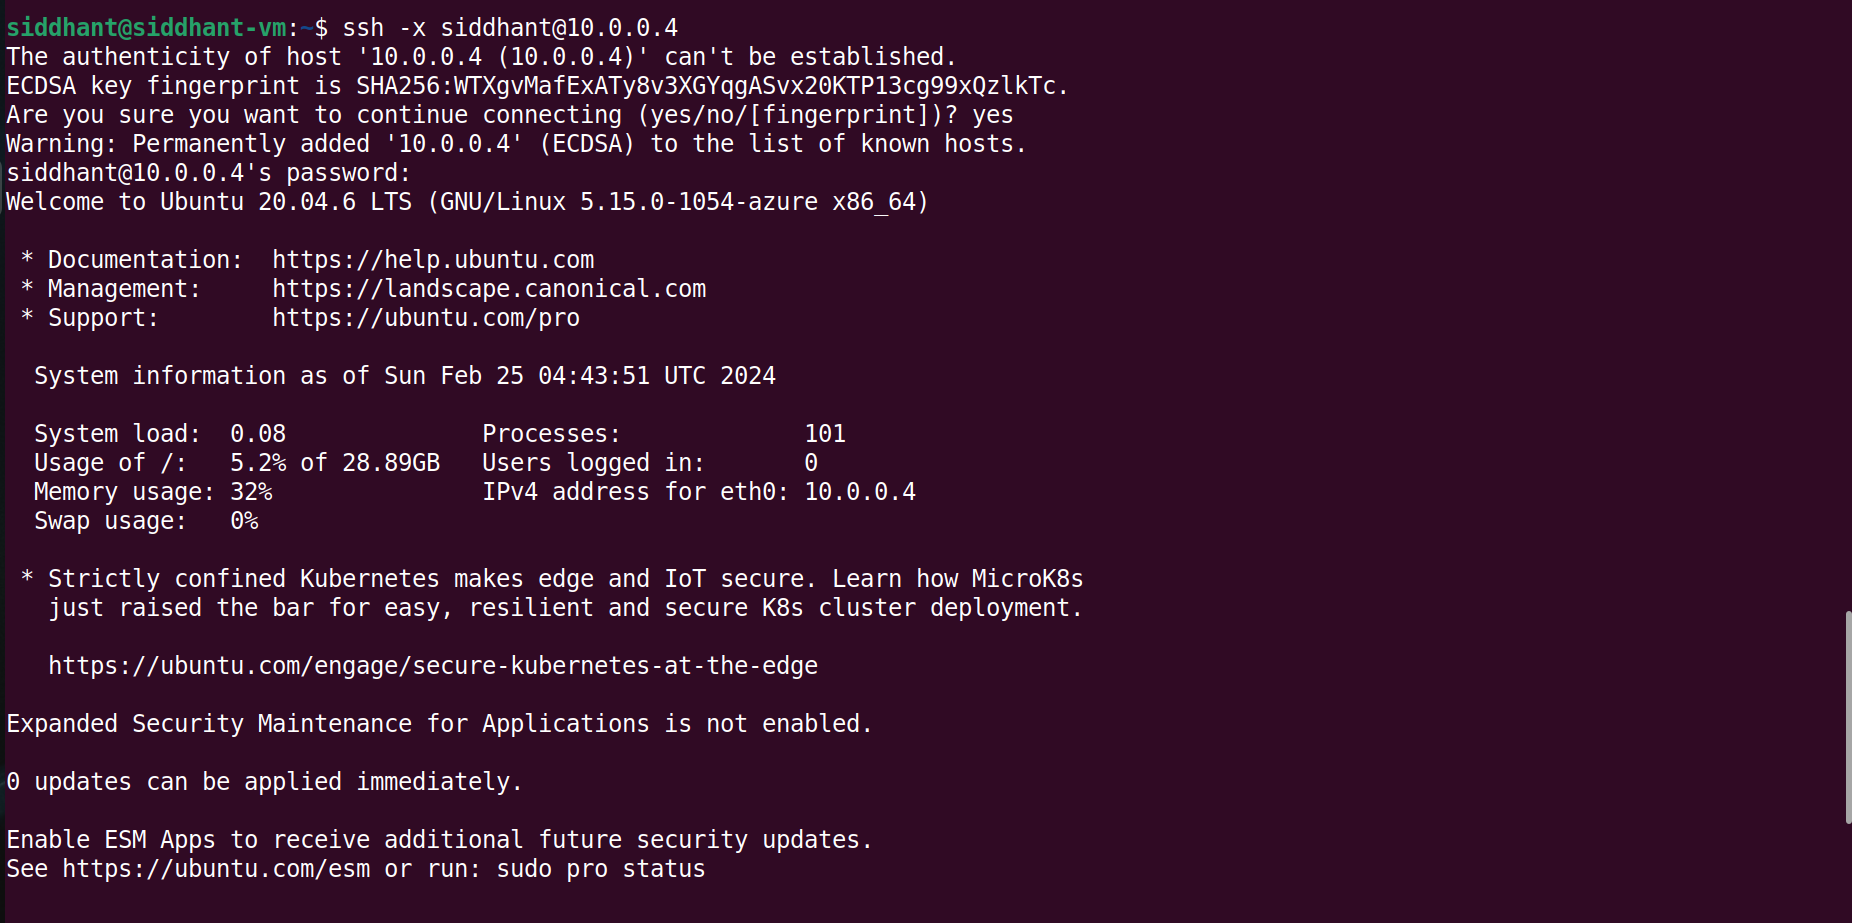
- Review and Create: After configuring the VM settings to suit the back-end application's needs and ensuring it's connected to the private subnet without a public IP, review all settings and click "Create".

Step 3: Cleaning the Resources
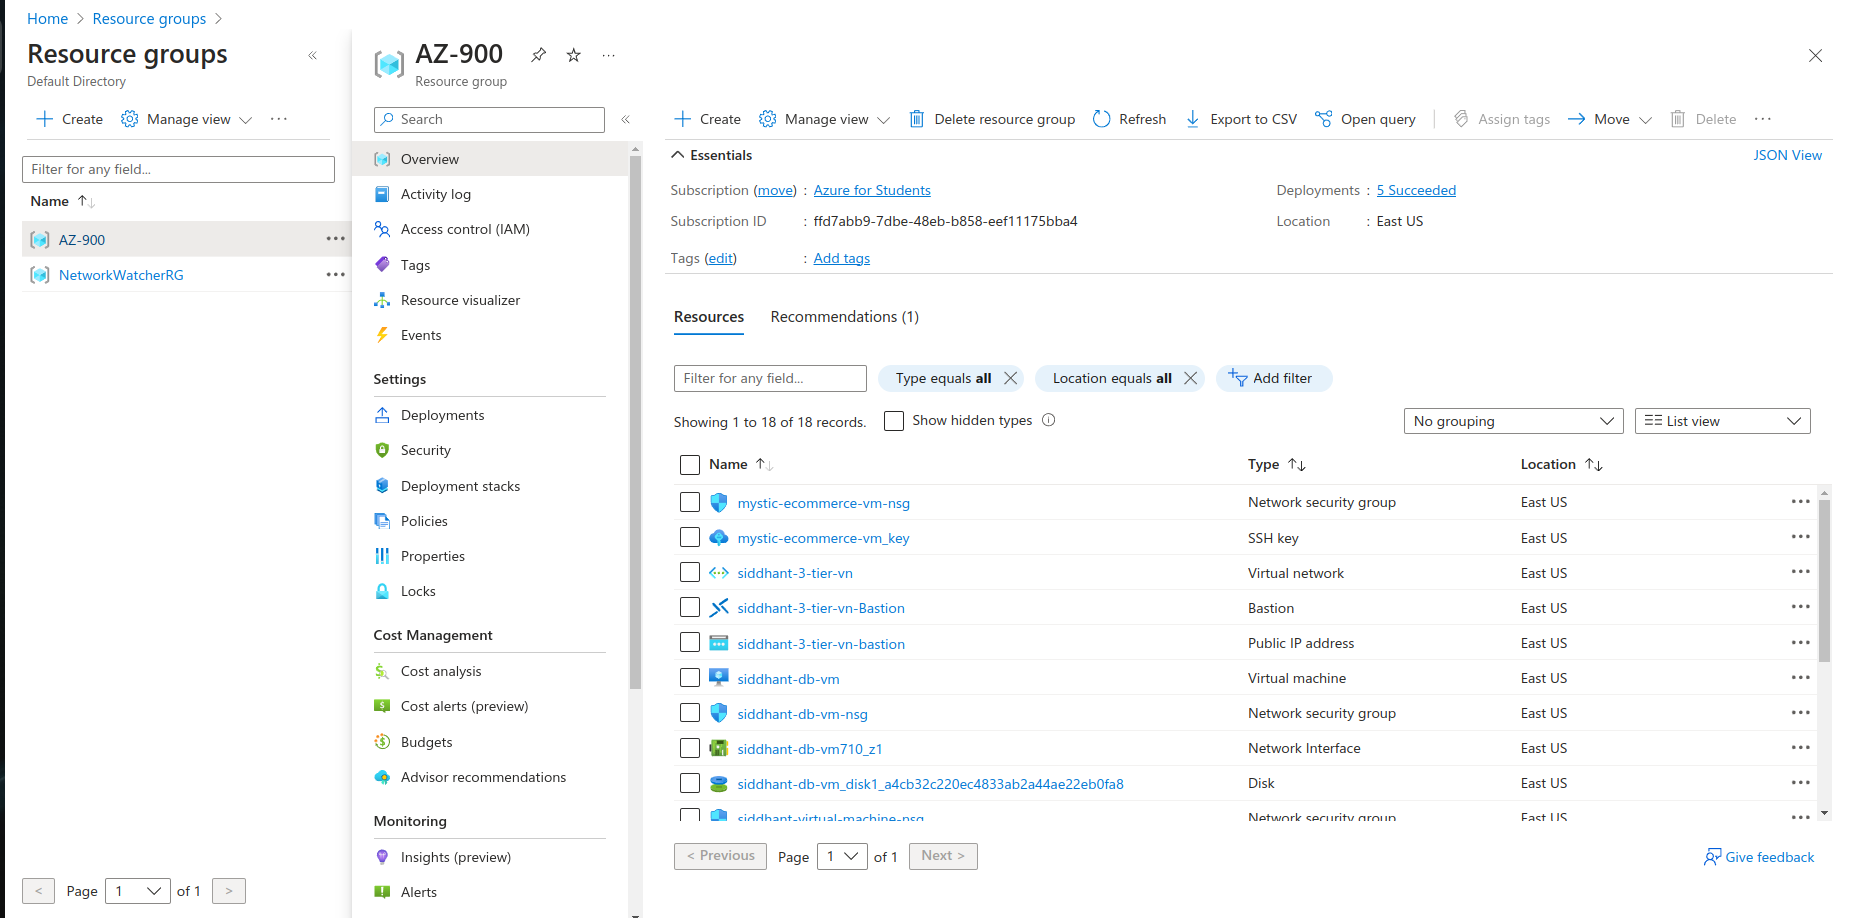
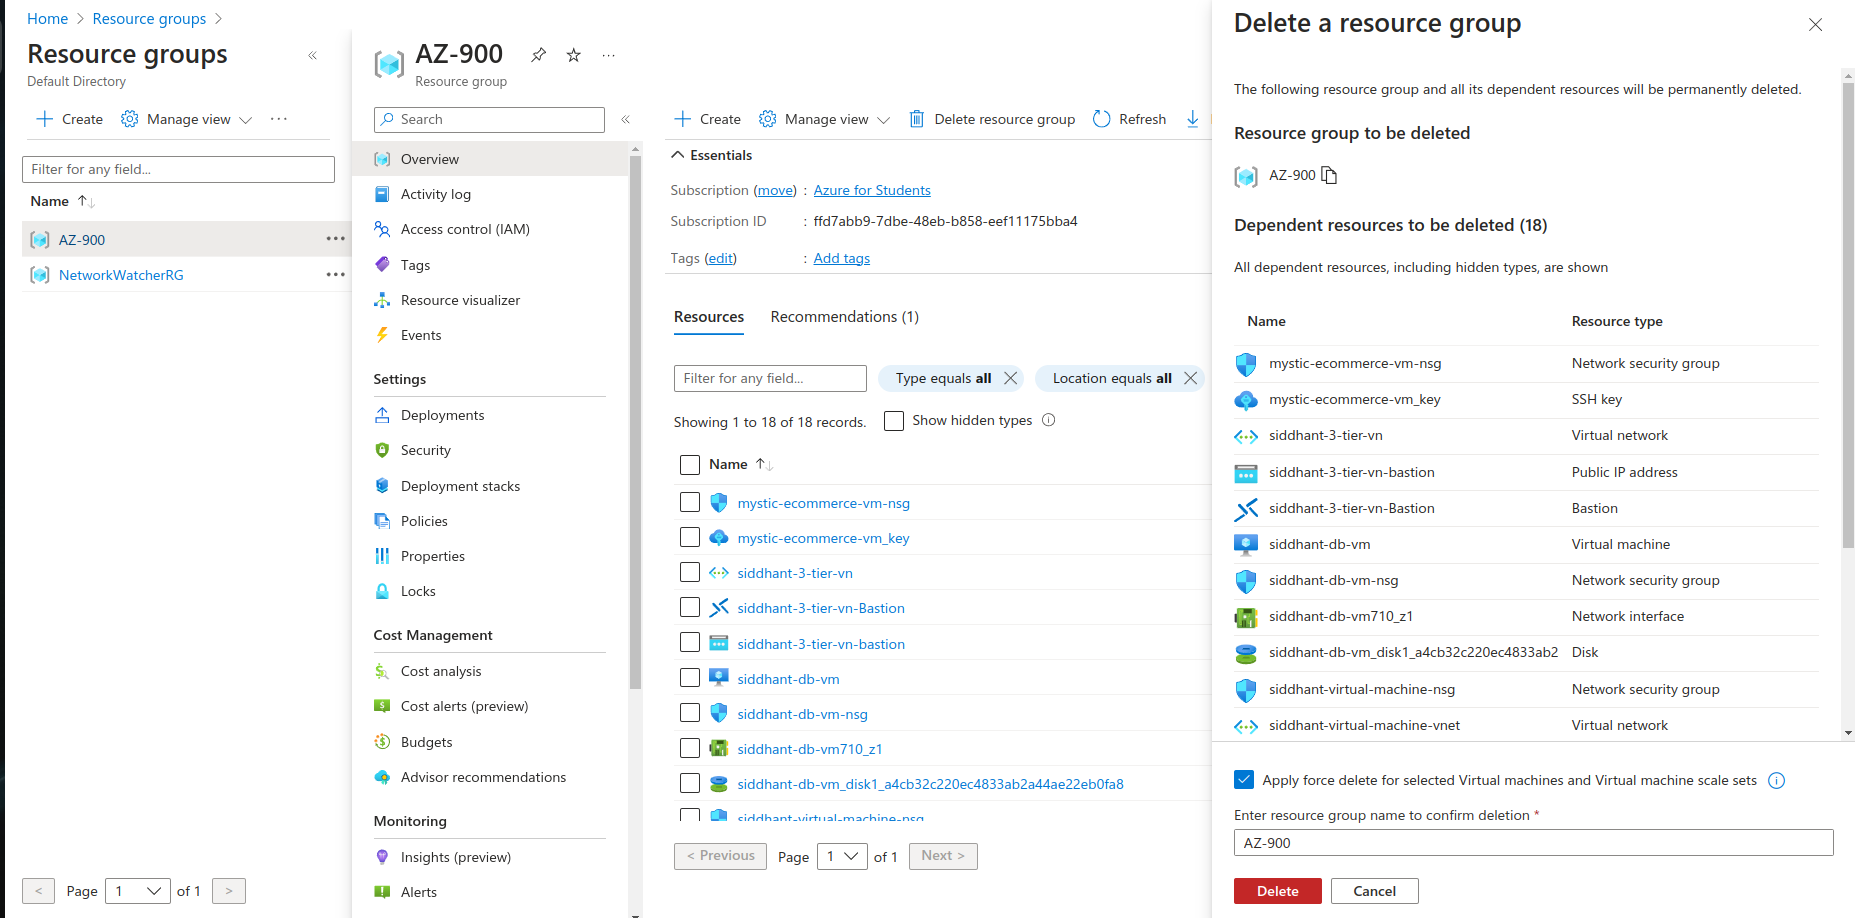
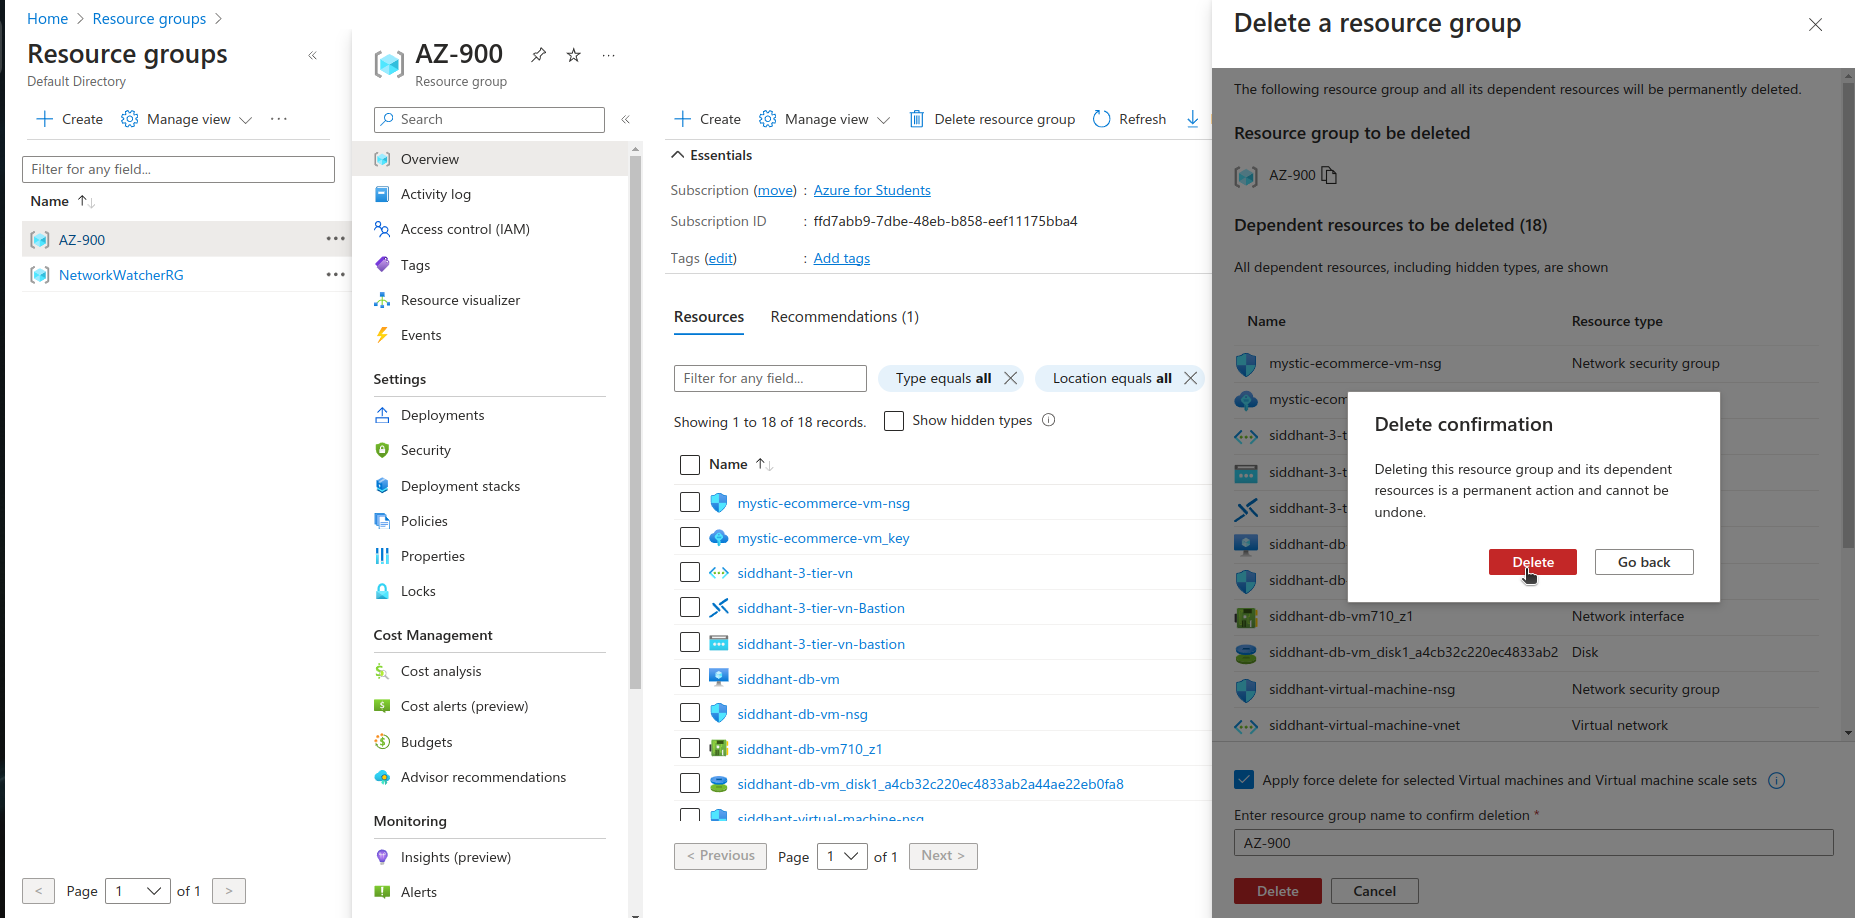
Access the desired resource by navigating to it. In this instance, we are focusing on removing the AZ-900. Once you've chosen the resource you wish to eliminate, confirm the deletion, ensure to mark the "apply forcefully delete" option, and then press the delete button. This action will eliminate all the resources associated with that Resource Group.
In conclusion, we've successfully set up a secure and scalable system for a web application using Microsoft Azure. This setup includes a special network that keeps the web part and the database part separate, making sure the website is fast and safe. We also added a secure way to access the system without exposing it to the internet. This is great for websites that need to keep their customer data safe but still run smoothly. Our project shows that Azure is a powerful tool for building strong and efficient online services.
Subscribe for more!!!
Subscribe to my newsletter
Read articles from Siddhant Bhattarai directly inside your inbox. Subscribe to the newsletter, and don't miss out.
Written by

Siddhant Bhattarai
Siddhant Bhattarai
I am a versatile professional with expertise in multiple domains, including DevSecOps, AWS Cloud Solutions, AI/ML, and Cyber Security. With over 5 years of experience in the field, I have honed my skills and dedicated myself to various roles and responsibilities. If you're looking for opportunities for collaboration, insights, or exciting ventures in these domains, I'm open to connecting. Please don't hesitate to reach out – I'm excited to engage with professionals, learners, and enthusiasts who share my passion for these fields!