MySQL Database with MySQL Workbench: A Step-by-Step Guide
 Divya Mahajan

Today, we're diving into the world of databases, specifically MySQL, using the convenient tool MySQL Workbench. Whether you're new to databases or looking to refresh your skills, this guide will walk you through creating your first database. So let's get started!
Prerequisites
Before we begin, ensure you have the following prerequisites:
MySQL Server: You'll need MySQL installed and running on your machine. If you haven't installed MySQL yet, you can download it from the official website: MySQL Community Downloads
MySQL Workbench: MySQL Workbench is a visual database design tool and SQL development environment. Make sure you have MySQL Workbench installed. You can download it from: MySQL Workbench Downloads
Step 1: Open MySQL Workbench and Connect
First things first, fire up MySQL Workbench.
Upon launching, you'll be greeted with the option to create a new connection.
Go ahead and do that. Give your connection a name, and hit 'OK'.
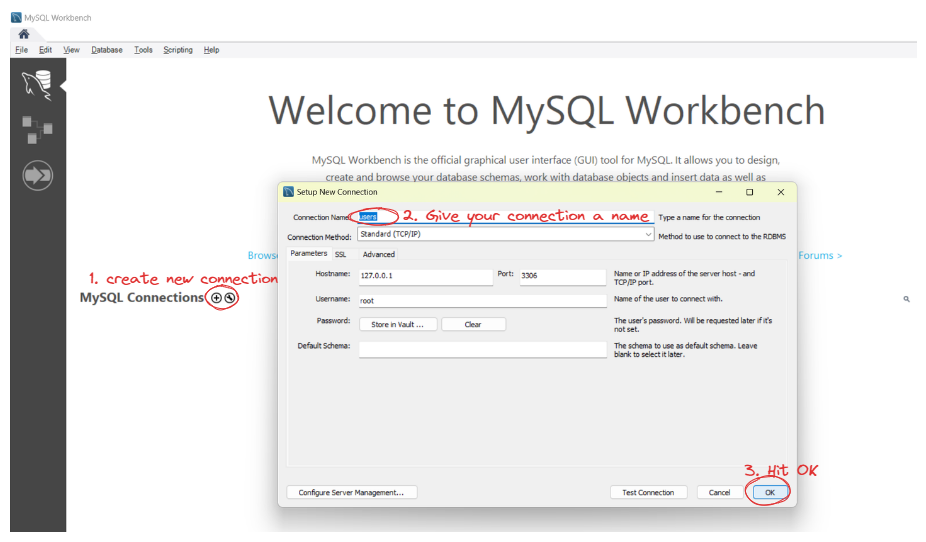
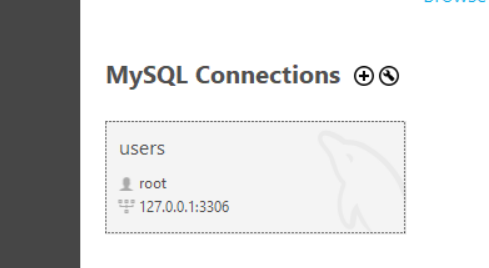
Now, you should see your newly created connection listed.
Click on it to connect to your databases.
Step 2: Explore Existing Databases
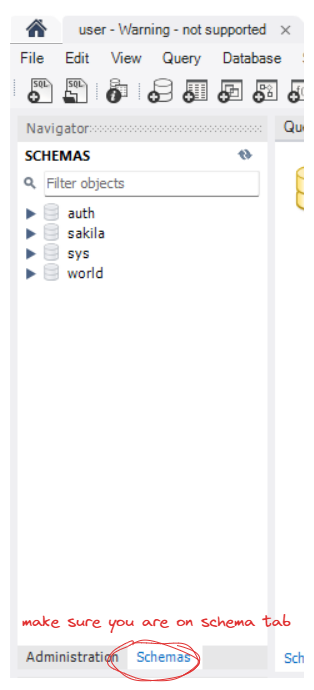
Upon connecting, you might various existing databases or schemas listed.
These are examples that may come with the installation.
Feel free to explore them to get a sense of what's already there.
You can click on the schemas to view their tables and data.
Step 3: Creating a New Schema (Database)
Let's create our own database.
Right-click in the empty space and select 'Create Schema'.
Give your schema a name, for instance,
userdb, and hit 'Apply'.
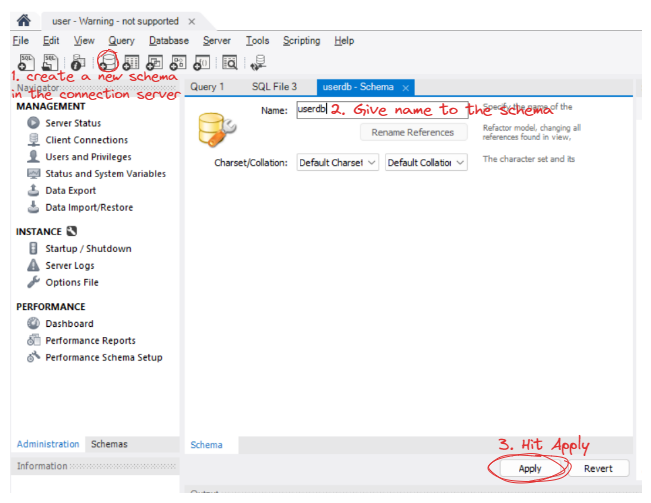
You'll see the SQL script that will be executed to create this database.
Once confirmed, click 'Apply' again and then 'Finish'.
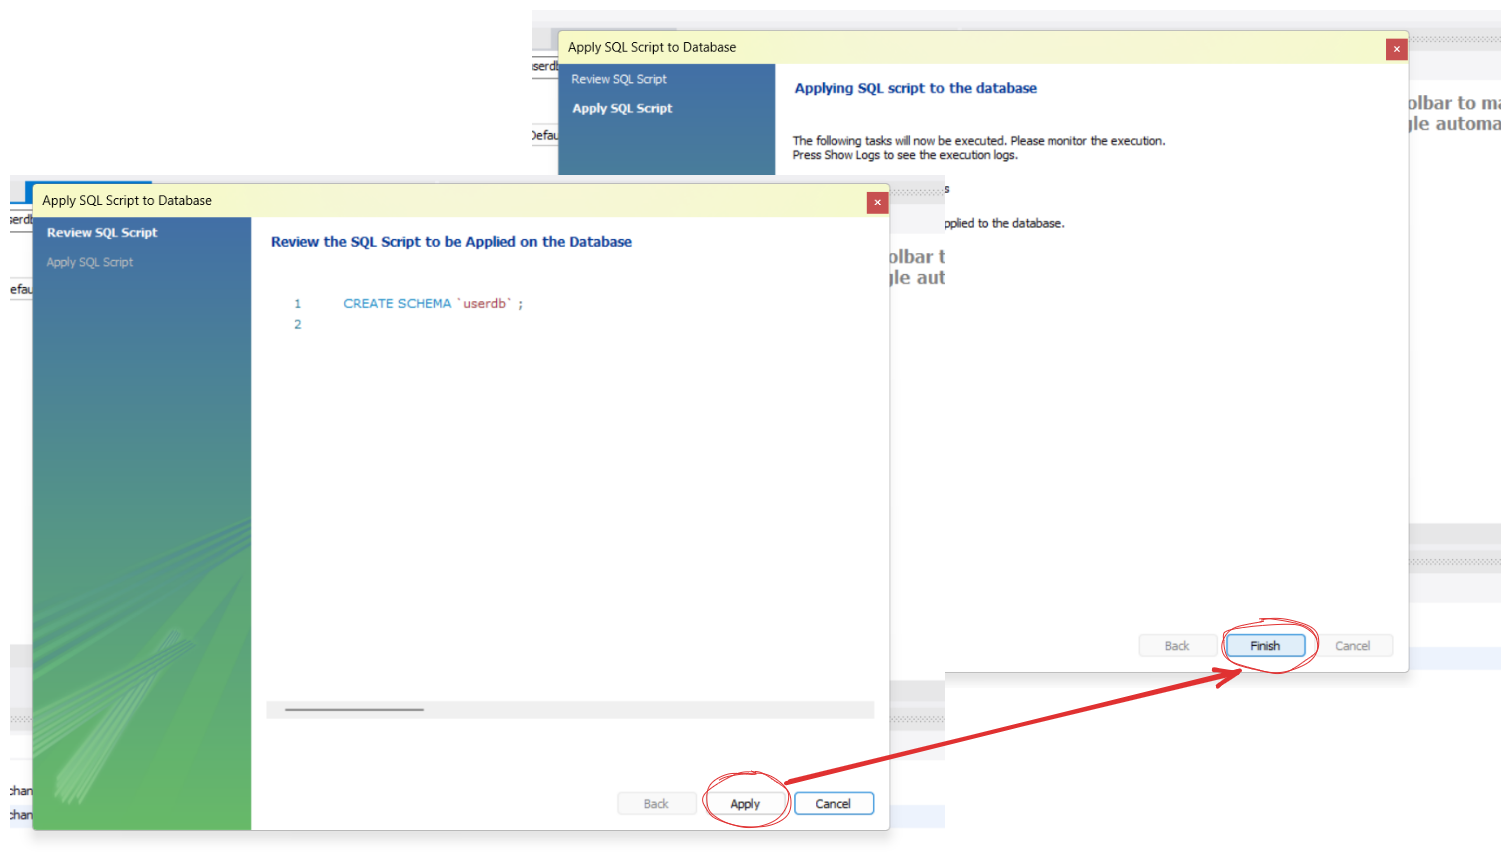
You can now see your newly created database in the schema
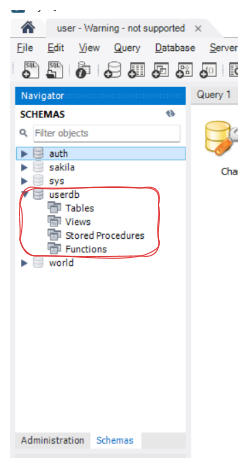
Step 4: Designing a Table
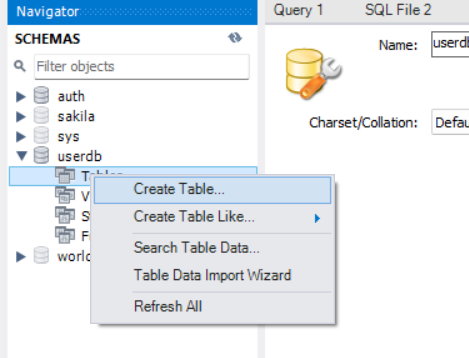
Now, within your newly created database, right-click on 'Tables' and choose 'Create Table'.
Let's name our table
users.Define the columns for your table. For example, an
idcolumn asINT(for unique identifier),first_nameasVARCHAR, andlast_nameasVARCHAR.Assign the primary key by selecting the 'id' column and ticking the 'PK' checkbox. This ensures each entry has a unique identifier.
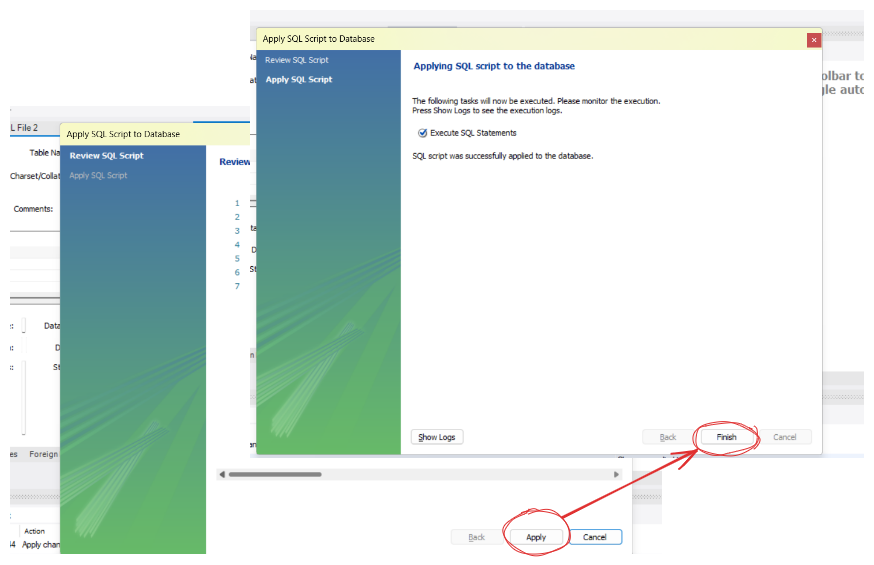
Once you've defined your table structure, hit 'Apply'.
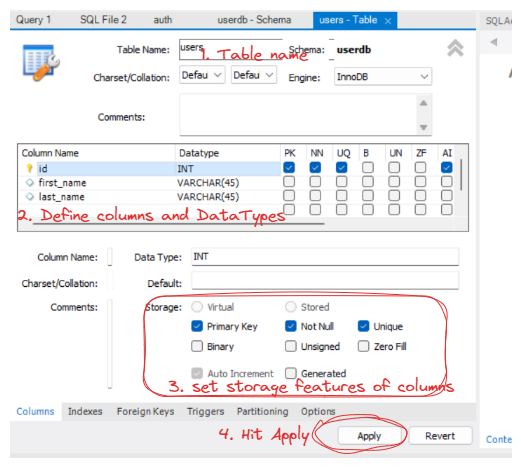
MySQL Workbench generates the SQL script for table creation. Review it if you like, then click 'Apply' to execute the script and create your table.
Step 5: Adding Data
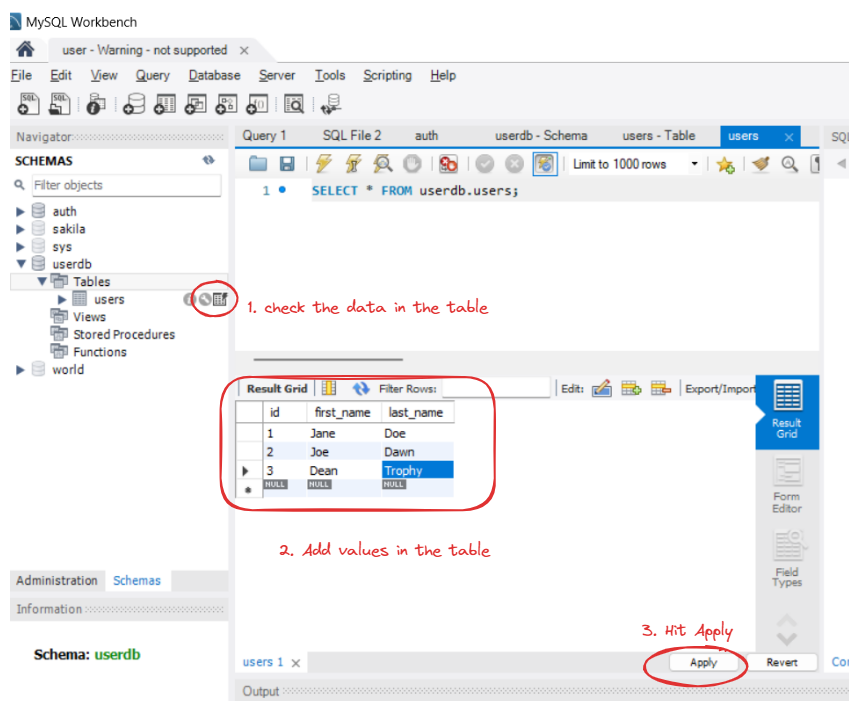
Now that your table is created, you can insert data into it.
Right-click on your table, choose 'Table Data', and then 'Insert Rows'.
Enter values for each column and hit 'Apply' to add the data.
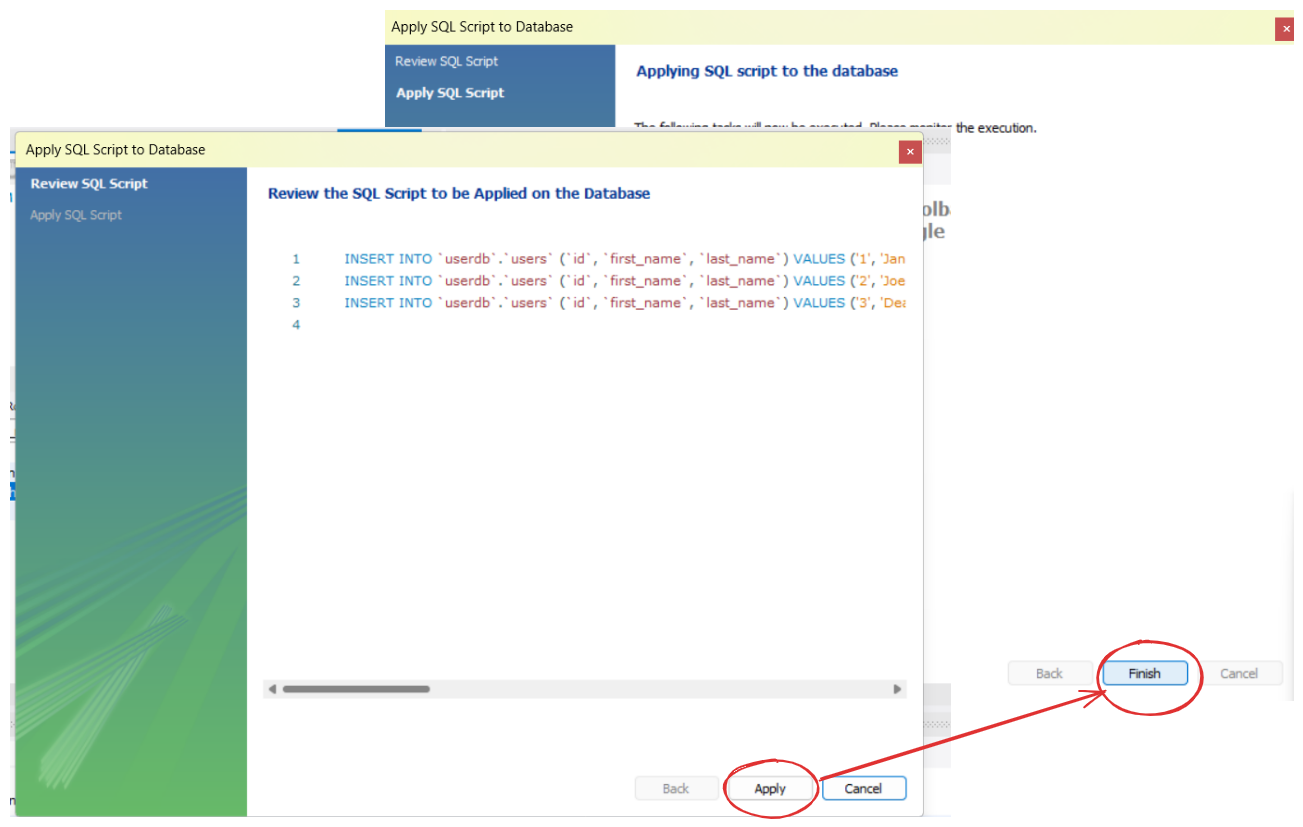
- MySQL Workbench generates the SQL script for inserting rows. Review it if you like, then click 'Apply' to execute the script and add records to your table.
Step 6: Modifying Data
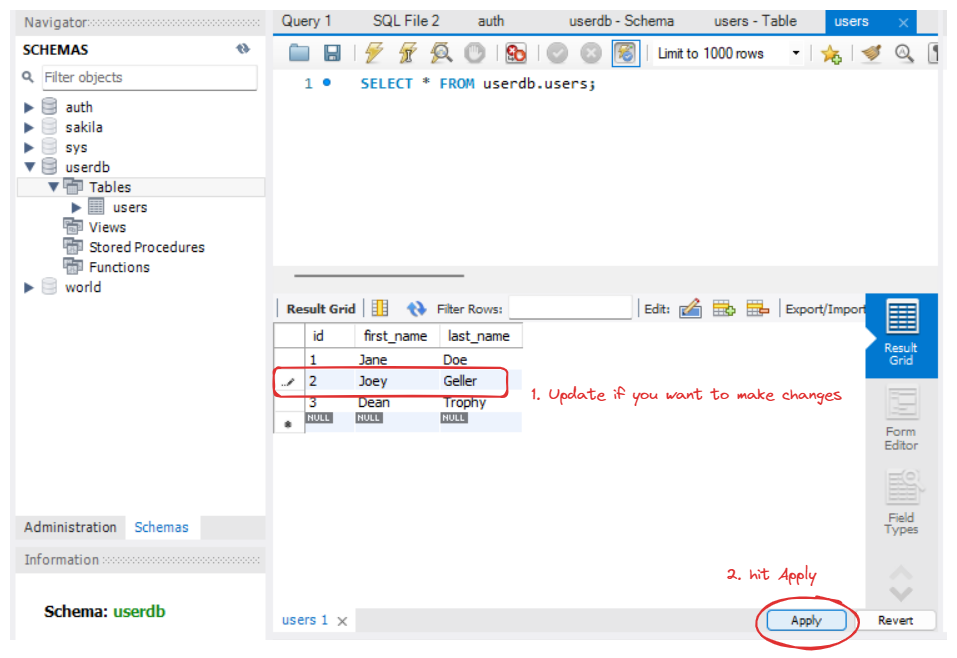
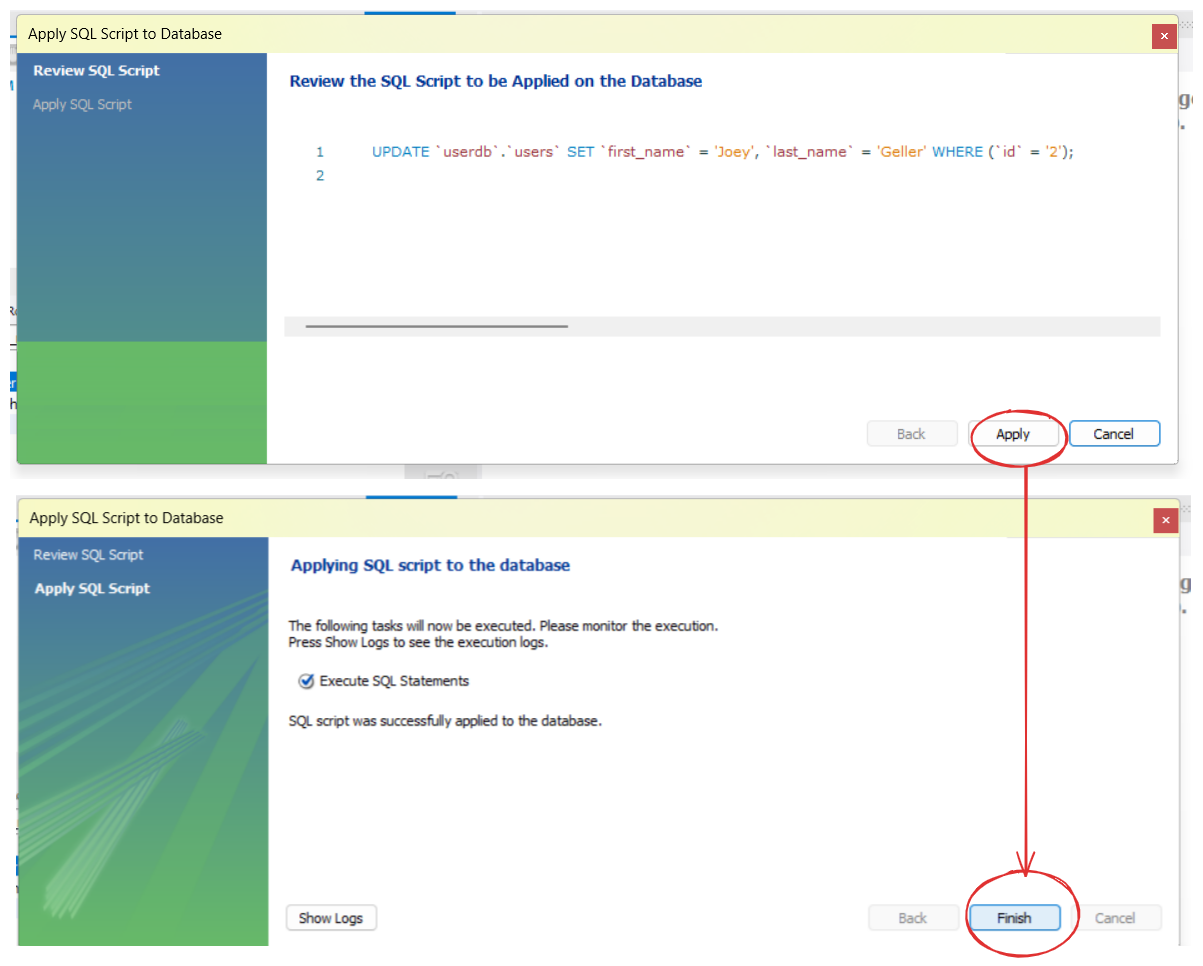
You can also modify existing data. Simply select the row you want to modify, change the values, and hit 'Apply'. MySQL Workbench will generate the SQL update statement for you.
Step 7: Deleting Data
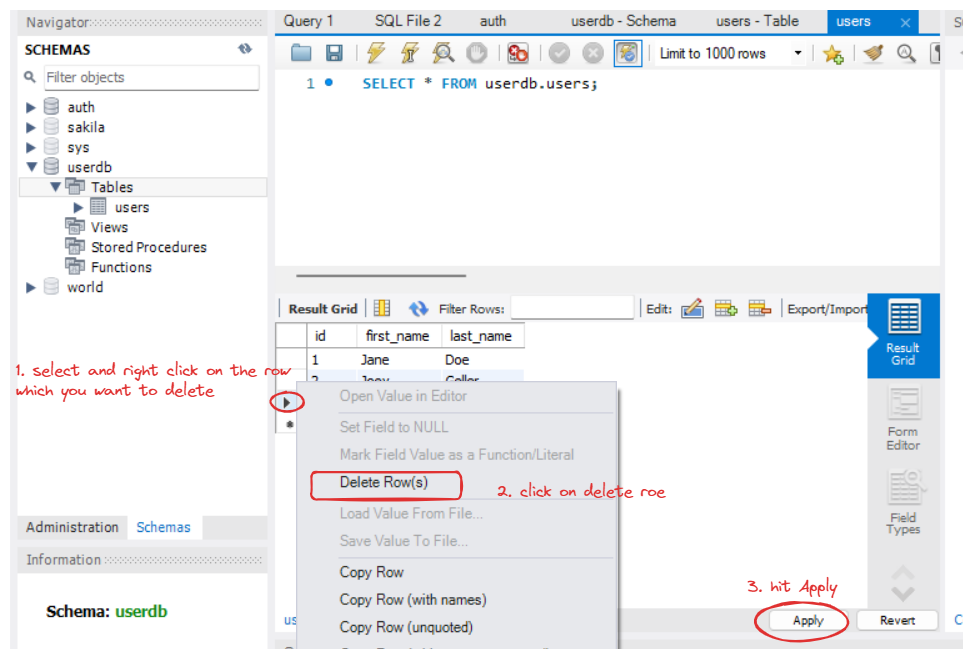
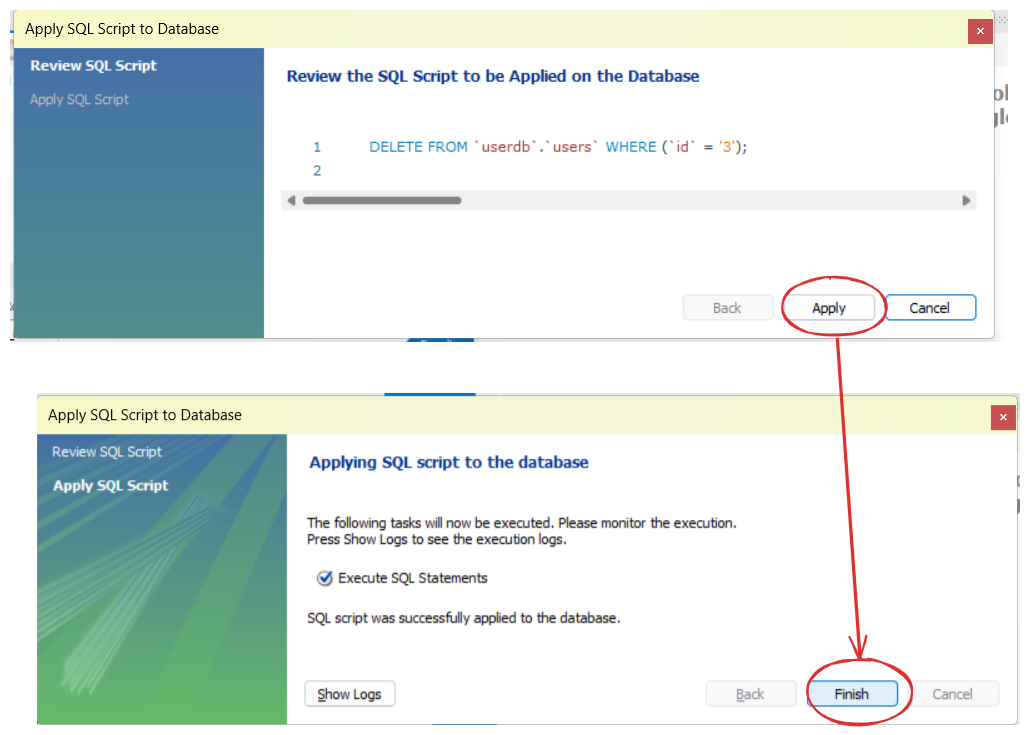
To delete data, select the row(s) you want to delete, right-click, and choose 'Delete Rows'.
Confirm the action, and MySQL Workbench will execute the SQL delete statement.
Step 8: Final Touches
Explore additional features like diagram creation, table dropping, or schema deletion. But exercise caution, especially with actions like dropping databases or tables, as they're irreversible.
Conclusion
Congratulations! You've successfully created your first MySQL database using MySQL Workbench. In future tutorials, we'll delve deeper into interacting with this database using Golang. If you have any questions or need further clarification, feel free to ask in the comments below. Stay tuned for the next part of our journey!
Subscribe to my newsletter
Read articles from Divya Mahajan directly inside your inbox. Subscribe to the newsletter, and don't miss out.
Written by

Divya Mahajan
Divya Mahajan
Experienced Technical developer with 6+ years' global collaboration. Proficient in Python, Go, React, Next.js, Django, various databases, Cloud & DevOps (AWS EC2, Docker, Kubernetes), and Big Data tools. Skilled in data structures and algorithm, API development, and end-to-end software engineering. Excels in back-end development, front-end design, Root Cause Analysis, and product management to deliver superior user experiences. Holds a master’s degree in computer engineering.