Draw Freehand Shapes on Google Maps in React.js | by @pushpend3r | #1
 Pushpender Singh
Prerequisites
Node.js runtime (if you don't have it, get it from here)
Google Map API Key
Generate Google Map API Key
Log in to Google Cloud Console
Create New Project
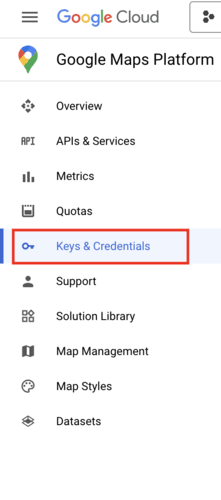
Go to Keys & Credentials
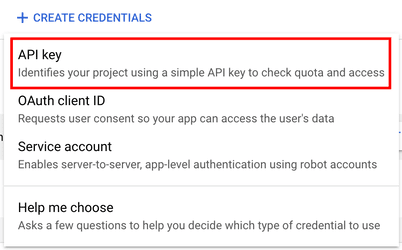
Click on Create Credentials

Then on API Key
Project Setup
After that fire up your terminal and run the below commands.
npm create vite@latest <DIR_PATH> -- --template react-ts
Here <DIR_PATH> will be the path for your project. Put . if you want to bootstrap project files in the current directory you are in.
npm i
npm run dev
After this, your app should be started on localhost.
For this article, We will use @vis.gl/react-google-maps the npm package. Install it by running the below command
npm i @vis.gl/react-google-maps
Create .env file at the root of the project.
VITE_GOOGLE_MAP_API_KEY=<API_KEY>
Create/Update the following files -
/* -- src/components/Map/MapProvider.tsx -- */

import { APIProvider } from "@vis.gl/react-google-maps";
import { PropsWithChildren } from "react";

const MapProvider = ({ children }: PropsWithChildren) => {
  return (
    <APIProvider apiKey={import.meta.env.VITE_GOOGLE_MAP_API_KEY}>
      {children}
    </APIProvider>
  );
};

export default MapProvider;
/* -- src/components/Map/Map.tsx -- */

import { Map } from "@vis.gl/react-google-maps";

type Polyline = google.maps.Polyline;

interface MapProps {
  width?: string;
  height?: string;
  onShapeDraw?: (polygon: Polyline) => void;
}

const AppMap = ({
  width = "100vw",
  height = "100vh",
  onShapeDraw,
}: MapProps) => {
  return (
    <div style={{ width, height }}>
      <Map defaultCenter={{ lat: 22.54992, lng: 0 }} defaultZoom={3}></Map>
    </div>
  );
};

export default AppMap;
/* -- src/App.tsx -- */

import AppMap from "./components/Map/Map";

function App() {
  return <AppMap onShapeDraw={(polyline) => console.log(polyline)} />;
}

export default App;
/* -- src/main.tsx -- */

import React from "react";
import ReactDOM from "react-dom/client";

import App from "./App.tsx";
import MapProvider from "./components/Map/MapProvider.tsx";
import "./index.css";

ReactDOM.createRoot(document.getElementById("root")!).render(
  <React.StrictMode>
    <MapProvider>
      <App />
    </MapProvider>
  </React.StrictMode>
);
/* -- src/index.css -- */

:root {
  font-family: Inter, system-ui, Avenir, Helvetica, Arial, sans-serif;
  line-height: 1.5;
  font-weight: 400;
  font-synthesis: none;
  text-rendering: optimizeLegibility;
  -webkit-font-smoothing: antialiased;
  -moz-osx-font-smoothing: grayscale;
}

body {
  box-sizing: border-box;
  margin: 0;
  padding: 0;
}
Drawing shapes
Now let's move to the drawing part.
Although Google Maps offers a drawing manager by which we can create shapes like circles, rectangles, polylines, and polygons you can't draw freehand shapes with it.
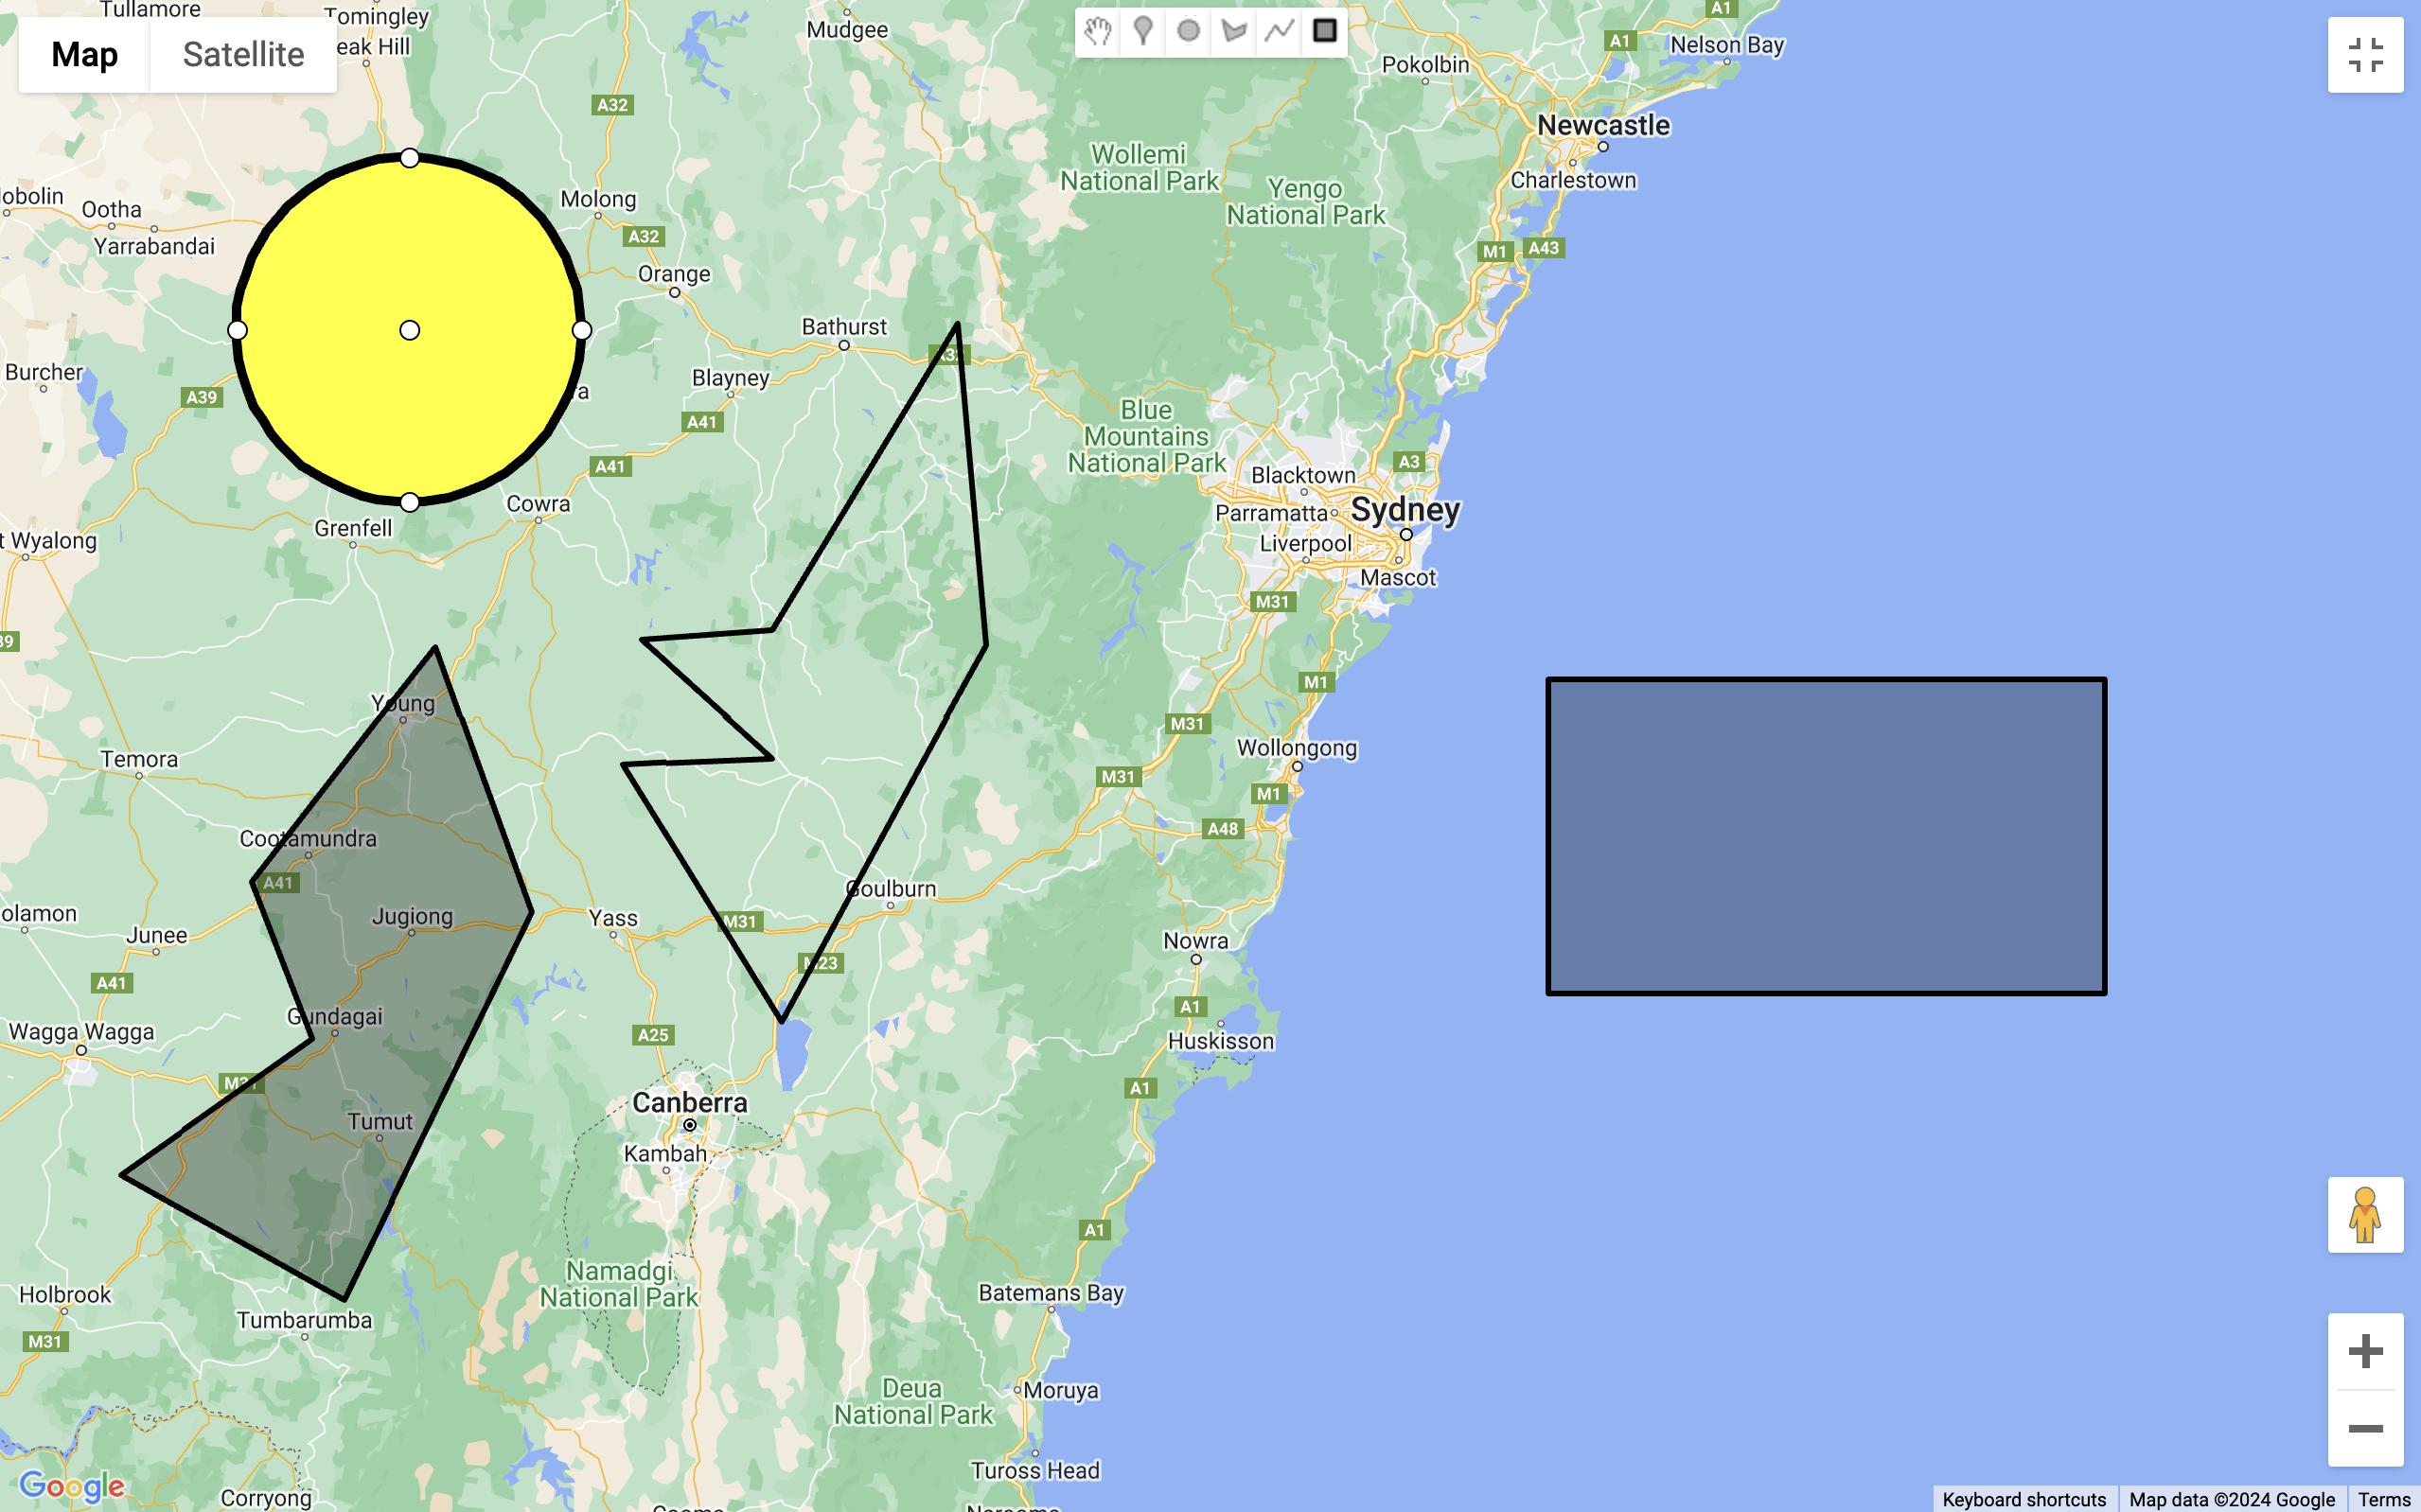
We will use polyline (or polygon) for our use case.
What is polyline and why are we using it?
In computer graphics, a polyline is a continuous line that is composed of one or more connected straight line segments, which, together, make up a shape.
Below is how you can create a polyline with Maps JS SDK -
const coordinates = [
  { lat: 37.772, lng: -122.214 },
  { lat: 21.291, lng: -157.821 },
  { lat: -18.142, lng: 178.431 },
  { lat: -27.467, lng: 153.027 },
];

const polyline = new google.maps.Polyline({
  path: coordinates,
  strokeColor: "#FF0000",
  strokeOpacity: 1.0,
  strokeWeight: 2,
});
So our freehand shape is nothing but these polyline points that are so close together they seem like a curve.
Now we need to decide when our shape should start drawing into our screen.
Google Maps offers the following events that we can listen to in our application.
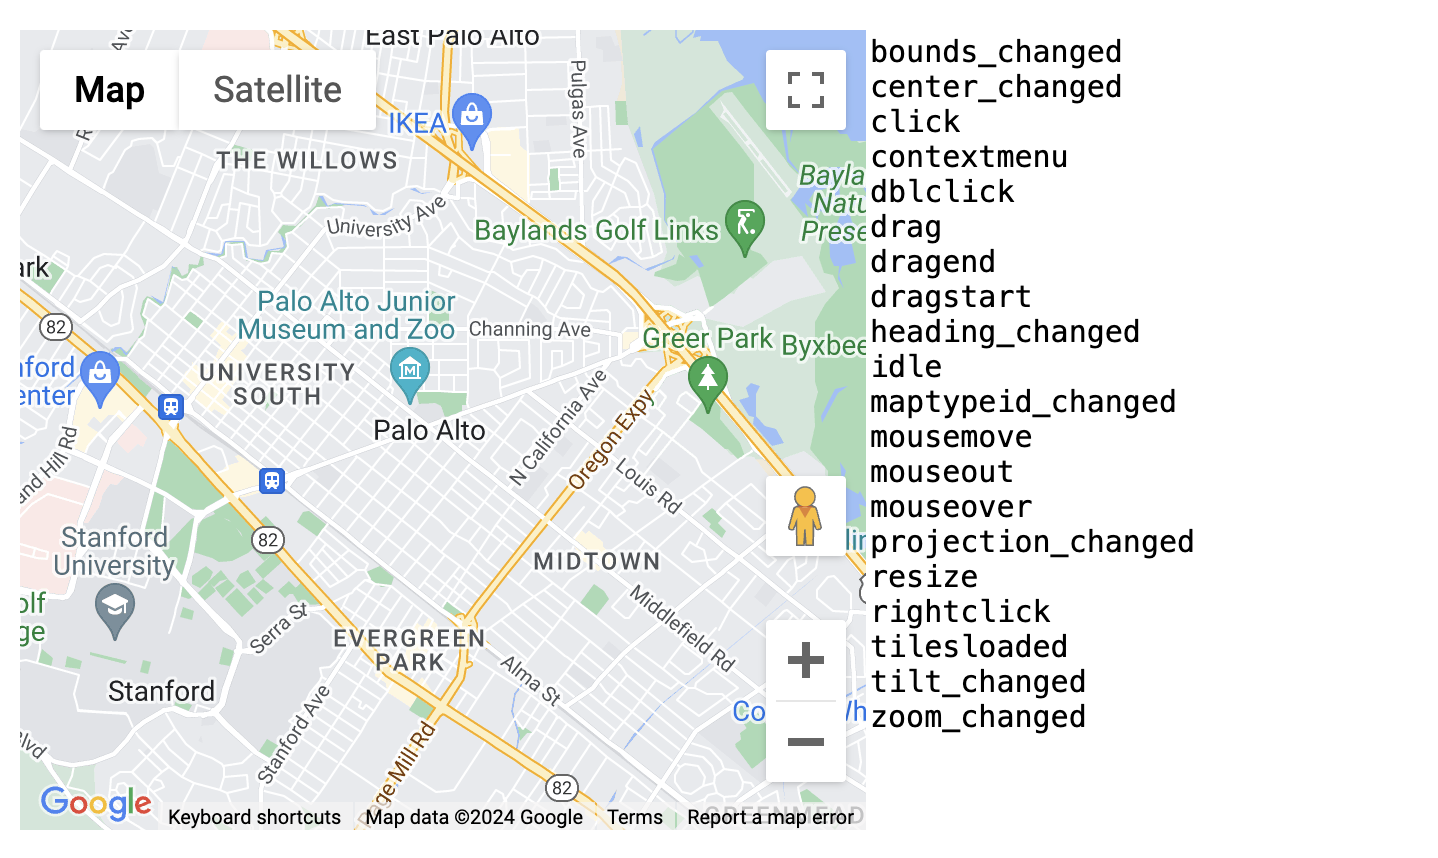
For our use case, we need mousesup, mousemove, and mousedown
Unfortunately, Google Maps offers only mousemove but we will find a way to get around with that.
Let's add a useEffect in our src/components/Map/Map.tsx file.
import { useMap, useMapsLibrary } from "@vis.gl/react-google-maps";
import { useEffect } from "react";

// ....

const coreLibrary = useMapsLibrary("core");
const mapInstance = useMap();

useEffect(() => {
  if (!mapInstance || !coreLibrary) return;

  const handleMapMouseMoveListener = (e: google.maps.MapMouseEvent) => {
    console.log(e.latLng);
  };

  coreLibrary.event.addListener(
    mapInstance,
    "mousemove",
    handleMapMouseMoveListener
  );

  return () => {
    coreLibrary.event.clearListeners(mapInstance, "mousemove");
  };
}, [mapInstance, coreLibrary]);

// ...
Now move your mouse over the map and check the console you will see an object being logged. This object contains functions lat() and lng() which will give the latitude and longitude respectively.
We don't want to draw our polyline on every mouse move, it should start drawing on mousedown and ends on mouseup.
For this, we will create two ref objects:-
isMouseDownRef
mapContainerRef (stores our Map container's HTMLElement node)
and attach javascript native mouseup and mousedown to our mapContainerRef.current.
Below is the respective code -
import { Map, useMap, useMapsLibrary } from "@vis.gl/react-google-maps";
import { ElementRef, useEffect, useRef } from "react";

type Polyline = google.maps.Polyline;

interface MapProps {
  width?: string;
  height?: string;
  onShapeDraw?: (polygon: Polyline) => void;
}

const AppMap = ({
  width = "100vw",
  height = "100vh",
  onShapeDraw,
}: MapProps) => {
  const coreLibrary = useMapsLibrary("core");
  const mapInstance = useMap();

  const mapContainerRef = useRef<ElementRef<"div"> | null>(null);
  const isMouseDownRef = useRef<boolean>(false);

  const mapContainer = mapContainerRef.current;

  const handleMouseDownListener = () => (isMouseDownRef.current = true);
  const handleMouseUpListener = () => (isMouseDownRef.current = false);

  useEffect(() => {
    if (!mapInstance || !coreLibrary || !mapContainer) return;

    mapInstance.setOptions({
      // To disable dragging
      gestureHandling: "none",
    });

    const handleMapMouseMoveListener = (e: google.maps.MapMouseEvent) => {
      if (!isMouseDownRef.current) {
        return;
      }
      console.log(e.latLng);
    };

    mapContainer.addEventListener("mousedown", handleMouseDownListener);
    mapContainer.addEventListener("mouseup", handleMouseUpListener);

    coreLibrary.event.addListener(
      mapInstance,
      "mousemove",
      handleMapMouseMoveListener
    );

    return () => {
      coreLibrary.event.clearListeners(mapInstance, "mousemove");
      mapContainer.removeEventListener("mousedown", handleMouseDownListener);
      mapContainer.removeEventListener("mouseup", handleMouseUpListener);
    };
  }, [mapInstance, coreLibrary, mapContainer]);

  return (
    <div style={{ width, height }} ref={mapContainerRef}>
      <Map defaultCenter={{ lat: 22.54992, lng: 0 }} defaultZoom={3}></Map>
    </div>
  );
};

export default AppMap;
Now we only get our latitude and longitude logged when -
mousedown --> mousemove --> mouseup
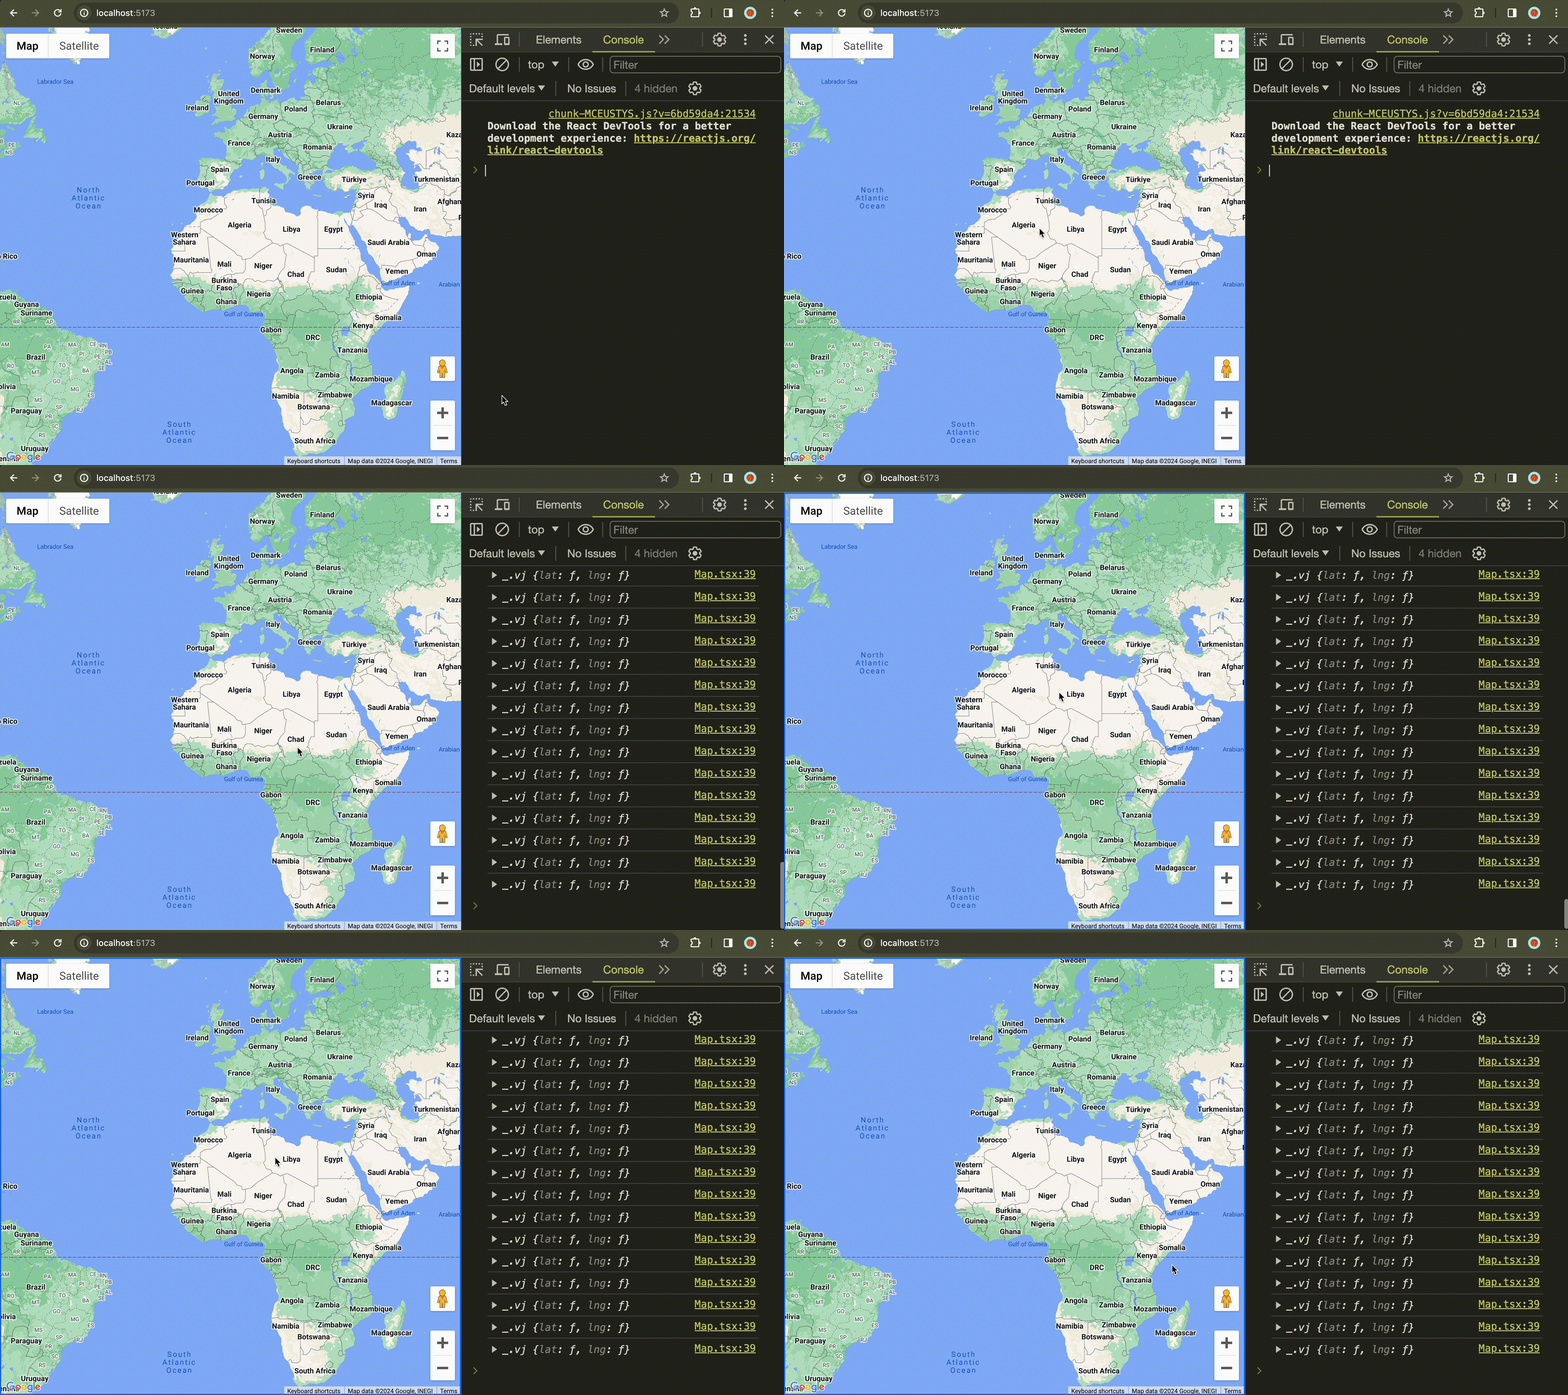
Let's draw the shape! shall we?
To store our polyline we need to create ref that will store the polyline object.
const polylineRef = useRef<Polyline | null>(null);
As soon as mousedown event fires we create a new Polyline instance and set it to our mapInstance,
on the map mousemove we get the current coordinates and append them to the polyline's path.
on mouseup we connect the last point with the first point back for the closed shape.
We will also call our onShapeDraw function on mouseup.
const handleMouseDownListener = () => {
  polylineRef.current = new mapsLibrary!.Polyline({
    strokeColor: "#005DA4",
    strokeOpacity: 1,
    strokeWeight: 3,
  });
  polylineRef.current.setMap(mapInstance);

  isMouseDownRef.current = true;
};

const handleMouseUpListener = () => {
  const path = polylineRef.current!.getPath().getArray();
  path.push(polylineRef.current!.getPath().getArray()[0]);
  polylineRef.current?.setPath(path);

  onShapeDraw?.(polylineRef.current!);

  isMouseDownRef.current = false;
};

// ...

const handleMapMouseMoveListener = (e: google.maps.MapMouseEvent) => {
  if (!isMouseDownRef.current) {
    return;
  }
  const path = polylineRef.current!.getPath().getArray();
  path.push(e.latLng!);
  polylineRef.current!.setPath(path);
};

// ...
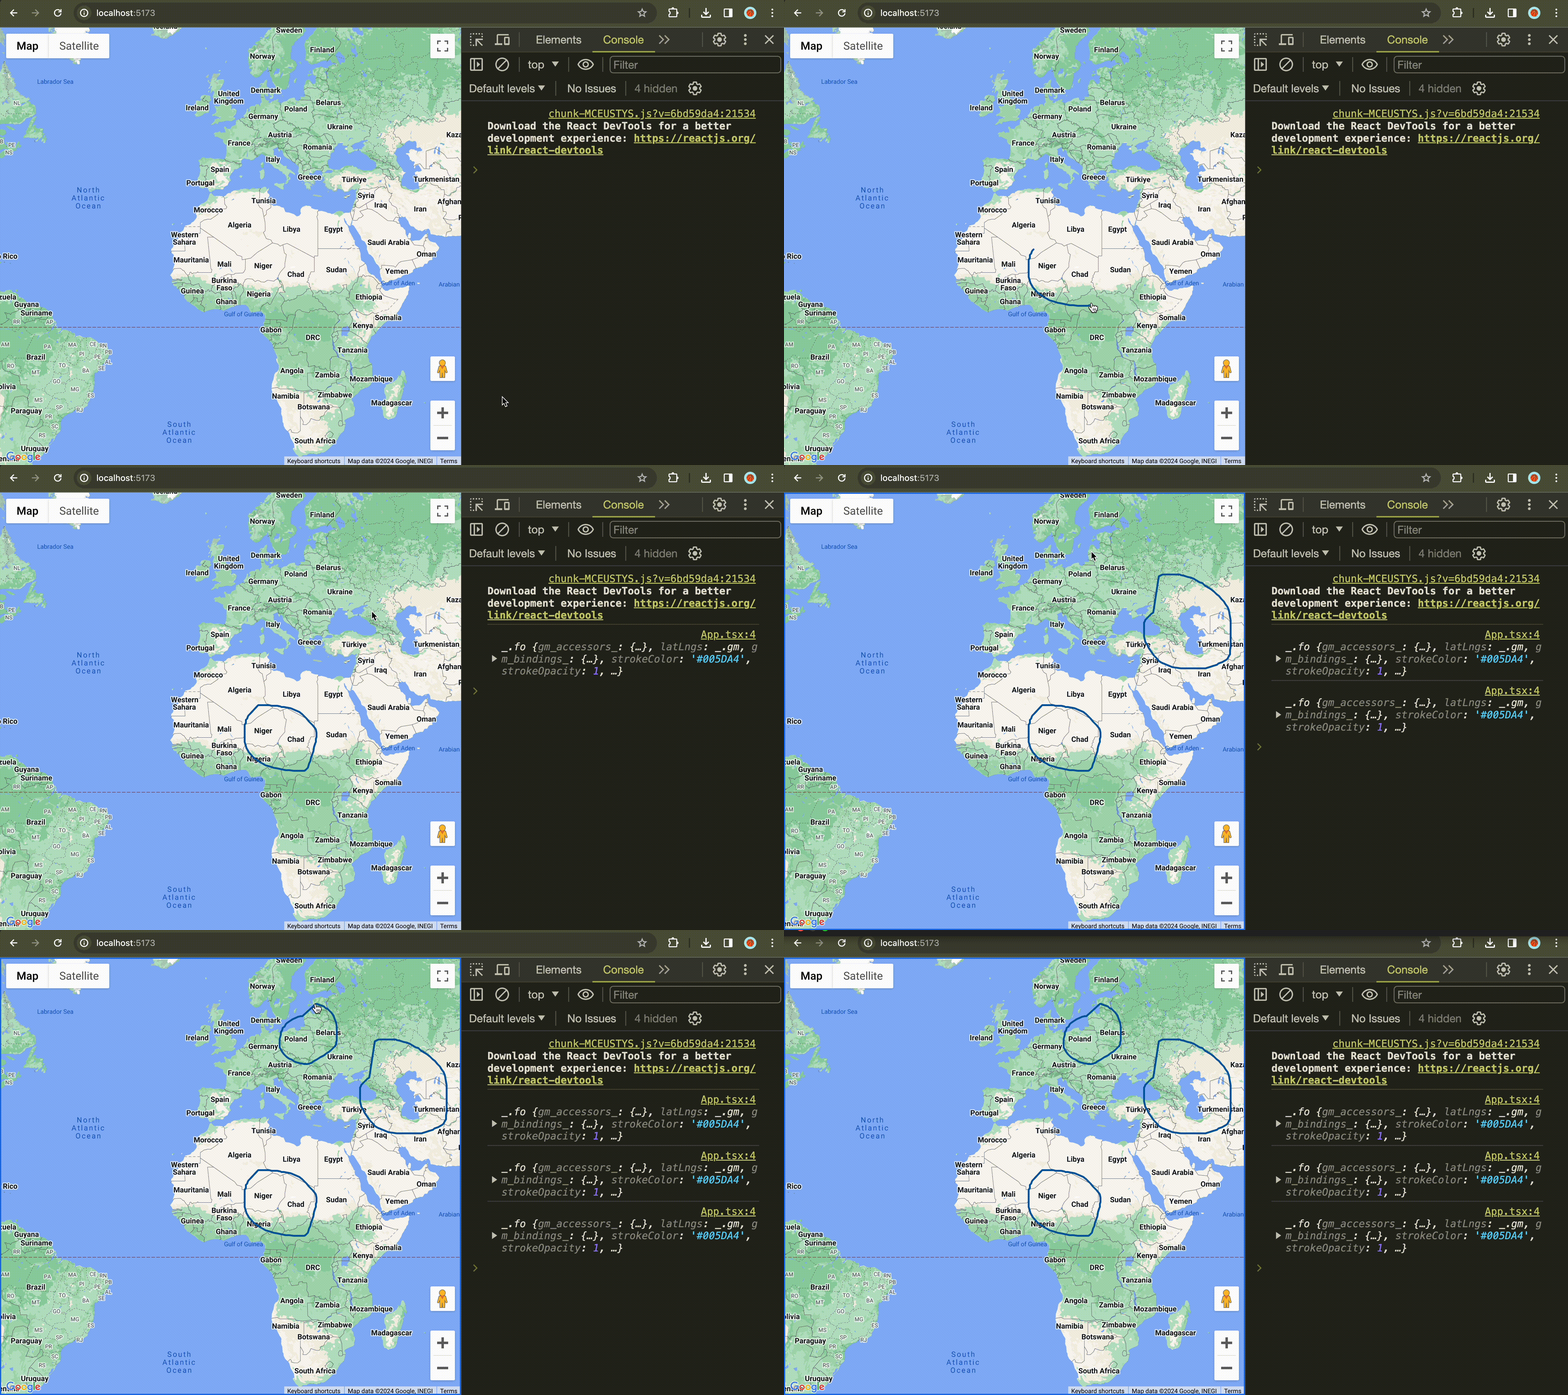
All seems good, right? Well, our current solution only works on the desktop, because on mobile there are no mouseup and mousedown events.
On Mobile Devices
On mobile, we have touchstart and touchend events. We have already done the heavy lifting of our solution just add the below event handlers, trigger the map mousemove event manually on touchmove and we are good to go.
const triggerMouseMoveEventOnMap = () => {
  if (!coreLibrary || !mapInstance) return;
  coreLibrary.event.trigger(mapInstance, "mousemove");
};

useEffect(() => {
  // ...

  const handleMapMouseMoveListener = (e: google.maps.MapMouseEvent) => {
    if (!isMouseDownRef.current || !e) {
      return;
    }
    const path = polylineRef.current!.getPath().getArray();
    path.push(e.latLng!);
    polylineRef.current!.setPath(path);
  };

  // ...

  mapContainer.addEventListener("touchmove", triggerMouseMoveEventOnMap);
  mapContainer.addEventListener("touchstart", handleMouseDownListener);
  mapContainer.addEventListener("touchend", handleMouseUpListener);

  // ...

  return () => {
    // ...

    mapContainer.removeEventListener("touchmove", triggerMouseMoveEventOnMap);
    mapContainer.removeEventListener("touchstart", handleMouseDownListener);
    mapContainer.removeEventListener("touchend", handleMouseUpListener);
  };
  // eslint-disable-next-line react-hooks/exhaustive-deps
}, [mapInstance, coreLibrary, mapContainer]);
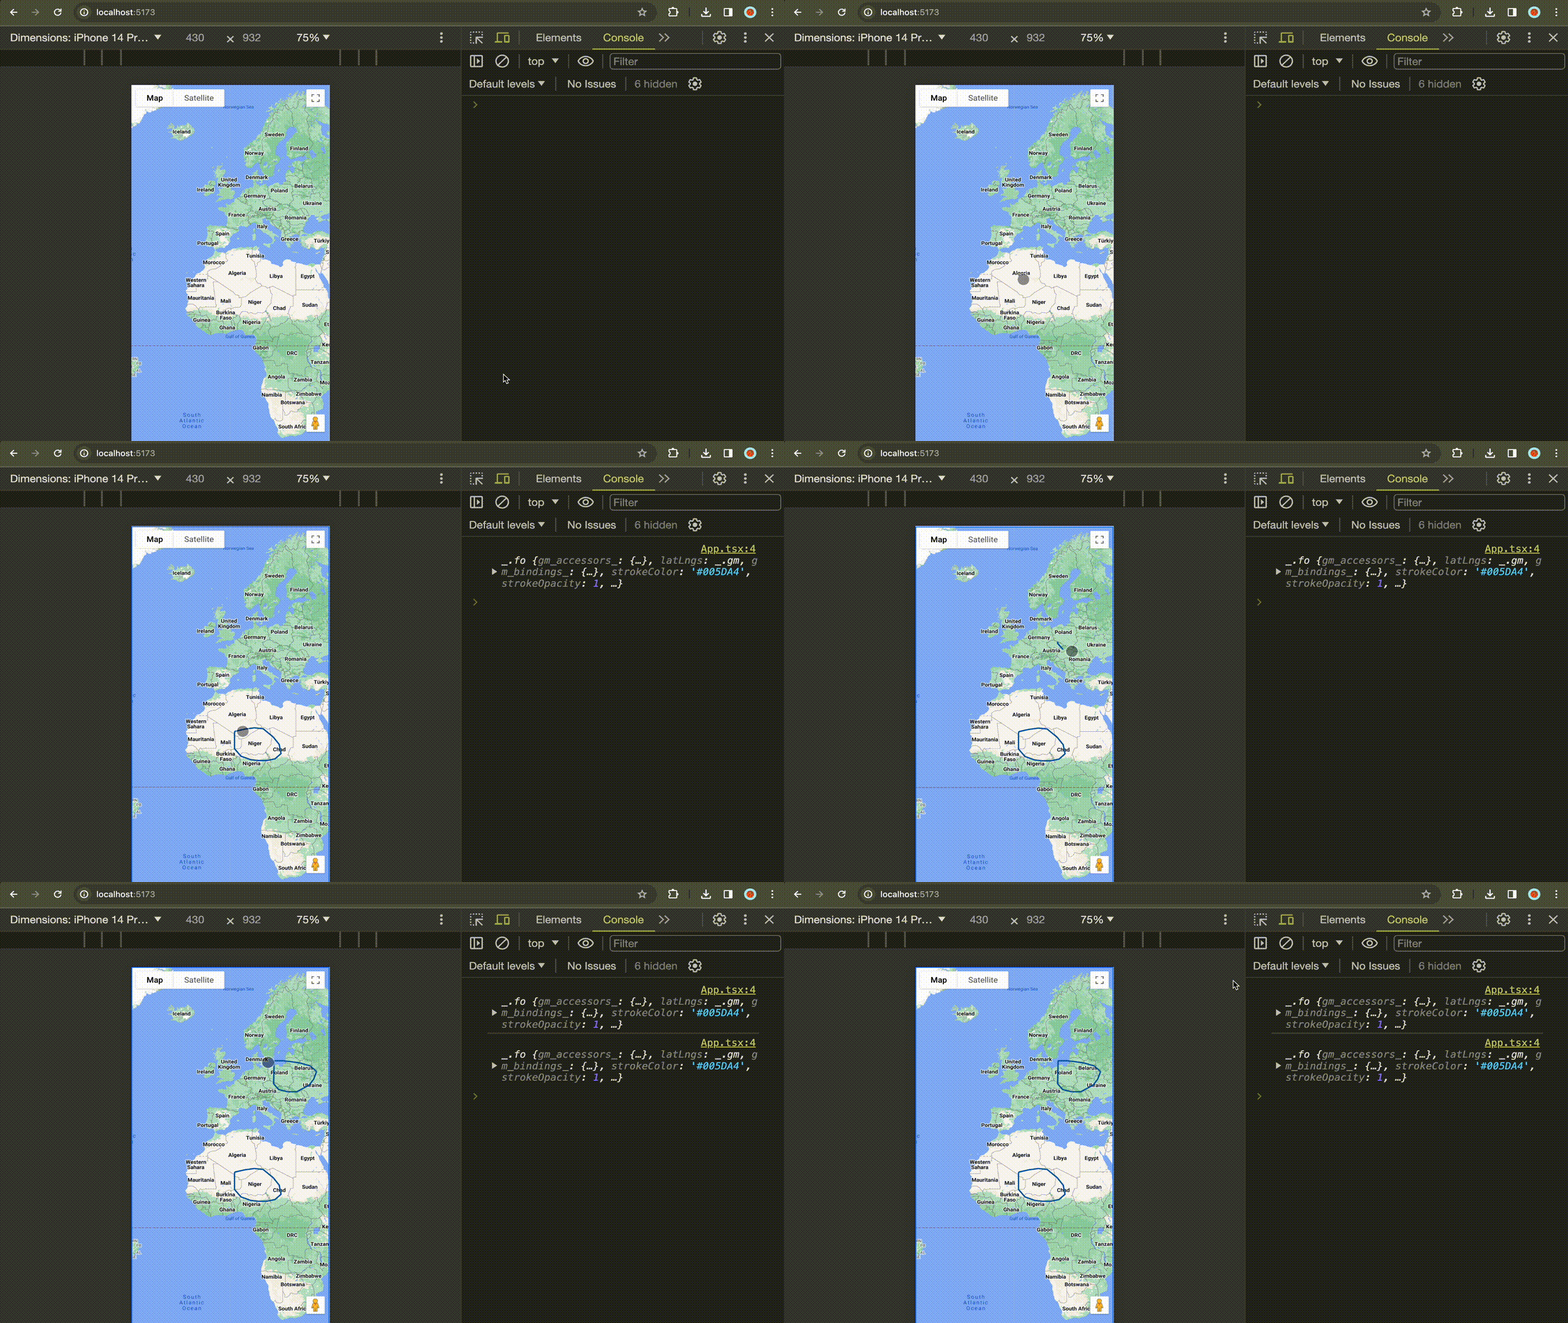
Now every time we draw a shape, we get a polyline object that we can use for our further purposes.
You can check the docs for polyline.
Complete Code - Repo Link
Bonus
There are libraries (turf and simplify.js) that you can use to validate and reduce polyline points if you want.
// https://www.npmjs.com/package/@turf/boolean-valid
import booleanValid from "@turf/boolean-valid";
import * as turf from "@turf/turf";

export function reducePoints(
  points: google.maps.LatLng[],
  coreLibrary: google.maps.CoreLibrary
): google.maps.LatLng[] | null {
  const turfPoints: turf.Position[] = points.map((item) => [
    item.lat(),
    item.lng(),
  ]);

  const turfPolygon = turf.polygon([turfPoints]);

  if (booleanValid(turfPolygon)) {
    return points;
  }

  const simplifiedTurfPolygon = turf.simplify(turfPolygon, {
    tolerance: 0.0001,
    highQuality: true,
  });

  if (!booleanValid(simplifiedTurfPolygon)) {
    // do something
    return null;
  }

  return simplifiedTurfPolygon.geometry.coordinates[0].map(
    (position) => new coreLibrary.LatLng(position[0], position[1])
  );
}
Thanks for reading and hopefully you learn something new today.
Let me know your thoughts in the comments.
Peace ✌️
Subscribe to my newsletter
Read articles from Pushpender Singh directly inside your inbox. Subscribe to the newsletter, and don't miss out.
Written by

Pushpender Singh
Pushpender Singh
Software Engineer