Setting up MySQL and MySQL Workbench Locally on Windows
 Victor Nduti
As we venture through the vast landscape of relational databases, two stalwarts emerge to guide us – MySQL and its trusty sidekick, MySQL Workbench. In this walkthrough, we'll navigate the steps to set up this dynamic duo within your Windows playground.
Start the process by visiting the MySQL downloads page through the link provided below and downloading the MySQL Community version.
Navigate to: https://www.mysql.com/downloads/
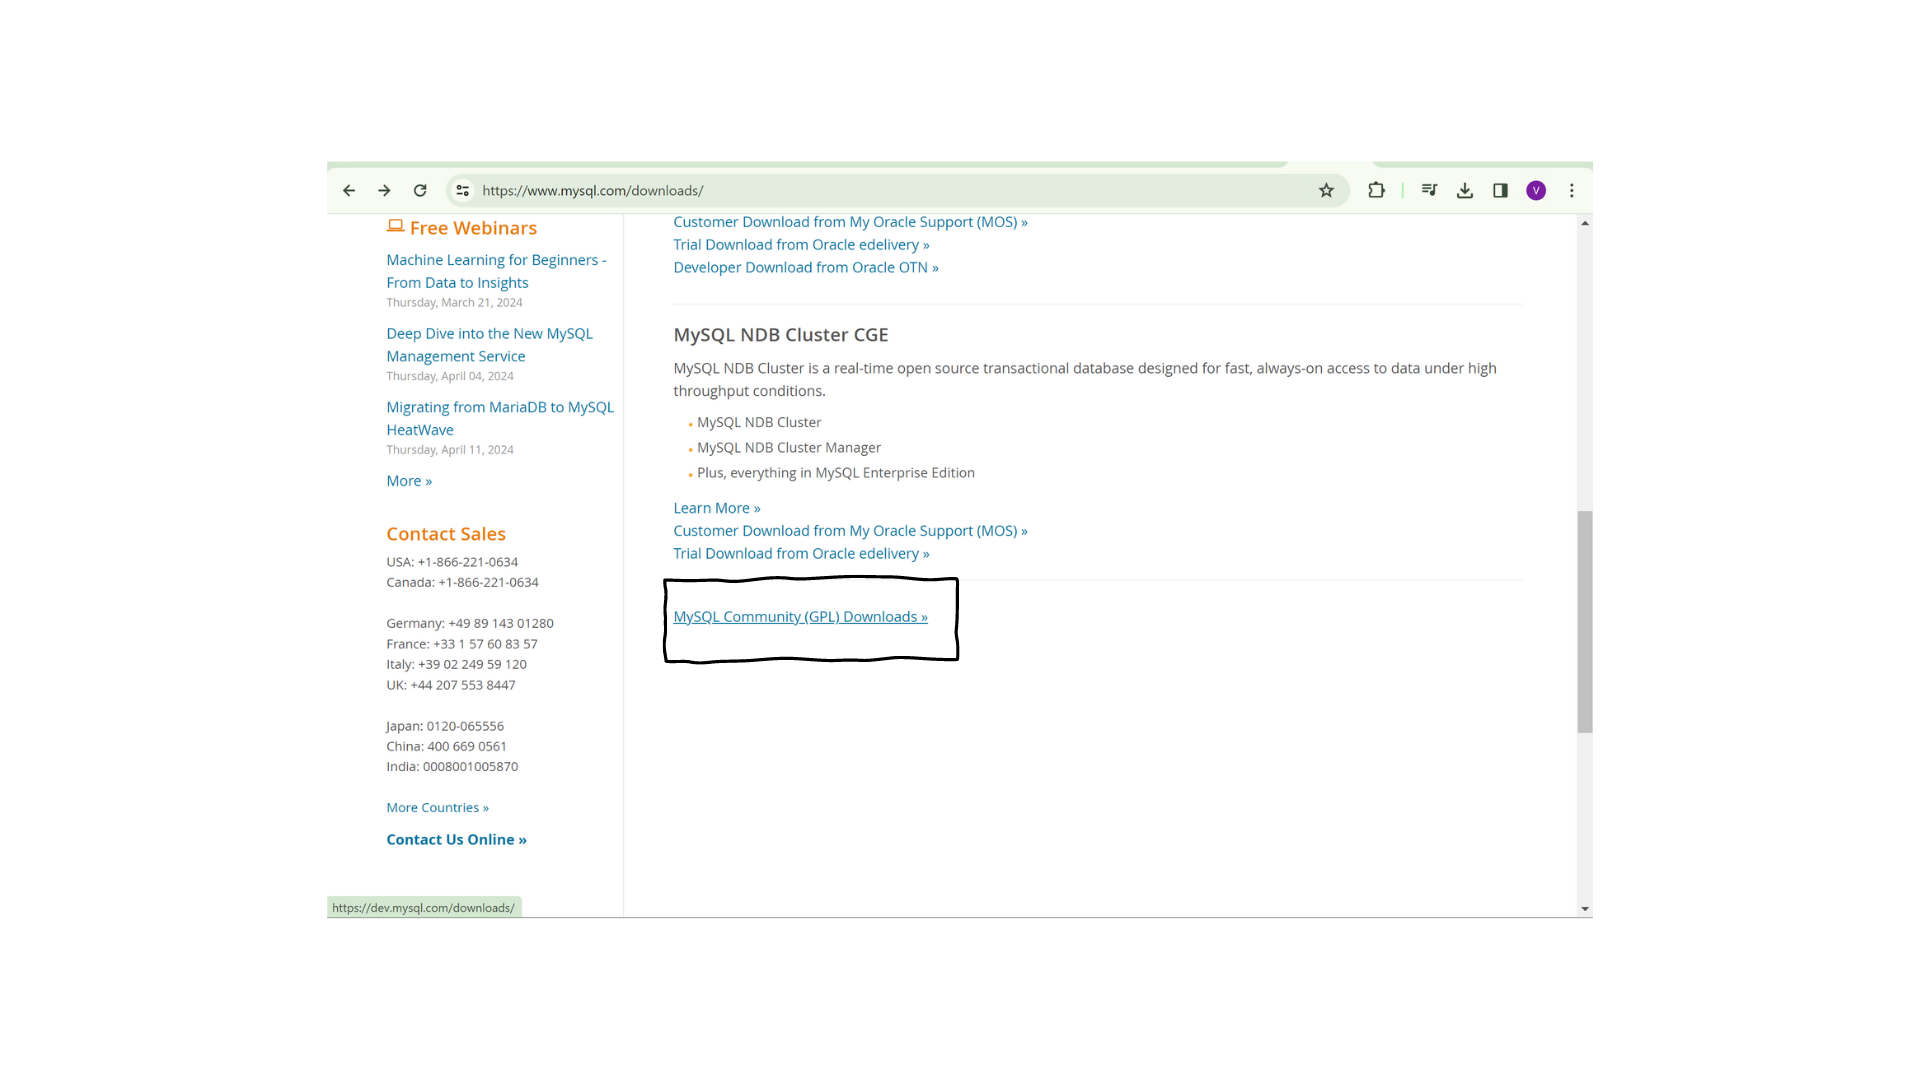
Scroll to the bottom of the page to locate the MySQL Community Downloads section, then click on the corresponding option.
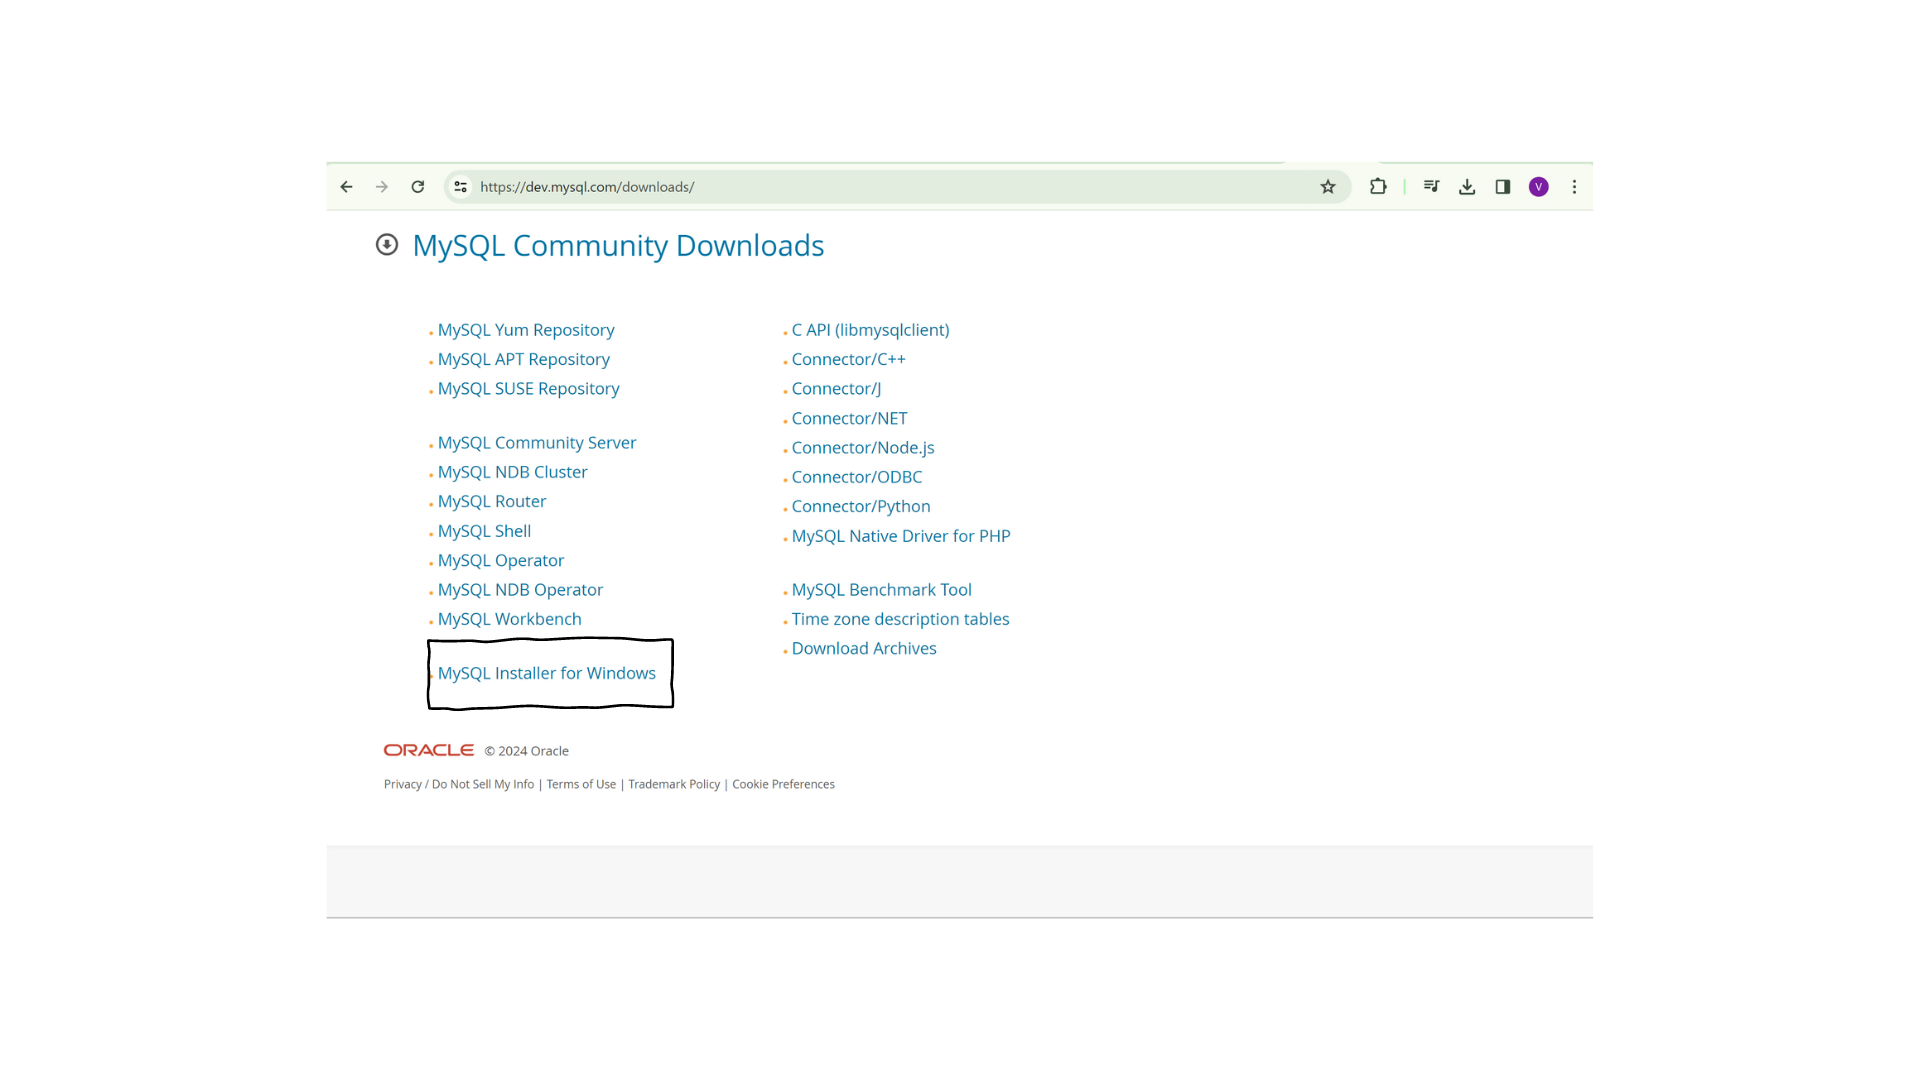
Select the 'MySQL for Windows Option'.
Install version '288.M' by following the displayed instructions:
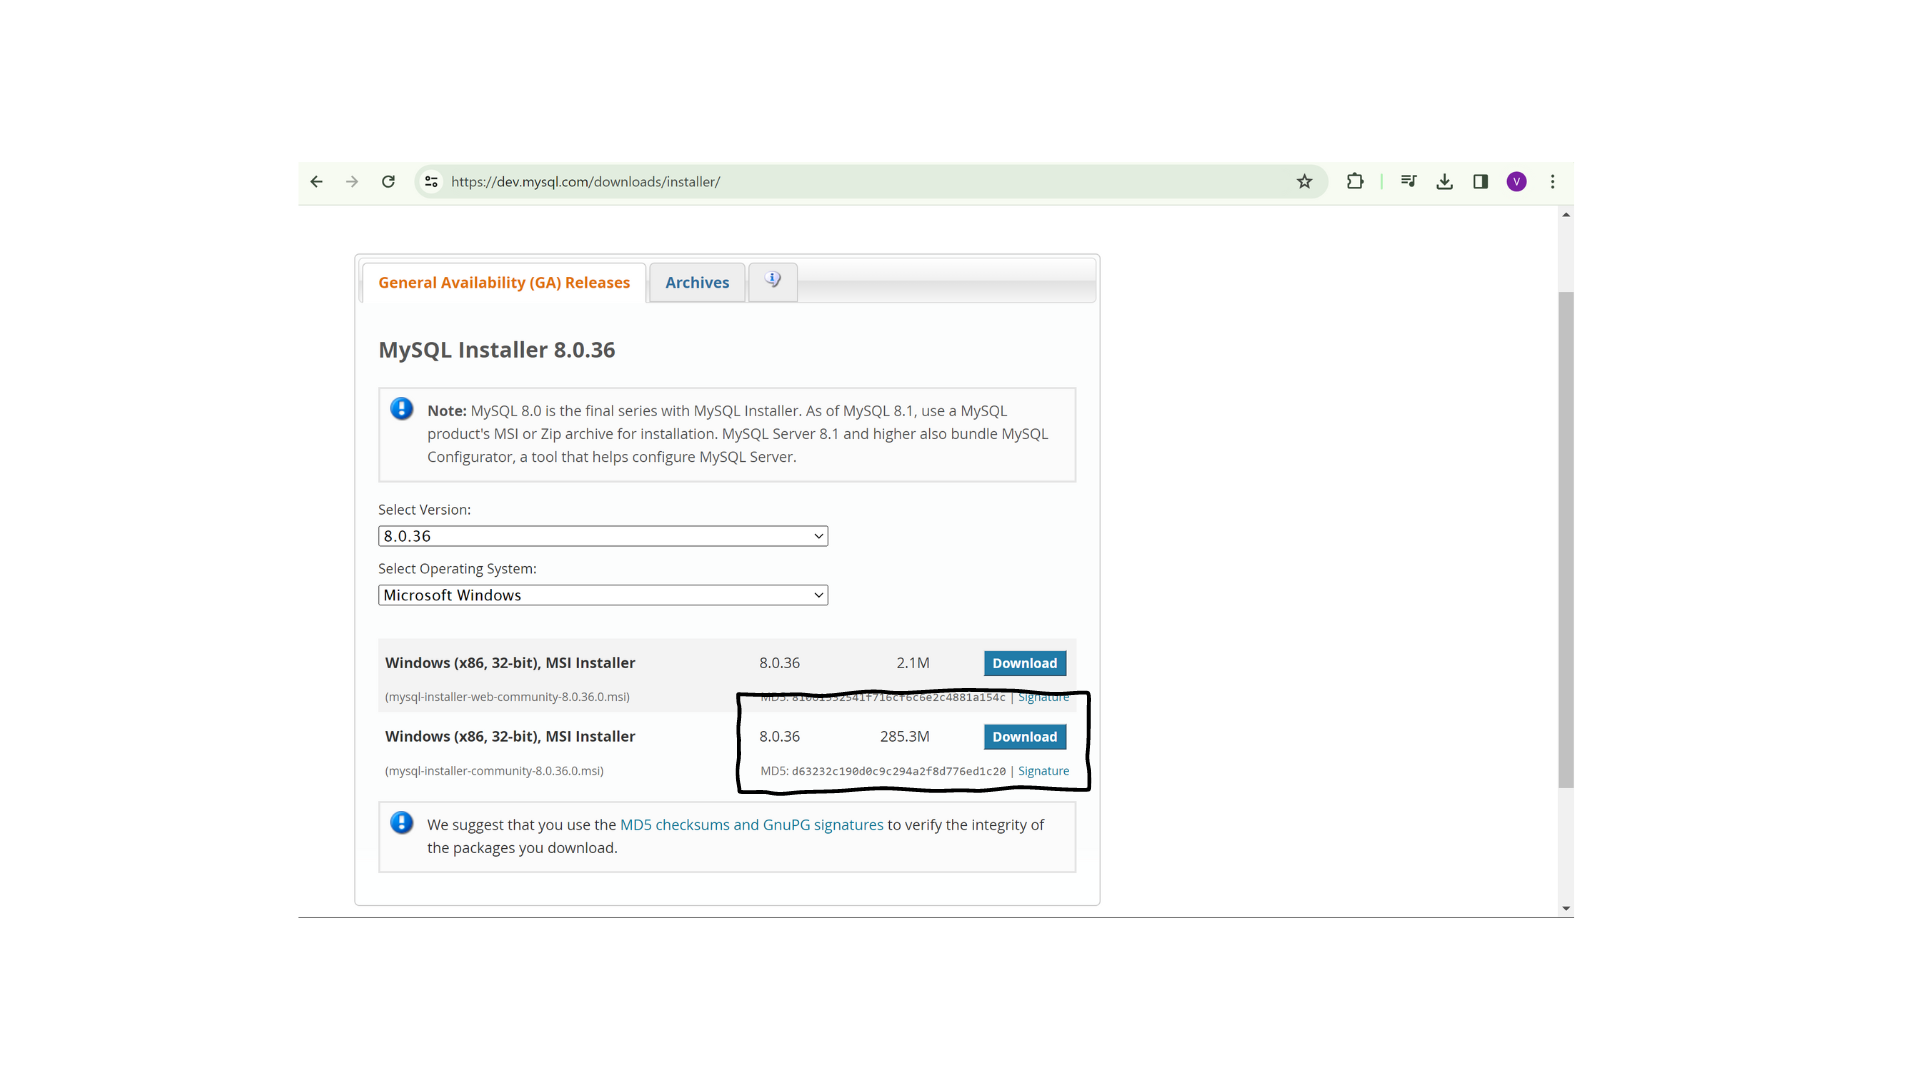
Feel free to bypass the account creation step and proceed with the download.
After the download is complete, locate the file in your Downloads section, as illustrated below:

Click on the file to initiate the installation. Be sure to grant all necessary Administrative privileges by clicking 'Yes'.
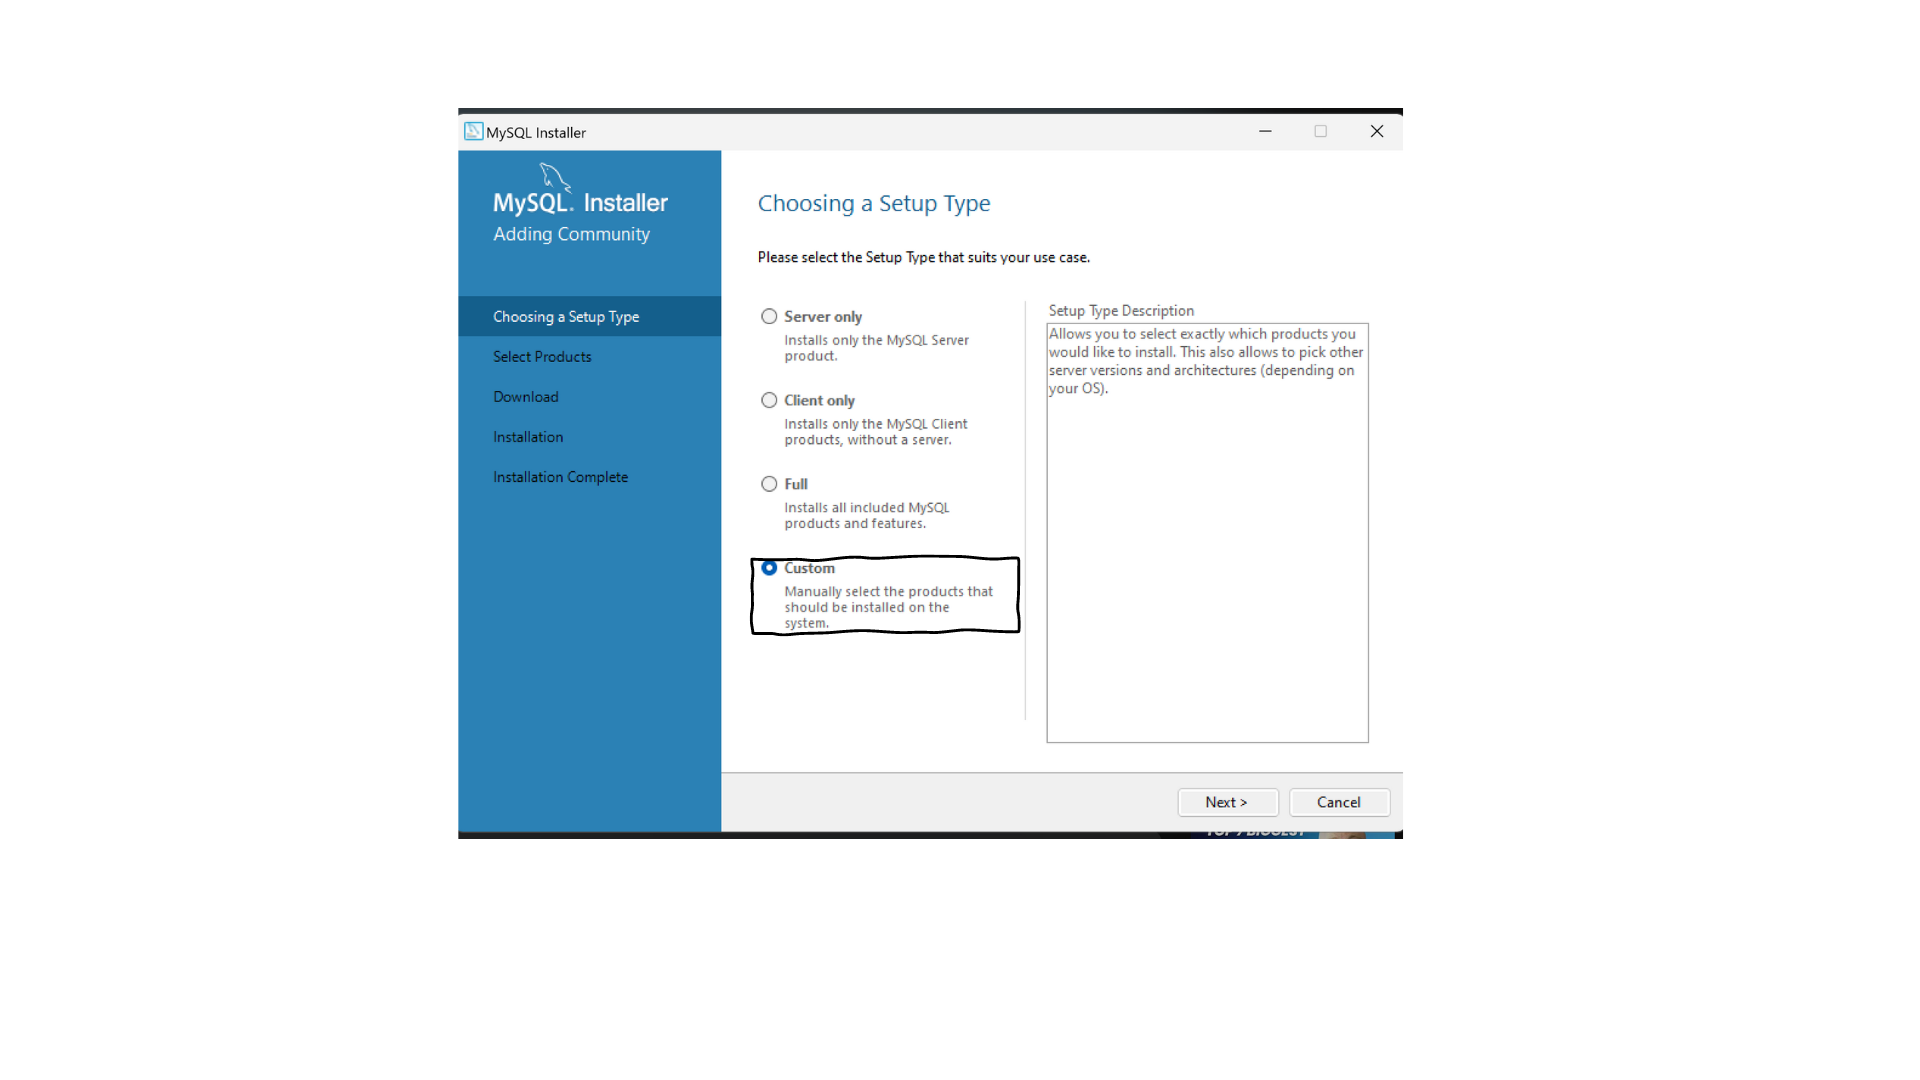
This page should appear. Opt for the custom installation option and click 'Next'. This allows you to specify the products you want to install.
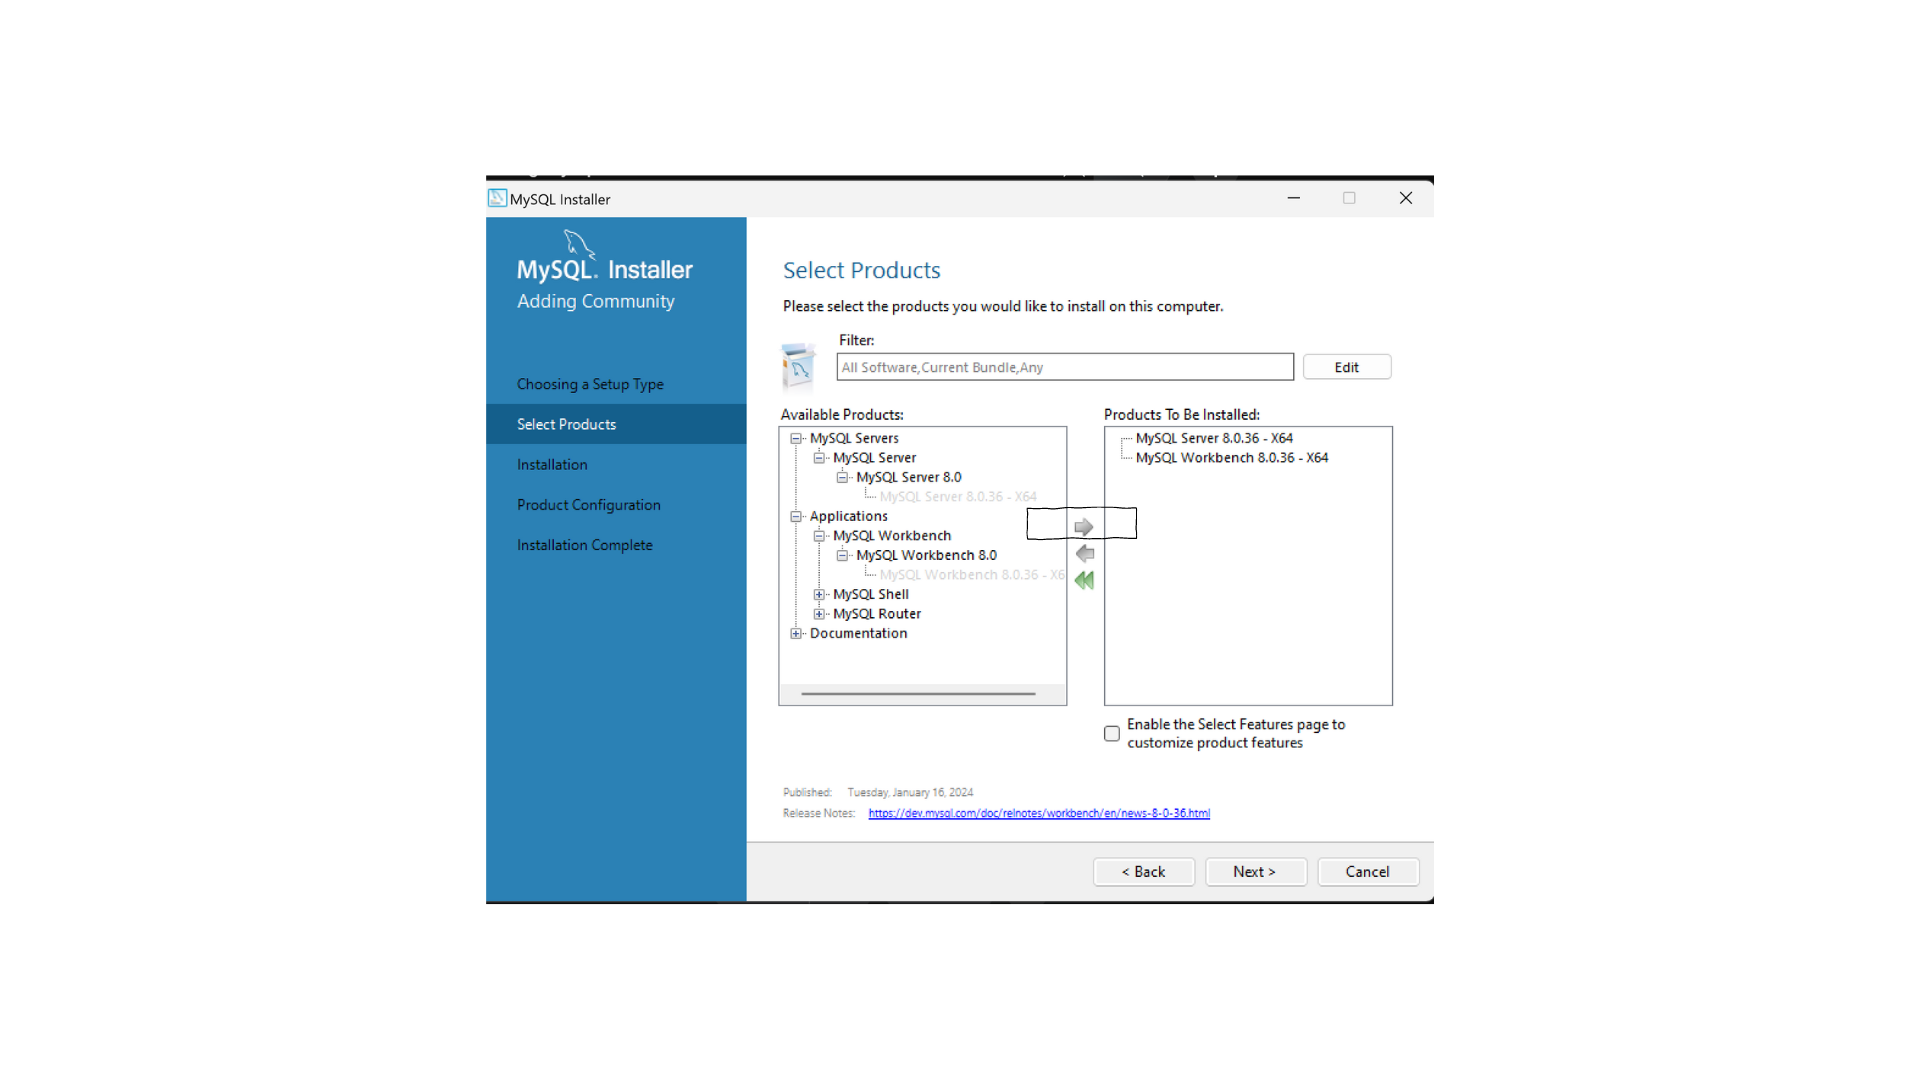
Choose 'MySQL Server' and 'MySQL Workbench' by individually selecting the products and adding them using the right-facing arrow, as highlighted:
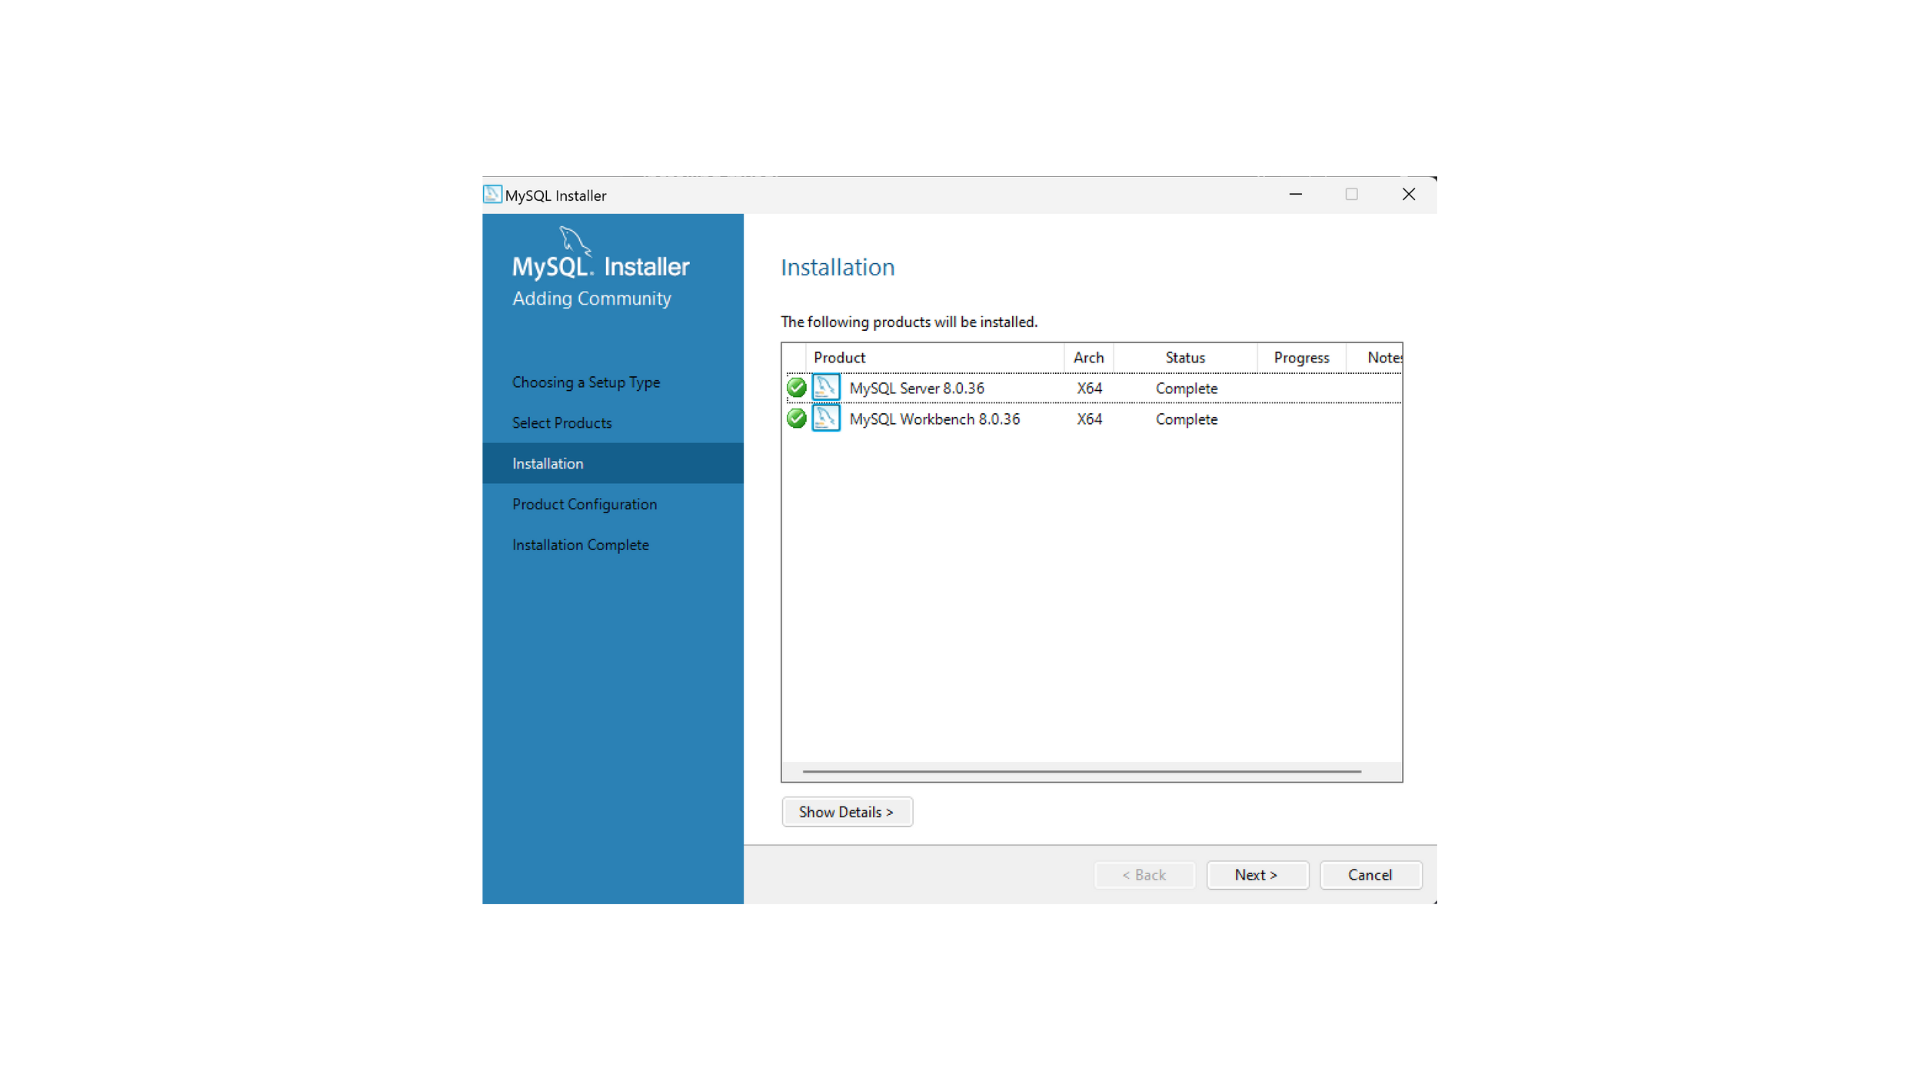
Proceed by clicking the 'Next' and 'Execute' buttons on the subsequent page. Your selected products for installation should be visible as shown below:
Click 'Execute' to commence the installation. A successful installation will be indicated by green tick marks next to the products, as observed below.
Continue by clicking 'Next', maintaining default settings for Product Configuration, Type, and Networking, and Authenticating Method.
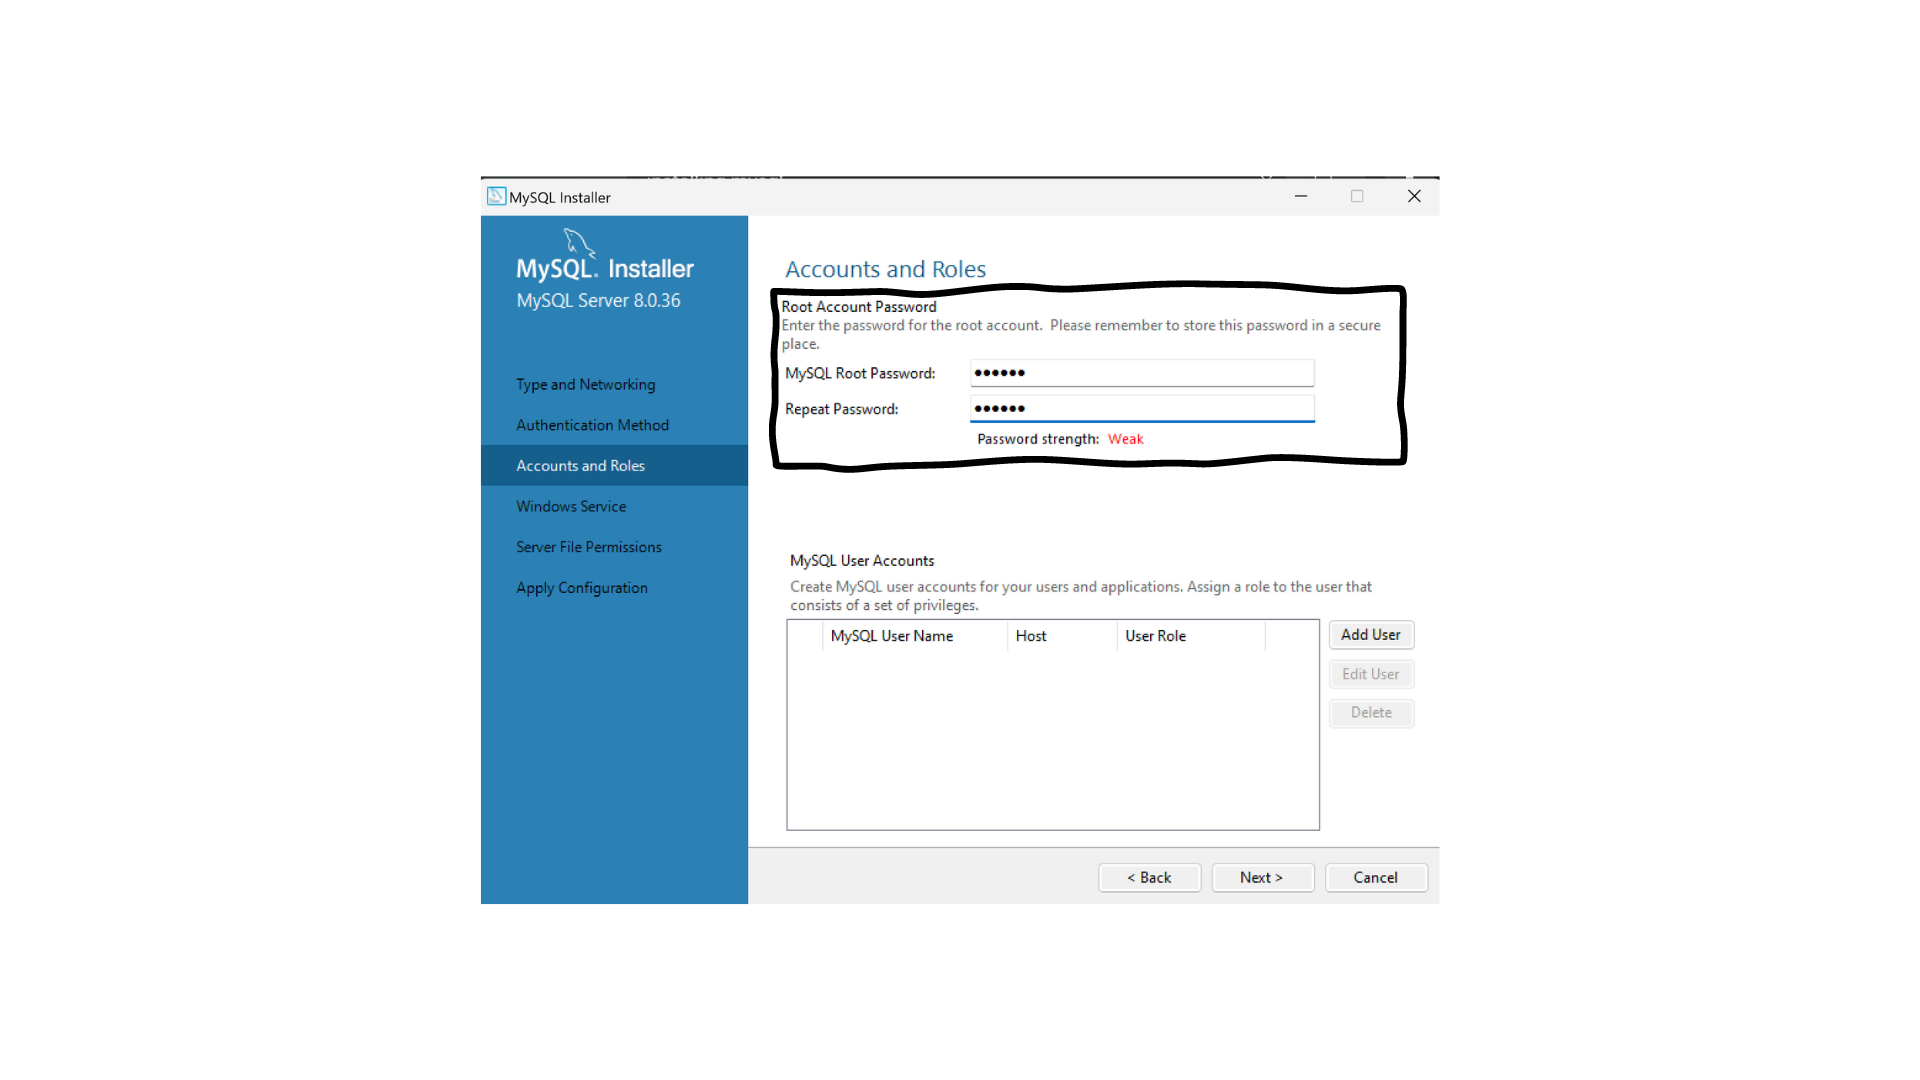
On the Accounts and Roles page, set and confirm your desired password, as illustrated below:
Click 'Next' on the Windows Service and Server File Permissions pages, keeping the default settings. Click 'Execute' on the Apply Configuration page to finalize the setup.
Once all steps are completed as shown below, click 'Finish' to conclude the installation.
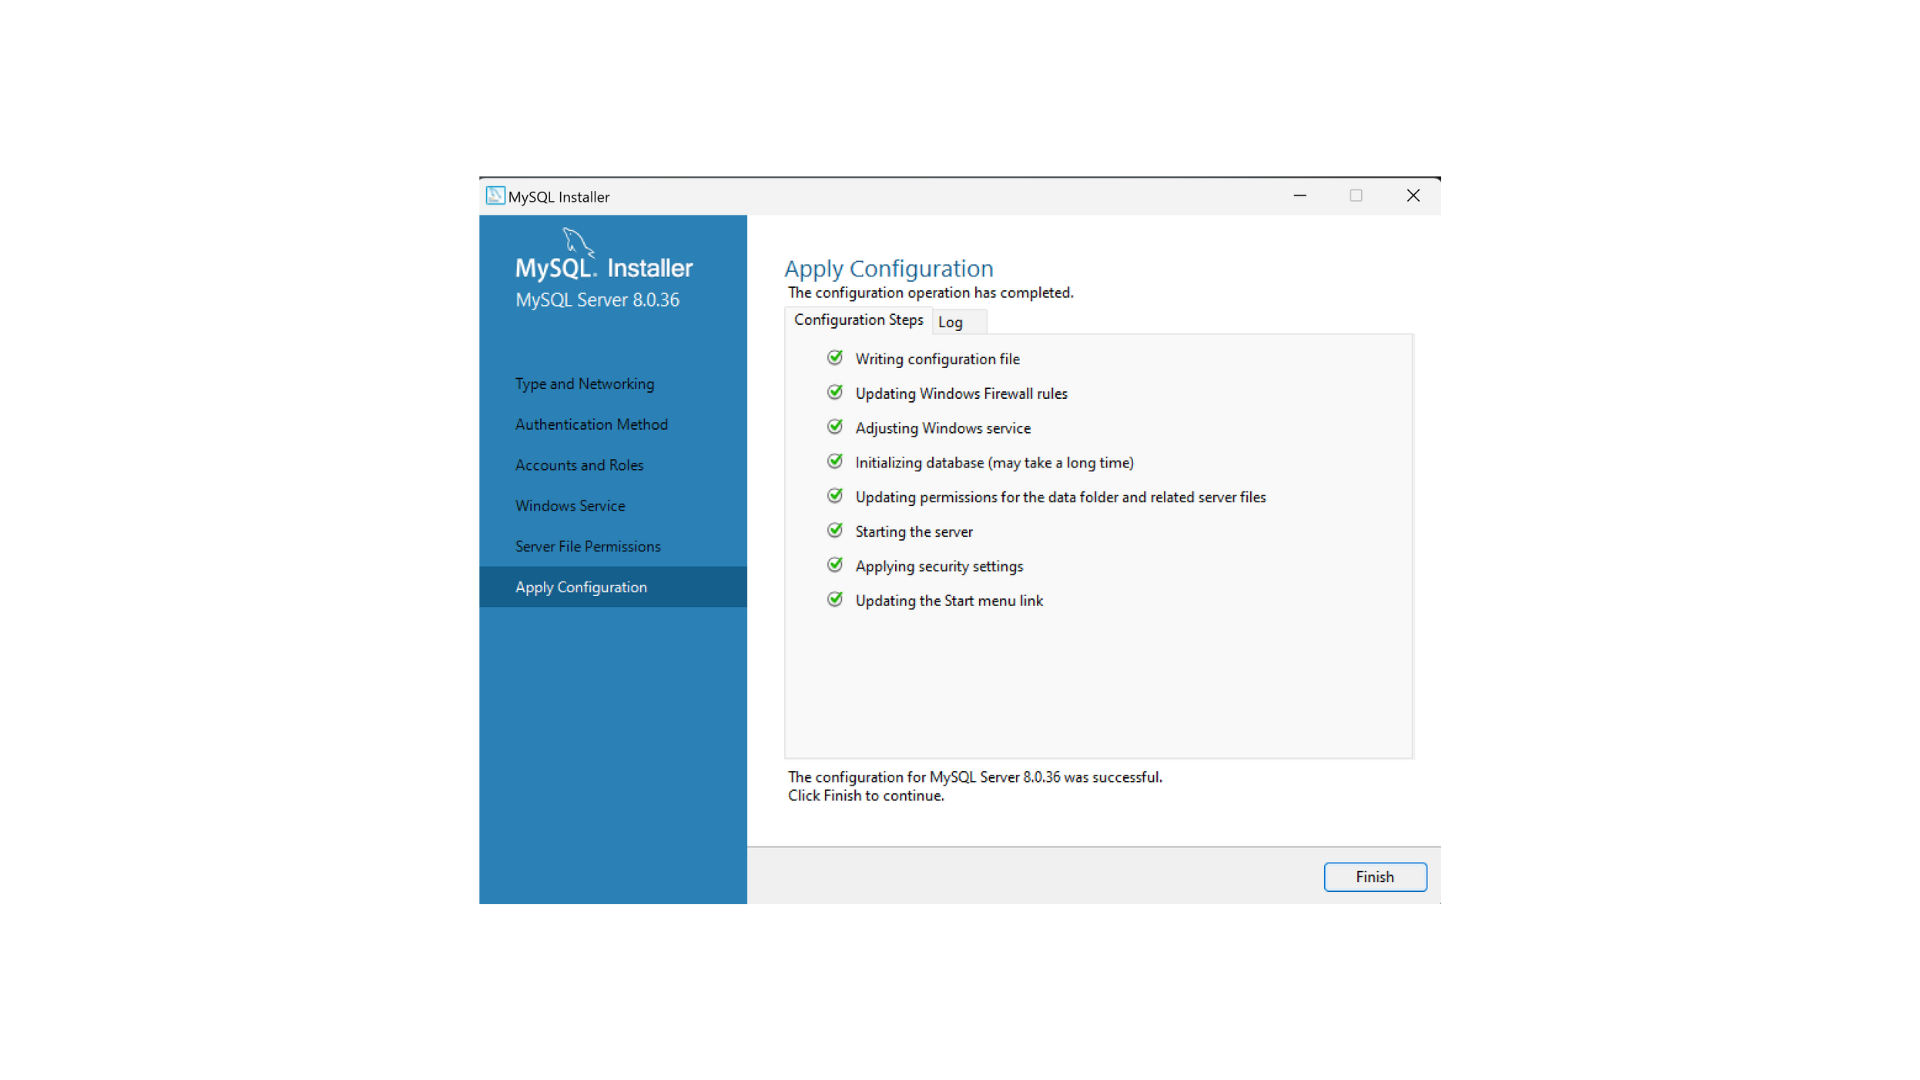
The message on the next page should confirm the successful installation and automatically initiate the workbench if that option is selected.
This concludes the installation process. Upon opening 'MySQL Workbench,' select the local instance and enter the code you generated during the setup.
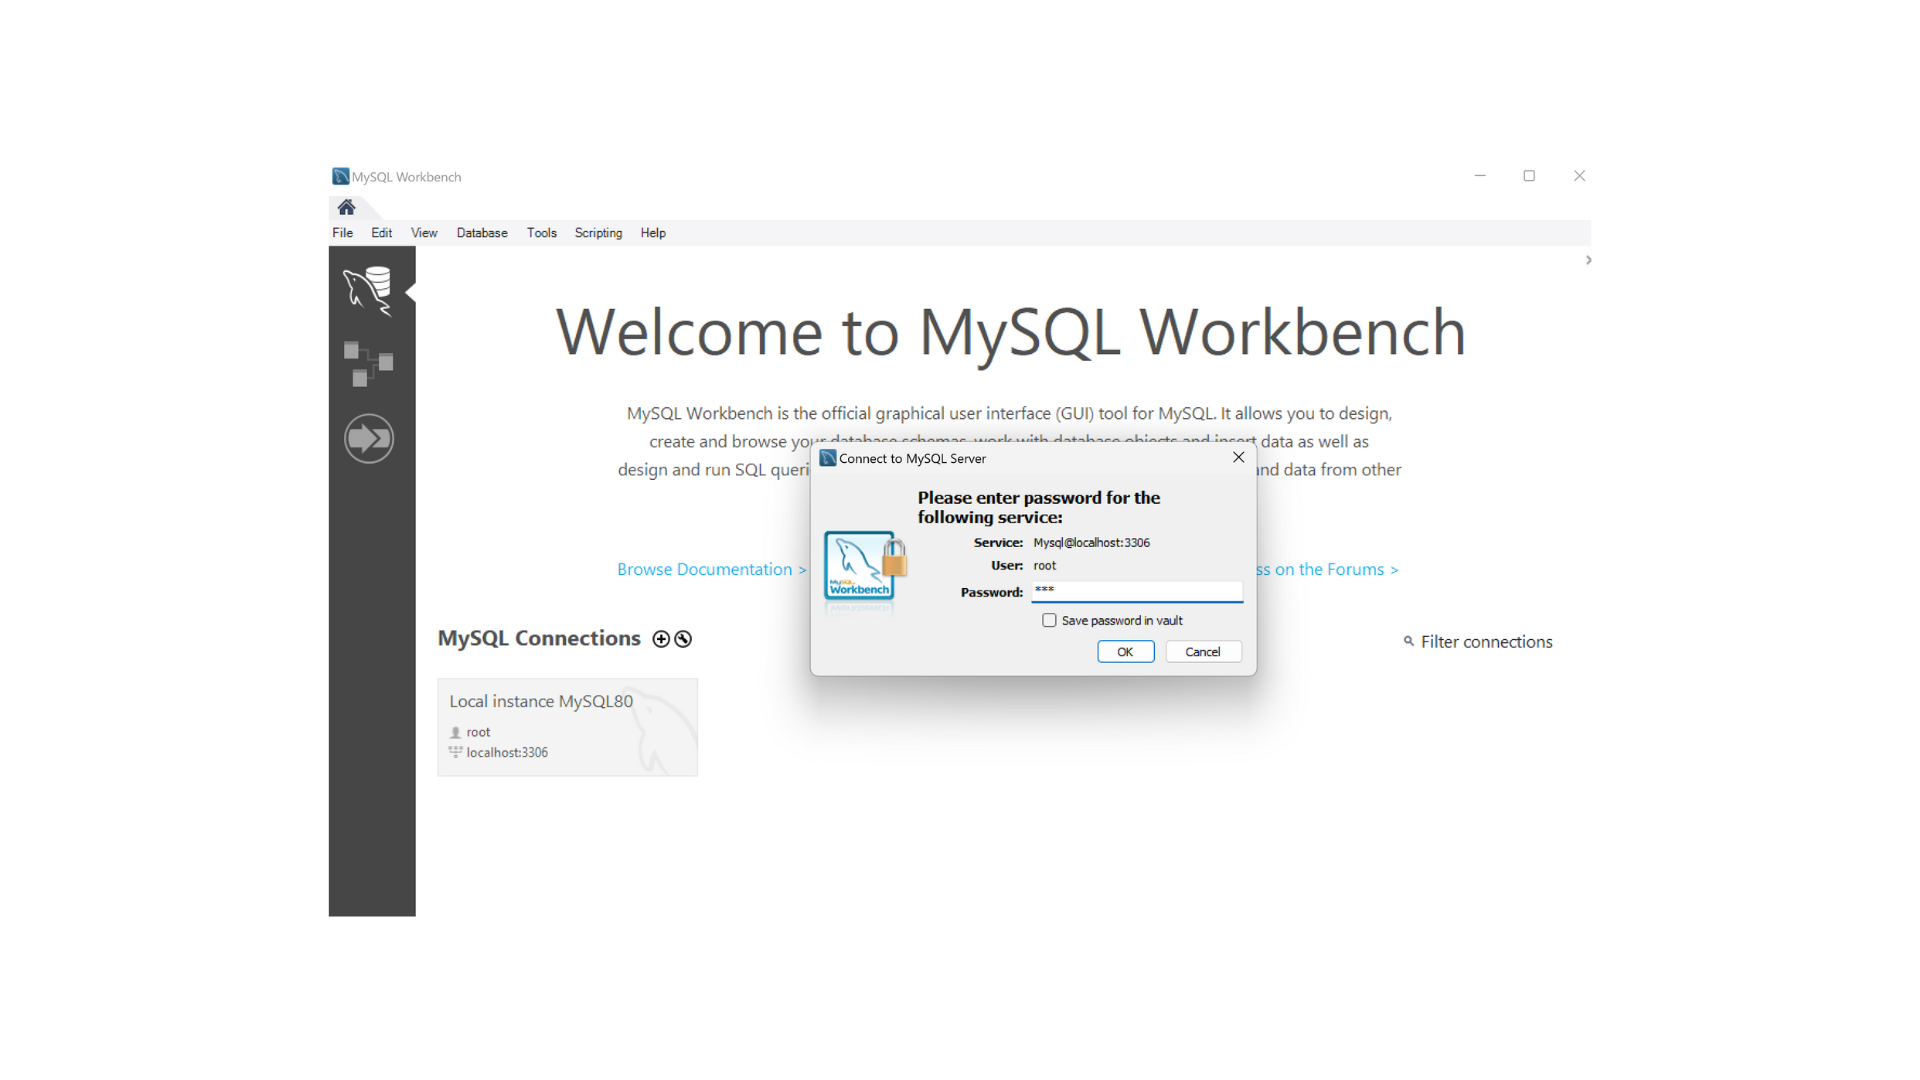
Now Query Away!!
Subscribe to my newsletter
Read articles from Victor Nduti directly inside your inbox. Subscribe to the newsletter, and don't miss out.
Written by

Victor Nduti
Victor Nduti
Data enthusiast. Curious about all things data.