Database First Approach Example - Entity Framework Core Framework
 Sudip Bhandari
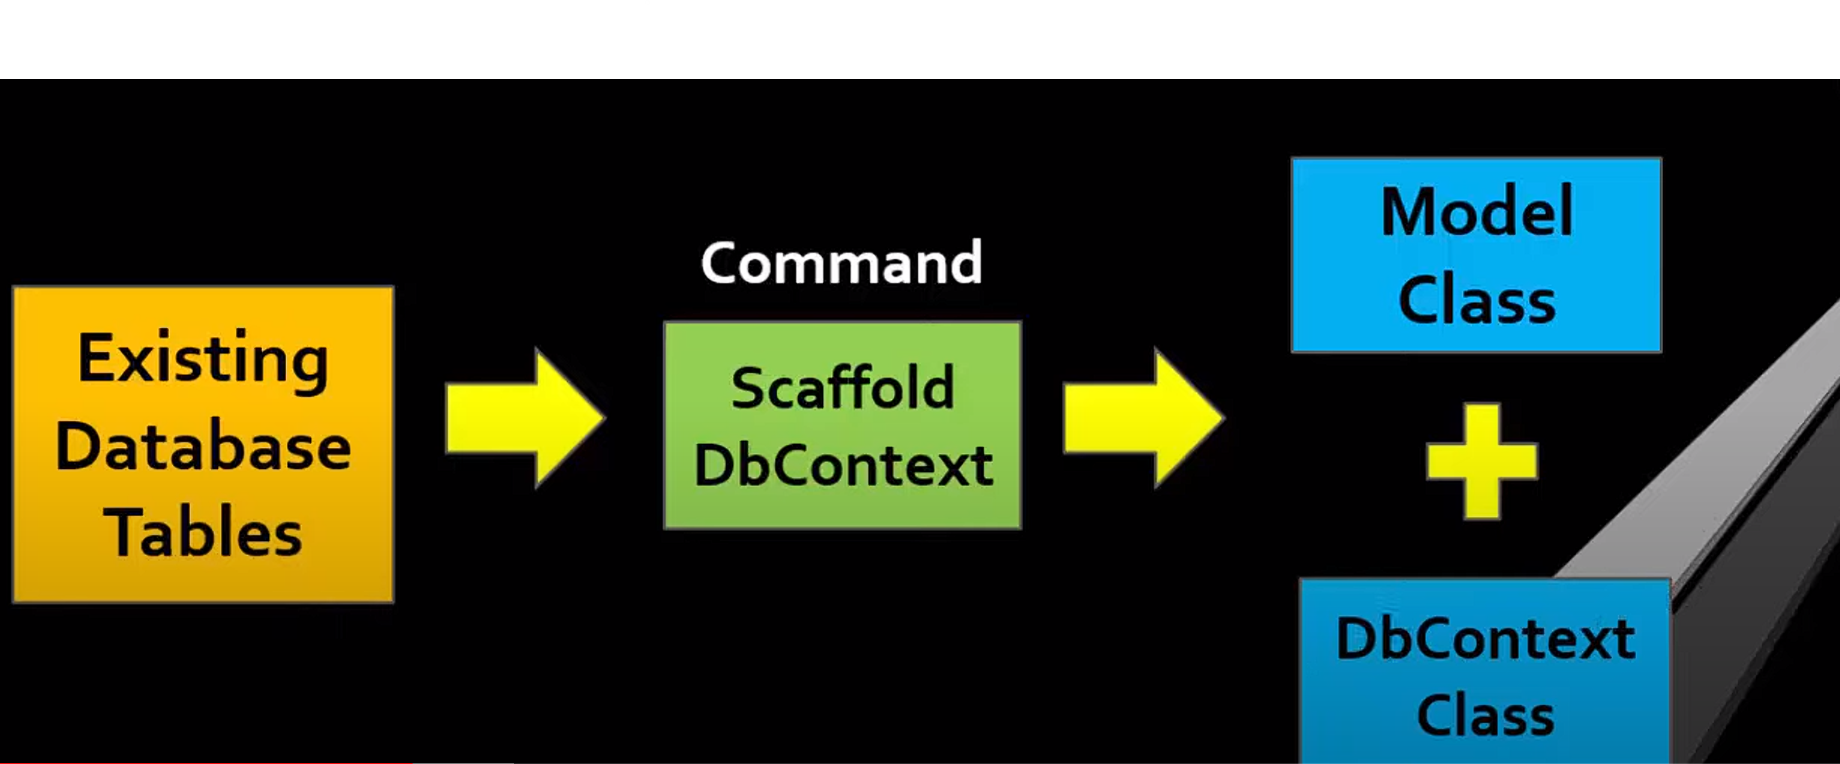
The Database First approach is suitable when the database schema is already defined or when there is an existing database that needs to be integrated into the application. It allows developers to focus on application logic without worrying about database design and SQL queries, as much of the database interaction is handled through the generated entity classes and ORM frameworks.
To get started with Database First Approach follow the following steps:
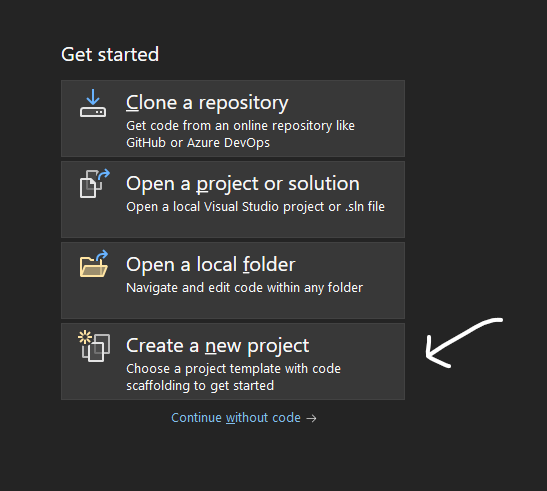
Open Visual Studio and click on create a new project from the right helper menu.
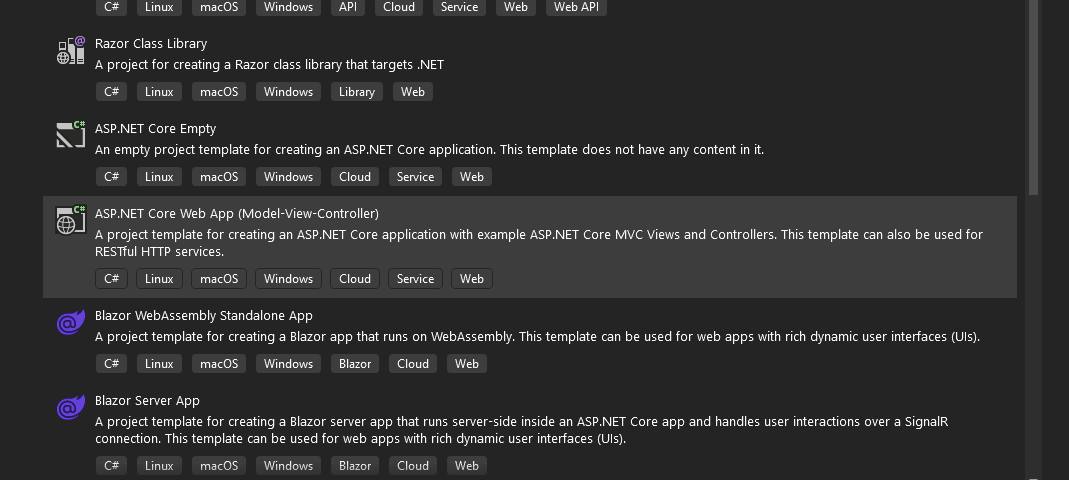
Choose ASP.NET Core Web App (Model-View-Controller)
Provide the appropriate name for the project and click on Next and click on Create.
Let's install the necessary packages now. Right-click on the dependencies from Solution Explorer and select Manage NuGet Packages
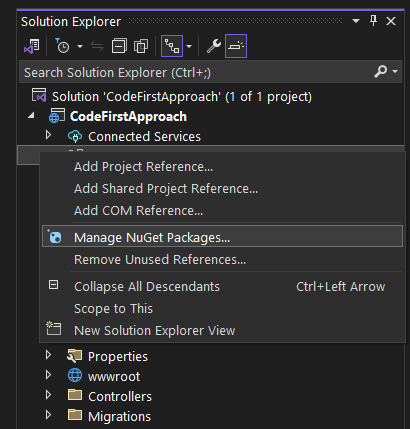
Install following packages
Microsoft.EntityFrameworkCore.Design
Microsoft.EntityFrameworkCore.Designcontains all the design-time logic for Entity Framework Core. It's the code that all of the various tools (PMC cmdlets likeAdd-Migration,dotnet ef&ef.exe) call into.Microsoft.EntityFrameworkCore.Tools
Enables these commonly used commands: Add-Migration Bundle-Migration Drop-Database Get-DbContext Get-Migration Optimize-DbContext Remove-Migration Scaffold-DbContext Script-Migration Update-Database
Microsoft.EntityFrameworkCore.SqlServer
Microsoft SQL Server database provider for Entity Framework Core.
Now let's create a models class and DB context using the scaffold command
I already have a database on the server running and I am using the database that we have created on Code First Approach.
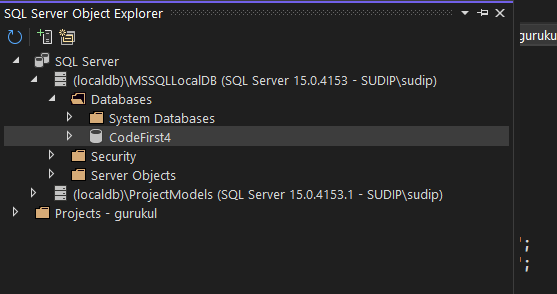
Goto Tools and select NuGet Package Manager and select NuGet Package Manager.
On the package manager console, enter the commands:
Scaffold-DbContext "Server=(localdb)\MSSQLLocalDB;database=CodeFirst4;trusted_connection=true" -Provider Microsoft.EntityFrameworkCore.SqlServer -OutputDir Models
Note: If Scaffold-DbContext is not found error then install in the package manager console
Install-Package Microsoft.EntityFrameworkCore.Tools
Now you will see your model class and db context is generated for you from the database
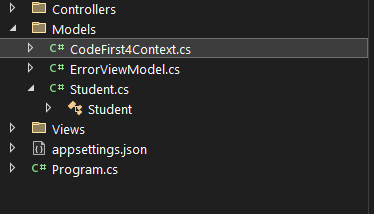
If you want to update the models class once the database schema has been changed. Run this command
Scaffold-DbContext "Server=(localdb)\MSSQLLocalDB;database=CodeFirst4;trusted_connection=true"Microsoft.EntityFrameworkCore.SqlServer -OutputDir Models -forceNow update your connection string in
appsettings.jsonfile andProgram.csfile as:"ConnectionStrings": { "dbcs": "Data Source=(localdb)\\MSSQLLocalDB; Database=CodeFirst; Initial Catalog=CodeFirst;Integrated Security=True;Connect Timeout=30;Encrypt=False;Trust Server Certificate=False;Application Intent=ReadWrite;Multi Subnet Failover=False" },var builder = WebApplication.CreateBuilder(args); // Add services to the container. builder.Services.AddControllersWithViews(); var provider = builder.Services.BuildServiceProvider(); var config = provider.GetRequiredService<IConfiguration>(); builder.Services.AddDbContext<StudentDBContext>(item => item.UseSqlServer(config.GetConnectionString("dbcs"))); var app = builder.Build()To create the news continue with tutorials on the code-first approach link
Wait Wait, if you want to generate a controller and methods for the database there is a quicker way.
Delete a previous controller eg: HomeController.cs
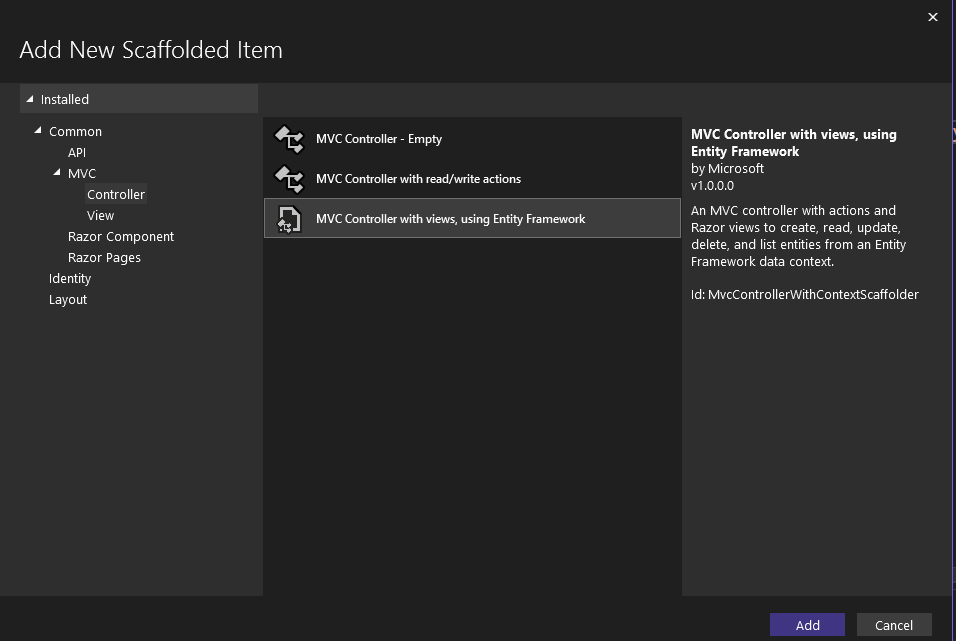
Add a new controller to your controller folder and select MVC Controller with views using the Entity Framework option.
Choose a model class to generate views for and click on add as
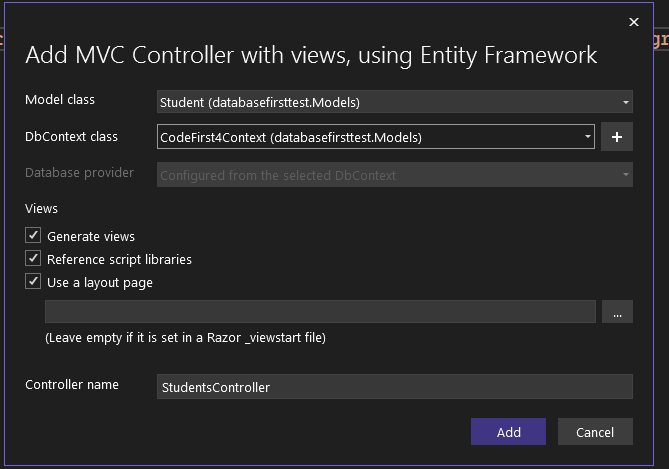
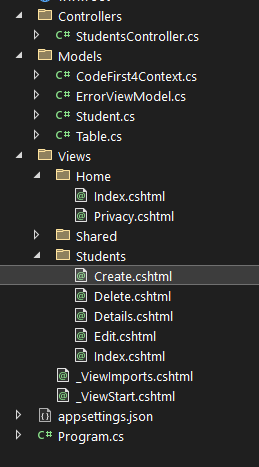
A scaffold will be generated for your model class, this might take some moments.

As a result, all the views for students are updated.
Subscribe to my newsletter
Read articles from Sudip Bhandari directly inside your inbox. Subscribe to the newsletter, and don't miss out.
Written by
