Streamlining OAuth for Shopify Apps: A Step-by-Step Guide
 Joy Mendonca
Welcome to a hassle-free solution for OAuth in Shopify Apps! If you've ever found yourself grappling with the complexities of OAuth integration for Shopify Apps, fear no more. In this guide, I'll introduce you to my Laravel package designed specifically to streamline this process. Whether you're a seasoned developer or a newcomer to Shopify App development, this guide will simplify the setup and usage of OAuth in your Laravel-powered Shopify Apps. Let's dive in and make OAuth a breeze!
Creating and configuring the Shopify App
Step 1:
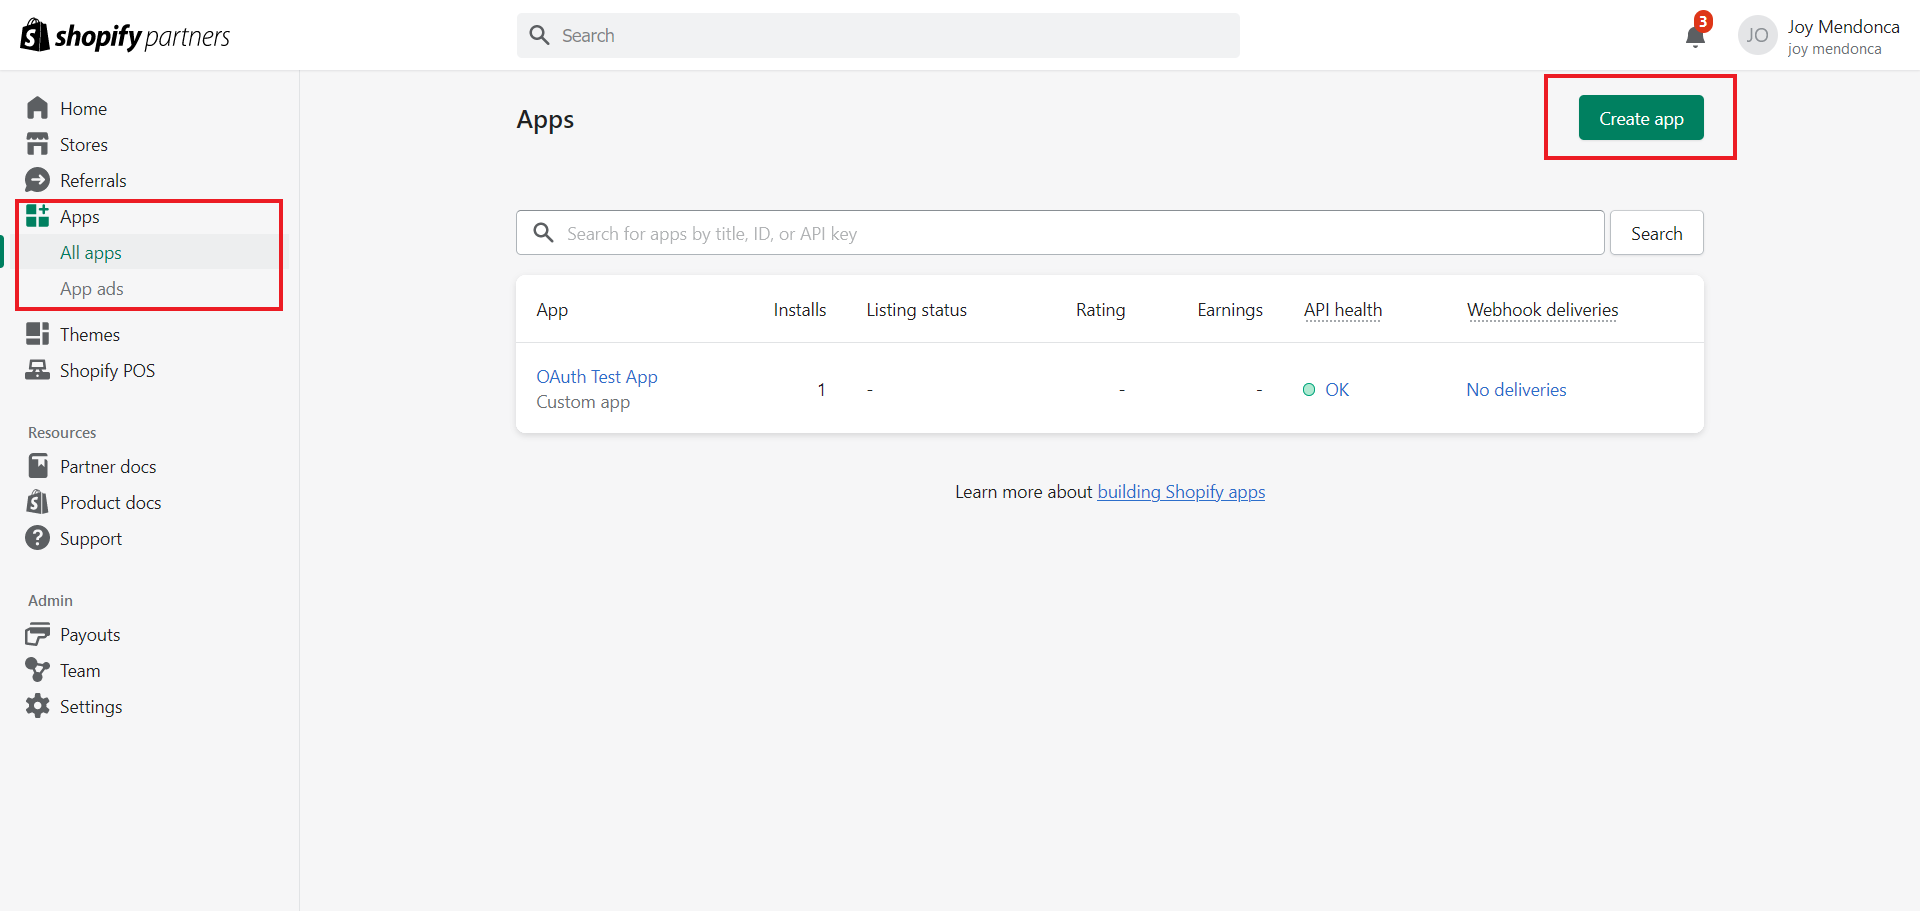
Login to your shopify partner account, and head over to the apps section. Click on the create app button on the top right (This process can also be done through shopify CLI but for the simplicity of this guide we will be manually creating it)
Step 2:
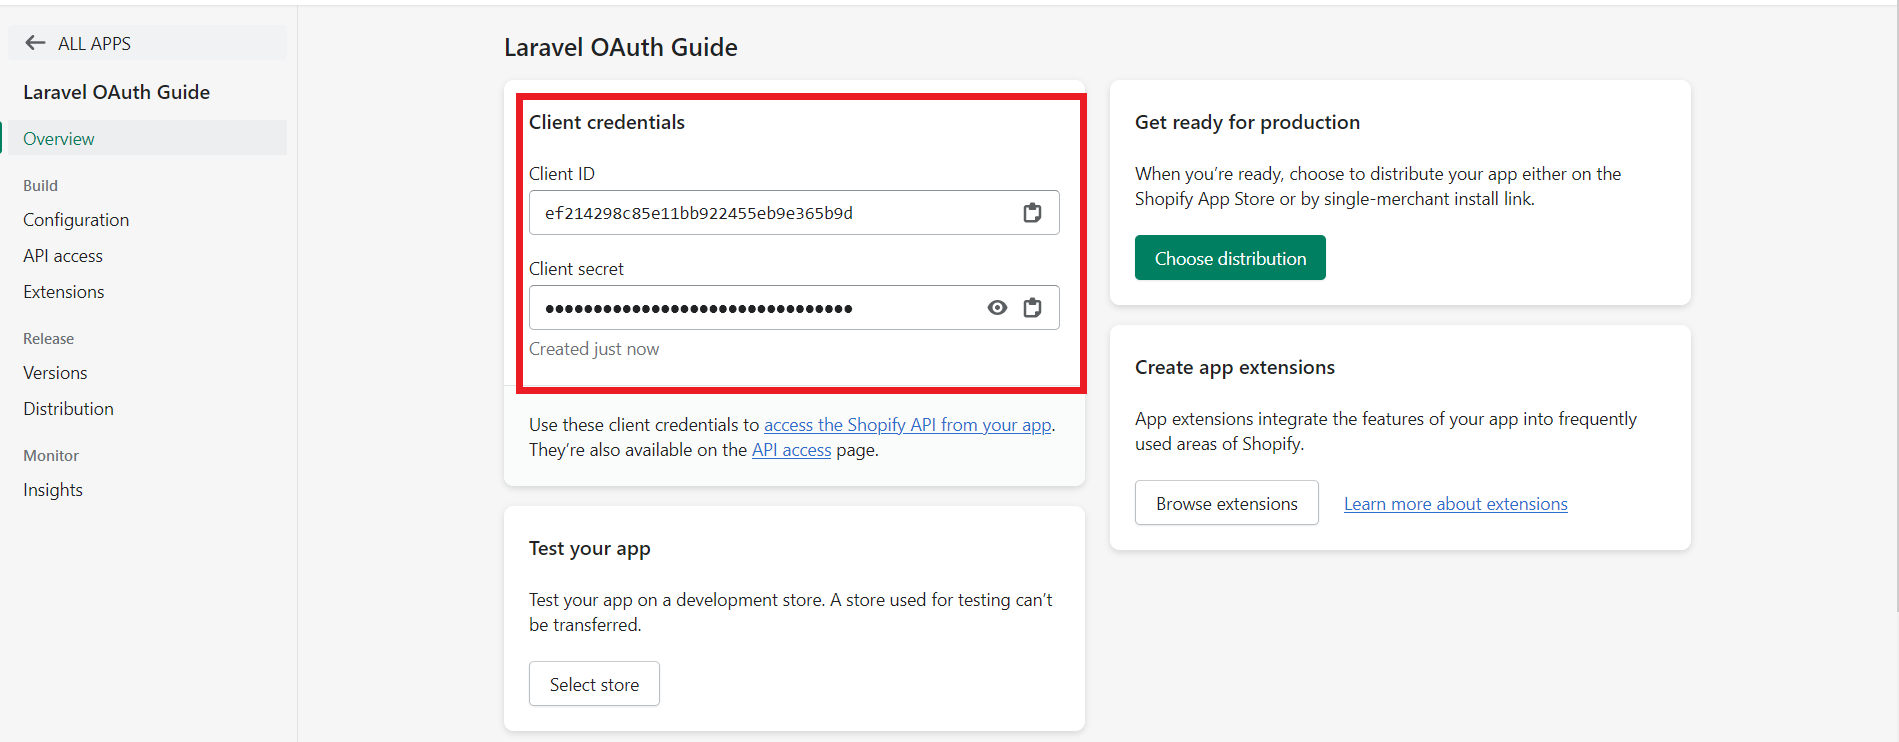
You will be prompted to enter a name for your app and once you have entered the name you can create your app, after which you will get the client id and client secret for your app. We will need these details later on when we setup the laravel package.
Step 3:
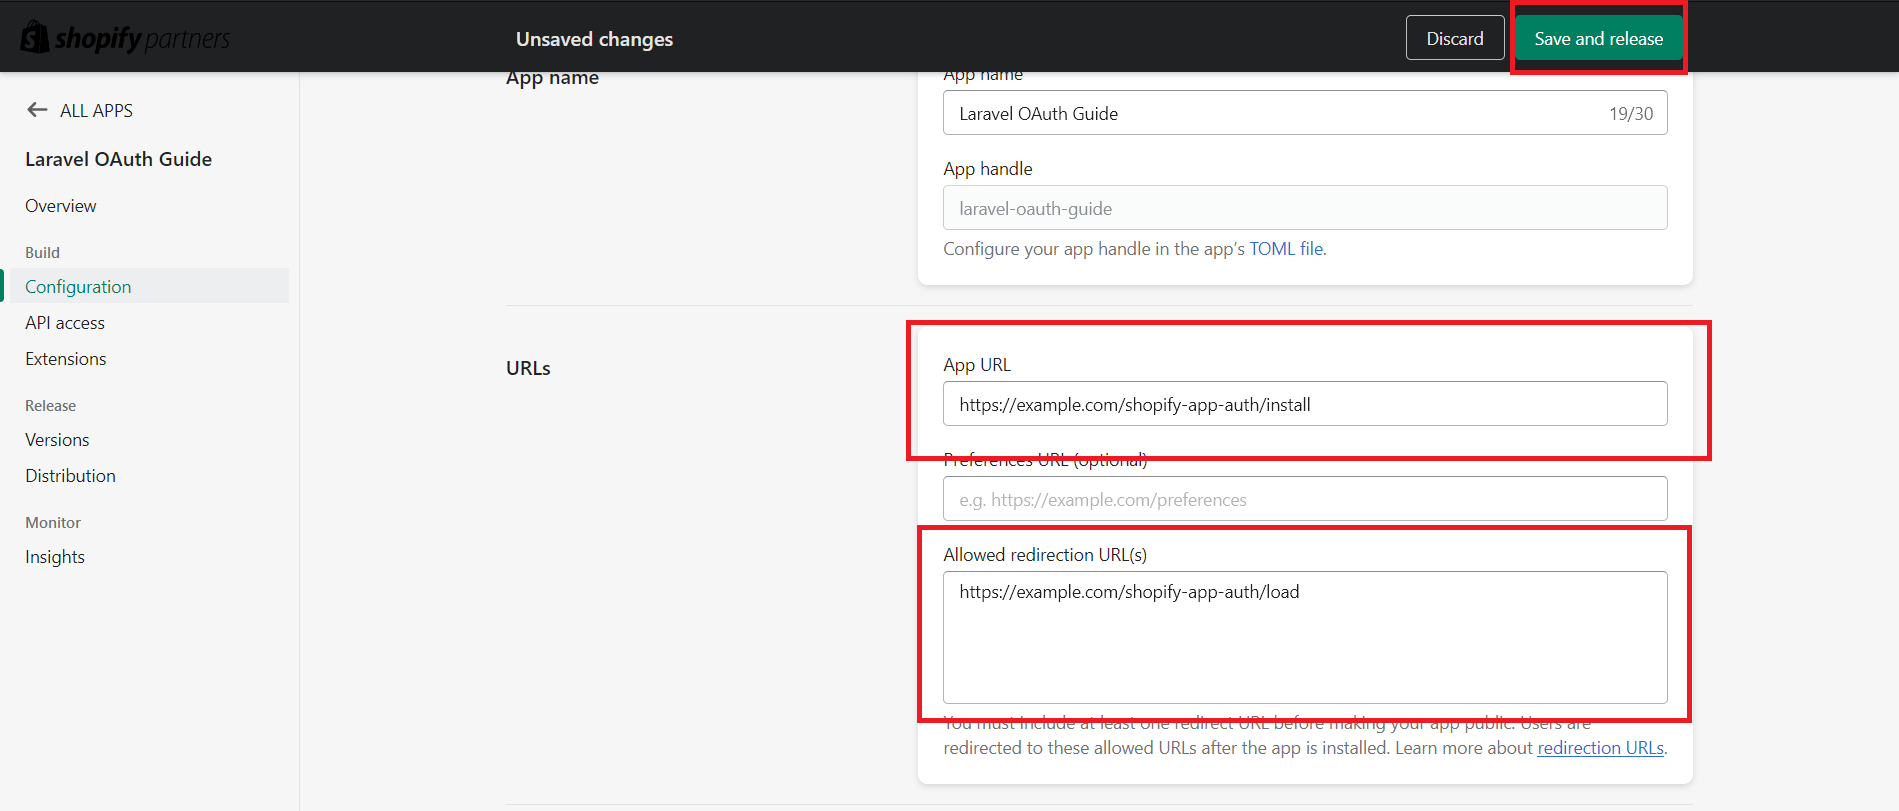
From the navbar on the left navigate to the Configuration page. Here you will have to set your App URL and your Allowed redirection URL as follows:
App URL: https://your-website.com**/shopify-app-auth/install**
Allowed redirection URL: https://your-website.com**/shopify-app-auth/load**
Note: You can also use your localhost URL if you are in development mode.
Setting up Laravel Project with the package
Step 1:
Navigate to the directory of your laravel project and install the package using commandline by the following command
composer require joymendonca/shopify-oauth-laravel
Step 2:
Publish and run migrations with the following commands, this will create all necessary migrations to save all the details of your store.
php artisan vendor:publish --tag="shopify-oauth-laravel-migrations"
php artisan migrate
Step 3:
Now we will have to register the routes in the web.php file of your Laravel Project with the following code
use joymendonca\ShopifyOauthLaravel\ShopifyOAuthLaravelRoutes;

ShopifyOAuthLaravelRoutes::register();
Step 4:
The final step is to setup the enviornment variables in your .env file as below.
APP_URL="https://your-website.com"                    #The base url for your website
SHOPIFY_CLIENT_ID="your-shopify-client-id"            #Shopify App Client ID
SHOPIFY_CLIENT_SECRET="your-shopify-client-secret"    #Shopify App Client Secret
SHOPIFY_SCOPES="read_products,write_products"         #Shopify App Scopes Needed
SHOPIFY_APP_HOME_URL='/'                              #URL you want the user to get redirected
                                                      #to when they launch the app
Voila! Your setup is now completed and your app is now ready to be installed.
You can get the Access Token and Store URL of the logged in store using the below code.
use joymendonca\ShopifyOauthLaravel\Facades\ShopifyOauthLaravel;

$access_token = ShopifyOauthLaravel::getStoreAccessToken();
$store_url = ShopifyOauthLaravel::getStoreUrl();
Optional:
You could also publish the config file with the command below and play around with a bunch of settings like Setting the API Version for the Shopify API or changing the Store Model.
php artisan vendor:publish --tag="shopify-oauth-laravel-config"
Installing Shopify App to your Store
Step 1:
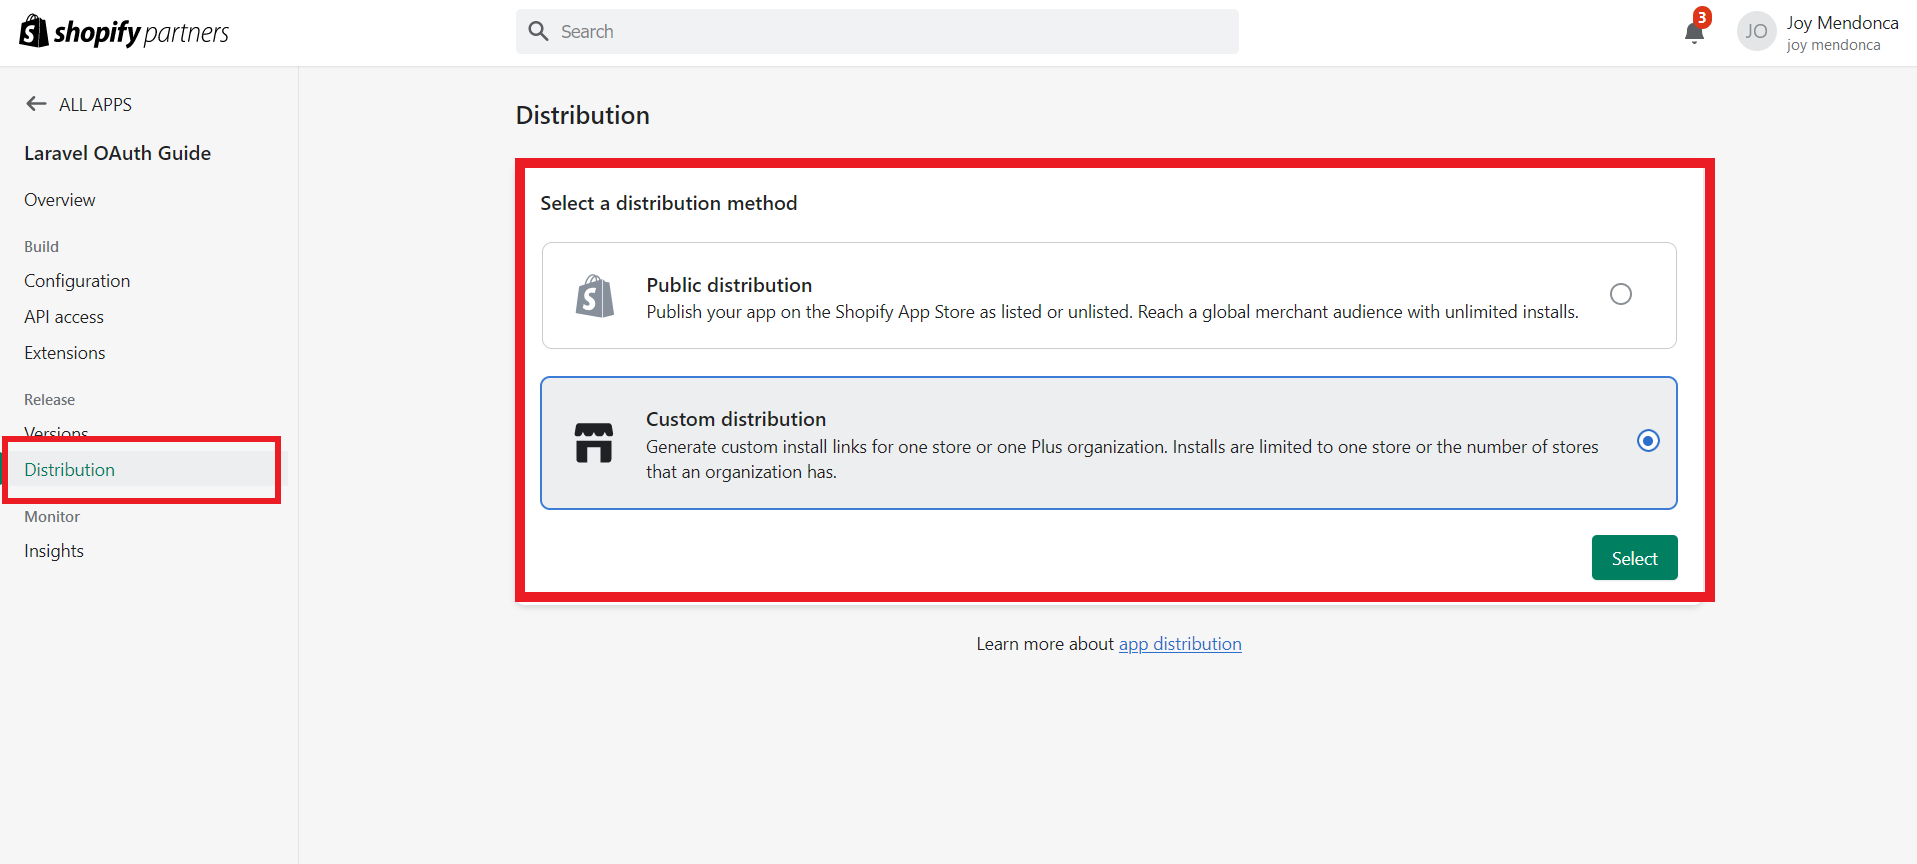
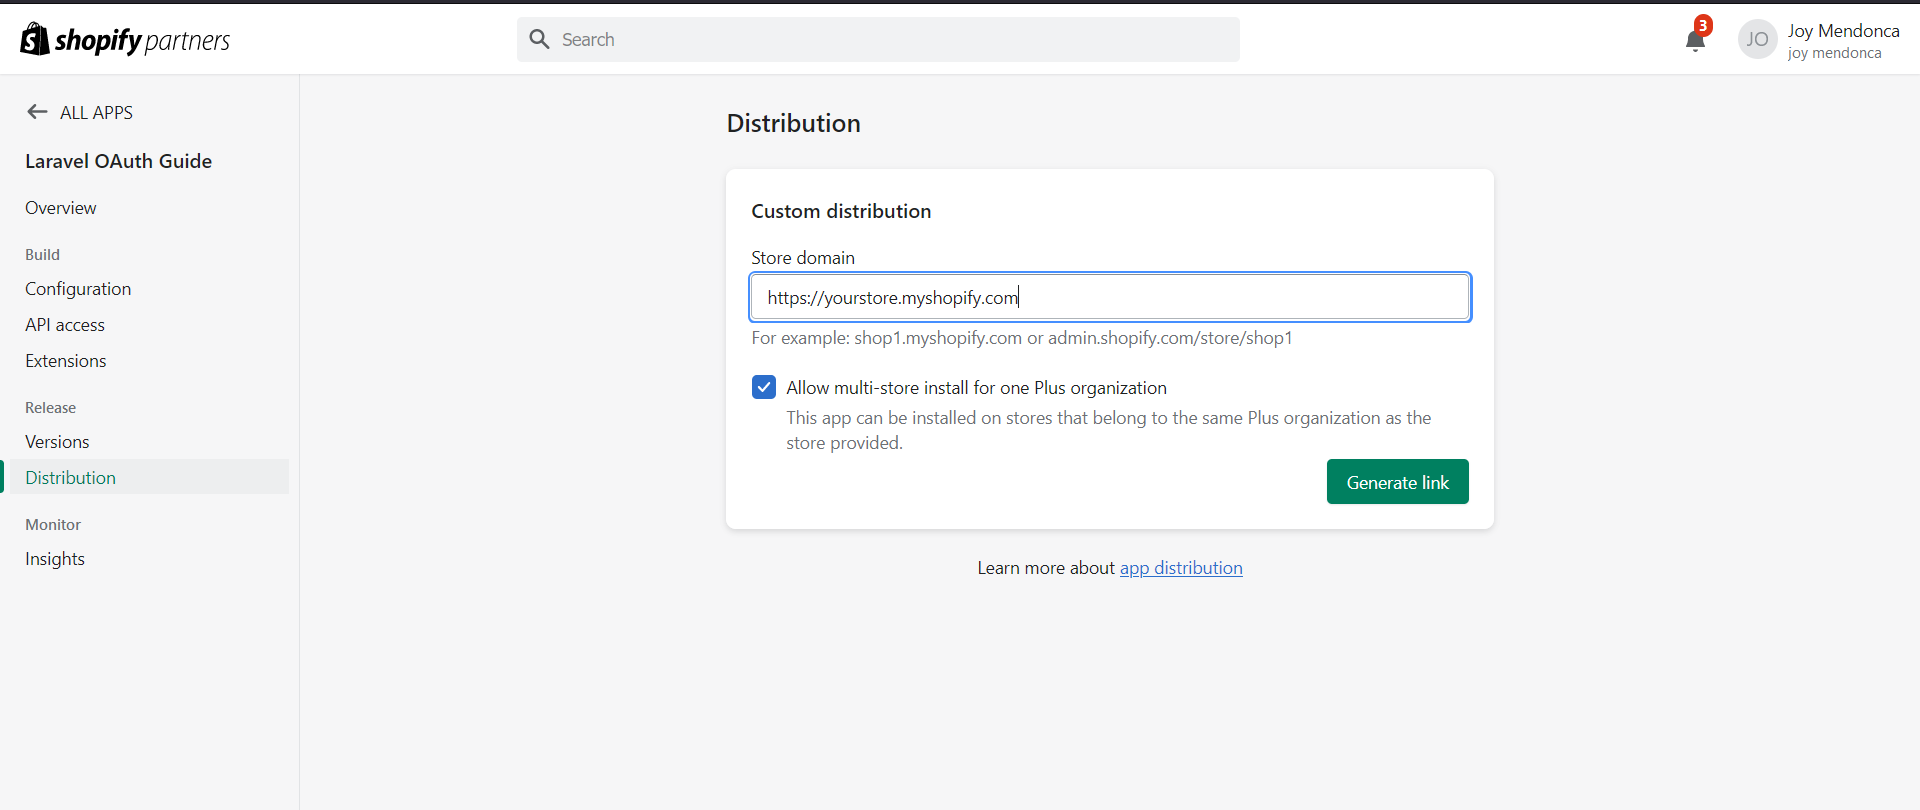
Navigate to the distribution page for your app from the shopify partner account dashboard, and select the type of distribution you would like. For the simplicity of this guide we will go ahead with the custom distribution.
Step 2:
You will be prompted to enter your Store URL. Which is your myshopify url or the url you get when you login to your store admin dashboard. Enter your store URL and generate the Link.
Step 3:
You can now use this generated link to install the app to your store. You will be prompted to grant permissions based on the access scopes you selected.
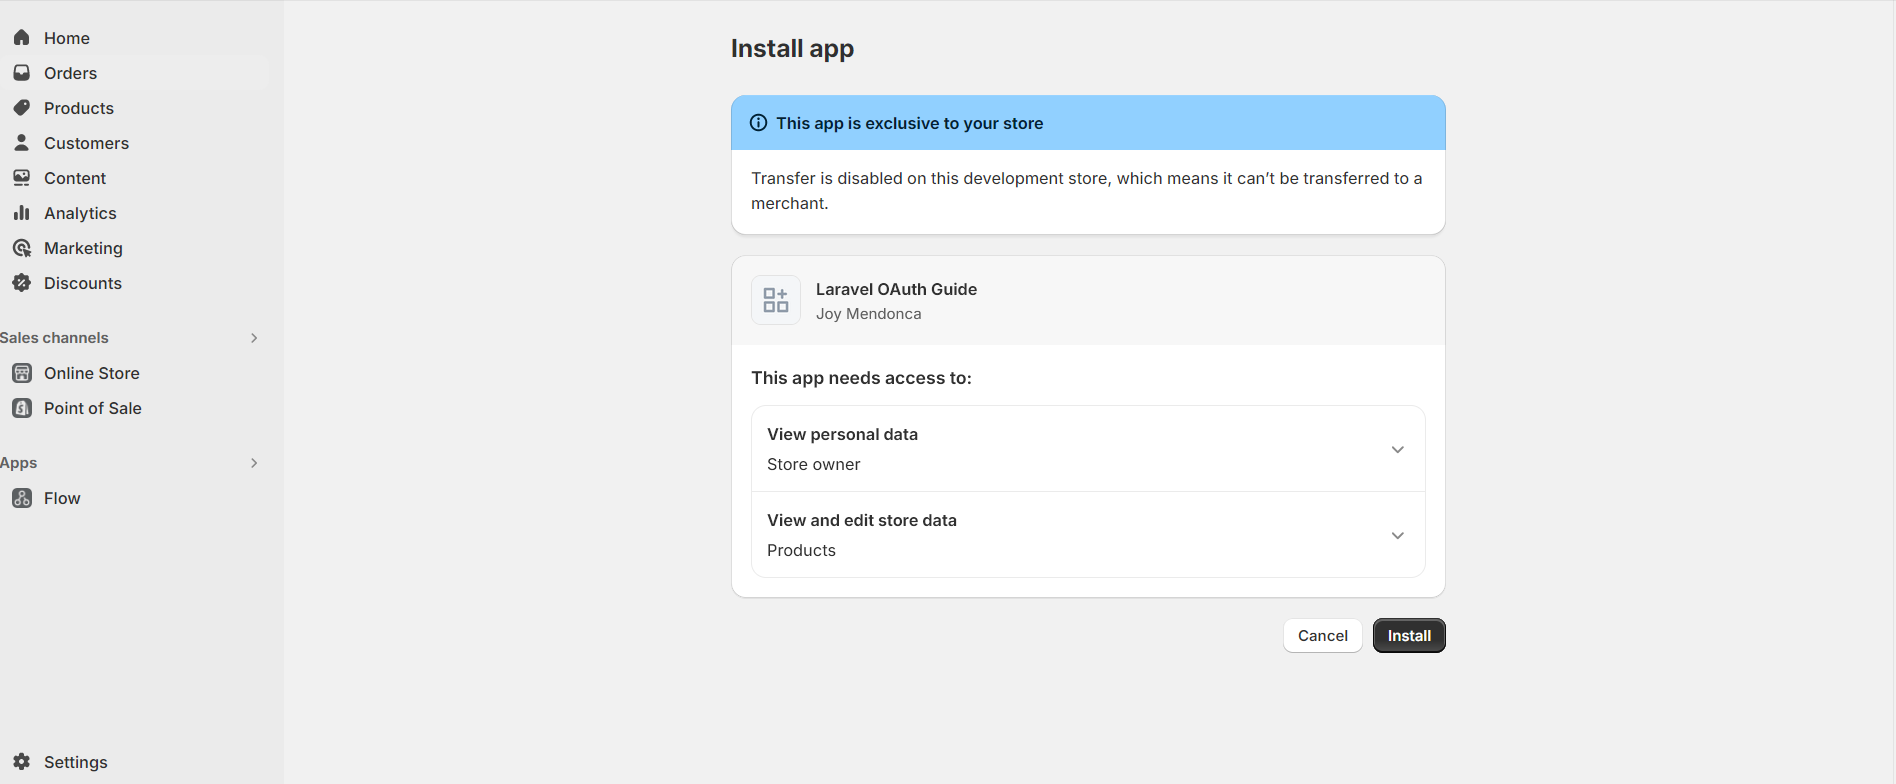
Click on install, and your app is up and ready to be used!
With the assistance of the Shopify OAuth Laravel package, navigating the OAuth process for Shopify Apps becomes not only manageable but also efficient. By following the steps outlined in this guide, you can seamlessly integrate OAuth authentication into your Laravel-powered Shopify Apps, saving time and effort in the development process. Embrace the simplicity and convenience offered by this solution, and elevate your Shopify App development experience to new heights. Happy coding!
Subscribe to my newsletter
Read articles from Joy Mendonca directly inside your inbox. Subscribe to the newsletter, and don't miss out.
Written by
