Connect to VPC resources using AWS Client VPN with Mutual authentication (certificate-based)
 Ranjith R
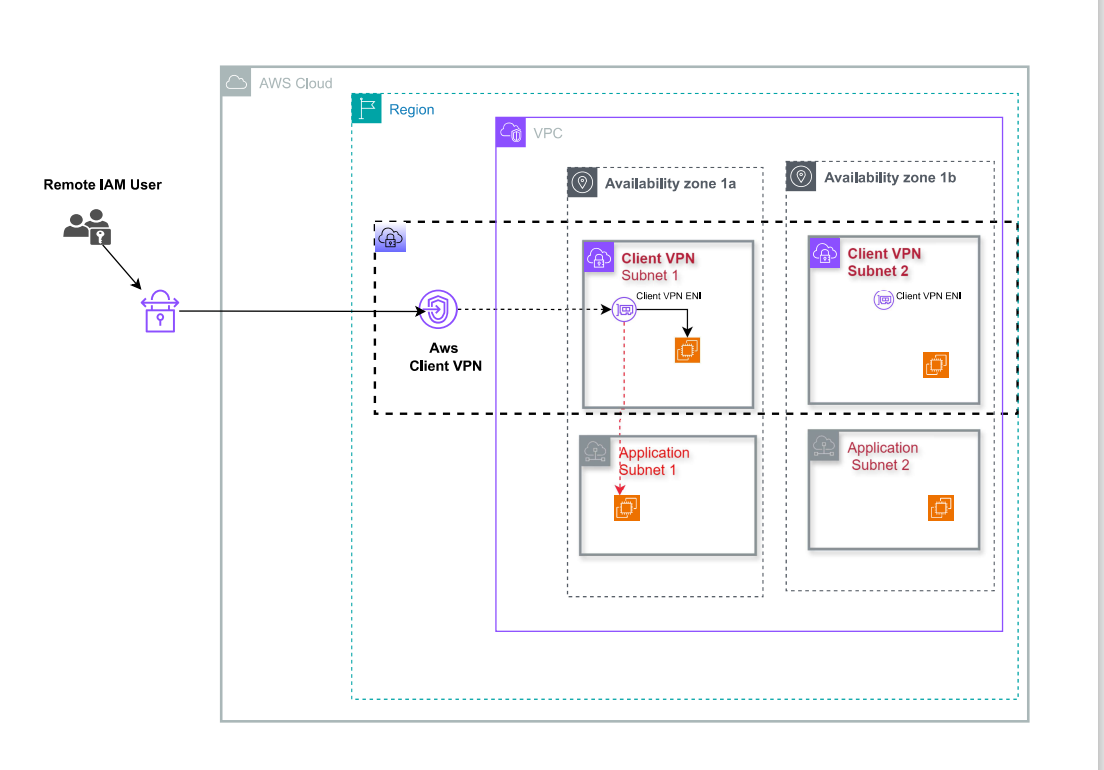
AWS Client VPN is a managed client-based VPN service that enables you to securely access your AWS resources and resources in your on-premises network. With Client VPN, you can access your resources from any location using an OpenVPN-based VPN client.
We are going to set up an AWS Client VPN in Ap- south-1(Mumbai), let's get started
This is Part I of the series, In this one, we will be focusing on Access to a VPC
Step 1. Create a VPC
Navigate to
VPC Console>Create a VPCEnter Name as
vpn-vpcand IPV4 CIDR as192.168.0.0/16
• Navigate to Subnet > Click Create a Subnet > Select vpn-vpc > Subnet name as private-subnet and IPV4 CIDR as 192.168.0.0/27
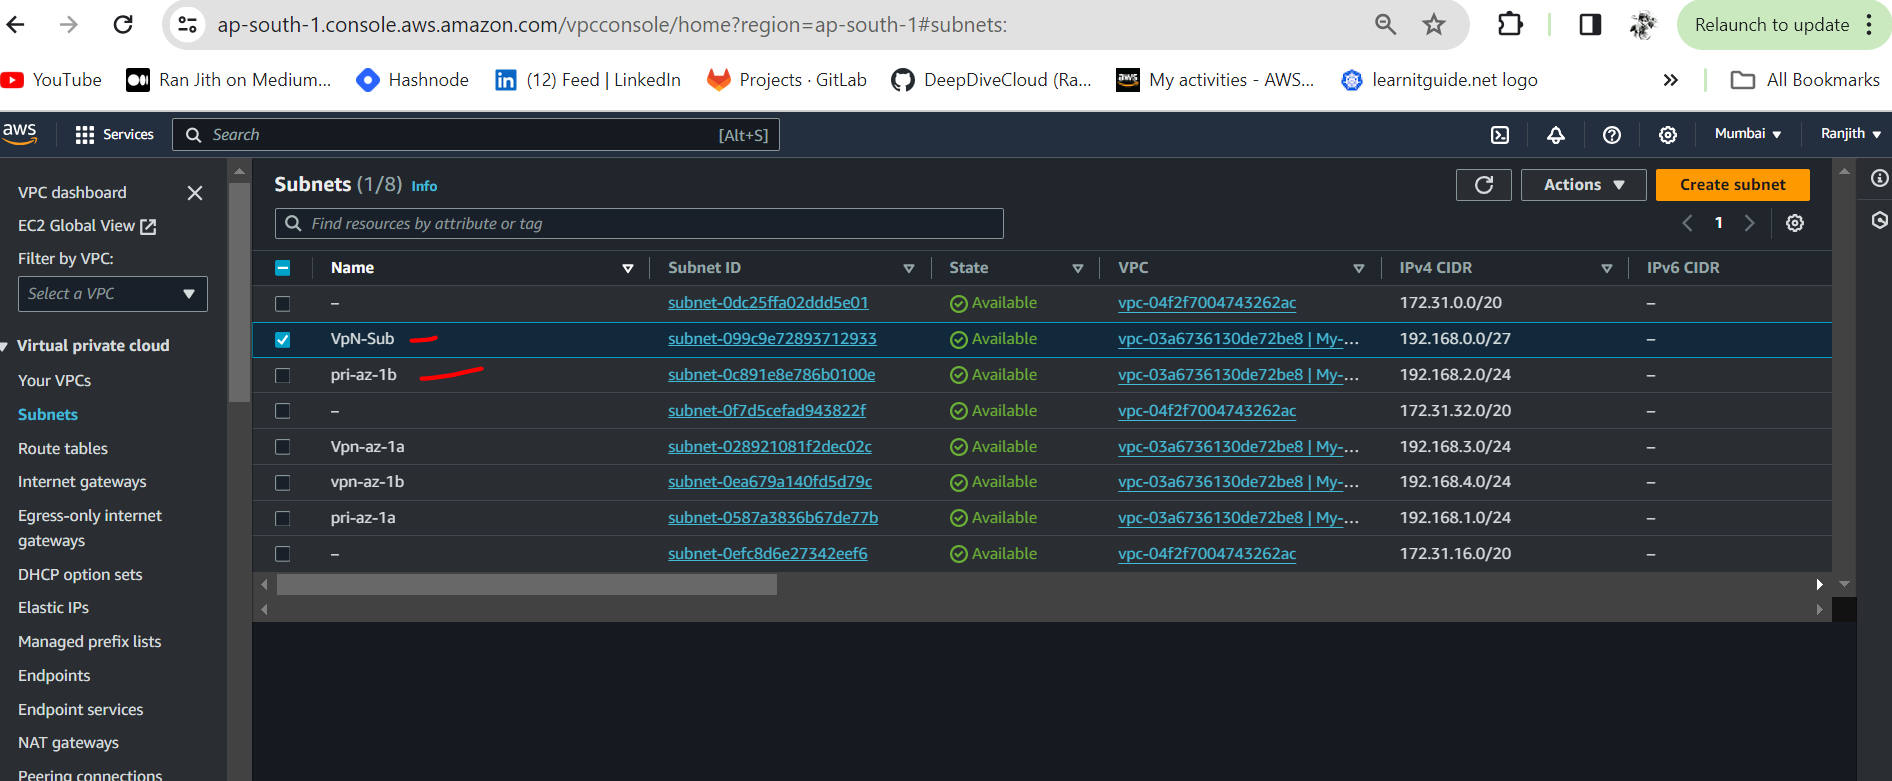
We will launch an EC2 instance into this subnet for a connectivity test at the end.
Step 2. Authentication
Client VPN uses Authentication as the first entry point into the AWS cloud. There are three ways to authenticate, we are going to use Mutual authentication (certificate-based)
Active Directory authentication (user-based)
Mutual authentication (certificate-based)
Single sign-on (SAML-based federated authentication) (user-based)
Mutual authentication (certificate-based)
Create RSA Certificate
With mutual authentication, Client VPN uses certificates to authenticate the client and the server. Certificates are a digital form of identification issued by a certificate authority (CA). The server uses client certificates to authenticate clients when connecting to the Client VPN endpoint. You must create a server certificate and key, and at least one client certificate and key.
You must upload the server certificate to AWS Certificate Manager (ACM) and specify it when you create a Client VPN endpoint. When you upload the server certificate to ACM, you also specify the certificate authority (CA). You only need to upload the client certificate to ACM when the CA of the client certificate is different from the CA of the server certificate.
You can create a separate client certificate and key for each client that will connect to the Client VPN endpoint. This enables you to revoke a specific client certificate if a user leaves your organization. In this case, when you create the Client VPN endpoint, you can specify the server certificate ARN for the client certificate, provided that the client certificate has been issued by the same CA as the server certificate.
Windows
The following procedure installs Easy-RSA 3. x software and uses it to generate server and client certificates and keys.
To generate server and client certificates and keys and upload them to ACM
Open the EasyRSA releases page download the ZIP file for your version of Windows and extract it.
Open a PowerShell and navigate to the location that the EasyRSA-3.x folder was extracted to.
Run the following command to open the EasyRSA 3 shell. For example below EasyRSA-3.x folder was extracted to the Desktop.
.\EasyRSA-Start.bat
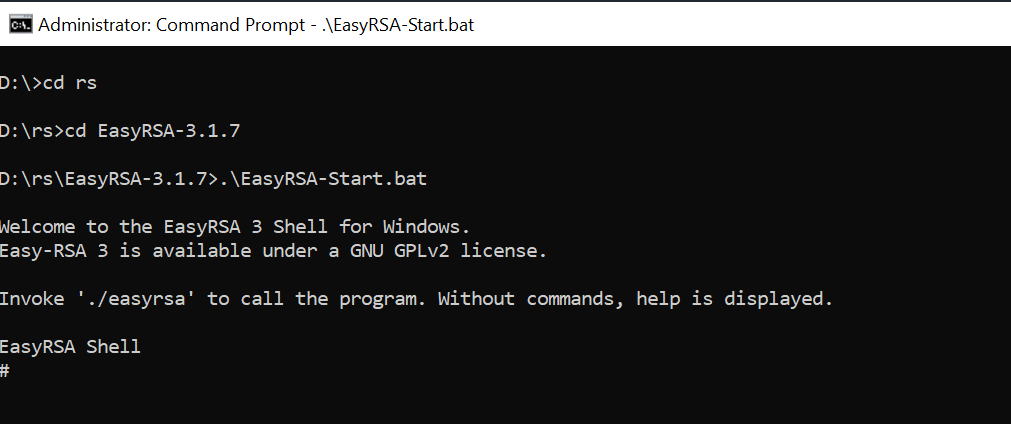
Initialize a new PKI environment.
./easyrsa init-pki
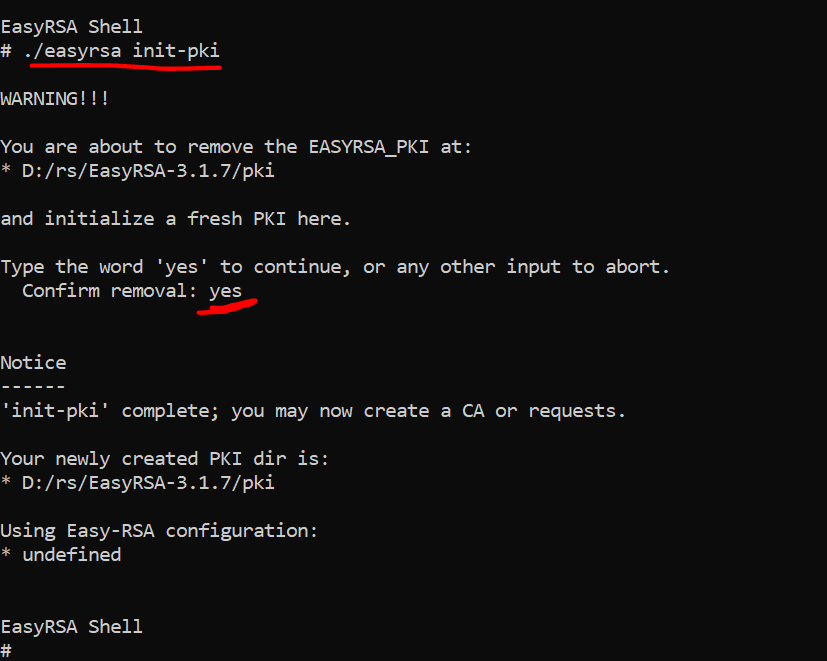
- To build a new certificate authority (CA), run this command and follow the prompts. For "Common Name" enter
vpc-aws-test
./easyrsa build-ca nopass
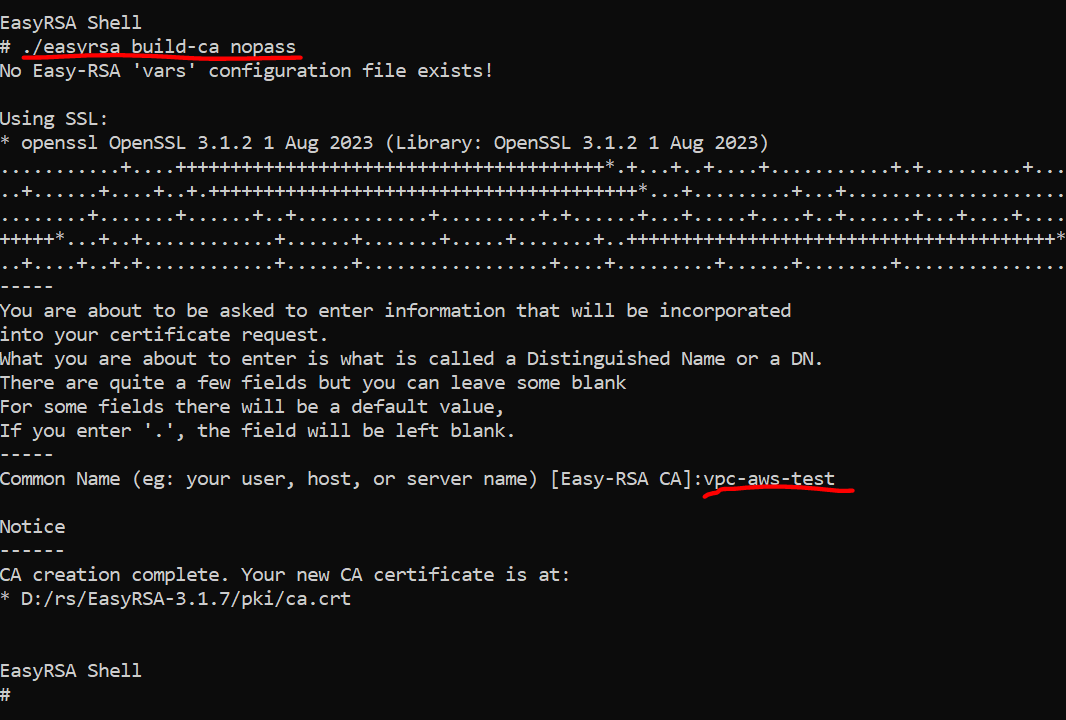
- Generate the server certificate and key. Type yes to confirm when prompted.
./easyrsa build-server-full vpc-aws-test nopass
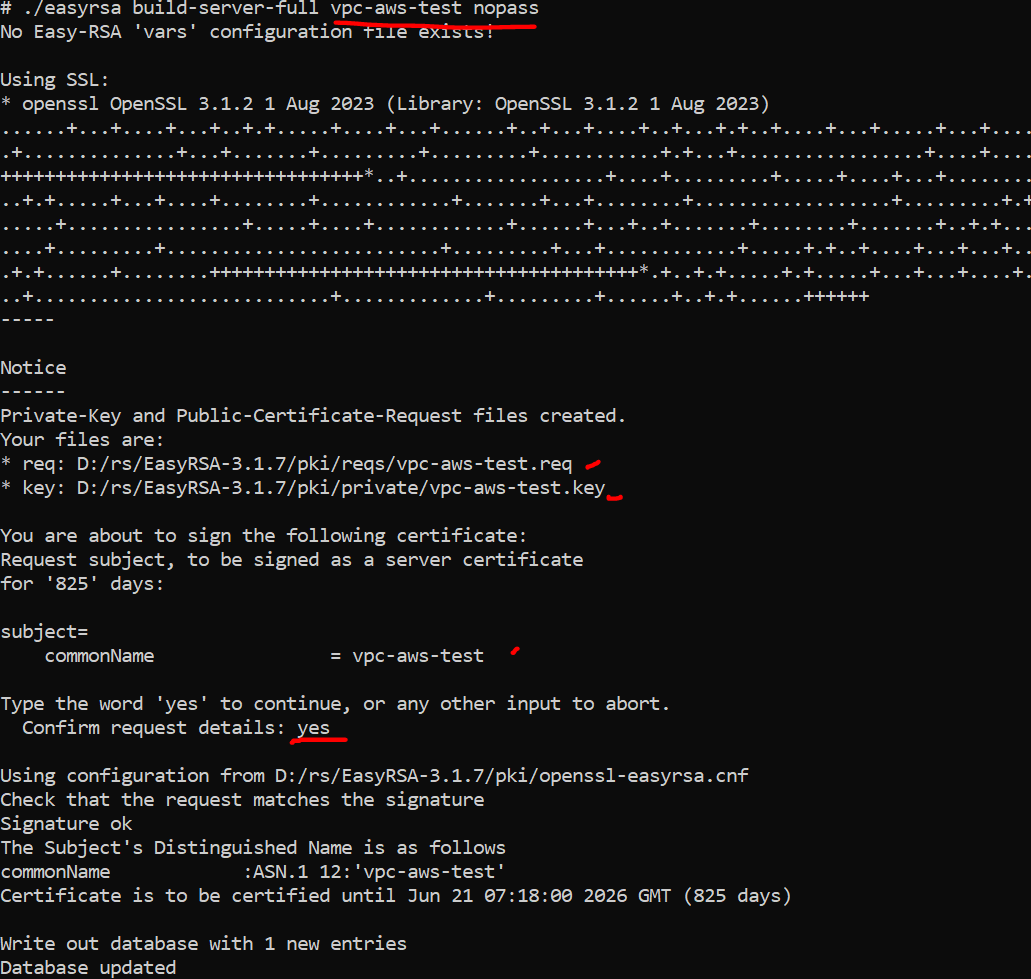
- Generate the client certificate and key. Type yes to confirm when prompted.
./easyrsa build-client-full user-vpc-aws-test nopass
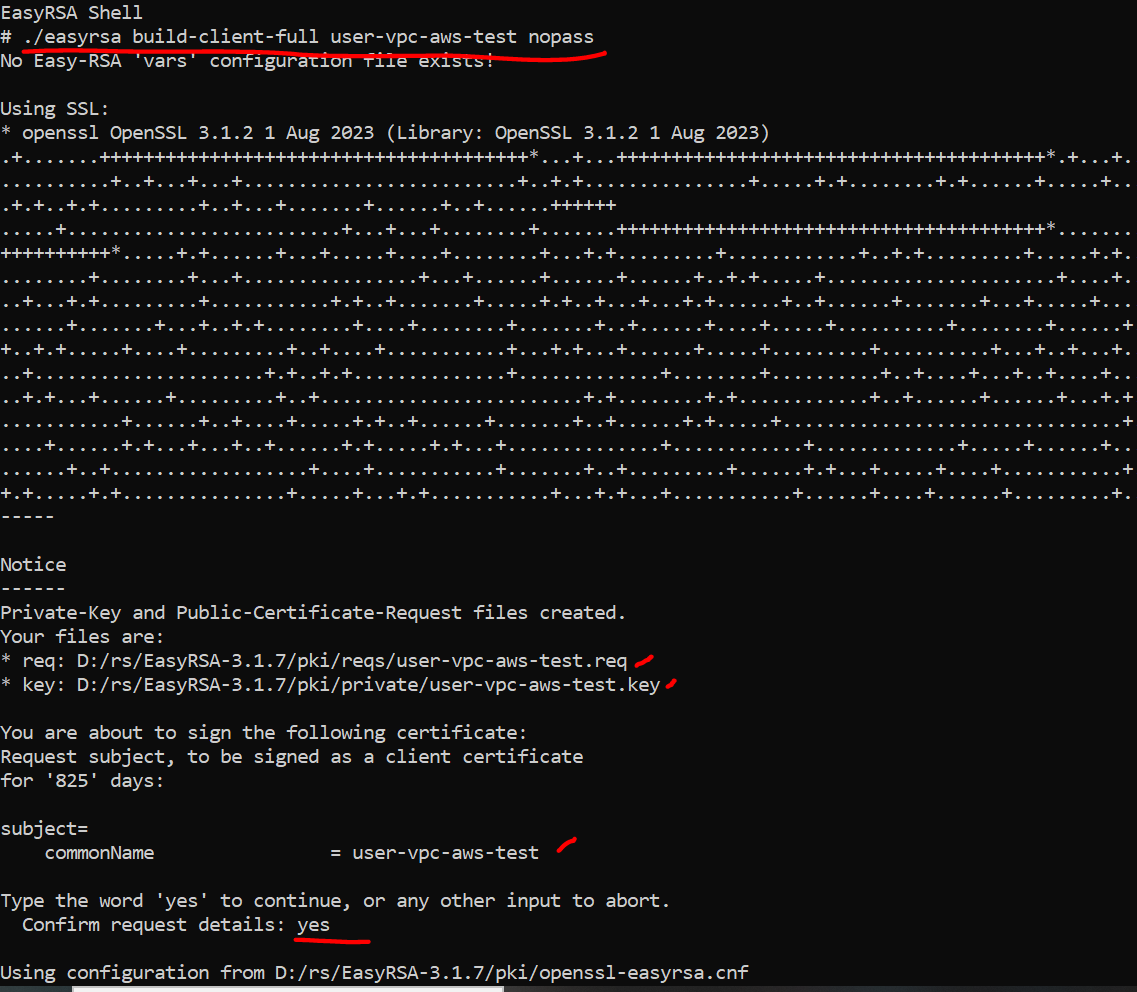
- Exit the EasyRSA 3 shell.
exit
You do not necessarily need to upload the client certificate to ACM. If the server and client certificates have been issued by the same Certificate Authority (CA), you can use the server certificate ARN for both the server and client when you create the Client VPN endpoint. In the steps above, the same CA has been used to create both certificates. However, the steps to upload the client certificate are included for completeness.
You have completed the steps to create Server and Client certificates.
Step 3 : Upload Certificates to ACM
You do not necessarily need to upload the client certificate to ACM. If the server and client certificates have been issued by the same Certificate Authority (CA), you can use the server certificate ARN for both the server and client when you create the Client VPN endpoint.
For this exercise, we are going to upload the server and the client certificates to ACM. Be sure to use the same Region in which you intended to create the client VPN endpoint.
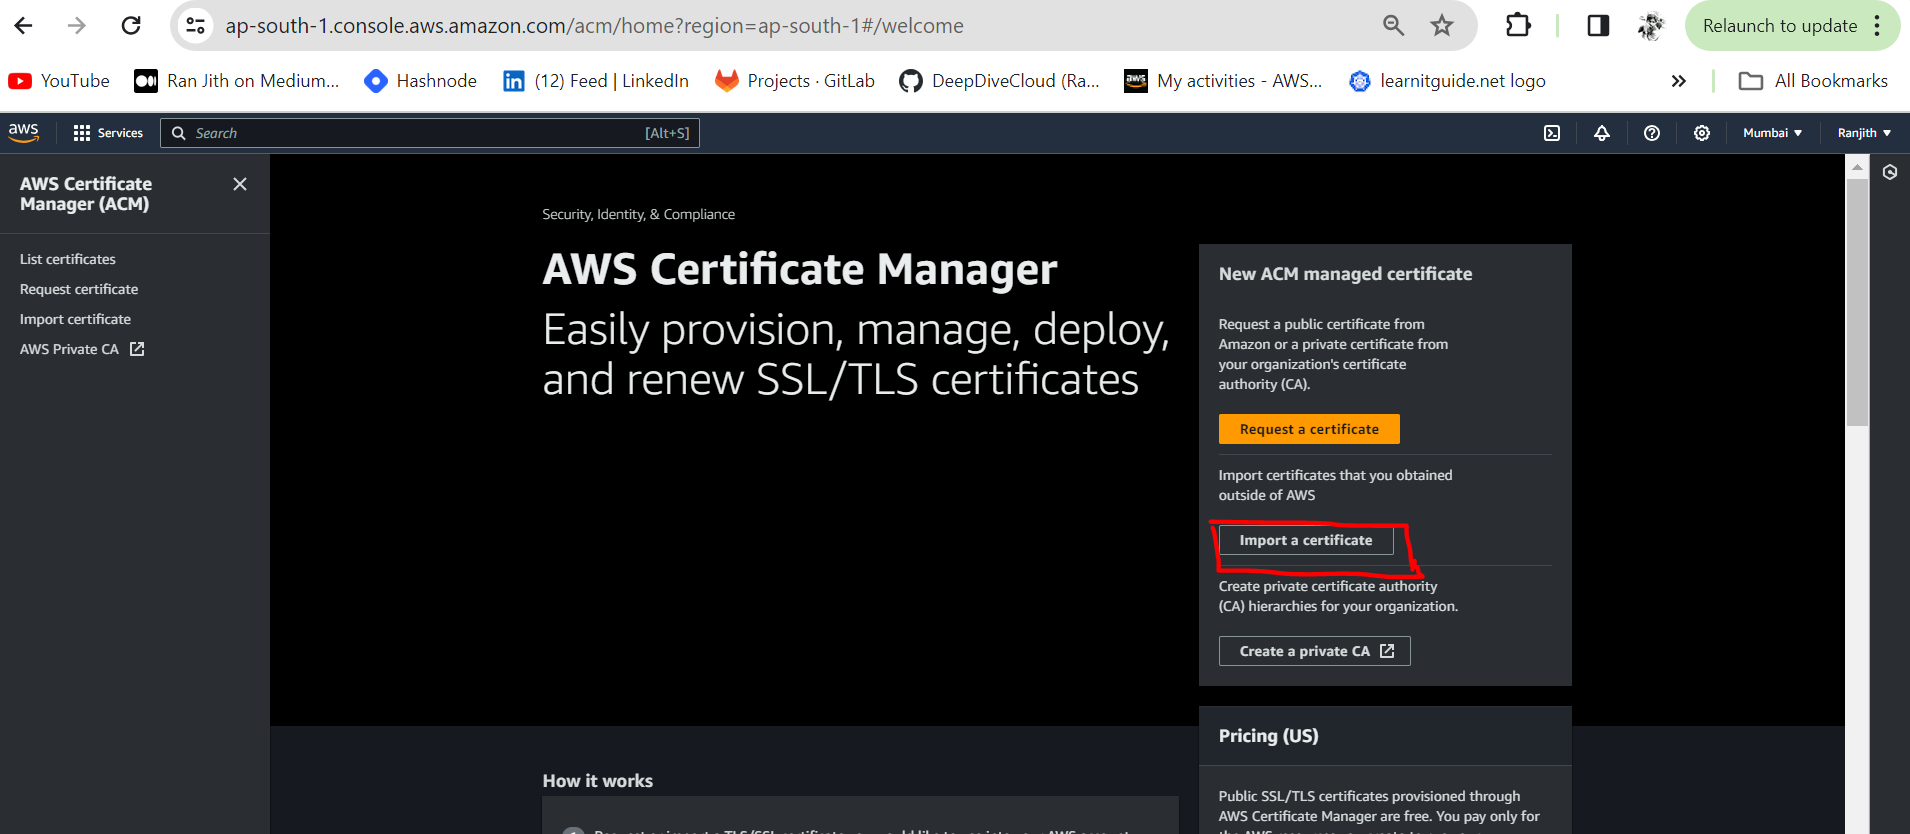
Go to the directory where you have installed Easy RSA. Input server certificate details as mentioned below.
a. Open the file located in /easy-rsa/easyrsa3/PKI/issued/VPN-aws-test.crt in a text editor of your choice
- Copy section located at the bottom of the file from
-----BEGIN CERTIFICATE-----and ending with-----END CERTIFICATE-----in to Certificate body
b. Open the file located in /easy-rsa/easyrsa3/PKI/private/VPN-aws-test.key in a text editor of your choice
- Copy the section of the file beginning from
-----BEGIN PRIVATE KEY-----and ending with-----END PRIVATE KEY-----in to Certificate private key
c. Open file located in /easy-rsa/easyrsa3/PKI/ca.crt in a text editor of your choice
- Copy the section of the file beginning from
-----BEGIN CERTIFICATE-----and ending with-----END CERTIFICATE-----in to Certificate chain
d. Select Next when completed
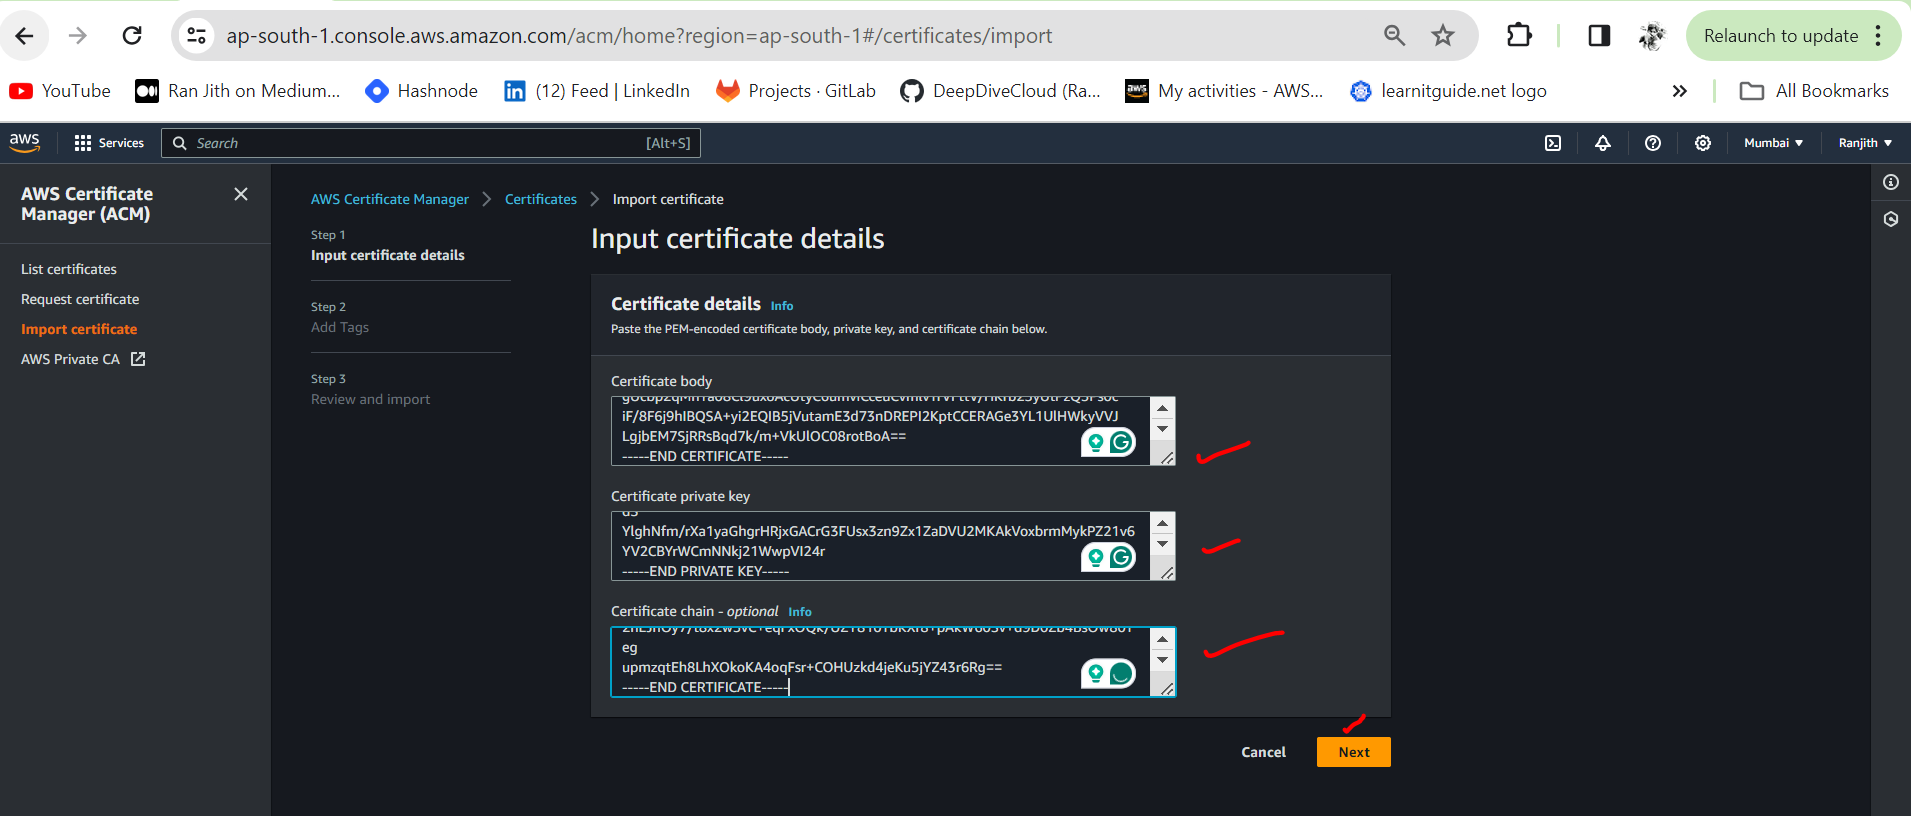

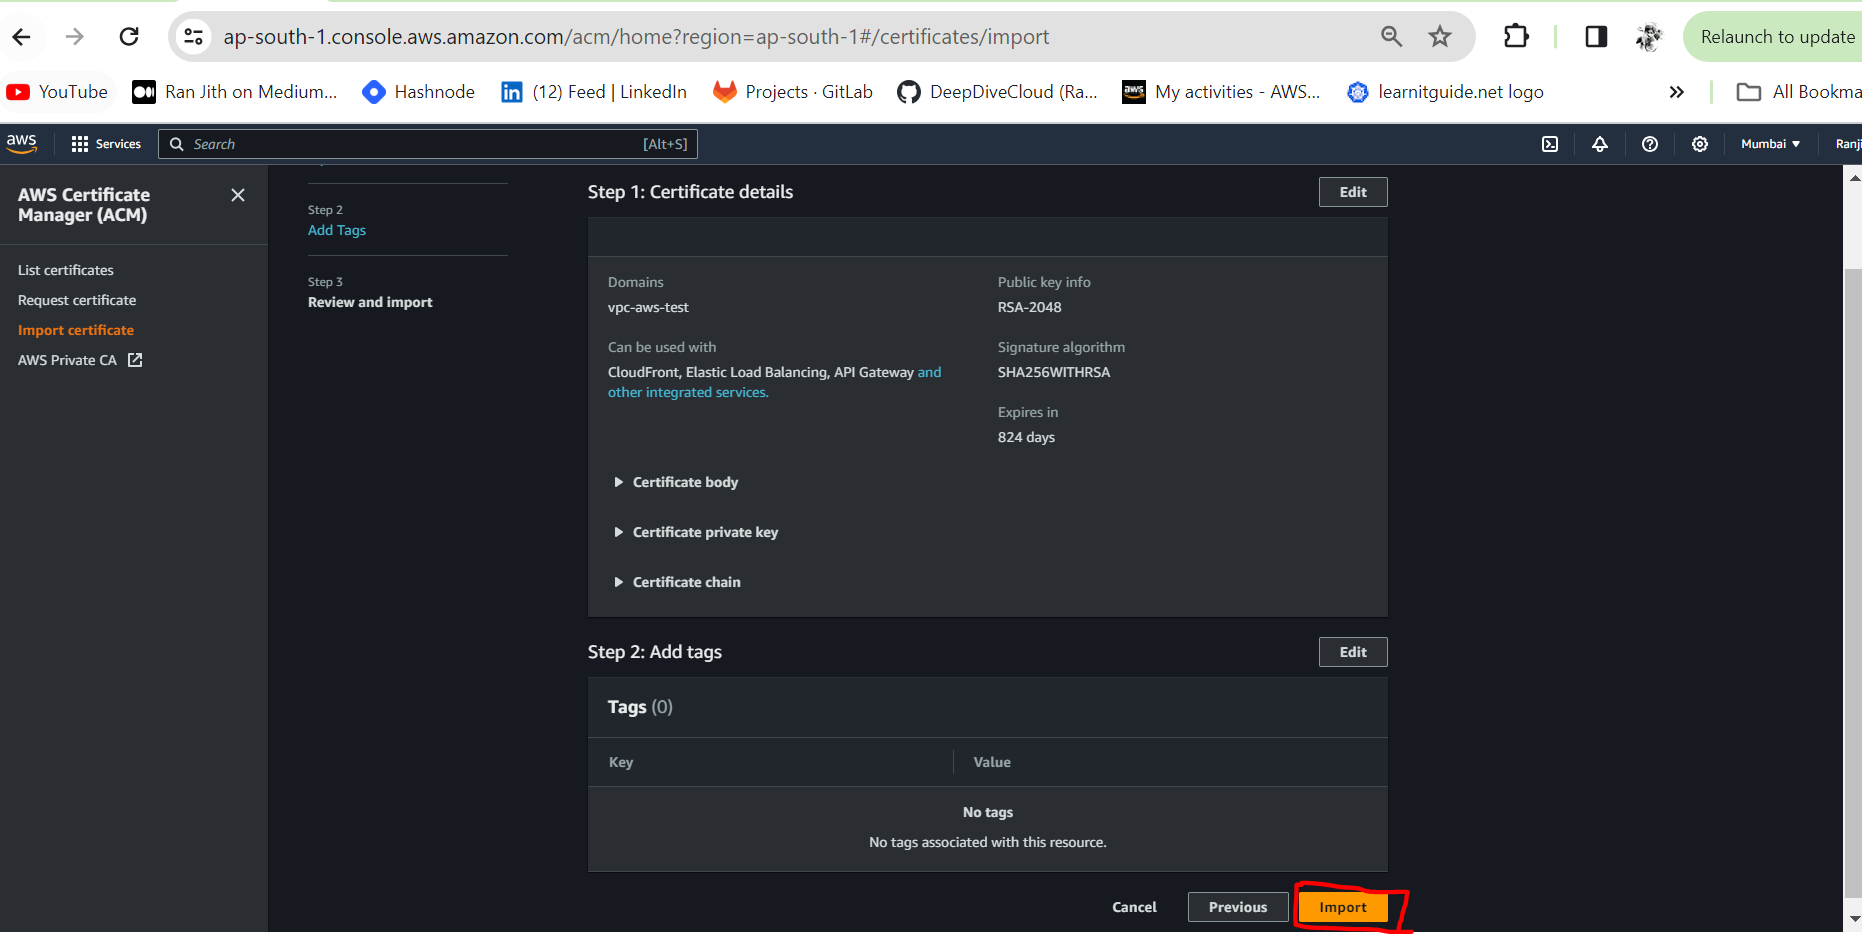
step 4 :Create a Client VPN endpoint
Navigate to
VPC Console>Client VPN Enpoints>Create Clinet VPN EndPointProvide a
nameanddescription(optional) for the Client VPN endpointEnter a Client IPv4 CIDR as
10.0.0.0/22
Note: The IP address range cannot overlap with the target network or any of the routes that will be associated with the Client VPN endpoint. The client CIDR range must have a block size that is between /12 and /22 and not overlap with VPC CIDR or any other route in the route table. You cannot change the client CIDR after you create the Client VPN endpoint.
Select
Server certificate ARN,Client certificate ARNand checkUse mutual authenticationSelect no for
Connection LoggingandClient Connect HandlerSelect
Enable split-tunnelLeave the rest of the default settings, and choose
Create Client VPN Endpoint.
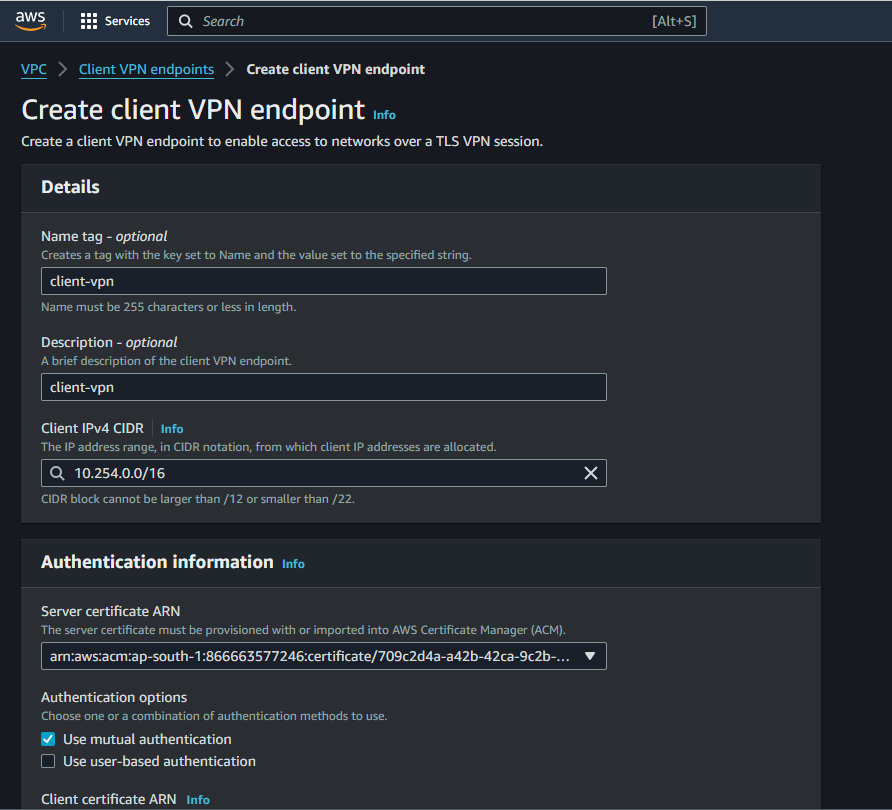
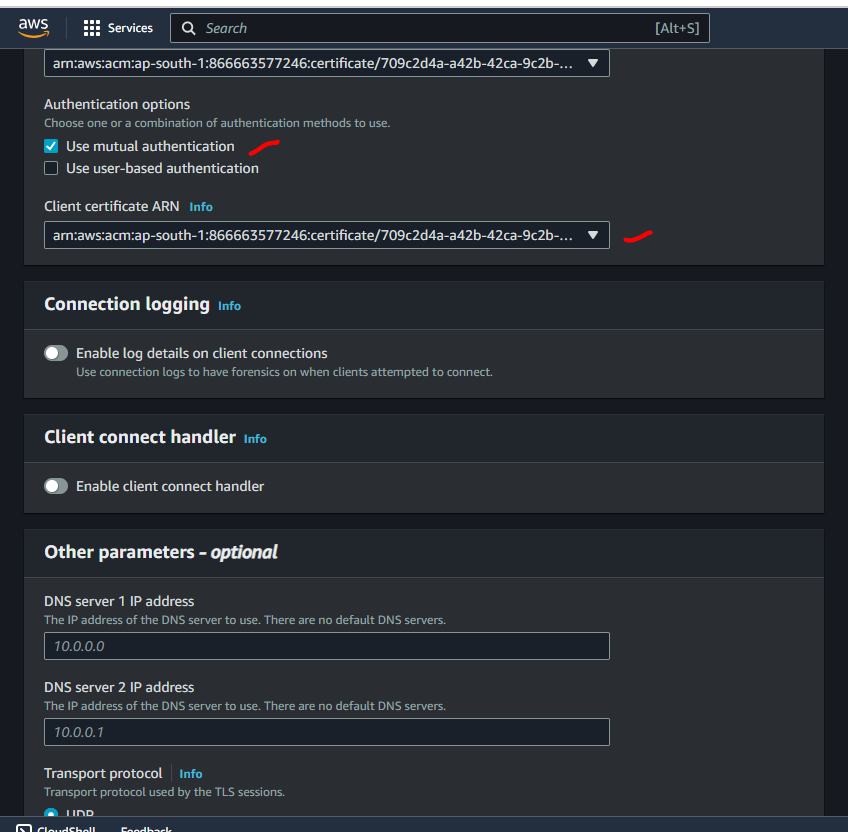
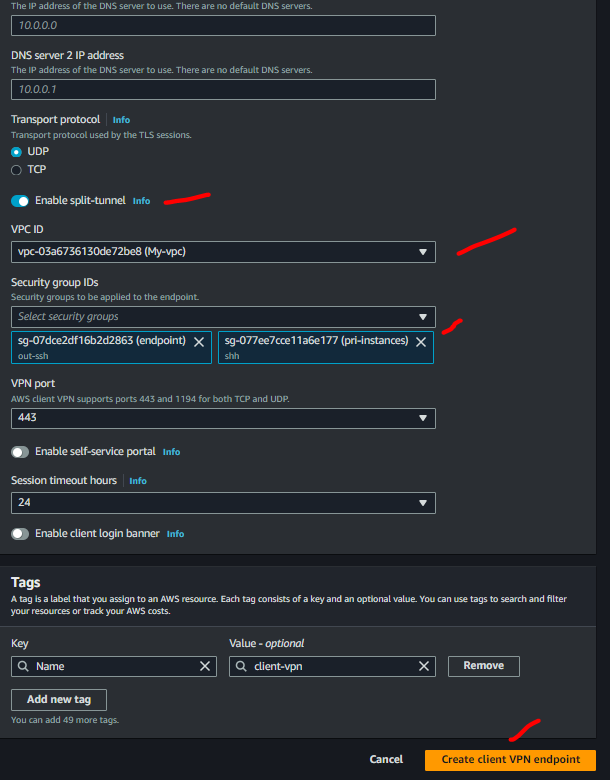

The status of the Client VPN endpoint will be in pending-associate at this stage.
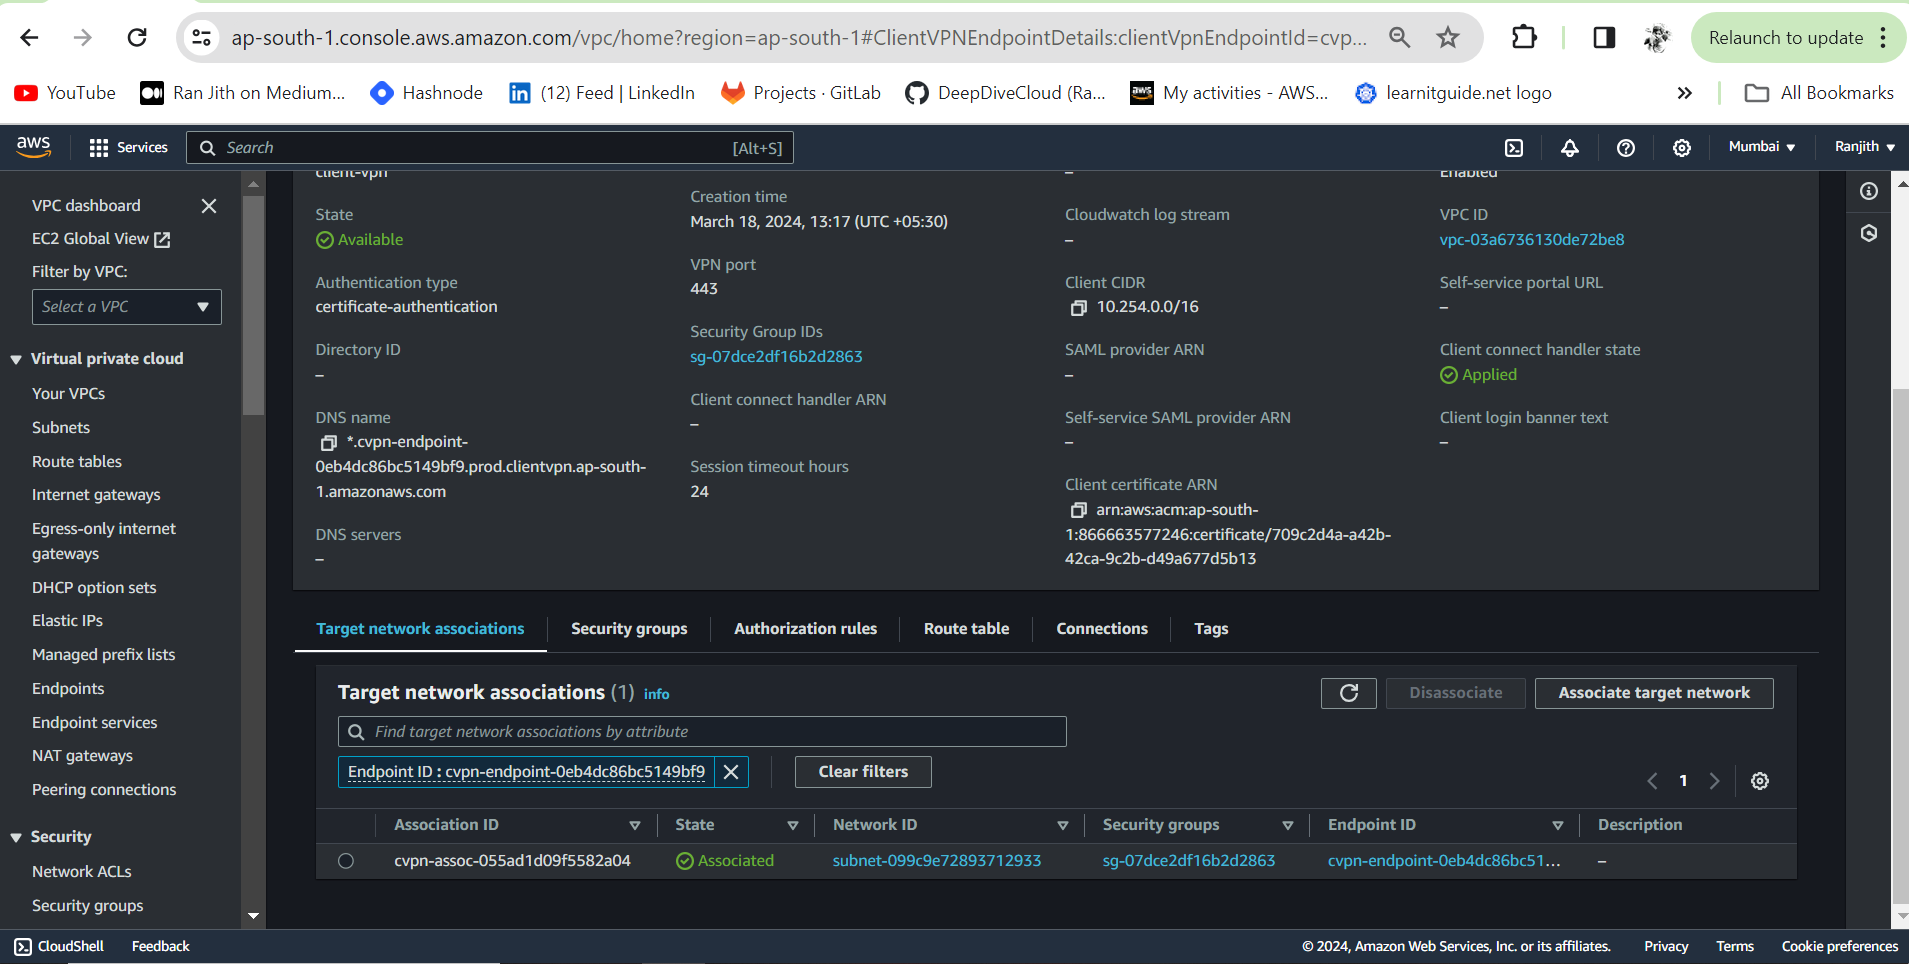
Step 5 : Enable VPN connectivity for clients
Navigate to
VPC Console>Client VPN Enpoints> ChooseClinet VPN EndPoint> ClickAssociations> ClickAsscociateSelect the VPC (same VPC as in Step 1) and a subnet
Click on
Associate
Note: If authorization rules allow it, one subnet association is enough for clients to access a VPC's entire network. You can associate additional subnets to provide high availability in case one of the Availability Zones goes down.
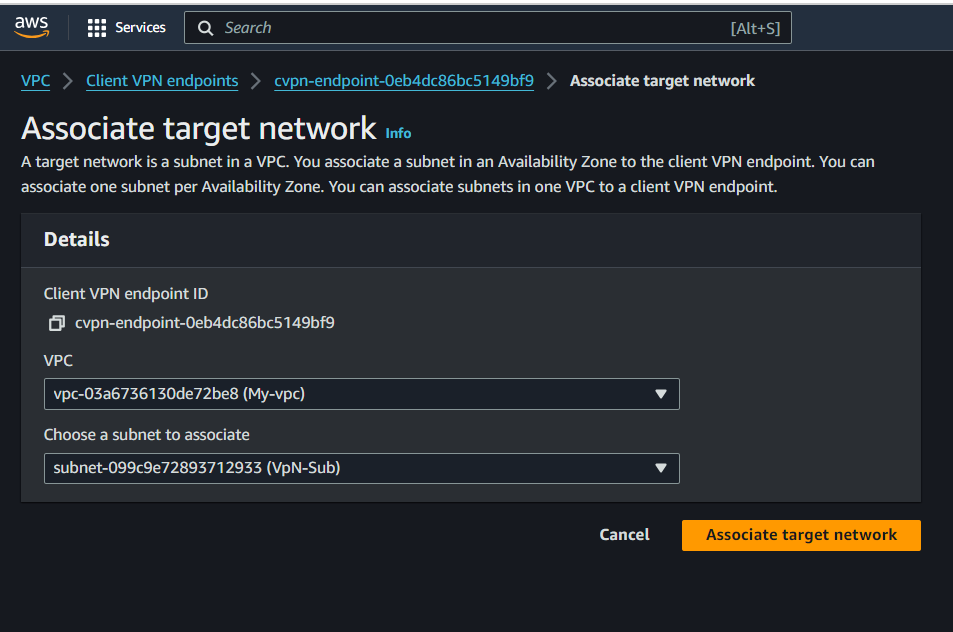
The following are created when we associate the Client VPN Enpoint with the first subnet
The state of the Client VPN endpoint changes to available. Clients can now establish a VPN connection, but they cannot access any resources in the VPC until you add the authorization rules.
The local route of the VPC is automatically added to the Client VPN endpoint route table.
The VPC's default security group is automatically applied for the subnet association.

Step 6 : Authorize clients to access a network
Navigate to
VPC Console>Client VPN Enpoints> ChooseClinet VPN EndPoint> ClickAuthorization> ClickAuthorize IngressEnter
192.168.0.0/16forDestination network to enable,Allow access to all usersforGrant access toand Description asVPC-through-VPNEndPointClick
Add authorization rule
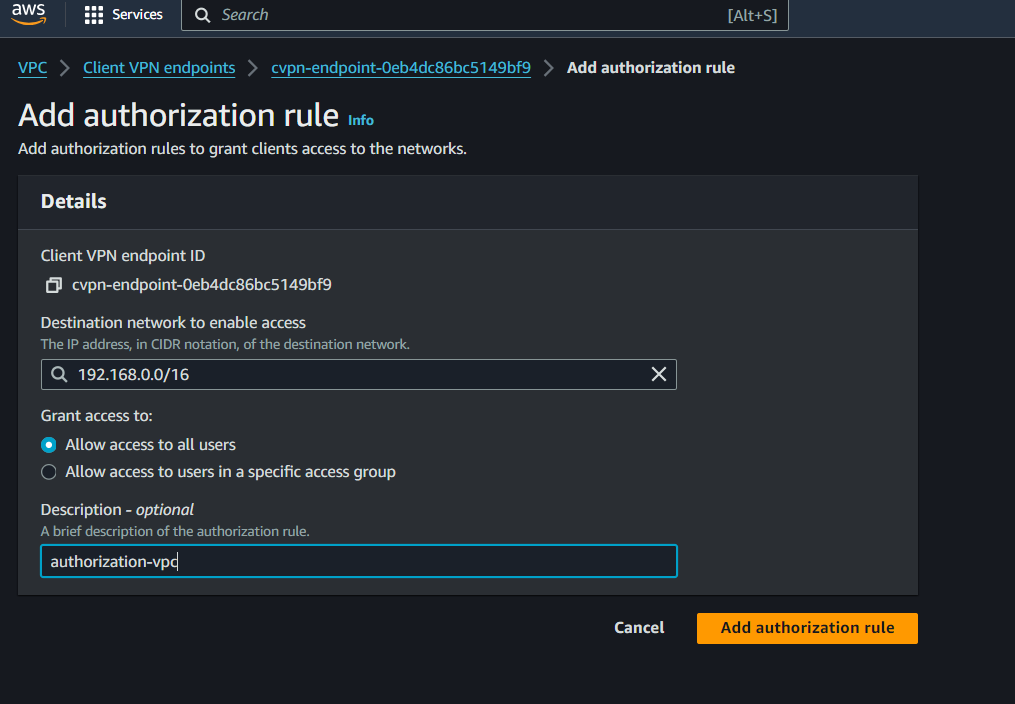

Step 7 : Connect to the AWS Client VPN endpoint
Steps to connect to the AWS Client VPN endpoint
You can choose the Client VPN application from AWS provided client and select the OS of your choice. Once installed you will use the VPNendpoint configuration file you downloaded in the earlier step to connect to the AWS Client VPN endpoint.
- Download and install the Windows version from AWS provided client - Windows Download. Follow the prompts to install this software. Once AWS provided client has been installed, open the software.

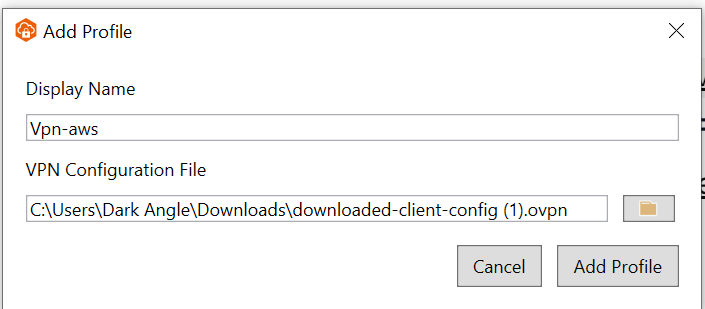
Select File, Manage Profiles and Add Profile.

Enter the Display Name
AWS ClientVPNand select the VPN ConfigurationFile which you downloaded earlier downloaded-client-config.ovpn. Select Add Profile.
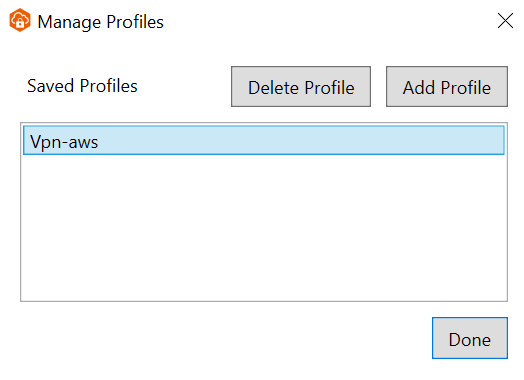
On Manage Profiles screen select Done.
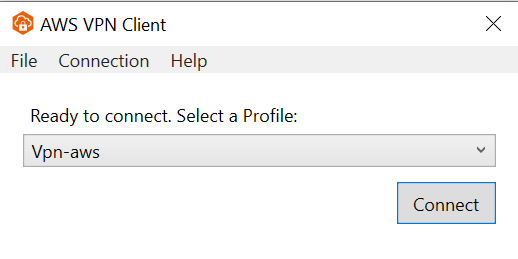
Return to AWS VPN Client window and select Connect.
Once connected the AWSClient VPN will display Connected.
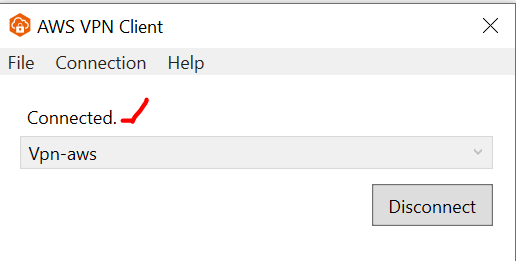
You have completed the steps to connect to AWS Client VPN
Step 8: Testing
When the connectivity is established, you can see OpenVPN Statistics by clicking on
Connection>Show Details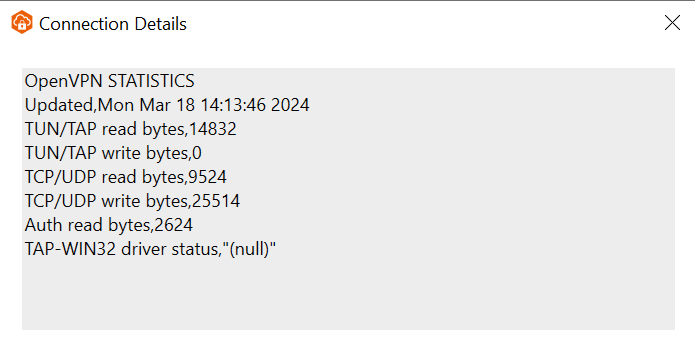
You could also check under
Connectionstab underClient VPN Endpoin
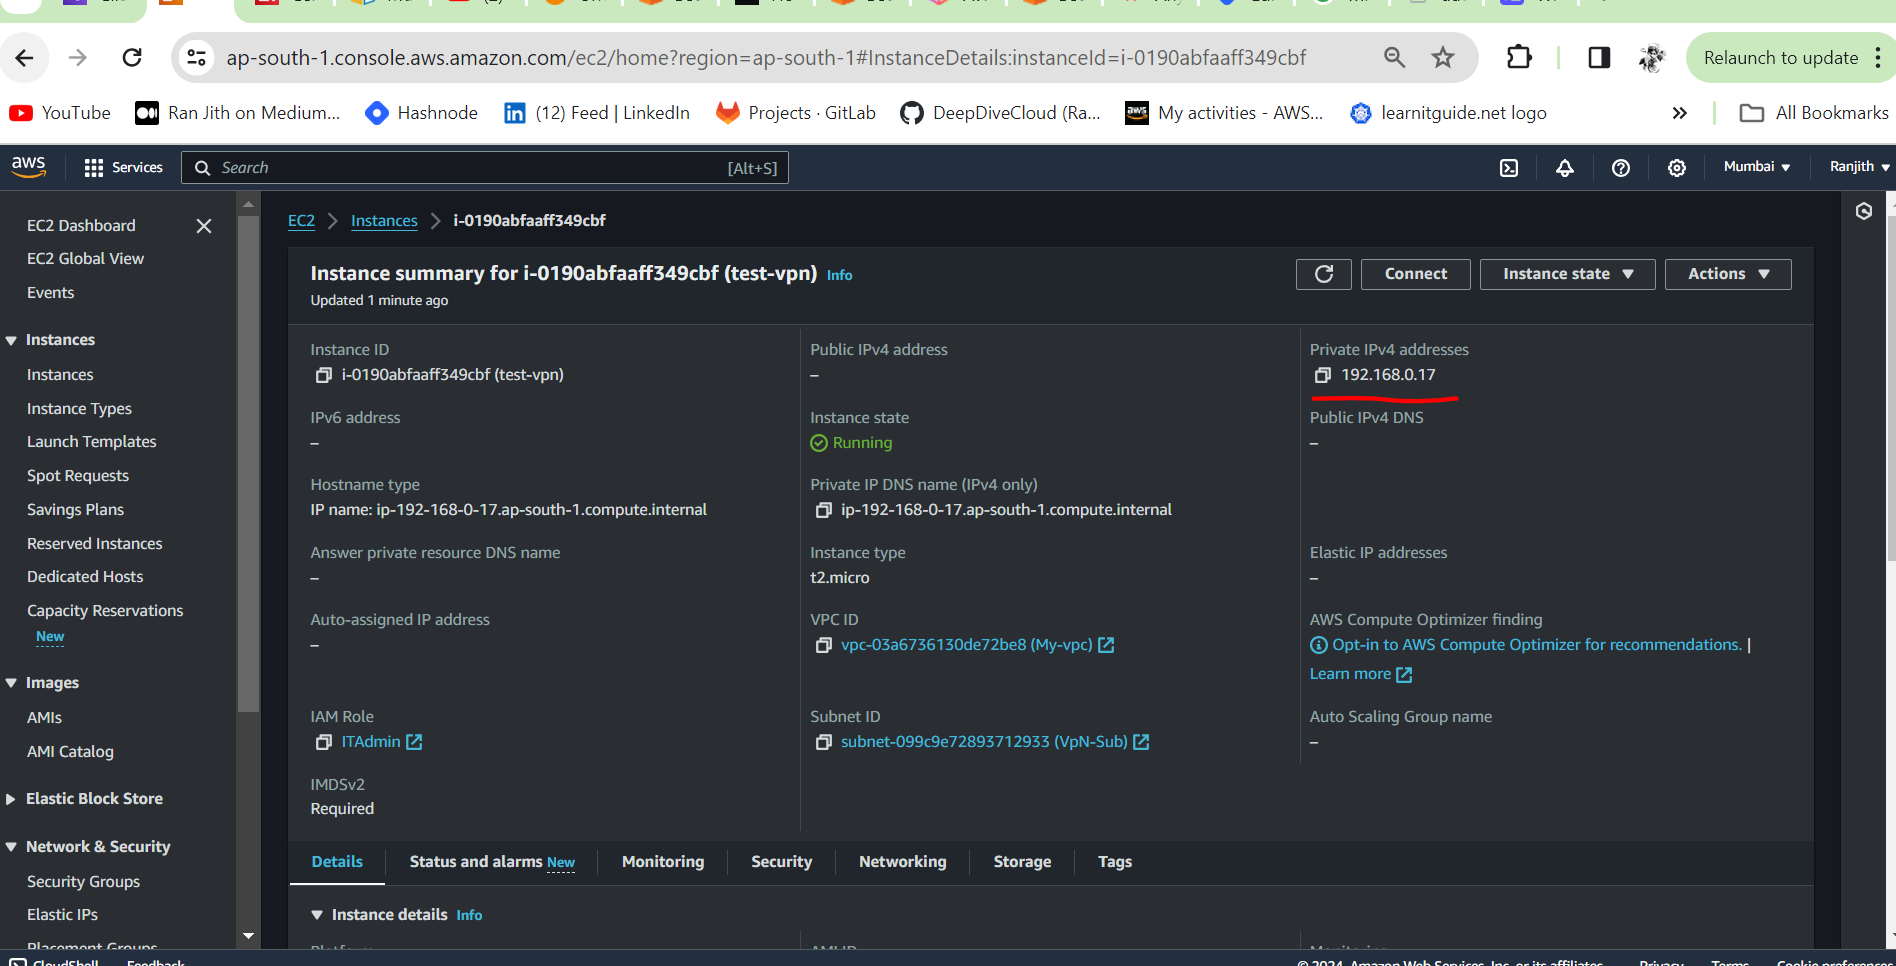
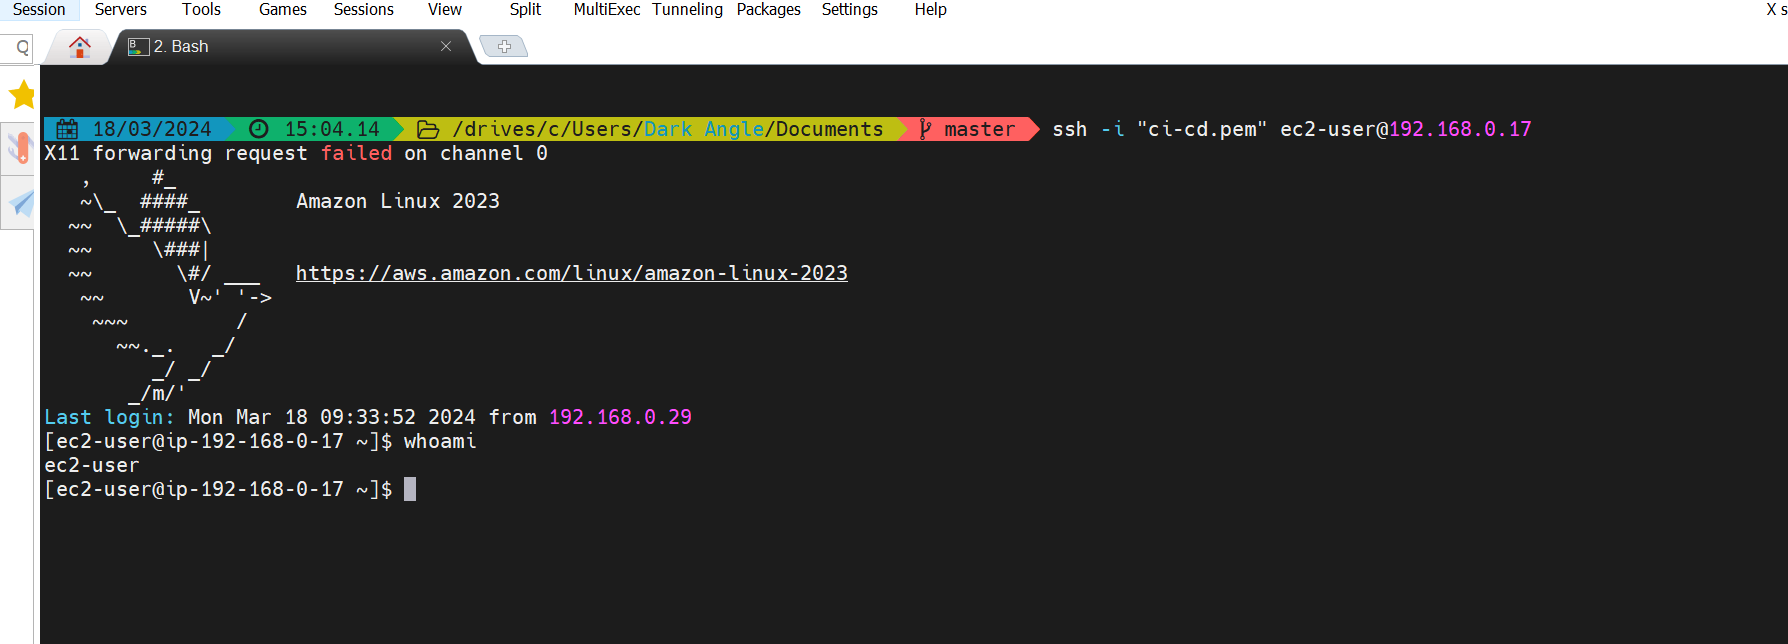
We can also launch an EC2 instance in the private subnet created in Step 1 and connect to it.
Client VPN scaling considerations
Source
The maximum number of concurrent VPN connections depends on the following
Client CIDR range size
👉 Points to note:
When we create a Client VPN endpoint, we must specify a client CIDR range, which is an IPv4 CIDR block between a /12 and /22 netmask.
Each VPN connection to the Client VPN endpoint is assigned a unique IP address from the client CIDR range.
A portion of the addresses in the client CIDR range are also used to support the availability model of the Client VPN endpoint, and cannot be assigned to clients.
We cannot change the client CIDR range after you create the Client VPN endpoint.
Number of associated subnets
👉 Points to note:
When we associate a subnet with a Client VPN endpoint, we enable users to establish VPN sessions to the Client VPN endpoint. We can associate multiple subnets with a Client VPN endpoint for high availability, and to enable additional connection capacity.
We cannot associate multiple subnets from the same Availability Zone with a Client VPN endpoint. Therefore, the number of subnet associations also depends on the number of Availability Zones that are available in an AWS Region.
For example, if you expect to support 4,000 VPN connections to your Client VPN endpoint, specify a minimum client CIDR range size of /19 (8,192 IP addresses), and associate at least 2 subnets with the Client VPN endpoint.
If you’re unsure what the number of expected VPN connections is for your Client VPN endpoint, we recommend that you specify a size /16 CIDR block or larger.
Cost
For Asia Pacific (Mumbai) (ap-south-1)
AWS Client VPN endpoint association $0.10 per hour
AWS Client VPN connection $0.05 per hour
There is a cost for an
Asscociaed VPN Endpointeven when not in use, soDisassociatewhen not in use.
Subscribe to my newsletter
Read articles from Ranjith R directly inside your inbox. Subscribe to the newsletter, and don't miss out.
Written by
