🌿TerraWeekChallenge:DAY3🌿
 Hema Rawal
!!!!Welcome to day-3 of this amazing Terraweek Challenge. Today, we will be learning about Creating AWS EC2 Machine using Terraform!!!!
Task 1: Terraform Configuration File😊
Let's start by creating a Terraform configuration file to define an AWS EC2 instance resource.
Assuming that terraform is already installed and you have configure aws cli and you are in the choice of your directory
We will create provider.tf file and main.tf file.In provider.tf file we defining the providers to connect to aws. In main.tf file we defining the infrastructure of resource we want to create.
# Define provider
terraform {
    required providers{
        aws = {
           source = "hashicorp/aws"
            version = "5.41.0"
           }
      }
}
provider "aws" {
  region = "us-east-1"
}
Now,Lets Create main.tf File
# Create an EC2 instance
resource "aws_instance" "myec2instance" {
  ami           = "ami-0c55b159cbfafe1f0" #give ami id of machine
  instance_type = "t2.micro"
  tags = {
      Name = "terraform-batch"
  }
}
📚Task 2:
Check state files before running plan and apply commands & Use validate command to validate your tf file for errors and provide the Output generated by each commands.
Validating Terraform Configuration
The terraform validate command is used to check the syntax and configuration of Terraform files (.tf files) in your project directory.To validate the Terraform configuration file for errors, we can use the terraform validate command.
...Before running terraform validate command ,you have to initialize terraform by running terraform init command....
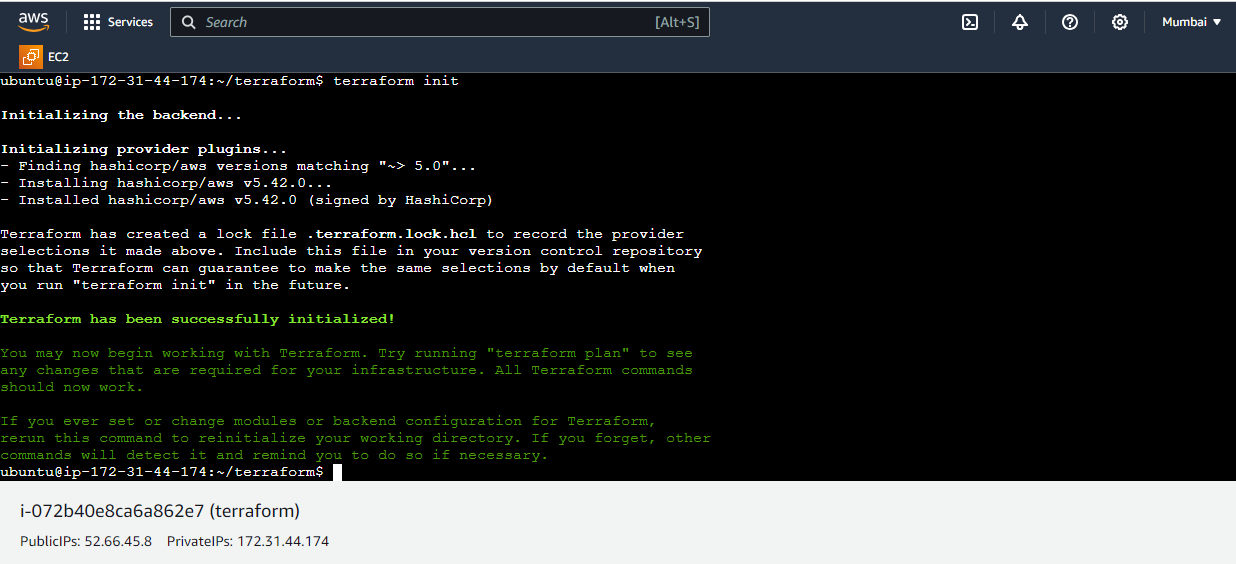
#terraform init
OUTPUT show below!

Now, run terraform validate command.
#terraform validate
Output show below!

🌑Task 3: Adding Provisioners
Now, let's Open main.tf file and add a provisioner to our main.tf file. We'll use a simple shell script as our provisioner.
WHAT IS PROVISIONER: A Provisioner is a feature that allows you to perform tasks on the resource after it has been created or destroyed. Provisioners are used to initialize, configure, or manage resources once they are deployed by Terraform. They enable automation of post-deployment tasks such as software installation, configuration management, or running scripts.
resource "aws_instance" "myec2instance" {
  ami           = "ami-0a1b648e2cd533174" # Give the AMI ID of the machine
  instance_type = "t2.micro"
  tags = {
    Name = "terraform-batch"
  }

  provisioner "remote-exec" {
    inline = [
      "sudo apt update",
      "sudo apt install nginx -y",
      "sudo systemctl start nginx"
    ]
  }
 connection {
      type        = "ssh"
      user        = "ubuntu"  # or any other user depending on your AMI
      private_key = file("<PATH_TO_YOUR_PRIVATE_KEY_FILE>")
      host        = self.public_ip
    }
}
To specify the path to your private key file in Terraform, you should replace <PATH_TO_YOUR_PRIVATE_KEY_FILE> with the actual file path to your SSH private key file.
#private_key = file("~/.ssh/id_rsa")
NOW, Save this file and add lifecycle..
📚Task 4: Adding Lifecycle Management
To control the lifecycle of our EC2 instance, we'll add lifecycle management configurations.
TYPES OF LIFECYCLE :
1.Prevent Destroy
2.Prevent Changes
3.Create Before Destroy
4.Customize Resource Behaviour
resource "aws_instance" "myec2instance" {
  ami           = "ami-0a1b648e2cd533174" # Give the AMI ID of the machine
  instance_type = "t2.micro"
  tags = {
    Name = "terraform-batch"
  }

  provisioner "remote-exec" {
    inline = [
      "sudo apt update",
      "sudo apt install nginx -y",
      "sudo systemctl start nginx"
    ]

    connection {
      type        = "ssh"
      user        = "ubuntu"  # or any other user depending on your AMI
      private_key = file("<PATH_TO_YOUR_PRIVATE_KEY_FILE>")
      host        = self.public_ip
    }
  }
#lifecycle set
lifecycle {
 create_before_destroy = true
 }
}
Save the file and Run Commands.
Applying Changes and Destroying Resources
Now that our configuration is complete, we can apply it to create our EC2 instance:
#terraform plan
#terraform apply

Subscribe to my newsletter
Read articles from Hema Rawal directly inside your inbox. Subscribe to the newsletter, and don't miss out.
Written by

Hema Rawal
Hema Rawal
AWS SOLUTION ARCHITECT|DEVOPS ENGINEER|BLOGGER